Article Contents:
- Mounting adhesive, joint compound and sealant: three different tasks
- Mounting adhesive holds the product on the wall
- Joint adhesive bonds the ends of the strips
- Sealant and filler handle the finishing task
- Why polystyrene should not be glued at random
- Why polyurethane also requires testing
- Can one compound be used for both materials
- Plaster and putty
- Drywall
- Painted wall
- Wallpaper under molding
- Tile, gloss and other non-absorbent surfaces
- Long moldings: less glue is not always neater
- Profile with a ready-made corner
- Volumetric and narrow overlays
- Longitudinal joint of two moldings
- 45-degree corner joint
- Straight profile with a ready-made decorative corner
- When joint adhesive is not required separately
- How many strips will be needed
- What if ready-made corners are used
- How to calculate the amount of mounting adhesive
- Which adhesive is best for decorative moldings?
- What to use to glue polyurethane molding to the wall?
- Can polystyrene and polyurethane be installed with the same adhesive?
- Which adhesives are dangerous for polystyrene profiles?
- What is the difference between mounting adhesive and joint adhesive?
- Is it necessary to buy joint adhesive for polyurethane?
- Can stucco molding be glued to a painted wall?
- Can moldings be mounted over wallpaper?
- What should I use to fill gaps between moldings?
- Why do joints crack after painting?
- How do I glue on a three-dimensional polyurethane overlay?
- Where can I buy STAVROS moldings and stucco?
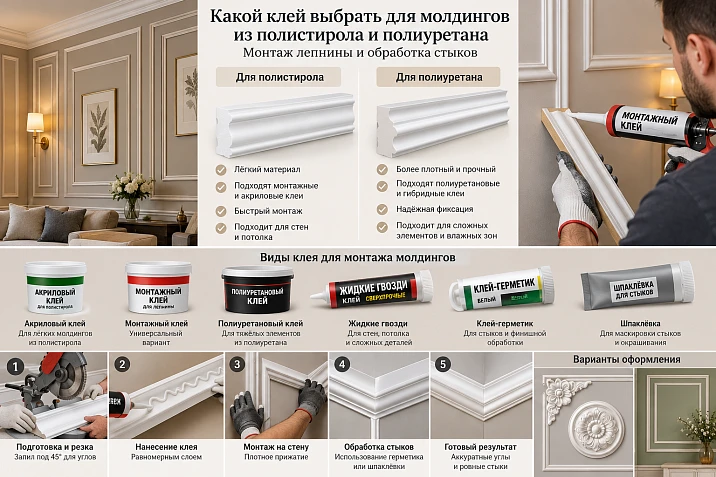
The moldings have already been delivered, and the markings on the wall are ready. All that's left is to glue the strips in place — and this is exactly where it's easy to ruin the result. On the store shelf there are acrylic mounting adhesive, a hybrid compound with high initial grab, sealant, and a tube labeled "for joints." They all look like a thick paste. But the materials have different purposes.
A compatible mounting adhesive is needed to attach the molding to the wall; a separate jointing compound is sometimes required to connect the ends; and a suitable finishing material is needed for small visible gaps.
Polystyrene and polyurethane also cannot automatically be considered identical substrates for gluing. Some solvents can damage polystyrene decor, and the universal label "liquid nails" does not reveal the chemical composition. For polyurethane moldings The STAVROS selection is complemented by one more task: preserving the correct junction of straight moldings with corners and overlays without smudging the relief.
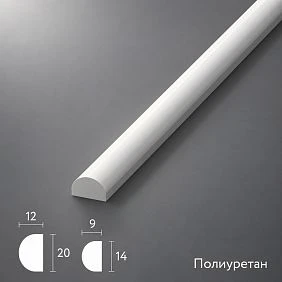




Mounting adhesive, jointing compound, and sealant: three different tasks




Mounting adhesive holds the product on the wall
The main load is transferred through the back surface of the molding and the adhesive layer to the substrate. The bond will be only as reliable as the entire chain is strong: profile — adhesive — primer or paint — plaster. If the old coating is peeling, increasing the amount of adhesive usually does not solve the problem: the coating will come off together with the decor.
Indoors, on strong absorbent substrates, water-based acrylic mounting compounds are often used. For some non-absorbent substrates and special conditions, hybrid polymer adhesives exist. What decides is the data sheet of the chosen compound, which must specify compatible materials and substrates.
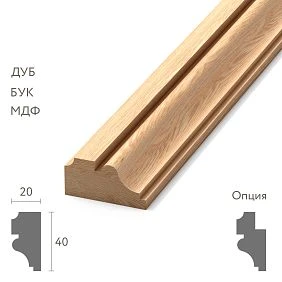
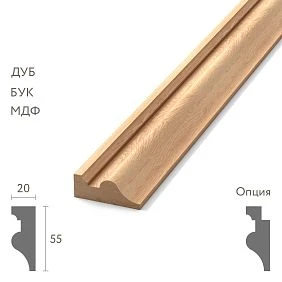
Our factory also produces:






Joint adhesive bonds the ends of the strips
An end joint works differently. Two profiles have a small contact area, and the slightest difference in length and position makes the seam noticeable. In some factory decorative systems, a separate adhesive is intended for such joints. It is applied to the prepared ends according to the manufacturer's instructions, after which the elements are brought into one line.
The existence of a special adhesive in one product line does not mean that it is necessarily needed for any stucco. If the manufacturer does not provide for such a method or a specific profile is incompatible with the compound, unauthorized replacement of mounting adhesive with joint adhesive is not permissible.
Get Consultation
Sealant and filler solve a finishing task
A thin gap between the molding and a level wall may require a paintable sealant; a small hollow at a visible joint may require a compatible filler. These products do not fix a poor cut, weak fixation, or a joint that has come apart.
For example: in the Orac manufacturer's mounting system, separate products are used for attaching the profile, joining its ends, and decoratively filling defects. This is an example of how a system is organized, not a ready instruction to apply the same compounds to all STAVROS products.
Adhesive for polystyrene and polyurethane: comparison table
| What to check | Polystyrene profile | Polyurethane profile |
|---|---|---|
| Compatibility with polymer | Testing the effect of solvents on the specific polystyrene is especially important | Check the product formulation and the adhesive and decor manufacturers' instructions |
| Water-based mounting compound | Possible with the stated compatibility and a suitable substrate | Possible under the conditions specified by the manufacturer |
| Hybrid mounting compound | Explicit compatibility with polystyrene is required | Compatibility with polyurethane and the wall is required |
| Absorbent plaster | Check strength, priming and drying | The same parameters are checked |
| Smooth painted wall | Assess paint strength and adhesive curing ability | Similarly |
| End jointing | According to the specific product's technology | According to the technology of the specific product, sometimes with a separate adhesive |
| Sealing the visible seam | With a compatible finishing compound | With a compatible finishing compound |
Why polystyrene should not be glued at random
Various products are sold under the name “polystyrene moulding”: lightweight foamed profiles and denser variants. Their surface, solvent resistance and permitted installation differ. An adhesive capable of softening or deforming a specific profile can ruin the edge even before installation.
Check the adhesive instructions for a direct mention of a suitable type of polystyrene or expanded polystyrene. The absence of immediate damage should not be considered a sufficient test: evaluate the sample after the specified curing time.
Why polyurethane also requires testing
Polyurethane products vary in formulation, construction and face finish. A thin linear profile, a wide cornice element and a three-dimensional wall overlay create different installation conditions.
If the project involves relief overlays, a suitable polyurethane molding it is more convenient to select together with the drawings: this makes it clear where the product actually touches the wall and where the adhesive will need to be carefully dosed.
Can one adhesive be used for both materials?
Yes, if its manufacturer explicitly permits both materials and the actual wall substrate. Also check the restrictions on moisture, temperature, painted coatings, and setting time. Compatibility with polyurethane does not automatically prove suitability for expanded polystyrene, and a "for decorative use" label does not replace the list of approved substrates.
The substrate matters more than the bold promise on the tube
Plaster and filler
Run your palm over the wall: if powder remains, first remove the dust and check the strength of the layer. Weak filler must be repaired, and the primer should be selected taking into account the substrate and the adhesive. The primer must not turn into an intermediate weak film. After preparation, allow the drying time specified by the manufacturer.
Check the flatness with a long straightedge. If a 2600 mm profile touches the wall only at the ends, an adhesive bead will not replace leveling. Such fastening retains internal stresses and increases the risk of gaps.
Drywall
On drywall, assess the condition of the paper layer, joints, and applied finish. The adhesive will bond to a sound surface but will not strengthen damaged paper. If a large or heavy decorative element is planned, check the permitted fastening method and whether the substrate needs reinforcement.
For new partitions, the possible movement of joints is considered separately. A relief strip does not serve as reinforcement for a drywall structure: a crack in a moving joint must first be resolved structurally.
Painted wall
A dense painted coating may have poor absorbency. For water-based adhesive this is a particularly significant limitation if the second surface to be bonded also does not let moisture through.
Check whether the paint is firmly adhered, whether there is any contamination or traces of detergents, and whether the chosen adhesive is suitable for such a surface. If the instructions require matting or other preparation, carry it out on the intended area. Fixation on old unknown paint cannot be guaranteed by simply changing the adhesive.
Wallpaper under molding
If the profile is fixed over the wallpaper, the load passes through the wallpaper adhesive and the covering itself. Heavy textured wallpaper, poorly adhered edges, contamination, and an unknown old substrate increase the risk of delamination. The most predictable option for a new renovation is to leave a strip of solid substrate for installing the molding and bring the finish up to its edges.
On an already finished wall, you have to choose between the ability to carefully remove a narrow strip of wallpaper and whether it is acceptable to attach to the existing finish.
Tile, gloss, and other non-absorbent surfaces
Here you cannot mechanically transfer the instructions for plaster. You need a compound designed for both contacting surfaces and capable of curing in such a system. Some compounds require a special primer, others do not.
Which STAVROS polyurethane products require a different approach to installation
The difference is not that one item necessarily needs a "strong" adhesive and another needs a "weak" one. Products differ in the length of contact, the geometry of the back side, the number of joints, and the need to precisely align the relief.
| Product | Size, mm | Installation feature |
|---|---|---|
| MLDPU-001 | 10 × 6 × 2600 | Narrow long line; excess adhesive and marking deviation are especially noticeable |
| MLDPU-004 | 15 × 8 × 2600 | Straight profile with a joint to the ready-made corners of series 004 |
| MLDPU-002 | 22 × 11 × 2600 | Expressive profile; check the fit along the entire length |
| NPU-506 | 12 × 205 × 5 | Narrow textured overlay; adhesive must not reach the front ornament |
| MLDPU-004U | 135 × 135 × 10 | Corner element that is first test-fitted with the straight profile |
| MLDPU-2-2.1 | 235 × 237 × 21 | Three-dimensional overlay; checking the weight and actual contact areas is mandatory |
Long moldings: less adhesive is not always neater
Suitable for a thin wall line polyurethane molding MLDPU-001. Its visible width is 10 mm. If an excessively thick bead is squeezed onto the back surface, the excess material will end up along the edges. Removing it from a painted wall is sometimes harder than gluing the profile itself neatly.
The other extreme is to apply a few random drops. This method cannot be considered universal for a long molding: the contact may be uneven. Apply adhesive according to the manufacturer's pattern, taking into account the shape of the back side and the nature of the substrate.
Profile with a ready-made corner
Polyurethane molding MLDPU-004 has a cross-section of 15 × 8 mm and a length of 2600 mm. In the same system, the corner element MLDPU-004U is used with it. In this case, the adhesive simultaneously secures each item to the wall, but the joint between the two parts requires separate assessment according to the installation instructions.
Volumetric and narrow overlays
NPU-506 measures 12 × 205 × 5 mm. Before installation, lay out several elements on a table, check the orientation of the ornament and mark the axes on the wall. The narrow back surface requires measured application of adhesive; removing excess compound from the front relief is especially difficult.
Another case is the MLDPU-2-2.1 overlay measuring 235 × 237 × 21 mm. The dimensions of the product do not allow calculating its weight or the required amount of adhesive. For installation, you need to study the actual back geometry, weight and permissible fixing scheme. If the instructions provide for additional fastening, you must not limit yourself to adhesive alone.
How to join straight sections, corners and decorative overlays
Longitudinal joint of two moldings
First, make even mating ends and check that the front relief matches. Then determine which compound is intended for the end joint itself. With a system that uses a separate joint adhesive, it must reach the designated contact surfaces of the ends; random spots of mounting adhesive near the seam do not replace the recommended procedure.
Bring the parts together along a single line and temporarily fix them if necessary. Some products wash off with water before curing, while others require special cleaning methods. You must not apply solvent to painted polystyrene or polyurethane without checking.
45-degree corner joint
Two 45° segments form a right angle only if the frame geometry is correct. If the wall or layout deviates from a right angle, a precise 45° cut alone does not guarantee the absence of a gap. Before applying adhesive, dry-fit the corner; check that the outer and inner edges match and the position of the profile on the wall plane.
Gluing two inaccurately cut parts in the hope of "filling the gap later" is a poor technique. First correct the cut or the geometry, and leave the finishing compound for genuinely small defects.
Straight profile with a ready-made decorative corner
Corner moulding MLDPU-004U is designed to match the 004 series profile. But it does not turn installation into fitting parts without dry-fitting. The corners must be positioned according to the markings; then measure the actual distance between the abutment points and only after that cut the straight sections.
This prevents a common mistake: buying mouldings for the perimeter of the future frame and forgetting that part of the contour will be taken up by ready-made decorative pieces.
When joint adhesive is not required separately
If the manufacturer of the system being used specifies a single compatible compound for both mounting and joining, follow that instruction. There is no need to assign the buyer a second mandatory tube without a technical basis. The difference between adhesive types is functional, not a requirement to buy a certain number of types of compounds.
Step-by-step installation of polyurethane moulding
- Check the wall. Remove dust, dirt and loose coatings. Find areas with peeling paint, wallpaper or filler. The substrate must meet the conditions of the selected mounting adhesive.
- Make precise markings. Check horizontals with a level, verticals with a plumb line or level; compare the dimensions of decorative frames by their diagonals. For a long line, stretch a control cord or use laser marking.
- Cut and dry-fit the elements. Do not start gluing the first section until you have made sure that the adjacent element joins without stress.
- Read the glue instructions. Check the permitted temperature, humidity, substrate requirements, working time with the applied adhesive, and whether temporary fixing is needed. If the manufacturer requires applying the glue, separating the parts and leaving a pause, follow it; for another glue this sequence may be wrong.
- Apply the adhesive to the designated contact areas. Do not randomly fill all the recesses on the back side. The adhesive bead must ensure real contact when pressed, rather than remaining in a deep groove without touching the wall.
- Install the strip according to the marks. Press it evenly along its length without squeezing the profile out of the markings. If necessary, use temporary fixing that is safe for the wall and the front surface.
- Remove excess before it cures. Take the cleaning method from the glue data sheet. Do not smear the product over the relief and do not use aggressive solvents without testing.
- Seal the joints and paint the decor. Carry out the finishing work after the curing time specified by the manufacturer. There is no universal rule that you should paint exactly after 24 hours.
When installing several frames, check each one after gluing the adjacent one: a slight displacement of the first strip easily turns into a noticeable difference in the width of the gaps between all the frames.
How to glue a decorative overlay without damaging the ornament
For a three-dimensional piece, the main danger is getting the position wrong and having to move the overlay when the glue has already begun to set. First mark the center, top and side boundaries on the wall. Place the piece without glue and assess its position relative to the frame and neighboring overlays. For complex relief, it is useful to make a paper template of the outer dimensions.
Examine the back of the product. If it does not form a continuous plane, you cannot mechanically assume that the entire rectangle of the outer dimensions is glued to the wall. Apply the adhesive to the designated contact areas. The glue must not fill through decorative openings or come out onto the front scrolls or recesses.
After installing the overlay, check the axis and symmetry. Remove any protruding adhesive in an approved way and hold the element in place for the required time. Heavy, large items or those installed on a non-standard substrate may require reinforced fastening: the decision is made based on technical documentation, not on an advertising claim of high initial tack.
For this design, you can choose Polyurethane decorative appliques STAVROS.
Why molding peels off and how to fix the defect
| What you notice | Likely cause | Correct action |
|---|---|---|
| The strip comes off together with the paint | Weak paint layer | Remove the weak coating, prepare a solid base, choose a compatible adhesive |
| The molding holds in places, the middle comes off | Uneven wall, incomplete adhesion, or incorrect application | Check the plane and application pattern; if necessary, dismantle and redo |
| Polystyrene has softened or deformed | Incompatible composition or solvent | Stop use, replace damaged parts and adhesive |
| A crack has appeared at the longitudinal joint | Jointing error, weak connection or movement of the base | Determine the cause; redo the faulty joint, not just close the gap |
| Sealant has come away from the profile edge | Unsuitable composition, dirty surface or too large a gap | Clean and correct the geometry, then use the finishing material as intended |
| Glue got onto the ornament | Excess amount, incorrect application areas | Remove according to instructions before curing; on the next element, reduce and reposition the strips |
| The seam became visible after painting | Premature finishing or shrinkage of the seam material | Wait for full stabilization, check the joint, and restore the finish |
Not every crack can be repaired without disassembly. If the edges of the molding are movable, first restore fixation and geometry. Filling over a movable joint will create a neat appearance only for a short time.
Calculating moldings and glue: example for one wall frame
How many strips will be needed
Let's consider a frame of 1000 × 1500 mm; the dimensions are specified by the outer points of the profile cut, without finished corners. The perimeter is:
2 × (1000 + 1500) = 5000 mm.
Molding MLDPU-004 is produced in a length of 2600 mm. Two strips give 5200 mm, and for this specific cutting plan they may indeed be sufficient: one 1500 mm segment and one 1000 mm segment can be obtained from each. The remainder, before accounting for saw kerfs, is 100 mm on each.
This works provided that 1500 and 1000 mm are the maximum required segment lengths, including the corner ends, and that the selected cutting technology fits within the remaining allowance. If the same dimensions were taken along the inner contour of the frame, the length will need to be recalculated based on the actual profile cross-section. Do not confuse the usable length of the blank with the distance between the inner points of its visible edge.
And if ready-made corners are used
The area of the frame does not change, but the number of straight profiles may decrease. Four corner pieces occupy parts of the side lines, but you cannot simply subtract 135 mm from each side of the side length based on the overall dimensions of MLDPU-004U. You need a drawing of the product and the distance between its actual points of junction with the straight profile. Only from these can a new cutting map be compiled.
How to calculate the amount of mounting adhesive
There is no universal norm in milliliters per linear meter. An example from one factory system: for Orac DecoFix Pro mounting adhesive in a 310 ml package, the manufacturer specifies an approximate coverage of 7–8 linear meters of a suitable profile under the recommended application pattern. For our 5 m, this gives an estimated consumption of about 194–221 ml, meaning one such package is theoretically sufficient.
This norm cannot be transferred to any adhesive or any STAVROS profile. A different adhesive bead diameter, two strips instead of one, pronounced rear geometry, and bulky overlays will change the consumption. For purchasing, use the data sheet of the selected compound and the actual application pattern.
The number of joints is counted separately. In a frame with four straight strips, there are four corner junctions. With ready-made corners, the number of abutments of straight segments to decorative parts increases; take them into account in the plan if the system requires a special joint adhesive.
How to choose a molding kit and mounting system at the same time
The first option is calm geometry. Four straight MLDPU-004 segments form a frame with a 45° miter cut. You will need the calculated number of strips, mounting adhesive, the end-treatment method specified by the manufacturer, and a finishing compound for small visible gaps. This composition does not require purchasing ornamental overlays just to complete the set.
The second option is coordinated corners. MLDPU-004 is complemented by ready-made MLDPU-004U elements. Here, first of all, check the joints and the installation sequence: the corner pieces define the end points of the straight profiles. Cutting accuracy becomes more important than trying to fill a loose joint with adhesive.
The third option is a relief composition. polyurethane molding MLDPU-002 can be combined with the one developed for it molded overlay MLDPU-2-2.1. First check the drawings and the placement of the ornament; then compile a list of attachment and joint areas. For a three-dimensional piece, the installation technique is not necessarily identical to applying adhesive to a straight strip.
If the task is — Buy moldings for the entire wall, calculate the complete set rather than the cost of just one linear meter. The calculation includes the profile, corners, overlays, mounting and, if necessary, jointing compounds, surface preparation, finishing, and possible consumables. A more expensive decorative system is justified when you need its specific relief and coordinated elements, not because polyurethane is supposedly always better to attach than polystyrene.
Ten mistakes when choosing and applying adhesive
- Buying "liquid nails" without studying the composition. Products with different chemical bases are found under the common name. Check the technical data sheet and the list of compatible materials.
- Assuming any adhesive is safe for polystyrene. An incompatible solvent can damage the profile. Before the main work, check the intended use and do a test on an offcut.
- Attach moulding over peeling wallpaper. A strong bond with the wallpaper won't save a weak bond between the wallpaper itself and the wall. Prepare a reliable base.
- Not checking old paint. If the paint layer is peeling, the new moulding will come off with it. Remove the unstable coating before installation.
- Replacing joint adhesive with sealant. If the factory system requires gluing the ends, decorative filling won't replace this step.
- Skipping the dry fit. A long moulding cut after adhesive is applied is easy to misalign. First, finally check the cutting and joints.
- Applying the compound without considering the back geometry. Adhesive in a deep groove may not touch the wall. Study the recommended application line and pressing method.
- Relying only on initial grab. Fast holding of the strip doesn't mean the adhesive has fully cured or is compatible with a complex base.
- Soiling the ornament and cleaning it with a random solvent. The procedure for removing excess depends on the adhesive and the coating. Before installation, prepare approved cleaning agents.
- Painting before the permitted time. Moisture or other adhesive components must escape or react according to the instructions. Observe the specified time, not arbitrary “a few hours.”
Frequently asked questions
Which adhesive is best for decorative mouldings?
The one that is simultaneously compatible with the material of the specific strip and the actual base. For dry, solid plaster, the manufacturer may recommend a water-based acrylic compound, while for a smooth, non-absorbent base, a different type of mounting adhesive. The final choice is made according to the technical data sheet; high initial fixation alone is not enough.
What adhesive should be used to attach polyurethane molding to a wall?
Choose an installation compound whose instructions permit polyurethane and the given substrate: plaster, filler, paint, or drywall. Check the requirements for cleaning, priming, application pattern, and temporary fixing. Do not replace a compatibility check with the advice that 'any adhesive for decor will do'.
Can polystyrene and polyurethane be installed with the same adhesive?
Yes, if the adhesive manufacturer explicitly confirms both materials and the intended wall surface. Check compatibility with polystyrene especially carefully: some solvents damage certain types of polystyrene. If in doubt, review the product documentation and test the compound on an offcut before installing all the moldings.
Which adhesives are dangerous for polystyrene profiles?
Compounds containing solvents that are incompatible with the specific type of polystyrene are potentially dangerous. Safety cannot be determined from the adhesive's trade name alone. Look for an explicit statement that it is suitable for polystyrene or expanded polystyrene, as well as any restrictions in the technical data sheet.
What is the difference between installation adhesive and joint adhesive?
The first fixes the product to the wall via its back surface. The second, in systems where it is provided for, joins the ends of individual profiles. Their tasks differ in the nature of the contact and the requirements for the joint. Sometimes the manufacturer permits one compound for several operations; this must be confirmed by the instructions.
Is it mandatory to buy joint adhesive for polyurethane?
There is no universal requirement for all polyurethane products. Some installation systems have a separate compound for ends, while others provide a different method of joining. If a special adhesive is specified, replacing it with filler without justification is incorrect. If it is not specified, there is no need to buy an additional compound just because of the word 'polyurethane'.
Can molding be glued to a painted wall?
Yes, if the paint adheres firmly, the surface is prepared, and the adhesive is intended for such a coating. On smooth, non-absorbent paint, the curing conditions of the compound are checked separately. Molding must not be installed on a peeling paint layer: failure will occur at the weakest part of the substrate.
Can moldings be mounted over wallpaper?
Sometimes it is possible, but reliability will be limited by the strength of the wallpaper material and its adhesion to the wall. For critical compositions, it is preferable to provide strips of a strong substrate for mounting. Particular caution should be taken with textured, heavy, and old wallpaper of unknown adhesion.
How to fill gaps between moldings?
For small, immobile defects, use a compatible finishing filler or a paintable sealant — depending on the nature of the joint and the manufacturer's requirements. If the ends diverge or the profile pulls away from the wall, first restore the fastening and geometry. A thick layer of sealant does not replace repair of a defective joint.
Why do joints crack after painting?
There are several reasons: inaccurate mating, insufficient adhesive curing, unsuitable finishing material, wall movement. First check whether the elements move and whether the adhesive layer has failed. If the joint is strong, local finishing is acceptable; if not, the joint itself needs repair.
How to glue a three-dimensional polyurethane overlay?
Mark the axes, dry-fit the product without adhesive, and inspect its rear contact areas. Then use a compatible mounting compound according to the instructions, provide the necessary fixation, and promptly remove excess. For a large or heavy element, check the permissible load and the need for additional fastening.
Where to buy STAVROS moldings and stucco?
The manufacturer's catalog presents straight polyurethane profiles, corner pieces, and relief overlays. If required polyurethane moldings buy for a complete composition, first match the item codes and drawings. Adhesive selection is done after determining the product material, wall type, and intended joint pattern.
How to achieve neat joints that last
Buying a good molding does not compensate for a poor substrate or an incorrectly chosen adhesive. For polystyrene, compatibility with the chemical composition of the mounting product is checked separately; for polyurethane — the adhesive's purpose, the product's shape, and the manufacturer's requirements. Then three operations are distinguished: attaching to the wall, joining the ends, and final finishing of the visible seam.
A simple straight decorative line can be made from a suitable polystyrene or polyurethane profile. If frames with ready-made corners and relief overlays are planned, it is convenient to choose coordinated products from a single system. This makes it easier to determine the abutment points, installation sequence, and the actual number of pieces. For complex architectural trim, polyurethane moldings and molded decoration made of polyurethane STAVROS. And make the final decision on adhesive only after checking the technical instructions for all materials used.