Article Contents:
- Moulding for joinery products is first chosen by function
- Why one profile cannot be automatically applied to all products
- Wooden moldings for furniture
- Frames on fronts and drawers
- Decorative bands and furniture edges
- How to separate the leaf size from the free margin
- How to choose the character of the profile
- How to combine lines with overlays and rosettes
- What real product cards show
- Frame angle and 45-degree cut
- Joining and finishing linear decor
- What counts as molding for joinery products
- Which wooden profile to choose for furniture
- How to choose a molding for a wooden door
- Which profile to use for a decorative panel
- How wooden moulding differs from a batten
- What the dimensions A, C and L mean
- How to match profile width to product size
- How to choose between oak and beech
- How to check a 45-degree mitre joint in moulding
- Should you buy a sample before the full batch
- How to calculate the quantity of moulding
- Where to buy wooden moulding for joinery products
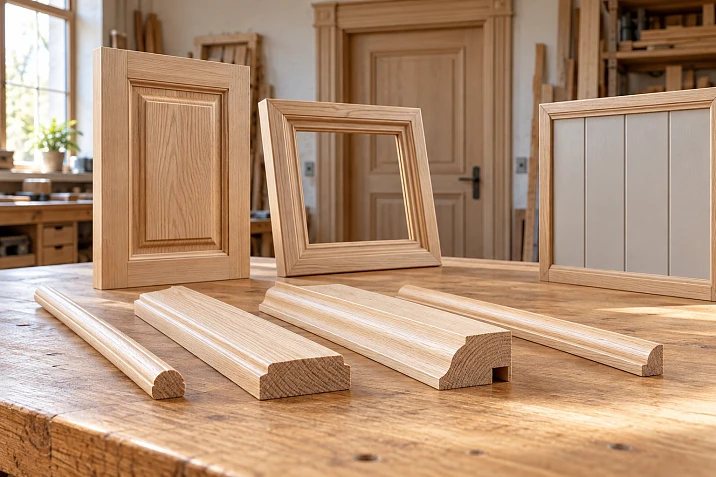
A narrow moulding may fit the door leaf in terms of width and still interfere with the handle because of its protrusion. A wide batten that successfully divides a wall panel can leave too tight an inner field on a small cabinet door. That is why moulding for joinery products is chosen for a specific installation location: first the available surface and the movement of adjacent parts are checked, then the cross-section, joints and material are selected.
For a workshop, this order reduces the number of late reworks. If you first order the profile you like and then adjust the furniture to fit it, you will have to change the offsets, relocate the hardware, or find a way to join incompatible relief. It is far easier to rule out an unsuitable cross-section on the drawing and confirm the remaining option with a sample.
Furniture, doors, frames, and decorative panels have different conditions. On a facade, the space for gripping the handle and the opening matter. On a door leaf, it is the position of the panel and the distance to the frame. On a frame, it is the visible opening and the support structure for the insert. On a panel, it is the overall rhythm, the intersections of lines, and the junction with carved decor. These differences determine the choice.
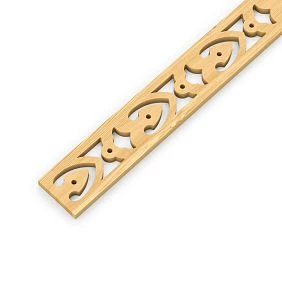
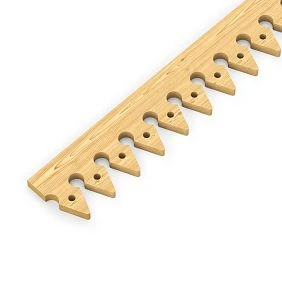
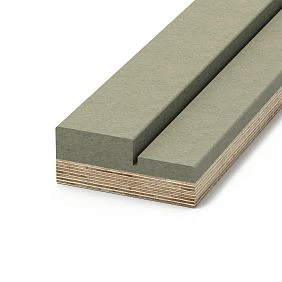
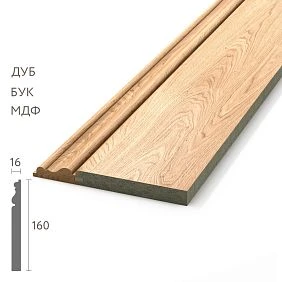
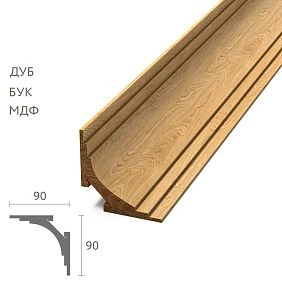
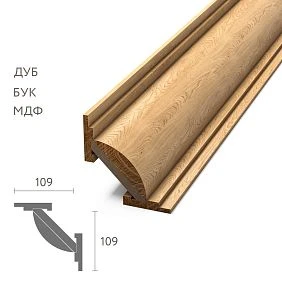
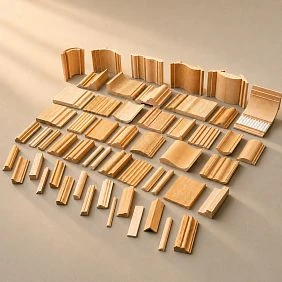
Moulding for joinery products is first selected by function
Start with a short note in the project: what exactly should the strip do. "Decorate the chest of drawers" is too broad a task. "Close the frame on the top drawer while keeping space for the handle" is already sufficient grounds for selecting several profiles.
| Task | Which products to consider | What to check first |
|---|---|---|
| Assemble decorative frame | Moulding or figured profile | The width of the remaining field and the joining of corners |
| Finish the edge of the part | Profile with a suitable mounting side | Support on the base and position of the protrusion |
| Create repeating lines | Straight or shaped rail | Width, spacing, and end cap finish |
| Frame a picture, mirror, or panel | Baguette, molding, or composite frame | Visible opening and insert retention method |
| Add an ornamental band | Carved molding | Pattern repeat and its position at joints |
| Connect adjacent surfaces | Profile of the required cross-section | Installation angle and actual bearing points |
Decorative wooden trim can serve several purposes at once. For example, a line along the edge of a furniture portal completes the plane and supports the overall pattern of the fronts. But to choose, you need to determine the main function: if the profile must close the edge, its installation geometry matters more than the ornament's resemblance to other details.
Separately specify whether the element will be only a decoration or part of the structure. A decorative frame around a mirror and a frame that holds the mirror and transfers its weight to the hangers require different solutions. The name “baguette” by itself does not confirm that the cross-section, joints and fastenings are sufficient for the second task.




Why one profile cannot be automatically transferred to all products
Imagine a set for one room: a wardrobe, a door and a panel next to a mirror. Repeating the character of the profile on all three products is a clear solution. However, the same line shape does not oblige you to use one width and one projection everywhere.
On a wardrobe door, the moulding rests on a flat front. On a door, the same strip may land on the bevel of a panel and be left without full support. On a large panel, its width may not be enough for noticeable division. At the same time, increasing the depth of the profile does not always correct the scale: the line will protrude more strongly, but will still look narrow.
Check the transfer of a profile against three conditions: whether there is a suitable base, whether there is enough free space in front of it, and whether the line can be completed in the corners. If at least one condition changes, the assembly must be tried on again.
It is useful to group products by a feature that is actually visible in the interior: repeat the rounded bead, the step or the character of the groove. Then a small furniture profile and a wider panel profile can be perceived as a coordinated group. At the same time, each will retain the dimensions suitable for its place.
Our factory also produces:
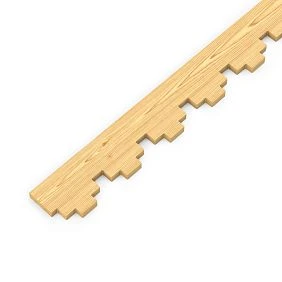
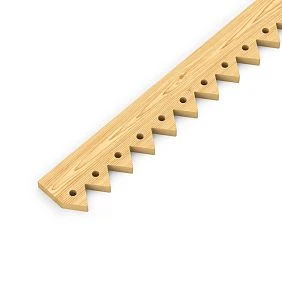
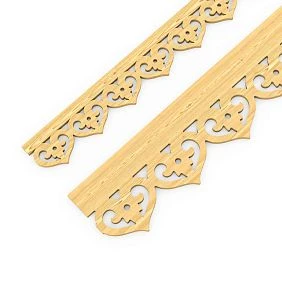
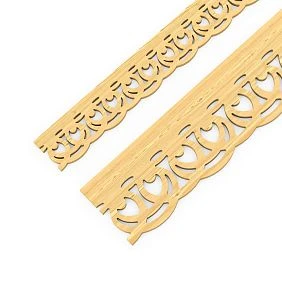
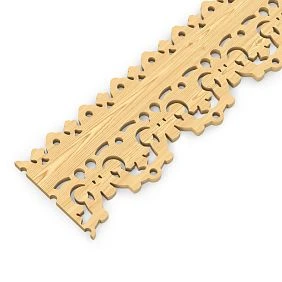
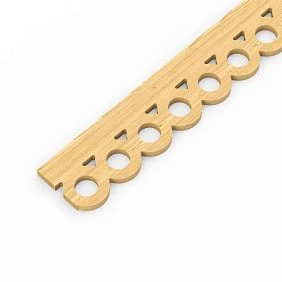
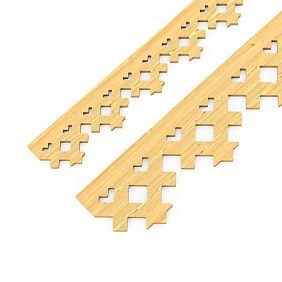
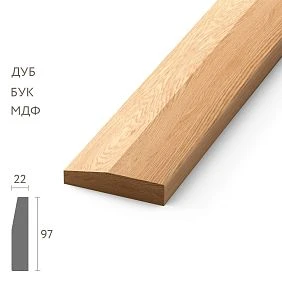
Wooden millwork for furniture
In furniture, a moulding works right next to other details: a handle, an adjacent door, a worktop, a plinth. Therefore, it is worth starting the choice with the overall appearance of the product, and then moving on to an individual front. Otherwise, a neat frame on one door may disrupt the horizontal lines of the entire wardrobe.
Get Consultation
Frames on fronts and drawers
For the frame, the outer contour, the offset from the edge of the front, and the profile width are determined. After that, the remaining inner field is checked. On a low drawer, it is often the field that becomes the constraint: the wide top and bottom rails come so close together that the handle ends up pinched between them.
It is more convenient to compare two or three sections at the full size of the front. Stick on paper strips of the appropriate width, mark the handle, and look at the entire row of drawers. Such a mock-up shows the proportions, but the projection of the molding is assessed using a three-dimensional sample. Be sure to leave room for fingers: the absence of direct contact with the handle does not yet mean a comfortable grip.
On paired doors, you need to decide in advance what the frames are measured from. Usually these are the specified edges of each leaf and the common horizontals of the set. Trying to align already cut parts "by eye" produces differences that are especially noticeable at the central gap.
The detailed assembly sequence is covered in the article about wooden moldings for furniture and frames on the front. When selecting the trim for the entire product, it is enough to first approve the contour itself and its relationship with the hardware.
Decorative bands and edges of furniture
The decorative band on a chest of drawers is assessed taking into account its continuation onto the side panels. If the front and side planes meet at an angle, a proven corner joint is needed. If the line ends on an open section, the end treatment is chosen in advance. An unfinished cross-cut may be visible from the walkway, even though it is not present in the frontal drawing.
For a furniture portal, the depth of the entire assembly is significant. The molding, the overlay, and the adjacent post may each fit in size individually, but together form an undesirable step. They are compared in a single cross-section relative to the common plane of the cabinet.
A vertical decorative strip made of solid wood helps divide a wide front into fields. But the line cannot be continuously fixed over the gap between independently opening leaves. Each moving part gets its own segment with a planned termination.
When you need to buy wooden moldings for furniture, select in the catalog of moldings and linear millwork suitable profiles and check them at the tightest spot of the unit. Usually it is a small door or the top drawer that limits the choice more than a large front.
Linear millwork for wooden doors
For a door, one should distinguish the decorative molding on the leaf, the casing around the opening, and the door frame profile. They are located in different places and serve different purposes. A casing you like cannot be considered a suitable layout for a panel just because both products belong to linear millwork.
First, on the drawing of the leaf, mark the handle with its base, the lock area, the hinge side, the edges of the panel, and any existing bevels. Then find the flat strip that the chosen molding can actually rest on. The width of the decorative field in the front view is sometimes greater than the width of the flat mounting surface — this difference must be seen before ordering.
A solid wood panel installed so that it can move within the frame requires special attention. The applied decor must not accidentally bond it to the frame with a rigid glue bridge. The attachment point and freedom of movement are preserved in accordance with the door construction. The molding itself does not eliminate the need to account for changes in wood dimensions when humidity changes.
The fitting is carried out both with the door closed and with the door opening. Check how the profile passes near the frame, casing, wall, and neighboring objects. For an existing leaf, it is useful to attach a three-dimensional mock-up of the protrusion at the intended location: a flat marking will not show a collision during rotation.
How to separate the leaf size from the free field
A conventional example: for a door 800 mm wide, the flat field for the decorative frame is 520 mm wide. The offset from the boundaries of this field to the outer edge of the frame is taken as 35 mm on each side. Then the outer width of the frame will be 520 − 2 × 35 = 450 mm. With a profile width of 25 mm, 450 − 2 × 25 = 400 mm will remain inside.
The values are given to explain the calculation, not as recommended dimensions for door decor. The actual offsets depend on the pattern of the panel, the hardware and the mounting surface. If you measure the same 35 mm from the outer edge of the whole door, the frame will end up in a completely different place and may cross structural elements.
On a door with several panels, it is more useful to coordinate their overall rhythm than to achieve the same shape for each frame. The top and bottom panels may have different heights, but should repeat the moulding width, the offsets and the overall verticals. The sample should be tried near the handle — in the area most sensitive to protrusion.
Linear stock for wooden frames
A frame for a picture, mirror or decorative insert is designed starting from what must remain visible. The outer dimension is the next step. This order is especially important if the frame must fit into a niche or sit between already installed panels.
A frame has at least three different sizes: the visible opening, the seat for the insert and the outer contour. They do not coincide if the profile overlaps the edge of the mirror, picture or glass. In the specification, each of these dimensions must be labelled separately.
Suppose a hypothetical project requires a visible opening of 600 × 800 mm, and the face width of the frame from its edge to the outer contour is 50 mm. The outer dimension will be 700 × 900 mm. If the insert must go under the frame by 10 mm on each side, its geometric size before assigning seating clearances will be 620 × 820 mm. The specific clearances and fastening are chosen according to the insert material and the construction.
This example shows why an order for a “600 × 800 frame” is ambiguous. The profile manufacturer, the joiner and the installer need identically designated dimensions.
How to choose the character of the profile
A smooth strip creates a simple contour. A shaped profile adds height variations and shadow. Carved linear stock introduces a repeating ornament that will have to be matched at the corners. Baget is usually the name for a profile used for framing, but the required seating rebate should not be considered an obligatory property of any product with that name.
For the selected section, check whether there is room for supporting the insert and whether there is enough depth for the entire assembly. For a picture under glass, this may include the glass, the image, the mount and the backing; the composition depends on the project. If a ready-made decorative profile does not have the required seat, a separate load-bearing base with a decorative surround is possible. Its dimensions and joints are calculated independently.
A molding glued to the base around a mirror does not automatically become a mirror holder. First, the method of holding and hanging is defined, then the visible frame is selected. Otherwise, a small end glue joint may receive a load that no one has tested it for.
On a deep frame, not only the front surface is visible, but also the outer side, and sometimes the inner reveal. Try the profile in the direction in which the frame will be seen from the room. This helps to notice in advance an exposed end, a step, or an unfinished area hidden in the product's frontal photo.
Molding for decorative wooden panels
On a panel, the profile must organize a whole field. What matters here is the position of the main lines, the width of the piers between frames, and the connection with neighboring elements. Choosing each strip separately is inconvenient: first you need a general layout drawing tied to the edges of the panel or another fixed base.
For a framed composition, the outer contours of all fields are defined. For a vertical layout — the number of slats, their width, and the gaps. A decorative band is aligned in height with an adjacent door, furniture, or the horizontal of the panel itself, if such alignment is provided by the project.
To calculate the rhythm, it is useful to distinguish between the clear gap and the spacing between axes. A conditional example: on a field 600 mm wide, six slats of 30 mm are placed, leaving equal gaps between them and at both edges. For the gaps, 600 − 6 × 30 = 420 mm remains. There are seven gaps, so each equals 60 mm. The axis spacing of adjacent slats is 30 + 60 = 90 mm.
If the edge margins need to be different, the calculation changes. Marking only by spacing without checking both edges often leaves a random narrow strip on one side. For a decorative panel, this is more noticeable than a slight change in several internal gaps.
How to align lines with overlays and rosettes
When the composition includes carved overlays for furniture and panelsFirst, mark their full outer contour. The central axis of the overlay may coincide with the axis of the field, while protruding leaves or scrolls may cross the future frame. You need to check the extreme points of the carving, not just the dimensions of its central part.
A rosette at the intersection of lines requires a pre-selected node. Profiles may meet it end-on, stop at a distance, or partially extend under the element intended for this. The last option is acceptable only with a suitable reverse side and sufficient support. A flat overlay placed over a protruding molding does not by itself achieve a stable fit.
For framing the central wooden carved decoration compare the height of the relief and the depth of adjacent lines. It is useful to assemble a small fragment of the composition on a common base and light it from the side. Then it will become clear which element comes forward, where a deep shadow forms, and whether the junction looks accidental.
If the panel covers a serviced area or consists of removable parts, the layout must preserve access. A continuous band attached directly to two removable fragments will connect them to each other. The joint lines and the terminations of the profiles are included in the design before the final choice of section.
How to read dimensions A, C and L
STAVROS moulding product cards use letter designations for dimensions. For an initial comparison, it is convenient to read A as the profile width, C as its height or depth dimension, and L as the length of the strip. The final position of these dimensions is clarified on the drawing of the specific product.
| Designation | Why it is needed when choosing | What else to check |
|---|---|---|
| A | Estimate the occupied band and the remaining field | Whether the overall width matches the visible width after installation |
| C | Assess the thickness and possible protrusion | From which mounting surface the dimension is measured and how the profile is oriented |
| L | Select product strips for the cut lengths | The length of the selected version, the sales unit and the allowances |
For a simple molding laid flat side against the facade, the relationship between dimensions and appearance is usually obvious. With a profile that has a groove, a step or an angled position, part of the section may overlap the edge or go into the seating area. In that case, the visible protrusion is determined from the cross-section of the assembled unit, not just from the C number.
First, A and C must suit the product. Then L must allow the required parts to be obtained. The reverse order leads to buying a strip that is convenient in length but has to be reworked by cross-section.
What real product cards show
The table shows examples of solid wood versions presented in STAVROS product cards. These are reference points for comparing dimensions, not a ready-made assignment of profiles for any facade or door.
| Product | A × C, mm | L, mm | Practical meaning of the comparison |
|---|---|---|---|
| Molding MLD-019.1 in beech or oak | 17 × 12 | 2400 | Compare the relatively narrow face strip with its depth |
| Molding MLD-002 in beech or oak | 22 × 11 | 1000 or 2400 | Take into account the selected length even with a single SKU and cross-section |
| Rail RK-001 in beech or oak, one of the versions | 24 × 5 | 2400 | Consider a wider and shallower strip |
MLD-019.1 also lists an MDF version with a length of 2600 mm. Therefore, the length from the first visible line of the product card cannot be carried over to the selected beech or oak. In the order, the SKU, material, cross-section, and length must all match at the same time.
The RK-001 strip is offered in several cross-sections. A single SKU entry without dimensions also does not identify the required part. Before placing an order, open the selected version and transfer its parameters to the specification in full.
Cross-section matters more than the name of the trim
The words "molding", "baguette", "strip", and "profile" help you find the right catalog section. However, the final decision is made based on the cross-section. Two products with the same overall width may have different contact area, edge height, and position of the most protruding point.
Check the mounting side. Does the profile need a continuous flat support, or is it designed for a different position? Is there a step on the back side? Which part should be in contact with the base? If the profile is intended to be installed over a finished covering, the compatibility of the fastening with that covering is additionally taken into account in the assembly.
Then look at both edges of the cross-section. On an asymmetrical moulding, one edge may be higher than the other. Its orientation determines the transition to the inner field, the framing of the insert, and the joint with the overlay. On the working drawing, it is useful to mark the face side and the installation direction so that parts are not flipped during cutting.
Evaluate the relief with future finishing and maintenance in mind. A narrow, deep groove is harder to sand and clean than a smooth transition. This matters for kitchen furniture and for a door that is touched frequently. An expressive shape is justified when the workshop can properly prepare and finish its entire surface.
A decorative wooden profile for a specific edge, frame, or transition is discussed in detail in the article on choosing a cross-section for a furniture assembly. To supply several joinery products, it is convenient to supplement their general views with small sections: the same profile immediately becomes clear at each installation location.
How to match a profile to the scale of the product
Scale is set by the relationship between the line and the free field. The universal recommendation to "use a moulding whose width is such-and-such a percentage of the door" does not account for handles, multiple nested frames, a carved center, or the character of the cross-section. It is more reliable to compare options on a full-size image.
Small door. Look at how much free space remains between opposite strips. If you add a handle and a central overlay to the frame, the composition can become cramped even with a small outer moulding size. Sometimes it is more useful to reduce the number of lines than to look for an even narrower profile.
Large cabinet. Evaluate the entire row of fronts from the distance at which the cabinet is seen as a whole. A thin profile may work well inside several small fields but get lost in one large outline. Increasing the cross-section is worth doing after checking the overall layout of the divisions.
Door leaf. Relate the moulding to the specific panel, not just to the height of the door. A recessed narrow panel and a wide flat field require different solutions, even if the outer dimensions of the leaves are the same.
Large wooden panel. First check the readability of the main lines under real lighting. A deep profile with a side light source produces a noticeable shadow that itself becomes part of the pattern. Excessive relief can visually fragment a calm panel.
Frame. Compare the width of the surround with the visible opening and the image itself. A wide profile reduces the free space around the frame, and a deep inner edge can shade the insert. For a mirror, additionally check the reflection of the inner side of the surround.
It is useful to make two paper outlines and one three-dimensional mock-up of the chosen section. Paper allows you to quickly compare width and spacing; the mock-up shows the shadow, projection and joints. These checks complement each other and take less time than altering an already assembled frame.
Oak or beech for joinery mouldings
The species is chosen together with the future finish and adjacent wooden parts. Oak mouldings are worth considering when the expressive grain should remain visible: under clear lacquer, a suitable oil or a semi-transparent tint. If an oak facade is nearby, compare not only the shade but also the character of the grain on both parts.
Beech mouldings are suitable for projects with a calm texture, including under opaque enamel. However, choosing beech does not eliminate surface preparation and a test application of the finish. Under a tint, differences between individual sections may also show; the desired result is confirmed with a test coat.
At STAVROS, the quality designations for laminated timber "for enamel" and "for tinting" refer to the preparation of the blank. According to the section about materials and quality of wooden products, in the first case the lamellas are not matched by colour and texture, in the second they are matched while preserving the possibility of natural differences. These are not names of a finished topcoat.
Therefore, first choose the required appearance, then clarify the available execution for the specific article. Even the same species does not guarantee the same shade after finishing. Parts that will be adjacent under a clear finish are worth considering together.
For a more detailed comparison, there is an overview of oak and beech moldings and a separate article about beech profile for enamel and tinting. In the specification, it is enough to record the species, the selected preparation and the approved finish sample.
How to check joints before buying the whole batch
A test joint is needed to check the profile shape after actual cutting. On a straight strip, the relief looks continuous; in a corner, the orientation of the section, the quality of the end face and the accuracy of line alignment become apparent. Figured wooden moulding with several narrow steps is especially demanding.
Frame corner and 45-degree cut
For a rectangular frame made of the same profile installed in one plane, two parts with 45° cuts form a 90° angle. This condition cannot be automatically transferred to an arbitrary spatial junction or to a profile installed at an angle.
On a test pair, check that the inner and outer edges match, that there is no step on the face surface and that the relief lines converge. The parts should connect without force that bends the strip or crushes the profile. Strong clamping can temporarily hide an error, but it does not correct a wrong angle or a mismatched section.
After a successful pair, assemble a small frame completely. Four corners show the accumulated error that is difficult to notice on a single joint. Compare the diagonals and make sure that the opposite sides have the specified length and that the frame lies flat without rocking.
For testing, you need a piece of sufficient length that can be securely fixed on the selected equipment. A short demonstration sample should not be considered a convenient blank for any cutting method.
Joining and finishing linear trim
On a long run, the position of the end joint is planned in advance. Under a clear finish, the transition is visible not only as a gap but also as a change in texture. Under enamel, the requirement for clean geometry remains: the coating must not be used to hide poorly fitted parts.
For an inside or outside corner, first confirm the actual angle of the substrate and the position of the mounting surfaces. Cuts for a flat frame and for a profile that transitions between different planes may require different setup.
For carved moulding, also check where the ornament ends. A geometrically tight joint can cut through a repeating motif at an awkward point. If the pattern must be symmetrical, the cut points are determined from a sample, and the additional lengths of material this requires are taken into account.
After test sanding, dry-fit the parts again. If the sanding has noticeably rounded a thin edge or changed the height of the relief at the end, the seam will look different. For a production run, you need a consistent finishing method that preserves the profile shape on every part.
Why order a moulding sample
A sample turns a choice made from a photo into a specific joinery assembly. It is placed against the substrate on which the profile will be installed and compared with the adjacent finish. The white background of a product card does not show how the moulding will look on a dark cabinet front, next to a raised panel, or under side light.
STAVROS offers samples of moulded products 100 mm long. The page states that they are shipped from available materials. Therefore, to check the tint, the required species must be confirmed separately: a sample of suitable geometry in another material will not answer the question about the color of the finished part.
A short fragment is enough to assess the cross-section, feel the projection, and see the transition to the adjacent surface. But it does not confirm the straightness of a long strip, the distribution of texture along the full length, or how a large frame behaves during assembly. For these tasks, you need a longer piece or a trial production strip agreed upon when ordering.
The working sequence looks like this:
- Select the article number, material, and preliminary cross-section according to the drawing.
- Obtain a sample with clear labeling of the finish.
- Try it in the actual assembly and check the clearance.
- Test the required joints on suitable blanks.
- Perform a trial finish using the future technology.
- Approve the result and record its parameters for ordering the batch.
It is advisable to keep the reference sample in the workshop. On the reverse side, you can note the article number, dimensions, species, preparation, coatings used, and the approval date. For a complex frame, it is also useful to keep a small assembled corner. It shows the expected joint quality better than a separate painted section.
If another employee handles the purchasing, pass this record along with a photo of the labeling. Phrasing like "the same molding" or "beech like last time" leaves too many options: the length, cross-section, and blank preparation can differ for the same model.
How to coordinate the profile with the future finish
The finish influences the choice before installation. A clear coating leaves the texture, lamella joints, and pattern changes at the ends visible. Enamel covers the wood color but emphasizes geometric defects under side lighting. Therefore, the sample is evaluated after the full prescribed processing cycle.
For a solid wood furniture profile intended for tinting, uniform preparation of the compared areas and controlled application of the composition are important. Accidentally left glue can alter absorption and cause a stain. Its removal and further preparation are carried out before finishing in a way compatible with the chosen coating system.
On a moulding with pronounced relief, the test finish should include the peaks, the recesses and the end grain. A flat area does not show whether the material accumulates in the grooves, how well fine lines are preserved, or how the corner joint looks after coating. If several coats are planned, evaluating after only the first coat will be incomplete.
The order of "assemble first or finish first" is chosen per joint. When the entire facade is painted with an overlay frame, it may be convenient to finish the assembly. With a contrasting frame or hard-to-reach internal surfaces, some operations are performed in advance. In this case, glued areas are prepared according to the requirements of the chosen adhesive: the presence of lacquer, oil or primer on the mounting side changes the bonding conditions.
Suitable Mounting and finishing materials are selected taking into account the substrate, the coating and the conditions of use. A single adhesive for raw wood, a painted facade and various decorative substrates cannot be chosen based on one profile name alone.
The strip installed on the product will also need maintenance. On a frequently used door or kitchen facade, check that the grooves are accessible for routine cleaning. If the chosen relief requires complex care, this should be agreed before manufacturing the entire set.
How to calculate the quantity after choosing a profile
The linear footage is calculated after the cross-section, orientation and joint pattern have been approved. Changing the profile mid-calculation can change the part lengths: for example, with the same outer frame, a different width value changes its inner opening and the position of the short cut points.
Compile a list of finished cut pieces with quantities. For each one, specify the measurement basis: along the long side of the cut, along the short side, or between other designated points. Then match the cut pieces against the retail length of the chosen version.
The total linear footage serves as a check on the sum, but it does not determine the number of strips. If a continuous section of 1350 mm is needed, a set of one-metre strips will not replace a single suitable long blank without changing the design. Similarly, a 2500 mm part cannot be obtained whole from a 2400 mm strip.
The purchase should include material for cuts, end trimming, test joints, pattern matching and a justified reserve. Its size depends on the composition of the parts and the technology, so a fixed percentage without a cutting map can give false confidence.
The detailed calculation is provided in the material on the linear footage of decorative wooden moulding and the cutting map. To select a profile, it is now important to confirm that the available length allows the longest visible sections to be completed according to the adopted scheme.
What to record in the specification before ordering
Once a sample is approved, its selection must be documented so that the supplier and the workshop understand each item in the same way. A single article number defines the model, but it may not define the entire finish. Material, dimensions and the agreed preparation are added to it.
| Specification field | What to record | What error does this prevent |
|---|---|---|
| Installation location | The product and the specific component | Swapping similar profiles between the door and the furniture |
| Article number | Designation from the product card | Ordering a visually similar model |
| Material | Beech, oak or another agreed finish | Material substitution with identical cross-section |
| Dimensions | A, C and the selected L | Obtaining a different thickness or length |
| Preparation | Agreed quality of gluing and processing | Mismatch with the future transparent or opaque finish |
| Quantity | Number of commercial strips with unit specified | Mixing linear meters and pieces |
| Reference | Sample and finish designation | Ambiguous agreement on appearance |
| Special conditions | Requirement for solid sections and agreed restrictions | Unplanned joints in visible areas |
It is useful to attach a sheet with a general view and several details from the section to the specification drawings and product models, if the required materials are available for the selected item. Show the profile location, its orientation, angles and adjacent parts. A general photograph of the furniture does not replace a dimensional drawing of the junction.
For the internal work of the workshop, it is worth separating the purchasing line and the list of finished parts. The first lists the product strips, the second lists what should result after cutting. Then a change in the cutting map will not look like a change to the selected profile, and a change in the supply length will not go unnoticed.
After receiving the batch, check the marking, completeness, visible damage and compliance with the approved finish. Before serial cutting, compare the strips with the working sample. Storage and preparation for processing are organized taking into account the supplier's recommendations and the workshop conditions: the condition of the wood upon delivery does not cancel its reaction to further changes in humidity.
When it is worth abandoning the selected profile
Sometimes a sample confirms that the product is well made but is not suitable for the project. This is a useful result of the check: it allows you to change one item before purchasing and manufacturing the entire batch.
Reject the option if the moulding rests only on a narrow random edge, interferes with opening, or leaves no room for the hand near the handle. Such geometry should not be compensated for with a thick, untested layer of glue or by moving the hardware without revising the product.
Another reason to change the section is the constant need to grind down its front part. If each part requires reducing the protrusion, destroying the specified relief, the profile no longer matches the assembly. For a small series, such adjustment also makes it difficult to obtain identical parts.
For a frame, the basis for rejection will be the lack of a suitable solution for retaining the insert. For a long band, it will be the impossibility of obtaining the required continuous section when visible joints are prohibited. For a panel, it will be the incompatibility of the profile with overlays or removable parts. These limitations are checked before the selected model becomes a mandatory part of the order.
A wooden profile for furniture should likewise not be moved into outdoor or other substantially different conditions without additional approval. Suitability is determined by the material, construction, fastening and finishing system as a whole. The word "solid wood" alone does not confirm such use.
Frequently asked questions about choosing joinery moulding
What counts as moulding for joinery products
These are long-length components from which moulded frames, layout battens, decorative bands, surrounds and other linear elements are made. In a specific order, it is important to move from the general name to a model with a specified cross-section, material and commercial length.
Which wooden profile to choose for furniture
The one that fits on the mounting surface, leaves a sufficient margin and does not interfere with using the furniture. For an overlay frame, a moulding is usually considered; for repeating straight lines, a batten. The protrusion is checked near handles and when opening the doors.
How to choose a moulding for a wooden door
Identify the free flat strip, the position of the panel, handle and lock. Then test the profile's volume when the leaf opens. If the panel must move within the frame, the decorative fastening must preserve this possibility.
Which profile to use for a decorative panel
The choice depends on the pattern: a moulding is suitable for frame contours, a batten for linear rhythm, and carved moulding for an ornamental band. The cross-section is checked together with overlays, rosettes and the panel's joint locations.
How wooden moulding differs from a batten
Moulding is usually chosen for its decorative relief and contour line. A batten is often used for straight layouts and repeating strips. At the same time, a shaped wooden batten can also have a complex cross-section, so the name does not replace studying the drawing.
What the dimensions A, C and L mean
For the moulding in question, A denotes the width, C the height or depth of the cross-section, and L the length of the strip. The direction of measurement and the position of the profile are clarified by the drawing: the visible projection after installation is not always equal to the overall C.
How to match the profile width to the size of the product
Draw the outer contour and the remaining inner field at full scale. Add handles and other decor. For a wardrobe and a panel, assess the overall appearance; for a frame, the ratio of the surround to the visible opening. There is no universal width ratio for all products.
How to choose between oak and beech
Oak is considered when you want to preserve an expressive texture, beech when you prefer a calmer pattern, including under enamel. The final choice depends on the neighbouring materials and a test finish, as well as on the available preparation of the specific product.
How to check a 45-degree moulding joint
Assemble a test corner from blanks suitable for reliable fixing during processing. Check the edges, the face surface and the relief. For a frame, then assemble all four sides: this will reveal the cumulative error in length and angles.
Should I buy a sample before the full batch?
For a new profile or a new combination with a base, a sample helps confirm the geometry and appearance. A short piece is suitable for checking the cross-section; testing a long section, joints, and the full pattern will require a corresponding blank.
How to calculate the quantity of linear stock
Record the lengths and quantities of finished parts, choose the stock length, and create a cutting plan. Account for saw kerfs, end trimming, testing, and a reserve. The total linear meters without distributing parts across the bars does not determine the exact quantity to purchase.
Where to buy wooden linear stock for joinery products
At STAVROS, profiles can be selected from the linear stock product cards, and the shape and finish can be checked on samples. Before placing a batch order, confirm the specification, length, quantity, availability, and shipping terms for the selected items.
Where to buy linear stock for joinery products
To buy wooden linear stock for a specific project, start with the STAVROS linear stock catalog for joinery products. For furniture frames and door leaves, compare moldings; for linear layouts, use battens; for expressive framing, use shaped profiles. It is convenient to limit the selection to two or three cross-sections that already fit within the given assembly.
If you need to buy carved wooden moulding, evaluate its pattern on the entire composition at once. Indicate where the corners, end joints and ornament terminations will be. This will help you understand whether a single profile is needed for the whole set or elements of different scales for the door, furniture and panel.
After making a preliminary selection, proceed to product samples. To place an order, provide the item codes and the purpose of each sample, the required wood species and the planned finish. If you need to test a joint or a long section, ask whether it is possible to obtain a blank sufficient for testing.
Workshops and furniture manufacturers may find it useful to review the terms of cooperation for manufacturersThe payment, receipt and transportation procedure for long-length products is specified in the section payment and delivery. Cost and lead times are compared based on the selected versions and the agreed set, including the required packaging and transportation.
It is worth buying solid wood moulding after three results have been confirmed: the profile suits the installation location, its joints can be made using the chosen technology, and the trial finish matches the project. Then the moulding for joinery products will arrive at the workshop with a clear purpose for each strip — for a specific furniture facade, door, frame or panel.