
























































Article Contents:
- When a furniture maker really needs beech mouldings
- Beech, oak or MDF: the decision starts with the future surface
- Moulding, batten, cornice: which profile suits which task
- How to read dimensions A, C and L in a beech profile product card
- What the dimensions mean using two real mouldings as examples
- How to assemble visible frames for a clear finish
- Why the same angle does not mean the same length
- If the frame is mounted on a facade made of a different material
- Why the second frame may require a different layout
- Does it make sense to replace beech with MDF for a length of 2600 mm
- How to avoid mixing two production batches
- Can beech moulding be used on an MDF front?
- Do all four sides of the frame need to be made from one strip?
- Is a 100 mm sample suitable for checking a precise cut?
- Why are joints sometimes darker than the face surface after tinting?
- Can beech moulding be shortened from 2400 to 2200 mm?
- Should a beech frame be painted before gluing?
- How can you avoid confusing MDF and beech when reordering the same moulding?
- What should you choose for a clear finish if the furniture is already made of oak?
- When is it better to skip the frame and leave the facade smooth?
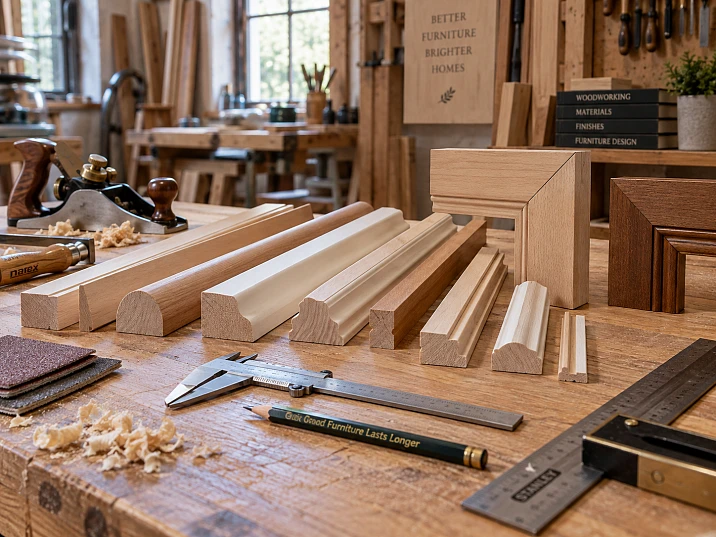
The beech moulding has already been matched to the facade by pattern, but during a trial assembly it turns out that the door catches on the adjacent drawer. The cause is not the wood or the quality of the product: when choosing, the visible width of the profile was considered, but the projection above the facade plane was not checked. Another common case is when the profile looks good under white enamel, but after tinting the four sides of one frame end up in different shades. Both defects can be detected before buying the full set.
Beech moulding is sensible to choose when a furniture project specifically needs a solid wood profile, and its cross-section, length, surface, and future finish are coordinated with the furniture construction. Beech by itself guarantees neither invisible joints nor uniform color. These results depend on the choice of the specific profile, cutting, assembly, and coating technology.
The working order for a joinery workshop is this: determine where the profile will be installed; select the cross-section; check the dimensions and material in the product listing; test-fit a sample; make one trial assembly; approve the finish; create a cutting map; then order the moulding for the series. Changing this sequence around is expensive: the neatest painting will not fix an incorrectly chosen moulding height, and an extra meter of wood will not eliminate a conflict with the handle.
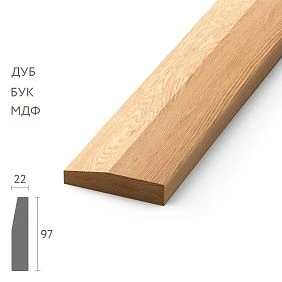
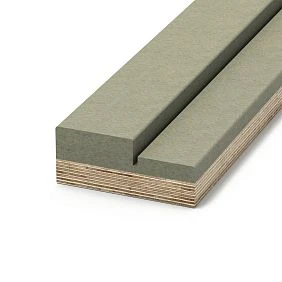
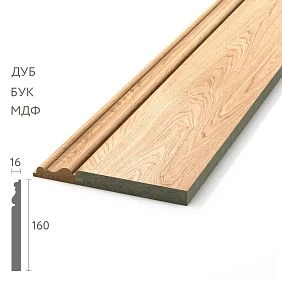
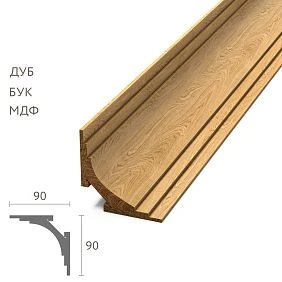
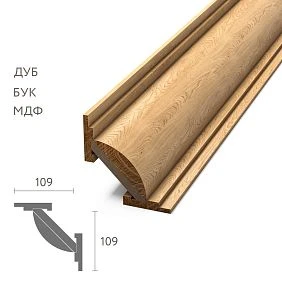
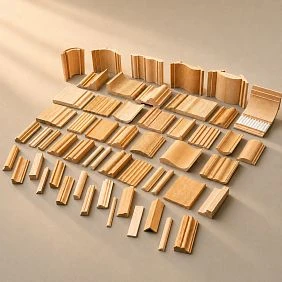
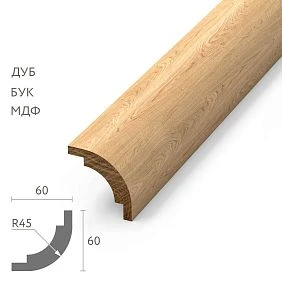
When beech moulding is truly needed by a furniture maker
The most straightforward scenario is wooden furniture or facades where the decorative frame should remain part of a solid wood construction. For example, on a beech chest of drawers, they want a slim border around the drawers and then to coat the facades and overlay elements with the same enamel. If another material is used on the facade, its connection to the wood must be assessed separately: with humidity fluctuations, solid wood may change dimensions differently from a sheet substrate. In such a joint, not only the beauty and cost of the moulding matter, but also the fastening construction.
The second scenario is visible natural wood. On a facade, display cabinet door, or side panel of a beech wardrobe, a thin profile line can be lacquered or tinted. The shade will depend on the sample, preparation, and chosen coating, but the part will retain its own grain pattern. Beech usually has a relatively calm, fine texture. It does not have to look like oak: even with a similar tone, the character of the pores remains different.
The third case is repeated parts. A small workshop makes six identical cabinet doors and wants the outer frame on each to be the same width, have the same projection, and meet the corner in the same way. A ready-made profile frees the shop from milling the same cross-section itself. But having a standard item number does not remove the need to check the actual strips and set up the saw before a run.
Beech moulding should not be chosen just because the word “solid wood” seems more prestigious than other materials. For a fully painted MDF facade, a matching MDF profile is sometimes easier to coordinate with the substrate in terms of finish and material behavior. For oak furniture under clear lacquer, on the other hand, it is better to compare the beech and oak options right away rather than try to make them identical later with a single stain.
Therefore, the question “beech moulding or not?” arises after another one: what exactly should this cross-section do in the furniture, and what will the final finish be?




Beech, oak, or MDF: the decision starts with the future surface
In the STAVROS catalog there are profiles whose geometry matches but whose material and stock length differ. This is convenient during design: you can first choose the moulding line, then evaluate its execution in beech, oak, or MDF. However, this interchangeability applies primarily to the outline of a specific item. In service, different materials do not become the same.
| The task of the furniture project | What makes sense to consider | What to check before deciding |
|---|---|---|
| Solid beech facade, the profile will remain wooden | Beech | Matching shade, grain direction, and coating system |
| Beech facade under opaque enamel | Beech; where the construction allows — MDF | Base, primer, material transitions, joint behavior |
| Oak furniture with open grain | Oak | Species matching, plank selection, test tinting |
| Fully painted MDF front with no solid wood requirement | MDF; under special structural conditions — beech | Overhang, mounting method, edge quality after cutting |
| Custom front with visible beech profile | Beech | Test finish and color sorting of planks |
| Very long straight section with joint limitations | An option whose length allows obtaining a whole part | The actual length of the strip, the cutting plan, and the location of possible joints |
Beech is suitable for both painting and clear or semi-transparent finishing. However, the requirements for the initial surface differ between these two approaches. Under enamel, minor color variations in the wood are usually hidden by the opaque coat, whereas joints, scratches, torn fibers, and steps at the seams can become visible under side lighting. Under clear lacquer, the shape of the joint is also important, but differences between the end grain, the face, and adjacent strips are additionally visible.
One should not automatically consider beech the best material for white paint. MDF may be more suitable when a natural texture is not needed at all and the construction is designed for sheet material. Beech has an advantage where solid wood is required or where it needs to match other wooden components. The decision is made based on the specific furniture assembly, not on a general ranking of species.
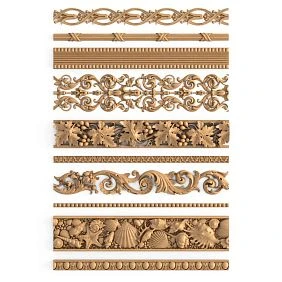
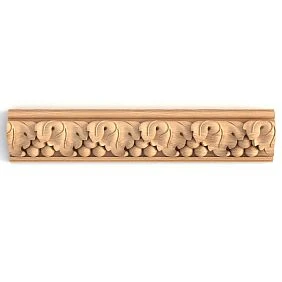
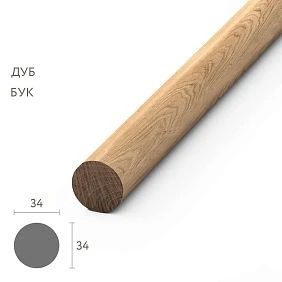
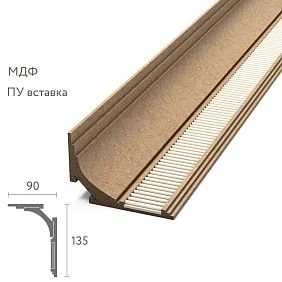
Our factory also produces:
Molding, batten, cornice: which profile is needed for which task
The word “molding” refers to a long-length product, but by itself it says almost nothing about how the part works. A joiner has different tasks: to run a thin line across a facade, assemble a decorative frame, finish the top of a cabinet, or frame an opening. Buying the same wooden profile for all of these would be a mistake.
Molding is used when a shaped decorative line or frame is needed on a facade. It may have a simple geometric cross-section or a more complex rounded relief. Its visible width sets the scale of the framing, while its projection determines the character of the shadow and the constraints when opening doors.
A batten is more often used as a flat, extended strip: in repeating vertical divisions, on side panels, in a calm geometric pattern. If the project needs a clean line without pronounced relief, a complex molding would be unnecessary.
A cornice closes off or emphasizes the upper boundary of a furniture structure: a cabinet, sideboard, bookcase, or portal. Here, not only the face dimension matters, but also the overhang, joints at outer corners, the connection to the uprights, and the possibility of installation under the ceiling. A profile that looks good on a small drawer may get lost on a two-meter bookcase.
A casing is needed to frame an opening or to transition between planes. It may be part of built-in furniture, but its shape is chosen taking into account how it adjoins the carcass, the wall, and the door leaf.
A plinth or lower profile strip completes the base section. Such a part is constantly near the floor, legs, and cleaning area, so depth, service accessibility, and the coating system are of more practical importance than on an upper cornice.
Wide STAVROS wooden mouldings catalog useful not as a list of similar photos, but as a set of sections with different purposes. First, narrow the choice by product type and installation space. Then compare specific options from beech.
Get Consultation
How to read dimensions A, C, and L in a beech profile card
In a furniture sketch, a profile often looks like a single line. In reality, it has three dimensions, and each one affects the project.
The STAVROS moldings discussed below have parameters A × C × L listed in their cards. For these products, A shows the face dimension of the section, C shows its depth, and L shows the commercial length of the strip. The letter designations must be matched against the drawing for the specific SKU: the interpretation cannot be transferred to any other product in the catalog without verification.
Width A determines how much of a band the molding will occupy on the facade. If the outer dimension has already been set along the frame contour, increasing A reduces the open field inside it. On a narrow drawer, this is especially noticeable. For example, the difference between a 17 mm and a 25 mm wide molding is 8 mm on each side. For a rectangular frame, the inner opening will become 16 mm narrower and 16 mm shorter with the same outer dimension.
Depth C shows how bulky the profile will be. This is not only a decorative parameter. A molding that protrudes above the facade plane can interfere with the handle grip area, the adjacent door, or an opening drawer. Internal corners of built-in furniture, tight openings, and proximity to hinges require especially careful checking. The profile protrusion is compared with the actual clearance during the full travel of the facade, not only in the closed position.
Length L determines which sections can be made as single pieces and how the order will be laid out across the source strips. Two geometrically identical frames may require different numbers of strips depending on the length of the source stock. Nominal linear meters do not reveal this difference.
Before approving a profile, measure the width and height of the facade face plane, the offsets to the edges, the handle position, the distances to adjacent parts, the intended outer frame line, and the minimum allowable inner clearance. Only after that does it make sense to compare sections.
What the dimensions mean using two real moldings as examples
У MLD-059 section 17 × 10 mm. For beech, the card lists a 2400 mm strip. This is a relatively narrow profile that can be used as a more restrained line on the facade; specific suitability depends on the chosen placement.
У MLD-057 section 25 × 12 mm. The beech version also has a length of 2400 mm. Its front strip is 8 mm wider, and the depth is 2 mm greater. On a small door, these are two different compositional solutions, even if the craftsman plans to cover both with the same color.
| Parameter | MLD-059, beech | MLD-057, beech |
|---|---|---|
| Face size A | 17 мм | 25 мм |
| Depth C | 10 мм | 12 мм |
| Length L | 2400 мм | 2400 мм |
| Width difference relative to MLD-059 | — | +8 mm |
| Depth difference relative to MLD-059 | — | +2 mm |
| The main question when choosing | Will the narrow line get lost? | Will the frame turn out to be excessively wide? |
These dimensions apply to the specified beech versions, not to all materials in the product card. In particular, the corresponding MDF versions have a length of 2600 mm. Substituting the length of one material with that of another leads to an incorrect calculation even when the section matches completely.
The table deliberately does not claim that one profile is "modern" and the other "classic." The impression depends on the shape of the facade, the adjacent decor, color, and light. With side lighting, a small difference in depth can affect the shadow more noticeably than a difference in face width.
How to choose molding for the width and height of a furniture facade
The same profile behaves differently on a 140 mm high drawer, a 700 mm door, and the side panel of a two-meter wardrobe. Therefore, proportions are better assessed not by the total area of the facade, but by the free field after placing the frame, handle, and other details.
Let's imagine a door measuring 520 × 760 mm. The craftsman wants to place a molding frame with an outer offset of 45 mm from each edge. Then the outer size of the frame will be:
- by width: 520 − 45 − 45 = 430 mm;
- by height: 760 − 45 − 45 = 670 mm.
The outer frame remains the same for both moldings under consideration. But the inner field differs:
| Option | Outer frame size | Profile width | Inner field by frame dimensions |
|---|---|---|---|
| MLD-059 | 430 × 670 mm | 17 мм | 396 × 636 mm |
| MLD-057 | 430 × 670 mm | 25 мм | 380 × 620 mm |
This is a calculation of the geometric opening of a rectangular frame with a uniform outer boundary. It does not account for the rounding of a specific profile, the method of joining, or the elements within the field. The visual result must be verified with a sample.
On this same door, the handle must be checked in advance. If its base intersects the future frame, reducing the molding width may solve the problem, but not always: the handle base and the finger zone have their own dimensions. It happens that a small handle in the drawing does not overlap the profile, yet when opening, fingers touch its protrusion. You need to check the ease of grip, not just the absence of intersecting lines.
On a long leaf, consistency of the frames across adjacent doors is also important. If four fronts have the same width but different heights, the decision on the outer offset is made for the entire group. Mechanically centering each contour can result in different distances between the frame and the bottom line of the cabinet. Here it is better to draw the overall furniture front, mark the main horizontals, and only then approve the details.
If a decorative overlay is planned inside, its dimensions are checked after calculating the inner field. You cannot first choose a large overlay, then a wide molding, and leave the free space for the handle as a leftover. For furniture with a complex facade pattern, it is useful to lay out full-size paper templates on a table.
Beech moldings under enamel: where defects most often appear
White or colored enamel hides the natural shade of beech, but it does not hide the surface shape. Moreover, a smooth opaque coating under side lighting makes steps between parts, unglued corners, and sanding irregularities noticeable. Therefore, preparing the molding for enamel begins before painting.
First, check which wood preparation option is provided for the specific product. Solid wood items may have different versions for enamel and for tinting, and the list of available options depends on the article number. Ordering “beech 2400 mm” without specifying the required preparation is not enough.
The next step is a dry assembly of the frame with actual cuts. The profiles are placed against the front, and the matching of the profile at the corners and the absence of steps are checked. If the joint does not align, do not expect a thick primer layer to eliminate the problem: a weak joint will remain under the coating, and the defect may reappear.
Particular attention is paid to the end grain. The cross-section of beech absorbs the finishing compound differently than the longitudinal surface. If the end grain is not sealed by the priming technology provided for, differences in absorption and gloss may appear on it. When the sides of the frame are joined at a miter, a significant part of the end-grain zone ends up in the glue seam, but the open edges and areas after fitting still require treatment.
The primer and enamel must be suitable for the wood and compatible with each other. The sanding schedule between coats is selected according to the technical documentation of the system used, not by a universal recipe. When choosing a finishing system, it is also worth checking with STAVROS recommendations for installation and finishing. If too much material is removed on a narrow convex part, the profile geometry can be altered; on four identical corners this will be visible.
Painting before installation and after installation solve different tasks. If the profile is prepared separately, it is easier to paint its hard-to-reach sides, but during subsequent trimming and installation there remain areas for local touch-up. If the assembled frame is painted together with the facade, it is easier to maintain a uniform color surface, however seams, glue and material movement require special attention. The decision depends on the fastening method, the facade base and the finishing technology of the workshop.
A test frame made of the same beech, with the same glue and the same coating is more useful than several separately painted offcuts. It shows how the corners, joints and finish behave in the finished assembly.
Beech for tinting: how to preserve the wood grain and achieve a consistent shade
If the customer wants to see the wood, simply matching the word "beech" in the specification is not enough. Two planks of the same species can differ in tone, grain and reaction to stain. In a photo of the moulding these differences are often barely noticeable, but on the finished facade the four sides of one frame are next to each other, so every transition reads much more clearly.
It makes sense to tint the beech profile after selecting the parts. Lay the strips face up under the lighting in which the furniture will be evaluated, and compare the shade, direction of the grain, noticeable stripes and possible transitions at the places where the wood is joined. For a transparent finish, the character and location of the joints must be agreed in advance. If the visible facade is intended to have an even natural surface, the suitable execution and sorting are checked before cutting.
Then make test stains. On the first sample, use the surface preparation and coating planned for the facade. The second sample makes sense only if there is a real choice between two tinting schedules or two compositions. Endlessly changing stains on the same small offcut is useless: differences in the original wood can distort the comparison.
The end grain is examined separately. End-grain fibers often darken more strongly than the face surface because they absorb the composition differently. Even a neat miter cut can stand out with a transparent finish if the craftsman did not provide for treating the joint. It is a mistake to expect that a dark tint will necessarily mask the joint: the contrast sometimes becomes stronger.
To apply oil or lacquer, you need to take into account the manufacturer's requirements for the preparation of the product, the permissible moisture content of the wood, intercoat processing, and drying time. You cannot combine oil, water-based stain, lacquer, and opaque enamel in a single instruction just because they are all applied to beech. These are different finishing systems.
When matching a beech profile to oak fronts, it is worth comparing samples under the finish rather than "raw" parts. Oak has a pronounced pore structure, while beech has a calmer grain pattern. Stain can bring the colors closer, but it will not transform one species into another. If the goal is an exact match of the visible texture, it is wiser to choose molding made from the same species as the adjacent solid wood.
How to assemble visible frames for a clear finish
Suppose a cabinet consists of four doors, each with a beech frame made of four segments. After cutting, there are sixteen finished parts. If the craftsman assembles the frames from whatever is closest without sorting, even a high-quality lacquer can emphasize the difference in shades.
It is more convenient, before the final cut, to distribute the original strips among the doors, mark them on the back side, and keep the sets together during sanding. Parts with a similar tone are kept in one visual group. After a test coating, evaluate not each segment separately, but all four fronts side by side. For a batch of furniture with an open texture, such sorting is part of production, not an extra embellishment.
Precise 45-degree joints: what must match besides the angle
A rectangular frame has four joints. In the drawing, each pair of parts meets at 90 degrees, so their ends are usually cut at 45 degrees. However, setting the saw to the number "45" is not enough. The tightness of the joint depends on exactly how the profile lies on the table, how securely it is pressed down, whether the supporting surfaces match, and whether the workpiece shifts during the cut.
For small beech molding, a step in the relief is especially unpleasant: the outer edges may meet, but the peaks of the profile at the corner end up at different heights. On a painted front, such a transition creates a short shadow that a color change will not remove. Therefore, the craftsman checks two things at once — the plane of the joint and the continuity of the face relief.
The following order for a test assembly is convenient:
- Cut two pairs of elements for one frame from the selected profile, leaving a reasonable technological allowance where it is provided for by the cutting plan.
- Place the frame on a flat surface with the front side up, without fixing it permanently.
- Check all four corners: outer vertices, inner vertices, and alignment of the relief.
- Measure the outer width, height, and diagonals of the frame. A discrepancy in the diagonals shows that squareness needs adjustment, even if the individual corners look neat.
- Place the assembled frame against the facade and compare its position with the markings.
- Only after eliminating the mismatches should you approve the setup and repeat the cut for the rest of the batch.
If the corners do not meet, first look for the cause in the cut setup, profile orientation, and actual dimensions. Gluing up a large gap and covering it with filler is a poor substitute for precise fitting, especially for a clear finish.
Why the same angle does not mean the same length
Suppose the outer width of the frame is 430 mm. For molding cut at a miter, this value refers to the distance between the outermost outer vertices of the corresponding horizontal piece. Its inner edge is shorter. If the craftsman measures 430 mm along the inner side, the finished frame will be wider than calculated. For a profile 17 mm wide, the difference between the outer and inner length at the two ends of a rectangular 45-degree cut is approximately 34 mm; for a width of 25 mm, approximately 50 mm. This is a geometric relationship applicable to a rectangular frame plan, not a statement about the shape of any profiled relief.
It is necessary to agree in advance which dimensions are given in the cutting map: outer, inner, or centerline. Mixing measurement methods within one batch is unacceptable. The error is especially common when one employee performs the crosscutting and another assembles the frame.
If the frame is mounted on a facade made of a different material
Wood changes dimensions when humidity changes, and it behaves differently along and across the grain. The sheet substrate to which the molding is attached may behave differently. For a small facade, this does not automatically mean a wooden frame is unsuitable, but the joining method should be chosen taking into account the construction, room conditions, and recommendations for adhesive and finishing. An adhesive designed for one type of joint is not necessarily suitable for all materials and coatings.
A long, massive profile should not be installed on an unprepared base and its possible movement should not be completely blocked without verifying the technology. If the furniture will stand near a heat source, in a damp area, or be used with sharp changes in indoor climate, the question of joint construction becomes more important than the decorative pattern.
Length 2400 mm and cutting plan: example for six doors
Calculating linear meters is useful, but a craftsman buys whole strips. Therefore, before ordering, it is important to understand which actual cut pieces fit into one blank. Let us return to the door 520 × 760 mm, for which the outer frame size is 430 × 670 mm.
One door requires four cut pieces with a calculated length along the outer vertices of the cuts:
- 670 mm — two vertical sides;
- 430 mm — two horizontal sides.
Total finished length: 670 × 2 + 430 × 2 = 2200 mm.
For beech MLD-059 or MLD-057, the original strip in the verified product card has a length of 2400 mm. It turns out that the four sides can theoretically fit into one strip:
2400 − 2200 = 200 mm of nominal remainder before sawing, fitting, and possible rejection of ends.
Suppose, for illustration, that the workshop has allowed for eight saw passes with a loss of 3 mm each. Then the total loss is 24 mm, and the calculated remainder decreases to 176 mm. This is an example of a calculation assumption, not a characteristic of specific equipment: the actual number of cuts and the kerf width depend on the chosen technology. Additional losses may also be added to this value for trimming the ends, a test cut, and removal of a defective section.
For six identical doors, the base requirement for this cutting option is:
- 6 frames × 4 parts = 24 segments;
- 6 frames × 2200 mm = 13,200 mm of finished length;
- if each frame is successfully placed in one plank — 6 planks of 2400 mm;
- a total of 14,400 mm of initial linear stock will be purchased.
The solution “6 planks are enough” is valid only provided that all required segments can be obtained without losing an entire side due to defects, incorrect cutting, or requirements for matching the wood grain. For a clear finish, it is sometimes more rational to abandon the minimum number of planks in order to assemble each visible frame from visually compatible material.
The technological reserve is calculated separately based on the possibilities for reordering, the need for a trial assembly, and the likelihood of rework. A universal percentage allowance for any item does not take into account the actual placement of segments.
Why the second frame may require a different layout
Suppose a craftsman is making a tall door, for which the two vertical strips must be 1900 mm long. From a single beech strip 2400 mm long, you cannot get two such verticals: 1900 + 1900 is greater than the original length. This means that at least two strips will be needed for the two long sides, even if the total requirement of the whole frame seems small.
After obtaining the vertical from each source piece, nominally about 500 mm will remain before the cut. If the horizontal parts of the frame need to be 460 mm long, one can try to fit them into these remnants — but only after checking all required end trims and actual lengths. If the crossbars require 520 mm, the scheme no longer works, and a different distribution must be found.
Hence a useful production takeaway: linear stock is purchased as a set of segments, not as a single total of meters. What is often most valuable is not the shortest remnant in the batch, but the ability to preserve long visible sides without intermediate joints.
Does it make sense to replace beech with MDF for the sake of a 2600 mm length
For the items under consideration, the MDF variant has a commercial length of 2600 mm, i.e. 200 mm more than the beech variant. But it does not follow from this that MDF always saves one strip.
In the example with a 430 × 670 mm frame, both lengths allow all four segments to be placed on one strip with the adopted cutting order. The number of source pieces will not change: one strip per front. What will differ are the length of the remnants, the material, the price, and the behavior of the finished structure.
In another project, the extra 200 mm may be decisive — for example, when the required combination of segments slightly exceeds 2400 mm but fits within 2600 mm taking losses into account. Changing the material solely for such a gain is acceptable if it does not conflict with the structural requirements and the furniture finish.
One profile for the entire furniture or different cross-sections
A profile should be evaluated not in isolation, but within the system of all fronts. In a wardrobe where four tall doors are located above a row of low drawers, the same molding may look too massive on the drawers or too inconspicuous on the upper tier. But the opposite extreme is no better: choosing a separate cross-section for each section destroys repeatability.
There are two practical approaches.
A single profile. All frames are assembled from one item and one material. This scheme is convenient for small furniture series: fewer variants in the specification, easier setup of the miter saw, and a clearer calculation of remnants. It works especially well when the front sizes are similar and the decorative purpose of the frames is the same.
Two coordinated profiles. On large doors, a wider molding is used; on small drawers, a compact one. For example, MLD-057 is considered for a large facade, and MLD-059 for a small one. But such a combination is not automatically successful: first, the character of the relief, its roundings, the height of the protrusion, and the overall logic of the facades are compared. Proportions are checked on the general frontal drawing and a trial layout.
If furniture is being designed for repeat production, the set of sections is approved for the entire piece at once. A model with one profile in the first batch and one that accidentally looks similar in the second will already differ, even if the difference in catalog width is only a few millimeters.
When a 100 mm sample is enough, and when a whole strip is needed
Ordering a large amount of beech molding based only on a picture is risky. It is unclear how the profile looks on a real facade, how deep a shadow the relief casts, and whether it can be combined with a handle. For an initial selection, STAVROS provides samples of moulded products 100 mm long. The page states that samples are selected by article numbers and are available from stock materials, including beech; the availability of the selected version must be confirmed when ordering.
Such a short piece is usually enough to:
- place the profile against the front surface of the facade and assess its scale;
- check the protrusion next to the handle or another decorative element;
- compare the character of the section by touch and visually;
- perform a small test finish on a suitable surface;
- show the customer the actual profile, not a photograph.
However, a 100 mm sample does not confirm the straightness of the strips over a 2400 mm length, does not show the full range of shades of the future batch, and does not replace making a frame with four joints. When the accuracy of a long section or the quality of a 45-degree cut is critical, after choosing a sample it makes sense to purchase a full-length strip to test the production assembly.
A test facade is especially useful if the moulding will be glued to a painted or laminated base, and also if the clearance when opening is very small. Here they check not only adhesion, but also the possibility of repeatable assembly without fitting each item by eye. One successfully assembled frame with a fixed processing method becomes the reference for the rest.
What to check when receiving beech mouldings for a series
A package of several dozen strips may look uniform while the parts are stacked. After distribution across facades, shade deviations, areas with a different grain pattern, local edge damage, or differences in relief become visible. Wood remains a natural material, and the same article number does not mean a mathematically identical pattern on every millimetre of the surface.
For furniture production, the actual received goods should be compared with the order: article number, cross-section size, length, species, surface finish, quantity, and condition of the packaging. Then check the selected part of the batch for straightness, condition of the front edge, and suitability for the planned finishing. Specific permissible deviations cannot be set arbitrarily: if the project requires tight tolerances, they are agreed in advance and recorded in the documentation.
For a clear finish, it makes sense to sort the items before cutting so that the long and most visible sides are not assembled from strips of different shades. If some mouldings are intended for painting and some for tinting, keep them separate from the moment they arrive. Otherwise, the same cross-section easily hides the difference in the required wood preparation.
Long-length parts also require careful storage. The items are placed on a level base under conditions that meet the supplier's requirements, without exposing them to local heating or moisture. Do not straighten a problematic strip during frame assembly by fastener force alone: the stress will remain inside the joint. Storage and subsequent processing details can be checked against the section quality of STAVROS products and the instructions of the manufacturer of the selected coating.
How to avoid mixing two production batches
Let's imagine that the workshop has already produced eight painted doors, and a month later the customer added two more. The saved article number will allow ordering the same profile, but visual matching is not guaranteed by a single entry on the invoice. The wood, the shade of the selected enamel, the application method, and the curing conditions of the coating may all differ.
For a repeat order, keep a sample of the finished profile, a photo of the joint under standard lighting, the code or exact name of the coating, the preparation parameters, batch data, and the approval date. New parts are compared with this reference before final painting. If the shade and texture do not match, it is better to identify this on a test piece than after installing the last two frames.
Where beech moulding should not be used
Sometimes it is wiser to abandon a beech profile than to complicate the structure for the sake of the chosen material.
Narrow technical gap. If the moulding protrudes so much that the facade touches the adjacent cabinet, the decorative issue should not be solved by filing down random sections of the finished profile. The profile, the position of the frame, or the design of the joint needs to be reconsidered.
Transparent finish with a requirement for an exact oak match. A beech profile may be close in color, but not in the character of the grain. When all the furniture is made of visible oak, it is worth comparing the oak version of the same profile.
Unjustified complication of a fully painted facade. If the base and structure are designed for MDF, and the customer does not require solid wood, a corresponding MDF profile may be more appropriate. Buying beech by itself will not make the finished frame more durable.
Conditions in which the wood will be constantly exposed to moisture. A finish does not override the properties of solid wood. For furniture in a potentially damp area, the construction, end grain, joints, and operating conditions must be assessed separately; sometimes a different material or a different joint solution is needed.
A joint in the most visible place that cannot be hidden. If the height of a part exceeds the commercial length, and the customer requires a fully continuous natural surface, a standard strip may not be suitable. A different layout is sought, a long-length version with confirmed availability, or the facade design is reconsidered.
These are not shortcomings of beech as a species. They are limitations of a specific construction that are best discovered on the drawing.
How to specify a beech profile in the working specification
For a small workshop, a table is sufficient if it describes the exact version being purchased, not just the name of the design. The line “beech molding, 20 meters” does not protect against mix-ups and calculation errors.
| Specification field | Example of completion or content |
|---|---|
| Furniture assembly | Cabinet facade frame, model F-01 |
| Article number | MLD-059 |
| Material | Beech |
| Cross-section and commercial length | 17 × 10 × 2400 mm |
| Surface preparation | Clarify and specify the selected version for the given finish |
| Purpose | Four segments per facade |
| Dimensions of finished sides | Two at 670 mm, two at 430 mm along outer vertices |
| Joining method | Miter cut at 45 degrees, trial assembly approved |
| Finishing | Name of primer and enamel or tinting and lacquer system |
| Quantity per series | Six fronts — by default six whole strips according to the approved cutting map |
| Reserve | Calculate and approve separately based on the actual map and risks |
| sample status | Approval date, photo, and storage location |
For a neighboring furniture model with the MLD-057 profile, a separate row should be created. It is not enough to replace the article number in the previous row: the cross-section, the inner field of the frame, and possibly assembly specifics will change. With the same length of 2400 mm, the cutting map may remain the same, but the geometry and appearance of the assembly must be approved anew.
If the product is manufactured serially, it is useful to assign the facade an internal number and a drawing version. Then a change of molding is recorded as a design change, rather than as an unnoticed substitution of goods during purchasing.
How much does a finished frame cost: what goes into the estimate
It is convenient to divide the cost into four parts: purchase of solid strips, consumables and fastening, processing and painting, losses on cutting and possible rework. The price of one strip by itself does not reveal the cost of the finished frame.
For the six already-calculated fronts, the minimum purchasing base when cutting one strip per frame is six beech strips of the selected article. At the time of checking on October 10, 2026, the STAVROS listing showed for MLD-059 in beech 17 × 10 × 2400 mm a price of 1,020 ₽ per strip, and for MLD-057 in beech 25 × 12 × 2400 mm — 1,250 ₽ per strip. Consequently, the cost of just these six strips was 6,120 ₽ and 7,500 ₽ respectively, a difference of 1,380 ₽.
These amounts do not include delivery, packaging, additional strips for reserve, cost of samples, labor costs for trimming, assembly and painting. Prices and availability change, so before placing an order they should be rechecked in the product cards. A wider profile may have a different production value for specific furniture; choosing only by the difference in wood cost would be too simplistic.
If the finished cross-section allows you to eliminate milling the entire set yourself, the estimate reduces the costs of machine setup and producing the profile. But the cuts, assembly, end processing, and finishing remain. Compare the option of “buying ready-made beech molding” with making it yourself by the cost of the finished installed element, including time and the risk of rework, not by the price of the source board.
Where to buy beech trim for furniture facades
It is more convenient to start selecting beech molding from the STAVROS trim catalog: it presents wooden profiles for various purposes, and the listings allow you to choose material and dimensions. For furniture frames, you can compare MLD-059 and MLD-057 if such cross-sections suit your project. When other wooden components are needed along with the frame, it is also convenient Catalog of solid wood items.
For those who plan to buy wooden moldings for furniture for the first time, it is worth ordering samples of trim in advance and checking them on a real facade. For a manufacturer who assembles a small series or several furniture models, the terms of interaction are collected on the page STAVROS for manufacturers. The methods of placing an order, shipment, and delivery are specified in the section payment and delivery.
When you need to buy beech moulding specifically for a covering enamel, the order should specify the article number, material, dimensions, and the agreed surface preparation. For beech moulding intended for tinting, separately clarify the finish suitable for visible finishing and the possibility of selection by grain pattern. It is helpful to attach a drawing with long sections and joints: this way the seller and the workshop discuss one specific set rather than different ideas of a "profile for a cabinet."
It makes sense to order the main linear footage after the profile has actually been tried against the furniture, the corners of the test frame meet, and the finish has been agreed upon. Then purchasing becomes the final stage of the decision rather than an attempt to resolve all production issues after delivery.
Frequently asked questions from furniture makers
Can beech moulding be used on an MDF facade?
Such a combination can be considered, but it is necessary to check the joint between the solid wood and the sheet base, the operating conditions, and the compatibility of the adhesive and the finish. Beech and MDF react differently to changes in humidity. For long or especially critical joints, the fastening technology should be chosen with the construction in mind rather than relying only on the decorative result.
Do all four sides of the frame need to be made from a single plank?
No. It can be convenient for color control and reducing the number of source items, but it is not a mandatory rule. With a large frame, all sides may not fit within a single length. With a clear finish, it is sometimes more useful to select visually compatible planks and obtain a neat set from several source items.
Is a 100 mm sample suitable for checking an exact cut?
It will allow you to evaluate the cross-section, but a full-fledged corner is better checked on two sufficiently long pieces of the selected profile. A short sample does not show the quality of the entire commercial length and does not replace assembling a test frame.
Why are joints sometimes darker than the face surface after tinting?
End-grain fibers can absorb the composition more intensively. The result is influenced by preparation, the chosen stain, the application method, and the treatment of the joint. This should be checked on a cut sample with the same coating that will be used for the furniture.
Can a beech moulding be shortened from 2400 to 2200 mm?
Yes, if the required profile and the specific project allow such a cut. But first determine which side the finished length is measured along, what cuts are needed, and how much material will be used for them. Do not set the finished size based on the raw end without accounting for future joints.
Should a beech frame be painted before gluing?
There is no universal order. Separate painting makes surfaces easier to access; painting after assembly provides a uniform finish for the facade and frame. The decision is made taking into account the adhesive bonding technology, surface preparation, accessibility of joints, and the coating instructions. A test assembly helps choose the method without redoing a whole batch.
How can you avoid confusing MDF and beech when reordering the same moulding?
It is not enough to specify the article number in the specification. Record the material, cross-section, commercial length, and required finish. For example, for the MLD-059 considered, the beech strip is 2400 mm long, while the MDF version is 2600 mm. You cannot transfer the number from one product line to another.
What should you choose for a clear finish if the furniture is already made of oak?
First consider an oak profile. A beech option is acceptable when the difference in texture is part of the project and the color and joints are agreed upon on samples. If a natural wood match without contrast is required, a close stain shade will not replace the same species.
When is it better to abandon the frame and leave a smooth facade?
If the molding interferes with the handle, hinges, adjacent facade, or reduces the working area so much that the decorative composition becomes cramped, the frame can be abandoned. Another option is to use a narrower profile after rechecking the geometry. Manufacturing complexity alone does not justify a decorative element that impairs the furniture's function.