Article Contents:
- Why a public interior cannot be viewed from a single point
- First, mark the routes and stops
- How decor changes with viewing distance
- Choose several base profiles
- Where polyurethane mouldings work
- How to decorate a long wall without an endless series of frames
- Why a corridor requires separate solutions for corners and endings
- Where one-off stucco is appropriate
- Divide areas by likelihood of physical contact
- How to choose a skirting board for a long route
- How a cornice unites the hall, waiting area, and corridor
- How to coordinate ceiling molding with equipment
- How to transition from a formal area to a calm one
- When wooden trim is included in the overall system
- How to test the solution on a real area
- How to convert a repeating module into the number of planks
- Why two different reserves are needed
- How to build repairability into the wall pattern
- What to include in an order for stucco and trim
- Check before confirming the purchase

At the entrance, a visitor sees the far wall in full. After a few steps, they turn into a corridor where the frames on the walls merge into a repeating pattern. Then they sit down in the waiting area — and the same profile ends up right in front of their eyes. Here its relief, joint, and paint quality are already noticeable.
That is why decorative solutions for public spaces should be checked along a person's route. A single beautiful wall does not yet show how the entire lobby, passage, or gallery will be perceived. It is necessary to connect the large lines, repeating sections, and places where the visitor lingers.
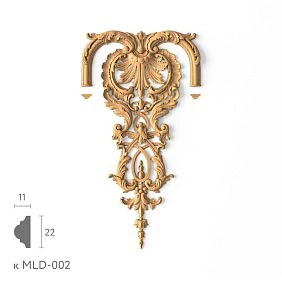
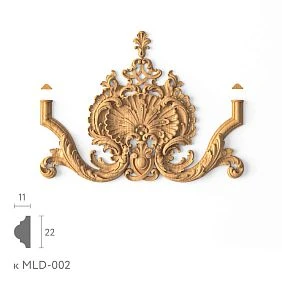
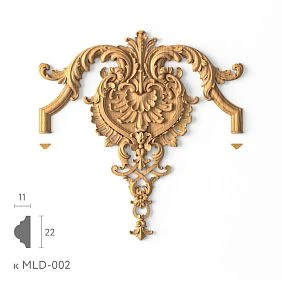
Stucco and trim solve different tasks in this system. Trim refers to long products of a specified cross-section: moldings, cornices, skirting boards, battens. They set the overall pattern of the space. Piece stucco — individual overlays, rosettes, and other relief details — helps highlight selected places. Let's break down how to distribute them, check the actual products, and prepare a clear order.
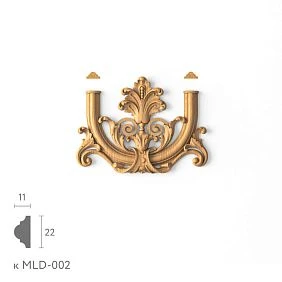
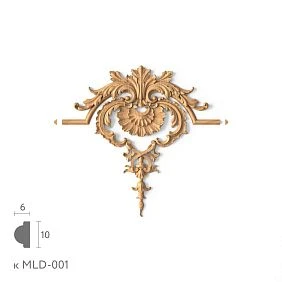
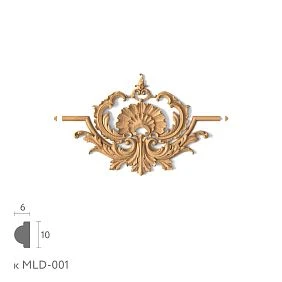
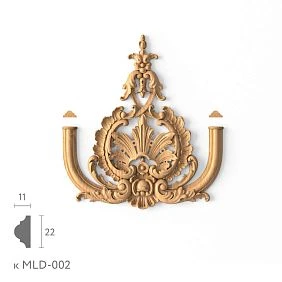
Why a public interior cannot be considered from a single point
A space with constant movement has no single "correct" viewpoint. The wall is seen straight on and from the side, up close and across the entire hall. Part of the decor is blocked by visitors, furniture, counters, and open doors.
In a long corridor, identical frames are perceived primarily as rhythm — a sequence of repetitions and intervals. In the waiting area, a person has time to examine an individual detail. At the entrance, the overall organization of the space matters more: where the main wall is, where to move, and where the service counter is located.
These differences change the task of the product. A small ornament may be appropriate next to armchairs, but hardly participate in the perception of the far wall. A large frame, clearly visible from the lobby, may turn out to be too protruding on a narrow turn.
That is why the solution is checked in at least several characteristic positions: at the entrance, along the main passage, after the turn, and at the stopping point. These are working checkpoints, not a universal standard for any building.




First, mark the routes and stops
Take the plan with doors, furniture, and equipment. Mark the main visitor path, branches, queues, waiting areas, and service movements. Separately show where carts and cleaning equipment pass: their trajectory may differ from normal human movement.
For each part of the route, determine what role the finish plays. The entrance marks the beginning of the space, a turn opens the next section, and the service counter becomes a stopping point. Between them, calm segments are needed where the decor supports the overall composition.
| Route section | How it is perceived | What to check in the decor |
|---|---|---|
| Entrance area | First as a whole, then with zoom | The main line, scale, and position of the accent |
| Long corridor | Mostly in motion and at an angle | Rhythm, repetition of doors, ends of profiles |
| Turn | In parts, when the direction of gaze changes | Outer corner, line transition, possible contacts |
| Waiting area | Longer and from a close distance | Relief, joints, coating, furniture position |
| Service counter | From the aisle and when stopping | Counter background, visibility of markings, large wall divisions |
This is how the basis for choice emerges moldings from polyurethane: it becomes clear where an extended line is needed and where a separate decorative element is.
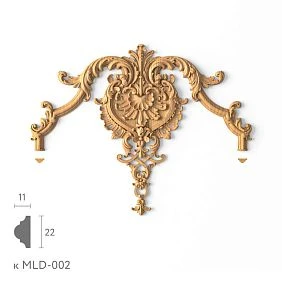
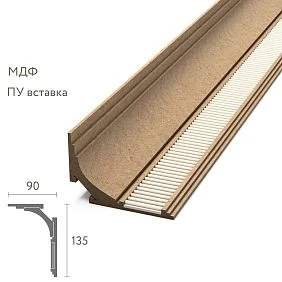
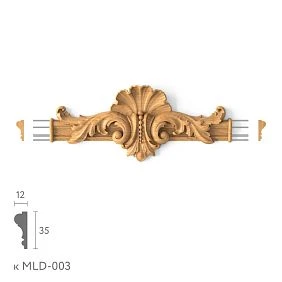
Our factory also produces:
How decor changes with viewing distance
At a far distance, large relationships are read first: the height of the band, the size of the wall fields, the alternation of verticals and horizontals. A field is the area of surface between frames, openings, or other boundaries. If the far wall is divided into many small fields, they may be perceived as a fragmented background.
At a medium distance, frames, portals, and the pattern of divisions become distinguishable. A portal is the architectural framing of an opening. Here it already matters whether its width relates to the door and the adjacent wall piers — the sections of wall between openings.
Up close, relief transitions, corners, seams, and paint texture are visible. This is exactly where it makes sense to evaluate small appliqués and thin profiles.
The boundaries of these distances depend on the size of the room, the light, and the contrast of the finish. There is no need to assign them the same number of meters for all projects. It is better to mark the actual observation points and check a test area from them.
Get Consultation
Choose several base profiles
It is convenient to build the overall system on a small set of products. One profile carries the main line, another frames additional borders. The baseboard completes the wall from below, the cornice connects it to the ceiling. A separate molding set highlights an important area.
| Role | Example of a project designation | Where it is used |
|---|---|---|
| main moulding | ML-01 | Large frames and main divisions |
| additional moulding | ML-02 | Inner frames and less noticeable areas |
| Cornice | KR-01 | Upper line of connected rooms |
| Baseboard | PL-01 | Lower wall contour |
| Accent set | DK-01 | Portal, niche, or selected central composition |
This is an example of a project layout, not a mandatory set of five products. Sometimes a single molding is enough, and sometimes different cornices are needed for rooms of unequal height.
A project designation helps locate an element on a drawing. An article number is the designation of a specific product from the manufacturer. Once a product is selected, they are linked: a conditional ML-01 should lead to an exact article number, size, and material, not to the generic word "molding."
Where polyurethane moldings are used
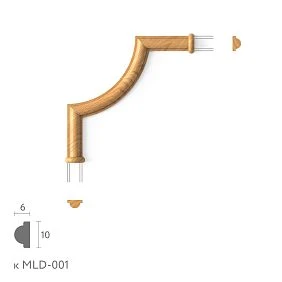
A molding is a decorative strip for frames, bands, and dividing a surface. Polyurethane is a polymer material from which such profiles and relief details are made. The choice of a specific model depends on the shape, size, finish, and requirements of the area where it will be installed.
Moldings made of polyurethane can be considered for wall frames, vertical divisions, and trims. At the same time, the width and projection of the profile are responsible for different properties. Width shows how much space the line occupies on the wall. Projection shows how far it extends forward from the surface.
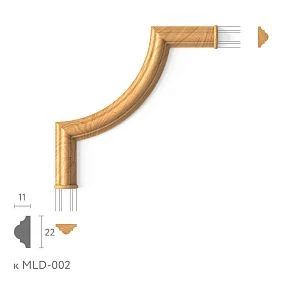
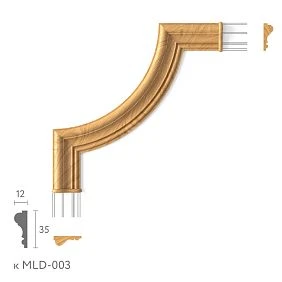
For example, STAVROS offers two options:
| Product | Width | Profile projection | Plank length |
|---|---|---|---|
| MLDPU-002 | 22 мм | 11 мм | 2600 мм |
| MLDPU-003 | 35 мм | 12 мм | 2600 мм |
The second is noticeably wider, but projects only a millimeter more. Width alone cannot automatically determine shadow depth or suitability for a passage area: you need to see the cross-section, that is, the shape of the transverse cut, and test the product in the design lighting.
How to design a long wall without an endless series of frames
Imagine a wall 24 meters long. If you divide it into twelve identical sections just for the sake of an even step, the frames may land on doors, information signs, or places where people stop. An arithmetically even division does not take into account how the space is organized.
First, identify whole sections between openings, turns, and functional zones. Then choose a repeatable module — a fragment of the composition that can be used several times. For example, it could be one large frame with equal side margins.
Along an extended section, the module repeats calmly. At an important point, a larger field or a local accent appears. Between dense zones, you can leave the wall without additional overlays. Such a pause helps distinguish neighboring parts of the interior.
You do not have to place an accent on every second field. If the alternation is not connected to anything in the room, it quickly becomes a new kind of monotony. It is better to tie the rhythm to real events along the route: an entrance, a turn, a group of doors, a waiting area.
Why a corridor requires separate solutions for corners and endings
In a corridor, the wall is often seen at an acute angle. Extended horizontals become especially noticeable, and small inconsistencies at turns repeat throughout the entire perspective — the visible space in depth.
Check not only the long straight line, but also the places where it ends. How does the molding meet the door trim? What happens on a short wall pier? Where should the profile end near an opening without a casing?
Standard situations require coordinated junctions — solutions for where parts meet and terminate. You can plan for a connection with a surround, a short turn of the profile to the wall, or finishing with a separate frame. The choice depends on the shape of the product and the construction of the wall; a random exposed end should not become the default solution.
If a short section cannot accommodate a full module, it is not worth compressing it into a narrow strip. Often a calm blank wall preserves the rhythm better than yet another reduced frame.
Where individual moulding is appropriate
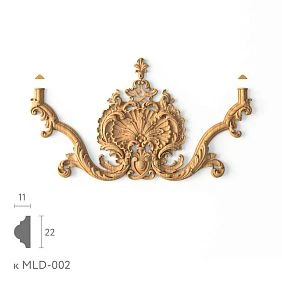
A separate moulded element attracts attention more strongly when it has a clear place in the composition. This could be the top of a portal, a large niche, the wall behind a service counter, or the end of a gallery visible from afar.
molded decoration made of polyurethane does not have to be repeated on every section. If overlays are placed everywhere, they stop highlighting important points and increase the number of details that will have to be coordinated, painted, and maintained.
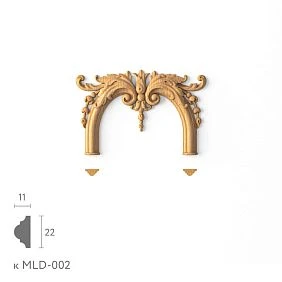
To connect an overlay with a profile, check the dimensions and shape of the junction — the place where the parts meet. For paired elements, take into account left and right versions. For an ornamental band, check the repeat: the distance over which the pattern repeats.
A decorative accent can support the composition of a route, but clear signs must still remain independent and easy to read. A sign should not be designed more elaborately than the section of wall it relates to.
Divide sections by the likelihood of physical contact
The lower part of the wall may be hit by suitcases, chair legs, and cleaning equipment. On an outer corner, the risk is associated with a person or cart turning. Near a counter, visitors may touch the wall with their hand or place bags next to it.
The boundary of such a zone is not determined by a single height for the entire building. It is found based on actual furniture, equipment, and movements. In one place, contact occurs at the floor; in another, at the level of a chair back.
In these areas, not only the relief is checked, but also the material, fastening, coating, and the possibility of cleaning and replacement. A decorative profile cannot automatically be considered impact protection. If the wall needs special protection, it is provided as a separate solution and coordinated with the finish.
The upper part of the wall usually experiences fewer accidental touches. A more complex relief can be moved there while keeping the lower zone calm. At the same time, access for cleaning remains part of the task: a high installation does not make the element maintenance-free.
How to choose a skirting board for a long route
The skirting board forms the lower contour of the wall. On a long passage, its continuity and connections with doors, panels, and furniture are important. First check the height and thickness, then see where the protruding edge may end up in the path of equipment.
Pay especially close attention to the junction with the door casing. If the skirting board is thicker than the door frame, you need to decide in advance how to finish the protrusion. A poor joint repeated at dozens of openings will become a noticeable part of the interior.
Before Buy skirting board, clarify the material of the specific model. In this STAVROS section, in particular, HIWOOD polystyrene skirting boards are presented. Polystyrene and polyurethane are different polymers; placing a product in the catalog does not make them the same material.
For areas with likely damage, think in advance about where the replaceable fragment will end. It is easier to restore an area between clear boundaries than to select a small insert piece in the middle of an open long wall.
How a cornice unites a hall, waiting area, and corridor
The cornice shapes the transition from wall to ceiling. When the lower part of the interior is interrupted by doors, furniture, and counters, the upper line can remain a common reference for several zones.
But the same cornice does not need to be carried through all rooms at any cost. If the ceiling height changes or a beam appears, a separate transition will be required. It is important to decide in advance whether the line continues at the new level, ends at the portal, or gives way to a simpler profile.
У of the ceiling cornice they check the height on the wall and the projection onto the ceiling — the distance it extends from the wall. These dimensions cannot be reduced to a single word, "width".
On a long section, joints and turns are also considered. The proximity to opening doors, curtains, and equipment is checked separately. Buying a cornice from a single photo is not enough: its cross-section must match the specific installation location, and the line must have a clear continuation or termination.
How to coordinate ceiling molding with equipment
The ceiling pattern is developed on a plan that already shows light fixtures, ventilation grilles, sensors, cameras, fire suppression devices, and service hatches. The placement of these elements is clarified with the relevant specialists before the final approval of the decor.
For example, a decorative rosette may surround a light fixture, but it must not become an accidental support for it. The mounting of the light fixture is decided separately, taking into account the base and its load. For the hatch, the ability to open and access the equipment is preserved.
If, in a symmetrical composition, the molding falls on an engineering element, a coordinated solution is sought first. Moving a sensor or grille solely for the sake of a beautiful pattern without the involvement of the responsible designer should not be done.
Before buying ceiling molding, check not only the view from below but also maintenance. A beautiful central detail may require access for cleaning or repainting. In a large hall, the method of such access affects the practicality of the solution no less than its appearance.
How to transition from a formal area to a calm one
The transition is perceived more easily when adjacent areas share a common element. For example, a cornice continues from the entrance hall into the waiting area, while large wall frames become simpler. Further on, in the corridor, the main height levels and a more restrained rhythm are maintained.
It is convenient to reduce decorative density gradually: first remove individual overlays, then reduce the number of inner frames. At the same time, the transition itself is tied to a clear boundary — an opening, a turn, a change in height, or the function of the area.
If the main molding is replaced with a narrower one, they should not simply be joined end-to-end in the middle of the wall. The difference in cross-sections is resolved through completing the composition or a specially designed junction.
Decorative solutions for public spaces maintain unity through such connections. Uniform density of ornamentation is not required everywhere: the visitor should distinguish important focal points and calm passages, while seeing that they belong to the same interior.
When wooden trim is included in the overall system
Wooden trim it is appropriate to consider it alongside wooden panels, furniture, and door frames. The visible texture — the pattern of wood grain — can link these elements together.
At the same time, a similar shape of a wooden and polyurethane profile does not make them one product. Surface preparation, coating, fastening, and conditions of use are determined separately for each material. If visually coordinated painted parts made of different materials are needed, this is verified on samples of the finished surface.
For lower contact areas, the entire assembly matters, including the base and coating. The name of the material alone does not prove that a specific product is resistant to impacts or the chosen cleaning chemicals. The requirements of the facility and supporting documents are verified with respect to the model and installation location.
In the project, it is useful to indicate the reason for each material transition: connection with furniture, surface character, operational task. Then the replacement does not look accidental and remains understandable during subsequent repairs.
How to test the solution on a real area
A test area is a full-scale fragment of the future finish. It is needed to see how the wall, profile, coating, and light work together. For a complex location, include the baseboard, molding, and a characteristic joint; check the top line separately at the specified height.
First, compare the dimensions and geometry against drawings and 3D models. Then use suitable Product samples or approved items to check the physical result. A small fragment shows the shape, but does not replace evaluating a large frame on the wall.
Look at the area from the main entrance, at an angle from the passage, and from the seat of a seated visitor. Check the provided lighting options. Side light can reveal relief and joints more strongly than even front light.
Also evaluate the proximity of furniture and the possibility of routine cleaning in an approved way. Record the result specifically: which profile was chosen, which finish was approved, which joint was accepted. If the material or coating changes after verification, the affected part of the solution must be checked again.
How to convert a repeating module into the number of strips
First calculate the module, then the number of its repetitions. After that, separately add non-standard endings, short wall sections, and transitions. This gives the geometric linear footage — the total length of the parts in the finished composition.
Let's consider a conditional area with eight identical frames. Each requires two vertical parts 1800 mm long and two horizontal parts 600 mm each. We take the dimensions along the long side of the finished part after the corner cut.
| Parts | Quantity | Length of one | Total length |
|---|---|---|---|
| Vertical | 16 | 1800 мм | 28.8 m |
| Horizontal | 16 | 600 мм | 9.6 m |
| Total | 32 | — | 38.4 m |
If a 2600 mm strip is used, dividing 38.4 by 2.6 and rounding up gives 15 strips. But there are sixteen long parts, and two 1800 mm parts do not fit into one strip. Therefore, when making verticals without intermediate joints, at least 16 strips are required.
A possible cutting plan is one 1800 mm part and one 600 mm part from each strip. 200 mm remains for cuts and end preparation; the sufficiency of this allowance is checked against the accepted processing method. This gives 16 strips, or 41.6 linear meters of supply.
A linear meter is one meter of product length, regardless of its width. The difference between 41.6 and 38.4 m relates to cutting and technological losses. It does not mean that after installation there will be a stock of whole products left for repair.
Why two different reserves are needed
The installation reserve is intended for current work: possible damage to a part, additional trimming, or adjustment of a specific section. Cutting losses are first accounted for in the cutting plan itself. They cannot simultaneously be recorded as a remainder that is guaranteed to be left after handover.
The repair reserve is kept for operation. These are whole strips, paired overlays, or other elements from which a damaged part of the finish can later be restored. Its purpose is specified separately so that these products are not used up during ordinary installation.
There is no common percentage for all items. A common smooth profile and a rare right overlay have different consequences of shortage. When determining the quantity, take into account places of probable damage, the size of the section to be replaced, and the confirmed possibility of reordering.
The reserve is marked by article, size, material, and project designation. For a set of several parts, its composition is preserved. One remaining overlay will not replace a complete set if a paired element is required for repair.
How to build repairability into the wall design
Repairability means the ability to restore an area with a clear scope of work. Having a spare strip helps, but by itself it does not make the finish convenient to repair.
Look at where the natural boundaries are: a corner, a door, the edge of a panel, a completed frame. If the damaged fragment can be replaced between them, it is easier to determine the scope of restoration. On a continuous strip with a pronounced ornament, the pattern will also need to be matched.
Keep a description of the coating: preparation, paint, shade, gloss level, and application method. The gloss level shows how much the surface reflects light. Even a close color with a different gloss can make the repaired area stand out.
The operating organization also needs agreed recommendations for cleaning the specific surface. If a repeat order is needed after several years, the current product characteristics and the condition of the installed finish are checked. A new element may match the original sample but differ from the surface that has changed during use. This is taken into account when choosing the boundaries for repainting.
What to include in an order for stucco and trim
Once the system has been checked, it is transferred to a specification — a list of products with characteristics and quantities. For each item, specify the project designation, manufacturer, exact article number, material, dimensions, and commercial length. Commercial length is the size of the whole supplied strip before cutting.
Next, record the application area, the number of strips or piece parts, the installation and repair reserve, the finish, and the number of the approved sample. Add the document version so that purchasing and installation rely on the same data.
If you need to buy stucco decor for frames, the composition of the set is broken down by element. The selected Decor for Molding is linked to a specific profile; the left and right parts are not combined into an unnamed total quantity.
Before deciding to buy polyurethane moldings, clarify the current dimensions, availability, and delivery terms of the selected version. Compare the cost for an agreed set: with the required preparation, quantity, and additional elements. The price of one strip does not show the cost of finishing the entire route.
Check before confirming the purchase
Walk through the future route using the plan, wall drawings and a trial section. At each stage, the next step should be clear:
- At the entrance, the overall composition and the main focal point are legible.
- In the passages, the repeating module is coordinated with the doors and wall sections.
- At the turns, the corners, end pieces and potential contact points are resolved.
- In the waiting area, the close-up view, the surface and the adjacent furniture have been checked.
- The skirting board and cornice have clear transitions between sections.
- The ceiling composition is coordinated with the equipment and maintenance access.
- For each item, the article number, finish, quantity and reserve have been confirmed.
After that, you can request the price and availability of STAVROS products using the prepared specification. If the project is based on polyurethane decorpass the selected article numbers along with the approved dimensions and finish. Such an order preserves the connection between what a person will see along the route and the specific details that will need to be supplied, installed, and subsequently maintained.