Article Contents:
- Trim is a ready-made profile that the craftsman cuts to fit their project
- Why linear footage and the number of strips are different things
- First choose a specific profile, then calculate the order
- The parts list is the basis for a proper calculation
- A single facade is calculated separately first
- How to move from a single facade to a series
- Step 1. Approve a single facade
- Step 2. Lock in the finished lengths
- Step 3. Record the number of parts per one facade
- Step 4. Multiply by the number of facades
- Step 5. Build the overall cutting map
- Step 6. Determine the number of whole strips
- Oak
- Oak
- Cabinet
- Commode
- Door
- Usable offcut
- Sample
- Unusable waste
- What is decorative wooden linear trim?
- How to calculate the linear footage of trim?
- Why total footage is not enough for ordering?
- How to calculate the number of strips by length?
- How to account for a 45-degree cut?
- How to account for the saw kerf width?
- How much extra stock should be added to wooden moulding?
- How to calculate linear metres for a furniture facade series?
- How does carved moulding differ from a smooth profile in cutting?
- Where to buy decorative wooden moulding?
Page description: How to calculate decorative wooden moulding for furniture and joinery: linear metres, part lengths, cutting map, angles, waste, oak or beech, and purchasing STAVROS carved moulding.
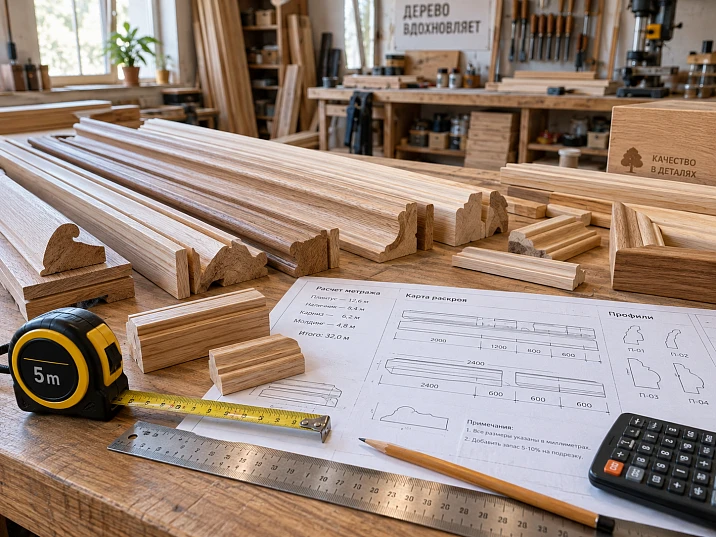
A project may require 23 linear metres of wooden moulding, but that does not yet mean it is enough to order 23 metres of the product. If the required parts are 720, 430, 1180 or 1500 mm long, what becomes decisive is not the total linear metres, but how these segments fit into the actual stock strips.
This is where excess consumption most often appears. The total amount of material seems to be enough, but after cutting, short pieces remain from which the next long part can no longer be made. As a result, a new strip has to be opened.
Therefore, for a joinery workshop, decorative wooden trim should be calculated in two stages:
- first determine all finished lengths;
- then distribute them across the commercial strips of a specific SKU.
The total linear meterage is needed. But ordering based only on it is too rough.
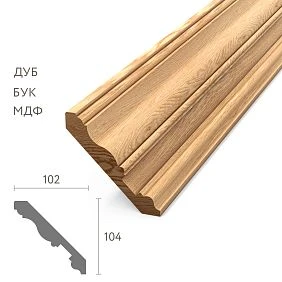
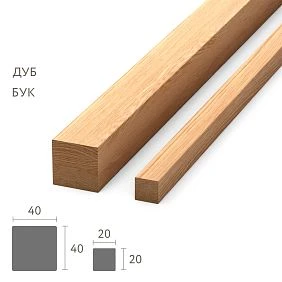
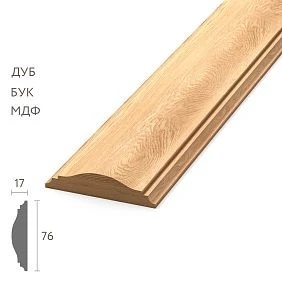
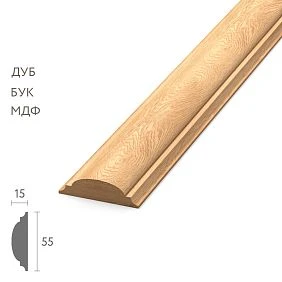
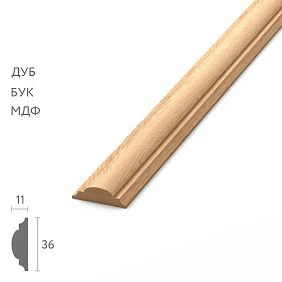
Trim is a finished profile that the craftsman cuts for their project
It is convenient to think of wooden trim as a linear semi-finished product.
The craftsman no longer forms a complex profile from a rectangular block. The profile is ready. But the final product is not ready yet.
In the workshop, what remains is to determine:
- the length of each part;
- the number of identical segments;
- joint locations;
- cut angle;
- the direction of the pattern;
- finish;
- installation method.
This is the value of ready-made moulding.
For a small workshop, there is no need to mill the same complex profile from scratch every time. You can buy a ready-made strip of the required cross-section and focus on cutting, joining, finishing, and assembly.
But precisely because the product comes in strips of a certain length, the order calculation cannot be reduced to linear meters alone.




Why linear meters and the number of strips are different things
Let's imagine that a series of fronts requires:
- 20 parts of 720 mm;
- 20 parts of 430 mm.
Total finished length:
20 × 720 = 14,400 mm
20 × 430 = 8,600 mm
Total:
23,000 mm, or 23 m.
If the stock plank is 2000 mm long, simple division gives:
23 ÷ 2 = 11,5.
It seems we need to round up to 12 planks.
But this calculation does not account for the actual cut lengths.
From one two-meter plank, it is convenient to get:
720 + 720 + 430 = 1870 mm.
Ten planks will yield:
- all 20 pieces of 720 mm;
- only 10 pieces of 430 mm.
There will still be 10 pieces of 430 mm left.
A single two-meter plank fits four such segments:
430 × 4 = 1720 mm.
The remaining ten parts will require three more planks.
Total:
13 planks of 2000 mm each.
Nominally, this is 26 m of material, although the net total of the parts is only 23 m.
This is why the total linear meterage does not answer the main question: how many commercial planks should actually be ordered.
In this example, we have not yet accounted for the saw kerf width and the final trimming. In real production, these must also be factored in.
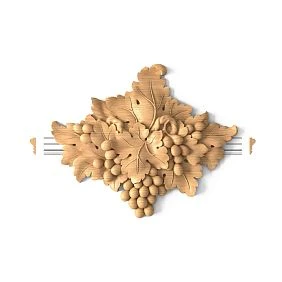
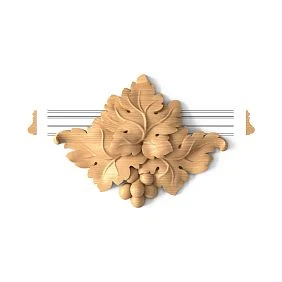
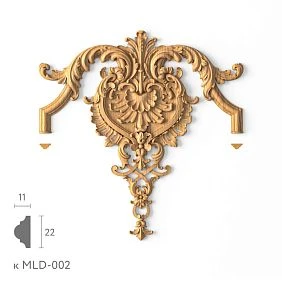
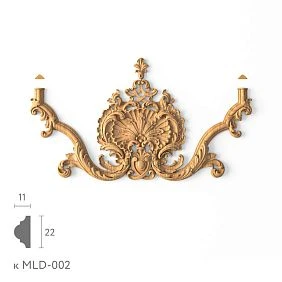
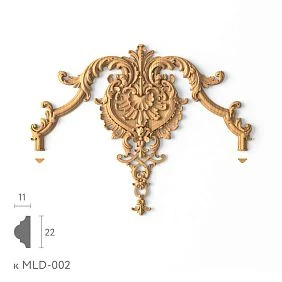
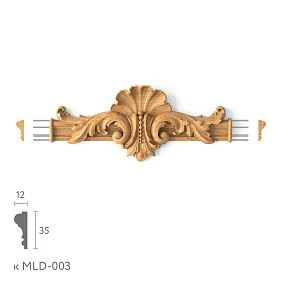
Our factory also produces:
First choose a specific profile, then calculate the order
You cannot first decide: “We need approximately 30 meters of wooden moulding,” and then look for a suitable product.
First, a specific profile is chosen.
The reason is simple: different products may differ not only in pattern and cross-section, but also in the available plank length.
For example, the carved moulding K-004 comes in long variants of 2000 mm and short ones of 300 mm.
For K-105, the long variant is already 1000 mm.
These are two completely different situations for cutting.
The same set of finished parts with a 2000 mm strip and with a 1000 mm strip will yield a different number of sellable units and a different remainder.
Therefore, the order is as follows:
select the product code → check available lengths → create a parts list → build a cutting map → determine the number of strips.
If the product code changes, the calculation must be checked again.
Get Consultation
The parts list is the basis for a proper calculation
Before the cutting map, you need a simple list of finished parts.
For example:
| Detail | Finished length | Quantity |
|---|---|---|
| frame vertical | 720 мм | 20 |
| Frame horizontal | 430 мм | 20 |
| Top profile | 1180 мм | 10 |
Even from this table you can see which lengths repeat.
You don't need to try to count the strips right away.
First, record all the finished cut pieces.
If different profiles are used in a product, each one must have its own list.
For example:
- K-004 — one table;
- K-016 — another;
- MLD-002 — a third.
They cannot be combined into a single line like “wooden trim — 27 m.” These are different profiles, different stock lengths, and different cutting patterns.
First, calculate one facade separately
If a furniture facade has a rectangular frame, it's best to calculate one facade first.
Let's say the frame consists of:
- two verticals of 720 mm each;
- two horizontals of 430 mm each.
For one facade you need:
720 × 2 + 430 × 2 = 2300 mm.
That is, the net linear length of one frame is 2.3 m.
But this is only the first level of calculation.
If there are ten such facades, you shouldn't just multiply:
2.3 × 10 = 23 m
and stop there.
It is more correct to multiply the number of parts:
- 720 mm — 20 pieces;
- 430 mm — 20 pieces.
After that, all identical parts are combined into a common cutting map.
For a series, this is much more useful.
How to move from a single front to a series
For small-batch production, this sequence is convenient.
Step 1. Approve one front
Dimensions, profile, angles, and frame position must be final.
Step 2. Lock in the finished lengths
Not “about 700 mm,” but specific finished dimensions.
Step 3. Record the number of parts per front
For example:
- vertical — 2;
- horizontal — 2.
Step 4. Multiply by the number of fronts
For 12 identical doors:
- verticals — 24;
- horizontals — 24.
Step 5. Build the overall cutting map
Now you can look for the most advantageous combinations of segments within a single product strip.
Step 6. Determine the number of whole strips
And only after that does the actual quantity for ordering appear.
This approach reduces the likelihood of a situation where the total linear meters are sufficient, but the required lengths can no longer be obtained.
Universal "plus 10 percent" rules work poorly
For wooden trim, 10% is often automatically added as a reserve.
Sometimes this is enough.
Sometimes this is too much.
Sometimes it is not enough.
The size of the actual reserve depends on:
- the length of the commercial strip;
- the set of ready-made cut pieces;
- the number of long parts;
- corners;
- kerf widths;
- end damage;
- pattern of the carved molding;
- the need to match the wood grain.
Let's imagine two projects with the same finished linear footage of 20 m.
In the first, all parts are short and fit well into the planks.
In the second, half of the elements are almost as long as the commercial plank itself.
The total linear footage is the same. The waste will be different.
Therefore, it is more correct to first build a real cutting plan, and then add a reserve for the specific workshop technology.
Place the longest parts first
This is one of the simplest and most useful cutting principles.
A long piece is harder to place than a short one.
If the strip needs to yield:
- 1700 mm;
- 460 mm;
- 350 mm,
you first need to secure the 1700 mm part.
A short 350 mm piece can be obtained from many offcuts.
A 1700 mm piece can only come from a sufficiently long full-length section.
Therefore, when optimizing manually, start with the longest parts, then fill the remainder with shorter ones.
This reduces the risk that several strips will first be cut into small pieces, and that another new one will have to be opened for one long part.
The kerf width also consumes length
A finished part 720 mm long takes up slightly more than just 720 mm on the stock bar.
The reason is the cut.
Each saw pass removes some material.
In addition, the workshop may require:
- finish crosscutting;
- repairing a damaged end;
- a test cut;
- trimming the end before the exact size.
You shouldn't put a universal value in millimeters in the article. It depends on the specific saw, blade, and working method.
It is more correct to use the allowance in your cutting map that corresponds to the actual equipment in the workshop.
If on paper the set of parts fits into the strip 'just barely,' such a cutting layout should be double-checked especially carefully.
A 45-degree cut requires a single measurement rule
Molding frames are often assembled 'on the miter.'
And here another typical mistake arises.
One craftsman specifies the length along the outer side of the part.
Another — along the inner side.
Both numbers can be correct, but they are different dimensions.
Therefore, before cutting in the workshop, a rule must be established once:
all dimensions of frame parts are specified either along the outer edge or along the inner edge.
And adhere to it in all drawings and specifications.
Otherwise, the same entry of 720 mm could mean two different parts.
This is especially dangerous when transferring a cutting map to another person.
Carved moulding is more complex than a smooth profile
For smooth moulding, the main task is to achieve the required length and correct angle.
Carved wooden moulding also has a pattern.
If the ornament repeats along the strip, the cut point may be visually noticeable.
You need to look at:
- where the motif ends;
- how the joint looks;
- whether the pattern matches on adjacent parts;
- whether the left and right sections start identically;
- whether an important element of the ornament is cut off.
On a central frame or symmetrical portal, this is especially noticeable.
Therefore, carved moulding sometimes produces more waste than a smooth profile of the same length.
The reason is not the wood itself, but the need to preserve a proper pattern.
K-004: one SKU, multiple sizes and lengths
Wooden Molding K-004 is available in several cross-sections.
The current product page includes, for example:
- 14 × 7 mm;
- 22 × 14 mm;
- 30 × 19 mm.
For these options, short 300 mm elements and long 2000 mm strips are available.
Material — beech or oak.
For the cutting plan, this is more important than the promotional description.
The master must first select the specific cross-section and length of the supplied strip, and only then calculate how many parts can be obtained from it.
You cannot simply say “let's take K-004” if the dimensions are not specified in the order.
When a short 300 mm strip is more useful than a long one
A two-meter strip is usually more convenient for long elements and general cutting.
But the short 300 mm option can also be useful.
For example, if the project needs individual short inserts and there is no point in opening long material.
Or if a profile sample is required for:
- fittings;
- trial finishing;
- approval with the customer;
- pattern check.
But short elements should not automatically be considered more economical just because there is less leftover.
The price per unit of length and the project task may differ.
The main principle is the same: first the actual parts, then the choice of commercial length.
K-016 should be counted as a separate line
Wooden Molding K-016 has a different profile.
The product page has the following options:
- 23 × 17 mm;
- 30 × 22 mm;
- 40 × 30 mm.
For the main long version, a length of 2000 mm is specified, and for the 23 × 17 mm cross-section there is also a short version of 300 mm.
If K-004 and K-016 are used in one product, you cannot write:
carved moulding — 15 m
and count everything together.
At least two separate lines are required:
- K-004;
- K-016.
They have different profiles, different cross-sections are possible, and separate cutting maps.
K-105 shows why a profile change requires a new calculation
Wooden molding K-105 has a cross-section of 9 × 4 mm.
But the key thing for our topic is the length.
It offers strips of 300 and 1000 mm.
This is a completely different source material for the cutting map than the two-meter K-004.
Let's imagine that the project already had a layout calculated for a 2000 mm strip.
You can't simply replace K-004 with K-105 in the specification.
Even if the external pattern works, the commercial length is different. The number of strips and the leftovers need to be recalculated.
So the rule is simple:
if the SKU or size has changed — recheck the cutting layout.
K-071 is another example of a separate linear component
Wooden molding K-071 it is also available in different cross-sections.
The product page shows, for example:
- 10 × 5 mm;
- 14 × 7 mm;
- 18 × 9 mm.
For long variants, the length is 2000 mm, and for the 10 × 5 mm cross-section there is also a short element of 300 mm.
This once again shows: the word “moulding” does not denote one universal material.
The workshop always has a specific one:
- profile;
- size;
- length;
- the material;
- quantity.
This is exactly what should go into the order.
Plain and carved mouldings are calculated slightly differently
For a smooth profile, it is usually enough to take into account:
- ready-made lengths;
- corners;
- kerf width;
- number of strips.
For carved ones, the following are added:
- pattern;
- pattern repeat;
- direction;
- joint location;
- visual symmetry.
If a carved element runs around the central facade, sometimes an economically advantageous cutting layout turns out to be visually poor.
For example, the left section starts with a whole sheet of ornament, while the right starts with half of the pattern.
Mathematically, everything is correct.
Visually, it is not.
In such a situation, the craftsman deliberately increases waste in order to preserve the composition.
Oak or beech for decorative moulding
The material also affects the assembly.
Oak
It is often chosen when the wood will remain visible:
- under oil;
- clear lacquer;
- stain;
- tinting.
Beech
A common scenario is dense enamel, when the wood grain should not be the main feature.
But this is not a strict rule.
For cutting calculations, something else matters: if the finish is transparent, it is better to deliberately match the planks of one product.
The difference in shade and texture after oil or lacquer can be more noticeable than on untreated wood.
Transparent finish makes batch matching more difficult
With dense enamel, a slight difference in the wood pattern almost disappears.
With a transparent coating, the following are visible:
- shade;
- grain direction;
- density of the pattern;
- transitions between planks.
Therefore, for a noticeable furniture frame, it is better not to rely on randomly buying additional material at the very last moment.
It is more useful to immediately order the main volume for a product or series and check the planks before cutting.
If a particularly precise visual match is required, the same linear meterage does not yet mean the same external result.
Sample profile before a large order
If you are using the profile for the first time, one of the most useful things to do is see it in person.
For STAVROS moldings, there is OMLD-005 sample set.
The set includes real profile samples made of oak, beech, and MDF. The length of individual samples is 100 mm.
For a workshop, such a set is useful not only when talking with a client.
Allowed:
- place the profile against the facade;
- assess the real scale;
- look at the cross-section;
- compare oak and beech;
- test the future finish on a separate sample.
This is better than approving a large batch based only on a photo.
How to count several types of furniture
If the workshop produces simultaneously:
- wardrobe;
- dresser;
- door;
- decorative panel,
you don't need to immediately add up all the linear footage as a single number.
First, a separate set of parts is compiled for each item.
For example:
Wardrobe
- 720 mm × 8;
- 430 mm × 8.
Chest of drawers
- 350 mm × 12;
- 600 mm × 6.
Door
- 1800 mm × 2;
- 700 mm × 2.
After that, identical profiles are combined.
If a wardrobe and a chest of drawers use the same K-004 of the same cross-section, their parts can be included in a shared cutting map.
If a K-016 is used on the door, it is counted separately.
This way, production sees not “46 meters total,” but actual sets of parts.
Leftovers are not always waste
After cutting, pieces of various lengths remain.
Not every one of them needs to be thrown away.
It is useful to divide leftovers into at least three groups.
Usable offcut
Long enough for a future standard part.
For example, a workshop regularly uses 300–400 mm offcuts. A 600 mm offcut is well worth keeping.
Sample
The piece can be used for:
- test painting;
- saw setup;
- test cuts;
- glue testing;
- color matching.
Unusable waste
The piece is too short or damaged and has no real use.
This approach gives a more honest picture of material consumption.
Sometimes a cutting map with a slightly larger physical remnant is more advantageous if that remnant is then constantly used in work.
Don't store remnants without a system
There is also the opposite mistake: saving literally every piece.
After a few months, the workshop ends up with dozens of short strips of unknown article number.
For a remnant to actually be useful, it needs to be labeled.
Minimum:
- article number;
- cross-section;
- the material;
- length.
For example:
K-004, 22 × 14 mm, oak, 610 mm
Then, in the next calculation, this remnant can be included in the available material in advance.
Without a label, it almost turns into waste, even if it is still physically usable.
How to document linear stock in the working specification
Entry:
moulding — 25 m
too weak.
Better to specify:
K-004, oak, 22 × 14 × 2000 mm, quantity according to the cutting plan
And separately attach a parts list:
| Finished length | Quantity |
|---|---|
| 720 мм | 20 |
| 430 мм | 20 |
| 1180 мм | 10 |
After building the plan, a summary appears:
order 13 strips
or another calculated quantity.
This is the number that should go into purchasing, not just the total linear meterage.
How to check the cutting plan before ordering
Before sending the order, it is useful to run a quick check.
- Make sure a specific item code is selected.
- Check the cross-section.
- Check the available stock length.
- Verify the quantity of finished parts.
- Check the longest segments separately.
- Add the saw kerf and finish trimming.
- For frames, check the angle measurement rule.
- For the carved profile, check the pattern and direction.
- See which offcuts can actually be used.
- Only after that, finalize the number of strips.
This kind of check takes significantly less time than an urgent reorder of material in the middle of assembly.
Where to buy decorative wooden moulding
For carved linear decor, use the section of carved wooden moldings.
For others solid wood trim there is a separate category.
Wooden mouldings, battens and other profiles are convenient to view separately.
After choosing a specific product, do not order material based only on the total linear meters.
First write down the finished lengths and build a real cutting plan.
Quick table: what affects the number of planks
| Factor | Why it's important |
|---|---|
| Product strip length | determines which parts fit together |
| The longest part | it is harder to place in the remainder |
| Number of identical parts | allows optimizing the batch |
| Cut width | each cut consumes material |
| Finish trimming | reduces the usable length |
| 45° angles | a single measurement method is needed |
| Carved pattern | the cut and joint location may be visually significant |
| Wood Species | with a transparent finish, the selection of strips is important |
| Useful leftovers | can reduce the future purchase |
| Change of SKU | requires recalculating the entire cutting map |
The bottom line
Decorative wooden trim cannot be ordered only "by meters."
Linear meterage answers the question of how much clean length the project requires.
The cutting map answers a different question — how many actual strips need to be purchased.
For a workshop, the second question is more important when purchasing.
The correct sequence is as follows:
specific profile → ready lengths → number of parts → length of the commercial strip → cutting map → saw kerf and end trimming → leftovers → reserve → number of strips.
If the moulding is carved, the pattern, direction and visual joints are added to this.
If the finish is transparent — selection of the wood.
Only after this does the quantity appear that can be confidently sent to order.
Frequently Asked Questions
What is decorative wooden moulding?
These are long-length wooden profiles with a finished cross-section or carved pattern, which the craftsman cuts to the required lengths and uses in furniture, doors, panels, frames and other joinery products.
How to calculate the linear metres of moulding?
Write down the length of each finished part, multiply by the quantity and add up the values. This will give the finished linear metres. To place an order, you additionally need to build a cutting map based on the commercial strips.
Why is the total linear metres not enough for an order?
Because the remainder of one length may not be suitable for the next part. Twenty-three metres of finished parts may require, for example, thirteen two-metre strips, that is 26 m of source material.
How to calculate the number of strips by length?
Make a list of all finished cut lengths and distribute them across bars of available stock length. Place the longest parts first, then fill the remaining spaces with short ones.
How do you account for a 45-degree cut?
First, establish a single measurement method — along the outer or inner side of the frame. All dimensions in the schedule must use one standard.
How do you account for kerf width?
Add the actual consumption of your equipment between adjacent parts. There is no universal value: it depends on the saw, the blade, and the technology.
How much allowance should be added to wooden linear trim?
You should not automatically use one percentage for all projects. First build a cutting map, then add a reserve taking into account trimming, the pattern, possible defects, and finishing specifics.
How do you calculate linear trim for a series of furniture fronts?
First approve one front and its finished lengths. Then multiply the number of parts by the number of fronts and build a general cutting map for the entire series.
How does carved linear trim differ in cutting from a smooth profile?
For carved profiles, you must additionally account for the pattern, its repeat, direction, and the appearance of the joints. Sometimes, for the sake of symmetry, you have to deliberately increase waste.
Where to buy decorative wooden trim?
Carved wooden trim, baguettes, and other profiles can be found in the relevant sections of the STAVROS catalog. Before ordering, select a specific item code and calculate the number of strips based on the actual lengths of the parts.