
















Article Contents:
- Crown Molding Corner Blocks vs Mitered Corners: The Quick Answer
- What Is a Crown Molding Corner Block?
- Decorative and geometric blocks
- Inside and outside blocks
- Four products that should not be confused
- Where coping fits into the comparison
- The molding can be correct while its position is wrong
- Projection exposes small errors
- The surrounding surfaces may disagree
- Simpler cuts and easier repetition
- A clear ending for complicated profiles
- A useful decorative feature
- When the inside corner is not square
- Why overall size does not prove crown compatibility
- Choose a consistent reference
- Modern and minimalist rooms
- Traditional rooms
- Classical and neoclassical rooms
- Rooms with extensive ornament
- 1. Map the complete crown route
- 2. Confirm the parts and prepare the substrate
- 3. Establish the crown line
- 4. Position and check the corner blocks
- 5. Establish the actual measuring endpoints
- 6. Cut and dry-fit each straight run
- 7. Attach the components in the specified order
- 8. Finish the joints and paint
- A simple break-even example
- A room calculation in feet and inches
- Plan usable pieces, not just total footage
- Assuming every corner is 90 degrees
- Cutting the entire room before proving one corner
- Choosing a block by one dimension
- Using the wall measurement as the finished cut length
- Mixing unrelated ornaments
- Assuming every STAVROS molding corner fits every crown
- Using filler as a substitute for a fitting joint
- Forgetting outside corners and open ends
- Fixing blocks before establishing the crown line
- For the ceiling perimeter
- For coordinated decorative molding corners
- What are crown molding corner blocks?
- Are crown molding corner blocks easier than miter cuts?
- Do crown molding corner blocks eliminate miter cuts?
- Can you use corner blocks on inside crown molding corners?
- Do corner blocks work on outside corners?
- What size crown molding corner block do I need?
- Do crown molding corner blocks have to match the profile?
- Can I use a decorative corner block with plain crown molding?
- Are corner blocks good for an old house with uneven walls?
- How do you install crown molding with corner blocks?
- Can corner blocks be used on vaulted ceilings?
- Are mitered corners better for modern crown molding?
- Why does my 45-degree crown molding joint have a gap?
- What if the room corner is not 90 degrees?
- Can I use polyurethane corner elements with polystyrene crown molding?
- 1. Lay out the entire composition
- 2. Check the corners at full size
- 3. Determine the actual joint locations
- 4. Prepare the straight elements
- 5. Assemble the frame without glue
- 6. Prepare the base and glue the pieces
- 7. Finish the joints and paint
- Approximate calculation in rubles
- Example for a room 3.2 × 4.2 m
- Why linear meters do not replace cutting
- Automatically cutting everything at 45°
- Starting with the finish strips
- Buying corner decor before the main profile
- Judging compatibility from a photo
- Assuming all STAVROS corners are universal
- Ignoring the scale of the ornament
- Measuring length along the wrong edge
- Filling a large gap instead of adjusting
- Fastening corners before general marking
- How to make a ceiling cornice corner?
- How to join a ceiling cornice at corners?
- Do you always need to cut a cornice at 45 degrees?
- Why is there a gap after cutting at 45°?
- What should I do if the wall angle is not 90 degrees?
- What is a ready-made corner element?
- Can I do without cutting?
- How do I make an inner corner for a ceiling cornice?
- How do I make an outer corner?
- Which is easier — a ready-made corner or cutting?
- How do I choose the size of a decorative corner?
- Can I use a corner element from another molding?
- Is MLDPU-001U suitable for any cornice?
- How to finish the corner of a wide ceiling cornice?
- What is better for a modern apartment?
- What is better for a classic interior?
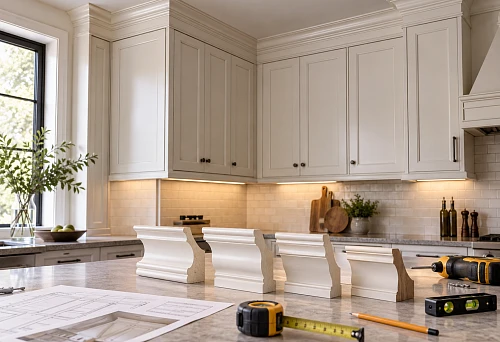
A straight run of crown can look perfect until it reaches the corner. That is where a slight wall angle, a rotated profile, or a poorly chosen connector becomes visible. Crown molding corner blocks and mitered corners solve that junction differently, and choosing between them early makes the entire installation easier to plan.
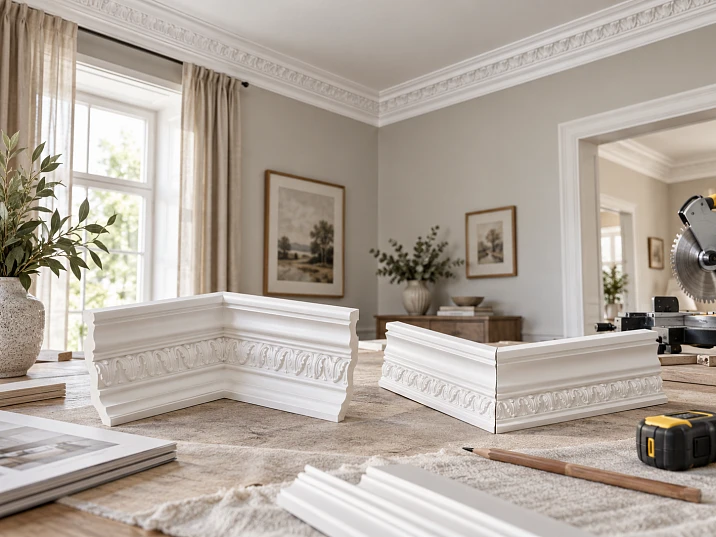
At an inside corner, a block gives each run of molding a separate surface to meet. A miter joins the two pieces of crown directly, carrying the profile around the room. One approach makes the corner a visible feature; the other aims to make the joint disappear.
For a successful crown molding installation, the choice needs to work in three ways: the parts must fit, the attachment must suit the material, and the finished corner must belong in the room. A block that is easy to cut around can still be the wrong size. A carefully cut miter can still open if the molding is installed at inconsistent angles.
This guide compares the methods, explains the measurements that matter, and shows how to evaluate actual STAVROS products. It also distinguishes ceiling corner blocks from decorative corners for flat wall frames—a difference that can prevent an expensive ordering mistake.
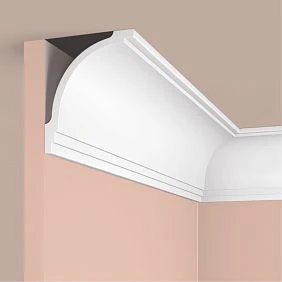


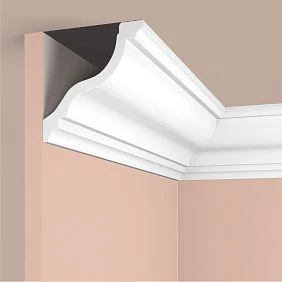
Crown Molding Corner Blocks vs Mitered Corners: The Quick Answer
Choose compatible corner blocks when you want a visible corner detail and simpler end cuts. Choose mitered corners when a continuous crown profile is the priority and you can control the cutting and installation geometry. For inside corners, a coped joint is another option worth discussing with your installer.
| Factor | Crown molding corner blocks | Mitered corners |
|---|---|---|
| End cuts | Often square cuts in a compatible system | Angled cuts matched to the installation |
| Appearance | A distinct corner feature | A continuous profile around the turn |
| Out-of-square walls | May simplify the visible junction; the block still needs to fit | Require measured angles and trial fitting |
| Profile matching | Usable receiving surfaces must accommodate the crown | Both pieces must align in position and shape |
| Modern interiors | Best considered with restrained block designs | Often the cleaner visual choice |
| Ornament | Can introduce a deliberate decorative pause | Keeps attention on the crown itself |
| DIY difficulty | Usually simpler cutting, with layout still essential | More practice and consistent support required |
| Extra purchases | Separate inside, outside, or transition components | No visible corner component |
| Finishing | Usually two crown-to-block joints per corner | One crown-to-crown joint per corner |
Neither method guarantees a better result. A matched block system can be straightforward in a small bedroom, while a custom block fitted to irregular plaster can take considerable work. An experienced finish carpenter may complete familiar miters quickly; a first-time installer may spend much longer developing the same fit.
Make the decision with two short molding samples held at ceiling height. You should be able to see where the profile ends, how the corner projects into the room, and whether the block creates the emphasis you want. That small mockup is more informative than choosing from separate product photographs.




What Is a Crown Molding Corner Block?
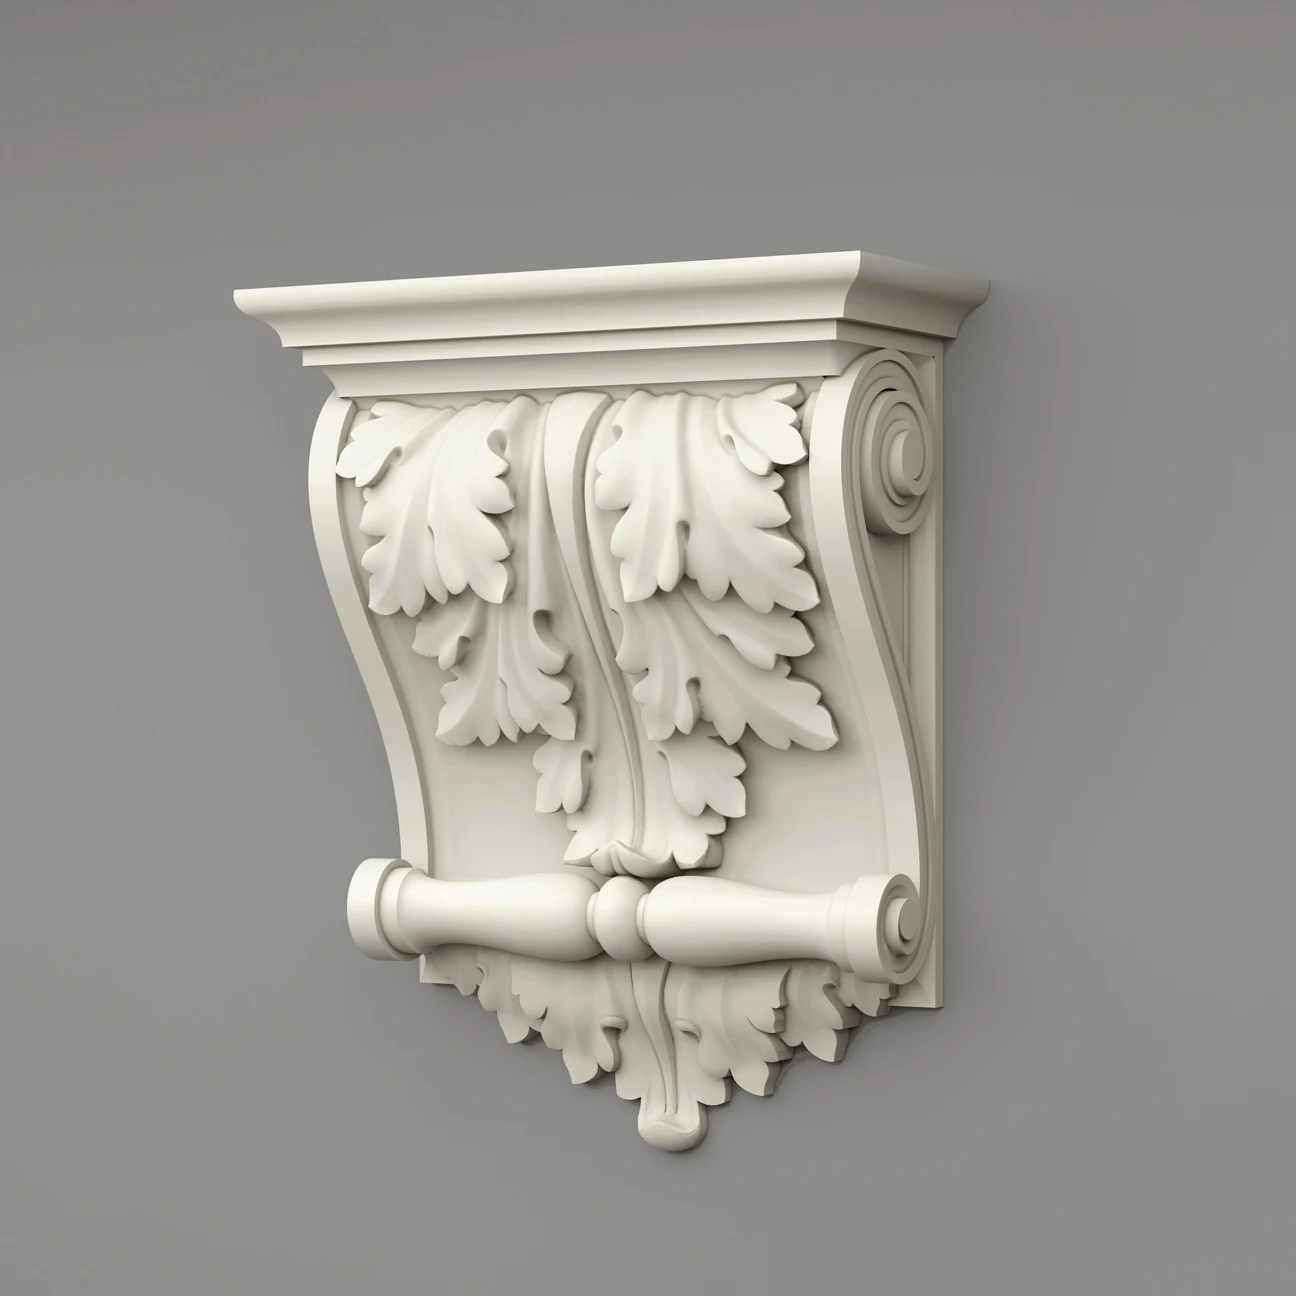
A crown molding corner block is a separate, visible component placed where two crown runs change direction. In a typical butt-joint system, each run ends against the block instead of meeting the other run at a miter. The block provides the finished corner shape.
Наша фабрика также производит:
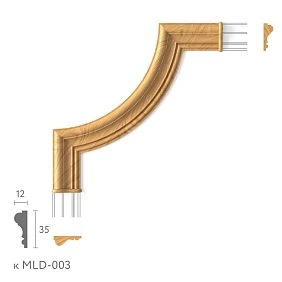
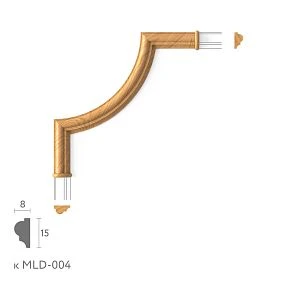
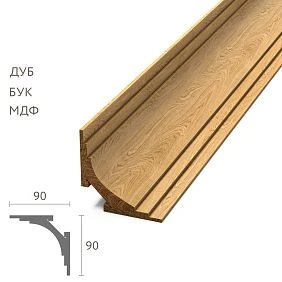
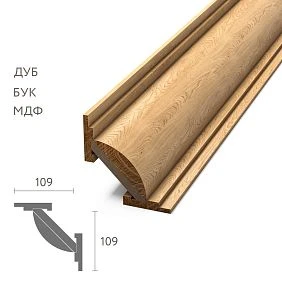
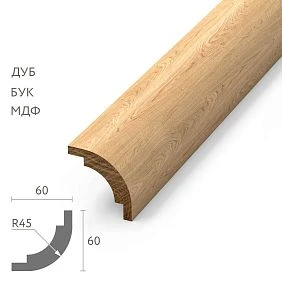
Смотреть весь Каталог продукции
Decorative and geometric blocks
A decorative block may have a stepped face, a small capital, or carved ornament. A simple geometric version may resemble a plain vertical block with a cap. Both can simplify the crown ends, but they produce different room designs. The plain version can be quiet; an elaborate one deliberately attracts attention.
Получить консультацию
Inside and outside blocks
An inside block occupies a recessed corner between walls. An outside block wraps or caps a projecting corner, such as a bump-out or the edge of a soffit. Their backs, receiving faces, and visible surfaces differ. Buying four identical pieces because a room has “four corners” is safe only after identifying the actual corner types.
Four products that should not be confused
- A visible crown block interrupts the profile and receives the straight runs.
- A prefabricated crown corner reproduces a particular crown profile around a specified angle. It may arrive assembled or as pieces requiring assembly.
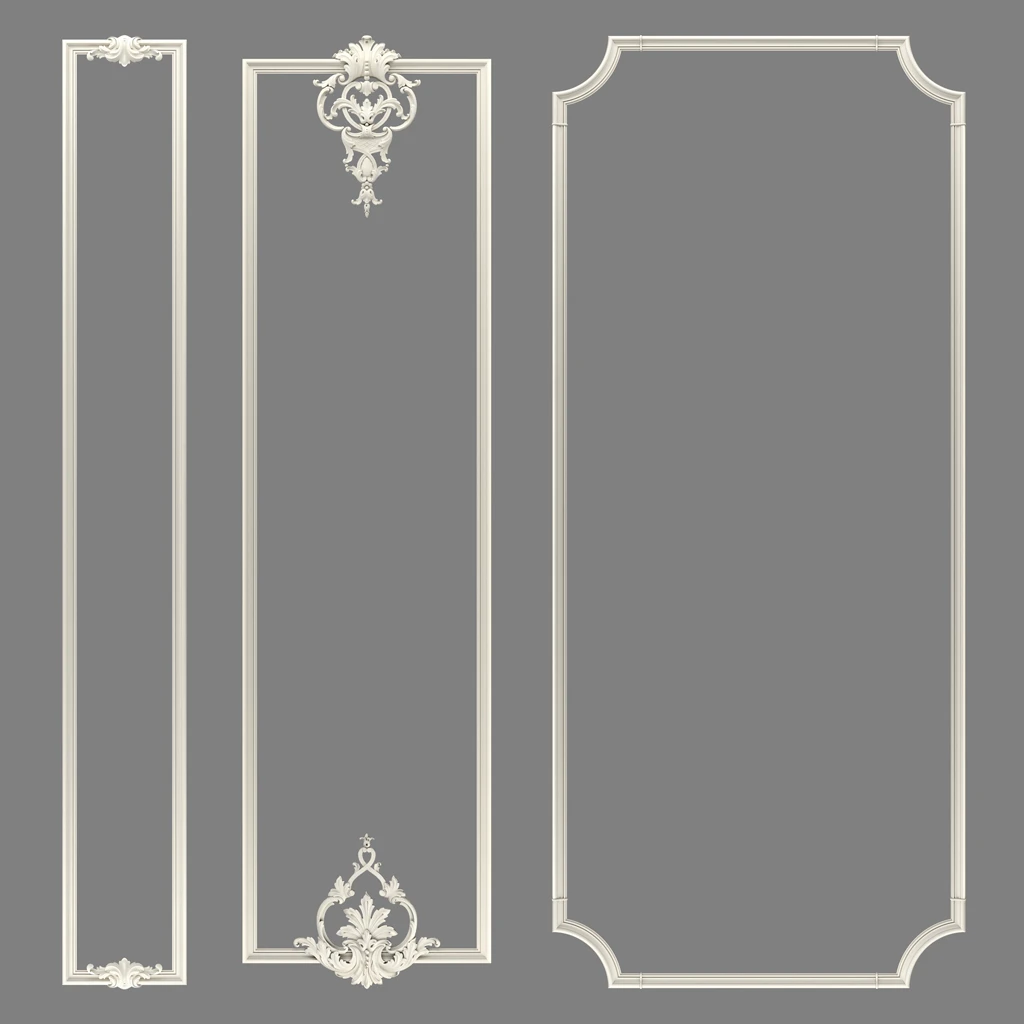
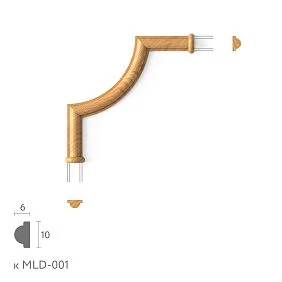
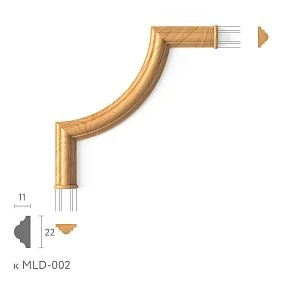
- A flat molding corner ornament decorates the turn in a wall or ceiling frame lying on one plane.
- Concealed backing or blocking supports the crown from behind and does not create the visible finish.
These distinctions matter when searching for crown molding corner pieces. Similar names can describe components that solve completely different problems. Check the drawing and installation instructions before assuming that a photographed “corner” can connect two lengths of ceiling crown.
What Is a Mitered Crown Molding Corner?
A mitered crown molding corner joins two angled ends so their visible contours continue around the turn. For matching crown installed consistently, the two cut surfaces meet and the beads, coves, steps, or other details line up.
The cutting method depends on how the crown is supported. With suitable crown nested against a saw's table and fence so its spring angle is reproduced, the corner can be cut by changing the miter angle without tilting the blade. When crown is cut lying flat, the same three-dimensional joint generally requires both a miter setting and a bevel setting.
The spring angle describes how sprung crown sits between wall and ceiling. It is separate from the angle between the walls. A saw setting that works for one spring angle, orientation, or cutting method cannot automatically be transferred to another.
Where coping fits into the comparison
At an inside corner, an installer can also shape one molding end to fit over the face of the adjoining piece. That is a coped joint. It can preserve the appearance of continuous crown while accommodating some irregularity. House of Fara's coping guide illustrates this distinct method for wood crown. Coping is not the usual solution for an exposed outside corner, and its suitability depends on the material and profile.
You can therefore choose continuous crown without committing to mitering every inside corner. Discuss the joint construction separately from the appearance you want.
Why Crown Molding Corners Are Harder Than They Look
Crown sits across two surfaces, which makes the room's geometry part of the joint. A corner that appears square from the floor might measure 88, 91, or 94 degrees at crown height. Even if the wall angle is correct, a ceiling slope or a thick patch of joint compound can rotate one piece away from the other.
The molding can be correct while its position is wrong
Imagine two identical samples with accurate cuts. If one is pressed higher on the wall, its face rotates. The lower edges may appear aligned while the upper contours separate. Cutting a new angle will not reliably correct a placement error that changes each time the piece is held up.
Projection exposes small errors
A profile extending farther across the ceiling places its outer edge farther from the wall junction. A small rotational error can therefore create a more noticeable mismatch at the exposed face. This is one reason a deep crown may demand more careful support than a shallow profile of similar height.
The surrounding surfaces may disagree
A bowed wall, a rounded plaster corner, and a wavy ceiling are different conditions. Measuring only the wall angle does not describe all three. Check the intended contact surfaces with short crown samples and a straightedge. The useful question is whether both pieces can sit in their intended position at the same time.
That check belongs before cutting either a finished miter or the straight lengths for a block installation. Both methods need a consistent crown line and a stable place to attach the trim.
Crown Molding Corner Blocks: Main Advantages
Simpler cuts and easier repetition
Using corner blocks for crown molding can remove the need to produce two matching angled ends at each compatible corner. Once the blocks are positioned, the straight run is measured between its actual endpoints. Repeating a square end cut is usually easier for a beginner than repeating a compound cut in the correct orientation.
The benefit can accumulate across several similar rooms. Keep one approved sample assembly and use it to check the block's position, crown height, and visible margins. Repetition then becomes a controlled installation task instead of a fresh design decision at every corner.
A clear ending for complicated profiles
An ornate crown may have repeating leaves, dentils, or other details that are awkward to reconcile at a turn. A suitable block gives those details a deliberate stopping point. It does not need to copy every contour when its receiving faces are designed to accept the full crown end.
A useful decorative feature
Corner blocks can connect the ceiling treatment to substantial door casings, pilasters, or other architectural details. Their value is strongest when they belong to the room's design from the beginning.
They can also reduce the visual importance of a crown-to-crown angle. That advantage is conditional: the chosen block must still seat properly against the walls and ceiling. Easier crown cuts do not automatically mean easier fitting of the block itself.
Crown Molding Corner Blocks: Limitations
A block changes the crown's silhouette. Even painted the same color, it casts its own shadow and interrupts the profile. In a room with many short wall returns, a succession of bulky blocks can become more prominent than the crown.
It also adds a compatibility requirement. The crown must meet a usable surface at the correct height and projection. A block's decorative outer dimensions do not prove that its sides will accept your profile. Ornament, caps, grooves, or mounting tabs may reduce the usable area.
Nor does a block eliminate finishing. One conventional miter connects two crown pieces at a single seam; a butt-joint block arrangement usually creates a seam on each side. Those joints may be easier to prepare, but both must look consistent.
Availability can complicate the choice. A system may offer an inside block without the outside or sloped-ceiling element your room needs. Verify the whole route before buying the first component.
Finally, visible blocks are a design commitment. Installing an oversized piece to conceal an earlier cutting mistake can make the repair more conspicuous. Approve its appearance with the entire corner mocked up, including adjacent door trim or cabinetry.
Mitered Crown Molding Corners: Main Advantages
The main advantage is continuity. The crown's shape turns with the room, giving the ceiling perimeter a consistent rhythm. This is particularly useful when the molding itself is the intended architectural feature.
A well-fitted miter adds no separate ornament, so it often works comfortably in modern, transitional, and restrained traditional interiors. It also avoids the need to find a separate visible component for every corner size.
Miters can be used with many crown profiles, provided the material can be cut appropriately and the geometry is manageable. Deep relief or repeating ornament may still require extra planning; accurate cuts alone do not guarantee attractive pattern placement.
For a room with several projecting corners, the same profile can continue around each turn without adding a series of vertical accents. This can help a soffit or chimney bump-out remain visually integrated with the rest of the room.
The practical benefit depends on execution. Continuity looks convincing when the contours align and the seam stays small enough for the specified finishing method.
Mitered Corners: Main Limitations
A miter has less visual separation between the two pieces, so it exposes discrepancies in both cutting and placement. If one profile is rotated, bowed, or seated on a thicker patch of wall finish, the joint can look wrong even when the saw settings were calculated correctly.
Long lengths add handling difficulty. A sample that fits perfectly near the corner may behave differently when replaced by a full piece resting against several uneven areas. Support and dry-fit the actual run before committing to final attachment.
Outside corners deserve particular care because the exposed point and profile alignment are easy to see from multiple directions. Repeated trimming can also shorten a piece until it no longer reaches its other endpoint.
Material behavior remains relevant after installation. Wood responds to changing humidity; other trim materials have their own requirements for conditioning, bonding, and movement. A miter does not override those requirements, and a corner block does not remove them either.
Allow time for test pieces and adjustment. Choosing a miter because it has no separate corner-part cost can be a false economy if the project has no allowance for careful fitting.
Inside Crown Molding Corner Blocks
Crown molding inside corner blocks sit in the recessed junction where two walls meet. In a straightforward system, each length of crown approaches the block from one side and ends against a receiving face.
At a square corner with a flat ceiling, the main checks are position, fit, and appearance. Hold the block in place with a crown sample on each side. Confirm that the molding meets both faces without twisting and that any visible margin below or beside the profile looks intentional.
When the inside corner is not square
A rigid block made for a 90-degree corner may rock or leave a gap against an 88- or 94-degree corner. That is a block-to-wall problem, even if the crown ends are easy to cut. The solution may involve preparing the mounting surface, fitting an approved trimmable component, or selecting a custom element.
Do not assume all crown molding inside corner pieces are adjustable. Some are decorative solids; others are hollow, have mounting tabs, or rely on a particular clip arrangement. Altering the back without checking the design can remove the very surfaces needed for attachment.
In a room with several inside corners, compare the blocks from the doorway before fastening them. A slight difference in height is especially noticeable when their bottom edges create repeated landmarks. Keep the crown's intended position consistent, then resolve local wall irregularities around that layout.
Outside Crown Molding Corner Blocks
An outside corner turns around a projecting wall edge. Common examples include a chimney enclosure, a closet projecting into a room, and a boxed soffit. The appropriate crown molding outside corner block must accommodate that outward turn and provide finished surfaces visible from both approaches.
Inspect an outside block from below and from across the room. A component can look balanced from one side yet project awkwardly beyond the adjoining trim when seen from the other. A full-size mockup is particularly useful near a doorway or upper cabinet.
The supporting corner also matters. Drywall corner bead and accumulated joint compound can change the local shape. If the block rests only on a high spot, tightening a fastener will not necessarily bring both sides into position. Check the bearing surfaces and attachment method before installation.
Inside and outside blocks do not have to be identical, but they should belong to a coherent design. Another legitimate approach is to use blocks at inside corners and miters at outside corners. Approve that combination in a room mockup rather than assuming every turn needs the same treatment.
Count outside corners separately on the shopping list. They are easy to miss when estimating from room length and width alone.
Corner Block Size: How Large Should It Be?
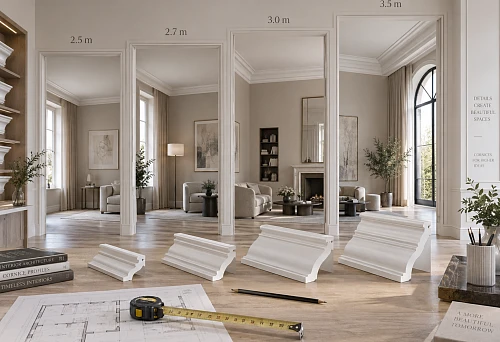
A block must accommodate the crown's installed height and projection, as well as its end shape. Height is the amount of wall the crown occupies. Projection is the distance it extends across the ceiling from the wall. The decorative width measured along the face of a molding is a different measurement.
For example, suppose a crown occupies 3 inches vertically and projects 2½ inches. A receiving face offering only 2¾ inches of usable height and 1½ inches of usable depth cannot accept the complete end. A product labeled “4-inch block” may still fail this test if that number describes a different dimension.
| Check | What you need to establish |
|---|---|
| Usable receiving height | The full crown end fits vertically in its installed position. |
| Usable receiving depth | The crown's projecting contours remain within the intended junction. |
| Back geometry | The component seats against the actual wall and ceiling arrangement. |
| Visible margins | The exposed block around the crown looks balanced on both sides. |
| Attachment surfaces | The fit leaves the required bonding or fastening areas available. |
Small crown molding corner blocks can suit a compact profile, but “small” is a visual description, not a compatibility specification. Large crown molding corner blocks also need a reason for their scale. An 8-inch-tall block beside a 2-inch crown can dominate a modest room even if the crown physically fits.
There is no universal extra margin that works for every block. Use the manufacturer's maximum crown size or compatibility drawing where available, then inspect the actual combination. Paper templates help judge proportions; short physical samples reveal whether the three-dimensional connection works.
Keep catalog dimensions and cutting dimensions separate. A decorative block's overall width may differ from the distance it occupies along each wall, which is the measurement needed to calculate the crown length.
Decorative Crown Molding Corners
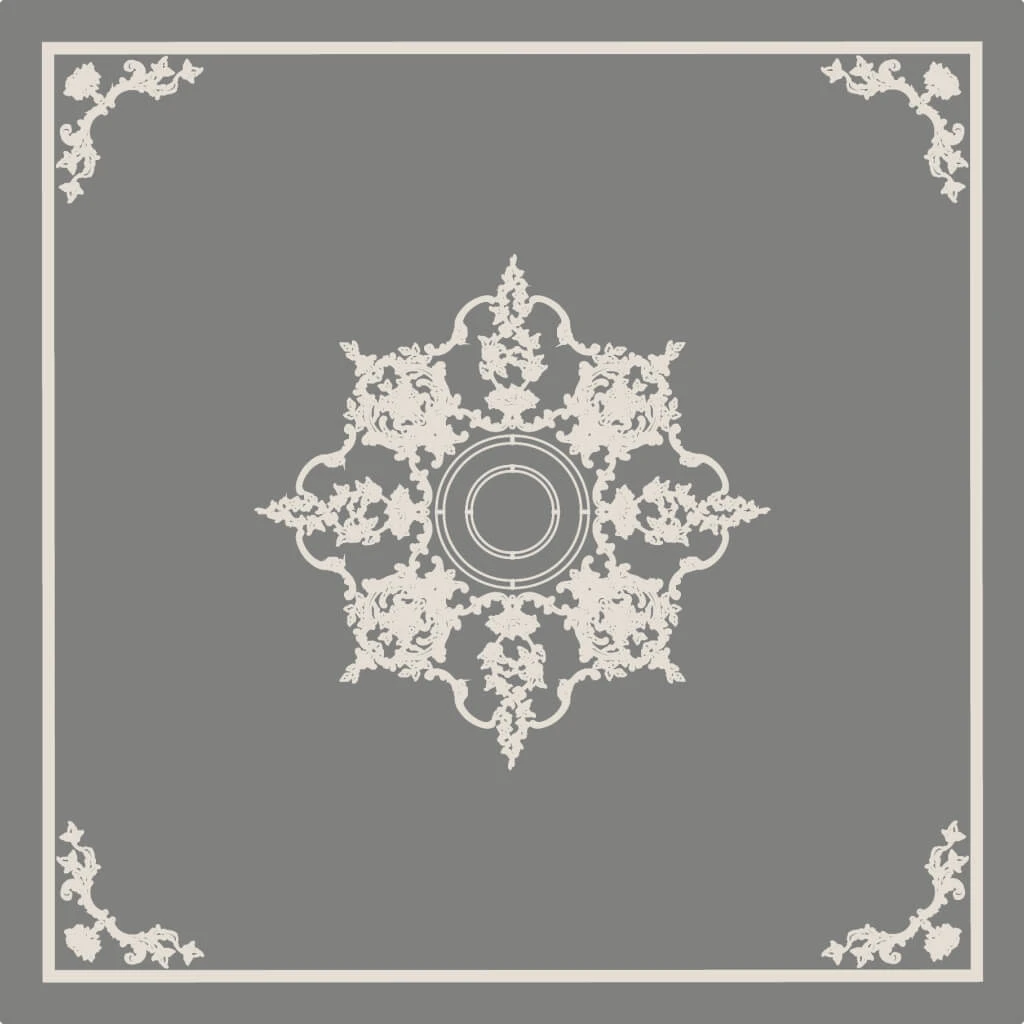
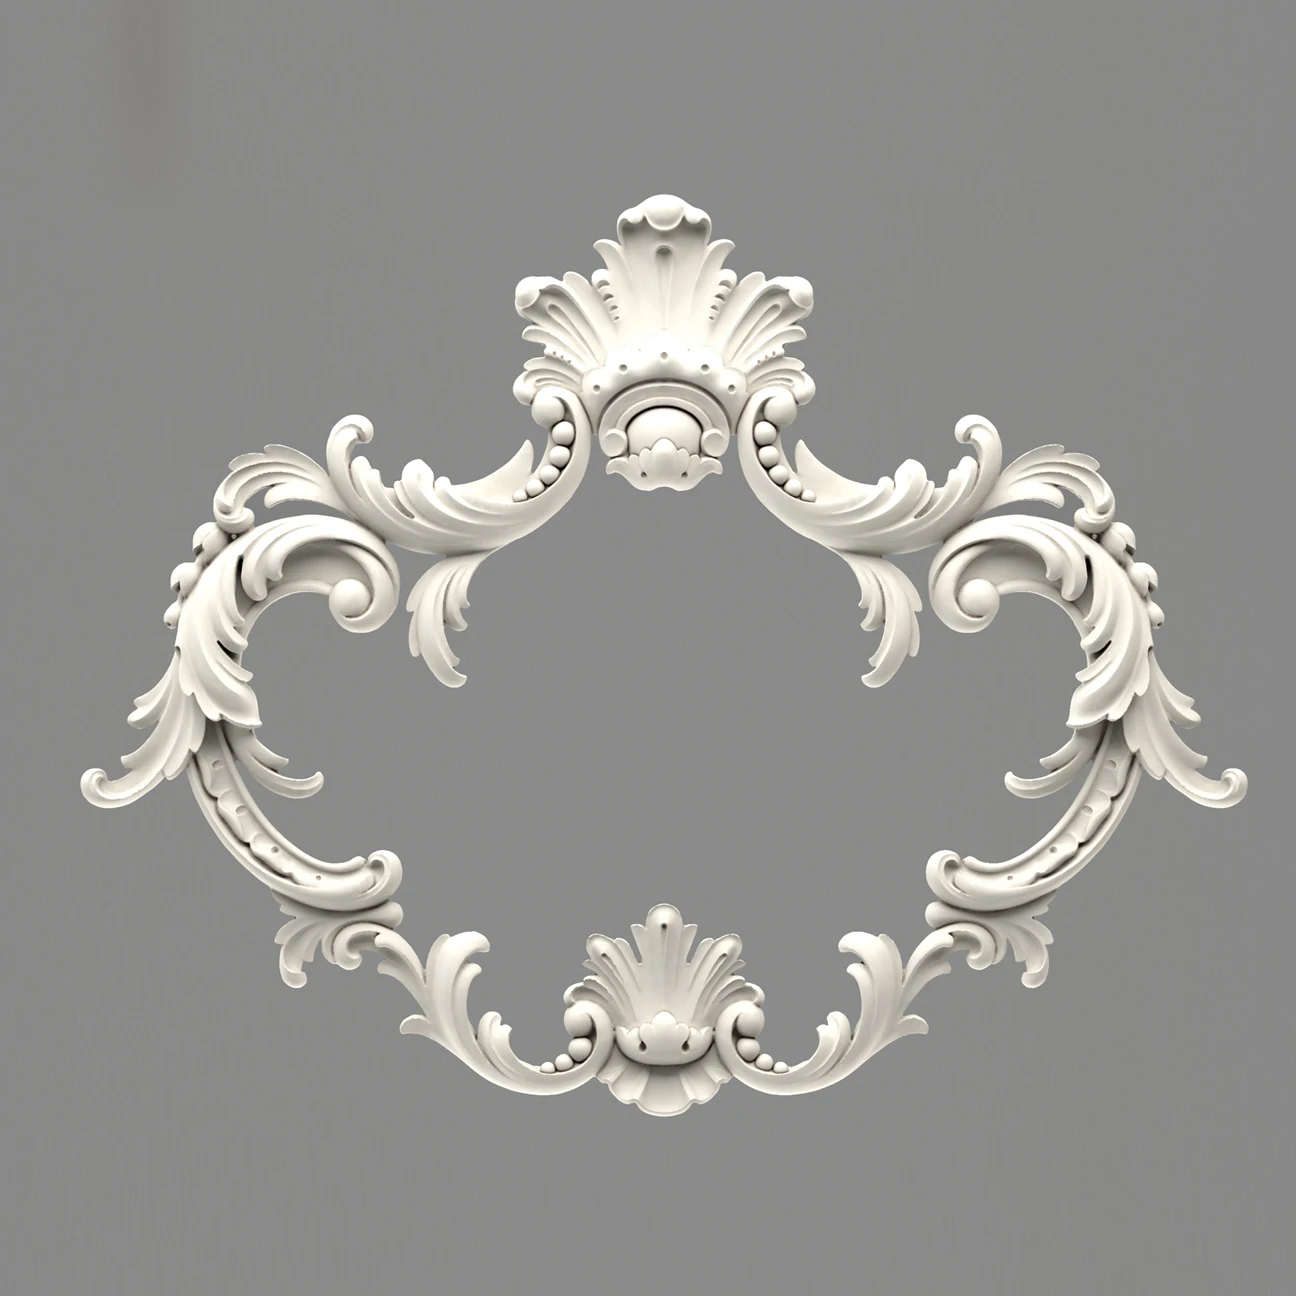
Decorative crown molding corners can add a quiet geometric accent or a more expressive motif. Plain stepped blocks emphasize structure. Rosettes, floral details, acanthus leaves, and scrolls introduce ornament. Neoclassical rooms often benefit from clear proportions and controlled repetition rather than simply choosing the largest available element.
Think about where ornament already appears. If door headers, a mantel, and wall frames are richly detailed, a quieter crown corner may give those features room to stand out. If the walls are simple and the ceiling border is the focal point, a more pronounced corner can be appropriate.
Match the scale and character of the details, not just their color. Painting unrelated ornaments white does not make their proportions or patterns agree. Check the corner beside the actual crown, then view it at the distance from which people will normally see it.
For a more developed composition, coordinate the perimeter with selected ceiling decor. A ceiling frame or central ornament can share a visual language with the crown while remaining a separate assembly with its own installation requirements.
STAVROS Decorative Corner Elements: What They Actually Are
STAVROS offers polyurethane decorative elements for molding systems in its Molding Decor category. The category includes accessory filters for the MLDPU-001, MLDPU-002, MLDPU-003, MLDPU-004, and MLDPU-027 series. These filters help organize a coordinated molding composition; they do not establish compatibility with unrelated ceiling crown.
The following products illustrate the range of sizes available. The dimensions are the listed overall A × B × C measurements in inches. They describe decorative elements, not a maximum crown height or a maximum ceiling projection.
| Product | Listed dimensions | Material | Product reference |
|---|---|---|---|
| MLDPU-001U | 3.39 × 3.39 × 0.28 in. | Polyurethane | Small polyurethane corner element |
| MLDPU-004U | 5.31 × 5.31 × 0.39 in. | Polyurethane | Decorative molding corner element |
| MLDPU-002U | 6.77 × 6.77 × 0.51 in. | Polyurethane | Polyurethane molding corner |
| MLDPU-003U | 8.58 × 8.58 × 0.59 in. | Polyurethane | Large decorative corner element |
Why overall size does not prove crown compatibility
A decorative corner that occupies several inches across a flat surface can still be only a fraction of an inch thick. That geometry serves a different purpose from a block receiving crown that projects several inches into the room. The two products may look related in a front-facing photograph while fitting very differently in section.
The practical use for these MLDPU elements is to develop a coordinated molding design with the appropriate straight profiles. Browse the relevant polyurethane moldings and verify the matching series, profile transitions, and dimensions for the proposed arrangement.
These are components of STAVROS molding systems. Do not assume automatic compatibility with a HIWOOD crown molding profile solely because both are decorative trim products. A proposed crown connection needs separate confirmation of the receiving geometry, installed position, and attachment.
That distinction leaves plenty of design freedom. A room can use continuous HIWOOD crown at the ceiling and coordinated polyurethane frame corners lower on the walls. The parts complement each other without being physically joined. For that application, see the guide to decorative corner elements for molding frames.
Mitered Corners With Smooth Crown Molding
Smooth crown provides clear reference lines: the top edge, bottom edge, and any continuous steps or curves. Without a repeating ornament to align, the installer can concentrate on the shape and position of the joint.
This makes smooth profiles a useful starting point for a restrained interior. STAVROS offers polystyrene crown molding in different heights and projections, allowing the ceiling border to be selected around the room's proportions.
Smooth does not mean that a poor seam will disappear. Daylight running along the ceiling or light from a nearby fixture can reveal a ridge, a hollow patch, or an uneven paint texture. A modest profile installed accurately may look more substantial and deliberate than a larger one with inconsistent joints.
Before finishing, inspect a trial joint under the room's expected lighting. Look along the profile as well as directly at it. The most revealing angle is often from the doorway or along the adjoining wall.
Mitered Corners With Decorative or Deep Crown Profiles
Depth and ornament introduce different challenges. A deep, smooth crown demands consistent support and positioning. An ornate crown also requires a decision about where the pattern meets the corner. A technically closed joint can still leave an awkward half-leaf or unevenly spaced repeating detail.
Compare these HIWOOD crown dimensions from the STAVROS catalog. Height and projection should be checked against the product's installation orientation when preparing the actual layout.
| Profile | Height, Size A | Projection, Size C | Stock length |
|---|---|---|---|
| A70 | 1.97 in. (50 mm) | 1.97 in. (50 mm) | 78.74 in. (2 m) |
| A70V2 | 2.76 in. (70 mm) | 1.46 in. (37 mm) | 78.74 in. (2 m) |
| A100 | 3.94 in. (100 mm) | 2.09 in. (53 mm) | 78.74 in. (2 m) |
The A70V2 is taller than the A70 but projects less. Selecting a corner component only by crown height would miss that difference. Similarly, the A100 is much taller than the A70, while its projection is only slightly greater. Height alone is an incomplete measure of either fit or cutting difficulty.
These are dimensional comparisons, not confirmed block-and-crown combinations. They show why the cross-section matters. For a deep profile, mock up enough of each run to reveal rotation; for repeating ornament, lay out the pattern before deciding where to make the final cuts.
What If the Wall Corner Is Not 90 Degrees?
Measure the corner where the crown will actually sit. A reading near the baseboard does not necessarily represent the upper wall. Also check whether the surfaces are sufficiently flat for the measuring tool to bear correctly rather than bridging a lump or rounded corner.
For a symmetrical miter, the cut geometry must divide the turn appropriately between the two pieces. That does not mean every number shown on an angle finder should simply be halved and dialed into the saw. Tools may display the included wall angle, a supplementary angle, or a calculated miter setting. The cutting method and spring angle also matter.
Use the measured angle with the instructions or calculation method appropriate to your setup, then make two short test pieces. Hold both in the installed position. Evaluate the joint and the adjacent contact surfaces together before cutting the finished lengths.
| What you observe | What to check next |
|---|---|
| The profiles sit at different heights | Layout marks, orientation, and whether a surface is rotating one piece. |
| The seam changes when you press one end | Support and seating before making another angle adjustment. |
| Both pieces sit consistently but the seam remains open | Measured wall angle, saw setup, and cut accuracy. |
| A block rocks against the corner | Its back geometry and the actual mounting surfaces. |
A corner block can reduce the need to match two exposed crown ends precisely, but its own geometry still has to work. A stock 90-degree block is not automatically suitable for every slightly non-square corner. Check whether the manufacturer allows fitting adjustments or offers a suitable alternative.
Do not force the crown out of position to close a gap. That can improve one seam while sending the profile off line along the next wall. Resolve the cause while the assembly is still a dry fit.
Corner Blocks vs Mitered Corners in Older Homes
In an older American home, the challenge may be an irregular plaster surface rather than the wall angle alone. Rounded inside corners, accumulated paint, earlier repairs, and a ceiling that varies in height can all affect the fit.
Separate the room's character from the defects that prevent installation. A slightly uneven ceiling may be part of the existing visual rhythm; loose plaster or an unstable mounting area needs attention before decorative trim is attached. Neither a block nor a miter provides structural repair.
Choose a consistent reference
On a wavy ceiling, a perfectly level crown line can leave a changing gap above the molding. Following every ceiling dip can make the bottom edge wander instead. Evaluate both effects with sample pieces and a reference line, then decide how the local surface or backing will be prepared. Large discrepancies deserve a specific installation detail.
Blocks can work well when substantial corner accents suit the existing trim. For a quieter result, carefully fitted miters or suitable coped inside joints may be preferable. Avoid turning every irregularity into a decorative feature unless that repetition improves the room.
Check the most difficult corner first. If a standard block cannot seat there, discover that before ordering all the pieces. The same principle applies to a complicated miter: prove the intended joint in the actual location before treating the rest of the room as routine.
Corner Blocks for Vaulted Ceilings
Crown molding corner blocks for vaulted ceilings must address more than a turn between two walls. The crown may change slope, meet a horizontal run, or approach a peak. Those changes can alter both the connection angle and the way the visible profile lines up.
A standard flat-ceiling inside block is therefore not an automatic solution. The design may require a purpose-made transition block, a component approved for trimming to the ceiling slope, or a custom assembly. Measure the wall angle, ceiling slope, and intended crown position separately.
Manufacturer offerings illustrate how specific these connections can be. One Creative Crown vaulted-corner listing asks for the wall corner angle, wall-to-ceiling angle, direction, and molding model. It also states that the supplied corner pieces need assembly. A product described as “pre-cut” does not necessarily arrive as one finished block.
Before selecting a transition, decide whether the crown will follow the slope or run horizontally below it. Those layouts create different visual effects and different mounting conditions. A horizontal route may simplify some turns but needs a deliberate termination and support detail where the ceiling rises away.
At a peak or horizontal-to-sloped junction, build a full-size sample of the proposed connection. Check the shadow lines from below. A geometrically workable assembly can still look too crowded when several profiles and transitions meet in a small area.
Are Corner Blocks Easier for DIY Crown Molding Installation?
Usually, a verified block system makes the cutting portion easier. It replaces a pair of matching corner cuts with simpler crown ends and a separate component. That can be a substantial advantage when you are learning to measure, support, and install long trim at the same time.
The remaining work still requires care. You need a consistent layout, stable attachment, accurate lengths, and an understanding of which side of the molding faces the ceiling. Blocks must be positioned correctly before their locations can serve as measuring references.
A useful readiness test is to assemble one complete corner with two short crown pieces. If you can place it consistently, identify its attachment points, and explain how the final joints will be finished, the system is becoming predictable.
If the sample only fits when you twist the crown or press the block away from one wall, solve that problem before proceeding. Also check your saw's capacity and the molding manufacturer's cutting instructions. A simpler joint does not remove the need to support the work securely or use the tool as instructed.
Which Looks Better: Corner Blocks or Mitered Corners?
Modern and minimalist rooms
A continuous, restrained crown usually fits the emphasis on clean lines. Miters can keep the eye moving around the ceiling without a separate focal point at each corner. A plain geometric block may also work, especially when similar rectangular details already appear in the room.
Traditional rooms
Both treatments can be convincing. Continuous crown can complement familiar casing and baseboard profiles; a well-proportioned block can relate to substantial door headers or paneled walls. Decide whether the corners should recede or become part of the decorative rhythm.
Classical and neoclassical rooms
Decorative corner elements can contribute to a more developed composition. Their success depends on scale, placement, and consistency with nearby ornament. A large scroll beside a very narrow crown needs a convincing relationship to the rest of the ceiling design.
Rooms with extensive ornament
A corner block can provide a controlled break between patterned runs. It can also overcrowd a junction already occupied by a pilaster, ceiling frame, or ornate door surround. Lay out those elements together.
Use three viewing positions for the final choice: directly under the corner, from the main doorway, and from the room's usual seating area. The corner should fit at close range and look balanced at normal viewing distance. Paint color helps unify the assembly, but its silhouette remains visible.
How to Install Crown Molding With Corner Blocks
The sequence below explains how to use crown molding corner blocks as a complete layout system. Exact cuts, adhesives, fasteners, clearances, and installation order must follow the instructions for the selected products.
1. Map the complete crown route
Mark inside corners, outside corners, wall lengths, soffit returns, and any open ends. Note where stock lengths will need a splice. This reveals missing component types before installation starts.
2. Confirm the parts and prepare the substrate
Dry-fit the crown and block samples together. Check the receiving faces, back geometry, and attachment surfaces. Prepare sound, clean mounting areas appropriate to the adhesive or fastening method. Observe the material's specified conditioning requirements.
3. Establish the crown line
Use a short sample in the intended orientation to mark the crown's position. Check that the line works around the entire room and at both sides of every block. Resolve ceiling variations before measuring finished crown lengths.
4. Position and check the corner blocks
Hold each block at its proposed location with crown samples against both sides. Check symmetry, visible margins, and seating. Confirm how the block will remain supported while any adhesive cures.
5. Establish the actual measuring endpoints
For a simple butt-joint system, measure between the receiving faces. If the crown slides behind a lip or into a recess, account for that geometry according to the instructions. Do not substitute a block's overall decorative width for its installed take-up along the wall.
6. Cut and dry-fit each straight run
Cut the crown ends square where the system requires square ends. Mark orientation and location on the back. Test the full run at the layout line, including any straight splice, before final attachment.
7. Attach the components in the specified order
Some systems begin with fixed blocks; others depend on clips, backing, or coordinated assembly. House of Fara's crown-block instructions, for example, position the blocks and measure the molding between them. That sequence does not make the guide's wood fasteners appropriate for every polymer product.
Use the attachment method approved for the actual crown, block, and substrate. Keep the profiles on the reference line while they are secured. Do not rely on an end joint alone to carry a long unsupported molding run.
8. Finish the joints and paint
Use the specified joint adhesive, filler, or paintable sealant for each location. A crown-to-block joint, a straight splice, and a small wall-edge gap may call for different treatment. Correct a poor fit before applying finishing material.
Allow the required drying or curing time, then prepare and coat the surfaces as directed. Inspect the completed corner under normal room lighting. The final check is a consistent profile and finish, with no visible twist or large patch disguising an incorrect connection.
How a Mitered Crown Corner Is Made
A reliable miter begins with the actual installation geometry. Identify the corner type, measure its angle at crown height, and establish the molding's intended position against the wall and ceiling.
Choose a cutting method suited to the profile and your saw. Nested cutting holds suitable crown in an orientation representing its installed position; flat cutting uses a calculated combination of miter and bevel. Keep the method, reference edges, and sample orientation consistent throughout the trial.
Cut two manageable test pieces and label them by location and direction. Dry-fit them at the room corner, checking both the seam and the alignment of the visible contours. If the joint changes when pressure is applied, recheck seating before changing the saw settings.
Once the samples fit, transfer the proven setup to the finished pieces and verify their lengths. Dry-fit the complete runs, make any necessary adjustment, and attach them without rotating the crown away from the established position. Finish the seam with products appropriate to the molding material.
This is the principle behind the joint, not a universal saw-angle recipe. Someone learning how to cut crown molding corners needs instructions that match the spring angle, corner type, saw arrangement, and material. A chart for crown lying flat cannot be used as though the same crown were nested against the fence.
Keep the successful samples until the room is complete. They provide a physical reference if a later corner or replacement piece behaves differently.
Corner Block vs Miter: Cost
Compare the installed cost of the two approaches. A block adds a purchased component and may add attachment or finishing work. It may save cutting time or reduce discarded crown, but the savings depend on the room, system, and installer.
Ask for a comparison covering the same crown profile, preparation, finish, and number of corners. A quote for bare installation is not directly comparable to one that includes filling, painting, and correction of uneven surfaces.
A simple break-even example
The following numbers are invented for calculation, not current product prices or a US labor-rate estimate. Suppose four blocks cost $18 each and require $8 in additional supplies. The added cost is $80. If the block approach avoids $20 in wasted crown, there is $60 left to recover through labor savings.
Break-even labor hours = (extra block and supply cost − avoided waste cost) ÷ hourly labor cost
At an assumed $60 per hour, the example breaks even if blocks save one hour. If they save only half an hour, the $30 labor saving plus $20 avoided waste totals $50, leaving the block approach $30 more expensive.
Use this calculation to organize your own figures, not to predict a contractor's price. A fixed-price quote may not change in proportion to the hours you expect to save. Ask the installer to price the actual alternatives.
For DIY work, also consider tool rental, practice material, extra trips, and the value of a result you can repeat. The cheapest component is not necessarily the easiest route to an acceptable finished room.
Corner Block vs Miter: Material Waste
Blocks can reduce waste from unsuccessful corner cuts, but they do not automatically reduce the number of crown lengths you must buy. Stock length, wall length, splice placement, saw kerf, and damaged ends all affect the cut list.
A room calculation in feet and inches
Consider a rectangular room measuring 12 by 14 feet at crown height. Its perimeter is 52 feet. For this hypothetical layout, assume a verified inside-block system takes up exactly 3 inches along each wall at every corner.
Each wall loses 6 inches of straight crown coverage: 3 inches at either end. The two shorter runs become 138 inches each, and the two longer runs become 162 inches each. Total straight crown coverage is therefore 600 inches, or 50 feet.
If the chosen crown comes in 78.74-inch lengths, eight pieces provide 629.92 inches before cuts. That is a starting quantity, not a complete purchase recommendation. You still need to map individual pieces, allow for kerf and end trimming, and reserve material for trials or defects.
The longer runs reveal a useful constraint: two 78.74-inch pieces total only 157.48 inches, so each 162-inch run needs at least three sections. The 138-inch runs need at least two. In this layout, that means at least six straight splices across the four walls, even though the corners use blocks.
This is a planning example, not a claim that a particular STAVROS decorative element is compatible with those crown lengths. The actual block take-up must come from the confirmed system.
Plan usable pieces, not just total footage
Build the cut list around long runs first, then assign suitable offcuts to shorter sections. Keep practice pieces separate from finished material. Never assume a nominal 2-meter crown is an 8-foot stick: 78.74 inches is approximately 6 feet 6¾ inches.
Whether you choose blocks or miters, a joint-free wall also requires a stock length long enough to span it. Corner treatment cannot remove that basic constraint.
Common Crown Molding Corner Mistakes
Assuming every corner is 90 degrees
Measure at the crown location and verify with samples. A visually square room can contain corners that need different adjustments. The same assumption can cause trouble with a rigid 90-degree block.
Cutting the entire room before proving one corner
Test the method and installed position first. Label every run and both of its endpoints. A successful inside corner does not establish the correct orientation for the next outside corner.
Choosing a block by one dimension
Check receiving height, projection, back geometry, and attachment area. A large front face can conceal a surprisingly shallow component. A block can also fit technically while looking far too large beside the crown.
Using the wall measurement as the finished cut length
Blocks, pockets, and overlapping covers can change the endpoints. Measure the installed system. For miters, identify the correct reference edge and long or short point for that specific corner.
Mixing unrelated ornaments
A floral block, a sharply stepped crown, and an elaborate ceiling frame need a coherent relationship. Review them together at full size. Matching paint does not correct conflicting scale or geometry.
Assuming every STAVROS molding corner fits every crown
MLDPU decorative frame elements and HIWOOD ceiling crowns serve different roles. Confirm a proposed physical connection by drawing, sample, and installation method. Shared branding and compatible colors are not sufficient evidence.
Using filler as a substitute for a fitting joint
A large patch can hide an opening while leaving the profile distorted. It may also behave differently from the surrounding material. Refit a fundamentally incorrect joint before applying the specified finishing product.
Forgetting outside corners and open ends
Walk the entire crown route. Soffits, bump-outs, and changes in ceiling height may introduce extra corner types or terminations. Include those details in the design and order.
Fixing blocks before establishing the crown line
The block's bottom edge is not necessarily the crown's bottom edge. Position the complete sample assembly first. Otherwise, a row of securely attached blocks may force the molding into inconsistent positions.
How to Choose Between Corner Blocks and Mitered Corners
Start with the appearance, then prove the geometry and installation method. This keeps a convenient component from quietly determining the whole room's design.
- Decide whether the corner should be visible. Choose a continuous profile if you want the ceiling border to flow around the room. Explore blocks if repeated corner accents improve the composition.
- Survey every turn. Record inside and outside corners, actual wall angles, ceiling slopes, and surface irregularities. Identify the hardest location.
- Choose the crown cross-section. Compare installed height and projection, then check stock length and suitable cutting methods.
- Verify the proposed connection. For blocks, establish the usable receiving surfaces and attachment. For miters, prove a pair of test cuts in position.
- Compare the whole installation. Include preparation, components, cutting, splices, finishing, and painting in the cost and time assessment.
- Approve one complete mockup. Evaluate fit and appearance at ceiling height before ordering the remaining corner parts.
Choose miters when continuity is the priority and the installer can execute the required geometry. Consider compatible blocks when a deliberate corner feature is desirable and simpler crown cuts make the project more manageable. For suitable inside corners, keep coping in the discussion.
Choosing STAVROS Products for the Project
For the ceiling perimeter
Compare crown molding profiles by installed height, projection, cross-section, and stock length. The HIWOOD examples in this guide are polystyrene. Select the crown first, then establish an appropriate corner method for that profile.
For coordinated decorative molding corners
Explore polyurethane molding corner elements for the corresponding molding composition. Confirm the specific series and joining geometry. These products can enrich wall frames or other suitable decorative arrangements without functioning as ceiling crown blocks.
When comparing crown molding corner blocks for sale, ask the seller for the compatible crown dimensions, corner angle, installation drawing, and material instructions. “Foam crown molding corner blocks” is a broad shopping description: it does not establish a single density, surface finish, or approved adhesive.
For a US project, also confirm available lengths, the complete inside/outside component set, and delivery arrangements before scheduling installation. An English product page or a dollar price alone does not establish local inventory.
The useful purchase is a verified combination of parts. A sample order and a clear drawing can answer more than a general description saying that a decorative corner is “universal.”
Frequently Asked Questions
What are crown molding corner blocks?
They are separate visible components that form the corner between adjoining crown runs. In a compatible butt-joint system, straight-cut crown ends meet the block's sides. They differ from concealed support blocks, flat wall-frame ornaments, and prefabricated corners that reproduce a particular crown profile around an angle.
Are crown molding corner blocks easier than miter cuts?
They usually simplify the crown end cuts, especially for a beginner. They still require accurate positioning, suitable attachment, and a block that fits both the molding and the room. A custom block on uneven walls may take more work than a familiar miter performed by an experienced installer.
Do crown molding corner blocks eliminate miter cuts?
They can eliminate miter cuts at the corners they are designed to handle. Other parts of the installation may still need angled cuts, including straight-run splices, open-end returns, or transitions. Check the entire crown route and the actual system instructions before assuming that every cut will be square.
Can you use corner blocks on inside crown molding corners?
Yes, when the component is designed for an inside ceiling corner and accommodates the chosen crown. Test it with a sample on both sides. A block made for a square corner can still need a different solution when the walls are out of square or the ceiling slopes.
Do corner blocks work on outside corners?
Purpose-made outside blocks can work at projecting corners. Their back geometry and finished faces differ from inside blocks, so the two types are not interchangeable. Check the appearance from both adjoining walls and below, and verify that the supporting corner allows the component to seat correctly.
What size crown molding corner block do I need?
Use the crown's installed height and ceiling projection, then compare its complete end shape with the block's usable receiving surfaces. Also check the mounting geometry and intended visible margins. The block's overall decorative dimensions or a single nominal size do not provide enough information to establish a fit.
Do crown molding corner blocks have to match the profile?
They need to be compatible with its geometry and appearance. A plain block can intentionally contrast with a curved crown if its receiving faces accommodate the end. A prefabricated corner that continues the crown's shape, however, generally needs to match the specific profile and the intended corner angle.
Can I use a decorative corner block with plain crown molding?
Yes, if the fit is verified and the decorative emphasis suits the room. Check the combined scale at ceiling height, especially near doors, cabinetry, and wall frames. A heavily ornamented block can become the focal point even when the crown itself is modest and both parts share one paint color.
Are corner blocks good for an old house with uneven walls?
They can be useful when the visible corner detail suits the existing trim and the block can be fitted correctly. They do not repair unstable plaster or automatically accommodate every wall angle. Survey the mounting surfaces first, then compare a block with a fitted miter or a suitable coped inside joint.
How do you install crown molding with corner blocks?
Establish the crown line, verify the blocks in position, and measure between the system's actual receiving surfaces. Cut and dry-fit the straight runs, attach the components in the specified order, then finish and paint the joints. Adhesives, fasteners, clearances, and curing times depend on the actual products and substrate.
Can corner blocks be used on vaulted ceilings?
Yes, where a suitable transition component or approved custom detail addresses the ceiling slope and corner geometry. A standard flat-ceiling block is not a universal substitute. Confirm the wall angle, wall-to-ceiling angle, crown orientation, and direction of the transition, then inspect a full-size mockup from below.
Are mitered corners better for modern crown molding?
They often suit modern rooms because they preserve continuous lines without introducing another decorative element. The result still depends on proportion and installation quality. A restrained geometric block can also be appropriate when its shape relates clearly to the room's other architectural details.
Why does my 45-degree crown molding joint have a gap?
The wall angle may differ from 90 degrees, the crown may be rotated, or the cutting setup may not match the profile and method. Flat-cut crown generally needs a coordinated miter and bevel. Recheck seating and orientation with short samples before repeatedly changing angles or filling the opening.
What if the room corner is not 90 degrees?
Measure the actual angle at crown height and use the appropriate cutting method or a corner component verified for that geometry. Make a trial assembly before cutting final lengths. Do not assume that a nominal 90-degree block or an unadjusted pair of 45-degree cuts will fit.
Can I use polyurethane corner elements with polystyrene crown molding?
Only when dimensions, receiving geometry, mounting method, finish, and overall design have been verified. Material names alone do not establish compatibility. In particular, a STAVROS MLDPU corner for a flat molding composition should not be treated as a compatible HIWOOD ceiling crown block without separate confirmation.
Choose the Corner as Part of the Whole Room
Crown molding corner blocks are a useful choice when their visible form belongs in the room and their geometry fits the selected crown. Mitered corners are a strong choice when the goal is an uninterrupted profile and the installation can support accurate fitting.
Begin with the crown's height and projection, survey the actual corners, and approve a complete sample assembly. Then build the cut list and choose the attachment and finishing products for the verified materials. This sequence makes the result more predictable—and gives every corner a clear architectural purpose.
With a deep profile, a slight rotation has a stronger effect on the edge farthest from the wall. In addition, a large piece is harder to hold and support evenly during cutting and fitting. Here, suitable tooling and a stable support are especially important.
But height alone does not make a miter cut impossible. A smooth, large cornice may prove easier to work with than a small profile with thin protrusions and repeating ornament. The entire shape and the available processing method are assessed.
The dimensions given show the proportions of cornices. They are not a compatibility table for MLDPU corners. The ability to attach a separate decorative element still needs to be confirmed for a specific assembly.
Ready-made corner elements in a classic interior
In a classic composition, a corner can become a standalone accent: support a frame, emphasize a turn, or connect several decorative lines. This technique is especially convincing when it is repeated meaningfully and relates to door surrounds, panels, and central ceiling decor.
For calm neoclassicism, clear proportions and free space are usually more important than the amount of ornament. In a richer baroque or palatial design, corner scrolls may be more noticeable. But the style name itself determines neither the size of the element nor the number of pieces.
Decide what will be the focal point in a specific area. If attention is already drawn by a large portal, expressive wall frames, and an elaborate chandelier, additional massive ceiling corners may create unnecessary competition. When the rest of the trim is calm, it is the corner accents that can set the desired character.
It is useful to check the composition from three positions: directly at the angle, from the entrance, and from a typical viewpoint in the room. Up close, the quality of transitions is assessed; from a distance, the overall scale and rhythm.
Painting in a single color unifies different details, yet their shadows and protrusions remain. Therefore, the decision is first made based on form, and then refined with the finish. A neat white corner can be very active if its dimensions and relief noticeably exceed the scale of the adjacent cornice.
Why a miter joint often looks better in a modern interior
A modern interior is often built on continuous lines and a small number of standalone details. In such a room, a miter joint helps the cornice remain a calm boundary between the wall and ceiling. The eye reads the overall contour without stopping at every turn.
This is especially useful near large smooth facades, tall doors, and minimalist wall panels. An expressive decorative corner can introduce a different scale and a different style, even if the material and color match the main finish.
At the same time, a separate block is not ruled out. A rectangular or stepped detail can support the geometry of the space if similar shapes already exist in the interior. The reason for its appearance matters: it should improve the room's composition, not look like a random filler.
For a small apartment, the number of turns is additionally assessed. The more boxes, protrusions, and short sections there are, the more active the repetition of corner inserts becomes. A continuous profile in such a situation often gives a more cohesive result.
Also check the lighting. Linear lighting, directional light, or a bright window can emphasize every protrusion and every uneven seam. A simple form does not lower the requirements for neatness: it is precisely on a calm surface that a poorly finished joint is most noticeable.
How to install molding with ready-made corner elements
Using a wall frame as an example, it is easiest to understand the assembly principle of straight and corner MLDPU parts. Below, we are talking specifically about a composition on a plane. For a separate corner block of a ceiling cornice, additionally check its fit between the walls and the ceiling, and then follow the instructions of the selected system.
1. Mark out the entire composition
Determine the outer boundaries of the frame and its position relative to doors, furniture, and neighboring elements. Clarify along which line the dimensions are set: along the outer edge of the decor, along the axis of the molding, or along the free field inside. Mixing up these measurements leads to an error even before cutting.
2. Check the corners at full size
Attach all corner parts and short straight samples. Evaluate the rotation of the ornament, visible transitions, symmetry, and distances to other frames. For mirrored parts, check the correct side, and for identical ones, check the required orientation.
3. Determine the actual joint locations
Straight sections must be measured between the points where the moldings actually end. You cannot automatically subtract two overall dimensions of the corner decor from the frame width. For example, the calculation 1200 − 2 × 86 = 1028 mm is arithmetically correct, but it still does not prove the correct length of the strip: the 86 mm dimension may refer to the outer ornament rather than to the junction point.
4. Prepare the straight elements
Cut them using a method suitable for the material and the intended joint. Label the location on the back side. If adjustment is needed, do it gradually, checking the part against the actual end points, not only against the initial sketch.
5. Assemble the frame without glue
Check the entire composition at once. Equal diagonals help control the rectangle, but additionally check the parallelism of the sides and the consistency of visible boundaries. A decorative protrusion can create the impression of skew even when the main layout is correct.
6. Prepare the base and glue the parts
The surface must be suitable for the chosen adhesive and strong enough for the finish. The order of fixing corners and straight sections is determined by the specific system. If the corners are installed first, their position is checked once more before it becomes the basis for the final measurement of the strips.
The mounting compound is selected according to the material of the products and the base. The instructions must define the application method, the need for temporary fixation, and the holding time. General advice such as “any liquid nails” is not sufficient here.
7. Treat the joints and paint
Use the compounds intended for the system. The joint between the parts and a small abutment to the wall may require different treatment. Before filling, correct any noticeable step or incorrect position of the profile: the finishing compound should not recreate the entire lost relief.
After the required holding time, prepare and paint the composition according to the material instructions. Inspect the frame under normal room lighting. Pay special attention to the uniform texture on the molding, corners, and treated transitions.
With a ceiling solution, the general principle remains: first the confirmed position of the corners and profile, then the actual lengths, a trial fitting, fastening, and finishing. But a wall frame does not serve as a ready-made installation drawing for a ceiling cornice.
How to miter a ceiling cornice corner
Start by identifying the section: whether it is an inner or outer corner, which strip fits on the left and which on the right. Measure the geometry at the height of the cornice and check the position of the sample relative to the wall and ceiling.
Then choose the cutting method that suits the profile and the tool. In a mitre box or on a saw, the cornice must be reliably supported and secured in accordance with the tool's instructions. Accidental shifting at the moment of cutting changes the result even with a correctly chosen setting.
Prepare a test pair and label it. Install both segments according to the markings, align the visible lines, and assess the gap. If it changes when you press on the parts, first check the support and orientation. If the position is stable, refine the measurement and the cut setting.
After a successful test fit, move on to the final strips. For each one, determine the correct length reference point, the cutting direction, and the side to keep. Check the entire section before final fastening, especially if its other end also terminates in an angle.
During installation, do not rotate the profile just to get a tight seam. It must retain the same height and projection at which the samples were tested. Then perform the specified treatment of the joint, observing the requirements for adhesives, fillers, and painting.
This is the general order of work. The exact settings of the mitre box or mitre saw depend on the measurements, the shape of the cornice, and how it is held. A single pair of numbers does not replace this source data. Keep the successful samples until the room is finished: they will help you verify the setting at the next turn or when replacing a part.
Which is cheaper: a ready-made corner or a mitre cut
You need to compare the cost of a finished section. A ready-made corner adds the price of a separate part and, possibly, additional installation materials. It can reduce cutting time and the number of ruined strips, but the size of this saving depends on the complexity of the room and the installer's experience.
A mitre cut has no separate decorative part in the estimate. At the same time, the costs of marking, test cuts, fitting, and joint treatment remain. If these operations are not taken into account, a comparison based only on purchase costs will be incomplete.
A conditional calculation in rubles
Let's take fictional figures purely as an example. These are not STAVROS prices and not the average cost of a craftsman's work. Suppose four suitable corners cost 500 rubles each, and additional materials cost 200 rubles. The total increase is 2,200 rubles.
Suppose that using ready-made corners avoids the loss of straight profile worth 400 rubles. The remaining 1800 rubles must be offset by working time. At a conditional cost of 1200 rubles per hour, achieving equal costs requires saving one and a half hours.
Required time savings = (cost of additional parts and materials − cost of prevented defects) ÷ cost per hour of work.
If in the same example only half an hour was saved, the gain from labor will be 600 rubles. Together with 400 rubles of saved material, that makes 1000 rubles, meaning the ready-made corner option remains 1200 rubles more expensive.
This arithmetic helps compare your own initial data, but it does not predict the contractor's price. With a fixed payment for the entire scope, reducing time does not necessarily reduce the bill. Ask for both options to be calculated with the same preparation, painting, and requirements for the result.
For DIY installation, also consider trial material, tool rental, repeat trips, and the ability to confidently complete the work. A cheaper individual part does not always result in lower total costs, especially if the base or the entire composition has to be redone because of it.
Which method produces less waste
A ready-made element can reduce waste from unsuccessful corner cuts. However, the number of purchased strips is also determined by wall length, locations of straight joints, saw kerf width, and the condition of the ends. The total linear meters are only the beginning of the calculation.
Example for a room 3.2 × 4.2 m
Suppose the dimensions have been checked at the installation height of the cornice. The perimeter of such a room is 14.8 m. For the example, let us assume that the selected and already verified ceiling corner system occupies exactly 60 mm along each wall in each corner.
On each wall, 120 mm is subtracted from the length of the straight section: 60 mm at both ends. This gives two straight sections of 3080 mm and two of 4080 mm. Each of these sections may consist of several cornice segments joined together.
The total requirement for straight cornice is 2 × 3080 + 2 × 4080 = 14,320 mm, or 14.32 m. Eight blanks of 2000 mm each yield 16 m before cutting. This is the starting quantity for creating a cutting plan, not a guarantee that the kit is ready for installation.
The long walls reveal an important limitation: two two-meter blanks yield only 4000 mm, but 4080 mm is needed. Therefore, each such section consists of at least three segments. For the 3080 mm line, a minimum of two are needed. As a result, across four walls there will remain at least six straight joints, despite the ready-made corners.
The 60 mm dimension here is arbitrary and does not refer to the MLDPU corners from the table. For a real project, it is taken from the verified position of a specific ceiling component. The overall dimensions of the wall ornament cannot be substituted for it.
Why linear footage does not replace cutting layout
Distribute the blanks across the sections, first ensuring the long parts. Then assign suitable offcuts to the short locations and separately provide samples. Take into account the saw kerf width, end trimming, and the requirements for joining straight sections.
Even from a 2000 mm blank, you cannot get two full 1000 mm parts with a single cut: some material will be lost to the kerf. For the same reason, a margin of a few millimeters on paper does not always exist in the workshop.
For the mitre cut, a similarly detailed list is drawn up. The differences lie in the ends of the parts and the possible allowance for fitting, but the principle remains the same: you need to buy material for specific segments, not an abstract length with an arbitrary percentage added on top.
Common mistakes when forming corners
Automatically cutting everything at 45°
The actual angles and the position of the cornice may differ. First measure the installation location and confirm the method on samples. A successful cut on one turn does not prove that the setup is correct for all the other corners in the room.
Start with the finish strips
Repeated trimming quickly shortens the length of the part. Individual test cuts help you understand the geometry without wasting material that must cover a specific wall. After checking the samples, you still test-fit the full strip.
Buying corner decor before the main profile
The appearance of the insert does not determine the right cornice. First choose the straight piece and its position, then confirm the connection. The exception is a ready-made set for which the manufacturer has already specified compatible straight and corner elements.
Judging compatibility from a photo
The front view hides the thickness, projection, mounting pads, and the shape of the back side. Request a drawing or samples. The overall size of a decorative corner can be many times greater than the width of the molding it is intended for.
Assuming all STAVROS corners are universal
The MLDPU series and HIWOOD ceiling cornices serve different purposes. Having products in the same catalog does not mean they are physically compatible out of the box. Check the specific item numbers, the joining method, and the intended fastening.
Ignoring the scale of the ornament
A large corner piece may be technically acceptable but look heavy next to a thin line. Evaluate it at the required height and from a distance. This is especially important in a small room with several closely spaced turns.
Measure length along the wrong boundary
In a finished system, use the actual end points of the straight profile as your reference. When cutting, account for the correct edge and the direction of the angle. Do not substitute these dimensions with the distance between walls or the overall width of the decorative trim.
Fill a large gap instead of fitting
A thick filler can cover the gap, but it will not align diverging beads and steps. Fix the cause of the defect before finishing. For a small, correct joint, use the material specified by the chosen system.
Fasten corners before general layout
The lowest point of the ornament does not necessarily coincide with the bottom edge of the cornice. First, do a full dry assembly. Otherwise, already glued corners may force the straight strips to sit at different heights or at the wrong angle.
Ready-made corner or miter cut: how to choose
It is convenient to decide in one order: first the desired appearance, then the geometry, then the composition of parts and installation. That way, a randomly convenient accessory will not determine the design of the entire room instead of you.
- Determine the role of the corner. If you need a continuous line, start with a miter cut. If the turn should become a decorative accent, consider a suitable ready-made piece.
- Check the entire perimeter. Note the inside and outside corners, boxes, protrusions, slopes, and cornice ends. Find the most difficult section.
- Select a straight profile. Set the material, height, projection, cross-section shape, and workpiece length. For a frame, additionally determine the molding width and the size of the free field.
- Confirm the joint. For a miter cut, you need a successful test pair. For a finished element — clear abutment points, proper fit, and the possibility of fastening.
- Assess the full scope of work. Include base preparation, cutting, angles, straight joints, finishing, and painting.
- Approve the sample in the interior. Look at it from below, from the entrance, and from the main viewing point. After that, you can order the remaining parts.
A miter cut is usually chosen for continuity and a restrained pattern. A ready-made corner is considered for a coordinated decorative accent and a simpler joint in a proven system. With non-standard geometry, both solutions require a separate trial fit, rather than choosing based on the promise of "no complex cutting."
Answers to frequently asked questions
How do you make a corner for a ceiling cornice?
The main options are to join two strips after an angled cut or to use a separate compatible corner element. The choice depends on the desired pattern, the cornice cross-section, and the room geometry. First check the actual installation location on short samples, then determine the final lengths and the fastening method.
How do you join a ceiling cornice at corners?
Both strips must occupy the intended position in height and projection. For a miter cut, the ends and all relief lines are aligned. In a system with a ready-made corner, each strip is brought to its own abutment surface. The joint is checked without glue, and noticeable mismatches are corrected before finishing.
Do you always need to cut a cornice at 45 degrees?
No. The correct cutting angle depends on the actual wall turn and how the cornice is positioned in the tool. When cutting flat, coordinated rotation and tilt may be required. Settings for one method cannot be automatically transferred to another, even if it is the same strip.
Why is there a gap after cutting at 45°?
Walls may not meet at 90°, one strip may be rotated, and there may be an unevenness under the mounting surface. An orientation error during cutting is also possible. Check the position of two short samples and the stability of their support before trimming the long piece again.
What should I do if the wall angle is not 90 degrees?
Measure it at the cornice height, check the adjoining surfaces, and make a test joint with the appropriate setting. If you are considering a ready-made block, confirm that its back is designed for such geometry. A nominal 90° angle does not have to fit any walls without adjustment.
What is a ready-made corner element?
This is a separate part for finishing a turn, but its purpose can vary. There are blocks for ceiling cornices, turns for a specific profile, and decorative corners for flat moulding frames. Before buying, you need to find out which group the product belongs to and how straight sections are attached to it.
Can I do without miter cuts?
At corners for which compatible parts with direct joining are provided, complex corner trimming can often be avoided. But other places may require special cuts: straight joints of long sections, ends, or transitions. You need to evaluate the entire room and the instructions for the specific system, not just one successful turn.
How do I make an inside corner for a ceiling cornice?
Prepare a pair of mitered strips or a suitable inner element. Install the samples on both sides at the same time and check the pattern, height, and projection. If the finished piece rocks on the plaster or one strip has to be repositioned, resolve the fit first. Filling the gap with compound will not replace proper fitting.
How do you make an external corner?
Use a miter cut designed specifically for the external turn, or a corner element intended for it. Check the joint on both sides and from below. An external corner is especially noticeable, so the cut direction, the length reference point, and the condition of the protruding edge deserve separate checking before fastening.
Which is easier — a ready-made corner or a miter cut?
In a confirmed system, a ready-made piece usually simplifies cutting straight strips. But its installation still requires marking, a suitable base, and precise dimensions. Custom fitting of an unsuitable block can take longer than a standard miter cut by a craftsman familiar with the chosen profile.
How do you choose the size of a decorative corner?
Compare the size and shape of the straight profile with the actual joint surfaces. For a cornice, consider the height and projection; for a frame, the molding width, the protrusion, and the ends of the relief. Then assess the overall scale of the piece in the interior. A single number in the name or a front view does not confirm compatibility.
Can you use a corner element from another molding?
Only after checking the specific pair. Similar width or the same material does not guarantee matching relief, thickness, and junction points. Clarify the dimensions, the joining and fastening method, and assemble a sample. If arbitrary reworking of decorative surfaces is required, it is better to compare the result with a suitable element from your own system in advance.
Is MLDPU-001U suitable for any cornice?
No. This is a decorative corner of the molding system, and its dimensions of 86 × 86 × 7 mm do not mean universal compatibility with ceiling profiles. For the HIWOOD cornice, the spatial shape of the joint, the projection, the height, and the installation are checked separately. Such a conclusion cannot be made based on the generic name "corner element."
How do you finish the corner of a wide ceiling cornice?
Check not only the height, but also the projection, the cross-section shape, and whether the piece can be confidently supported during cutting. Do a test assembly of sufficient length to see the turn and the pattern. For a ready-made block, confirm the usable size of the adjoining surfaces: a large overall dimension by itself guarantees nothing.
What is better for a modern apartment?
For a calm, continuous line, people often choose a miter cut on a smooth cornice. A simple geometric block is also possible if it is tied to the rest of the trim and does not overload small areas. Assess the number of turns, the room height, and the lighting. Neatness of the joint remains important with any chosen style.
What is better for a classic interior?
Both solutions will work. A miter cut preserves the expressiveness of the cornice itself, while a ready-made decorative corner can support frames, panels, and other accents. Choose it based on the overall scale of the composition and confirmed compatibility. A classic interior does not require the maximum amount of ornament at every turn.
A neat corner starts with choosing the whole system
A well-finished ceiling cornice corner preserves the correct position of the profile and the intended pattern of the room. A miter cut helps create a continuous line. A ready-made piece allows the turn to become a standalone accent if its shape and installation suit the chosen system.
Before buy a ceiling cornice, check the height, the projection, the actual angles of the room, and the cutting plan. For the MLDPU composition, select straight and decorative elements in a coordinated way. One tested sample before purchasing the whole set helps avoid both random combinations and redoing already installed pieces.