
















Article Contents:
- What Size Crown Molding Should You Use? The Quick Answer
- Crown Molding Size Is More Than One Number
- Profile height: the drop down the wall
- Ceiling projection: the reach into the room
- Profile depth, relief, and face width
- Why two 4-inch crown moldings can look different
- Why an 8-foot ceiling benefits from restraint
- A small bedroom and a large living room need different tests
- Modern and traditional approaches at 8 feet
- A53: a compact reference
- A70V1: more wall height with limited projection
- What the extra foot changes
- Bedroom versus living room
- Open-plan rooms require one continuous decision
- Why a taller ceiling can support more visual weight
- When a 4-inch profile works
- When to compare larger crown molding
- When large crown still looks wrong
- A90V2: a taller, shallow outline
- A100: a more projecting alternative
- Why small crown molding can disappear
- Scale first, ornament second
- A great room and a narrow room are different problems
- Room width and length
- Doors, windows, and remaining wall height
- Baseboards and wall paneling
- Built-ins, open plans, and viewing distance
- Smooth modern profiles
- Traditional profiles
- Deep ornament
- Living room
- Bedroom
- Dining room
- Kitchen
- Hallway
- Great room and foyer
- What size crown molding should I use?
- What size crown molding is best for 8-foot ceilings?
- What size crown molding should I use with a 9-foot ceiling?
- What size crown molding should I use with a 10-foot ceiling?
- What size crown molding works with a 12-foot ceiling?
- Is 4-inch crown molding too large for an 8-foot ceiling?
- Can crown molding be too small for a high ceiling?
- How is crown molding size measured?
- Is crown molding height the same as projection?
- Should crown molding match baseboard size?
- Does large crown molding make a room look smaller?
- Should crown molding size change in an open floor plan?
- What size of ceiling cornice should you choose?
- How wide should a ceiling cornice be?
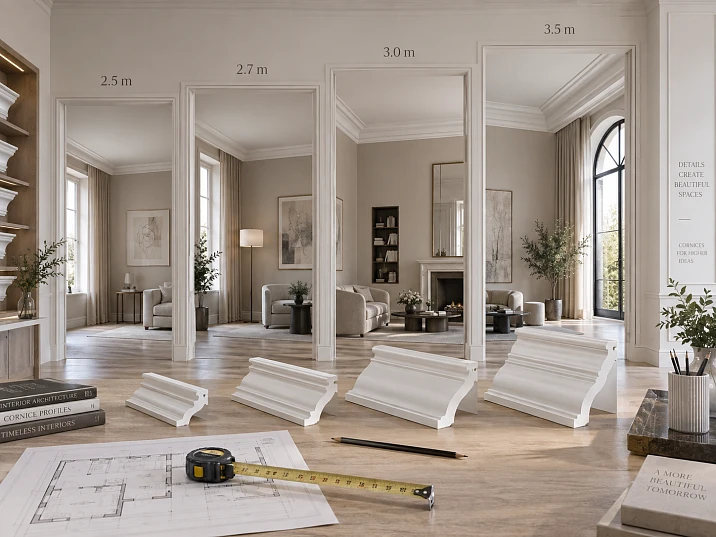
- Which cornice should you choose for a 2.5-meter ceiling?
- What cornice size is suitable for a 2.7-meter ceiling?
- Which cornice should you choose for a 3-meter ceiling?
- Which cornice is suitable for 3.5-meter ceilings?
- Can a wide cornice be used with a low ceiling?
- Which matters more — the height or the projection of a ceiling cornice?
- How is a ceiling cornice measured?
- Is a 100 mm cornice a large size or a medium one?
- Should a ceiling cornice be the same height as the baseboard?
- How can you tell that a cornice is too large for a room?
The useful measurements are how far the molding drops down the wall, how far it projects across the ceiling, and how those dimensions relate to the room. A tall, shallow profile behaves differently from a deep cove. A large room needs to be evaluated from across the space, while a narrow hallway brings the same detail much closer to your eyes.
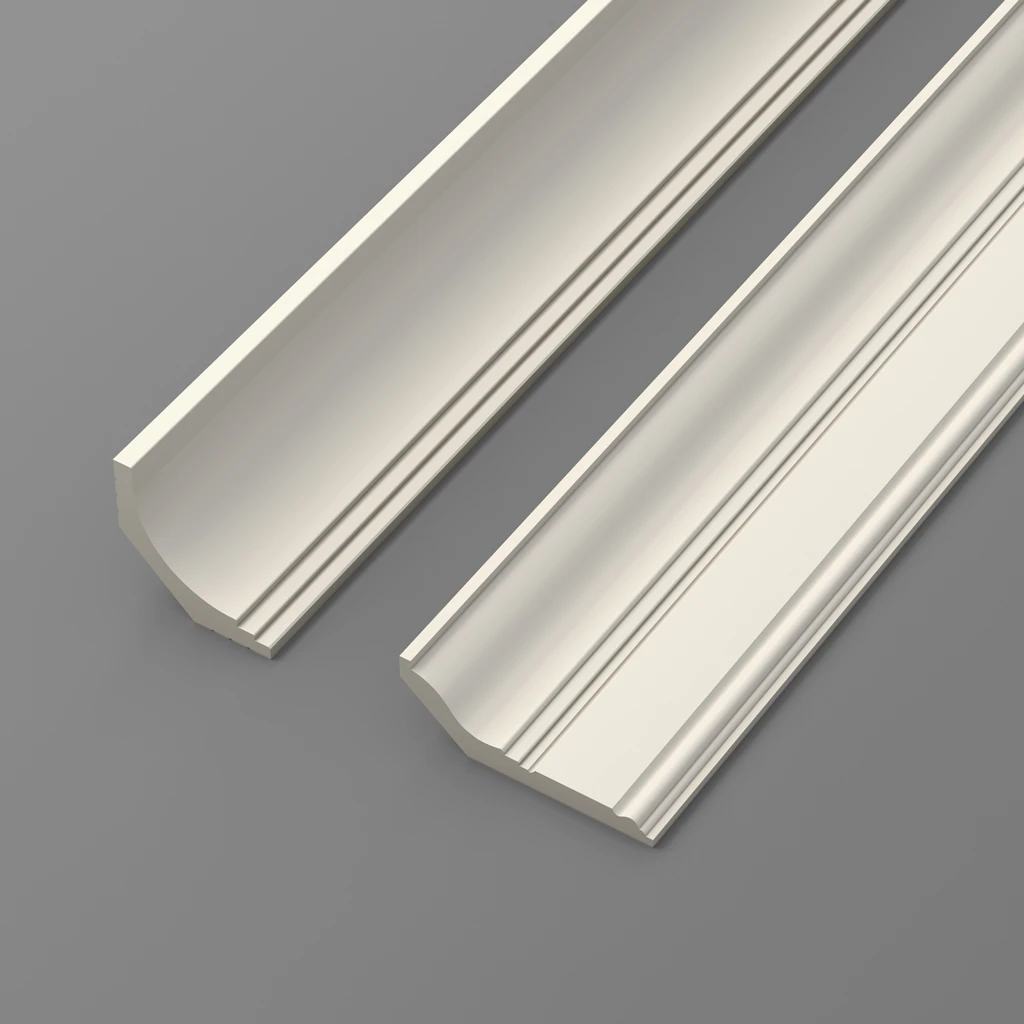
This guide explains how to compare crown molding sizes in feet and inches, test the proportions in your own home, and narrow the choice to an actual profile. The STAVROS examples range from compact HIWOOD trim to more substantial crown molding. They are reference points for different design goals, with attention to the dimensional details that a simple ceiling-height chart can miss.


What Size Crown Molding Should You Use? The Quick Answer
For a restrained, single-profile installation, a useful first mock-up is approximately 2–3½ inches of installed wall height at an 8-foot ceiling, 3–4½ inches at 9 feet, 3½–5½ inches at 10 feet, and 5–7 inches at 12 feet. These are suggested sizes to compare in the room, not an industry standard or a requirement. A deliberately subtle detail can be smaller; a formal architectural composition can be much larger.
| Ceiling height | Initial profile scale | What to evaluate first |
|---|---|---|
| 8 ft / 96 in | Small to restrained | Wall coverage, ceiling projection, and the space above doors and windows |
| 9 ft / 108 in | Small to medium | Room width, existing trim, and continuity through connected rooms |
| 10 ft / 120 in | Medium to substantial | Viewing distance, door height, cabinetry, and the intended formality |
| 12 ft / 144 in | Substantial for a clearly visible finish | Overall room volume, readable profile shape, and whether a larger composition is needed |
Before comparing a product with those starting points, establish what its advertised size means. A molding sold as “4-inch crown” may be measured across its angled face. That is different from a profile that actually covers 4 inches of wall after installation.
Ceiling height is only the starting point. Room size, profile projection, ornament, wall height, trim already present in the room, and viewing distance all affect how large crown molding appears. Use the table to choose two or three samples, then compare them at the actual wall-to-ceiling transition.
Also separate one-piece crown from built-up crown. A built-up treatment combines several components, sometimes with a painted band between them. Its total decorative height can greatly exceed the size of the main crown profile. Those two measurements should never be substituted for one another.




Crown Molding Size Is More Than One Number
The phrase “crown molding width” is less precise than it sounds. One supplier may use width for the broad face of the uninstalled molding. Another may show a rectangular cross section with vertical and horizontal dimensions. A size guide is useful only when its measurement matches the dimension on the product you are considering.
Наша фабрика также производит:

Смотреть весь Каталог продукции
Profile height: the drop down the wall
Installed height, often called drop or wall coverage, is the vertical distance from the ceiling to the molding’s lowest edge. This measurement determines how much of the upper wall the crown occupies. It is the most useful dimension when checking the gap above window casing, a tall doorway, or wall paneling.
Measure vertically rather than along the sloping decorative face. If a crown sits at an angle between the wall and ceiling, a tape stretched across that face will usually give a different number. Where a catalog provides a dimensioned installation drawing, use the vertical dimension shown for the intended orientation.
Получить консультацию
Ceiling projection: the reach into the room
Projection is the horizontal distance the installed profile extends from the wall across the ceiling. It affects the width of the visible ceiling border and the relationship to nearby curtain tracks, recessed fixtures, beams, and ceiling details. A crown with modest wall coverage can still occupy considerable ceiling space.
This distinction matters in low or narrow rooms. Choosing a shorter profile does not necessarily solve a crowded ceiling edge if the new profile projects farther into the room.
Profile depth, relief, and face width
Depth is sometimes used as another name for projection, but catalogs may also use it for the material’s thickness. Decorative relief is a separate issue: the curved, recessed, or projecting features within the profile create highlights and shadow lines. Always identify the endpoints of a dimension instead of relying on its label alone.
Face width describes the broad span across the molding itself. On sprung crown—the kind installed at a specified angle—it is not automatically equal to either installed height or projection. The intended angle and the shape of the back determine how the profile meets the wall and ceiling. Do not rotate a profile simply to force it into a preferred measurement.
Why two 4-inch crown moldings can look different
Even when both products truly have a 4-inch wall drop, one might project only 1 inch while the other projects 3 inches. A broad cove, several stepped edges, or deep ornament can change their apparent weight further. They occupy the same vertical band but create different ceiling borders.
For a meaningful comparison, record four things beside each product: installed height, installed projection, cross-sectional shape, and supplied length. Length determines how you plan joints and quantities; it does not describe the profile’s visual scale.
What Size Crown Molding for 8-Foot Ceilings?
For an 8-foot ceiling, begin with a modest profile and assess the room before moving larger. Comparing approximately 2-inch and 3-inch installed wall footprints is a practical first exercise in a small bedroom. A larger living room may justify testing a 3½- or 4-inch footprint as well. The projection and shape of each candidate matter as much as that first number.
Why an 8-foot ceiling benefits from restraint
The top of an 8-foot wall is relatively close to normal viewing height. Broad projections and repeated shadow lines are easy to notice, especially from a seat near the wall. A crown that looks balanced when held at arm’s length may look much heavier when it wraps the whole ceiling perimeter.
Restraint does not mean choosing the smallest available product. An extremely fine strip can look disconnected from substantial door casing or a large fireplace surround. The aim is a finished upper edge that belongs to the room, with enough plain wall remaining beneath it.
Check the tightest location first. Suppose the top of a window casing is 8 inches below the ceiling. A crown with a 3-inch wall drop leaves a 5-inch band; a 5-inch drop leaves only 3 inches. Neither remaining gap is automatically right, but the comparison makes the design consequence visible before you buy.
A small bedroom and a large living room need different tests
Consider two hypothetical rooms with identical ceiling heights: a 10-by-12-foot bedroom, or 120 square feet, and a 16-by-20-foot living room, or 320 square feet. In the bedroom, much of the crown is viewed nearby. A compact profile may be enough to define the ceiling without becoming a prominent feature.
In the living room, the longer walls and greater viewing distances can accommodate a clearer architectural line. Try a larger sample alongside the compact option. Stand at the entry and sit where the sofa will be; a profile should be judged from the places where people actually experience the room.
Modern and traditional approaches at 8 feet
For modern crown molding, look for a simple curve or a few controlled steps, with projection that suits the available ceiling space. A shallow profile can create a distinct finish without a broad overhead band. Keeping its color close to the wall or ceiling can soften the boundary further.
A traditional room can carry more detail, particularly when the doors, baseboards, and furnishings already establish that language. Compare the size of the individual curves and edges, not merely the amount of ornament. Several tiny decorative features can look busy at close range even when the molding itself is small.
Choose crown molding for low ceilings by testing the whole relationship: crown, remaining wall, opening trim, and ceiling border. An 8-foot ceiling allows many successful designs; it simply makes excessive projection and crowded details harder to overlook.
STAVROS Crown Molding Examples for an 8-Foot Ceiling
A53: a compact reference
The A53 compact crown molding profile is listed at 1.46 × 1.46 inches. Its approximately equal vertical and horizontal dimensions make it useful for evaluating a small coved transition. In a modest bedroom or hallway, this is a reference for a subtle finish rather than a broad architectural band.
There is a dimensional discrepancy to resolve for precise fitting: the product drawing labels both dimensions as 37.7 mm, approximately 1.48 inches. Treat A53 as roughly 1½ inches for visual comparison, and confirm the ordered dimensions if clearances are tight.
A70V1: more wall height with limited projection
A70V1 offers a different proportion: 2.76 inches of height and 0.83 inch of projection in the illustrated orientation. This low-projection crown molding lets you test a taller wall finish while keeping the ceiling border comparatively shallow.
The choice between these profiles is therefore more specific than small versus large. A53 is shorter but extends farther across the ceiling. A70V1 emphasizes the wall more strongly. Hold both outlines in place and decide which relationship better suits the room.
What Size Crown Molding for 9-Foot Ceilings?
A 9-foot ceiling gives you another 12 inches of wall height, but it does not require an automatic jump to a large crown. Start with medium crown molding and compare approximately 3- to 4½-inch installed heights for a restrained single-profile design. Then adjust the shortlist to the room’s width, its existing trim, and the visual role you want the crown to play.
What the extra foot changes
A higher wall can leave more space between the molding and the tops of doors or windows. It can also increase the distance from which the profile is seen. Both may make a slightly stronger upper edge appropriate. However, if the windows and cabinetry also rise higher, that extra wall space may already be occupied.
Measure the actual clear band above each major feature. Two homes with 9-foot ceilings can have very different amounts of uninterrupted wall. A room with tall transom windows needs a different composition from one with lower window heads and a broad plain surface above them.
Bedroom versus living room
In a 12-by-13-foot bedroom, begin with a calm profile around the smaller end of your shortlist. Look at it from the bed as well as the doorway. A shallow crown can provide sufficient definition when the room already includes a tall upholstered headboard, curtains, or patterned walls.
In a 16-by-18-foot living room, compare that same sample with a taller or more projecting option. The larger room may benefit from a stronger perimeter, especially beside substantial casing and baseboards. If the smaller sample reads clearly from the main seating position, however, height alone is no reason to replace it.
Open-plan rooms require one continuous decision
For crown molding in an open floor plan, walk the entire kitchen, dining, and living area before selecting the profile. A molding chosen beside a small kitchen wall may look faint along a long living-room run. A profile selected for the living area may collide with cabinetry at the other end.
Where the ceiling plane and perimeter continue uninterrupted, keeping a consistent profile usually produces the clearest result. If different sizes are needed, place the change at an architectural break such as a beam, doorway, or change in ceiling level. Plan the termination rather than letting two unrelated profiles meet halfway along a wall.
For 9-foot ceilings, the strongest starting question is whether the crown should be a quiet boundary or a visible feature. Use room size and sightlines to refine that answer, then compare height and projection separately. This produces more useful crown molding proportions than choosing a size because a neighboring house used it.
STAVROS Crown Molding Example for a 9-Foot Ceiling
L1902S is listed at 3.15 × 1.06 inches, with a length of 78.74 inches. This 3-inch crown molding profile provides a useful medium-scale reference when you want a visible wall finish with a relatively shallow ceiling reach.
The distinction is practical: its 3.15-inch height does not mean 3.15 inches of projection. The drawing shows a taller vertical profile with a smaller horizontal dimension. That proportion is worth testing in a bedroom, hallway, or living area where the ceiling edge needs definition but a deep cove would feel intrusive.
At 9 feet, compare its outline against the door casing and the space above the windows. In a large open-plan room, also assess it from the farthest regular viewing position before deciding whether this scale is sufficient.
What Size Crown Molding for 10-Foot Ceilings?
For a 10-foot ceiling, compare medium and substantial profiles, beginning around 3½–5½ inches of installed wall height for a simple one-piece treatment. A profile near 4 inches can create a controlled finish in a modest room. A broad living room or formal dining room may need more height, more projection, or a coordinated built-up composition.
Why a taller ceiling can support more visual weight
A 10-foot wall provides more vertical space for the trim to occupy. In a large room, the crown may also sit farther from the main viewing positions. A stronger outline can help define the wall-to-ceiling transition clearly, particularly alongside tall doors, wide casing, paneling, or substantial built-ins.
Those surrounding elements matter more than the ceiling number alone. A room with 8-foot doors presents a different upper-wall arrangement from a room with 6-foot-8-inch doors. Record the top of the finished casing, not just the door slab height, when checking the space available beneath the crown.
When a 4-inch profile works
A profile with approximately 4 inches of wall coverage is a useful candidate when the goal is a clean, visible perimeter rather than an elaborate cornice. In a transitional bedroom or study, a moderate cove with limited ornament may give the room the finish it needs.
Check whether “4-inch” describes installed height or face width before making that comparison. Also inspect the projection: a tall, shallow design and a broad cove can have similar wall coverage while producing very different shadows. Try the more projecting option only if the ceiling border and nearby details can accommodate it comfortably.
When to compare larger crown molding
Move to a larger mock-up when the smaller one disappears from the room’s normal viewing positions or looks unrelated to substantial surrounding trim. This can happen in a wide living room, a long dining room, or an open-plan space with large windows and tall cabinetry.
If the design calls for a broad classical cornice, measure the complete arrangement. An extra molding below the main crown, a frieze, and a ceiling component all contribute to the apparent size. Adding their individual catalog widths will not necessarily give the installed total because components may overlap.
When large crown still looks wrong
A narrow 8-by-10-foot study can have a 10-foot ceiling and still feel crowded by deep, heavily articulated trim. The ceiling is tall, but the viewer remains close to its edges. A taller, shallow profile may work better than a shorter one with a broad projection.
Similarly, crown that nearly touches window casing or wraps awkwardly around built-ins can look forced. Adjust the entire composition before enlarging the profile. Crown molding for high ceilings should establish a convincing upper boundary while leaving the other architectural features room to read.
STAVROS Crown Molding Examples for a 10-Foot Ceiling
A90V2: a taller, shallow outline
A90V2 is listed at 3.54 × 1.06 inches. This 3.5-inch crown molding is a useful comparison when you want more wall height while retaining a modest horizontal reach. It also provides a clear next step from L1902S: the listed vertical dimension increases, while the horizontal dimension stays the same.
A100: a more projecting alternative
A100 measures 3.94 × 2.09 inches. The 4-inch crown molding profile has a substantially greater ceiling reach than A90V2, despite adding only about 0.4 inch of height. Its horizontal dimension is almost twice as large.
This comparison shows why rounding both products to “about 4 inches” loses useful information. Test A90V2 if keeping the ceiling edge shallow is a priority. Compare A100 when you want a more pronounced transition and have room for its projection. The larger outline is a design option, not an automatic upgrade.
What Size Crown Molding for 12-Foot Ceilings?
For a 12-foot ceiling, begin by comparing a substantial single profile around 5–7 inches of installed wall height if you want the crown to read clearly as an architectural feature. That is a mock-up range, not a minimum. A narrow room may need less visual weight, while a broad formal space may call for a larger built-up treatment.
Why small crown molding can disappear
At greater height and viewing distance, a small decorative profile can lose its individual details. The overall outline remains visible longer than tiny beads or closely spaced grooves. If the purpose is to frame a large ceiling, adding fine ornament to an undersized profile may not create the presence you want.
Assess the sample from the entry, the main seating area, and across the room. A small profile may look acceptable directly beneath it but barely register from the sofa. Conversely, a deliberately subtle perimeter can be entirely appropriate in a minimalist interior. Decide whether visibility or understatement is the goal before calling a molding too small.
Scale first, ornament second
Start with the overall wall drop and projection, then choose the decorative shape within that footprint. A broad, legible curve may work better at a distance than numerous small details. The size of the individual steps, coves, and flat bands should be evaluated along with the external dimensions.
For large crown molding for high ceilings, consider how the entire room is organized. Tall openings, wall paneling, a major fireplace, and a substantial ceiling fixture can establish the scale that the crown needs to complete. Avoid enlarging only the crown while leaving the rest of the trim visually unrelated.
A great room and a narrow room are different problems
A hypothetical 20-by-24-foot great room has broad ceiling planes and long viewing distances. A clear, substantial border may help frame that volume. A 7-by-14-foot foyer with the same 12-foot ceiling keeps viewers much closer to the walls and concentrates attention on the upper perimeter.
The foyer may benefit from a taller but shallower profile, particularly if a deep projection would create a strong tunnel-like border. The great room may justify a broader cove or a coordinated multi-piece cornice. Compare each composition at full size instead of treating all 12-foot ceilings as the same setting.
If a 5-inch crown molding sample still looks too slight in the larger room, do not assume that a more ornate version will solve the problem. Test a larger total outline and decide whether a single profile or a designed build-up better serves the architecture.
STAVROS Crown Molding Example for a 12-Foot Ceiling
A130 is listed at 5.12 × 2.56 inches, with a length of 78.74 inches. This 5-inch crown molding profile offers a substantial reference for comparing scale beneath a 12-foot ceiling.
Its greater wall height and projection distinguish it from A100, but its suitability still depends on the room. Test its outline against the longest wall and beside the largest opening. In a narrow foyer, also look along the ceiling edge from close range to assess the horizontal reach.
A130 is a starting candidate for this scale of room. A large, formal great room may need a bigger overall composition; a quiet contemporary room may intentionally use a smaller detail.
Ceiling Height Alone Does Not Determine Crown Molding Size
Crown molding belongs to the room’s complete trim arrangement. To choose its size well, look at the geometry of the space and the features it will meet. A quick sketch of each wall can reveal more than another hour of comparing isolated product photographs.
Room width and length
Width changes how close the opposite ceiling edge feels. Length changes the sightlines along the room and the visual importance of a continuous run. A 10-by-20-foot room and a roughly square room with the same floor area should not automatically receive identical crown.
Evaluate long views as well as the room’s center. A restrained profile can make a strong continuous line over a long run; a deep border may become more prominent when repeated on both sides of a narrow space.
Doors, windows, and remaining wall height
Measure from the ceiling to the highest point of the finished casing. Subtract the proposed crown drop to find the remaining plain wall band. Repeat this check above every opening, because the tightest location may determine whether a profile can run consistently around the room.
Baseboards and wall paneling
Crown does not have to match baseboard height inch for inch. Baseboards sit in a different visual plane and interact with flooring, furniture, and door casing. Instead, compare their overall weight: broad plain surfaces, deep curves, fine grooves, and color contrast.
Where paneling is present, include its top rail and any cap molding in the sketch. A wide crown and a tall paneling cap can crowd the wall if the space between them is too compressed.
Built-ins, open plans, and viewing distance
A built-in bookcase can become part of the ceiling composition, while an uninterrupted open plan makes several functional areas visible together. Decide which edges should align and where trim can change or terminate naturally.
Finally, consider standing and seated views. The molding’s appearance beside a ladder tells you little about its effect from a dining chair or across a great room. Choose for the room as it will be occupied.
Crown Molding Height vs. Projection: Which Matters More?
Height controls the band of wall the molding occupies. Projection controls its reach across the ceiling. Neither consistently matters more; the limiting condition in your room decides which deserves priority.
If tall window casing leaves little upper-wall space, wall drop may be the constraint. If curtain hardware or another ceiling feature sits close to the perimeter, projection may be the constraint. In a room with generous clearance in both directions, the decision becomes more about proportion and the desired shadow line.
The STAVROS examples make the distinction concrete. A70V1 measures 2.76 × 0.83 inches, L1902S measures 3.15 × 1.06 inches, and A100 measures 3.94 × 2.09 inches. From L1902S to A100, the vertical dimension increases by 0.79 inch, while the horizontal dimension increases by 1.03 inches. The change in ceiling reach is proportionally much greater.
Likewise, L1902S and A90V2 share a listed projection of 1.06 inches despite their different heights. You can therefore compare more wall coverage without assuming a deeper ceiling border. These relationships are visible in the cross section even when product photographs make the profiles look similar in scale.
For your shortlist, draw two perpendicular lines representing wall and ceiling. Mark each candidate’s drop on one line and projection on the other. This simple footprint comparison reveals how much space the installed molding occupies; an actual sample then shows the profile and shadows within that footprint.
Use that drawing to compare mounting positions accurately. A profile installed below the ceiling, reversed, or at a different angle is a different arrangement. Its clearances and attachment must be checked for that specific use.
Does Crown Molding Make a Ceiling Look Lower?
Crown molding can emphasize the ceiling boundary, but its effect depends on the whole composition. A strong contrast line, a broad projection, and deep shadows can make that boundary more conspicuous. A restrained profile in a closely related color may create a gentler transition.
Separate the physical change from the visual impression. Crown occupies the perimeter; it does not lower the central ceiling plane. However, a dark or heavily articulated band can draw attention to the top of the walls, particularly in a small room with an 8-foot ceiling.
Matching the crown to the ceiling can make it read as part of the ceiling border. Matching it to the wall can soften its lower edge. Neither treatment guarantees a taller-looking room, because light, sheen, projection, and neighboring surfaces still affect the result.
Test the intended paint relationship, not just the unpainted sample. A white sample against a dark wall may seem too strong even though the finished crown will be painted to match the wall. Conversely, a subtle white-on-white display can understate how prominent the profile will become in a contrasting scheme.
Check the mock-up during daylight and under the fixtures used in the evening. Light grazing across the profile may reveal deep shadows that are absent under diffuse daylight. If the perimeter feels heavy, compare a shallower profile, simpler detailing, or a different color relationship before rejecting crown molding entirely.
Smooth vs. Ornate Crown Molding: Why Style Changes Perceived Size
Two moldings with the same height and projection can carry different visual weight. The shape inside that outline determines where light catches and where shadows collect. That is why proper crown molding size includes both dimensions and profile design.
Smooth modern profiles
A smooth cove or a few broad steps can produce an orderly ceiling edge with relatively little visual activity. In a modern interior, this may allow a more substantial profile without making the room feel highly decorated. Even so, a large smooth projection can create a strong shadow, so simplicity does not make size irrelevant.
Traditional profiles
Traditional crown often combines concave curves, convex curves, and flat bands. These can relate naturally to paneled doors, substantial casing, or a detailed mantel. Compare the scale of those features: a crown with very fine grooves may look unrelated to trim built from broad, simple shapes.
Deep ornament
Ornate crown molding adds pattern as well as relief. In a small room, closely spaced detail can make the perimeter feel busy. At a high ceiling, very small ornament may lose its definition while the main silhouette remains visible.
Choose the overall scale first and then test the decorative treatment at its intended distance. For a classic interior, a larger readable curve can sometimes be more convincing than an undersized profile with elaborate surface detail. For a minimalist room, carefully proportioned plain surfaces may provide all the character required.
Crown Molding Size by Room Type
Room function changes how the molding is viewed and which features it needs to complement. Use these scenarios to decide where to place your mock-up and which relationships deserve the closest attention.
Living room
Evaluate the crown with the fireplace, main window, and door casing visible together. A profile that looks convincing above a blank wall may appear weak beside a substantial mantel. View the sample from the sofa and from the main entrance. In a large room, test it on both a short wall and a long uninterrupted run.
Bedroom
Look from the bed, where the ceiling occupies more of the view than it does while standing. Check the relationship to a tall headboard and curtain hardware. A shallow, quieter profile can work well when fabrics and wall finishes already carry detail. If you want a decorative ceiling border, assess it from a reclined position before deciding how much projection feels comfortable.
Dining room
A dining room can support a more formal trim arrangement, but its dimensions still govern the result. Compare the crown with door heads, paneling, and any ceiling medallion. Let those elements form a coherent composition; matching the crown size directly to the chandelier’s diameter is not a useful sizing method.
Kitchen
Check the ceiling perimeter against cabinet tops, tall pantry units, and any soffit. Decide whether the room crown will meet the cabinetry or remain a separate element. The smallest available clearance may limit the profile even when the room has a relatively high ceiling.
Hallway
A hallway combines close viewing distances with long repeated edges. Moderate projection and clear geometry often make a useful starting point. Look down the entire hall, including doorways and changes in ceiling level. A decorative detail that feels calm in one corner can become insistent when repeated along both sides.
Great room and foyer
Judge a great room from its longest normal sightline, where a small profile may lose definition. In a foyer, include the view from the front door and, where applicable, the stairs. For a vaulted or tray ceiling, use the height of the wall where the crown will run; the highest point of the ceiling is not a substitute for that local measurement.
Choosing Crown Molding When the Room Has Tall Cabinets
Tall cabinets introduce a physical fit problem as well as a design question. Before selecting the room crown, measure the distance between the cabinet top and the finished ceiling at several points. Include any existing cabinet crown, riser, or filler in the drawing.
For example, a cabinet top that sits 4 inches below the ceiling does not automatically require “4-inch crown.” The listed number might describe face width, the molding may need a mounting surface, and the cabinet may already include a top rail that affects the arrangement. Compare an installed cross section with the actual gap.
Choose one clear relationship: room crown can meet a coordinated cabinet detail, continue across a designed enclosure, or terminate before a separate cabinet composition. Avoid forcing two unrelated profiles into a narrow space simply because both are labeled crown molding.
Also check moving parts. Cabinet doors and nearby hardware need to operate without contacting the trim. Where the crown projects toward an opening door, a side-view drawing can expose an interference that a front elevation misses.
After confirming the fit, judge the visual hierarchy. A tall cabinet already provides a strong vertical element. The room crown can complement it without repeating every decorative line. Resolve this junction early so the chosen profile can continue coherently through the rest of the kitchen or open-plan room.
Polystyrene Crown Molding: Why Dimensions Matter More Than Material Labels
The six HIWOOD examples in this guide are listed as polystyrene crown molding. Their size and shape determine how they occupy the wall-to-ceiling junction. The material name alone cannot tell you whether a particular profile will look restrained, substantial, modern, or traditional.
When comparing polystyrene crown molding, begin with the dimensioned section. Then check the product’s surface, finishing instructions, mounting requirements, and suitability for the intended location. A lightweight profile can still look visually heavy if it has a deep projection or strong relief.
Keep material identification specific. Polystyrene and polyurethane are different materials, even when both appear within a broader decorative-molding catalog. Advice about adhesives, paint, cutting, or fastening should be confirmed for the exact product. A technique used for wood crown should not be transferred automatically to a polymer profile.
For sizing purposes, the most valuable information is still installed height, projection, shape, and length. Material becomes decisive when you evaluate handling, the finish you want, and the required installation method. Those decisions work together, but they answer different questions.
Before ordering a large crown, discuss its support and attachment with the installer using the actual drawing. Do not select a smaller profile simply because you assume a larger one cannot be installed, or select a larger one solely because it feels light in your hand. Confirm the mounting approach, then make the scale decision in the room.
STAVROS Crown Molding Size Comparison
The following table shows how the six reference profiles differ. The height and projection correspond to their illustrated cross-sectional orientation; the inch values reproduce the catalog listings. These examples are not assigned exclusively to a particular ceiling height.
| STAVROS profile | Height / Size A | Projection / Size C | What to compare in the room |
|---|---|---|---|
| A53* | 1.46 in | 1.46 in | A compact cove with approximately equal height and projection |
| A70V1 | 2.76 in | 0.83 in | More wall coverage with a shallow ceiling reach |
| L1902S | 3.15 in | 1.06 in | A medium vertical scale with a restrained projection |
| A90V2 | 3.54 in | 1.06 in | Additional height without increasing the listed projection |
| A100 | 3.94 in | 2.09 in | A modest height increase with a much greater ceiling reach |
| A130 | 5.12 in | 2.56 in | A larger overall outline for a more substantial perimeter |
*A53’s drawing shows 37.7 × 37.7 mm, approximately 1.48 × 1.48 inches, while its inch listing shows 1.46 × 1.46. Confirm the dimensional specification before ordering. All six listings show a length of 78.74 inches.
Read across the table before reading down it. A taller profile does not always project farther: A70V1 is taller than A53 but shallower. L1902S and A90V2 share a horizontal dimension. The strongest increase in ceiling reach between neighboring examples occurs from A90V2 to A100.
This gives you a useful way to build a shortlist. If the lower edge is too faint on the wall but the ceiling border already feels wide enough, compare greater height with similar projection. If the wall coverage works but the transition lacks the depth you want, compare a more projecting section at a similar height.
Product codes should remain on every sketch and sample. “The 3-inch molding” is not specific enough when several products have a similar rounded size. Record both dimensions, the exact profile, and the orientation so the approved mock-up translates into the correct order.
Finally, remember the supplied length. At 78.74 inches, these pieces are approximately 6 feet 6¾ inches long, not standard 8-foot sticks. Once you choose the profile, have the installer plan individual wall runs and joints using the actual length.
Common Crown Molding Sizing Mistakes
- Buying from ceiling height alone. A recommendation for a broad 10-foot living room may be excessive in a narrow room of the same height. Add room width, sightlines, and opening heights to the decision.
- Comparing face width with installed drop. Both may be called “size,” but they describe different measurements. Read the cross section before comparing products from different catalogs.
- Treating projection as a minor detail. A change of an inch in ceiling reach can noticeably alter a shallow profile’s footprint. Check it as carefully as the vertical dimension.
- Trusting a close-up product image for scale. Catalog photos often fill the frame regardless of product size. Use the drawing and a physical mock-up to understand the actual proportions.
- Ignoring the tightest part of the room. One high window, built-in, or ceiling feature can interrupt an otherwise straightforward perimeter. Test that location before approving the longest wall.
- Assuming ornament compensates for insufficient scale. Fine details may become indistinct under a high ceiling. Compare a clearer overall outline when a small crown fails to read from across the room.
- Forcing crown and baseboards to the same dimension. Their shapes and viewing conditions differ. Match the design language and relative weight rather than applying a fixed numerical ratio.
- Approving one small offcut at eye level. A short piece reveals the surface but gives little sense of a continuous ceiling border. Combine a profile sample with a longer footprint mock-up.
- Ordering before resolving corners and terminations. A profile can look right on a straight wall and still produce a crowded junction beside cabinetry. Include one representative corner in the review.
There is no single set of standard crown molding sizes that makes these checks unnecessary. Catalog dimensions are useful purchasing information; proportion is a decision made in the actual room.
How to Test Crown Molding Size Before You Buy
A full-size mock-up is the most direct way to turn general sizing advice into a decision. Use two or three noticeably different candidates so the comparison tells you something useful.
- Measure the finished ceiling height. Work from the final floor surface. Where the ceiling changes level, record the height at the wall where each run will be installed.
- Record the room and trim dimensions. Note width, length, casing height, baseboard height, cabinet clearances, and the distance from the ceiling to the highest opening.
- Draw each candidate’s installed footprint. Use the manufacturer’s section to identify the vertical drop, horizontal projection, and mounting orientation. Label the profile code and dimensions.
- Make a full-size trial. Cardboard or another lightweight template can represent the height and projection. Extend the mock-up roughly 24–36 inches along the wall so you can see more than a tiny isolated shape. Check the scale with a ruler if you print a drawing.
- Test a corner and a constrained location. Include the area above a window or beside a built-in. A straight run alone will not reveal how the profile occupies an inside corner.
- View it from normal positions. Compare from the doorway, the center of the room, and a usual seated position. In an open plan, walk through every connected area.
- Check the finish and lighting. Use an actual sample to assess detail, sheen, and shadow. Cardboard tests the footprint; it cannot reproduce the finished surface or exact relief.
For crown molding samples, ask STAVROS about the exact HIWOOD profile you are considering. The STAVROS Samples & Catalogs section provides a starting point for available presentation materials, but its listed resources also cover other decor families. Confirm the sample’s material and profile rather than assuming a general decor sample represents your selected crown.
Photograph each mock-up from the same location, with the same framing, and label the images. This makes it easier to compare candidates later with your installer. Keep the dimensions beside the photograph so an attractive image cannot become detached from the specification that produced it.
How to Choose a STAVROS Crown Molding Profile
Begin with the ceiling height, then define the result you want: a subtle transition, a clear architectural border, or a substantial decorative composition. Use room width, viewing distance, and the surrounding trim to decide how strongly the crown needs to read.
Next, shortlist profiles by height and projection together. Compare a shallow and a more projecting option if you are uncertain about visual weight. Keep the profile shape appropriate to the interior, whether that means smooth modern trim, a transitional cove, or more traditional detailing.
Before you buy crown molding, confirm the exact product code, dimensional drawing, intended mounting position, material, supplied length, and finish requirements. Then approve a mock-up in the room. If several rooms connect, make that approval with their shared sightlines in view.
When reviewing crown molding for sale, separate the scale decision from quantity planning. Choose the profile first; then measure every run, plan joints and terminations, and allow for the cuts your layout requires. Confirm current availability and delivery arrangements for the destination before finalizing the order.
Frequently Asked Questions About Crown Molding Size
What size crown molding should I use?
Start with ceiling height, then compare installed wall drop and ceiling projection in the room. Room width, viewing distance, existing trim, and the desired style can change the answer. Select two or three profiles with different footprints and test them at the ceiling junction. Confirm what each catalog means by width or height before comparing the numbers.
What size crown molding is best for 8-foot ceilings?
For a restrained single-profile treatment, try approximately 2–3½ inches of installed wall height as an initial comparison range. A compact detail can be smaller, while a broad traditional room may support more. Projection is especially worth testing at this height. Check the space above doors and windows before selecting a profile for the entire perimeter.
What size crown molding should I use with a 9-foot ceiling?
Begin by comparing medium profiles around 3–4½ inches of installed height for a simple design. A quiet bedroom may favor the smaller end, while a spacious living area may justify more presence. In an open floor plan, evaluate the crown across the connected space and at the cabinet junctions before making the final choice.
What size crown molding should I use with a 10-foot ceiling?
A practical first comparison is roughly 3½–5½ inches of wall coverage for a single profile. That range is a mock-up starting point, not a rule. A large formal room may need a bigger overall composition. A narrow study may work better with a taller, shallow profile than with a deep, heavy cove.
What size crown molding works with a 12-foot ceiling?
Compare substantial profiles around 5–7 inches of installed height when you want a clearly visible architectural border. A large formal great room may require a broader built-up treatment. A narrow foyer or deliberately understated interior may use less. Test the outline from the longest regular viewing distance rather than judging detail from directly underneath.
Is 4-inch crown molding too large for an 8-foot ceiling?
It can work, particularly in a larger room with compatible trim, but first establish what “4-inch” measures. Four inches across the molding’s face is different from a 4-inch installed wall drop. Compare projection, remaining space above openings, and color contrast. A room mock-up is more informative than treating 4 inches as an automatic limit.
Can crown molding be too small for a high ceiling?
Yes, if the intended architectural line becomes indistinct from normal viewing positions. A fine profile may look convincing in a close-up photograph and disappear across a great room. However, a subtle finish can also be intentional. Decide how visible the crown should be, then test its overall outline before adding more ornament.
How is crown molding size measured?
Measure installed height vertically down the wall and projection horizontally across the ceiling. Catalogs may also state face width, material thickness, and stock length. These dimensions are not interchangeable. A cross-sectional drawing showing the intended mounting position is the clearest way to identify which measurement describes the wall coverage you need.
Is crown molding height the same as projection?
No. Height is vertical wall coverage; projection is horizontal reach from the wall. Some profiles have similar dimensions in both directions, while others are tall and shallow. A molding around 3 inches high might project only about 1 inch. Compare both measurements because they affect different clearances and different parts of the room’s appearance.
Should crown molding match baseboard size?
It should relate to the baseboards, but it does not need the same numerical height. Compare the amount of detail, the scale of curves and flat bands, and the visual weight of the complete trim arrangement. Include door casing and paneling in that assessment. Equal measurements alone do not guarantee compatible proportions.
Does large crown molding make a room look smaller?
It can make the perimeter feel more prominent, especially with deep projection, strong contrast, or busy relief. The effect depends on room proportions and lighting. A broad, simple profile in a related color may feel calmer than a smaller ornate one. Test the intended paint relationship as well as the physical dimensions.
Should crown molding size change in an open floor plan?
A continuous ceiling perimeter generally benefits from a consistent profile. If different sizes are needed, place the transition at a clear architectural break and plan how each molding terminates. Select the common profile using the whole connected space, including the longest sightline and the tightest cabinet or window clearance.
Choose the Profile That Works in Your Room
The useful answer to what size crown molding you need is a short list of profiles that fit your room, followed by a full-size comparison. Ceiling height narrows the search. Installed height, projection, room dimensions, surrounding trim, and viewing distance tell you which candidate works.
Keep the approved cross section with your measurements and photographs. That gives your installer a clear reference and helps ensure the order matches the design you tested.
Explore the STAVROS crown molding profiles, compare their actual dimensions, and bring two or three candidates into the room before choosing. The best result is a ceiling edge that feels deliberately proportioned from the places where you will see it every day.
How to match a ceiling cornice with a floor skirting board
The cornice completes the wall at the top, the skirting board at the bottom. It is useful to choose them together, but matching height is not a mandatory condition. These elements are in different planes of view, interact differently with furniture, and create different shadows.
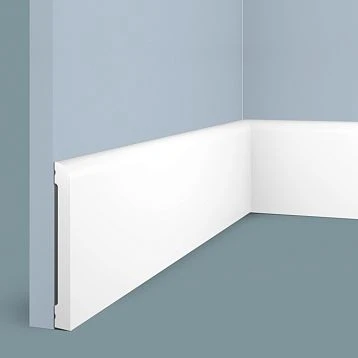
For example, a wide smooth skirting board 120 mm high can be combined with a lower cornice. The difference in size itself does not mean imbalance. Look at whether they support each other in form: wide calm surfaces, clear steps, or the character of the curves.
When comparing, be sure to include door casings. They are what connect the upper and lower parts of the wall in the overall perception. If the casing is thin and laconic, while two complex massive profiles appear next to it, such a difference may be more noticeable than a mismatch in their height.
Consider which part of the skirting board will remain visible after furniture is arranged. On an empty wall it looks like a continuous strong line; behind a sofa, wardrobe, and chest of drawers only separate sections are visible. The cornice, meanwhile, usually remains visible along most of the perimeter and may be perceived more actively.
With wall moldings, the check becomes even more important. First, position the frames and determine the offset from their upper edge to the cornice. Then assess the distance from below to the skirting board. These gaps should look like part of the intended wall design, not leftovers between randomly chosen products.
A convenient way to check is to draw one wall with a door to scale and mark all the profiles on it. Make two versions with different cornices while keeping the other elements the same. This way you will see the influence of the upper line without having to mentally change the entire interior.
If the existing skirting boards and casings remain, use them as a starting point. The new cornice can be more restrained or more expressive, but a connection in form and color will help avoid the feeling that the top and bottom of the wall were designed independently.
Polystyrene cornice: how profile dimensions influence the choice
All seven HIWOOD models reviewed in the article are designated in the catalog as polystyrene. They differ in geometry and help compare several scales of ceiling framing. The material name itself does not suggest which size will be suitable for your room.
Considering polystyrene cornices, first match the height, projection, and cross-section shape. Then clarify the installation method, base requirements, and finishing. This way you will sequentially solve two tasks: how the product will look and how to properly secure it in specific conditions.
A small weight of a decorative element does not mean a small visual volume. A deep protruding profile can look massive regardless of how easily the sample can be held in the hand. Conversely, a tall shallow cornice can be perceived as fairly calm.
Polystyrene and polyurethane are different materials. For the selected product, check the recommendations for adhesive, paint, joint treatment, and surface preparation. The name of the general category of decorative elements does not replace the characteristics of a specific model.
Before buying a polystyrene cornice for the entire room, coordinate the exact selected cross-section with the installer. It is important to understand where the support areas are located, how the corners are finished, and how the profile ends near furniture. With a stretch ceiling or a non-standard base, the compatibility of the solution should also be clarified before ordering.
This order helps avoid a situation where the model has already been chosen by appearance, but its placement requires a different size or a different adjoining scheme. Size, shape, and installation must correspond to the same design option.
Comparison of STAVROS ceiling cornice sizes
The table contains seven profiles where it is convenient to see different proportions. Height and projection are shown for the position presented in the product diagrams. No row means that the model is intended exclusively for a certain room height.
| Model | Height, size A | Projection, size C | What is convenient to check |
|---|---|---|---|
| A53* | 37.7 mm | 37.7 mm | Compact trim with roughly equal dimensions |
| A70 | 50 мм | 50 мм | Increase of both the wall and ceiling parts |
| A70V1 | 70 мм | 21 мм | A taller band on the wall with a small projection |
| L1902S | 80 мм | 27 мм | Medium scale with a moderate ceiling part |
| A90V2 | 90 мм | 27 мм | Additional height without increasing the projection |
| A100 | 100 мм | 53 мм | A more voluminous wall-to-ceiling transition |
| A130 | 130 мм | 65 мм | Large profile with noticeable height and a horizontal part |
For A53, the dimensions are taken from the name and the diagram. The product page specification table lists 37 × 37 mm; before precise fitting, the size should be verified. The rod length for all seven models on the product pages is 2000 mm.
The table shows why the word "larger" needs clarification. A70V1 is taller than A70, but its projection is less than half. L1902S and A90V2 differ in vertical dimension while having the same horizontal dimension. A100 noticeably increases the ceiling portion.
For the first pair of samples, choose the differences that match your task. If it is important to keep the ceiling plane free, compare models with a small projection. If you need to create a more voluminous transition, compare the arc shape and horizontal dimension at a similar height.
The rounded label "80 mm cornice" is suitable for an initial search. For purchase, you need the full product code and both dimensions. Be especially careful to distinguish between A70 and A70V1: similar-sounding codes do not make these models interchangeable.
Save the selected diagram next to the fitting photo. Then, when calculating the quantity, coordinating with the installer, and placing the order, it will be clear which exact product you approved. This is more useful than trying to reconstruct your choice later from a similar image in the catalog.
Common mistakes when choosing the size of a ceiling cornice
- Choosing strictly by ceiling height. The table helps you find initial options, but it does not account for a narrow room shape, tall windows, or furniture. Check the constraints that actually exist in the space.
- Calling both height and projection by the single word "width." Write down two separate numbers. This is especially important when discussing your choice with a seller or installer without the sample itself in front of you.
- Judging size from a large photo. In a catalog, a compact model and a large model may occupy the same image area. Scale is determined by the dimensions on the diagram, and the impression is clarified in the room.
- Checking only the free wall. Above a window or next to a wardrobe, the same cornice may leave too tight a gap. Start your inspection with the most difficult spot.
- Increase all parameters at once. If there is not enough height on the wall, first compare a taller profile with a similar projection. This makes it easier to see which change is actually needed.
- Compensate for the small scale with ornament. At a large distance, a small pattern loses clarity. If a noticeable contour is required, check the overall dimensions and large section lines.
- Forgetting about future painting. A white sample on a contrasting wall may look completely different than after finishing. Try on the chosen color combination.
- Not coordinating the baseboard and casings. The dimensions do not have to match, but the character of the profiles should support the overall composition of the wall.
- Ordering the entire volume based on a short sample. A small piece shows the material and texture. To evaluate a continuous line, add a long template and look at it from normal viewing positions.
If something does not appeal to you during a trial fit, formulate the reason: too wide a ceiling band, a tight gap, a weak contour, or strong shadows. Such a formulation will allow you to choose the next sample meaningfully, without going through all the sizes one after another.
How to check the size of a cornice before purchasing
For a preliminary assessment, a tape measure, a profile diagram, and a full-size template are enough. If you can obtain a sample of the desired model, use it to check the shape and future painting. Paper shows the dimensions well, but it does not reproduce the exact texture and character of the shadows.
- Measure the finished height. Record the distance from the finished floor to the ceiling. If there are level differences, measure separately each section where the cornice will run.
- Write down the length and width of the room. Mark niches, protrusions, cabinets, and tall openings. Find the tightest place for the future profile.
- Match the existing finish. Measure the baseboards, casings, and wall frame offsets. Take a photo of the entire wall so all elements are visible together.
- Choose two or three profiles. Make sure they differ noticeably in the relevant parameter: height, projection, or shape. Nearly identical samples are less helpful for understanding the direction of your choice.
- Prepare a template. Mark the vertical and horizontal boundaries of the profile according to the drawing. If you print the diagram, check the scale with a ruler: the "fit to page" setting may change the size.
- Show an extended section. Extend the reference strip by about 60–90 cm. A short end helps convey the cross-section, while a long section gives a sense of the line around the perimeter.
- Check the corner and adjacency to the opening. Compare how much space remains above the casing and how the two lines meet at the corner. If necessary, make a separate corner mockup.
- Look from several points. Step back to the entrance, sit on the sofa or bed, and assess the view through open doors. Then repeat the check under evening lighting.
Photograph the options from the same spot and under the same lighting. Note the product code and dimensions directly in the photo notes. This way you can compare proportions without errors caused by a different angle or zoom.
After making your choice, leave the diagram with the installer along with the indicated profile position. If installation requires shifting the curtain rod or finishing the junction differently, recheck the changed dimensions. The approved size must correspond to the solution that will actually be installed.
How to choose a STAVROS curtain rod: a step-by-step algorithm
Once the trial fitting is complete, the choice can be turned into a clear list for ordering. First, finalize the model, then calculate the quantity and materials for installation.
Step 1. Define the task. Write down the room height, its dimensions, and the desired impression: a calm line, a pronounced transition, or a large decorative composition. This will help maintain the logic of your choice if you need to compare a replacement.
Step 2. Lock in the profile. Specify the product code, height, projection, plank length, and installation position. Attach the approved photo or diagram. The wording "wide white cornice" is not enough for an accurate order.
Step 3. Mark out all sections. Measure the walls along the line of future installation, including protrusions and returns. A doorway is not subtracted if the cornice runs continuously above it. If the line breaks at furniture, mark the end point.
Step 4. Calculate the planks and joints. For example, the perimeter of a rectangular room 3 × 4 m is 14 m. With a product length of 2 m, that gives seven planks, but this is only the arithmetic minimum without accounting for cuts, trimming, and joint placement. The final quantity is determined by the cutting layout of individual sections.
Step 5. Agree on the allowance and finish. The allowance depends on the number of corners, short segments, pattern repeat, and installation experience. Confirm the compatible adhesive and paint, as well as the materials needed for the joints. A single conventional percentage does not replace a specific work plan.
After that, you can buy a ceiling cornice, checking the order against the selected profile. In the STAVROS catalog, compare Ceiling Molding by full specifications and check the current order terms. It is more convenient to settle all dimensional questions before purchasing, while changing the model does not affect installation.
Frequently asked questions about ceiling cornice size
What size ceiling cornice should I choose?
Start with the ceiling height, then compare the profile height and its projection. Take into account the shape of the room, the area, the viewing distance, and the free space above windows and doors. Choose two or three options and attach templates at the installation location. This sequence allows you to determine the suitable size for a specific interior, not for a conventional room from a table.
What width should a ceiling cornice be?
First, clarify which width you mean: the vertical band on the wall, the horizontal projection, or the size of the front surface. These parameters differ. For selection purposes, it is more useful to record the height and projection as two numbers. For example, 80 × 27 mm describes the geometry more precisely than the general label “80 mm wide cornice.”
Which cornice should I choose for a 2.5-meter ceiling?
For a first fitting, you can take profiles approximately 35–60 mm high. These are starting options, not a mandatory limit. In a small room, check the projection and the density of the relief especially carefully. In a spacious living room, it is acceptable to compare a taller profile if it maintains suitable clearances and coordinates with the rest of the finish.
What cornice size is suitable for a 2.7-meter ceiling?
Start with 50–80 mm and compare several sections. For a calm bedroom, a compact option may be enough; for a spacious living room, it is worth additionally considering 70–90 mm. In a combined kitchen-living room, evaluate the entire continuous perimeter. The size should suit both the overall volume and the tight areas near furniture.
Which cornice should I choose for a 3-meter ceiling?
For a single profile, it is convenient to start with a height range of 70–100 mm. In a large room, also compare a larger option if the contour is hard to read from a normal distance. In a small study, a high ceiling does not require a massive cornice: a shallow section may better preserve the calm proportions of the upper part of the room.
Which cornice is suitable for 3.5-meter ceilings?
As initial samples, you can consider profiles 80–130 mm high. In a spacious formal room, a larger scale or a composite composition may be needed. In a narrow room, it is more important to carefully check the projection. The final size is determined by the view from the entrance, from the main places in the room, and near tall openings.
Can a wide cornice be used with a low ceiling?
Yes, if its dimensions and shape suit the room. Compare the free space above the windows, the projection onto the ceiling, the number of details, and the color contrast. A tall, shallow profile sometimes looks calmer than a lower but strongly protruding one. A mock-up should show the future finish and a sufficiently long section of the line, not just a small sample.
What matters more — the height or the projection of a ceiling cornice?
It depends on the constraint. Above a tall architrave, height may be decisive, while next to a ceiling element or in a narrow room, projection is. Both dimensions affect the appearance. If it is unclear from the mock-up what to change, compare one parameter first while keeping the second similar: this makes it easier to see the cause of the difference.
How is a ceiling cornice measured?
Height is measured vertically from the ceiling to the lower edge of the installed profile. Projection is measured horizontally from the wall to its outer point. The length of the strip is specified separately. For an accurate comparison, use a cross-section diagram with the intended installation position. Measuring the slanted front surface does not replace the height on the wall.
Is a 100 mm cornice a large size or a medium one?
Without the second dimension and the room parameters, the answer will be incomplete. A 100 × 30 mm profile and a 100 × 60 mm profile occupy the same height of the wall but a different band of the ceiling. In a small bedroom, 100 mm may appear large, while in a spacious, tall hall it may look fairly restrained. Compare real cross-sections on site.
Should a ceiling cornice be the same height as the baseboard?
No, equal dimensions are not required. It is more important to coordinate the shape, the number of details, and the relative visual weight. Include door architraves and wall moldings in the comparison. They help connect the upper and lower parts of the wall. It is useful to evaluate the cornice and baseboard on a general layout where the furniture and free sections of the trim are visible.
How can you tell that a cornice is too large for the room?
Check whether the ceiling strip is becoming the main focal point without that being the intent, whether the profile is crowding the windows and cabinets, and whether it is overloading the corners. Then compare a more compact or less protruding option. Sometimes the issue lies in contrast and relief, so it is worth checking not only a reduction in external dimensions.
From the right size to a specific model
Select several profiles based on the room height, and make the final decision after checking their geometry in the room. A convenient result of such a check is a labeled cross-section diagram, a fitting photo, and clear dimensions of the free gaps above the openings.
With this data, it is easier to coordinate the cornice with the installer, compare similar models, and calculate the purchase. If the wall finish, cabinet position, or ceiling level changes, return to the relevant measurement before starting installation.
A well-chosen decorative ceiling cornice completes the interior from the points where you see it every day. Checking the sample in those exact places helps turn a general ceiling height recommendation into a conscious choice for your room.