Article Contents:
- What Is Cabinet Crown Molding?
- Cabinet crown molding vs. ceiling crown molding
- Where crown molding belongs on cabinetry
- What the molding actually changes
- Directly at the cabinet top
- Above the face frame
- Over a filler, fascia, or riser
- Against the ceiling or around a tall unit
- Start with cabinet height, then test the whole assembly
- Measure installed height, projection, and face width separately
- Include any forward offset
- When small crown molding works better
- Double-door cabinets and long runs
- Hoods, refrigerator surrounds, and pantries
- A useful example for an 8-foot ceiling
- Calculate the crown’s actual rise
- Plan the ceiling transition before installing the cabinets
- Keep the cabinet line level
- Choose a filler or a deliberate open separation
- A 2–4-inch gap
- A 6–12-inch gap
- A much larger opening
- Simple stepped profiles
- Cove profiles
- Traditional multi-step crown
- Small minimalist crown
- Decorative classical molding
- MLDPU-001: a fine detail
- MLDPU-002: a stronger surface outline
- MLDPU-003: a wider furniture profile
- MLDPU-004: a compact alternative
- 1. Measure and map the cabinet run
- 2. Measure the ceiling gap in several locations
- 3. Check cabinet level and door operation
- 4. Plan corners, returns, and joints
- 5. Fit the required support or riser
- 6. Make test cuts
- 7. Cut the first pieces
- 8. Dry-fit the assembly
- 9. Attach the profile using the specified method
- 10. Finish joints and fastening points
- 11. Complete the finish and final check
- Inside corners
- Outside corners and end returns
- Depth changes and non-square walls
- Choosing from a photograph without checking the section
- Judging each cabinet box separately
- Forgetting that doors need room to move
- Trying to absorb an uneven ceiling with the decorative profile
- Combining room crown and cabinet crown without a transition
- Using a surface molding as structural crown support
- Cutting the whole order before fitting the first corner
- Omitting returns, finish work, and usable stock lengths
- Calculate usable pieces, not just linear footage
- What is cabinet crown molding?
- What size crown molding should I use on kitchen cabinets?
- How big should crown molding be on upper cabinets?
- Can you put crown molding on existing kitchen cabinets?
- How do you attach crown molding to cabinets?
- Does cabinet crown molding have to touch the ceiling?
- How do you install crown molding when cabinets go to the ceiling?
- What do you put between kitchen cabinets and the ceiling?
- Can crown molding hide a gap above cabinets?
- What type of crown molding is best for kitchen cabinets?
- What crown molding works with Shaker cabinets?
- Can modern kitchens use crown molding?
- What is the difference between cabinet crown molding and ceiling crown molding?
- Should cabinet crown molding match room crown molding?
- Straight kitchen set
- L-shaped and U-shaped kitchen
- Outer corner of a tall cabinet
- Transition to a deeper cabinet
- 1. Check the level of the cabinets
- 2. Take measurements
- 3. Lay out the parts and identify the joints
- 4. Prepare the base for mounting
- 5. Make a test cut
- 6. Trim the main parts
- 7. Do a dry fit
- 8. Secure the cornice
- 9. Finish the joints
- 10. Complete the finishing and inspection
- Turn to the side panel
- Short profile return
- Wall junction
- Rely only on the photograph
- Check the height and forget about the overhang
- Choose too large an end piece
- Try to close the entire gap with one profile
- Not check the ceiling and door movement
- Mix different types of decor
- Forget about end faces and depth differences
- Cut the entire set in advance
- Why total footage is not enough
- How to determine the stock
- What is the cornice above kitchen cabinets called?
- What is the upper cornice in the kitchen for?
- What size furniture cornice should I choose?
- How high should the cornice above kitchen cabinets be?
- Can a cornice be made if the cabinets reach the ceiling?
- How to cover the gap between kitchen cabinets and the ceiling?
- How to attach a furniture cornice?
- How do you join a furniture cornice at the corners?
- Which is better for the kitchen — solid wood or MDF?
- Can the cornice be painted to match the facade color?
- Do you need a cornice on a modern kitchen?
- How does a furniture cornice differ from a ceiling cornice?
- Can molding be used instead of a furniture cornice?
- How do you finish the end of a cornice?

Cabinet crown molding finishes the upper edge of your cabinetry. It can give a row of wall cabinets a clear top line, connect a pantry to neighboring cabinets, or complete an enclosure that reaches the ceiling. Choosing crown molding for kitchen cabinets starts with the cabinet itself: its height, door position, available mounting surface, and distance from the ceiling.
That makes this a different project from installing crown around a room. Room crown meets a wall and ceiling. Cabinet crown may sit on a face frame, attach to a separate riser, wrap exposed cabinet ends, or stop below the ceiling with open space above it. Each arrangement changes how much of the profile is visible and where it needs support.
The best size is therefore the one that fits the assembly and looks balanced across the finished cabinet run. A profile that looks right in a photograph may project too far over your doors. A trim labeled “3-inch crown” may not rise 3 inches above your cabinet once its mounting overlap is included.
This guide explains how to measure those differences, compare styles, handle ceiling gaps, and plan installation. Dimensions are given primarily in inches for U.S. projects, with original metric measurements retained where they identify specific STAVROS products.


What Is Cabinet Crown Molding?




Cabinet crown molding vs. ceiling crown molding
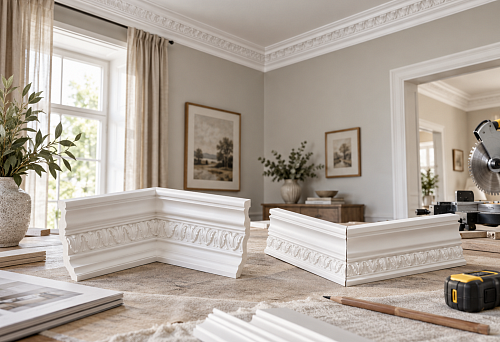
Cabinet crown molding is decorative trim at the top of a cabinet or cabinet assembly. Its lower edge relates visually to the doors and finished sides. Its upper edge can meet the ceiling, sit against a soffit, or remain exposed beneath an open gap.
Ceiling crown molding follows the room perimeter. Its proportions relate to the walls, ceiling height, and surrounding architectural trim. The two applications sometimes use similar shapes, but a shared appearance does not establish a shared mounting method. A ceiling profile designed to bear against two surfaces needs a suitable support arrangement when transferred to cabinetry.
Наша фабрика также производит:


Смотреть весь Каталог продукции
Where crown molding belongs on cabinetry
Typical locations include upper wall cabinets, tall pantry units, refrigerator surrounds, and built-ins next to the kitchen. A decorative hood enclosure can also have its own crown. Base cabinets and the bottom edge of upper cabinets involve different trim details and should be planned separately.
On a continuous run, the crown usually reads as one long element even when several individual cabinet boxes sit below it. Where cabinet heights or depths change, that line needs a deliberate return, step, or stopping point.
Получить консультацию
What the molding actually changes
A crown creates a finished upper boundary and adds shadow above the doors. Combined with a riser or enclosure, it can make cabinets appear taller. It can also conceal a small, properly detailed transition to the ceiling. The trim itself does not create storage, level uneven cabinets, or supply missing structural support.
Think of kitchen cabinet molding as part of the cabinet elevation. Its job is to make the top look resolved from the front, from the side, and from the places where you normally enter or sit in the room.
Crown Molding for Kitchen Cabinets: Where Should It Go?
Directly at the cabinet top
Some cabinet systems provide a suitable upper rail, integrated mounting foot, or matching starter molding. In those systems, crown molding on top of cabinets can be straightforward. Verify the intended attachment point in the cabinet specifications instead of assuming the top edge of every box is a usable fastening surface.
Above the face frame
A face frame is the framework around the front of a cabinet box. With partial-overlay or inset doors, some of the upper frame may remain visible. That can create room for a trim detail, but the available rail width and door clearance still need checking.
Full-overlay doors cover much more of the cabinet front. There may be too little exposed frame for direct attachment. Frameless cabinetry requires its own mounting detail because there is no face frame to use. In either case, a cabinet-compatible top cleat or riser may provide the necessary attachment surface.
Over a filler, fascia, or riser
A riser extends the cabinet visually upward. A cleat provides a fastening surface. A fascia is the visible flat band. One assembly can combine these functions, but a thin decorative strip should not be assumed to perform all three.
Decide whether that visible band will align with the cabinet box, door faces, or applied end panels. Moving it forward changes the crown’s overall projection. Finish any exposed parts to suit the cabinetry before access becomes difficult.
Against the ceiling or around a tall unit
At the ceiling, cabinet top trim becomes a transition between a level furniture assembly and a building surface that may vary. Around a pantry or refrigerator surround, it also turns onto deeper sides. Plan those intersections before choosing the profile: a good front elevation can hide an awkward side connection.
How to Choose the Right Size of Crown Molding for Kitchen Cabinets
Start with cabinet height, then test the whole assembly
The height of an individual wall cabinet gives useful context. A 30-inch upper, a 42-inch upper, and a stacked cabinet arrangement present different amounts of door area below the crown. However, there is no single crown size that automatically belongs to each cabinet height.
Use the following dimensions to make initial mock-ups, then narrow the choice using actual clearance and the profile drawing. These are design trial sizes, not manufacturer requirements or construction standards.
| Cabinet arrangement | Installed crown height to try first | What should decide the final choice? |
|---|---|---|
| Compact run with 30-inch wall cabinets | About 1½–2½ inches | Door proportions, exposed end width, and remaining ceiling gap |
| 36-inch wall cabinets | About 2–3½ inches | Profile projection and whether a riser is needed |
| 42-inch uppers or a visually substantial run | About 2½–4 inches | Actual space above the cabinet and the total trim height |
| Stacked cabinets or a tall pantry composition | Compare a 3–4-inch crown with a smaller crown over a flat riser | The combined cap, door rhythm, and adjacent cabinetry |
A shallow, simple crown can remain effective on tall cabinetry. A smaller cabinet may support a more expressive profile when it forms part of a broad continuous run. Treat the table as a way to choose samples, not as an order specification.
Measure installed height, projection, and face width separately
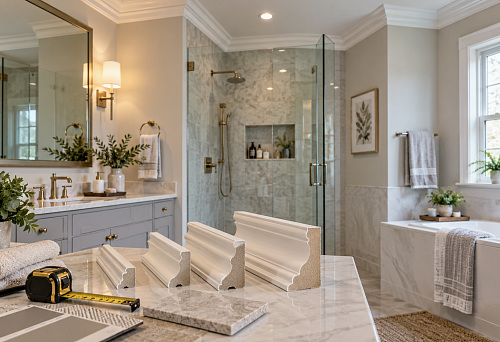
Installed height is the vertical distance between the profile’s lower and upper edges in its intended orientation. Projection is how far it extends horizontally from the mounting plane. Face width is measured across the sloping face and can be larger than the installed height.
A catalog’s “width” may describe any one of these, depending on the product. Read the cross-section drawing. Do not rotate a profile until it fits the gap unless the manufacturer permits that mounting orientation; changing the angle also changes its bearing surfaces and corner geometry.
For cabinet crown molding size, the useful number is often the amount that will rise above the box. If a crown has an installed height of 3 inches and its lower edge overlaps the cabinet by ½ inch, its top rises only 2½ inches above the box.
Include any forward offset
Suppose a cabinet is 12 inches deep, a mounting fascia sits ¾ inch forward of the box front, and the selected crown projects another 1½ inches from that fascia. Its leading edge is then 14¼ inches from the wall. That drawing tells you more about fit than the crown’s height alone.
Check the same relationship at cabinet ends, neighboring walls, windows, and hood surrounds. Use finished surfaces as your references, including applied panels and doors.
When small crown molding works better
Small crown molding for kitchen cabinets is worth testing when upper doors are short, the ceiling gap is tight, or an exposed cabinet end is narrow. It can also suit a kitchen whose main features are stone, wood grain, or strong hardware.
Make a short sample corner, not just a flat front sample. Place it above the actual cabinet and view it from the doorway and a seated position. A profile can look modest at eye level yet cast a heavy shadow when mounted overhead. Test it with the intended finish and the kitchen lights on.
Cabinet Crown Molding Proportion: Cabinet Width Matters Too
Height tells only part of the story. Crown molding proportion also depends on how much horizontal cabinet mass supports the profile visually.
Consider an isolated 12-inch-wide wall cabinet. If the crown extends 3 inches beyond each finished side, its total width becomes 18 inches. The same side extensions make a 36-inch-wide cabinet 42 inches wide at the crown. Both gain 6 inches, but the addition is much more prominent on the narrow cabinet.
This does not mean every 12-inch box in a kitchen needs smaller trim. A narrow cabinet within an uninterrupted run usually participates in the larger composition. Changing crown size at each box would break the top line unnecessarily. Judge continuous runs as a whole, then inspect exposed ends individually.
Double-door cabinets and long runs
Above a broad bank of doors, a restrained profile can create a clear horizontal line without a deep overhang. If the crown seems too weak, first compare a taller flat band beneath it. Increasing the total cap height and increasing projection are different design choices.
Hoods, refrigerator surrounds, and pantries
A wide hood enclosure may carry a larger cap than the adjoining cabinets, especially when it is intentionally taller or deeper. A refrigerator surround needs the same side-view check: its depth can make a familiar crown appear much larger from the room entrance.
A tall narrow pantry presents the opposite problem. More cabinet height does not necessarily justify a dramatically wider top. Compare the crown to the pantry’s door width and any neighboring wall space.
When reviewing cabinet crown molding ideas, sketch the complete elevation, including windows and appliances. Photographs cropped tightly around attractive trim rarely show the awkward end condition that determines whether the same profile will work in your kitchen.
How Much Space Do You Need Above Kitchen Cabinets?
Measure the distance from the cabinet box top to the ceiling at several points along the front and each exposed side. Record both the smallest and largest gaps. A single measurement in the middle of the run can miss a ceiling dip at an end.
A useful example for an 8-foot ceiling
Assume, for illustration, that the cabinet bottoms are installed 54 inches above the finished floor. That might result from a 36-inch counter and an 18-inch space above it, but your counter, appliances, and cabinet plan may require different dimensions. With a level 96-inch ceiling, the arithmetic is:
| Upper cabinet height | Cabinet top elevation | Box-to-ceiling gap | Planning implication |
|---|---|---|---|
| 30 inches | 84 inches | 12 inches | Evaluate an open gap, a constructed enclosure, or additional cabinetry |
| 36 inches | 90 inches | 6 inches | A riser and crown may provide a balanced transition |
| 42 inches | 96 inches | 0 inches | There is no upward allowance in this layout; door clearance and trim placement need redesign or verification |
Under a 9-foot ceiling, the same cabinet positions leave gaps of 24, 18, and 12 inches respectively. That extra foot should lead to a different upper-cabinet design, not simply a crown that is 12 inches taller.
Calculate the crown’s actual rise
Use the cabinet top as a reference line. Add the crown’s installed vertical height to the elevation of its lower edge above that line. If the lower edge sits below the cabinet top, subtract that overlap instead.
For example, a crown measuring 3¼ inches vertically, with its lower edge positioned 2½ inches above the box, reaches 5¾ inches above the box. This describes the visible placement. The riser still needs enough concealed material and overlap for proper attachment.
That distinction prevents a common ordering error: adding the full stock width of a riser to the full crown height even though part of each component is hidden behind another.
Crown Molding When Kitchen Cabinets Go to the Ceiling
Plan the ceiling transition before installing the cabinets
Kitchen cabinets to the ceiling with crown molding need room for the complete trim assembly and functioning doors. If the boxes are already tight to the ceiling, a crown may have nowhere to rise. Placing it lower can cover a top rail or interfere with a door, so solve the section before fastening anything.
For a new kitchen, include the crown, riser, mounting support, and final ceiling closure in the cabinet drawings. For an existing kitchen, inspect what is actually available before ordering a profile intended for a different configuration.
Keep the cabinet line level
The doors establish a strong horizontal reference. If the ceiling slopes while the cabinets remain level, forcing the entire crown to follow the ceiling can create a changing reveal above the doors or open previously fitted corner joints.
Measure the variation and decide which component will absorb it. A separately detailed, scribeable flat closure can follow an irregular ceiling while the main crown remains aligned with the cabinetry. “Scribing” means transferring the contour of the adjoining surface to a piece that is then cut to fit.
This solution requires a component with enough material to trim and attach properly. It does not mean sanding arbitrary amounts from the decorative face of any crown profile.
Choose a filler or a deliberate open separation
If one end of the cabinet-to-ceiling gap measures 5¼ inches and the other measures 5¾ inches, the transition must accommodate ½ inch of variation. A large bead of caulk is a poor substitute for designing that closure.
A built-up assembly may use a level fascia and crown with a separate fitted ceiling detail. Another option is to stop below the lowest ceiling point, leaving an intentional open separation. Its apparent width will still vary if the ceiling is uneven. Make it generous enough to look planned from normal viewing positions, or address the ceiling itself.
Cabinet-to-ceiling molding looks convincing when its visible lines have clear purposes. Decide which line belongs to the cabinets and which one follows the room before choosing the finishing technique.
Crown Molding Above Cabinets That Do Not Reach the Ceiling
A 2–4-inch gap
A modest gap may accept a small crown, a compact riser-and-crown assembly, or a simple flat cap. Check the effective rise rather than comparing the gap to the profile’s advertised size. A 3-inch crown overlapping the box by ½ inch leaves different space than the same crown starting above a riser.
If the remaining opening would be a thin, uneven slit, compare a fully closed detail with a visibly open one. The decision should be made in the mock-up, while changing the profile is still easy.
A 6–12-inch gap
This is often a composition problem as much as a trim problem. Crown molding alone may leave a large amount of wall visible, which can look appropriate if the cabinetry is intended to stop below the ceiling. To create a taller appearance, consider a finished fascia or enclosure with a proportionate crown above it.
Review the flat band as carefully as the crown. A tall blank strip can dominate short doors even when the curved profile is attractive. Check its height across windows, corners, and any cabinets installed at different elevations.
A much larger opening
With a substantial gap, compare keeping the space open, adding stacked cabinets, or constructing a soffit or finished enclosure. Those alternatives produce different storage, access, and installation requirements. Decorative trim should finish the chosen construction.
Also consider cleaning access. A narrow opening too small to reach but large enough to collect visible dust may be less practical than an open top or a complete closure. Where lighting is planned above the cabinets, coordinate the fixture, wiring access, and heat requirements before fixing the crown position.
What Types of Crown Molding Work on Kitchen Cabinets?
Compare crown molding styles for kitchen cabinets by silhouette first. Look at how the profile rises from its base, how far it projects, and how many shadow lines it introduces. Decorative detail comes after those larger decisions.
Simple stepped profiles
One or two steps can finish a painted cabinet run with little ornament. Check the width of each flat section: a broad upper ledge will read differently from several narrow steps even when the overall height is identical.
Cove profiles
Cove crown molding on cabinets uses a concave curve to soften the top edge. It can connect square cabinet doors with a gentler upper silhouette. A deep cove and a shallow cove create different shadows, so compare their sections and installed samples.
Traditional multi-step crown
Profiles combining curves, small beads, and flat bands can complement raised-panel or detailed inset cabinetry. Keep the scale of those details related to the doors. A busy cap above already elaborate fronts can make the upper portion difficult to read.
Small minimalist crown
A compact cap may provide enough definition for a small kitchen or a low-profile cabinet design. Its success depends on clean corners and consistent alignment. A simple shape leaves very little visual distraction from an uneven installation.
Decorative classical molding
An ornamental frieze or applied decorative element can sit below a separately supported crown in a classical design. Draw the complete arrangement so the added trim has a clear place rather than appearing attached wherever space remains.
When comparing crown molding profiles, use each product’s dimensions and mounting geometry to assess these choices. A category photograph helps with style; the section drawing determines whether the profile can fit the proposed cabinet assembly.
Modern Cabinet Crown Molding
Modern cabinet crown molding can be a quiet geometric finish. A smooth cove, a shallow stepped cap, or a flat fascia with a restrained upper profile can work with simple cabinetry when the overall silhouette stays clear.
Start by deciding which horizontal line you want to emphasize. A narrow cap keeps attention on the doors. A taller flat band can make several boxes read as one built-in volume. A deep projecting crown introduces a more pronounced shadow and may become a feature in its own right.
Keep the number of competing details low. For example, square slab doors, a strongly veined backsplash, and prominent cabinet pulls may already provide enough contrast. A plain crown can finish that arrangement without adding another pattern.
Paint matching matters as much as profile selection. White molding against white cabinets can still look mismatched if one finish is warmer or glossier. Compare a finished sample under daylight and the actual kitchen lighting. View its edge against the ceiling as well as against the door.
A modern kitchen can also finish with a flat top or a deliberate gap. Compare those options honestly during design. Choose crown because it improves the cabinet silhouette and resolves the transition.
Crown Molding for Shaker Kitchen Cabinets
Shaker cabinet doors have a clear frame-and-panel composition, making the relationship between flat areas and shadow lines especially noticeable. A simple stepped crown or restrained cove is a useful starting point, but the door label alone does not determine the correct trim.
Look at the frame width, panel recess, paint or wood finish, and surrounding architecture. Broad, substantial door frames can support a different upper assembly than slim frames in a compact kitchen. Test the complete cap above several doors, including the smallest exposed cabinet.
When comparing Shaker crown molding for cabinets, keep an eye on the visible band above the doors. A well-proportioned fascia can extend the cabinet upward without requiring a large curved crown. Too much fascia, however, can make the doors look compressed beneath a heavy upper border.
Use the same profile along a continuous level run unless a deliberate change in cabinet height or depth creates a natural break. At an isolated pantry, repeat the profile language while reassessing the overall cap. Consistency should make the kitchen feel connected while allowing each cabinet group to fit its own space.
Crown Molding for Traditional and Classical Kitchen Cabinets
Traditional cabinetry can accommodate a more layered upper finish: a flat frieze, a small bead, and a projecting crown. The parts should form an understandable sequence from the doors upward. Draw their combined height and depth before selecting individual decorative pieces.
Choose where the strongest ornament belongs. A hood or central pantry may be the focal point, while surrounding cabinets use simpler trim. Repeating a prominent decorative motif above every narrow cabinet can make the room feel crowded.
STAVROS decorative elements for molding can be evaluated for applied accents within a compatible molding composition. Verify the specified matching profiles and the size of each element; similar width does not guarantee that the relief will meet correctly.
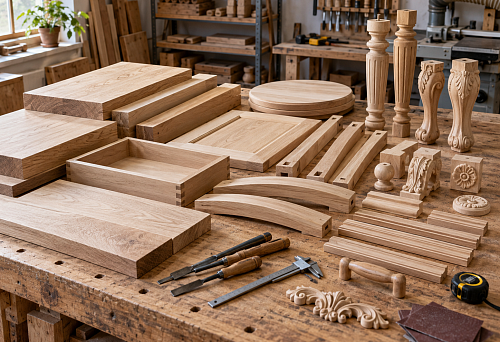
For a wood-based composition, carved molding decor offers a separate direction. Compare the actual wood and finish with the cabinetry. A carved accent does not need to cover a large area to become visually prominent.
Keep ornamental additions on suitable supported surfaces. They should not conceal appliance ventilation, service access, or a joint that needs to remain removable. The crown’s continuous line should remain readable around the decorative focal point.
Cabinet Crown Molding vs. Furniture Molding
Cabinet crown molding finishes the top of a cabinet. Furniture molding may outline a door, frame a panel, decorate a vertical surface, or form part of a wider applied composition. These functions involve different dimensions and attachment conditions.
A small flat-backed molding can decorate the face of a cabinet riser, but it does not automatically provide the projecting silhouette or mounting geometry of crown. Likewise, a ceiling crown may be far too deep to use as a frame on a cabinet front.
The STAVROS cabinet molding options should therefore be selected by the specific decorative task. The broader molding category includes products in different materials; check the individual item rather than relying on the category name.
For door and panel applications, the guide to wooden molding for furniture develops that separate subject. Here, the priority remains the top of the upper cabinets and the assembly that supports its finish.
Can STAVROS Crown Molding Be Used on Kitchen Cabinet Tops?
The STAVROS Crown Mouldings category contains HI WOOD polystyrene profiles presented primarily for wall-to-ceiling transitions. Their shape can be considered in a cabinet design, but the catalog category does not establish that every profile is suitable for every cabinet-top installation.
For a particular project, ask the supplier and cabinet fabricator to review the section drawing against the proposed backing. Identify the actual contact surfaces, their material and finish, the profile’s orientation, and the intended attachment method. An open cabinet top does not automatically provide the two supporting surfaces shown in a ceiling installation.
The review should also cover the visible back or upper edge if the crown will stop below the ceiling. A profile that looks finished from below may expose an unfinished rear surface when seen from an adjacent stair or upper landing.
Check paint compatibility, joint treatment, and any location near an appliance separately. Material names such as polystyrene and polyurethane are not interchangeable, and instructions for one product should not be transferred to another.
If the mounting arrangement cannot be confirmed, choose a cabinet-specific trim system or revise the supporting construction. A profile should be selected for the completed assembly, including its fastening surfaces and visible edges.
Polyurethane Moldings for Cabinet and Furniture Details
STAVROS also lists polyurethane profiles for decorative furniture applications. These are useful to distinguish from the HI WOOD ceiling-crown range. The following four items are surface moldings, not interchangeable substitutes for cabinet crown.
In this table, width runs across the decorated surface and projection is the relief above that surface. Inch conversions are rounded; use the original dimensions and current product drawing for fabrication.
| Profile | Width × projection | Original section | Decorative role to evaluate |
|---|---|---|---|
| MLDPU-001 | 0.39 × 0.24 inch | 10 × 6 mm | A fine bead or compact applied frame |
| MLDPU-002 | 0.87 × 0.43 inch | 22 × 11 mm | A more pronounced surface detail |
| MLDPU-003 | 1.38 × 0.47 inches | 35 × 12 mm | A wider frame on a sufficiently large panel |
| MLDPU-004 | 0.59 × 0.31 inch | 15 × 8 mm | A compact frame with greater relief than a fine bead |
MLDPU-001: a fine detail
This thin polyurethane molding for furniture is described for furniture-front decoration. Its small section makes it a candidate for a delicate applied outline. It should not be treated as a 10 mm crown capable of closing a cabinet-to-ceiling gap.
MLDPU-002: a stronger surface outline
MLDPU-002 is a decorative molding for kitchen cabinets with a more noticeable width and relief. Evaluate it on the flat decorative surface where it will actually sit, allowing enough open panel area around the frame.
MLDPU-003: a wider furniture profile
This wide furniture molding creates a broader applied border. Its 35 mm width needs space, especially around a small door or a narrow fascia. A wider face does not imply a correspondingly large projection.
MLDPU-004: a compact alternative
MLDPU-004 furniture trim molding offers an intermediate scale between a fine bead and a broader frame. Test its relief beside the cabinet’s existing door details before repeating it across a whole run.
Each of these four profiles is listed with a 2,600 mm strip length, approximately 102.36 inches. Other polyurethane molding designs may have different lengths, sections, and intended uses. Confirm the exact item when preparing the cut list.
Choose the Material and Finish Before Planning Attachment
Kitchen cabinet crown molding installation depends on both the trim and the surface receiving it. A method used for a wood cabinet package is not automatically suitable for a decorative polymer profile or a factory-finished cabinet surface.
| Material | What to establish before installation | Finishing question |
|---|---|---|
| Solid wood | Suitable backing, fastener locations, joint method, and conditioning instructions | Will the species, grain, stain, and sheen match the cabinets? |
| MDF | Manufacturer-approved fastening and suitability for the intended conditions | How should cut edges and fastener holes be prepared and sealed? |
| Polyurethane | Approved adhesive, compatible substrate, and any required temporary or mechanical fixing | Which preparation, primer, and coating system are specified? |
| Polystyrene | Product-specific mounting surfaces, adhesive, joint treatment, and support requirements | Are all adhesives, fillers, and coatings compatible with this exact profile? |
For factory-finished cabinetry, obtain a physical finish sample. A paint name does not reproduce the sheen, texture, or aging of an existing door. Stained wood is even more dependent on the actual material and finishing process.
Decide the finishing sequence now. Paint-grade trim may receive final joint treatment and coating after installation. Prefinished trim generally needs more careful protection and less visible fastening. A plan that assumes every joint can be sanded and painted later can damage an otherwise well-matched factory finish.
How to Install Crown Molding on Kitchen Cabinets
The following sequence organizes the work; exact fasteners, adhesives, spacing, and curing times come from the selected cabinet and molding systems. Before cutting, have the profile drawing, an elevation sketch, a cut list, and the approved attachment detail together.
1. Measure and map the cabinet run
Sketch every straight section, inside corner, outside corner, depth change, and exposed end. Include finished end panels and fillers in the measurements. Mark where the molding starts and stops, and distinguish the cabinet-box line from the face of the doors.
Choose a consistent reference for lengths. A dimension measured along the mounting line is different from the long point of a projecting outside miter. Put the reference on the sketch so it remains clear at the saw.
2. Measure the ceiling gap in several locations
Record the smallest and largest distances above the cabinets and check the exposed returns. Identify any sloping ceiling, soffit, beam, or wall irregularity that affects the assembly. Decide whether the crown will meet the ceiling or stop below it.
If it will meet the ceiling, resolve the fitted closure before making the main crown pieces. The available space must accommodate the assembly at the tightest location.
3. Check cabinet level and door operation
Verify that the installed cabinets are properly secured, aligned, and level before using them as the molding reference. Crown cannot reliably correct a misaligned run. Address an installation problem at the cabinets before concealing the top.
Position a sample of the proposed trim and open every affected door through its required travel. Check lift-up mechanisms especially carefully because their movement extends above the cabinet. Include handles and nearby doors in the clearance check.
4. Plan corners, returns, and joints
Decide which long faces should remain uninterrupted and where a necessary joint can be supported and finished. Draw the short return pieces at the ends now. These are easy to overlook when ordering by the front width alone.
At a depth change, build or hold a sample corner assembly in position. Confirm that adjacent profiles can meet without an exposed back, a projecting point, or a collision with the next door.
5. Fit the required support or riser
Install the cabinet maker’s specified cleat, starter, or riser arrangement. Confirm which part is structural backing and which part is visible finish. Match the support position to the approved crown section.
Choose fastener length and placement for the actual cabinet construction, including the thickness of the top and any concealed components. A visible fascia must remain in the intended plane across fronts and sides. Finish hard-to-reach exposed surfaces before the crown closes access.
6. Make test cuts
Use offcuts of the actual profile to prove the corner. Crown cut in its installed angle requires a repeatable nested position. Crown cut flat requires appropriate compound settings for its spring angle and the measured corner. These are different setups.
Do not assume every profile uses a 45-degree spring angle. Mark sample pieces with their location and orientation, then confirm the joint in place before cutting valuable full lengths.
7. Cut the first pieces
Use the cutting method and blade suitable for the material, with the work supported and secured as directed by the tool manufacturer. Set up dust collection and the required eye and respiratory protection for the operation.
Work from the labeled cut list. Keep small return pieces on longer stock while making the initial cut whenever the chosen safe cutting method allows. Avoid handling tiny loose pieces near a powered blade.
8. Dry-fit the assembly
Hold the pieces in their actual mounting positions without permanent attachment. Check the bottom reveal, profile alignment, ceiling relationship, and fit at the finished end panels. Inspect from below and from the side.
Fit the next piece to the installed geometry rather than assuming a nominally identical cabinet corner will need the same cut. Adjust the cause of an open joint before reaching for filler.
9. Attach the profile using the specified method
For a wood cabinet trim system, attachment may involve suitable finish fasteners into established backing. For a polyurethane or polystyrene product, follow its own adhesive and fixing instructions. Confirm compatibility with the cabinet finish as well as the trim material.
Keep the profile supported and aligned during fastening or curing. Do not use extra adhesive to bridge missing contact surfaces or assume that a thin decorative skin can hold the assembly securely.
10. Finish joints and fastening points
Use the filler, joint adhesive, sealant, or touch-up product specified for the material and finish. A tight decorative corner, a small perimeter joint, and an irregular ceiling closure are different conditions.
Prefinished and stained trim needs particular restraint: an oversized patch may remain more noticeable than the original gap. Where a joint does not fit, correct the cut or support rather than expanding the repair indefinitely.
11. Complete the finish and final check
Allow the specified cure times before sanding or coating. Protect doors, hardware, countertops, and appliances. Apply the selected finish in the planned sequence and inspect the result under the lighting used in the kitchen.
Recheck door travel, exposed ends, appliance access, and the consistency of the upper line. Keep a labeled offcut and the finish information for future touch-ups or matching work.
How to Handle Inside and Outside Cabinet Corners
Inside corners
An inside corner occurs where two cabinet runs meet inward. Measure the actual angle and check whether their mounting surfaces align. A nominal 90-degree room corner does not guarantee that the finished cabinet faces meet at exactly that angle.
With suitable wood trim, an installer may use a coped joint, where one profile is shaped to meet the face of the other, or a carefully fitted miter. The choice depends on the profile, finish, and installation method. Follow the specified joint detail for manufactured polymer profiles.
Outside corners and end returns
Outside corners wrap an exposed cabinet end. Their tips are highly visible, and small differences in installed angle can prevent the profiles from lining up. For a true square corner with crown held correctly in a nested setup, matching 45-degree miters form the basic joint. A flat-cut setup uses different compound settings.
A return takes the profile back toward a wall, side panel, or other finished stopping point. Include its full visible depth, including the crown’s projection and any forward offset of the mounting fascia.
Depth changes and non-square walls
A refrigerator surround or projecting hood can require several short pieces where a straight cabinet run turns forward and back. Draw that sequence in plan view. It is easier to discover an impossible intersection on paper than after attaching the longest molding.
Where a run ends at an irregular wall, a fitted end condition may be needed. Keep the main profile aligned with the cabinets and deal with the local wall variation at the termination.
Crown Molding Around a Range Hood or Decorative Hood
A hood enclosure can share the cabinet crown line or form a separate focal point. The right choice depends on its height, depth, and relationship to the adjacent upper cabinets.
If the hood enclosure aligns with the cabinetry, the crown may continue around it with planned changes in depth. If the hood is taller, consider returning the cabinet crown into the sides of the hood enclosure and giving the hood its own upper finish. Inspect that meeting point from both sides of the room.
Draw the widest part of each profile, not only its lower mounting line. Two crowns that appear to meet neatly in elevation may collide where their projecting edges cross.
Coordinate decorative trim with the exact hood and cooking-appliance installation requirements. Keep required clearances, ventilation paths, liner arrangements, and service access intact. A decorative molding is not a substitute for a specified hood liner or protective construction.
For an existing hood, identify how the filters, controls, and service panels are accessed before enclosing or trimming any area. The finished design should allow normal use and maintenance without removing permanent cabinet decoration.
Crown Molding on Tall Pantry and Refrigerator Cabinets
Tall units often establish the upper reference line for the kitchen. Decide whether neighboring wall cabinets will finish at that line or step down deliberately. Both approaches can work when the transitions are drawn before installation.
A pantry that shares the same finished height as adjacent uppers can use a continuous crown. If it is deeper, the profile must turn around the additional depth. Check the exposed side: the crown should relate to the finished panel, including any applied decorative door.
At a refrigerator surround, distinguish cabinetry from appliance components. The appliance’s ventilation and service requirements determine which openings can be enclosed and which panels must remain accessible. A custom panel arrangement that works for one refrigerator may be unsuitable for another.
Confirm the finished opening and door movement with the selected appliance model. Then position the decorative crown around the approved enclosure. This sequence avoids choosing a visually appealing top detail that later conflicts with installation or maintenance.
If a tall unit is isolated, test its crown as a complete three-sided cap. Its side projection may be more prominent than its front height, especially when the unit stands next to a doorway.
Common Cabinet Crown Molding Mistakes
Choosing from a photograph without checking the section
A photograph shows style but may hide the riser and support. Compare installed height, projection, and contact surfaces before ordering. Ask how much of the profile will overlap the cabinet.
Judging each cabinet box separately
A continuous run needs a coherent top line. Assess its overall width, then inspect narrow exposed ends. Changing the crown above every door width usually adds unnecessary interruptions.
Forgetting that doors need room to move
A lower edge that clears a closed door may still interfere with a lift-up mechanism or an adjacent opening door. Test the actual motion with the sample assembly in position.
Trying to absorb an uneven ceiling with the decorative profile
Twisting the crown can change its reveal and open corners. Plan a separate fitted closure, an appropriate riser arrangement, or an intentional open gap.
Combining room crown and cabinet crown without a transition
Matching color does not solve mismatched geometry. Where the profiles meet, draw their elevations and projections together. A clean termination can be more convincing than a forced intersection.
Using a surface molding as structural crown support
A decorative bead or furniture frame profile needs a suitable surface beneath it. It cannot bridge a large opening or replace the support required by a projecting crown.
Cutting the whole order before fitting the first corner
A small setup error repeats across every piece. Prove the installed angle and joint with offcuts, then fit the actual run in a controlled sequence.
Omitting returns, finish work, and usable stock lengths
Front width alone underestimates the job. Include exposed sides, test pieces, joints, risers, and finish materials. A purchase can contain enough total footage and still lack a piece long enough for the main face.
How to Choose and Order Crown Molding for Your Kitchen Cabinets
Turn the design into a short written specification before placing the order. It should identify the profile, material, finish, installed orientation, backing detail, and all visible terminations.
- Record cabinet dimensions. Include box height, finished width, depth, door position, and applied end panels.
- Map the ceiling gap. Measure several points and record the smallest opening and total variation.
- Choose the upper finish. Decide whether the cabinets stop below the ceiling or connect to it through a designed assembly.
- Set the projection limit. Check windows, walls, adjacent cabinets, doors, and hood surrounds.
- Compare profile shapes. Start with simple, cove, stepped, or classical silhouettes and test their actual scale.
- Confirm mounting and finishing. Match the installation method to both the molding and the cabinet substrate.
- Make a sample corner. Review the front, side, door clearance, and intended finish together.
- Prepare a cut list. Include corners, returns, stock lengths, and planned joints before calculating the order.
Calculate usable pieces, not just linear footage
Suppose the finished cut list contains a 90-inch front and two 15-inch returns, each measured at the required cutting reference. The total is 120 inches, or 10 linear feet, before cutting losses and test pieces.
If the chosen product is supplied in 78¾-inch lengths, two strips exceed 10 feet in total, but neither can produce the 90-inch front in one piece. You need an approved joint in that run or a different available stock length. Adding a percentage for waste does not solve the length constraint by itself.
Lay each proposed cut onto the actual stock lengths, allowing for the saw kerf, trimming ends, miter geometry, and defects if relevant. Reserve material for test cuts and possible corrections. Recheck the calculation when changing profiles; different products do not necessarily share the same strip length.
Use STAVROS samples and catalogs to review available reference materials, and ask about a physical sample of the exact proposed profile. The category includes decor samples and catalogs; it does not establish that every HI WOOD crown is available as a separate sample. Confirm the item, quantity, finish, and current ordering arrangements before committing.
Frequently Asked Questions
What is cabinet crown molding?
Cabinet crown molding is trim installed along the top of a cabinet or connected cabinet run. It creates a finished upper edge and can form part of a transition to the ceiling. Depending on the design, it attaches through a cabinet-specific starter, face-frame detail, or separate supported riser.
What size crown molding should I use on kitchen cabinets?
Start with the available gap, cabinet proportions, and permitted projection. Compare installed vertical height rather than relying on a nominal profile width. A sample showing the riser, crown, and actual overlap will give a more reliable answer than a size chart based only on the room’s ceiling height.
How big should crown molding be on upper cabinets?
It should finish the cabinet without overwhelming its doors or blocking their movement. Judge a continuous run as one composition, then check its exposed ends. A broad run can carry a different cap from an isolated narrow cabinet. Include any flat band below the crown in your assessment of total size.
Can you put crown molding on existing kitchen cabinets?
Yes, when the cabinets provide or can accept suitable support and the trim clears the doors and nearby surfaces. Check the cabinet construction, available upper space, and finish first. Full-overlay and frameless cabinets often need a planned top mounting detail rather than direct fastening to the visible front.
How do you attach crown molding to cabinets?
Use the attachment method specified for the cabinet construction and molding material. A wood system may fasten into a cleat or riser. A polymer profile may require a particular adhesive and support arrangement. Establish the contact surfaces and backing before selecting fasteners or adhesive; generic trim instructions are insufficient.
Does cabinet crown molding have to touch the ceiling?
No. Crown can finish the cabinet below the ceiling, leaving open space above. That arrangement works best when the remaining gap looks intentional and any visible upper or rear surfaces are finished appropriately. Decide between an open top and a closed transition before choosing the profile and riser height.
How do you install crown molding when cabinets go to the ceiling?
Measure the smallest gap and ceiling variation, preserve door clearance, and design the full support and closure assembly. Keep the main cabinet line consistent. Where needed, use a suitable fitted ceiling detail instead of twisting the crown. Boxes already touching the ceiling may require a different trim arrangement.
What do you put between kitchen cabinets and the ceiling?
Options include a supported riser and crown, a fitted fascia, a soffit, or additional cabinets. The appropriate choice depends on the size of the gap and whether you want storage or simply a finished enclosure. A large opening usually requires construction that the decorative trim then finishes.
Can crown molding hide a gap above cabinets?
It can conceal a gap that fits within the profile’s effective rise and approved mounting arrangement. Account for the part overlapping the cabinet and any visible riser. If the gap is larger, use a designed assembly. Crown should not be left unsupported while trying to span an opening.
What type of crown molding is best for kitchen cabinets?
The best profile fits the cabinet style, available space, finish, and mounting detail. Simple steps and coves are useful starting points; more detailed crowns can suit traditional cabinetry. Compare materials separately from shape. An attractive silhouette does not confirm that a particular product can be attached to your cabinets.
What crown molding works with Shaker cabinets?
A restrained stepped profile, shallow cove, or simple cap over a flat fascia is worth testing. Compare the trim to the door-frame width and cabinet proportions. Shaker doors vary in scale, so avoid treating one profile as universally correct. Check the finish and exposed end as well as the front.
Can modern kitchens use crown molding?
Yes. A smooth or geometric crown can provide a clear upper boundary without elaborate ornament. Keep its projection and shadow appropriate to the surrounding doors, backsplash, and hardware. A small number of well-aligned lines is often more effective than adding several decorative layers to a simple cabinet design.
What is the difference between cabinet crown molding and ceiling crown molding?
Cabinet crown follows the top of cabinetry; ceiling crown follows the room’s wall-to-ceiling junction. Similar profiles may serve both settings only when their mounting requirements are met. Cabinet use introduces door clearance, finished end panels, returns, and sometimes an exposed back that a room-perimeter installation does not have.
Should cabinet crown molding match room crown molding?
The profiles should look compatible, but identical size and shape are not always necessary. Relate their style, finish, and visual weight to the room. If they physically meet, resolve the geometry in a drawing or sample. If they remain separate, a shared design language can provide enough continuity.
Before ordering, place a finished sample above the actual cabinet with the proposed riser and return. Confirm the ceiling relationship, open the doors, and inspect the result from the room entrance. That small assembly brings size, style, and installation together in a form you can judge before committing to the full kitchen.
For each product, the preparation of the furniture base, the compatible adhesive, and the painting procedure are specified. Polyurethane and polystyrene are different materials; instructions for one do not become instructions for the other. Additional decor must also not block access to fasteners and serviceable parts of the kitchen.
Example of a STAVROS furniture cornice: MLD-039
For comparison, a compact profile can be considered wooden furniture cornice 36×36 mm MLD-039. The product page offers options in MDF, oak, and beech. This allows evaluating a single SKU for different finishing tasks.
| Material MLD-039 | Section size, mm | Length according to the options table, mm |
|---|---|---|
| MDF | 36 × 36 | 2600 |
| Oak | 36 × 36 | 2400 |
| Beech | 36 × 36 | 2400 |
The section size indicates the scale of the blank. The actual position on the furniture, the addition to the cabinet height, and the projection relative to the door are determined from the installation drawing. A compact cornice does not have to fill the entire gap above the wardrobe on its own.
For example, if a noticeable strip of wall remains above the furniture, such a profile can first be tried as a finish for an open top. If coverage up to the ceiling is required, an extension is designed separately. Increasing the entire structure solely through decorative relief is not always convenient.
The different lengths of the options matter when cutting. If the finished face part must be 2500 mm long, a 2400 mm blank will not yield it without joining. The 2600 mm option allows considering a one-piece part, but end trimming and the geometry of the cuts still need to be taken into account.
Therefore, MLD-039 is useful as a concrete example of selection by section, material, and length. Applicability to a specific kitchen set is confirmed by fitting and an agreed fastening method. Before ordering, check the selected option on the product page, not just the general SKU.
How to join a cornice on a straight kitchen and in a corner
Straight cabinet run
On a straight section, first determine whether the front piece can be made as a single solid part. If a joint is necessary, choose its location, the fitting method, and the support under the seam. The joint should not accidentally end up on the most visible section just because that is where the first blank ended.
For a clear finish, additionally match adjacent parts by grain pattern and wood tone. Under enamel, the main focus is on matching the profile and preparing the seam. Paint will not level out a step between incorrectly aligned parts.
L-shaped and U-shaped kitchen
In the inner corner, two cornice lines are joined. Before cutting, measure the actual position of the cabinets rather than assuming a perfect right angle based on the room's shape. In a U-shaped kitchen, check each corner separately: slight deviations may differ.
Make a test joint on offcuts and place it in the working position. Even a precisely set saw angle will not help if the adjacent parts were lying at different tilts during cutting.
Outer corner of a tall cabinet
The outer corner turns the profile onto the exposed side panel. Here the front point of the joint and the alignment of all relief steps are clearly visible. Dimensions are taken along the chosen reference line, taking into account the cornice overhang. The length along the carcass and the length to the outermost point of the cut may differ.
Transition to a deeper cabinet
When a tall cabinet protrudes forward, the cornice must turn by that depth or terminate before it as a separate solution. It is more convenient to first draw such a chain of short sections from above. On a flat view of the fronts, a possible collision of protrusions often remains unnoticed.
How to install a furniture cornice on kitchen cabinets
Installation of a furniture cornice begins after checking the cabinet body and coordinating the top trim. The specific fasteners, their spacing, adhesive, and curing time are selected based on the profile material, cabinet design, and manufacturer's instructions. Below is a sequence that helps you avoid missing the main steps.
1. Check the level of the cabinets
Make sure the cabinet bodies are properly secured, connected to each other, and leveled. If adjacent cabinets are misaligned, correct the position of the furniture first. Do not press the decorative strip against a curved line in hopes of hiding the mistake.
At the same time, check the door adjustment. The position of the top edge of the fronts should be clear before marking the cornice, otherwise the visible gap will change after adjustment.
2. Take measurements
Measure the length of all sections, exposed side panels, depth differences, and the distance to the ceiling. Include decorative panels in the measurements if they are already installed or planned in the design. Separately note the minimum clearance above the cabinet bodies.
On the diagram, label where the length of each part comes from: along the mounting line, the inner side, or the outermost cut point. Using the same recording method reduces the chance of error when transferring dimensions to the workpiece.
3. Lay out the parts and determine the joints
Before cutting, distribute the strips to their future locations. Select visible sections based on finish and surface condition. First set aside material for the long front parts, then for the side panels and short end pieces.
On the back side, you can make clear markings: left section, right end, top, bottom. On a solid-colored profile, after several cuts it is easy to confuse the orientation.
4. Prepare the base for mounting
If a support strip is provided, install and check it first. It must hold the profile in the agreed position, and its visible part must match the project in color and plane.
The length and location of the fasteners are selected according to the actual thickness of the parts so as not to come through to the front surface or touch the hardware. Thin decorative cladding must not automatically be assumed to be a sufficient base.
Determine in advance where the fasteners will be accessible from: inside the cabinet, from above, or from the side of the support strip. If the gap to the ceiling is small, the tool may not fit above the cabinet. If the connection requires working from above, this is taken into account before installation and a suitable assembly sequence is chosen. The fastening method must be agreed upon while the long decorative part has not yet blocked access to the base.
5. Make a test cut
Use offcuts of the selected profile. For a right angle, a joint of two 45° cuts is obtained with the appropriate positioning of the part and a suitable cutting scheme. If the profile is cut flat, other saw settings may be required.
Check the result in place. It is important that not only the edges match, but the entire cross-section pattern as well. The working position of the part must be repeated for subsequent cuts.
6. Cut the main parts to size
Use tools and accessories suitable for solid wood, MDF, or the selected polymer. The workpiece is securely supported and fixed according to the tool instructions. Short elements are prepared using a method that does not require holding a small loose part next to the cutting part.
Do not cut the entire set based on a single test fit. After the first corner, it is useful to check the adjacent actual sections, especially if the cabinets are installed along uneven walls.
7. Perform a dry fit
Assemble the section without permanent fastening. Check the bottom line, corners, end face, position at the ceiling, and support. Then open all adjacent fronts to the required angle, including lift-up doors.
Look at the structure from below and from the side. If the joint separates, first determine the cause: an angle error, different profile seating, or an uneven support. Filler should not replace correcting the geometry.
8. Secure the cornice
For solid wood and MDF, the mechanical fastening to the support provided by the furniture design may be used. The type of fastener and the need for adhesive bonding are determined by the specific assembly. There is no universal screw length for all profiles.
Polyurethane decor is installed according to its instructions, checking the compatibility of the adhesive with the material and the furniture finish. The fastening method for the main wooden cornice is not automatically transferred to a thin overlay molding.
For an already painted profile, prepare soft pads for the clamps and check the permissible method of temporary fixation. Tape may damage a fragile or not fully cured coating. Adhesive residue is removed with a product compatible with the specific finish. If the entire structure will be painted after assembly, leave access in advance to the areas that will require sanding and preparation.
9. Treat the joints
Use a compound intended for the selected material and subsequent finish. A joint under enamel and a joint under clear lacquer require different approaches: an opaque visible insert on wood will remain visible.
If the part is already painted, check the compatibility of the repair coating in advance. A wide patch with a different sheen can ruin a neat corner more than a small, properly finished seam.
10. Complete the finishing and inspection
Observe the drying times of the compounds and the agreed sequence of preparation, priming, and painting. Areas that will become inaccessible after installation are treated in advance. Facades, countertops, hardware, and appliances are protected during the work.
At the end, recheck the opening of doors, access to serviceable parts, and visible end faces. Keep a signed offcut with a finish sample: it will be useful for touch-ups or matching additional parts.
How to finish the end of the upper cornice
The end is visible on the outermost cabinet, near a window, passage, and on a freestanding tall unit. It is better to plan it when choosing the profile. If the front strip is finished with an ordinary untreated cut, the material structure and the shape of the workpiece will be visible from the side.
Turn onto the side panel
When the side of the cabinet is exposed, the cornice can be continued along it to the wall or another intended termination. The position is coordinated with the finished decorative side panel, not only with the internal carcass. With an overlay panel, the dimensions will change.
Short profile return
A return is a short continuation that turns the relief back toward the surface where the cornice ends. It helps create a finished termination instead of an open cut. Material is set aside for it in advance, and a reliable joint is planned.
Wall junction
If the cornice goes into the wall, check its unevenness and finish. The main line is kept consistent with the furniture, and local deviation is taken into account when fitting the end. A thick random filler strip on the most visible end rarely improves the result.
With a transparent finish, the quality of the end joint is especially noticeable. First try it without glue, then assess it from a normal distance. A close-up photo is useful for checking accuracy, but the final decision should take into account the appearance of the whole kitchen.
Cornice above the refrigerator and tall pantry unit
Tall modules often set the upper line of the kitchen unit. If their top aligns with the wall cabinets, the cornice can unite the entire row. If the pantry unit is taller, the height difference is designed deliberately: the lower section ends at its side panel, while the tall one gets its own finish.
For the refrigerator column and pantry unit, depth usually needs to be checked especially carefully. A protruding carcass will require profile turns or another solution at the meeting point. A single overall dimension along the front line of the kitchen does not describe these short sections.
The decorative treatment of the refrigerator cabinet is coordinated with the instructions for the specific appliance. Ventilation paths, service access, and the required door movement must be preserved. A gap that seems unnecessary in the facade layout may serve a function intended by the manufacturer.
The same is done near a decorative range hood. If its housing is taller or deeper than the adjacent cabinets, the point where the cornice ends is drawn separately. The appliance requirements for placement and protective elements determine the construction, and the decorative profile completes the already coordinated option.
For a freestanding pantry unit, do a trial fit with both the front and side parts at once. On narrow tall furniture, it may be the protrusion on the side panel that turns out to be excessive, even though the profile height looks suitable from the front.
Typical mistakes when choosing a furniture cornice
Relying only on a photograph
A photo rarely shows the support, overlap, and exact dimensions. Before buying, you need a cross-section drawing. First find out how the profile is installed, then evaluate its shape next to the facade.
Checking the height and forgetting about the projection
The profile may reach the ceiling while protruding too far near a window or a tall cabinet. Draw its extreme position at the top, including the mounting bracket projection and the thickness of the decorative side panels.
Choosing too large a finishing piece
A large cornice above short doors can take up a disproportionately large amount of space. Compare it with a smaller profile, and if necessary with a combination of a compact cornice and a calm flat filler.
Trying to close the entire gap with a single profile
A large gap requires a structural solution. Determine whether you need top cabinets, a panel, or open space. The cornice is chosen after that decision so that it finishes the top rather than hanging without suitable support.
Not checking the ceiling and door movement
The average gap and the look of a closed facade do not give the full picture. Measure the tightest spot, open the doors, and check the lift mechanisms with a sample of the installed cornice.
Mixing different types of decor
A ceiling profile, a furniture cornice, and a molding on a door may look similar, but they solve different tasks. Each element needs a suitable base and a separate check of its fastening.
Forgetting about end faces and depth differences
A continuous line in the front drawing may break apart on the side. Show the open ends, protruding tall cabinets, and the refrigerator cabinet on the top-view plan before calculating the material.
Cutting the entire set in advance
A working-position error will repeat on every part. First check a test angle and the first real section. Keep material for short returns and possible rework until the fitting is complete.
How to calculate the amount of cornice
The initial calculation is simple: add up the lengths of all visible sections, add the side extensions and short end pieces. Then create a cutting plan based on the actual length of the purchased blanks. It is the second step that determines the number of strips.
The list must separately indicate the face part, internal and external corners, turns near tall cabinets, straight joints, and end returns. For each part, use one clear measurement method agreed with the cutting drawing.
Why total linear meters are not enough
Suppose you need three separate face parts of 1300 mm each and two side sections of 350 mm each. The net total is 4600 mm. Two blanks of 2400 mm give 4800 mm, so by total linear meters the material seems to be enough.
But two parts of 1300 mm do not fit into one 2400 mm blank. For three solid face sections, you will need three such blanks. The side parts can be distributed among the leftovers, taking into account the saw kerf and end trimming.
A 2600 mm blank does not guarantee two finished 1300 mm sections either. Their sum already takes up the entire length, leaving no room for the saw kerf and end preparation. Cutting plans are checked against real dimensions, including the necessary allowances.
How to determine the allowance
The allowance depends on the number of corners, the complexity of the profile, the joint pattern, and fitting experience. Plan for test cuts and the possible replacement of a short part. A single universal percentage increase does not describe all kitchens.
Before ordering, sign off on which parts are cut from each strip. If the material or SKU changes, the calculation is repeated: the supply length may differ even among variants with an apparently identical profile.
How to choose a STAVROS furniture cornice
Before buying a cornice for the kitchen, prepare dimensions and a simple drawing of the upper part of the cabinet unit. For a specific choice, it is enough to show the carcass, the front, the ceiling, the intended support, and the direction of the projection. A photo of the kitchen helps convey the style, but it does not replace dimensions.
- Write down the height of the upper cabinets. Separately note the top boxes, tall units, and the refrigerator column.
- Measure the distance to the ceiling. Several points are needed, including the open side ends.
- Check the ceiling slope. Determine which part will account for the unevenness with a closed joint.
- Choose the height of the trim. Count the cornice together with the visible filler and take overlaps into account.
- Limit the allowable overhang. Check the window, adjacent modules, doors, and protruding side panels.
- Determine the material and finish. Compare solid wood and MDF for the specific desired result.
- Choose several profiles. First assess the silhouette, then the number of decorative transitions.
- Draw the angles and end faces. They determine the lengths of the parts and the visible ends.
- Do a test fit. It is better to use a fragment with an angle and the future coating, checking the opening of the fronts.
- Create a cutting plan. Calculate the number of blanks by their actual length, not just by the total linear meters.
After that, compare Cornices for furniture by specific item number, material, and size. In the selection request, indicate whether the profile will be installed on the cabinet, on a strip, or above a filler. Such a data set allows discussing a suitable design and set of parts.
If painting to match the existing kitchen color is needed, agree on a sample and finishing procedure in advance. It is better to make the final decision after the test fit, when the shape, color, fastening, and remaining gap are all clear.
Questions and answers
What is the cornice above kitchen cabinets called?
It is usually called an upper furniture cornice or a cornice for a kitchen unit. If the part is a flat strip, the project may use the names "top rail," "filler," or "false panel." It is best to clarify using the drawing: the name does not explain whether the profile protrudes forward or exactly how it is attached.
What is the purpose of an upper cornice in the kitchen?
It completes the cabinets, sets the overall top line, and contributes to the design of the space up to the ceiling. In combination with a suitable filler, it can conceal a part of the structure provided for by the project. Whether a cornice is necessary depends on the design: a modern kitchen unit with a neat, even top can look good without a shaped profile.
What size of furniture cornice should I choose?
First, measure the gap to the ceiling and determine the allowable protrusion, then compare several profiles with the height and width of the cabinets. Take into account the visible part of the filler. To check, you need a mockup in its working position: the nominal cross-section size does not always equal how much the cornice will rise above the cabinet after installation.
What height should the cornice above kitchen cabinets be?
There is no single mandatory height. A small profile may suit a tall cabinet, while a more expressive one may suit a wide continuous row. Choose the height together with the projection and shape. Check whether the overall band above the doors has become excessive and whether there is enough space for installation and door movement.
Can a cornice be made if the cabinets reach the ceiling?
It is possible if the design provides space for the profile, its supports, and door opening. When the cabinets already reach the ceiling, adding a cornice requires separate verification. It may be necessary to use a different placement for the decorative part or a different way of finishing. The junction with an uneven ceiling should be designed before manufacturing and cutting.
What can be used to close the gap between kitchen cabinets and the ceiling?
Depending on the size, a cornice with a filler strip, a false panel, a box, or an additional row of cabinets is used. A small gap can be covered with a compact trim, while a large one requires a structural solution. In any case, the necessary ventilation of appliances, movement of fronts, and access to serviceable connections are preserved.
How to attach a furniture cornice?
To the designated part of the carcass or a separate support suitable for the chosen profile. For solid wood, MDF, and polyurethane, the methods may differ. Fasteners are selected according to the cross-section of the part and the thickness of the base, and the adhesive — according to compatibility with the material and finish. One scheme does not automatically suit all products.
How to join a furniture cornice at corners?
Measure the actual angle, determine the working position of the profile, and make a trial joint on offcuts. The fit is checked on the cabinet before permanent fastening. On an outer corner, it is important that all steps of the cross-section align; on an inner corner, the position of adjacent supports also matters. A nominal right angle of the room does not guarantee an exact match of the furniture.
Which is better for the kitchen — solid wood or MDF?
Solid wood makes sense to compare when the look of natural wood and its coordination with the fronts are needed. MDF is often considered for a smooth opaque paint finish. The final choice depends on the profile, quality of preparation, coating, and conditions of use. Neither material eliminates the need for proper edge treatment and compliance with operating recommendations.
Can a cornice be painted to match the fronts?
Yes, if the material and preparation are suitable for the chosen coating system. It is better to approve a physical sample: the same shade name does not guarantee a match in gloss and texture. If the fronts are already installed, the test paint is compared with them under daylight and artificial lighting, as well as near the ceiling.
Is a cornice needed on a modern kitchen?
This is a matter of specific design. A simple profile can neatly finish the top row or connect it to a filler. If the furniture already has a clear, straight top line, a shaped cornice is optional. It is useful to compare both options on a sketch and check how the additional element affects door opening.
How does a furniture cornice differ from a ceiling cornice?
A furniture cornice relates to cabinets and is coordinated with their construction, fronts, and side panels. A decorative ceiling profile finishes the joint between the wall and the ceiling. Some shapes look similar, but the support conditions may differ. To use a ceiling product on furniture, the suitable position and mounting method must be confirmed separately.
Can molding be used instead of a furniture cornice?
Molding can decorate a flat top panel or be part of a composite design. But a thin profile for a front frame does not replace a cornice with a different cross-section and projection. It also does not serve as independent support and does not cover a large gap. First determine the purpose of the element, then choose the product.
How should the end of a cornice be finished?
Options include continuing along an exposed side panel, a short return of the profile, or a neat junction to the wall. The decision depends on the position of the end cabinet and the shape of the cross-section. The end is planned on the drawing before ordering, included in the cutting list, and checked during fitting. An exposed cut on a visible section requires the specified finishing.
Before purchasing, assemble a small fragment of the top design: support, visible filler, cornice, and corner finish. Place it against the kitchen, open the doors, and look from the entrance side. Such a trial brings together all the important questions — size, projection, color, and mounting — and helps choose a profile for the actual cabinet set.