

















Article Contents:
- Can You Put Crown Molding in a Bathroom?
- Powder rooms and bathrooms without a shower
- Full bathrooms with a tub
- Bathrooms with a shower
- Frequently used primary bathrooms
- Humidity is moisture in the air
- Condensation means liquid water on a surface
- Direct water changes the specification
- Steam showers require a separate approach
- Ventilation determines how long surfaces stay damp
- Polystyrene crown molding
- Polyurethane crown molding
- MDF crown molding
- Wood crown molding
- PVC crown molding
- Separate height, projection, and face width
- Start with a full-size comparison
- Calculate the visible gap above fixtures
- Keep projection under control
- Choose the detail the room needs
- Test it with the mirror and tile
- Consider the room's proportions
- A53: a compact, balanced section
- A70V1: more height with less projection
- L1902S: a taller outline with modest depth
- A100: a more substantial ceiling edge
- When tile stops below the crown
- When tile reaches close to the ceiling
- When a tiled wall meets a painted wall
- When the wall is tiled to full height
- Outside the enclosure
- Above the shower wall
- Inside the spray zone or a steam enclosure
- 1. Let the room and repaired surfaces dry
- 2. Check the substrate
- 3. Mark the crown line
- 4. Measure corners and plan the stock
- 5. Make test cuts
- 6. Dry-fit the profile
- 7. Use compatible adhesive and support
- 8. Treat joints with the specified products
- 9. Prime and paint where required
- 10. Allow curing before normal bathroom use
- Check the starting surface
- Choose performance before sheen
- Coordinate paint and sealant
- Can you put crown molding in a bathroom?
- What is the best crown molding for a bathroom?
- What material should crown molding be in a bathroom?
- Is polystyrene crown molding suitable for a bathroom?
- Is polyurethane crown molding good for bathrooms?
- Is MDF crown molding okay in a bathroom?
- Can wood crown molding be used in a bathroom?
- What size crown molding should I use in a small bathroom?
- Can crown molding go above shower tile?
- Can crown molding be installed inside a shower?
- Should bathroom crown molding be painted?
- Does bathroom crown molding need to be waterproof?
- Does crown molding make a small bathroom look smaller?
- Should crown molding match the ceiling or the wall?
- Can I use crown molding in a powder room?
- 1. Check the condition and moisture of the substrate
- 2. Make sure the surface is solid
- 3. Mark out according to the actual profile
- 4. Measure the walls and create a cutting plan
- 5. Check the corners and make test cuts
- 6. Prepare internal and external joints
- 7. Assemble the section without glue
- 8. Use a compatible mounting compound
- 9. Treat the joints
- 10. Apply paint and let the finish cure
- Preparation and priming
- Gloss and washability
- Paint and sealant
- Can a ceiling cornice be installed in the bathroom?
- Which cornice is best for the bathroom?
- Which cornice material is resistant to moisture?
- Can a polystyrene cornice be used in the bathroom?
- Can polyurethane decor be used in the bathroom?
- Is MDF suitable for the bathroom?
- Can a wooden cornice be used?
- What size cornice should I choose for a small bathroom?
- Which cornice should I choose for a 2.5 m ceiling?
- Can a cornice be installed over tile?
- Can a cornice be placed above a shower?
- Does a ceiling cornice need to be painted?
- What should be used to seal the joints?
- Can a wide cornice visually make a bathroom look smaller?
- Which matters more — the height or the projection of the cornice?
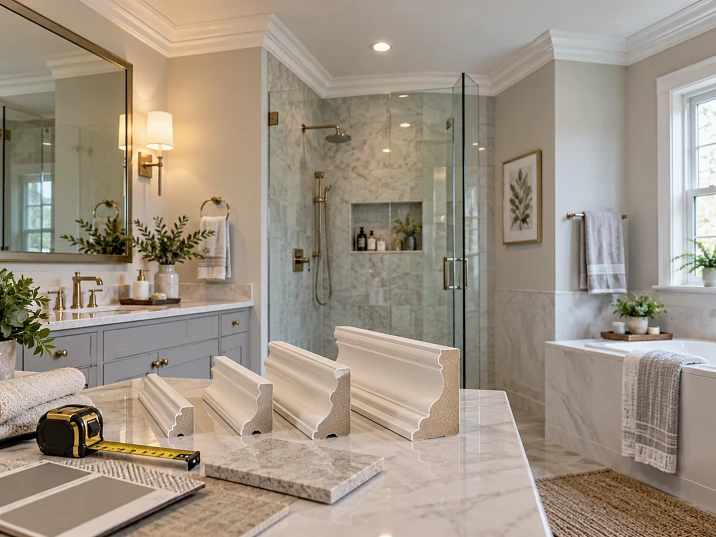
Bathroom crown molding can give a room a finished ceiling line, but choosing it takes more than matching a vanity or picking a decorative curve. Steam, condensation, tile thickness, mirror placement, and the way the room dries all influence the right profile. Crown molding in a bathroom works best when its material and installation suit the actual exposure.
A powder room used by occasional guests presents a different challenge from a small family bathroom with several daily showers. A painted wall above a vanity is also different from a tiled wall inside a shower enclosure. Treating those locations as interchangeable can lead to the wrong adhesive, an awkward transition, or a finish that needs repeated repair.
Start with six decisions: material, moisture exposure, placement, size, finish, and installation method. Then compare actual profiles. A taller crown with shallow projection may fit a compact bathroom more comfortably than a shorter profile that extends farther across the ceiling.
This guide focuses on the ceiling perimeter: how to select crown, coordinate it with tile and fixtures, and install it as a durable decorative finish. The STAVROS examples are HIWOOD polystyrene ceiling profiles. Polyurethane wall moldings and decorative accents are discussed separately so you can coordinate the room without confusing different products or their intended roles.


Can You Put Crown Molding in a Bathroom?
Yes, provided the material, placement, substrate, ventilation, and finish are appropriate. The useful question is how that particular bathroom behaves during and after use.




Powder rooms and bathrooms without a shower
A toilet-and-sink powder room usually has a lower moisture load than a full bathroom. This creates more flexibility for painted wood, suitable MDF products, or synthetic trim. Still, check for plumbing leaks, condensation on exterior walls, and ineffective ventilation. A room without a shower can have moisture problems for other reasons.
Наша фабрика также производит:
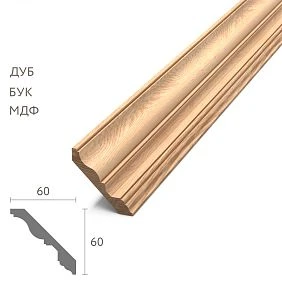
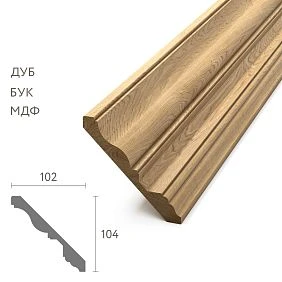
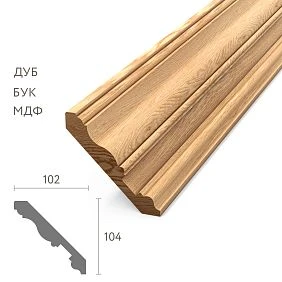
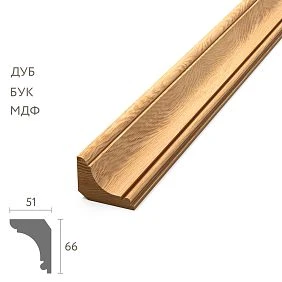
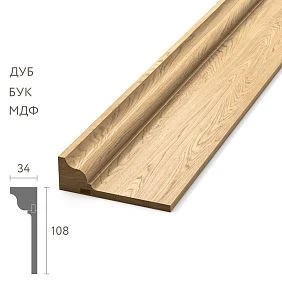
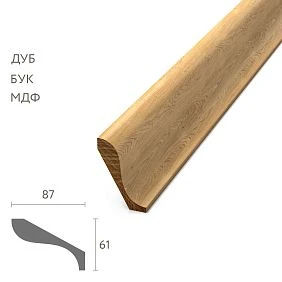
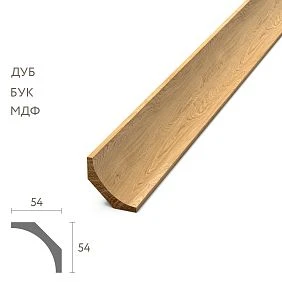
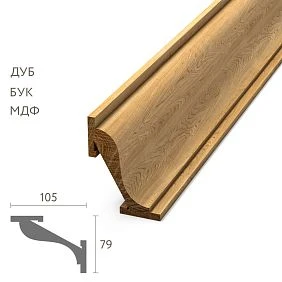
Смотреть весь Каталог продукции
Full bathrooms with a tub
A soaking tub releases moisture into the room, and a tub with a handheld sprayer can expose nearby surfaces to water. Identify whether the crown sits over a painted wall, above a tiled alcove, or directly over an area that gets sprayed during cleaning. The tub alone does not establish the exposure category.
Получить консультацию
Bathrooms with a shower
Separate the general room perimeter from the shower enclosure. Crown outside the enclosure may experience humid air and occasional condensation. Crown inside it may face persistent droplets, cleaning products, and concentrated moisture. The product and mounting system need to address those conditions together.
Frequently used primary bathrooms
Several showers in succession can leave little drying time. Before choosing a larger or more elaborate profile, observe the ceiling after normal use. Recurring dampness, peeling paint, or staining calls for a moisture investigation before decorative work begins. A moisture-tolerant profile cannot stabilize wet drywall or repair a leaking roof.
Bathroom Crown Molding Starts With Moisture, Not Style
Humidity is moisture in the air
Room humidity rises during bathing and should come back down as moisture is removed. Wood and wood-based materials respond to changing moisture conditions; synthetic products also have specific installation and exposure limits. Select the exact product for the room rather than assuming that a material name guarantees performance.
Condensation means liquid water on a surface
Warm, humid air can condense on a cooler ceiling or exterior-wall corner. A crown located well above the showerhead can therefore become wet without being sprayed. Look at the actual ceiling junction, especially during cold weather, instead of judging exposure only by distance from a faucet.
Direct water changes the specification
Repeated splashing, spray, and water used during cleaning introduce another level of exposure. The decorative face, cut ends, joints, adhesive, coating, and underlying wall all matter. A water-resistant strip attached to an unsuitable surface does not create a water-resistant assembly.
Steam showers require a separate approach
An ordinary shower that temporarily fogs a mirror is different from an enclosed steam shower with a generator. Steam-shower construction involves vapor management as well as liquid-water control. Specify any interior decorative trim with the enclosure designer and system manufacturer; a general bathroom-use statement is insufficient.
Ventilation determines how long surfaces stay damp
Judge moisture by duration as well as intensity. A brief rise during a shower followed by effective drying differs from a ceiling that stays wet between uses. Ventilation, room temperature, insulation conditions, and the enclosure layout can all influence that drying pattern.
Moisture resistance describes a product property. Bathroom suitability describes a complete application. Check both before ordering crown molding for humid rooms.
Bathroom Zones: Where Crown Is Actually Installed
Use the following locations to organize the project. These are practical exposure descriptions, not electrical zones or building-code classifications.
| Location | What to inspect | Planning priority |
|---|---|---|
| Above a vanity | Mirror top, cabinet doors, sconces, and localized condensation | Leave a deliberate visual gap and working clearance |
| Above painted walls | Paint adhesion, drywall condition, and ceiling irregularities | Create a sound mounting surface |
| Above tile | Tile height, finished thickness, top edge, and changes of plane | Resolve the transition before cutting crown |
| Near a bathtub | Spray reach, cleaning methods, and drying after use | Match the system to actual exposure |
| At a shower enclosure | Inside versus outside placement and waterproofing details | Obtain approval for the specific location |
| In a powder room | Wallpaper, wall color, ventilation, and ceiling scale | Coordinate the architectural details |
Do not treat decorative crown molding as part of a waterproof shower assembly unless the exact product and installation system are approved for that application. Crown can finish a junction visually, but that role is separate from keeping water out of the wall or ceiling.
Best Materials for Bathroom Ceiling Crown
Polystyrene crown molding
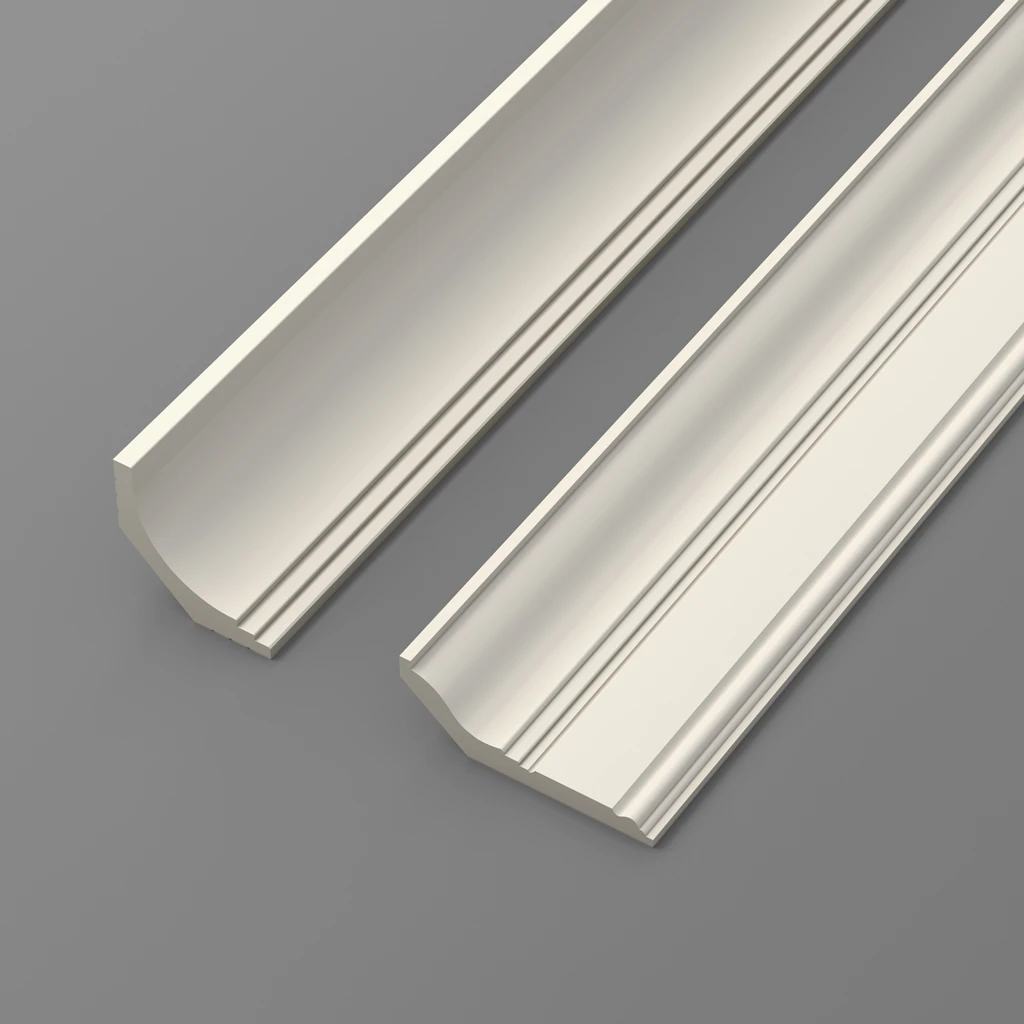
The STAVROS range of polystyrene crown molding includes HIWOOD profiles in several sizes. These provide lightweight options for a painted ceiling perimeter, including designs with a shallow ceiling projection.
Polystyrene is a material family, and density, surface preparation, geometry, and fastening instructions vary among products. Do not assume that a lightweight craft-foam strip and a dense architectural profile will handle or finish identically. Review the specified product rather than applying advice for generic “foam crown” to every molding.
For a bathroom, confirm suitability for the exposure, the compatible adhesive, and the required coating. Its resistance to moisture-related swelling can be useful, but the surrounding paint, joints, and substrate still need attention. Solvent compatibility also matters: an adhesive that works on wood may damage some polystyrene products.
Polyurethane crown molding
Polyurethane architectural moldings can reproduce curves, ornament, and fine relief. Suitable products offer a practical option for decorative work in humid interiors. They still require product-specific guidance for water exposure, temperature, installation, and finishing.
If you are comparing polyurethane crown molding for bathroom projects, check that the item is an actual ceiling crown with the geometry you need. STAVROS currently identifies the HIWOOD crown profiles featured here as polystyrene. Its polyurethane wall moldings and relief decorations belong to a different product group; they should not be relabeled as polyurethane ceiling crown.
MDF crown molding
MDF offers a smooth paint surface and crisp machined profiles. Standard MDF requires considerably more caution in humid interiors, particularly where cut ends, damaged coatings, or joints may become wet. Swelling at an exposed edge can remain visible after the surface dries.
Moisture-resistant grades are a separate consideration. For example, MEDITE's MR guidance permits humid-interior use while explicitly distinguishing the board from a waterproof product. That does not establish the grade of an unrelated molding. Ask which board or product specification applies to the trim you are buying.
Where the manufacturer permits bathroom use, follow its sealing and coating instructions for all required surfaces, including new cuts. Painting the front alone is not a substitute for protecting vulnerable areas. A supplier's identification of the grade is more useful than a general description such as “paint-ready MDF.”
Wood crown molding
Wood is worth considering when natural grain or a particular historic profile is central to the design. A stained crown can coordinate with an oak vanity or other woodwork, while paint-grade wood can match existing trim elsewhere in the house.
Its moisture content changes with surrounding conditions, which can cause dimensional movement. Species, grain, acclimation, joint design, and finish all influence the result. A small, well-ventilated powder room offers a different setting from a frequently damp shower ceiling.
Use the required coating system, protect cut surfaces as specified, and plan for maintenance. A clear finish changes the appearance of wood but does not make the assembled trim immune to moisture. Inspect joints and coating damage instead of waiting for visible swelling or discoloration.
PVC crown molding
Cellular PVC is another option where moisture tolerance is a priority. Manufacturers offer crown profiles as well as flat trim; compare the actual shapes available rather than assuming PVC is limited to plain strips.
PVC still needs suitable support, fastening, joint treatment, and paint compatibility. Temperature-related movement remains relevant even though it behaves differently from wood exposed to humidity. Follow the selected manufacturer's installation details instead of transferring fastening or adhesive instructions from a polystyrene product.
No material wins every bathroom application. The best choice combines appropriate exposure resistance with the profile, finish, installation method, and maintenance expectations of the room.
Polystyrene vs. Polyurethane vs. MDF vs. Wood vs. PVC
Use this comparison to narrow your search. The entries describe typical considerations; product specifications determine whether a particular molding is appropriate.
| Material | Humidity suitability | Profile detail | Weight | Finishing | Main concern |
|---|---|---|---|---|---|
| Polystyrene | Useful when the product and system suit the exposure | Smooth, stepped, or curved | Generally light | Compatible primer and paint as specified | Density, adhesive compatibility, and application limits |
| Polyurethane | Useful for approved humid-interior applications | Can reproduce detailed relief | Often relatively light | Product-specific paint system | Exact exposure approval and joint treatment |
| MDF | Conditional; grade matters | Crisp machined profiles | Moderate to heavy | Paint; protect required faces and cuts | Moisture reaching fibers at cuts or damaged areas |
| Wood | Conditional on exposure and detailing | Machined or carved | Varies by species and section | Paint or stain with suitable topcoat | Movement and coating maintenance |
| Cellular PVC | Strong moisture tolerance in suitable products | Depends on available profiles | Varies by section | Some products can remain unpainted; check instructions | Temperature movement, support, and paint compatibility |
Compare installed systems rather than just price per foot. Include the primer, finish, adhesive, joint product, mounting support, and labor. An inexpensive profile may become less attractive if it requires difficult preparation at every tile transition. Conversely, a more detailed molding adds little value if it cannot fit cleanly above the mirror.
What Size Crown Molding Works Best in a Bathroom?
Bathrooms are often physically small but visually busy. A vanity, mirror, tile pattern, shower glass, lights, and faucets may all occupy a short sightline. Crown becomes another strong boundary, so evaluate its relationship to those elements before choosing a nominal size.
Separate height, projection, and face width
Installed height is the vertical space the profile occupies on the wall. Projection is how far it extends across the ceiling. Face width follows the sloping or shaped face and may be a different measurement. A product marketed as 3-inch crown does not automatically cover 3 inches of wall.
Read the cross-section and confirm the intended mounting orientation. Rotating an asymmetrical profile to make it fit changes both its appearance and contact with the mounting surfaces.
Start with a full-size comparison
For an initial design test, compare approximately 1½–3 inches of installed height in a compact bathroom with an 8-foot ceiling. In a more open bathroom with a 9- or 10-foot ceiling, compare roughly 2½–4 inches. These are suggested mock-up ranges, not construction standards or limits on what can look good.
Hold a sample at the ceiling or use a folded cardboard section that represents both height and projection. View it from the doorway, the vanity, and the tub. A flat strip of tape shows wall coverage but cannot show the shadow of a projecting profile.
Calculate the visible gap above fixtures
In an illustrative room with a 96-inch ceiling and a mirror top at 84 inches, there are 12 inches above the mirror. A crown with a 3-inch installed height leaves 9 inches of visible wall. If the mirror instead reaches 92 inches, that same crown leaves only 1 inch. Ceiling height has not changed, but the design problem has.
Check medicine-cabinet doors and tall storage as well as fixed mirrors. A profile that fits visually may still obstruct a door swing or make a light difficult to service.
Crown Molding for a Small Bathroom
Keep projection under control
In a narrow room, you often stand close enough to see the underside of the crown clearly. A deep projection may therefore feel more substantial than the product photograph suggests. Compare projection separately from height, especially above a tall mirror or shower door.
A profile that extends about ¾ inch onto the ceiling creates a different edge from one projecting 2 inches, even when their wall heights are similar. Neither dimension establishes quality; the question is how much shadow and depth the room can accommodate.
Choose the detail the room needs
A simple curve or restrained stepped section often works well beside patterned tile and multiple metal finishes. If the walls are quiet, a more expressive crown can supply the main decorative detail. Small bathroom crown molding does not have to be nearly invisible, but it should have a clear role.
Test it with the mirror and tile
Look at a complete wall elevation. A framed mirror, a tile border, and an ornate crown can create three competing outlines. Try simplifying one of them or increasing the separation between them. Moving the mirror slightly may help, but only if its useful height and lighting remain comfortable.
Consider the room's proportions
A 5-by-8-foot bathroom and a 5-by-5-foot powder room can share the same ceiling height yet read very differently. An alcove, soffit, or high window can matter more than the floor area. Use the actual room and sample together rather than treating a size chart as a final answer.
STAVROS Crown Examples for Small Bathrooms
A53: a compact, balanced section
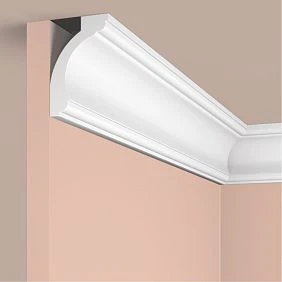
A53 is a compact crown molding to consider when the ceiling junction needs a modest finish. Its product title specifies a 37.7-by-37.7-mm section, which converts to approximately 1.48 by 1.48 inches.
The online inch fields show 1.46 by 1.46 inches. Because those figures differ slightly, confirm the current dimensioned drawing or sample before planning an exact fit. For an initial visual comparison, think of A53 as roughly a 1½-inch section rather than using the rounded listing to establish a tight clearance.
A70V1: more height with less projection
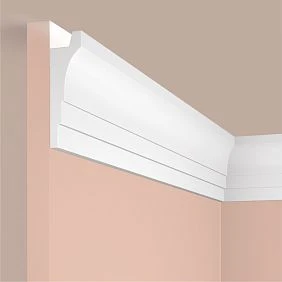
A70V1 offers a useful example of low-projection crown molding. Its listed dimensions are 2.76 inches high by 0.83 inch in projection, corresponding to 70 by 21 mm.
Compared with A53, it creates a taller wall outline while extending less onto the ceiling. That combination is worth testing when the room needs a visible top boundary but a deep overhead profile would crowd the composition. These are geometry examples; confirm the finish and installation system for your bathroom exposure.
Crown Molding for a Medium or Large Bathroom
A larger primary bathroom usually offers longer sightlines and more uninterrupted wall space. A taller profile may remain legible from the doorway without dominating the room. Greater projection can also create a richer shadow around a broad ceiling.
However, floor area is only part of the decision. A freestanding tub, tall linen cabinet, decorative pendant, and strongly veined tile already establish focal points. Choose which element should lead. If the tub wall is the main feature, a quieter perimeter may give it a better setting than a heavily ornamented crown.
Check each part of a divided room separately. A generous vanity area may connect to a narrow toilet alcove or lower shower soffit. Carrying one large profile everywhere can produce awkward stops. A simpler continuous profile, or a deliberate change at an architectural break, may make the entire room more coherent.
Do not enlarge crown solely because the budget or ceiling allows it. Compare samples from the normal viewing distance and include the lights that will illuminate the finished ceiling.
STAVROS Profiles for Larger Bathrooms
L1902S: a taller outline with modest depth
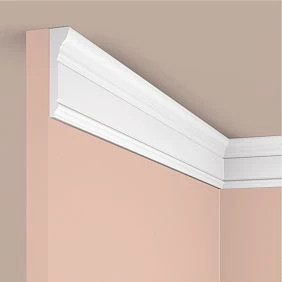
L1902S is a 3-inch crown molding profile with listed dimensions of 3.15 by 1.06 inches, or 80 by 27 mm. It is a useful comparison when the smaller profiles look too slight but a deep cornice would compete with the tile or lighting.
A100: a more substantial ceiling edge
A100 is a larger crown molding profile measuring 3.94 by 2.09 inches, or 100 by 53 mm. It is close to 4 inches high, with noticeably greater projection than L1902S. Test that extra depth in the room before choosing it for a broad ceiling perimeter.
| Profile | Approximate height | Approximate projection | Design question to test |
|---|---|---|---|
| A53 | 1.48 in* | 1.48 in* | Does a compact, balanced section finish the junction? |
| A70V1 | 2.76 in | 0.83 in | Would more wall height with shallow projection help? |
| L1902S | 3.15 in | 1.06 in | Does a taller, relatively shallow outline suit the room? |
| A100 | 3.94 in | 2.09 in | Can the ceiling composition support greater depth? |
*A53 conversion uses the 37.7-mm product title; the inch fields list 1.46 inches. Confirm dimensions and mounting orientation before installation. All four profiles are listed in 2-meter lengths, approximately 78.74 inches, rather than 8-foot lengths.
Crown Molding for an 8-Foot Bathroom Ceiling
An 8-foot ceiling leaves less room between tall fixtures and the ceiling perimeter, so measure that band carefully. A shallow profile in the approximate 1½–3-inch installed-height range is a reasonable first mock-up, especially in a compact bathroom. A different size may work once you see the sample in context.
Pay particular attention to over-mirror lights. The crown should not crowd the light's mounting plate, interfere with servicing it, or introduce an unwanted shadow. Also check the removable grille of a nearby exhaust fan. Leaving the fan visible is insufficient if the finished trim prevents the cover from being removed.
A ceiling that is slightly uneven needs a separate assessment. Dry-fit a length and see whether the proposed line creates a conspicuous wedge-shaped gap. Do not force a rigid profile against every dip or assume a wide bead of caulk will disguise the difference. Repairing the substrate or adjusting the finish detail may produce a cleaner result.
There is no useful universal rule that crown becomes impossible below a particular ceiling height. Geometry, ventilation, mounting conditions, and visual proportion should drive the decision.
Crown Molding for 9- and 10-Foot Bathroom Ceilings
A taller ceiling gives you more wall area to work with, but it does not make every bathroom spacious. Compare a 9-foot powder room measuring 5 by 6 feet with a 9-foot primary bathroom measuring 10 by 15 feet. Both have the same height; their floor areas are 30 and 150 square feet.
In the powder room, a restrained profile can keep the ceiling edge from dominating a close view. In the larger room, a taller section may relate better to the vanity, windows, and longer walls. Start by comparing samples around 2½–4 inches high, then move outside that range if the architecture calls for it.
At 10 feet, also judge the visibility of fine detail from below. Several tiny grooves may read as a dark band rather than distinct ornament. A clear curve or step can be easier to appreciate at that distance. Deep crown and elaborate decoration are separate choices; height alone does not require both.
Crown Molding Above Tile: Make the Transition Intentional
When tile stops below the crown
A painted band between tile and crown can give the room breathing space. Decide its visible height before setting the last tile course. A narrow leftover strip often looks accidental, particularly when it changes width along an uneven ceiling.
For example, assume a ceiling is 96 inches high and the tile ends at 93 inches. The remaining band is 3 inches. Crown with a 2.76-inch installed height leaves about 0.24 inch visible beneath it. Crown 3.15 inches high extends about 0.15 inch below the tile's top. Those two results require different details; neither is solved by ordering “about 3-inch crown.”
When tile reaches close to the ceiling
Coordinate the tile layout, top-edge finish, and crown's lower contact area. Do not leave a fragile sliver of tile simply because the crown was selected after tiling. Draw the wall elevation and section together so the installer can see both the visible lines and the mounting surfaces.
When a tiled wall meets a painted wall
Suppose the finished tile face sits ⅜ inch forward of the adjacent drywall. Crown following the tile is then mounted on a different plane from crown following the drywall. Bending a straight strip or filling a thick wedge with caulk is unlikely to produce a clean transition.
Depending on the layout, the detail may use suitable backing on the recessed surface, a deliberate return at the tile boundary, or a redesigned tile termination. Resolve it before fixing either finish. Backing, adhesive, and any penetration must remain compatible with the wall assembly.
When the wall is tiled to full height
Decide whether crown adds enough to justify covering part of the tile and introducing another junction. If it does, confirm a mounting method for that tile surface and profile. Preserve required movement joints, access, and waterproofing details. Decorative trim should not bridge a joint that the tile system needs to move.
Crown Molding With Subway Tile
Subway tile creates repeated horizontal lines, especially with contrasting grout. The crown's lower edge becomes one more line above that pattern. Compare its visual weight with the top tile course, any cap trim, and the mirror frame.
A simple crown often pairs well with strongly outlined subway tile. A curved profile can also suit a traditional bathroom, particularly when the grout is close to the tile color and the rest of the room is restrained.
Lay out the tile from the important visible boundaries, not just from the floor upward. See where the final grout line falls relative to the crown. If the plan leaves an unusually thin cut or a tiny painted band, adjust the layout while it is still a drawing. Crown can finish the composition, but it should not become a patch for an unresolved last row.
Crown Molding With Large-Format Tile
Large-format tile often creates a quieter surface with fewer joints, although pronounced veining can make it the room's strongest feature. A smooth or lightly stepped crown can finish the ceiling without introducing a competing pattern.
Look at the top cuts as a group. Crown of constant height may reveal differences in the tile-to-ceiling gap rather than hide them. Check the ceiling plane before deciding how much tile the profile will overlap.
Where a large tile surface ends beside painted drywall, its finished thickness still needs a transition detail. Tile size does not eliminate that change of plane. Have the installer confirm the bond surface and any movement accommodation before treating the crown as a continuous strip around the room.
Crown Molding Around a Shower Area
Outside the enclosure
Crown on the general room perimeter may continue past the outside of a shower enclosure when the geometry and exposure allow it. Check glass-panel brackets, door movement, and the position of the fan. Keep access to hardware that may eventually need adjustment or replacement.
Above the shower wall
Being above the showerhead does not guarantee a dry location. An open enclosure, handheld sprayer, or repeated condensation can wet the upper wall. Establish whether the planned crown sits on painted drywall, tile, or another surface, and ask for installation guidance for that combination.
If suitable decorative crown cannot be specified there, a deliberate termination outside the enclosure can be cleaner than continuing an unsuitable material. Plan the return so it looks finished from both the doorway and inside the bathroom.
Inside the spray zone or a steam enclosure
Do not automatically extend an ordinary decorative profile into these areas. Obtain confirmation for the exact trim, adhesive, coating, and joint system, together with the waterproofing detail. Fasteners and trim changes must not undermine the enclosure assembly.
Steam enclosures add vapor-control requirements. A waterproof tile backing system has its own rules for walls, ceilings, seams, and penetrations. Crown does not replace those layers. When approval is unavailable, keep decorative trim outside the enclosure and finish the interior with details designed for that system.
Crown Molding Above a Bathtub
Above a freestanding tub, the ceiling edge often forms part of the main view into the room. A balanced profile can frame that composition without competing with the tub silhouette. Evaluate it alongside the window trim, light fixture, and any decorative wall finish.
An alcove tub creates different conditions. Tile may meet the ceiling on three sides, and a shower combination introduces direct spray. Check the top tile course and wall-plane changes at both ends of the alcove before planning a continuous crown.
For either layout, observe condensation after bathing and consider how the area is cleaned. A high decorative ledge that collects residue but is difficult to reach may be inconvenient. Select a profile that can be maintained with the cleaning methods permitted for its finish. Avoid adding intricate detail solely to fill an otherwise calm wall.
Crown Molding in a Powder Room
A powder room gives decorative trim more freedom because there is normally no shower or tub generating repeated moisture loads. Crown can frame patterned wallpaper, connect painted wall panels to the ceiling, or provide a light outline above a deep wall color.
Choose the main feature first. If the wallpaper has a large pattern, a simple crown can give it a crisp ending. If the walls are quiet, a curved profile or a small coordinated ceiling detail can carry more of the decorative interest.
Specify the mounting surface as carefully as the visible finish. Wallpaper is not automatically a suitable structural base for adhesive-mounted crown; the bond is only as reliable as the layers beneath it. Coordinate the installation sequence so the molding can attach to an approved, sound surface.
A compact powder room can support dramatic color without requiring a deep cornice. Test the profile from the doorway, where visitors will first see the entire ceiling and upper wall together.
Modern Bathroom Crown Molding
A modern bathroom can use crown as a precise ceiling boundary. Look for a smooth curve, a clear step, or a restrained geometric section that relates to the vanity and mirror. Low projection is especially useful where the design relies on broad, quiet planes.
Consider the shadow as part of the design. A profile with several small ridges may look subtle in a catalog but produce a busy sequence of shadows under directional lighting. Test it with the vanity lights and ceiling fixtures on.
For simple bathroom crown molding, a monochromatic finish can make the detail feel integrated. Matching the ceiling emphasizes continuity overhead; matching the wall carries the wall color upward. Either can work with large-format tile and a frameless mirror.
A decorative crown is not automatically a lighting cove. If you want concealed LEDs, choose a system designed to accommodate the light source, heat management, wiring, access, and bathroom location. Do not place a light strip behind an ordinary profile simply because a gap is available.
Traditional Bathroom Crown Molding
Traditional bathrooms can support curved profiles, stronger projection, and coordinated ornament. Relate the crown to door casings, vanity detailing, mirror frames, and any wall paneling so the room has a consistent architectural character.
More detail does not require every surface to be elaborate. A shaped crown can provide the main architectural accent while subway tile and simple wall panels remain quiet. Alternatively, an ornate mirror may call for a restrained ceiling edge.
Check how the profile turns corners and ends at alcoves. Those transitions are often more visible in a small bathroom than in a large living room. A coherent sequence of corners and returns usually contributes more to a finished appearance than increasing the size of the molding.
When using painted ornament, keep enough separation between pieces to preserve their outlines. Crowding a medallion, ceiling frame, and perimeter crown together can make the ceiling difficult to read.
Combining Crown and Wall Molding
Give each layer a distinct job. Crown defines the ceiling perimeter, wall molding organizes the vertical surfaces, and baseboard or tile finishes the lower wall. They can share a color or a curve without having identical dimensions.
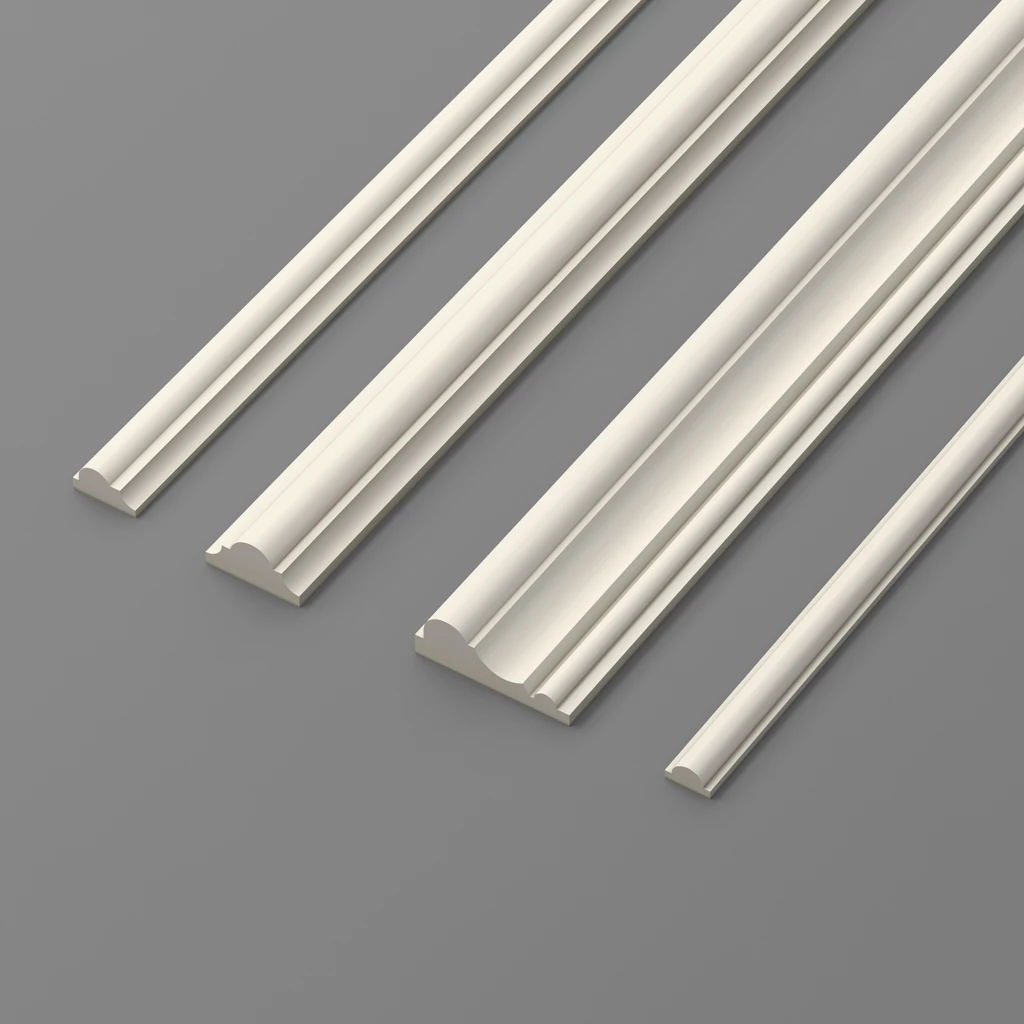
For the wall layer, compare polyurethane wall molding separately from ceiling crown. The MLDPU-004 wall molding, for example, has a listed section of approximately 0.59 by 0.31 inch, or 15 by 8 mm. It can illustrate the scale of a fine applied frame; it is not equivalent to a full crown profile.
Keep wall frames clear of switches, mirror edges, and splash-prone areas unless the specified system permits that exposure. For broader wall-decoration ideas, see the STAVROS guide to polyurethane molding in the bathroom. Confirm product-specific exposure limits when turning a design idea into an installation.
Polyurethane Decorative Elements in a Bathroom
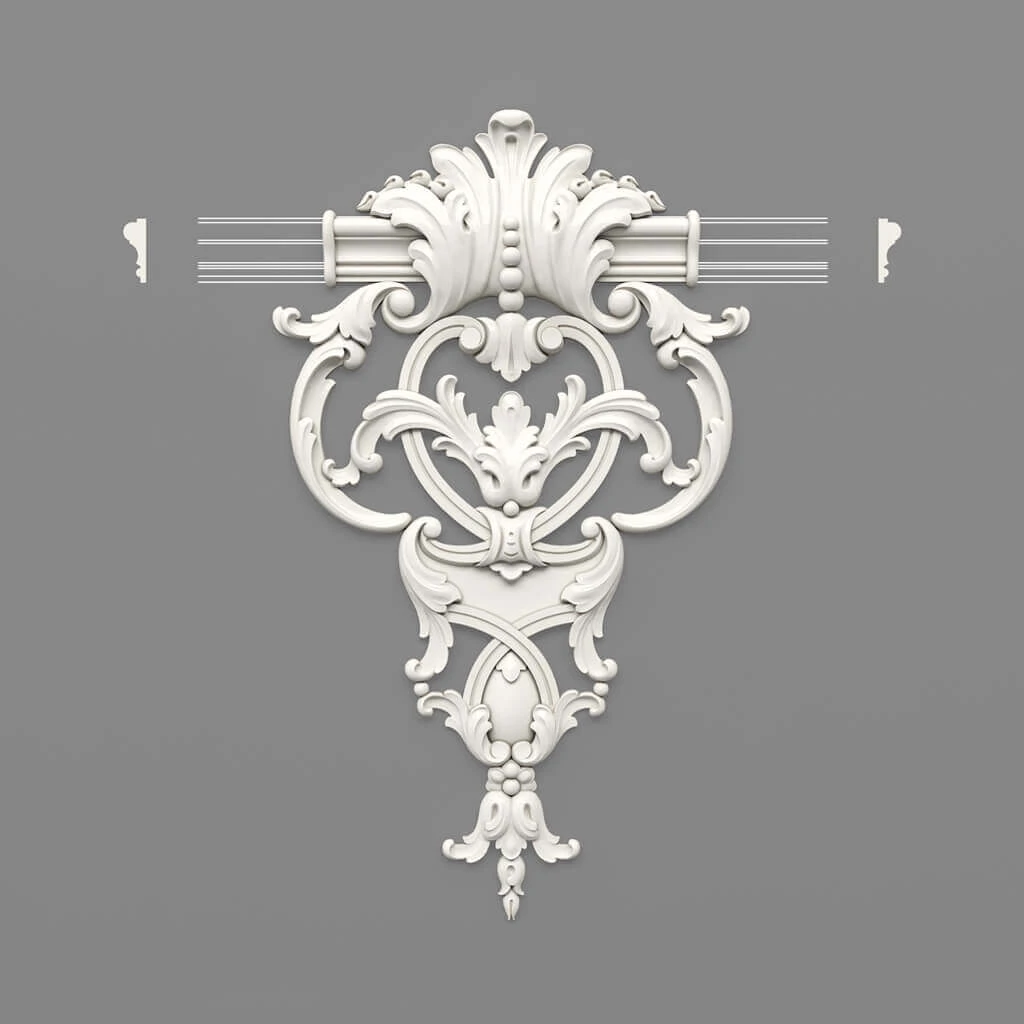
Small accents can coordinate a mirror wall or ceiling composition with the perimeter crown. Browse polyurethane decorative elements by their dimensions and intended position, then choose a limited number that reinforce the room's main feature.
Molding corner decor can help shape an applied wall frame when it matches the selected molding system. Decorative corner pieces for a flat frame should not be assumed to form the three-dimensional inside corner of a ceiling crown.
For additional discussion of wall applications, the guide to polyurethane wall molding in humid interiors addresses that separate design layer. Keep the crown selection centered on ceiling geometry and actual moisture exposure.
Ceiling Medallions and Crown Molding
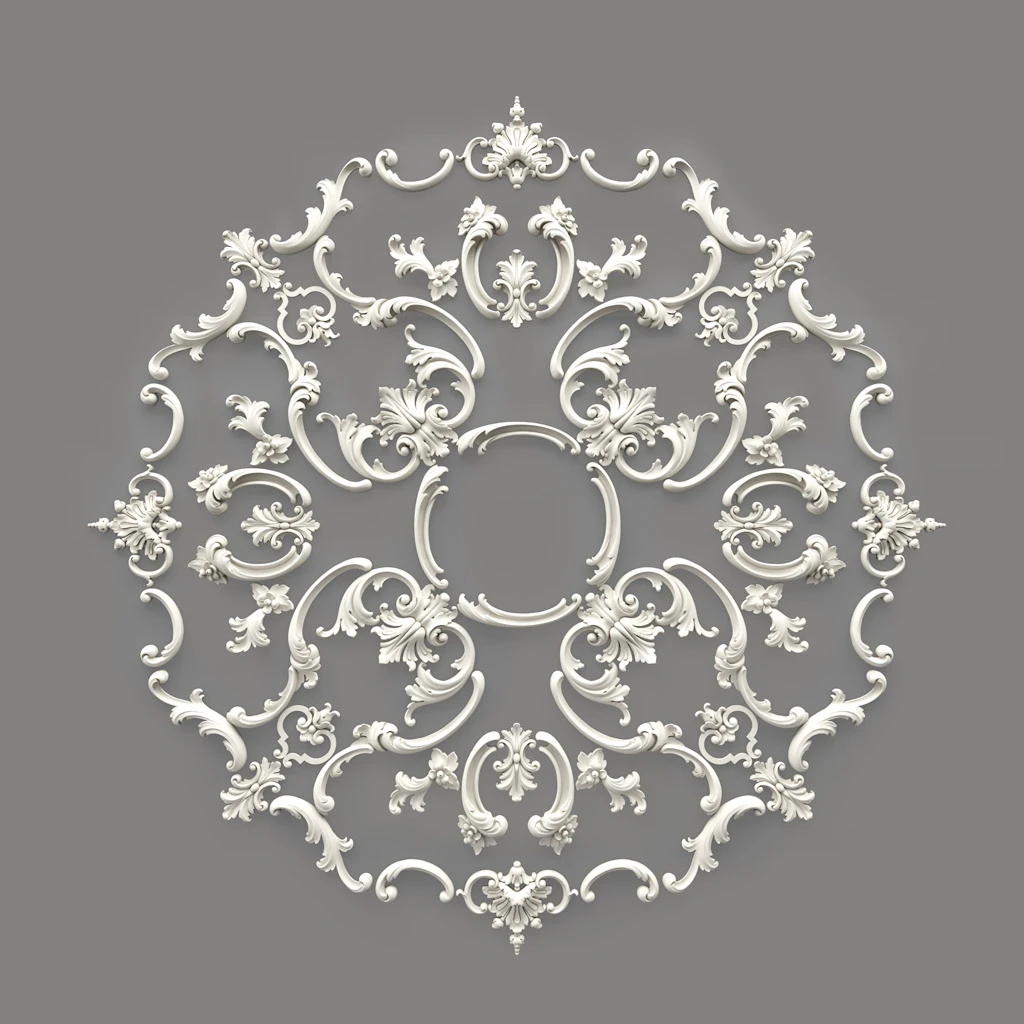
A medallion can provide a central detail in a larger bathroom or a decorative powder room. Compare its diameter and relief with the light fixture, available ceiling area, and perimeter crown. A compact room rarely needs every ceiling component to be equally prominent.
The STAVROS ceiling decor collection includes compositions with different components and materials. Check the bill of materials for the exact set: a decorative collection may combine polyurethane, polystyrene, and, in some arrangements, MDF. The bathroom suitability of one component does not establish the suitability of the whole set.
Keep the light independently supported and serviceable. A decorative medallion does not support the fixture, establish its suitability for a wet location, or override required clearances. Select the light for its bathroom position first, then coordinate the decorative surround.
How to Install Crown Molding in a Bathroom
The sequence below is a planning guide. Use the current instructions for the exact profile, adhesive, substrate, and coating to determine fastening, joint treatment, and cure times.
1. Let the room and repaired surfaces dry
Resolve leaks and persistent condensation before installation. Allow new plaster, joint compound, primer, and other preparation layers to reach the condition required by the next product. A surface that looks dry immediately after wiping may still be unsuitable for bonding.
2. Check the substrate
Remove loose material and identify the layers that will carry the crown. Adhesive attached to peeling paint is attached to a weak layer. Tile, painted drywall, plaster, and wallpaper need different preparation. Locate suitable support where the specified system requires mechanical fastening.
3. Mark the crown line
Use a sample in its intended orientation to mark the installed height and projection. Check those lines around the whole room, including tiled walls, cabinet tops, fan grilles, and door casings. Resolve ceiling irregularities before choosing the final alignment.
4. Measure corners and plan the stock
Measure each run and record inside corners, outside corners, returns, and plane changes. Do not assume every corner is square. Identify the joints needed for runs longer than the available stock.
A simple 5-by-8-foot rectangle has a 26-foot perimeter. Four 78.74-inch lengths total about 26.25 feet, leaving little allowance for cuts or mistakes. Each 8-foot wall is also longer than one length. Draw a cut list showing where joints land, then account for miter geometry, saw kerf, damaged ends, and test pieces. Perimeter divided by stock length is only an initial estimate.
5. Make test cuts
Use offcuts to establish the tool setup and joint fit. A nominal square corner may need adjustment, and a sloped crown must be held in the correct orientation. Nested and flat-cutting methods use different setups. Do not copy a universal miter-and-bevel setting without checking the profile geometry.
6. Dry-fit the profile
Check the complete transition before applying adhesive. The contact areas should sit as designed without twisting the crown to conceal an error. At tile boundaries, confirm that backing, returns, and visible gaps match the planned detail.
7. Use compatible adhesive and support
Check compatibility with both the molding and the mounting surface, including whether the surface is porous. Also confirm suitability for the room's exposure. Product names such as “construction adhesive” do not establish all three conditions.
Use the specified bead pattern, temporary support, and fastening method. Do not assume a polymer crown needs the same nails as wood, or that lightweight trim can always be glued without additional support. Avoid unplanned penetrations into shower waterproofing.
8. Treat joints with the specified products
A joint adhesive, surface filler, and flexible perimeter sealant perform different jobs. Use each where the system calls for it. Preserve movement joints in the underlying assembly instead of filling them rigidly or bridging them with trim.
9. Prime and paint where required
Finish exposed cuts, repaired joints, and the decorative face according to the material and coating instructions. Check whether factory primer needs additional preparation. Keep incompatible paint or solvents away from the molding.
10. Allow curing before normal bathroom use
Follow the relevant cure and return-to-service instructions before exposing the work to shower moisture or cleaning. Restore ventilation and keep it functioning. Dry-to-touch paint or adhesive that has initially grabbed may not yet be ready for the room's normal conditions.
Painting Crown in a Bathroom
Choose a coating for both the molding surface and the environment. “Bathroom paint” describes an intended use, but it does not automatically confirm adhesion to every polymer or factory primer.
Check the starting surface
Determine whether the profile is unfinished, primed, or supplied with a final coating. Remove permitted contaminants and prepare the surface as instructed. Do not aggressively sand a thin factory finish without checking the product guidance.
Choose performance before sheen
Satin and semi-gloss are common choices when a washable trim finish is desired, but gloss level alone does not determine moisture suitability. Manufacturers also offer matte coatings designed for bathroom humidity. Select a compatible product with the required durability and cleaning instructions, then choose the appearance you prefer.
Higher sheen tends to reveal joint imperfections under angled light. Paint a sample that includes a finished joint so you can judge both the profile and the workmanship. The same white may also look different beside warm stone, cool tile, or a bright ceiling.
Coordinate paint and sealant
Many silicone sealants are not paintable. Where the approved detail needs an unpaintable sealant, plan its color and application sequence instead of expecting the finish coat to hide it. Where a paintable joint product is specified, observe its curing requirements before coating.
Later, clean gently using methods permitted for the finish. Repeated scrubbing or aggressive chemicals can damage an otherwise suitable coating. If a joint repeatedly opens or stains, investigate movement or moisture before applying another cosmetic layer.
White Crown vs. Matching the Wall or Ceiling
White crown creates a distinct frame when the walls are darker. It can coordinate with white door casings and a traditional vanity, although a sharp contrast makes the perimeter more noticeable.
Wall-colored crown extends the wall color upward and can soften the separation between the wall and trim. This is useful when you want a shaped profile without a contrasting stripe.
Ceiling-colored crown can make the upper surfaces read as a connected composition. Test the transition against the wall and tile: matching color does not eliminate the shadow created by projection.
Use samples under daytime and evening lighting. A color that coordinates with tile near the vanity may shift visually at the ceiling, especially under different light sources. Make the decision with the actual finish sheen rather than relying only on a flat paint chip.
Ventilation Matters to the Entire Installation
Choose moisture-resistant crown molding as part of a room that dries effectively. Persistent condensation can affect paint, adhesives, joints, and the substrate even when the decorative profile itself tolerates moisture.
The Home Ventilating Institute recommends controls that continue bathroom ventilation for at least 20 minutes after use. Treat that as a practical starting point, not a promise that every bathroom will be dry on that schedule. Room conditions, equipment, and the ventilation design may require longer operation.
The Building America Solution Center's bathroom exhaust guidance emphasizes discharge outdoors. A fan that moves moist air into an attic or wall cavity has not removed that moisture from the building.
A running motor also does not prove adequate airflow. Blocked grilles, poor duct routing, or limited replacement air can reduce performance. If the ceiling repeatedly stays damp, have the system checked instead of compensating with a thicker coat of paint.
During planning, leave fan grilles and access panels removable. After installation, observe the upper corners through normal bathroom use. This gives more useful feedback than judging the finished crown only on the dry day it was painted.
Common Mistakes to Avoid
- Choosing by appearance alone. A suitable curve and color do not establish whether the product, mounting system, and surface can tolerate the exposure.
- Treating “synthetic” as a waterproof guarantee. Check the actual material, coating, adhesive, and permitted application. Different polymers and product constructions have different instructions.
- Calling every STAVROS crown polyurethane. The HIWOOD ceiling profiles discussed here are listed as polystyrene. Verify the material of each wall molding or decorative piece separately.
- Leaving vulnerable MDF cuts unprotected. A primed face does not establish protection at a freshly cut end. Confirm the MDF grade and follow its sealing requirements.
- Covering a damp or failing substrate. Crown hides the area from view but does not repair the condition that caused peeling, staining, or deterioration.
- Oversizing a small room. Check the distance above the mirror, the depth seen from below, and the relationship to tile and lights before ordering.
- Ignoring projection. Two profiles of similar height can create very different shadows and clearances. A flat paper strip cannot represent both dimensions.
- Continuing ordinary trim into a shower automatically. Confirm the complete application or provide a deliberate termination outside the enclosure.
- Leaving tile transitions until installation day. Establish the top course, visible band, and change of mounting plane while the design can still be adjusted.
- Using filler as a substitute for fit. Excess filler does not correct twisted molding, unsupported ends, or a moving joint. Fix the underlying detail first.
- Ordering by perimeter alone. Allow for stock length, joints, miters, saw cuts, returns, and test pieces. A long wall may require a joint even when the total footage seems sufficient.
- Ignoring ventilation after installation. Normal use starts only after the required curing period, and effective moisture removal remains part of maintaining the finished room.
How to Choose a STAVROS Crown for Your Bathroom
Prepare a short project description before comparing products. This makes the choice more precise and gives a supplier or installer enough information to answer application questions.
- Describe the room: powder room, tub bathroom, shower bathroom, or separate steam enclosure.
- Identify exposure: humid air, recurring condensation, occasional splashes, or direct spray at the proposed location.
- Record the geometry: ceiling height, room width, tile height and thickness, mirror top, cabinets, lights, and fan access.
- Choose a trial height and projection: compare full-size samples from normal viewing positions.
- Confirm the material and product: distinguish HIWOOD polystyrene crown from polyurethane applied molding and other decorative components.
- Plan the installation: establish the substrate, tile transitions, corners, returns, stock lengths, and joint locations.
- Confirm the finish system: obtain compatible adhesive, support, joint treatment, primer, paint, and return-to-service guidance.
When reviewing crown molding profiles, begin with the shape and dimensions that fit that description. A53, A70V1, L1902S, and A100 provide different proportions to compare; none is a universal bathroom choice.
Before you buy crown molding, confirm the current product specification and quantity from the cut list. For a US project, also confirm availability and delivery to the project address before scheduling installation. A price displayed in dollars does not by itself establish local stock or a delivery date.
Frequently Asked Questions
Can you put crown molding in a bathroom?
Yes. Choose a product and installation system suited to the actual moisture exposure, attach it to a sound substrate, and finish it as specified. Check ventilation before installation. A powder-room ceiling and the inside of a shower enclosure require different assessments.
What is the best crown molding for a bathroom?
The best option combines appropriate moisture tolerance with a profile that fits the room. Suitable polystyrene, polyurethane, or PVC products are worth comparing for humid interiors. Wood or an appropriate MDF grade may also work where the exposure and manufacturer's guidance allow them.
What material should crown molding be in a bathroom?
Start by identifying humid-air exposure, condensation, and direct water contact at the ceiling junction. Then compare approved products. Material names help narrow the search, but the coating, adhesive, substrate, and joint details determine whether the proposed installation is appropriate.
Is polystyrene crown molding suitable for a bathroom?
Suitable architectural polystyrene products can be considered for a bathroom perimeter when installed and finished for the exposure. The HIWOOD examples in this guide are listed as polystyrene. Confirm the selected profile's application limits; its material designation does not automatically approve it for direct shower spray.
Is polyurethane crown molding good for bathrooms?
It can be, when the particular product is intended for the conditions and its installation instructions are followed. Do not confuse polyurethane applied wall molding with ceiling crown. STAVROS identifies the A53, A70V1, L1902S, and A100 ceiling profiles discussed here as HIWOOD polystyrene.
Is MDF crown molding okay in a bathroom?
It depends on the grade, exposure, and coating system. Standard MDF needs particular caution around moisture. An approved moisture-resistant grade may suit humid interiors when fully protected as required. Moisture-resistant MDF is not automatically waterproof, and freshly cut ends need the specified treatment.
Can wood crown molding be used in a bathroom?
Yes, in appropriate conditions with suitable detailing and finish. Consider humidity changes, acclimation, cut surfaces, and maintenance. A well-ventilated powder room is generally a less demanding setting than a frequently damp shower perimeter. Wood should not be specified for direct exposure solely because it is painted.
What size crown molding should I use in a small bathroom?
For an initial mock-up in a compact bathroom with an 8-foot ceiling, compare about 1½–3 inches of installed height. This is a design starting point. Check projection, the gap above the mirror, lighting, tile layout, and the actual mounting orientation before selecting the profile.
Can crown molding go above shower tile?
Potentially, after you resolve exposure and the mounting detail. Check the tile's finished thickness, top-edge height, adjacent wall planes, and waterproofing requirements. Crown above the showerhead can still receive condensation or spray. Confirm that the complete trim system suits the proposed position.
Can crown molding be installed inside a shower?
Only specify it there when the exact product and installation system are approved for the exposure and coordinated with the shower assembly. Ordinary decorative crown should not be assumed suitable. An enclosed steam shower requires additional vapor-management consideration beyond general bathroom humidity.
Should bathroom crown molding be painted?
Follow the product specification. Some profiles require a finish coat, while other products may have an approved factory finish or permit an unpainted installation. If painting, choose compatible preparation, primer, and topcoat. Do not assume a white factory surface is already the final bathroom finish.
Does bathroom crown molding need to be waterproof?
It needs to suit its exposure. A crown on a normally dry perimeter may need a moisture-resistant system, while direct spray requires explicit approval. The phrase “waterproof crown molding” does not establish whether the adhesive, joints, coating, or underlying wall can tolerate the same conditions.
Does crown molding make a small bathroom look smaller?
A deep, highly contrasting profile can make the ceiling edge feel more prominent. A shallower section or coordinated color may feel less intrusive. The result depends on projection, lighting, detail, and the surrounding fixtures. Test a full-size sample instead of judging size from height alone.
Should crown molding match the ceiling or the wall?
Either approach can work. Matching the ceiling connects the upper surfaces; matching the wall extends its color upward. Contrasting white emphasizes the profile. Compare painted samples under the room's actual lighting, including the shadows the crown creates and the white tones in nearby tile.
Can I use crown molding in a powder room?
Yes. Powder rooms usually have lower moisture loads than bathrooms with showers, which gives more flexibility in materials and decoration. Coordinate the crown with wallpaper, mirrors, and lighting. Still check ventilation and provide a sound mounting surface rather than relying on weak wallpaper or peeling paint.
Choose the Profile That Fits the Whole Room
Good bathroom crown molding starts with the conditions at the ceiling junction. Once moisture exposure and mounting requirements are understood, select the height, projection, and detail that work with the mirror, tile, lights, and room proportions.
Compare actual profiles, test the shape at full size, and resolve the corners and tile transitions before ordering. A modest crown with a well-planned installation can give the bathroom a more convincing finish than a larger profile chosen without those details.
In a neoclassical bathroom, a single expressive profile around the perimeter and understated frames on the walls are often enough. If the mirror already has a rich frame, the ceiling can be kept more restrained. That way, every detail remains distinguishable.
Check the corners, short wall sections, and terminations near the duct boxes. In a small room, an awkward joint can be more noticeable than the absence of additional ornament. Therefore, the complexity of the pattern is chosen together with the ability to run it neatly along the actual geometry of the room.
Gilding, patina, and contrasting stripes require a separate fitting. They emphasize the relief, but also make joints and imperfections more noticeable. First, achieve the right size and quality assembly, then decide whether additional decorative finishing is needed.
Ceiling cornice and wall moldings in the same bathroom
The cornice sets the upper boundary of the room, while wall moldings organize the wall surface. They do not have to be identical in height and depth. A thinner frame under a prominent ceiling profile often looks more natural than several equally heavy lines.
When selecting moldings for the bathroom, first determine the free areas around the mirror, furniture, switches, and towel warmer. Do not try to maintain a symmetrical frame at the cost of inconvenient placement of equipment.
A separate article on how to combine moldings and decor for the bathroom, will help you work out the wall composition. Here it is enough to tie it to the ceiling perimeter by color, scale, and character of the lines.
For each wall element, assess the impact of splashes separately. A profile suitable for the upper dry part of the wall cannot automatically be transferred directly to the sink or into the shower area.
Polyurethane decor for the bathroom
polyurethane decor for the bathroom may include overlays, rosettes, and framing elements. Choose them by specific product cards: the range of the section does not mean that every element has the same material, dimensions, and permissible operating conditions.
For a fine ornamental line, you can consider decorative polyurethane molding. For example, decorative profile KPU-121 has dimensions 20 × 6 × 2000 mm and the specified material "polyurethane".
This is an example of additional decor, not a replacement for a 70 × 21 mm ceiling cornice. The products have different purposes and ways of participating in the composition. A narrow ornament can decorate a separate section of the wall, while the cornice completes the transition from wall to ceiling.
Also check whether the chosen relief will be convenient to clean. For a small bathroom, a few well-placed elements are usually more useful than densely filling all free surfaces.
Ceiling rosette and cornice in the bathroom
A rosette can accentuate the central light fixture in a large bathroom or a decorative guest powder room. First assess the size of the room, the ceiling height, the dimensions of the light fixture itself, and its mounting cup. Then match the rosette with the cornice in terms of depth and richness of pattern.
There should be enough free space between the central decor and the perimeter so that their shapes do not merge. In a narrow room, this task can be more important than matching the ornament. It is useful to mark the outer contour of the ceiling medallion before ordering.
Additional options are covered in the article about molded ceiling decor for the bathroom. When choosing a set, check the material of each component and its conditions of use.
A decorative medallion does not support the light fixture and does not determine its suitability for the bathroom. The mounting, permissible location, and access to electrical connections are provided independently of the molded decor. With a stretch ceiling, the entire composition is coordinated with its installer.
How to install a ceiling cornice in the bathroom
The sequence below helps organize the work. The specific mounting compound, fasteners, joint treatment, and waiting time are chosen according to the instructions for the profile and finishing materials. There is no single recipe for polystyrene, polyurethane, wood, MDF, and gypsum.
1. Check the condition and moisture level of the substrate
Eliminate leaks and address constantly damp areas. Let the plaster, filler, and other preparatory layers dry according to their requirements. If in doubt, the specialist should assess the moisture level using a method suitable for the substrate material. A surface that looks dry is not always ready for gluing.
2. Make sure the surface is strong
Remove loose layers and contaminants that interfere with adhesion. The cornice holds as reliably as the surface under the adhesive is strong. Old peeling paint will not become a good base for applying a thicker adhesive layer.
For tiles, separately check the preparation of the smooth surface and the suitability of the chosen compound. If mechanical fastening is required, determine suitable support locations in advance. In the shower, you must not make random holes without taking waterproofing into account.
3. Mark out according to the actual profile
Place the sample in the intended position, mark the bottom line and the projection. Go around the entire perimeter, including the areas above the mirror, door, and cabinet. Check the unevenness of the ceiling: this is exactly the moment to decide how the junction line will look.
4. Measure the walls and create a cutting plan
Record the length of each section, the internal and external corners, short returns, and end points. Do not automatically subtract the door width from the perimeter: if the cornice runs above the opening, that section is needed too.
For a rectangular bathroom 1.8 × 2.4 m, the perimeter is 8.4 m. With a strip length of 2 m, the initial calculation gives five pieces, that is, 10 m of material. But both walls 2.4 m long will require joints. You need to distribute the segments in advance, leave material for corner cuts, end alignment, and tests.
Five strips in such a calculation are a starting point, not a promise of sufficient reserve for any layout. Consumption is refined by the joint locations and the cutting method. From a blank exactly 2000 mm long, you cannot expect to get two 1000 mm segments after a saw cut that removes part of the material.
5. Check the angles and make test cuts
A room corner is not always 90°. Measure it and start with short test pieces. When cutting, the profile must be in the position intended by the chosen working method. The same number on the saw scale does not guarantee the same result for different sections.
6. Prepare internal and external joints
Check which way each segment is oriented and where its face side is. The external corner requires especially careful fitting: the protruding edge is visible from both sides. Do not carry over saw settings between cutting in the installation position and cutting flat without recalculating and checking.
7. Assemble the section without glue
A dry fit shows whether the pattern, bottom lines and installation surfaces match. Also check the transition from tile to paint. The strip should sit in the correct position without strong twisting or forced bending.
Label the prepared parts so you do not mix up the wall, direction and angle. In a small bathroom there are many similar short segments, and a mistake often becomes noticeable only during assembly.
8. Use a compatible installation compound
Check three conditions: whether the adhesive is suitable for the cornice material, the wall surface and the expected humidity. Clarify the application pattern, the permissible layer thickness, the need for temporary fixing and the holding time.
The jointing compound for the ends and the adhesive for attaching to the wall may be different products. Do not substitute one for the other just because both are sold for decorative profiles. Additional fixing is used where it is provided for by the chosen system.
9. Finish the joints
After fixing, finish the joints in a way suitable for the product. Distinguish between the joint of two strips, cosmetic surface levelling and a flexible junction to another material. These tasks may require different compounds.
Do not rigidly fill a joint that is meant to accommodate movement of structures. A large gap is first assessed as a fitting or preparation error, not as a reason to apply more sealant.
10. Apply the paint and let the finish cure
Treat the cut edges and repaired areas, apply the specified primer and paint. Observe the intervals between operations. Before returning the bathroom to normal use, wait until it reaches a state that can withstand moisture, not just until the surface is no longer tacky.
Ventilation must also work after installation. On first normal use, check how the upper corners dry out and whether condensation appears in a previously unnoticed spot. If the problem recurs, look for its cause rather than just touching up the paint.
What to use to paint a ceiling cornice in a bathroom
A moisture-resistant paint for the cornice must suit both the profile material and the conditions of the room. The label "for kitchen and bathroom" is useful, but by itself it does not confirm adhesion to any polymer or factory finish.
Preparation and priming
Find out whether the product is supplied unfinished, primed, or with a ready finish. Preparation is chosen according to this state. There is no need to automatically sand the factory surface heavily or apply a random universal primer.
Do a test on an offcut: the preparation, treatment of a small joint, primer, and paint should replicate the future work. This way you can see the difference in texture in advance and check the appearance of the repaired area.
Gloss and washability
A semi-matte or semi-gloss finish can be easy to maintain, but the degree of gloss does not replace technical specifications. Matte coatings also exist for wet areas. Choose based on compatibility, operating conditions, and the permitted cleaning method.
A glossier paint reveals minor unevenness more strongly under side lighting. If the bathroom has directional mirror lighting, evaluate the sample under exactly that light. The same white shade can also look different next to warm and cool porcelain stoneware.
Paint and sealant
Many silicone sealants are not intended for painting. If such a compound is required by the design, its color and application sequence are chosen in advance. If a paintable joint is required, select a compatible product with the necessary properties rather than painting over any sealant.
After renovation, stick to the permitted care products. Aggressive chemicals and a stiff brush can damage the coating. A joint that reopens or a stain requires investigating the cause, not another thick layer of paint.
White cornice or cornice in the wall color
A white cornice noticeably frames colored walls and can complement white trim or plumbing fixtures. The stronger the contrast, the more clearly the entire ceiling perimeter reads, including corners and short sections.
Painting in the ceiling color unifies the upper surfaces. The profile remains visible thanks to its relief but does not create a separate colored stripe. This is a useful option for a calm design in a small bathroom.
Painting in the wall color continues its shade upward and can reduce the contrast between the cornice and the vertical plane. The physical projection and shadow are still preserved.
Compare the options on a sample under daylight and evening lighting. Do not consider contrasting trim off-limits for a low ceiling: it is acceptable if its prominence matches the intended interior. The main thing is to assess the entire perimeter, not just one beautiful corner.
Why ventilation matters even for a moisture-resistant cornice
A moisture-resistant ceiling cornice works together with the adhesive joint, paint, and substrate. Constant condensation affects all of these areas. Therefore, the profile's own resistance to water does not eliminate the need for proper air exchange.
Check whether the ventilation grille is unobstructed and whether air supply to the room is provided. A running fan does not always mean sufficient moisture removal: the result also depends on the duct, the condition of the equipment, and the possibility of replacement air entering.
When using an exhaust fan, it is useful to provide a control that allows it to run after a shower. The duration is selected to suit the room and the equipment. A universal number of minutes does not guarantee that the upper corners have already dried.
If ventilation is natural and surfaces regularly remain wet, its operation needs to be checked. Do not block the standard opening with a decorative strip or cover it with furniture. Changes to the ventilation system should be coordinated taking into account the design of the house.
Grilles, hatches, and parts accessible for maintenance must remain removable. Sometimes it is enough to slightly change the height or projection of the cornice to preserve access without disrupting the composition. This is easier to plan in advance than to cut an already painted profile.
If stains near the ceiling recur, it is worth checking both possible leaks and cold areas of the structure. Not all dampness is caused by insufficient exhaust, so the solution starts with the cause, not with buying a more resistant paint.
Typical mistakes when choosing a cornice for a bathroom
- Buying based only on appearance. A photograph shows the shape but does not explain whether the product is suitable for your substrate, humidity, and finishing method.
- Confusing polystyrene with polyurethane. The material is determined by the specific model. The HIWOOD cornices from this article cannot be called polyurethane because of the name of the neighboring catalog section.
- Assuming any synthetic profile is suitable for a shower. A material's moisture resistance and its suitability for installation in a zone of direct wetting are different questions.
- Choosing too large a cross-section without a trial fit. Check the top of the mirror, cabinets, tiles, and the position of the light fixtures. On an empty wall, there seems to be more free space.
- Ignoring the projection. The height does not show how far the cornice will protrude along the ceiling. The depth affects the shadow, the reflection in the mirror, and access to equipment.
- Leaving the transition from tile to paint for the last day. The difference in planes must be resolved before fixing the profile. A thick bead of sealant rarely fixes a poorly planned junction.
- Gluing onto a damp or weak surface. Even a suitable mounting compound does not eliminate dampness or restore strength to a peeling coating.
- Replacing fitting with filling gaps. An incorrect cut, a twisted strip, and the absence of support are first corrected structurally. The material for the joint is used for its intended purpose.
- Not matching the paint with the sealant and primer. Each layer must be compatible with the previous one. It is especially important to check in advance whether painting of the chosen sealant is allowed.
- Blocking access to ventilation and light fixtures. Equipment must remain serviceable. A removable grille is checked not only by its visible outline but also by how it is removed.
- Hiding a serious unevenness behind the cornice. The profile does not replace repairing the base. A wide strip can emphasize a curved ceiling line if the junction is not thought through.
How to choose a STAVROS ceiling cornice for the bathroom: step-by-step algorithm
Before buying, put together a short description of the room and a few measurements. It makes comparisons easier Polystyrene ceiling cornices and lets you ask specific questions about installation.
- Determine the type of space: guest bathroom, bathroom with a standard tub, shower room, or combined room.
- Assess moisture exposure: humid air, condensation, splashes, or regular direct wetting.
- Note the cornice's path: over paint, above tile, near glass, next to bulkheads and cabinets.
- Measure the finished ceiling height at several points, including areas with possible level differences.
- Record the room dimensions and the placement of key objects that will be visible together with the profile.
- Determine the allowable cornice height based on the tightest area above the mirror, tile, or furniture.
- Check the projection on a three-dimensional mockup or sample with the lighting turned on.
- Compare real models: cross-section, material, plank length, and the shape of the front surface.
- Check the base and the possibility of mounting without damaging the ceiling structure or waterproofing.
- Plan the corners and cutting: where the joints, short pieces, and profile ends will be.
- Choose installation materials for the specific product, base, and operating conditions.
- Plan the finish: preparation, joints, priming, painting, and the time before using the bathroom.
To buy a ceiling cornice without unnecessary rework, give the installer the chosen product code before the tiling work is finished. Check the quantity against the cutting plan and confirm the availability of the required volume in advance. Replacing it with a similar profile in the middle of the renovation can change the junction height and the position of the joints.
Frequently Asked Questions
Can a ceiling cornice be installed in a bathroom?
Yes, if the product is intended for the actual conditions, the base is prepared, and the adhesive and finish are compatible. Before installation, the causes of constant wetting must be eliminated. The position of the cornice relative to the shower and the possibility of normal drying of the room after use are also important. The word “moisture-resistant” in the material description alone is not enough to evaluate the entire installation.
Which cornice is best for a bathroom?
The one that suits the material, height, projection, and installation conditions. For a standard ceiling perimeter, it is worth comparing suitable polymer profiles, including HIWOOD polystyrene ones. For another material, check the permissible humidity and finish. Then evaluate the sample next to the tile, mirror, and light fixtures, rather than choosing from a single attractive image.
Which cornice material is not afraid of moisture?
Suitable polystyrene and polyurethane products are resistant to moisture, but this does not mean that any profile can be constantly exposed to water. Check the properties of the specific product and the permitted place of application. In the finished trim, the adhesive, coating, joints, and substrate also matter: they may impose different requirements than the decorative strip itself.
Can a polystyrene cornice be used in a bathroom?
Architectural profiles intended for the relevant conditions can be considered. Cornices HIWOOD A70, A70V1, L1902S, and A90V2 in the STAVROS catalog are designated as polystyrene. For the selected area, the installation compound and finish are checked separately. The possibility of use in a bathroom should not be automatically extended to the interior of a shower with direct water exposure.
Can polyurethane decor be used in a bathroom?
Yes, if the specific moldings, overlays, or rosettes are suitable for the intended placement and are properly finished. Check each part separately. Polyurethane decorative trim and a polystyrene ceiling cornice can be part of the same composition, but they remain different products. A small wall profile does not replace a cornice just because it has a similar color.
Is MDF suitable for a bathroom?
This depends on the MDF grade, moisture exposure and surface protection. Standard material requires particular caution; a moisture-resistant grade is used within the manufacturer's tolerance. Edges, fresh cuts and damaged coating areas must be treated according to the instructions. Neither primer on the face side nor the name “moisture-resistant” permits any direct wetting.
Can a wooden cornice be used?
It can be used under suitable conditions, with well-designed joints and protective finishing. The change in wood moisture, material preparation and subsequent maintenance must be taken into account. A guest bathroom without a shower is usually less demanding than a ceiling above a shower that regularly gets wet. Paint or varnish alone does not confirm that a wooden product is suitable for any area of a bathroom.
What cornice size should be chosen for a small bathroom?
For a first fitting, it is often convenient to take a profile about 40–50 mm high and compare it with a taller option with a small projection. This is a guideline, not a rule. Assess the distances to the mirror, tiles, and light fixtures. The mockup should show depth: a flat strip on the wall does not convey the shadow and the appearance of the cornice from below.
Which cornice should I choose for a 2.5 m ceiling?
Start with moderate sizes and check them in the room. For a small area, it is useful to compare approximately 35–60 mm in height, and then try on a taller shallow profile if there is such a need. The result depends on the projection, the upper edge of the mirror, and the tiles. The 2.5 m mark itself does not dictate a single correct section.
Can a cornice be installed over tiles?
Yes, when the selected mounting system allows such a base. It is necessary to check the condition of the surface, the compatibility of the adhesive with the tile and profile, as well as the transitions to adjacent walls. Take into account the thickness of the cladding and the required expansion joints. Do not try to achieve a level perimeter by forcibly bending a rigid strip over the difference between tile and paint.
Can a cornice be installed above a shower?
The decision depends on the exact location. Outside the enclosure, above an open shower, and inside the direct water zone, different conditions apply. It is necessary to confirm the suitability of the entire solution: the product, adhesive, coating, joints, and substrate. If such confirmation is not available, provide for the decorative cornice to end outside the shower. A steam cabin requires separate consideration.
Does a ceiling cornice need to be painted?
Check the condition on delivery and the instructions. A product intended for painting may require a finish coat, while a ready factory finish requires different care and preparation. White color by itself does not mean that painting is unnecessary. When choosing paint, check its compatibility with the profile, primer, and bathroom conditions, including permissible cleaning agents.
What should be used to seal the joints?
The composition is selected based on the purpose of the joint and the requirements of the material manufacturers. The joint between two strips, cosmetic finishing, and elastic adjoining to tiles may require different products. Check the possibility of painting in advance. A large gap, an incorrect cut, or the absence of support should first be corrected, not compensated for with an arbitrary amount of sealant.
Can a wide cornice visually reduce the size of a bathroom?
A deep projection, a strong shadow, and contrasting color can make the upper boundary feel heavier. But the effect depends on the whole room. A tall, shallow profile sometimes looks calmer than a low, deep one. Compare samples under the same color and lighting, look at the reflection in the mirror and the remaining strip of wall above the fixtures.
What matters more — the height or the projection of the cornice?
Both dimensions are needed. Height determines the part of the wall occupied and the distance to the mirror or tile. Projection affects depth, shadow, and possible interference with doors and fixtures. For example, 50 × 50 and 70 × 21 mm are different proportions: the second profile is taller but projects noticeably less across the ceiling.
Where to start choosing
First, look at what happens under the ceiling after normal bathroom use. Then measure the free areas above the tile, mirror, and furniture, and determine the suitable material and mounting system. After that, compare the size and pattern of the profile.
Choosing bathroom cornices, evaluate the specific cross-section in the room itself. A suitable projection, neat joints, and a well-thought-out junction with the tile are more important than maximum width or the number of relief details. This way, the ceiling cornice becomes a natural part of the finish that is convenient to use and keep in order.