Article Contents:
- Floating furniture: what is the fundamental difference
- What to buy for a wall-mounted cabinet: complete set
- Facade of a wall-mounted cabinet: center of attraction
- Handles for a wall-mounted cabinet: the detail that decides everything
- Wall behind a wall-mounted cabinet: not a background, but a participant
- Baseboard under a wall-mounted cabinet: the lower line of the space
- Wood on a wall-mounted cabinet: where it is irreplaceable
- Polyurethane around a wall-mounted cabinet: atmosphere and structure
- Ready-made sets: five scenarios for a wall-mounted cabinet
- Minimum set: quick result
- Classic set: complete look
- Soft classic: gentle neoclassicism
- Formal option: richness of details
- Small room: lightness as a principle
- How to choose proportions: from cabinet to wall
- Installing moldings around a wall-mounted cabinet: work sequence
- Mistakes when choosing decor for wall-mounted furniture
- Color and painting: how to combine all elements
- Floating cabinet as an element of the interior zone
- What to buy together: a complete purchasing strategy
- FAQ: Answers to Popular Questions
- Can a floating cabinet be combined with polyurethane molding?
- What to buy for a floating cabinet in a classic style?
- Where to use wood and where to use polyurethane on a floating cabinet?
- How not to overload floating furniture with decor?
- How is a floating cabinet better than furniture on legs?
- What to use to glue polyurethane moldings to the wall behind the cabinet?
- Which baseboard to choose for a floating cabinet?
- About the Company STAVROS
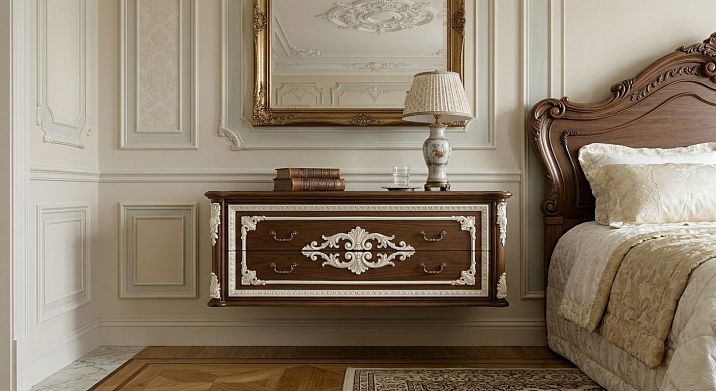
A floating cabinet is a special type of furniture that requires a completely different approach to decoration than any piece on legs. When the body hangs in the air without touching the floor, the eye automatically takes in everything: the facades, handles, the wall behind, the gap underneath, the baseboard, the moldings around. There is not a single detail left that can be hidden or left to chance. That is why a floating cabinet is not just a furniture solution—it is an interior design challenge that must be addressed comprehensively. The facade decor, handles, wall moldings, baseboard under the cabinet, and decorative frame around the area—all elements must be thought out in advance, purchased simultaneously, and installed as a single composition. This article is dedicated to this logic.


Floating furniture: what is the fundamental difference
Furniture on legs has a clear lower support point. The gaze "grounds" on the legs, base, and glides — and this gives a feeling of stability. A wall-mounted cabinet lacks this point. The body literally hangs on the wall, and this creates two opposite effects: on one hand — visual lightness, a sense of air and modernity; on the other — exposure of all details that cannot be hidden by anything. What exactly does a person see when looking at a floating cabinet without legs? The facade — completely, from the top edge to the bottom. Handles — in the center of attention, no lower element distracts from them. The wall behind the cabinet — it is open on the sides and top if the cabinet does not reach the ceiling. The lower gap — the space between the floor and the body, which can be either an accent or a problem. The baseboard — it is visible under the cabinet and must be coordinated with its height. Moldings and decor on the wall — everything that is near the cabinet falls into the field of view. This is the main difference between wall-mounted furniture and furniture on legs: here you cannot design just one item. Here, a zone is designed — with the cabinet in the center, the wall as a background, and decor as a connecting fabric between them.


What to buy for a wall-mounted cabinet: complete set
Before moving on to details, let's fix the full list of what is needed for the proper design of a wall-mounted cabinet in a classic interior. This is not a theoretical list — it is a practical shopping map:
-
Wooden handles — for cabinet facades, with fasteners included
-
decorative elements for furniture — overlays on facades, corner accents, planks with relief
-
Wooden decoration — carved overlays, side planks, lower body accents
-
Fasteners for the wall-mounted body — considering the cabinet weight and wall type
-
Moldings made of polyurethane — for a decorative frame around the cabinet zone
-
Polyurethane wall decor — wall panels, pilasters, decorative planes
-
Polyurethane appliqués — for lightweight facade frames without load
-
Decor for Molding — corner sockets and decorative inserts
-
Polyurethane trim — baseboard, cornice, horizontal profiles
-
Polyurethane moldings — additional decorative elements around the perimeter of the zone
-
Adhesive for mounting polyurethane elements
-
Acrylic sealant for joints
-
Primer — for wood and for polyurethane separately
-
Paint in the selected shade
-
Varnish or oil for final protection of wooden parts
-
Reserve 5–10% for each item
The main idea to understand before starting shopping: a wall-mounted cabinet looks expensive only when the fronts, handles, bottom gap, baseboard, and surrounding wall are assembled into one complete composition. A single beautiful front on a bare wall without moldings and baseboard is an unfinished look.
Our factory also produces:


Wall-mounted cabinet front: the center of attraction
If furniture with legs has a lower part that holds the gaze and grounds the perception, then for a wall-mounted cabinet, all visual interest is concentrated on the front. It is a rectangular plane that is seen entirely — without a plinth at the bottom, without legs at the corners. It is the front that determines the style, character, and visual weight of the entire zone. For a classic interior, the front of a wall-mounted cabinet must have relief. A smooth plane without decoration looks minimalist — that is a style, but not classic. Classic requires profile, texture, applied or milled ornament. decor for furniture made of solid wood — overlays with relief, corner strips, central rosettes — creates on the front that very volume that distinguishes classic furniture from any other. Wooden overlays made of beech or oak are glued to the front and additionally secured with fasteners. They withstand daily contact, do not lose shape from humidity changes, and are easily repainted when changing the interior concept. Polyurethane front frames are an alternative for neutral classic styles: Provence, neoclassicism, modern classic with laconic relief. Polyurethane appliqués are glued to the front, primed, and painted in a single color with the body — and create the effect of painted classic furniture with molding profile. An important limitation: polyurethane overlays are only permissible where there is no direct impact contact. The central part of the front, where the hand reaches when opening, should be finished with wood — either in the form of a handle or in the form of a wooden detail around it.
Get Consultation
Handles for a wall-mounted cabinet: the detail that decides everything
On a wall-mounted cabinet, handles are visible like nowhere else. No legs below, no baseboard to distract the eye. Only the facade and handles. This makes choosing a handle a fundamentally important decision — and at the same time gives an opportunity to create a strong accent with minimal cost. Furniture Handles made of solid wood for a wall-mounted cabinet — this is not just hardware. It is a style-forming element. The shape of the handle must match the character of the facade: if the facade has carved overlays with baroque relief, the handle should have proportionate plasticity. If the facade is in the soft classic style with thin molding frames, the handle should be elegant and restrained. A mismatch in scale between the handle and the facade decor destroys the image faster than any other mistake. For a wall-mounted cabinet, the handle projection — the distance from the facade surface to the outer edge — is especially important. A handle that protrudes too much visually "weighs down" the light floating body and creates a risk of snagging when passing by. The optimal projection for wall-mounted furniture is 2–3 cm: enough for a comfortable grip, but not so much as to disrupt the proportions. The vertical placement of the handle on the facade of a wall-mounted cabinet also matters. A handle installed in the center of the facade in height creates a feeling of stability. A handle shifted towards the top edge creates lightness. A handle near the bottom edge creates groundedness, which contradicts the concept of floating furniture. The optimal place is the center or slightly above the center of the facade. In the STAVROS collection Wooden handles for furniture are made from beech and oak using 3D milling, in several shapes and colors. This allows you to choose a handle exactly to match the style of the cabinet — from a laconic straight bracket to a curved classic overlay.
The wall behind a wall-mounted cabinet: not a background, but a participant
Here is a question that is rarely asked, but which is more important than everything else: what does the wall behind the wall-mounted cabinet look like? If the furniture stands on the floor, the wall behind it is partially hidden. A wall-mounted cabinet opens up the wall from below, from the sides, and often from above. And this open wall becomes part of the interior scene — whether we want it or not. An empty, undecorated wall behind a floating cabinet looks like unfinished work. This is especially noticeable in a classic interior, where rhythm and structure are basic principles. The wall behind the cabinet should be decorated. This does not mean that a complex stucco composition is needed. A molding frame is enough — two horizontal and two vertical of polyurethane moldingswhich form a rectangle, visually "embedding" the cabinet into the wall. This technique turns a wall-mounted cabinet from an "object attached to the wall" into an architectural element. The size of the molding frame should be slightly larger than the dimensions of the cabinet — usually by 8–15 cm on each side. A frame at the level of the cabinet or slightly above it creates the feeling of a niche, even if the wall is flat. If the frame is significantly wider than the cabinet, a feeling of emptiness appears on the sides, and the connection between the furniture and the decor is lost. For more complex solutions — for example, when the cabinet is integrated into the overall wall composition of a living room or bedroom — it is used Polyurethane wall decor: panels, pilasters, decorative horizontal belts. This creates a multi-level architectural scene in which the cabinet is one of the elements, not the only accent. It is important to consider sockets and switches. Before marking the molding frame, all electrical points are plotted on the plan — and the frame is designed around them. A molding covering a socket is not just an aesthetic mistake, it is a rework that is easy to avoid with proper planning.
Baseboard under a wall-mounted cabinet: the bottom line of the space
The lower gap under a wall-mounted cabinet is the space between the floor and the bottom edge of the body. It can be an accent — if designed correctly — or a problem — if not thought about. A baseboard under a wall-mounted cabinet solves several tasks at once. First, it covers the bottom line of the wall, which is completely open in the area under the cabinet. Without a baseboard, this line looks unprotected and random. Second, the baseboard creates a horizontal reference point that visually "grounds" the floating body — gives it a base without depriving it of a feeling of lightness. Third, the right baseboard completes the lower zone and creates a feeling of a well-thought-out interior, not hastily assembled furniture. Polyurethane trim — baseboard, cornice, horizontal profiles — optimal for this task. Polyurethane baseboard is easily cut to size, requires no complex installation, takes paint well, and creates a clean horizontal line under the cabinet body. The height of the baseboard should match the height of the cabinet's bottom clearance: if the clearance is 15 cm, a baseboard 10–12 cm high fills it correctly, leaving a visible strip of wall above — and that's fine. If the baseboard is higher than the clearance, it will conflict with the body. A horizontal molding between the baseboard and the cabinet area is an additional technique that creates a separation between the lower and upper parts of the wall. This works especially well in living rooms where a floating cabinet is integrated into a wall paneling system.
Wood on a floating cabinet: where it is indispensable
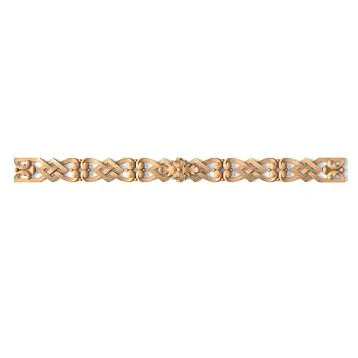
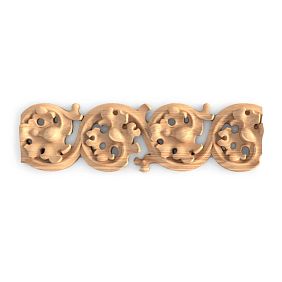
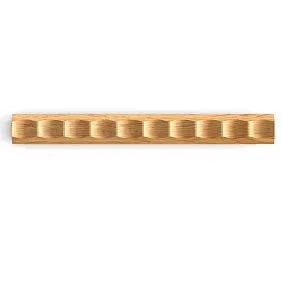
Floating furniture without legs loses its "wooden bottom" — legs, supports, base. But that doesn't mean wood isn't needed here. On the contrary: wood on a floating cabinet is concentrated in areas of greatest contact and greatest visibility. Handles are the first and foremost. On a floating cabinet, handles are located in the very center of the facade, in the most visible zone. Wooden handles made of beech or oak — this is warmth, texture, and status. They work as a point accent that immediately defines the class of furniture. Facade overlays are the second. decorative elements for furniture made of wood on the cabinet facade create a relief that is visible in full height. Corner strips, central rosettes, horizontal profiles — all of this forms the visual volume of a classic facade. Side body strips are the third. The sides of a floating cabinet are as visible as the facade: there are no legs or base to cover them from below. Wooden decorative strips on the sides complete the body and give it volume. The lower decorative belt is the fourth. The bottom end of the floating cabinet body is open and visible from below. A wooden strip along the lower perimeter of the body ensures clean details and completeness of form. Carved decor is the fifth. If the cabinet style is formal classic or Empire, carved wooden overlays with ornamentation create the necessary "depth" of the facade. The STAVROS catalog offers over 400 models furniture decorative elements — from laconic smooth strips for modern classic to complex ornamental panels with acanthus motifs.
Polyurethane around a floating cabinet: atmosphere and structure
polyurethane decor around a floating cabinet is not decoration. It is an architectural tool that turns a solitary hanging body into part of the interior environment. A molding frame on the wall creates a visual "niche" around the cabinet. This is the most effective technique for floating furniture: a frame made of of polyurethane moldings defines the boundaries of the zone, within which the cabinet ceases to be "glued to the wall" and becomes a detail integrated into the space. The cornice line above the cabinet — a horizontal molding at the level of the body's top edge or slightly higher — creates a "roof" for the zone. This works especially well in living rooms where a floating cabinet occupies the entire width of an accent wall: the cornice completes the top line and gives the zone monumentality. Decorative stucco on the wall behind the cabinet — for formal interiors. Decorative rosettes, medallions, horizontal friezes — all of this creates a complex background texture against which the cabinet looks like a central object in a frame. Decor for Molding — Corner elements, sockets at intersections are mandatory for classic frames. Without corner sockets, molding joints look like a construction node rather than a decorative detail. This is especially noticeable when painted the same color as the wall: the corner socket creates an accent point that enlivens the monochrome surface. It is important not to overload the area. Simultaneously active relief on the cabinet facade, complex moldings on the wall, and an ornamental baseboard create visual noise. The rule of one accent: either a rich facade + calm moldings, or a laconic facade + a complex molding frame. Both paths lead to harmony, but going down both at the same time means arriving at chaos.
Ready-made kits: five scenarios for a wall-mounted cabinet
Minimal kit: quick result
Wooden handles on facades + baseboard from polyurethane molding under the cabinet + horizontal molding on the wall at the level of the top edge of the body. This kit requires minimal expense and gives an instant result: handles accent the facade, baseboard covers the bottom line, molding completes the top. The cabinet ceases to be "hanging" and becomes part of the wall.
Classic kit: full-fledged look
Wooden handles in classic style + decorative elements for furniture on the facade + molding frame from of polyurethane moldings on the wall + Decor for Molding in the corners of the frame + baseboard. This kit creates a complete interior zone. Facade with wooden overlays + frame on the wall + uniform painting — and the result equals a designer solution, not a self-assembly.
Soft classic: soft neoclassicism
Smooth facades without overlays + laconic Furniture Handles in the form of a bracket + a thin molding frame in the color of the wall + a thin baseboard. All elements are in a single neutral shade. This approach creates the image of expensive painted furniture in the style of modern classics. No contrast, no relief noise — only clean lines and a sense of thoughtfulness.
Formal option: richness of details
Wooden decoration with baroque ornament on the facade + figured Wooden handles with a classic profile + a complex molding frame with vertical pilasters on the sides + Polyurethane wall decor in the upper part of the zone + a wide baseboard with a profile. This set is for spacious rooms with high ceilings. In a small room, such a solution will be excessive — it is designed for a space that can "accommodate" it.
Small room: lightness as a principle
In a small room, a hanging cabinet already creates a feeling of air — it is important not to destroy it. A laconic facade with minimal relief + thin Wooden handles small size + thin molding without corner rosettes + low baseboard. Uniform painting of all elements in a light neutral color. In a small room, a hanging cabinet is already the right solution in itself — it opens the floor and adds air. The task of decor is not to overload this feeling.
How to choose proportions: from cabinet to wall
A hanging cabinet in a classic interior requires precise proportion matching. A disproportionate frame on the wall, handles that are too large, a baseboard that conflicts with the clearance height — all of this disrupts the harmony the buyer wants to create. Width of the molding frame on the wall: optimally, the cabinet width plus 10–20 cm on each side. A frame that closely follows the cabinet's contour looks accidental. A frame that is significantly wider loses its connection with the furniture. Height of the frame on the wall: from the top edge of the baseboard to 20–30 cm above the top edge of the cabinet. This creates breathing space between the furniture and the top line of the frame. Handle projection relative to the facade: 2–3 cm. A handle protruding more than 4 cm visually detaches it from the facade and disrupts the proportions of the floating body. Scale of decorative overlays on the facade: should match the scale of the molding on the wall. If the facade has a large ornament, the molding is chosen with a voluminous profile. If the overlays are thin and minimalist, the molding is selected with minimal projection. Baseboard height: no more than 2/3 of the cabinet's bottom clearance. If the clearance is 20 cm, the baseboard height is up to 12–14 cm. If the baseboard is higher than the clearance, a visual conflict arises.
Installing moldings around a hanging cabinet: work sequence
The correct sequence for installing decor around a hanging cabinet is not a strict regulation, but a working logic that helps avoid rework. Start with wall preparation. The surface is leveled, puttied, and primed. Wallpaper in the molding installation area is removed — polyurethane elements are not mounted over wallpaper. Then, marking is done. The contours of the molding frame are drawn on the wall, and sockets, switches, sconces — everything that must remain accessible — are marked. The marking is checked with a level and tape measure on both sides of the cabinet axis: symmetry is critical. After marking, the cabinet body itself is hung — if it hasn't been installed yet. Fasteners for the hanging body are chosen considering the weight of the cabinet with contents and the wall type: for brick walls — dowels with bolts, for drywall — special anchors for hollow partitions. After ensuring the cabinet hangs evenly and securely, proceed to install the moldings. Cutting at angles is done using a miter box or miter saw. Detailed cutting and installation technology is in the article installing polyurethane molding. Glue is applied to the back of the molding, the element is pressed against the wall and held until it sets. Information on choosing the right adhesive can be found in the article what to glue polyurethane molding with. After installing all moldings, joints are treated with acrylic sealant and sanded. Then, the entire surface — the wall inside the frame, moldings, baseboard — is primed and painted in a single color. Wooden parts — handles, overlays — are processed separately: sanding, priming, painting in the desired color, final varnish or oil for protection.
Mistakes when choosing decor for hanging furniture
Let's look at typical mistakes — those that occur most often and are easy to avoid if you know about them in advance.
Thinking only about the facade and forgetting the wall. This is the first and most common mistake. A beautifully designed facade on a bare wall without moldings looks unfinished. A hanging cabinet requires decorating the area around it — not just the item itself.
Not considering the baseboard. The bottom clearance under the cabinet without a baseboard looks random. The baseboard is not an optional detail for hanging furniture, but a mandatory element of the bottom line.
Leave a random gap at the bottom. If the plinth is chosen without calculating the clearance height, a random "strip" of bare wall remains between the top edge of the plinth and the bottom edge of the cabinet. This looks sloppy and is easily solved by proper calculation at the purchase stage.
Buy handles without connection to moldings. A large handle with a heavy profile + a thin, elegant molding on the wall is a conflict of scales. The handle and molding must be coordinated in visual weight.
Place polyurethane overlays in a direct contact area. If the overlay is on the facade in an area where it is grabbed when opening, it will not withstand daily use. The central area of the facade should only be wood.
Fail to check the fastening before installing the decor. Decor is installed only after the cabinet is securely fastened to the wall and tested under load. Redoing moldings due to moving the cabinet is expensive and unpleasant.
Fail to account for the cabinet's weight when choosing fasteners. A suspended cabinet with contents weighs significantly more than an empty body. Fasteners must be designed for the full operational load with a safety factor.
Fail to take a reserve of moldings. Trimmings always occur during cutting, and errors are possible during installation. A 10% reserve is a standard rule that saves money on additional delivery.
Mix wood and polyurethane without a unified paint finish. Two different materials with different natural color shades create visual inconsistency. Painting all elements in one color immediately solves this problem.
Color and painting: how to unify all elements
A suspended cabinet in a classic interior benefits from a unified color concept. When handles, overlays, moldings, plinths, and the furniture itself are painted in one shade, the space is perceived as a thoughtful design solution rather than a set of random objects. The most practical options for a classic interior: white — universal, clean, creates a sense of lightness; cream — warmer than white, closer to traditional classic; pearl gray — modern classic, neutral and elegant; dusty green — trendy neoclassicism, requires unity of all details. For wooden handles and overlays, a "natural wood + white moldings" option is possible — this is a classic combination of warm wood and white stucco, working flawlessly in interiors of any scale. Important: all wooden elements are sanded before painting, primed with a special wood primer, and painted in two to three coats with intermediate sanding. Polyurethane elements are primed with a separate primer to ensure paint adhesion to polyurethane. Without primer, paint on polyurethane holds poorly and peels over time.
Suspended cabinet as an element of the interior zone
Suspended furniture is best revealed not as a single item, but as part of a broader area. In the living room — as an element of a media zone or decorative wall. In the bedroom — as a bedside table integrated into the overall wall paneling. In the study — as a console under a mirror or shelf. In each of these contexts, a suspended cabinet requires coordination with its surroundings: with neighboring furniture, with the height of the baseboard around the entire perimeter of the room, with the rhythm of moldings on other walls. If in the living room one wall has molding frames installed, and the suspended cabinet on the opposite wall stands without any decoration — the dissonance will be immediately noticeable. Consistency of decor throughout the space is a principle that distinguishes a well-thought-out interior from a randomly assembled one. Polyurethane moldings STAVROS is produced in hundreds of profiles and sizes — from the thinnest flat strips to voluminous cornices with rich relief. This allows you to choose a molding for the cabinet area that exactly matches the moldings in other parts of the room — and create a unified decorative language for the space.
What to buy together: a complete purchasing strategy
The "all in one order" principle is even more important for a suspended cabinet than for regular furniture. The explanation is simple: the decor around the suspended cabinet is installed together with the cabinet itself, not after it. If the moldings arrive later — you will have to remove the cabinet or install the moldings in cramped conditions. Recommended order of ordering:
-
Wooden handles — by number of facades + 1 spare
-
decorative elements for furniture — according to the number of facades + 10% spare
-
Moldings made of polyurethane — with calculation of frame perimeter + 10%
-
Decor for Molding — by number of frame corners
-
Polyurethane appliqués — for facade frames for painting, if planned
-
Polyurethane wall decor — for wall panels, if provided
-
Polyurethane trim — baseboard with calculation by length + 10%
-
Glue for polyurethane elements
-
Fasteners for the suspended body (considering weight and wall type)
-
Acrylic sealant — 1–2 tubes
-
Primer: separate for wood and for polyurethane
-
Paint in the desired shade — with a reserve
-
Varnish or oil for final wood protection
FAQ: Answers to popular questions
Is it possible to combine a wall-mounted cabinet with polyurethane molding?
Yes, and this is one of the most effective solutions for a classic interior. Polyurethane moldings — moldings, baseboards, decorative frames — create an architectural backdrop for wall-mounted furniture, integrating it into the space and transforming it from an "attached object" into an element of the interior scene. Wood is used in handles, facade overlays, and parts with direct contact.
What to buy for a floating cabinet in a classic style?
Wooden handles, decorative elements for furniture for facades, mounting hardware for the wall-mounted body, Moldings made of polyurethane for the frame on the wall, Decor for Molding, Polyurethane trim for the baseboard, glue, sealant, primer, paint, and spare.
Where to use wood and where to use polyurethane on a wall-mounted cabinet?
Wood — on facades in direct contact areas: handles, decorative overlays, side panels, lower body belt. Polyurethane — on the wall around the cabinet: molding frames, baseboard, cornice line. Wall Decor. A single paint finish unites both materials into a harmonious ensemble.
How not to overload wall-mounted furniture with decor?
Choose one main accent: either a rich facade with wooden overlays — and calm moldings on the wall, or a laconic facade — and an expressive molding frame. Overloading both the facade and the wall at the same time means creating a visual conflict. In a small room: a single color, thin profile, minimum relief.
Why is a wall-mounted cabinet better than furniture on legs?
A wall-mounted cabinet opens up the floor, creates a feeling of air and space, simplifies cleaning, and fits well into modern classic interiors. It has no "heavy bottom" — the body literally floats, giving the interior lightness. It is this lightness that requires proper decorative design: moldings, baseboard, and a frame that "ground" the floating body without depriving it of the feeling of weightlessness.
What glue to use for polyurethane moldings on the wall behind the cabinet?
With special glue for polyurethane products, on a prepared surface without wallpaper. Detailed guide — in the article what to glue polyurethane molding with. Technology for cutting at angles and obtaining clean joints — in the article installing polyurethane molding.
Which baseboard to choose for a wall-mounted cabinet?
Polyurethane trim with a profile aligned with the wall moldings. The height of the baseboard should be no more than 2/3 of the lower clearance of the cabinet. In a small space, use a thin profile. In a spacious room with high ceilings, use a more voluminous profile with a classic relief.
About the company STAVROS
A wall-mounted cabinet in a classic interior is an area where every detail contributes to the result: handles, facade decor, wall moldings, baseboard, fasteners, paint. STAVROS produces all elements of this set, from wooden handles и decorative overlays for furniture from beech and oak solid wood to of polyurethane moldings, trim, wall decor и moldings from polyurethane in a wide range. STAVROS works with orders from a single piece, accepts orders from any region of Russia and CIS countries, ensures fast delivery, and provides consultation on selecting compatible elements. All wooden products are manufactured using 3D milling from select solid wood, undergo geometry and coating inspection. Polyurethane products meet quality standards established for the professional interior market. For furniture manufacturers and design studios, STAVROS develops exclusive models based on technical specifications. When wall-mounted furniture must look flawless, details matter. STAVROS produces precisely those details that make the difference between "just a cabinet on the wall" and a classic interior solution.