
























































Article Contents:
- Can You Put Molding Over Wallpaper?
- Why Direct Attachment to Wallpaper Can Fail
- Does Painting the Wallpaper Make It Stronger?
- Can Lightweight Decorative Trim Be an Exception?
- Three Installation Methods Compared
- Method 1: Install Molding Before Wallpaper
- Method 2: Install Wallpaper Before Molding, but Bond to the Wall
- Method 3: Attach Molding Directly to Existing Wallpaper
- Nonwoven Paintable Wallpaper
- Embossed Paintable Wallpaper
- Paintable Fiberglass Wallcovering
- Paintable Vinyl Wallcovering
- Traditional Paper Wallpaper
- Polyurethane Molding
- Primed MDF Molding
- Solid Wood Molding
- Practical Material Comparison
- Thin Polyurethane Molding: MLDPU-001
- Medium Polyurethane Molding: MLDPU-002
- Wide Polyurethane Molding: MLDPU-003
- Comparing STAVROS Polyurethane Profiles
- 1. Paintable Wallpaper Inside Rectangular Molding Frames
- 2. Full Wallpapered Wall With Applied Architectural Frames
- 3. Wallpaper Within a Central Accent Panel
- 4. Double-Frame Molding With Textured Wallpaper
- 5. Wallpaper and Decorative Wainscoting
- Establish the Main Wall Axis
- Determine the Outer Margins
- Determine Frame Spacing
- Consider the Molding Face Width
- Plan Around Outlets and Switches
- Adhesive Contact Area
- Uneven Decorative Edges
- Deeply Embossed Patterns
- Paint Buildup
- Step 1: Inspect the Wall
- Step 2: Prepare the Surface
- Step 3: Create a Full Wall Layout
- Step 4: Select the Molding Profile
- Step 5: Prepare the Cut List
- Step 6: Cut and Dry-Fit
- Step 7: Install the Molding
- Step 8: Finish the Joints
- Step 9: Prepare for Wallpaper
- Step 10: Install the Wallpaper
- Step 11: Allow the Wallpaper to Dry
- Step 12: Paint the Composition
- Inspect the Existing Wallpaper
- Mark the Molding Footprint
- Expose the Supporting Surface Where Appropriate
- Prepare the Substrate
- Install the Molding
- When Is Complete Wallpaper Removal Better?
- Check the Wallpaper's Paint Compatibility
- Check the Molding's Factory Finish
- Use a Compatible Coating System
- Choose the Sheen Carefully
- Avoid Excessive Paint Thickness
- Test Before Painting the Entire Wall
- White Molding With Textured Wallpaper
- Dark Wall With Light Molding
- Tone-on-Tone Variations
- Metallic Decorative Accents
- MLDPU-001U: Small Decorative Corner
- MLDPU-002U: Larger Rounded Corner
- Corner Compatibility Matters
- Beaded Molding
- Rope Molding
- Floral and Acanthus Ornament
- Neoclassic Light Collection
- Example: CPU-2-4 Decorative Wall Kit
- When a Custom Layout Is Better
- Calculate One Rectangular Frame
- Calculate Four Frames
- Calculate STAVROS Stock Lengths
- Prepare the Cut List
- Total Material Waste
- Add Decorative Corner Elements Separately
- Calculate the Interior Opening
- Check Wallpaper Roll Width
- Calculate the Required Drops
- Account for Pattern Repeat
- Living Room
- Bedroom
- Dining Room
- Hallway
- Home Office
- Children's Room
- Kitchen and Bathroom
- Why Removable Wallpaper Creates Additional Risk
- Better Approaches
- Rental Property Considerations
- Wall Sconces
- Ceiling Lighting
- LED Accent Lighting
- Light and Surface Imperfections
- Measuring Tools
- Cutting Tools
- Wallpaper Installation Tools
- Finishing Tools
- Gluing Heavy Molding Directly to Wallpaper
- Choosing Molding Without Measuring Its Projection
- Ignoring the Wallpaper Roll Width
- Mixing Incompatible Profiles and Corners
- Installing Wallpaper Over an Unstable Surface
- Using Excessive Caulk to Conceal Gaps
- Applying Paint Before the Wallpaper Has Dried
- Using an Incompatible Paint
- Overdecorating With Multiple Patterns
- Ignoring Electrical and Safety Requirements
- Assuming All STAVROS Wall Kits Are Polyurethane
- Molding Cost
- Wallpaper Cost
- Installation Materials
- Labor Cost
- Long-Term Maintenance
- Polyurethane Molding
- Decorative Trim Molding
- Molding Corner Elements
- Polyurethane Onlays
- Coordinated Wall Decor Kits
- Ordering for the United States
- Can You Install Polyurethane Molding Directly Over Wallpaper?
- Should You Install Wallpaper or Molding First?
- Can You Install Molding Over Painted Wallpaper?
- What Is the Best Molding for Paintable Wallpaper?
- Can You Paint Wallpaper and Polyurethane Molding the Same Color?
- What Is Picture-Frame Molding?
- Can Paintable Wallpaper Be Used Inside Wall Molding Frames?
- Can You Use Embossed Wallpaper With Polyurethane Molding?
- Can Molding Be Installed Over Peel-and-Stick Wallpaper?
- Can You Remove Polyurethane Molding Without Damaging Wallpaper?
- Does Paintable Wallpaper Need Primer?
- How Long Should Wallpaper Dry Before Painting?
- Is Polyurethane Molding Better Than MDF?
- Can I Use Polyurethane Molding in a Bathroom With Wallpaper?
- What Adhesive Is Best for Polyurethane Molding?
- Do I Need Decorative Corners for Picture-Frame Molding?
- How Much Molding Do I Need for Four Decorative Wall Frames?
- Is Wallpaper Inside Molding Frames Better Than Wallpaper Across the Whole Wall?
- Can Wallpaper and Molding Be Different Colors?
- Can Polyurethane Molding Be Used With Wall Sconces?
- Are STAVROS Wall Molding Kits Entirely Polyurethane?
- Where Can I Buy Polyurethane Molding for Wallpapered Walls?
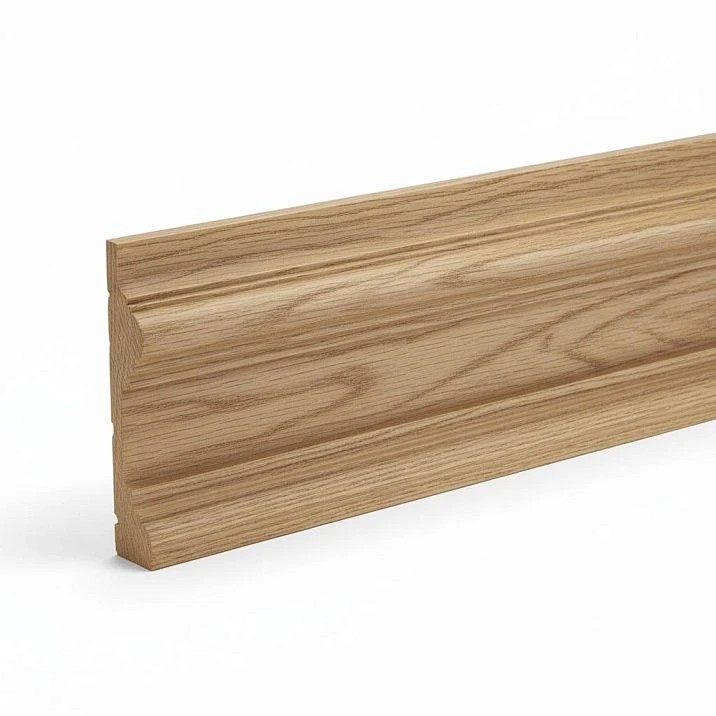
Wallpaper and decorative wall molding are two of the most effective ways to introduce architectural character into an ordinary room. Wallpaper provides color, texture, and visual depth. Molding creates structure, establishes proportions, and transforms flat walls into framed decorative compositions.
When combined carefully, they can produce the appearance of traditional architectural paneling without requiring extensive carpentry or the installation of full raised wood panels.
A simple accent wall can become an elegant neoclassical feature. A bedroom can acquire a refined hotel-inspired appearance. A hallway can gain visual rhythm through repeated molding frames, while paintable textured wallpaper introduces subtle relief within each panel.
The possibilities are attractive, but there is one important technical question:
Can you install polyurethane molding directly over wallpaper?
The answer is more complicated than simply choosing a strong adhesive.
In certain limited situations, a lightweight decorative component may be attached to an existing wallpapered surface if the manufacturer approves the application and the wallpaper is properly bonded. However, this does not make wallpaper an ideal structural mounting surface.
When molding is glued to wallpaper, the attachment depends not only on the molding adhesive but also on the wallpaper, wallpaper paste, paint film, and underlying wall preparation.
A strong construction adhesive cannot compensate for wallpaper that is beginning to peel away from the drywall.
For a permanent architectural installation, the generally preferable approach is to attach the molding to a sound, properly prepared wall surface and then install wallpaper around or inside the decorative frames.
This method provides a more dependable bond while maintaining the visual benefits of wallpaper and architectural trim.
In this guide, we'll explore how to combine paintable wallpaper and polyurethane molding, compare installation methods, choose appropriate profiles, create picture-frame wall panels, calculate materials, select finishes, and avoid common mistakes.
We'll also examine real products from the STAVROS polyurethane molding collection, including straight profiles, decorative corner elements, ornamental trim, and coordinated wall decor kits.
The objective is not simply to create an attractive wall. It is to create a decorative system that looks intentional, uses compatible materials, and remains practical to maintain.
Can You Put Molding Over Wallpaper?
Technically, attaching decorative trim over wallpaper may be possible under some conditions.
But the more important question is whether the resulting installation will be reliable.
That depends on the entire assembly.
A molding attached directly to prepared drywall or plaster transfers its load through the adhesive to the supporting surface.
A molding glued to wallpaper transfers that load through several additional layers.
Those layers may include the wallpaper's decorative face, its backing, the wallpaper adhesive, primer, and existing paint.
Every interface introduces another possible failure point.




Why Direct Attachment to Wallpaper Can Fail
Suppose a polyurethane molding strip is glued to an embossed wallpaper.
The construction adhesive bonds strongly to the wallpaper surface.
Initially, the trim appears secure.
But if the wallpaper paste loses adhesion at the wall, the molding may pull the wallpaper away from the substrate.
The molding adhesive itself may remain intact.
The failure occurs in the weaker layer behind it.
This problem is especially relevant when the wallpaper has a textured surface, multiple layers, damaged seams, or an unsuitable backing.
A relatively lightweight decorative strip still introduces weight, handling stresses, and possible movement.
Longer profiles can create additional demands at joints and corners.
Наша фабрика также производит:

Смотреть весь Каталог продукции
Does Painting the Wallpaper Make It Stronger?
Painting changes the surface finish, but it does not automatically improve the bond between the wallpaper and wall.
A sound paint film may improve the appearance and cleanability of a compatible paintable wallcovering.
However, the original wallpaper adhesive remains part of the attachment system.
If the wallpaper is poorly bonded, painting it does not turn it into a suitable structural mounting surface for architectural molding.
Получить консультацию
Can Lightweight Decorative Trim Be an Exception?
Some manufacturers may approve lightweight decorative elements for specific existing wallcoverings.
That approval should identify the relevant adhesive, surface preparation, product weight, and installation conditions.
Do not assume that all polyurethane moldings, ornamental onlays, and corner blocks qualify.
A small decorative applique and a full-height wall frame have different installation requirements.
If a manufacturer does not explicitly approve bonding to wallpaper, use a more suitable prepared mounting surface.
Molding First or Wallpaper First? Choosing the Correct Installation Sequence
The installation sequence is one of the most important decisions in a project combining wallpaper and decorative wall molding.
The right approach depends on whether the room is being renovated from bare walls or already has wallpaper in place.
Three Installation Methods Compared
| Method | How it works | Best application |
|---|---|---|
| Molding first | Install trim on a prepared wall, then apply wallpaper around or inside the frames | Preferred approach for many new permanent installations |
| Wallpaper first, exposed mounting zones | Install wallpaper, then carefully expose prepared substrate along the intended molding footprint | Selected renovations where wallpaper layout must be completed first |
| Molding directly over wallpaper | Attach the profile to the existing wallcovering | Only where the exact product and mounting system are specifically approved |
The first method generally offers the clearest and most reliable construction sequence.
The second requires careful planning and cutting.
The third should not be treated as a universal shortcut.
Method 1: Install Molding Before Wallpaper
This approach starts with a clean, stable wall.
The decorative layout is measured and marked.
The molding is installed directly onto a suitably prepared substrate using the manufacturer's approved adhesive or fastening method.
The joints are finished.
Wallpaper is then applied to the planned exposed areas, including the inside of decorative frames if required.
The final paint treatment is completed according to the wallpaper and coating instructions.
This method has several advantages.
The molding attachment does not depend on wallpaper paste.
The decorative frames can be aligned before the wallcovering is applied.
Future wallpaper replacement may also be simpler because the wallpaper is not trapped beneath the entire molding profile.
However, the edges of the wallpaper must be cut accurately.
The design should be planned so the wallcovering terminates neatly against the molding.
Method 2: Install Wallpaper Before Molding, but Bond to the Wall
Sometimes the wallpaper layout determines the location of the decorative profiles.
A designer may want a particular texture or pattern to continue uninterrupted within a larger decorative composition.
In that situation, it may be practical to install the wallpaper first.
However, the molding should not automatically be bonded over the wallpaper.
For a manufacturer-approved installation, the mounting zones can be planned so that a sound substrate remains available beneath the molding.
On an already wallpapered wall, a qualified installer may carefully remove wallcovering only from the intended trim footprint, preserving the underlying wall surface.
This requires accurate layout and appropriate cutting techniques.
The exposed area should be compatible with the molding adhesive.
Care is needed to avoid damaging drywall facing paper, existing coatings, or adjacent wallpaper.
For older American homes, disturbance of existing painted surfaces may also introduce lead-related safety requirements.
Method 3: Attach Molding Directly to Existing Wallpaper
This approach is sometimes proposed as a convenient DIY solution.
It avoids cutting or removing wallpaper before installing the decorative profiles.
However, it introduces uncertainty about the attachment.
The wallpaper may be textured, vinyl-coated, weakly bonded, or covered with an incompatible finish.
Even if the molding appears secure initially, its long-term attachment is limited by the weakest layer of the assembly.
Use this approach only where the molding and adhesive manufacturers approve the actual wallcovering and installation conditions.
For substantial architectural frames, bonding directly to a prepared wall is generally the more dependable choice.
Paintable Wallpaper: What Types Work With Decorative Molding?
Not all wallpaper is designed to be painted.
And not all paintable wallpaper has the same texture, backing, or installation requirements.
In the United States, paintable wallpaper may be marketed under several descriptions, including textured paintable wallpaper, embossed wallpaper, nonwoven paintable wallpaper, and paintable wallcovering.
The correct product depends on the intended decorative appearance.
Nonwoven Paintable Wallpaper
Nonwoven wallpaper is made using an engineered fiber-based structure.
Some nonwoven products are designed to receive paint.
Depending on the product, they may have a smooth or textured surface.
Paintable nonwoven wallpaper can work well inside decorative molding frames when the product is installed and finished according to the manufacturer’s instructions.
A fine texture can add depth without competing with the molding profile.
However, not every nonwoven wallpaper is paintable.
Always confirm that designation.
Embossed Paintable Wallpaper
Embossed wallpaper has a raised surface pattern.
It can imitate textile textures, traditional plaster finishes, geometric motifs, or other relief effects.
This makes it particularly attractive when combined with polyurethane decorative molding.
The molding establishes the large architectural outline.
The embossed wallpaper adds smaller-scale surface texture.
A simple rectangular frame containing lightly embossed wallpaper can resemble a more elaborate wall panel.
However, strong texture directly beneath a molding can create uneven contact.
This is another reason to install the molding on the wall substrate and use the wallpaper inside the decorative field.
Paintable Fiberglass Wallcovering
Certain fiberglass wallcoverings are designed for painted interior applications.
They may provide a woven or textured appearance.
Their installation requires the specified adhesive, surface preparation, and finish system.
They can be considered for decorative wall designs where their appearance and product properties suit the room.
However, fiberglass wallcovering should not automatically be treated as an approved mounting surface for applied architectural profiles.
The molding should still be attached according to its manufacturer's requirements.
Paintable Vinyl Wallcovering
Some vinyl-based wallcoverings are designed to be painted.
Others have factory finishes that do not accept ordinary interior paint reliably.
Check the exact product instructions.
A glossy or low-energy vinyl surface may be particularly challenging for adhesives.
Even if a paintable vinyl wallcovering accepts a suitable coating, that does not establish approval for attaching molding directly to it.
Traditional Paper Wallpaper
Ordinary decorative paper wallpaper is not automatically suitable for repeated painting.
Its surface may absorb moisture, distort, or lose visual quality when treated with an incompatible coating.
Choose a product expressly designated for painting if the design requires a uniform painted wall and molding composition.
Polyurethane Molding vs. MDF and Wood for Wallpapered Walls
The original material choice affects the appearance, installation, finishing, and maintenance of the wall.
Polyurethane, MDF, and solid wood all have legitimate applications.
However, they should not be treated as identical materials.
Polyurethane Molding
Polyurethane is often selected for molded architectural detail.
It can reproduce fine decorative profiles and ornamental patterns.
This makes it useful for painted picture-frame molding, decorative corner details, and wall-panel compositions.
Many suitable products can be finished using compatible interior paint systems.
However, the material's exact performance depends on the formulation.
Rigid polyurethane molding should not be assumed flexible.
Likewise, polyurethane should not be described as completely unaffected by moisture, temperature, or aging.
Primed MDF Molding
MDF is commonly used in painted architectural trim.
Its engineered structure can provide a uniform surface suitable for straight decorative profiles.
Factory-primed MDF products may simplify finishing when the coating system is compatible.
However, MDF remains sensitive to excessive moisture exposure.
Its cut edges, installation environment, and finish require appropriate consideration.
MDF should not automatically be selected for direct wet areas merely because it is primed.
Solid Wood Molding
Wood offers a natural material appearance.
Oak, beech, and other species provide different grain characteristics and finishing possibilities.
For painted architectural wall frames, wood can create an attractive traditional effect.
However, solid wood responds to humidity changes through dimensional movement.
Its installation and finishing should accommodate those characteristics.
Practical Material Comparison
| Material | Advantages | Main considerations |
|---|---|---|
| Polyurethane | Detailed molded profiles, ornamental designs, often relatively lightweight | Adhesive and paint compatibility; specific product rating |
| Primed MDF | Uniform painted surfaces, straight profiles, economical design possibilities | Moisture sensitivity, edge finishing, substrate compatibility |
| Solid wood | Natural grain, traditional millwork, stainable or paintable | Humidity movement, preparation, cost and finishing |
| High-density polystyrene | Practical engineered decorative profiles | Formulation-specific performance, adhesive and coating compatibility |
The best material depends on the project.
For a painted decorative frame with ornamental corners, polyurethane may provide a useful combination of relief and visual consistency.
For a simple straight profile, primed MDF may be appropriate.
For an interior where natural grain is essential, solid wood remains a strong choice.
Choosing Polyurethane Wall Molding for Paintable Wallpaper
The decorative molding profile determines how the wallpapered wall is perceived.
Thin profiles create restrained outlines.
Wider moldings produce more pronounced architectural relief.
Ornamental profiles introduce repeating patterns and stronger decorative character.
For American interiors, the most useful selection factors are the molding's visible width, projection, stock length, and compatibility with the intended composition.
Thin Polyurethane Molding: MLDPU-001
The STAVROS MLDPU-001 polyurethane molding has a compact semicircular cross-section.
Its listed specifications are:
| Parameter | Dimension |
|---|---|
| Face width | 0.39 in |
| Projection | 0.24 in |
| Stock length | 102.36 in |
| Material | Polyurethane |
This fine profile is well suited for consideration in restrained picture-frame wall compositions.
For example, a bedroom with lightly textured paintable wallpaper may benefit from a narrow molding outline.
The wallpaper remains the principal surface treatment.
The molding establishes the geometric frame.
When both are painted in the same color, the effect is subtle and architectural.
Medium Polyurethane Molding: MLDPU-002
For a more defined wall-panel appearance, consider the STAVROS MLDPU-002 polyurethane molding.
Its specifications are approximately:
| Parameter | Dimension |
|---|---|
| Face width | 0.87 in |
| Projection | 0.43 in |
| Stock length | 102.36 in |
| Material | Polyurethane |
The profile contains a central rounded detail and stepped transitions.
This produces more visible shadow lines.
It may suit neoclassical living rooms, traditional dining rooms, and decorative accent walls.
When used with lightly embossed wallpaper, the molding can create a convincing framed-panel effect.
The straight profile may also be coordinated with compatible polyurethane corner ornaments.
Wide Polyurethane Molding: MLDPU-003
The STAVROS MLDPU-003 polyurethane molding provides a broader architectural outline.
Its approximate dimensions are:
| Parameter | Dimension |
|---|---|
| Face width | 1.38 in |
| Projection | 0.47 in |
| Stock length | 102.36 in |
| Material | Polyurethane |
This profile works visually at a larger scale.
It may be considered for formal living rooms, tall decorative wall frames, and more substantial classical compositions.
However, the wider profile occupies more space.
A large molding frame around a strongly textured wallpaper panel can appear visually busy.
For this reason, decorative complexity should be distributed carefully.
A wide stepped molding often works best with a relatively restrained wallpaper texture.
Comparing STAVROS Polyurethane Profiles
| Molding | Face width | Projection | Visual character |
|---|---|---|---|
| MLDPU-001 | 0.39 in | 0.24 in | Delicate, minimal |
| MLDPU-002 | 0.87 in | 0.43 in | Defined, neoclassical |
| MLDPU-003 | 1.38 in | 0.47 in | Strong architectural relief |
All three are polyurethane products.
They should not be confused with STAVROS primed MDF or high-density polystyrene profiles available elsewhere in the catalog.
Picture-Frame Molding and Wallpaper: Five Design Approaches
A decorative frame can create an elegant architectural wall even without elaborate ornament.
Wallpaper expands the possibilities by introducing pattern and texture within the framed areas.
The best arrangement depends on the room, proportions, and style.
1. Paintable Wallpaper Inside Rectangular Molding Frames
This is one of the most practical solutions.
First, define the decorative frames with appropriately installed polyurethane molding.
Then apply the wallpaper inside the frames.
Finally, paint the wallpaper and molding according to the chosen design.
The wallpaper becomes the center of each panel.
The molding creates the raised architectural boundary.
This arrangement is particularly effective with embossed or lightly textured wallpaper.
It also allows the wall outside the frames to receive a different treatment.
2. Full Wallpapered Wall With Applied Architectural Frames
Another approach uses wallpaper as the principal wall finish.
Molding frames are positioned over the overall design.
However, the mounting areas must be planned to provide a suitable substrate or use an explicitly approved installation method.
This can create a cohesive monochromatic wall when both the wallpaper and trim receive the same color.
The texture remains visible while the molding creates larger-scale geometry.
This method requires greater care because the relationship between the wallpaper and molding needs to be planned before installation.
3. Wallpaper Within a Central Accent Panel
A large decorative molding frame can contain one feature wallpaper.
The surrounding wall remains painted.
This works well behind a sofa, headboard, or dining room sideboard.
It is especially useful when the wallpaper has a distinctive texture or pattern.
The molding provides a controlled boundary.
A simple border may be more successful than a highly ornate one because the wallpaper itself already provides visual interest.
4. Double-Frame Molding With Textured Wallpaper
A double frame uses one larger outer molding and a narrower inner profile.
Paintable wallpaper can be installed within the inner frame.
The additional molding layer creates depth.
For example, MLDPU-002 might establish the main architectural boundary.
A narrower compatible molding can introduce a secondary line.
This creates a more elaborate decorative effect.
However, the spacing between profiles must be accurate.
The combination should be evaluated in a scaled wall elevation before installation.
5. Wallpaper and Decorative Wainscoting
The lower portion of the wall can be organized with molding frames.
The upper portion may receive wallpaper.
A horizontal chair rail establishes the transition.
This is a familiar treatment for traditional and transitional American interiors.
In a dining room, the lower section might be painted in a subdued color while the upper wallpaper introduces texture.
In a bedroom, the entire composition could use a soft monochromatic palette.
The installation must account for the wallpaper edge, chair rail profile, and the selected wall substrate.
How to Plan Picture-Frame Wall Molding Proportions
Accurate proportions are essential.
Even expensive decorative profiles can appear poorly planned if the frames are irregular or unrelated to the room.
Start with a dimensioned wall elevation.
Record the actual wall width, ceiling height, and surrounding architectural features.
Establish the Main Wall Axis
Determine the visual center of the composition.
This may be the center of a sofa, bed, fireplace, or wall itself.
For a symmetrical treatment, align the frames around that axis.
Do not automatically center the layout on a wall if the furniture arrangement creates a different focal point.
Determine the Outer Margins
The space between the outermost molding frame and adjacent walls or door casing should appear intentional.
A very narrow margin may make the frames feel crowded.
A very wide margin may make the central composition appear disconnected.
As a preliminary design exercise, margins around 4–8 inches may be worth evaluating in certain residential layouts.
The actual dimension depends on the wall scale.
These are design references, not construction standards.
Determine Frame Spacing
Repeated frames should use a consistent spacing system.
For example, a row of three frames may use equal internal gaps.
However, the outer margins do not always need to equal the internal gaps.
A slightly larger outer margin can create a balanced appearance.
The relationship should be established in the drawing.
Consider the Molding Face Width
A frame measured to the outside edge of a 1.38-inch molding has a smaller interior opening than a frame made with 0.39-inch trim.
This affects how much wallpaper is visible.
For accurate planning, establish whether the frame dimensions refer to the outer edges, inner edges, or another consistent reference.
The cut list should use that same reference.
Plan Around Outlets and Switches
Electrical devices should not be treated as afterthoughts.
A wall outlet located directly across a planned molding line can disrupt the composition.
Where relocation is necessary, electrical work must be completed using appropriate methods and according to applicable code requirements.
Decorative molding should not conceal electrical boxes or interfere with required access.
Molding Over Textured Wallpaper: Why the Surface Matters
Textured paintable wallpaper is particularly attractive because it adds relief to the wall.
However, it also creates practical considerations.
A raised texture may prevent the back of a molding strip from making uniform contact with the surface.
Adhesive Contact Area
The attachment strength of a molding system depends partly on the actual bonding surfaces.
If adhesive contacts only the raised peaks of an embossed wallpaper pattern, the effective contact area may be reduced.
The wallpaper backing and paste also remain part of the assembly.
This is why directly bonding long architectural profiles to textured wallpaper is generally less desirable than bonding to a prepared wall.
Uneven Decorative Edges
A heavily textured surface can create small visible gaps along the molding.
Applying a thick bead of caulk to conceal the unevenness may produce an untidy border.
The better solution is to plan the wallpaper edges so the molding and wallcovering meet cleanly.
Deeply Embossed Patterns
A strongly embossed wallpaper can compete with highly ornate molding.
For a balanced appearance, pair elaborate wallpaper texture with relatively simple trim.
Conversely, a plain wallpaper can provide an effective background for more decorative molding.
Paint Buildup
Textured wallpaper and ornamental molding both contain recesses.
Repeated heavy paint application can obscure the details.
Use a compatible coating system and the application method recommended by the wallcovering manufacturer.
How to Install Polyurethane Molding Before Wallpaper
For a new permanent installation, attaching the molding directly to the prepared wall is often the preferred approach.
The following sequence provides a practical framework.
Always follow the exact molding, adhesive, wallpaper, and coating manufacturers' instructions.
Step 1: Inspect the Wall
Check the wall for cracks, loose paint, damaged drywall, and moisture problems.
The substrate must be stable.
Decorative molding should not be used to conceal deteriorating plaster or persistent dampness.
For homes built before 1978, evaluate lead-paint hazards before disturbing existing painted surfaces.
Step 2: Prepare the Surface
Clean the intended installation area.
Remove dust and contaminants.
Repair unstable finishes and surface defects using suitable methods.
Follow the adhesive manufacturer's requirements for primer, porosity, and surface condition.
Do not automatically apply an arbitrary primer.
The correct preparation depends on the specific substrate and adhesive.
Step 3: Create a Full Wall Layout
Mark all frames before cutting the molding.
Use a reliable level, tape measure, and straightedge.
Check the positions of outlets, switches, doors, and furniture.
For repeated frames, verify that the spacing and margins are consistent.
Step 4: Select the Molding Profile
Choose the profile based on the room's scale and decorative intent.
Record the product code.
Confirm the material and stock length.
For example, STAVROS MLDPU-001, MLDPU-002, and MLDPU-003 are supplied in 102.36-inch lengths.
Those dimensions determine the cutting plan.
Step 5: Prepare the Cut List
Calculate the finished length of each piece.
For rectangular frames with conventional mitered corners, establish the measurement reference.
Outside long-point measurements are commonly useful for preparing the cutting plan.
The total installed length should be distinguished from the number of stock strips required.
Step 6: Cut and Dry-Fit
Use a cutting tool appropriate for the specific polyurethane profile.
Dry-fit the pieces against the wall.
Inspect the corners.
Confirm that the decorative relief lines up.
If using corner ornaments, verify whether they replace the miter joint or are installed as overlays.
Step 7: Install the Molding
Choose an adhesive approved for the profile and substrate.
Apply it according to the specified coverage pattern.
Position the molding accurately.
Use temporary support where required.
Follow the published curing time before proceeding.
Do not assume that pressing a strip against the wall for a fixed number of seconds guarantees a permanent bond.
Step 8: Finish the Joints
Inspect the installed frames.
Use compatible joint adhesives, fillers, or paintable sealants where specified.
Correct poorly fitted corners rather than concealing large gaps under excess caulk.
Protect the adjacent wall surfaces.
Step 9: Prepare for Wallpaper
Once the molding installation and finishing materials have cured, prepare the exposed wall areas according to the wallpaper manufacturer's instructions.
A wallpaper primer or other specified preparation may be needed.
Keep the decorative molding protected from unnecessary wallpaper paste.
Step 10: Install the Wallpaper
Measure the exposed areas carefully.
For wallpaper installed inside molding frames, cut the wallcovering to the planned dimensions with appropriate allowance for positioning and trimming.
Apply it using the specified paste or installation method.
Trim carefully along the frame boundaries.
Avoid damaging the molding or wall substrate during trimming.
Step 11: Allow the Wallpaper to Dry
Follow the manufacturer's drying requirements.
Do not apply finish paint to a newly installed paintable wallpaper before it has dried sufficiently.
Premature painting can create adhesion problems, blistering, or uneven finish appearance.
Step 12: Paint the Composition
Apply the compatible finish system.
The wallpaper and molding may be painted in the same color or different colors.
For a monochromatic composition, check that the coating performs appropriately on both surfaces.
For contrasting finishes, protect the edges carefully and maintain consistent lines.
What If the Wallpaper Is Already Installed?
Many homeowners begin with an existing wallpapered room.
Removing all the wallpaper may seem unnecessary when the objective is simply to add a decorative molding frame.
However, the correct method depends on the condition of the wallcovering.
Inspect the Existing Wallpaper
Look for loose seams, bubbles, peeling edges, stains, and damaged areas.
Determine whether the wallpaper has been painted.
Check whether its surface is smooth, embossed, vinyl-coated, or another finish.
A wallcovering that is visibly failing should not be used as the attachment base for architectural trim.
Mark the Molding Footprint
Create the complete layout on the wall.
Use a temporary removable marking method that is suitable for the wallpaper finish.
Determine the exact area that the molding will occupy.
This may be wider than a single pencil line.
The full bonding footprint matters.
Expose the Supporting Surface Where Appropriate
Where the selected installation requires direct bonding, the wallpaper may need to be removed from the planned mounting strip.
This should be done carefully.
A cutting blade can damage drywall facing paper if used too deeply.
Professional installation may be preferable when the wallpaper is difficult to remove or the surrounding finish must be preserved.
Do not disturb potentially lead-containing old painted surfaces without the necessary precautions.
Prepare the Substrate
Once the actual supporting surface is exposed, evaluate its condition.
Remove unsuitable residue according to the adhesive manufacturer's instructions.
Repair damaged drywall or plaster as necessary.
The adhesive must bond to a stable prepared surface.
Install the Molding
Dry-fit the profiles before applying adhesive.
Use the appropriate mounting system.
Protect the remaining wallpaper.
Once the molding is secured, finish the transitions using products suitable for the actual joint design.
When Is Complete Wallpaper Removal Better?
Removing the existing wallpaper may be preferable when it is extensively loose, heavily layered, moisture-damaged, or unsuitable for the desired new finish.
If the wall requires significant repairs, complete removal may produce a more reliable result.
However, removal in older buildings should be planned with appropriate safety and preservation considerations.
How to Paint Wallpaper and Polyurethane Molding the Same Color
A monochromatic finish is one of the most effective ways to make separate decorative elements appear integrated.
The wallpaper provides subtle texture.
The molding establishes larger architectural lines.
A consistent color unifies the composition.
However, the surfaces are different.
They may require different preparation.
Check the Wallpaper's Paint Compatibility
Not every wallpaper is intended to be painted.
Use a wallcovering expressly suitable for painting.
Follow its requirements for drying, primer if specified, and the recommended coating type.
Check the Molding's Factory Finish
Some polyurethane molding is factory-primed.
Other products may require preparation before painting.
The product specification determines the correct approach.
Any exposed filler or repaired joint may also require spot priming.
Use a Compatible Coating System
A suitable water-based acrylic or latex paint may be appropriate for many paintable wallpaper and polyurethane molding combinations.
However, compatibility must be confirmed for both products.
The fact that a paint performs well on drywall does not guarantee identical performance on a particular polyurethane molding.
Choose the Sheen Carefully
Matte finishes create a restrained appearance.
Eggshell and satin finishes introduce more surface reflection.
Higher-gloss finishes emphasize the molding relief, but they may also reveal imperfections.
For heavily textured wallpaper, excessive gloss can create a visually busy surface.
The best choice depends on the room's lighting and desired effect.
Avoid Excessive Paint Thickness
Thick paint application can fill the decorative recesses of embossed wallpaper and ornamental molding.
Use the application method recommended for each surface.
Allow the appropriate drying time between coats.
Do not assume that every project requires exactly two coats.
Coverage depends on the paint, substrate, color, and manufacturer's instructions.
Test Before Painting the Entire Wall
Create a sample using the actual wallpaper, molding, primer, and paint.
Evaluate the combination under natural and artificial light.
This reveals potential differences in sheen, texture, and coating absorption.
It can also help determine whether the desired color is appropriate for the decorative composition.
Contrasting Wallpaper and Molding Colors
Monochromatic treatments are not the only option.
Contrasting color can emphasize the architectural geometry.
A white molding frame against a dark wall produces a traditional appearance.
Dark molding against pale textured wallpaper can create a more graphic modern effect.
Metallic finishes may provide selective accents in classical or Art Deco-inspired interiors.
White Molding With Textured Wallpaper
A white frame around subtly textured wallpaper creates a refined traditional appearance.
The visual emphasis comes from the molding outline and the wallpaper relief.
This can work well in dining rooms and formal bedrooms.
Dark Wall With Light Molding
A deep blue, green, or charcoal wall can provide a dramatic background.
White or cream-colored molding establishes a clear geometric structure.
The effect is especially noticeable under directional lighting.
However, high-contrast finishes reveal alignment errors more easily.
The frames must be carefully positioned.
Tone-on-Tone Variations
Using related shades can create a softer transition.
For example, the wall may be painted warm gray while the molding receives a slightly lighter shade.
This introduces definition without creating a sharp contrast.
Metallic Decorative Accents
Gold, bronze, and other metallic-looking finishes can emphasize selected ornamental details.
A small floral onlay or decorative corner may be highlighted while the straight molding remains neutral.
Use compatible decorative coatings.
Avoid applying metallic paint to every profile simply because the design is classical.
Selective emphasis often produces a more controlled result.
Decorative Molding Corners for Wallpapered Panels
A rectangular frame does not always need plain mitered corners.
Decorative corner components can introduce rounded transitions or ornamental relief.
STAVROS offers polyurethane molding corners and decorative accessories associated with specific molding families.
MLDPU-001U: Small Decorative Corner
The MLDPU-001U polyurethane molding corner measures approximately 3.39 × 3.39 × 0.28 inches.
It belongs to the 001 molding family.
This compact scale can be considered for relatively fine decorative frames.
MLDPU-002U: Larger Rounded Corner
The MLDPU-002U polyurethane molding corner measures approximately 6.77 × 6.77 × 0.51 inches.
Its larger footprint creates a more prominent corner treatment.
It is associated with the MLDPU-002 molding family.
Corner Compatibility Matters
Not every decorative corner is a simple replacement for a conventional miter.
Some products are connectors.
Others are ornamental overlays.
Their installation methods and required cutting dimensions differ.
Before ordering, verify compatibility with the selected straight profile.
For a wallpapered frame, determine whether the corner piece will cover part of the wallpapered field.
If so, plan the wallpaper boundary accordingly.
Beaded Molding and Rope Molding With Paintable Wallpaper
Decorative trim can introduce an additional layer of texture.
However, the wallpaper and molding should not compete excessively.
A fine embossed wallpaper may pair well with a beaded border.
A strongly patterned wallpaper may be more suitable inside a simple frame.
Beaded Molding
The STAVROS KPU-105 beaded molding is a polyurethane ornamental strip.
Its listed dimensions are approximately 0.43 × 0.24 × 39.37 inches.
The repeating bead pattern provides traditional decorative character.
It can be considered for compatible straight borders within larger architectural compositions.
Its relatively short stock length requires careful joint planning.
When used with wallpaper, position the decorative strip on a suitable supporting surface according to the product's installation requirements.
Rope Molding
The STAVROS KPU-125 rope molding features a narrow braided pattern.
Its dimensions are approximately 0.35 × 0.20 × 39.37 inches.
The profile can provide a traditional ornamental accent.
A simple or lightly textured wallpaper usually offers a more balanced background for this kind of detailed trim.
Floral and Acanthus Ornament
The STAVROS decorative polyurethane trim collection includes ornamental patterns featuring floral and classical motifs.
These can complement certain paintable wallpaper designs.
However, an ornate molding is not always the right choice.
If the wallpaper already contains a strong raised floral pattern, adding sculpted leaf molding may create visual clutter.
Use one dominant decorative language.
Ready-Made Wall Molding Kits and Wallpaper
Not every homeowner wants to calculate and assemble each decorative frame individually.
A coordinated wall molding kit can simplify the design process.
STAVROS offers wall decor collections containing selected decorative elements and linear profiles.
Some are intended for neoclassical interiors.
Others emphasize restrained contemporary geometry.
These products can be combined with suitable wallpaper treatments when the complete installation is planned appropriately.
Neoclassic Light Collection
The STAVROS Neoclassic Light collection includes decorative wall compositions using polyurethane ornamental elements and primed MDF molding.
This material distinction matters.
The kit is not necessarily made entirely of polyurethane.
The MDF component may have different finishing and moisture-related requirements.
For a painted bedroom or living room wall, the combination can offer an attractive architectural appearance.
However, the wallpaper installation must still account for the actual material and mounting method.
Example: CPU-2-4 Decorative Wall Kit
The STAVROS CPU-2-4 wall molding set provides a symmetrical decorative frame.
Its listed overall dimensions are approximately 39.37 × 90.55 × 0.79 inches.
The composition contains polyurethane ornamental corner elements and primed MDF molding.
This is a larger decorative arrangement.
It may be suitable for a substantial wall panel where textured wallpaper is used as the interior background.
The wallpaper should be selected and measured according to the actual clear opening of the frame, not merely the overall product dimensions.
When a Custom Layout Is Better
A kit provides a coordinated design, but it cannot automatically fit every wall.
If the available space is narrow or interrupted by outlets and doors, custom frame dimensions may be preferable.
Individual polyurethane molding profiles provide greater control over width and height.
The choice depends on whether the primary objective is customization or a coordinated decorative composition.
Picture-Frame Molding Calculator: How Much Material Do You Need?
Decorative frames require accurate measurement.
A common mistake is calculating only the total linear footage without checking how the individual pieces fit within the available stock lengths.
A reliable estimate includes the perimeter of each frame and an actual cutting plan.
Calculate One Rectangular Frame
The formula is:
Frame perimeter = 2 × width + 2 × height
Suppose one decorative frame measures 24 inches wide and 48 inches high.
The perimeter is:
2 × 24 + 2 × 48 = 48 + 96
Total = 144 inches
144 ÷ 12 = 12 linear feet
This is the net installed length for one frame.
For mitered corners, define the finished cut lengths consistently—for example, using the outside long points.
Calculate Four Frames
Four identical frames require:
4 × 144 = 576 inches
576 ÷ 12 = 48 linear feet
Now determine the number of complete molding strips.
Calculate STAVROS Stock Lengths
Suppose the design uses MLDPU-002.
The factory stock length is 102.36 inches.
The theoretical minimum strip count is:
576 ÷ 102.36 = 5.63
Rounded up:
6 full strips
But the actual cutting plan must confirm that six strips are sufficient.
Prepare the Cut List
Four rectangular frames need:
| Piece | Quantity | Total |
|---|---|---|
| Vertical pieces, 48 in | 8 | 384 in |
| Horizontal pieces, 24 in | 8 | 192 in |
| Total | 16 pieces | 576 in |
A feasible preliminary cutting arrangement is:
| Stock strips | Cuts per strip | Result |
|---|---|---|
| 4 strips | 48 + 48 in | 8 vertical pieces |
| 2 strips | 24 + 24 + 24 + 24 in | 8 horizontal pieces |
Each stock strip provides enough length for these cuts with room for ordinary saw kerf.
This means six strips are sufficient for the stated finished-piece dimensions under the assumed cutting plan.
Total Material Waste
Six strips provide:
6 × 102.36 = 614.16 inches
Net installed molding:
576 inches.
Nominal unused material before saw kerf:
614.16 − 576 = 38.16 inches
This illustrates why a planned cut list can be more reliable than automatically adding 10–15% waste.
An additional strip may still be justified when the product is difficult to replace or the project has special installation risks.
Add Decorative Corner Elements Separately
Four rectangular frames contain sixteen corner positions.
If the design uses one compatible decorative corner at every position, the initial requirement is sixteen components.
For directional ornaments, left-hand and right-hand quantities must be calculated separately.
The straight molding cut lengths may also change depending on whether the ornaments replace or overlay the corners.
How Much Wallpaper Do You Need Inside Molding Frames?
Wallpaper quantity is calculated differently from molding.
Molding is measured in linear feet.
Wallpaper is measured according to the width and length of the roll, panel dimensions, pattern repeat, and installation method.
Calculate the Interior Opening
Suppose a frame measures 24 × 48 inches to its outside edges.
The interior clear opening is smaller because the molding occupies space around the perimeter.
For illustration, if the molding has a face width of 0.87 inches, the approximate clear width is:
24 − 2 × 0.87 = 22.26 inches
The approximate clear height is:
48 − 2 × 0.87 = 46.26 inches
This assumes the profile and frame geometry are arranged so that the full visible face width reduces the inside opening.
Actual measurements should be taken from the installed frame.
Check Wallpaper Roll Width
A common U.S. wallpaper roll width is around 20.5 inches, although many other widths are available.
A 22.26-inch-wide frame interior cannot be covered by one 20.5-inch-wide strip without a seam or another design adjustment.
That is important.
A decorative frame may look perfectly proportioned on paper but require a wallpaper seam in the center.
For plain or subtly textured wallpaper, this may be acceptable.
For a strongly repeating pattern, the seam may require careful matching.
Calculate the Required Drops
Determine how many wallpaper strips are needed to cover the clear opening.
Include the manufacturer's recommended cutting allowance.
For multiple frames, plan the layout to minimize waste.
However, material savings should not compromise pattern alignment.
Account for Pattern Repeat
A patterned wallpaper may require additional length to align adjacent strips.
The repeat can substantially affect the amount of material required.
A plain paintable embossed wallpaper may be easier to fit into small decorative panels than a large-scale repeating pattern.
The final quantity should be calculated from the actual roll specifications.
Paintable Wallpaper With Molding: Room-by-Room Design Ideas
Different rooms benefit from different compositions.
The goal is not to repeat the same decorative layout everywhere.
The wallpaper and molding should respond to the room's use and visual scale.
Living Room
A living room may use a large central wallpaper panel behind the sofa.
The wallpaper introduces texture.
A polyurethane molding frame establishes the architectural boundary.
For a restrained transitional interior, one large frame may be sufficient.
In a more formal living room, multiple vertical frames can create rhythm.
The molding profile should be selected according to the furniture and ceiling height.
Bedroom
A bedroom often benefits from a softer treatment.
Paintable wallpaper with fine textile-like texture can be used inside molding frames behind the bed.
The surrounding trim may be painted in the same color.
This creates depth without strong visual contrast.
Narrow polyurethane molding may be preferable to a heavily sculpted profile.
Dining Room
A dining room is a natural location for decorative wall panels.
The lower wall may use picture-frame molding while the upper area receives wallpaper.
Alternatively, the entire wall may use painted textured wallpaper inside repeated rectangular frames.
A chair rail can connect the composition horizontally.
The result can support traditional or neoclassical furniture.
Hallway
Hallways often have interrupted wall areas between doors.
Narrow vertical frames can create visual order.
A fine paintable wallpaper texture may add interest without making the space feel crowded.
Because hallways are exposed to more frequent contact, select finishes that suit the expected wear and cleaning requirements.
Home Office
A home office can use deeper colors and subtle molding relief.
Paintable wallpaper may introduce a textile-like background.
A decorative frame behind the desk creates a clear architectural focal point.
Tone-on-tone painting can provide a professional appearance without distracting ornament.
Children's Room
A child's room may benefit from playful color and simple geometric framing.
However, choose products and coatings appropriate for the intended environment.
Avoid unnecessary projecting ornaments in locations likely to receive impacts.
For pre-1978 homes, lead-safe requirements are particularly important when renovating existing painted walls.
Kitchen and Bathroom
Wallpaper and decorative molding can be used in certain protected locations.
However, moisture exposure, cleaning requirements, and substrate conditions need careful evaluation.
Do not assume that polyurethane molding automatically makes wallpaper suitable for a shower, wet backsplash, or other direct-water location.
Use materials and assemblies approved for the actual conditions.
Can You Use Molding With Peel-and-Stick Wallpaper?
Peel-and-stick wallpaper is often selected for temporary decorative projects.
It can be attractive in rental homes or rooms where the design may change frequently.
However, removable wallpaper is not automatically a suitable mounting base for permanent architectural trim.
Why Removable Wallpaper Creates Additional Risk
Peel-and-stick wallpaper is designed to be removable under specified conditions.
Attaching molding to its surface may introduce weight and adhesive stresses beyond its intended use.
If the wallpaper releases from the wall, the molding may detach.
A stronger molding adhesive does not solve the problem if the wallpaper itself is the weak layer.
Better Approaches
For a permanent molding installation, secure the trim to an appropriate substrate.
Use removable wallpaper in the decorative fields between the molding profiles.
For a temporary decorative project, evaluate whether a lightweight removable trim product and mounting method are expressly approved for the wallcovering and conditions.
Do not assume that heavy polyurethane ornament can be safely mounted using ordinary removable adhesive strips.
Rental Property Considerations
Permanent adhesive molding can damage painted drywall during removal.
It may also affect wallpaper and existing finishes.
Before making alterations to a rental property, confirm the landlord's permission and the relevant lease requirements.
A removable wallpaper project and a permanent architectural molding installation should be planned differently.
Integrating Lighting With Wallpaper and Molding
Decorative molding becomes more visually expressive under carefully selected lighting.
A raised profile casts shadows.
Embossed wallpaper creates smaller-scale texture.
Together, they produce layered relief.
Wall Sconces
A wall sconce may be positioned within or beside a decorative frame.
The fixture can emphasize the architecture through directional light.
However, its mounting box and wiring must remain compliant with applicable electrical requirements.
Ordinary polyurethane molding is not an approved electrical raceway.
Decorative onlays should not be used to conceal inaccessible junction boxes.
Ceiling Lighting
General ceiling lighting provides an overall view of the decorative wall.
Directional accent lighting can emphasize selected panels.
The fixture's beam angle influences how strongly the relief appears.
LED Accent Lighting
An appropriate LED system may highlight architectural surfaces.
However, the lighting hardware, wiring, and installation method must be specified separately.
Do not assume that a general-purpose polyurethane molding can accommodate an LED strip safely.
Use products designed for the intended lighting application.
Light and Surface Imperfections
Directional lighting makes relief more visible.
It also reveals poor joints, uneven filler, and damaged wallpaper seams.
This is another reason to prioritize accurate installation and surface preparation.
Wallpaper and Molding Installation Tools
A successful project requires appropriate measuring, cutting, mounting, and finishing equipment.
The precise tools depend on the selected materials and installation method.
Common requirements include a reliable tape measure, straightedge, level, pencil, appropriate saw, cutting supports, adhesive applicator, wallpaper smoothing tools, trimming tools, and suitable finishing equipment.
Measuring Tools
A laser level can be useful for repeated frames.
However, a reliable conventional level and careful measurement can also produce accurate layouts.
The important factor is consistency.
Cutting Tools
Use a cutting method suitable for the selected molding.
A fine-tooth saw or properly equipped miter saw may be appropriate for many architectural profiles.
Follow the manufacturer's instructions.
Do not assume that all polyurethane moldings should be cut with the same blade or technique.
Wallpaper Installation Tools
The wallcovering manufacturer's instructions determine the required tools.
A smoothing brush, appropriate roller, trimming guide, and compatible paste may be needed.
Some wallpaper products use a paste-the-wall method.
Others require adhesive application to the back of the wallpaper.
Follow the product's specified installation procedure.
Finishing Tools
A suitable brush or roller is needed for the planned paint system.
Decorative molding may require smaller brushes for recessed details.
Protect the wallpaper and surrounding surfaces when applying contrasting colors.
Common Mistakes When Combining Wallpaper and Wall Molding
Several recurring errors can undermine an otherwise attractive design.
Gluing Heavy Molding Directly to Wallpaper
This is one of the most important mistakes.
The installation may depend on wallpaper paste rather than a sound structural substrate.
Use the manufacturer's approved mounting method.
Choosing Molding Without Measuring Its Projection
A profile may look narrow in a catalog but project substantially from the wall.
That affects shadows, adjacent fixtures, and the relationship to textured wallpaper.
Check both face width and projection.
Ignoring the Wallpaper Roll Width
The interior of a decorative frame may be wider than the wallpaper roll.
This can create an unexpected seam.
Calculate the clear opening before ordering.
Mixing Incompatible Profiles and Corners
A decorative corner from one molding family may not align with another profile.
Check manufacturer compatibility.
Installing Wallpaper Over an Unstable Surface
Wallpaper cannot correct deteriorating plaster, loose paint, or persistent moisture.
Prepare the substrate properly.
Using Excessive Caulk to Conceal Gaps
Large gaps should not be treated as normal.
Accurate cutting and fitting reduce the need for filler.
A thick visible bead of caulk can spoil the appearance of a delicate molding frame.
Applying Paint Before the Wallpaper Has Dried
Premature painting may damage the wallcovering or interfere with the adhesive.
Follow the manufacturer's drying requirements.
Using an Incompatible Paint
Not every wallpaper or polyurethane profile accepts the same coatings.
Verify compatibility.
Overdecorating With Multiple Patterns
Highly embossed wallpaper, ornate molding, floral appliques, and metallic finishes can create visual competition.
Choose a clear decorative hierarchy.
Ignoring Electrical and Safety Requirements
Wall molding and wallpaper should not conceal electrical hazards or interfere with access to required equipment.
In pre-1978 homes, work that disturbs painted surfaces may involve lead-related hazards and legal requirements.
Assuming All STAVROS Wall Kits Are Polyurethane
Some ready-made compositions combine polyurethane decorative elements with primed MDF molding.
Read the product specifications.
The materials have different properties and installation requirements.
Cost Planning: Is Wallpaper With Polyurethane Molding Expensive?
The project budget depends on several variables.
These include the selected wallpaper, molding profile, room size, decorative complexity, surface preparation, and installation labor.
A simple monochromatic panel can be relatively economical.
A wall with elaborate ornamental frames and expensive textured wallpaper can require a significantly larger investment.
Molding Cost
Calculate the required number of complete stock lengths.
Multiply by the current unit price.
Do not calculate only from the net installed footage.
Include offcuts and pattern-related waste.
Wallpaper Cost
Calculate the number of rolls from the usable width, length, pattern repeat, and actual panel dimensions.
Include cutting allowances.
For small decorative frames, roll width can be especially important.
Installation Materials
Account for the wallpaper paste or approved installation system.
Include molding adhesive, joint-finishing materials, primer, paint, and surface preparation supplies.
Use product-specific coverage information to calculate quantities.
Labor Cost
The complexity of the layout affects labor.
A single large rectangular frame is generally simpler than a wall containing many smaller panels.
Textured wallpaper with a repeating pattern may require more careful installation than a plain paintable surface.
Existing wallpaper removal can also add work.
Long-Term Maintenance
Paintable wallpaper may allow future color changes without full replacement when the product is designed for repainting.
Similarly, suitable molding can be repainted.
However, the number of repainting cycles and long-term appearance depend on the wallpaper texture, coating system, and existing finish thickness.
Repeated heavy paint application can eventually reduce the clarity of the relief.
Do not assume unlimited repainting without loss of detail.
Choosing STAVROS Products for Wallpaper and Wall Molding Projects
A coordinated architectural composition may use several related product categories.
The specific selection depends on the frame geometry and desired style.
Polyurethane Molding
For straight decorative profiles, start with the STAVROS polyurethane molding collection.
The MLDPU-001, MLDPU-002, and MLDPU-003 profiles provide different scales of architectural relief.
These products can be considered for decorative frames installed on appropriate wall substrates.
Decorative Trim Molding
For repeating ornament, explore decorative polyurethane trim.
Beaded molding, rope molding, and other ornamental patterns can introduce additional texture.
They are most effective when coordinated with the wallpaper's own pattern.
Molding Corner Elements
For rounded or ornamental corners, browse polyurethane molding corners and accessories.
These elements should be selected according to their compatibility with the straight molding.
Polyurethane Onlays
For classical decorative accents, the polyurethane onlays and appliques collection provides additional sculpted components.
A carefully positioned applique can introduce a focal point above a decorative frame.
However, not every design needs an additional ornament.
Coordinated Wall Decor Kits
For more elaborate compositions, explore STAVROS wall decor kits.
These offer coordinated designs in different styles.
Check the actual kit dimensions and material composition.
Some combine polyurethane ornaments with MDF molding.
Ordering for the United States
The English-language STAVROS website provides dimensions in inches and displays product prices in U.S. dollars.
However, published shipping information primarily describes delivery within Russia and certain neighboring markets.
For a project located in the United States, confirm current international shipping availability, freight costs, customs requirements, and delivery terms before ordering.
Do not assume that U.S.-dollar pricing means domestic U.S. inventory.
Frequently Asked Questions About Polyurethane Molding and Wallpaper
Can You Install Polyurethane Molding Directly Over Wallpaper?
Only when the specific molding and installation system are approved for the wallcovering and conditions. For many permanent installations, bonding to a properly prepared wall substrate is the more reliable approach.
Should You Install Wallpaper or Molding First?
For many new installations, install the molding on the prepared wall first, then fit wallpaper around or inside the frames. Other sequences may be appropriate for specific products and designs, but the attachment should not rely on unsuitable wallpaper layers.
Can You Install Molding Over Painted Wallpaper?
Painted wallpaper is not automatically a suitable mounting surface. The attachment depends on the wallpaper's bond to the wall, the paint film, and adhesive compatibility. Direct-to-wall installation is generally preferable for permanent decorative profiles.
What Is the Best Molding for Paintable Wallpaper?
A compatible polyurethane, MDF, or wood profile may be appropriate. Narrow molding works well with stronger wallpaper texture. More elaborate profiles often pair better with restrained wallpaper surfaces.
Can You Paint Wallpaper and Polyurethane Molding the Same Color?
Yes, provided both products accept the selected finish system. A monochromatic treatment can create a unified architectural appearance while preserving the relief of the molding and wallpaper.
What Is Picture-Frame Molding?
Picture-frame molding is decorative trim applied to walls in rectangular or other framed shapes. It creates architectural outlines without necessarily installing full raised wall panels.
Can Paintable Wallpaper Be Used Inside Wall Molding Frames?
Yes. This is one of the most practical ways to combine wallpaper and applied molding. The wallpaper provides the inner decorative field while the molding establishes the architectural border.
Can You Use Embossed Wallpaper With Polyurethane Molding?
Yes, when the products are selected and installed appropriately. Embossed wallpaper can provide attractive texture inside molding frames. The trim should be mounted according to its specified substrate and adhesive requirements.
Can Molding Be Installed Over Peel-and-Stick Wallpaper?
Do not assume that removable wallpaper can support permanent architectural trim. The wallpaper's adhesive may be the weak point. Use an approved mounting system or install the molding directly on a suitable substrate.
Can You Remove Polyurethane Molding Without Damaging Wallpaper?
Not reliably in every case. Permanent adhesives can damage wallpaper and painted drywall during removal. Do not assume that a product is removable merely because it is lightweight.
Does Paintable Wallpaper Need Primer?
Follow the wallcovering manufacturer's instructions. Some products require particular wall preparation or primer before hanging. The wallpaper's requirements for primer before painting may differ.
How Long Should Wallpaper Dry Before Painting?
Follow the manufacturer's specified drying period. The correct time depends on the product, adhesive, room temperature, humidity, and installation conditions.
Is Polyurethane Molding Better Than MDF?
Each material has advantages. Polyurethane is useful for molded ornamental detail. Primed MDF can provide economical painted straight profiles. The best choice depends on the design, environment, and intended finish.
Can I Use Polyurethane Molding in a Bathroom With Wallpaper?
Possibly in suitable protected bathroom areas, but the wallpaper, adhesive, substrate, and decorative profiles must all be appropriate for the moisture exposure. Ordinary decorative molding does not make a wall assembly waterproof.
What Adhesive Is Best for Polyurethane Molding?
Use an adhesive approved for the exact molding and substrate. Do not assume that a general-purpose construction adhesive is suitable for bonding to wallpaper.
Do I Need Decorative Corners for Picture-Frame Molding?
No. Many frames use conventional mitered joints. Decorative corners are optional unless a particular design requires them. If used, they must be compatible with the selected molding series.
How Much Molding Do I Need for Four Decorative Wall Frames?
Calculate the perimeter of each frame and prepare a cut list. In the 24 × 48-inch example above, four frames require 48 linear feet of finished molding, which can be cut from six 102.36-inch STAVROS strips under the stated layout.
Is Wallpaper Inside Molding Frames Better Than Wallpaper Across the Whole Wall?
Neither approach is universally better. Wallpaper inside frames allows a clear decorative boundary and more controlled material selection. A fully wallpapered wall can provide a continuous texture, but its installation with applied molding requires careful planning.
Can Wallpaper and Molding Be Different Colors?
Yes. Contrasting colors can emphasize the decorative geometry. Tone-on-tone finishes create a more restrained appearance. The correct choice depends on the room's design and lighting.
Can Polyurethane Molding Be Used With Wall Sconces?
Yes, as a decorative element within a properly planned composition. The light fixtures require their own approved electrical mounting and wiring methods. Ordinary molding should not conceal inaccessible electrical connections.
Are STAVROS Wall Molding Kits Entirely Polyurethane?
Not necessarily. Certain wall decor kits contain polyurethane ornamental elements combined with primed MDF molding. Check the material specifications of the selected set.
Where Can I Buy Polyurethane Molding for Wallpapered Walls?
Browse the STAVROS polyurethane molding catalog for linear architectural profiles.
For ornamental accents, explore decorative trim molding, polyurethane molding corner elements, and wall decor collections.
Confirm the exact product dimensions, materials, installation requirements, and shipping terms before ordering.
Final Thoughts: Combine Wallpaper and Molding With the Right Installation Plan
Paintable wallpaper and polyurethane molding can create an elegant architectural finish without requiring extensive custom millwork.
Wallpaper introduces surface texture.
Molding establishes geometry.
Color unifies the composition.
Together, these elements can transform an ordinary wall into decorative paneling suited to traditional, transitional, neoclassical, or contemporary interiors.
The result depends on more than appearance.
The most important decisions involve the installation sequence and the quality of the mounting surface.
For many permanent projects, attaching the molding directly to the prepared wall before installing wallpaper offers a more dependable solution than bonding the trim to a wallcovering.
Wallpaper can then be applied neatly inside the decorative frames or around the installed profiles.
The selected paint system should be compatible with both the wallpaper and molding.
The layout should be measured accurately, and the material order should be based on an actual cut list rather than an approximate footage estimate alone.
STAVROS offers polyurethane molding profiles, decorative trim molding, polyurethane corner ornaments, architectural onlays, and coordinated wall decor collections that can be considered for such decorative projects.
Choose the wallpaper texture first.
Establish the architectural proportions.
Select the molding profile.
Plan the installation sequence.
Calculate the materials.
Then finish the composition using compatible preparation and paint products.
The most successful wallpaper-and-molding interior is not created by simply attaching trim to a decorated wall. It is created by designing the wallpaper, molding, substrate, and finish as one coordinated architectural system.