Article Contents:
- First determine the door type, not the ornament you like
- Which wooden overlays are suitable for a door slab
- Smooth door: freedom of composition does not cancel scale
- Panel door: measure the inner flat area
- Moulded frame: what to choose first — the profile or the carved overlay
- Dimensions A, B, and C: how to read an overlay product card
- Mounting area: why matching dimensions is not enough
- Relief thickness: the piece may fit but still obstruct the door
- Handle and lock: functional area first, decor second
- Opening check: wall, casing, and adjacent leaf
- One central plate or two small ones
- Double-leaf door: choosing the shape matters more than mechanical repetition
- Corner plates: a good choice for a frame, but not for every corner
- When a wooden rosette is needed for the plate
- Beech or oak: the material is chosen to match the finish of the entire door
- Finishing and installation: best coordinated before painting the leaf
- Full-size paper template: check before payment
- Three selection examples: when the decision changes due to dimensions
- Narrow panel and an overly wide overlay
- A smooth door and two competing components
- Two door leaves and a mistake with the ornament direction
- What to include in the production specification
- Can a wooden overlay be installed on a door with a veneer finish?
- Are carved furniture overlays suitable for an interior door?
- Do I need to buy two identical overlays for two door leaves?
- Can a wooden overlay be installed on an already painted door?
- What should I do if a suitable ornament is wider than the flat part of the panel?
- How can I order a small batch of identical elements for a door workshop?
- What should I choose for a door with an already installed moulding frame?
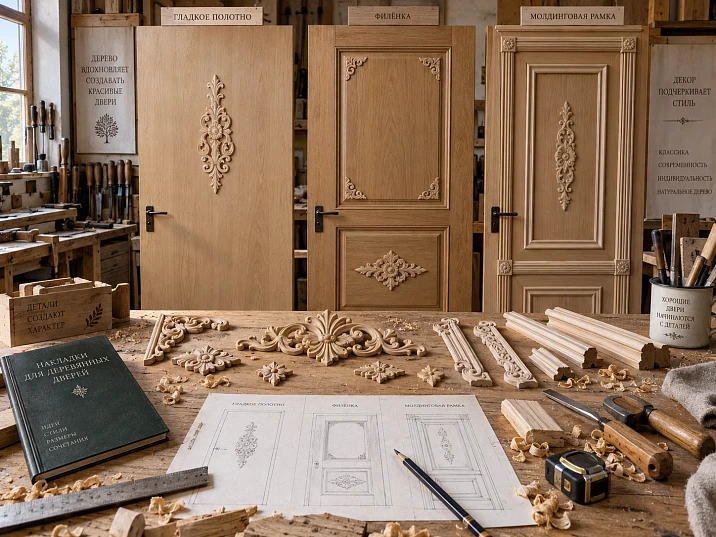
A door leaf 800 mm wide does not necessarily mean that a 300 mm wide carved overlay will fit on it. On a panelled door, the actual area for decoration may be considerably narrower: part of the width is taken up by the stiles, the profile and the panel bevels. In a photo the overlay looks suitable, but during a test fitting its edges fall on an uneven area.
Overlays for wooden doors are chosen primarily by the construction of the leaf, the free flat area and the relief projection. The pattern, wood species and finish colour come next. Some compositions are suitable for a smooth door, others for a door with panels, and when a moulding frame is already installed, the choice is limited not only by the size of the frame but also by its profile.
Before buying, it is useful to get five answers: where exactly the decor will be placed; how much truly flat space there is; what the width, height and thickness of the overlay are; whether it will end up next to the handle or lock; and whether the element can be fixed without disrupting the operation of the door structure. If even one answer is unknown, it is better to postpone ordering a large carved element until a test fitting.
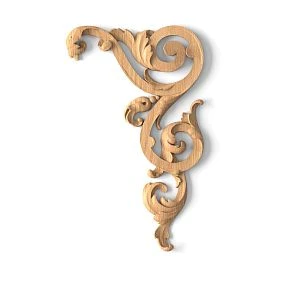
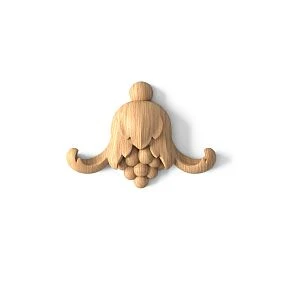
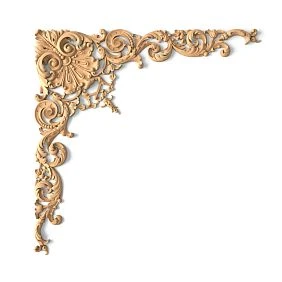
First determine the type of door, not the ornament you like
On a smooth door, you can define a decorative panel area yourself. In a frame-and-panel construction, the boundaries already exist: stiles, rails, and profiles limit the installation area. On a door with moldings, there is another line that the new ornament should follow rather than randomly overlap.
|
Door construction |
Where to place the overlay |
What to check before purchasing |
|
Smooth panel |
In a specially chosen central, upper, or elongated area |
Scale relative to the panel, handle position, clearance from edges |
|
One large panel |
On its flat central part |
Size of the area without chamfers and profile, possible movement of the panel |
|
Two or more panels |
In one selected zone or on a separate element in each |
Different sizes of the top and bottom margins, distance to the dividing crossbar |
|
Leaf with a moulded frame |
Inside the frame, near its corners, or as a coordinated accent |
The inner opening of the frame, the width and height of the profile, the method of joining |
|
Double-leaf door |
On each leaf or as a coordinated pair |
Different widths of the leaves, the central rebate, the position of the handles |
The check begins from the front side, on which the decor will be installed. For a door that opens into a corridor, both sides may look identical on the drawing, but the conditions around them differ: on one side the architrave and the switch are close, on the other there is a wall or the adjacent leaf. Therefore, each side with overlays requires its own inspection.
A separate case is a door with a factory-applied paint and varnish coating. One cannot assume that a wooden overlay will automatically adhere to any coating. The compatibility of the substrate, the finish, and the adhesive must be checked before installation, not after purchasing the entire batch.




Which wooden overlays are suitable for a door leaf
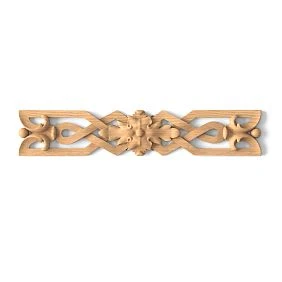
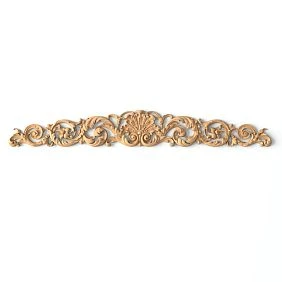
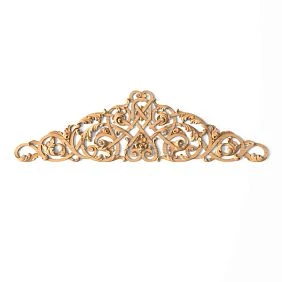
In the decorative overlays STAVROS there are central, vertical, horizontal, corner, and asymmetrical elements. The suitable shape is determined not by the name of the collection, but by the place the overlay is to occupy on the door.
A central overlay creates a single noticeable accent. It is convenient on a wide smooth surface or inside a large panel, when there is enough uncluttered space around the carving. If the door already has expressive casings and a complex profile, it is better to choose a central element with a calmer relief.
A vertical overlay emphasizes the height of a narrow field. It is appropriate on an elongated panel, but requires checking the handle and lock: a vertical ornament shifted toward the lock stile may end up exactly where a person grabs the door.
A horizontal overlay usually works in the upper part of the leaf or above a rectangular frame. It can support a wide upper panel if its height is small. On a too narrow upper area, large scrolls look cut off by the boundaries of the field.
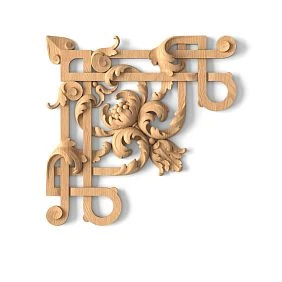
Corner overlays help create a framed composition without overloading its center. But a corner piece must fit against a real plane: if the frame has a protruding profile, an ordinary flat overlay cannot be considered suitable for installation over it without checking.
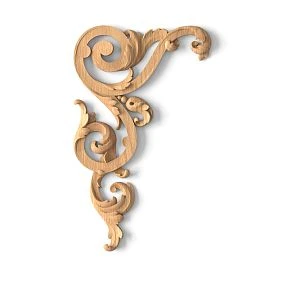
Left and right overlays are needed when the design is directed to one side. For example, a branch or scroll "looks" toward the center of the field. In this case, two identical left elements will not replace a mirrored pair. On a double-leaf door, such a mistake is especially noticeable.
|
Design task |
What to consider |
When it is better to avoid |
|
Highlight the center of a large panel |
One central overlay |
If the central field is crossed by a profile or is too narrow |
|
Emphasize the elongated upper zone |
Horizontal carved element |
If its ends fit flush against the frame |
|
Support a tall door opening |
Vertical overlay or a small pair |
If the decor falls within the hand-grip zone |
|
Create a molding frame |
Corner elements or decor for moldings |
If the mounting surfaces and profile do not match |
|
Get a mirrored pattern on two door leaves |
Mirrored left and right parts |
If elements of the same orientation were ordered |
It is convenient to first select two or three shapes, and only then compare their sizes. You should not simultaneously buy a massive central overlay, large corner elements, and wide moldings just because all the items belong to the same collection. There must be space left on the door leaf between them for the pattern to be perceived.
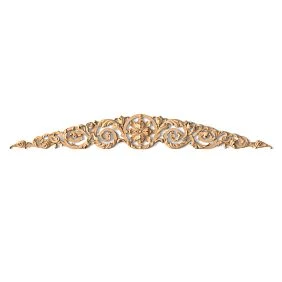
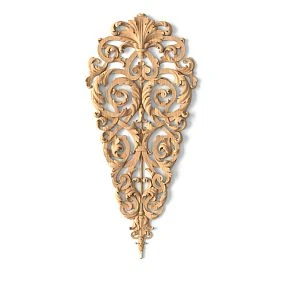
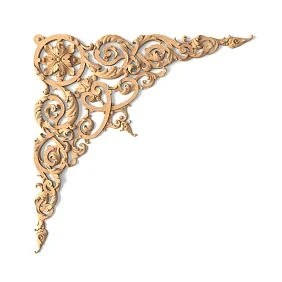
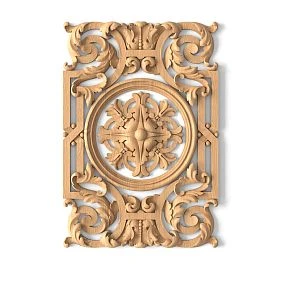
Our factory also produces:
Smooth door: freedom of composition does not cancel scale
A smooth door leaf seems like the simplest base. It has no ready-made frames, and the overlay can be placed almost anywhere. But it is precisely the absence of boundaries that often leads to excessively large decor: a person chooses an element separately rather than evaluating it across the entire height of the door.
Start with a frontal photo of the closed door. It is better to shoot without tilting the phone too much, otherwise the verticals will be distorted. On the image, mark the boundaries of the door leaf, the handle, and the approximate free grip area. Then apply the intended rectangle for the decor.
For a nominal panel width of 800 mm, you can preliminarily leave 90 mm on each side for visually open margins. That leaves 620 mm of width for the main composition. This is an example of design layout, not a mandatory standard: the exact offset depends on the edge profile, hardware, ornament size, and the overall look of the door.
If a trial central overlay 420 mm wide fits within this field, arithmetically there are 100 mm left on each side. But the size of the overlay itself does not yet tell you how dense the composition will be. A wide ornament with thin branches looks different from a compact carved panel with a dense center. Compare not only the bounding rectangle but also the actual contour.
On a smooth door, a single expressive element at the top often works well. The lower half can be left free — especially if the door is adjacent to furniture that already has carved fronts. There is no need to repeat the ornament on every free part of the panel.
If a frame is planned, first decide what will be the main feature: the molding lines or the applique itself. This determines the selection order and the width of the free margin.
Get Consultation
Paneled door: measure the inner flat area
The most common mistake when selecting carved decor for doors is comparing the dimensions of the applique with the overall width or height of the panel. But the visible panel consists not only of a flat surface. The edges may have bevels, moldings, and transitions to the frame.
Let's imagine an upper panel whose visible width is 340 mm. On each side, 25 mm is taken up by the profiled and beveled area. The flat area is only 290 mm wide. If we leave another 12 mm of technological clearance on each side for a neat fit and subsequent finishing, the preliminary width of the applique will be no more than 266 mm.
The calculation is simple: 340 − 25 − 25 − 12 − 12 = 266 mm. All numbers here are conditional; their purpose is to show why a 300 mm applique may not fit into a visually wide panel.
Height is measured in the same way. Special attention should be paid to the top and bottom zones: there the profile often differs from the side profile, and the bevel may be wider. Do not transfer the dimension obtained at the center of the panel to its entire surface.
There is also a structural limitation. In a classic frame-and-panel door, the panel may be installed with the possibility of slight seasonal movement of the wood relative to the frame. The applique must not rigidly connect the movable panel to the stile or rail of the door. Otherwise, the decorative piece turns into a bridge between parts that were not originally meant to work as a single unit. The consequences may not appear immediately, but when humidity changes.
If the chosen applique captures the edge of the panel and part of the frame, it is necessary to change the composition or discuss the solution with the door manufacturer. Trimming the ornament on site is not a universal solution: it can ruin the design and weaken thin carved areas.
On a door with two panels, one should not automatically repeat the same model in both fields. The upper zone is often smaller than the lower one; identical elements may look disproportionate. Sometimes it is better to install carving only on top and leave the lower panel clean.
Molding frame: what to choose first — the profile or the carved overlay
The frame sets strict geometry, while the carved detail adds a sculptural pattern. If both elements actively compete for attention, the result on a small door leaf is an overly dense composition.
There are two workable approaches. In the first, the frame plays the main role: the selected wooden molding forms the proportions, while a small central overlay or rosette completes the composition. In the second, the carved element becomes the main feature, and a simple narrow profile merely marks the boundary around it.
When decorating doors with moldings, check the inner clearance of the frame, not its outer dimensions. For example, a frame with an outer width of 500 mm and a profile occupying 35 mm on each side leaves an inner opening of 430 mm. If a relief overlay 420 mm wide comes almost right up to the profile, the composition may look cramped, even if the details do not overlap. In such a situation, it is wiser to choose a narrower carving than to try to fill the frame as much as possible.
A separate topic is the point where the decor meets the profile. In the STAVROS range there are elements for finishing moldings, including products with a back side prepared for a specific cross-section. An ordinary flat corner overlay and a special joint element are not the same thing. If the decor is to extend onto the molding, check the junction drawing and the compatibility of the specific products.
On an already painted door with a finished frame, measure its thickness and projection in advance. An overlay whose edge lands on the profile will not get a reliable fit just from a thicker layer of adhesive. A large adhesive gap does not replace a suitable shape of the base.
Dimensions A, B, and C: how to read an overlay product card
In the STAVROS catalog, three main dimensions are used for decorative overlays: A — width, B — height, C — thickness. When choosing, people usually look at width and height first, and leave thickness for later. For doors, this order is incomplete: the relief protrusion affects opening, handle operation, and the overall perception of the door leaf.
Some products offer several sizes of the same model. For example, the mirrored carved elements N-349L and N-349R are available in 200 × 200 × 22 mm, 250 × 250 × 27 mm, 300 × 300 × 32 mm, and 350 × 350 × 38 mm. These values refer to the versions specified in the product cards; when ordering, you need to verify the selected modification, material, and manufacturing conditions.
|
Parameter |
What it shows |
How to check on a door |
|
A — width |
Maximum horizontal dimension of the product |
Compare with a flat surface and side clearances |
|
B — height |
Maximum vertical dimension of the product |
Check the position relative to the panel, handle, and frame |
|
C — thickness |
Overall depth of the product |
Assess the protrusion, adjacent parts, and safety in use |
|
Thread contour |
Where the extreme protrusions and thin elements are located |
Place an image or a full-scale paper template |
|
Back side |
What area can be used for mounting |
Compare with a flat section of the panel; if necessary, request a drawing |
A drawing is more important than a perspective photo. In a photo, a carved sheet may appear thin even though the edge of the relief protrudes quite strongly. And vice versa: with side lighting, shallow carving casts a large shadow and looks more massive than its actual size.
For a large piece, it is useful to request a drawing of the back side. An overall dimension of 300 × 300 mm does not guarantee that this entire area sits against the door. The back surface may have recesses, level differences, or small contact areas.
Mounting area: why matching dimensions are not enough
Installing a wooden overlay begins not with glue, but with checking the fit. This is especially true for panel doors, decorative boards with mouldings, and leaves that have already been painted.
Place a short straight batten or ruler on the intended installation area and check the plane in several directions. If the ruler rocks or a noticeable gap appears beneath it, the base cannot be considered fully flat. Then place the paper outline of the overlay on it: it will show whether the edge runs onto a step, chamfer, or moulding.
Checking at a single center point is not enough. A large overlay may touch the surface firmly in the middle but remain unsupported at the ends. For a carved piece with thin leaves, this is more dangerous than for a short, dense rosette: when pressed or cleaned, the protruding area receives unnecessary stress.
After the dry fit, mark the actual support points on the back of the piece. If there are few, ask the manufacturer whether a specific mounting method is intended for this model. Do not try to level the fit yourself with excessive glue, shims of unknown material, or fasteners through the front carving.
Key question: will the overlay sit stably and evenly against exactly the part of the leaf where it is planned to be attached? If not, choose a different shape, size, or method of finishing the door.
Relief thickness: the piece may fit, but interfere with the door
Thickness C is not a secondary characteristic. It determines how far the overlay protrudes above the front plane, and how this bulge interacts with objects around the door.
Suppose two elements are identical in width and height, but one is 12 mm thick and the other is 32 mm. On a front drawing they will occupy the same place. In a real room, the second will have a more pronounced shadow, and its edge will be farther from the door surface. This may be an advantage for a tall entrance door and a drawback for a narrow hallway where the leaf opens close to the wall.
Deep carved decor is appropriate where it does not intersect with working areas. Check the clearance to the door casing when opening, protruding hardware, the adjacent leaf, and the wall. If the door opens to a doorstop, assess its position at the extreme point: the doorstop should protect the leaf and surrounding surfaces, not allow the carving to come into contact with the wall.
In bright side lighting, the relief reads more strongly. Therefore, for doors positioned perpendicular to a window, a calmer and finer ornament is sometimes sufficient. In a dark hallway, large deep carving can, on the contrary, turn into a heavy dark spot. You should not choose thickness solely on the principle of "the deeper, the richer."
Particularly careful design is required for frequently used passages. On the door of a pantry, bathroom, or walk-through room, protruding thin elements will more often catch on clothing and hands. There, a compact ornament located outside the everyday touch zone is preferable.
Handle and lock: working zone first, decor second
A person does not grip the handle with their fingertips. The palm and hand occupy the space around it; when turning the handle, the hand may move sideways or upward. If a carved overlay is located nearby, its sharp protrusion can interfere with normal movement, even when the handle itself works flawlessly.
You can check compatibility without complex calculations. On a closed door, mark the intended contour of the overlay with painter's tape. Open and close the door several times with a normal movement. Try doing this with your right and left hand, with a bag in your hand, with the light on and off. For a walk-through door, it is useful to ask a person of a different height to perform the test. If the hand regularly enters the marked area, the decor needs to be shifted or replaced with a more compact one.
Consider not only the handle but also the lock overlay, keyhole, and turn latch. Space should remain around the hardware for fasteners, maintenance, and possible replacement. On an entrance or interior door with a mortise lock, you must not drill the leaf in the intended mechanism area just to secure the ornament.
Pay special attention to doors with a narrow locking stile. On them, the hand ends up closer to the side edge, which means vertical carved decor on the same side can create a constant conflict. It is better to move the accent toward the center of the free field or abandon the protruding overlay near the handle.
It happens that a decorative composition looks perfect precisely at handle level. Then it is worth reconsidering the composition as a whole. Selecting a handle "to fit the remaining space" after gluing on the overlay is significantly harder than coordinating the placement of all elements in advance.
Opening check: wall, door casing and adjacent leaf
A gap that seems sufficient on a stationary door may disappear when it opens. The leaf moves along an arc, and the protruding carving follows a trajectory different from that of its flat surface. This is especially important near reveals, side walls and furniture.
Open the door to the actual stop. Look at the position of the intended overlay at several intermediate points, not only when the leaf is fully closed. For a paper template, the thickness of the future relief can be roughly shown with a small cardboard protrusion of the corresponding depth. Such a model does not replace a full mock-up, but it helps to detect an obvious collision even before ordering.
For double-leaf doors, the central rebate must be checked separately. When one leaf is open and the other is closed, the carving must not interfere with movement, the operation of the bolt or access to the handle. Protruding elements installed directly near the line where the leaves meet are especially undesirable.
If the door opens almost flush to the wall, first resolve the issue of the stop and the actual opening angle. Buying a deep applique on the assumption that “the door is rarely opened fully anyway” is risky. The position of the leaf is determined by everyday use, not only by the design intent.
For doors with regulatory requirements for fire resistance, smoke and gas tightness, or another certified construction, unauthorized addition of parts may be unacceptable. Such leaves are modified only within the solutions permitted by the manufacturer and applicable requirements. An aesthetic desire does not replace verification of whether the intervention is permissible.
One central applique or two small ones
One large carved element is not always better than a pair of compact ones. The decision depends on the geometry of the free field and on which details are already present on the leaf.
On a door with one tall panel, a central overlay forms a clear visual center. But if the panel is narrow, a long ornament may turn out to be excessively dense. Two small overlays separated by a free area sometimes read better: a pause appears between them that emphasizes the height of the door.
For a door with two panels of different sizes, another logic is also possible: one accent in the upper field, no carved decor in the lower one. This is especially appropriate when the lower part is actively perceived up close and is more often subjected to contact by footwear, bags, or cleaning items.
When choosing paired details, take into account the orientation of the ornament. A mirrored pair is necessary if the scrolls or branches must unfold toward each other. If the element has axial symmetry, two identical pieces can produce the desired pattern without choosing a right- or left-hand version.
For an initial selection, you can look at vertical и Horizontal appliqués, but the final comparison should be made using specific product cards and drawings. The name of the shape does not guarantee a suitable size or reverse side.
Double-leaf door: choosing the shape matters more than mechanical repetition
On two leaves, the decorative rhythm is more noticeable because the eye compares adjacent panels. But this does not mean that every detail needs to be duplicated without changes. On a one-and-a-half-leaf door, one leaf is noticeably narrower, and identical large overlays may look disproportionate.
If the leaves are the same width, you can choose one symmetrical central piece or a mirrored pair of directional elements. In the second case, be sure to specify the quantity of left and right items in your order. The catalog includes, for example, left N-349L и right N-349R — these are separate product variants, and they cannot be substituted for each other just because the photo looks similar.
For a door with an active and an inactive leaf, it is better to first determine how noticeable the second part of the composition should be. Sometimes a expressive overlay on the wide leaf and a calmer accent on the narrow one are enough; sometimes both leaves should be kept equally restrained. The decisive factor is the overall appearance of the closed opening and the specific dimensions of the installation areas.
Pay attention to the direction of the pattern on the side from which the door is most often seen closed. The decor may have a clearly defined top: you cannot flip the item on the other leaf for the sake of mirroring without checking the ornament. Not every overlay allows a 180-degree rotation without visual disruption.
For serial door production, it is better to record this scheme on a separate sheet showing each leaf. It should include not only the axes but also product names, orientation, dimensions, and quantity — these details are what prevent confusion when ordering and assembling.
Corner overlays: a good choice for a frame, but not for every corner
A corner carved element is perceived as a natural continuation of the molding composition. It can emphasize the intersection of horizontal and vertical lines, soften a rectangular frame, or make the upper part of the door more expressive without a large ornament in the center.
However, an “corner” has two different geometries: the corner of the decorative field in the photo and the actual joint where the profiles meet. In the first case, a flat pad is sufficient. In the second, you need to check the fit against the molding or use a special connecting element.
Before purchasing corner wooden overlays draw the frame at full size in at least one corner. Show the width of both profiles and the distance to the inner opening on the drawing. Attach the carving outline. Repeat the check at the top and bottom corners if their surroundings differ.
Four large corner overlays can visually narrow the inner field more than one central element. This is not a mistake in itself, but with a narrow door this effect has to be taken into account. If the frame already has pronounced carving, it is often wiser to omit additional corner overlays altogether.
Another practical point is cleaning. Complex carving placed at the lower corners of the door is closer to accidental impacts and dirt. For heavily used openings, a decorative accent in the upper part is usually safer.
When a wooden rosette is needed for an overlay
A rosette is useful not as a mandatory addition, but as a way to solve a specific compositional task. It can complete the intersection of moldings, highlight a small center of the frame, or support the ornament where a full-size overlay would be too large.
A round rosette has a different character of pattern: it gathers attention at a point. With an elongated carved overlay, the eye moves along the ornament. If both details are equally active and placed close together, competition arises. Therefore, a large central overlay does not necessarily need rosettes added above and below.
In the section carved wooden rosettes it is more convenient to look for a compact accent for a small area. Compare the diameter or overall dimensions of the product, its thickness, and the shape of the back side. For a frame with a narrow inner opening, this may prove more practical than a large applique.
Separately check whether the rosette only visually covers the joint of the moldings. If the profiles meet with a gap or at different heights, the decorative rosette should not be used as a substitute for properly fitting the load-bearing and finishing elements.
Beech or oak: the material is chosen to match the finish of the entire door
For surface-mounted decor made of solid wood, the choice of species is especially noticeable after finishing. On a painted door, the viewer first sees the shape and shadow of the carving. With a clear finish, the grain pattern, shade, and differences between the base and the applique are added to these.
Beech is reasonable to consider for a project under opaque enamel, when the door and the applique should be perceived as a single painted surface. Beech by itself does not eliminate the need for priming and preparation: end sections, fine carving, and possible glued joints require attention during finishing. The quality of the result depends on the preparation and compatibility of the entire paint system.
Oak is often chosen where they want to preserve a noticeable wood texture under oil, lacquer, or clear tinting. If the door leaf is also oak, the likelihood of achieving a similar surface character is higher than when combining dissimilar species. However, the same species does not yet mean the same color: different batches, cuts, pre-sanding, and a test coat can produce differences.
|
Project conditions |
Preferred selection direction |
What to check |
|
The door and decor are painted with opaque enamel |
Beech overlay as one of the practical options |
Surface preparation, primer, and coating compatibility |
|
Oak panel with a clear finish |
Oak veneer |
Grain pattern, shade after a test finish |
|
Restoration of an old door with an unknown coating |
First, a compatibility test and a sample |
Adhesion of the new layer, condition of the substrate, color |
|
A series of doors with a repeatable finish |
One approved combination of material and coating |
Sample stability and batch consistency |
When ordering large carved decor, it is also worth remembering the weight of the product. It depends not only on the wood species, but also on the dimensions, thickness, shape, and the amount of wood removed. If a genuinely heavy element is planned, its mounting method should be agreed separately. The reliability of installation cannot be judged only on the basis that it is "wood to wood."
You should not choose oak automatically because of the idea of it as a more expensive option. If the door will be fully covered with enamel and the grain pattern is not needed, the paid advantage of a clear oak texture may not matter for the result.
Finishing and installation: best coordinated before painting the door leaf
The most manageable situation is when a new door has not yet been painted. You can check the overlay on a dry surface, clarify the fitting position, and do a trial assembly, and then carry out the finishing according to the approved technology.
At the same time, the phrase "glue before painting" should not turn into universal advice. The sequence depends on the construction, the type of coating, the adhesive used, and the shape of the carving. Some elements are more conveniently finished separately in advance in order to reach hard-to-access places, and finally installed after the necessary operations. For another project, it is technologically more correct to assemble the unit first. The decision is made based on specific materials and manufacturers' recommendations.
When finishing under enamel, pay attention to the transition between the edge of the overlay and the door leaf. A poorly prepared joint will show even with high-quality carving: a gap, a thick buildup of primer, or uneven texture will become visible along the perimeter.
Under a clear finish, correcting such mistakes is more difficult. Filler suitable under opaque paint may be noticeable under varnish or oil. If the overlay and the door have different shades, first make a test coat on samples of both surfaces and compare them under the room's lighting.
For a finished painted door, check the strength of the existing coating and whether gluing to it is permissible. It is important to obtain a preparation scheme approved by the adhesive manufacturer. Glossy varnish, wax, oil, and opaque enamel are different substrates. You cannot assume the same adhesion without testing.
For heavy parts, a combined fastening method is possible, but any mechanical fasteners must be acceptable for the given door design. You must not drill into the lock area, damage thin panels, or compromise the integrity of a certified door leaf without a scheme. Additional recommendations for preparation and finishing can be checked against the section STAVROS installation and finishing tips.
Full-size paper template: verification before payment
The on-screen image of the overlay does not convey its scale with sufficient accuracy. It is more reliable to cut out the outline of the intended product from cardboard or thick paper and hold it against the door. This is especially useful when choosing a large carved element or several parts of a single composition.
1. Measure a flat area on the door leaf, excluding chamfers, steps, and moldings.
2. Transfer dimensions A and B of the selected overlay onto paper at a 1:1 scale. If a drawing of the product is available, use its outline.
3. Mark the handle, lock, and edge of the leaf. Do not cover these marks with the template: they are needed to assess the working area.
4. Secure the template with removable tape that does not damage the finish, and look at the door in the closed position from a normal distance.
5. Check the movement of the door and your hand. For a deep overlay, separately simulate the protrusion of thickness C.
6. Repeat the check with the lights on and in daylight, if possible.
A paper rectangle will show the overall dimensions, but not the full behavior of the carving. If the overlay has long thin leaves or strongly protruding parts, make the outline closer to the real shape or request a drawing. A dense solid patch of cardboard sometimes seems heavier than the actual openwork ornament — this should be taken into account when evaluating.
For a door manufacturer, it is useful to store the template together with a sample of the approved finish. Then, when reordering, you can quickly check that changed hardware or a new panel size has not disrupted the previously approved scheme.
Three examples of selection: when the decision changes because of dimensions
Narrow panel and overly wide overlay
Condition: the flat area of the upper panel measures 270 × 420 mm. The overlay you like is 300 × 300 mm. Even without an additional offset, the item is 30 mm wider than the base. If you try to center it, the edges of 15 mm on each side will extend beyond the flat field.
You should not buy this overlay just because it fits the overall door width. Workable options are to take a smaller size of the same model, consider a narrow vertical overlay, or abandon the central carved element altogether in favor of a small accent. The priority here is not the artistic concept, but the possibility of a flat and safe installation.
Smooth door and two competing parts
Condition: the panel is 900 mm wide. A 650 mm area is allocated for the central composition, and the selected overlay is 380 mm wide. After centering, 135 mm of free field remains on each side. Geometrically, everything looks convincing. But the designer additionally suggests corner overlays and a wide molding frame.
The problem is no longer that the decor does not fit, but that the free area quickly disappears. With such a set of elements, you should first assemble a paper mockup of the entire composition. Perhaps the best result will be one central carved overlay without a frame; another option is a calmer central part with a thin molding. Checking each purchase separately is not enough: the elements interact with each other.
Two leaves and an error with the ornament direction
Condition: for each leaf, one asymmetric element is selected, whose branches point to the right. In the closed position, both branches face the same direction. If the design intends an ornament converging toward the center, two identical parts will not produce the desired composition.
Before placing an order, the specific left and right versions must be indicated on the drawing. A mirrored pair of a single product item may not be sufficient. This check relates specifically to the selection of products; detailed layout of their relative positioning is performed after the shape, dimensions, and orientation have been approved.
How to approve decorative elements before manufacturing a series of doors
For a single home door, a mistake may result in replacing one overlay. In a workshop that assembles dozens of identical door leaves, incorrect orientation or an unsuitable size will be repeated across the entire batch. Therefore, a control sample is approved first, and then used for subsequent purchases.
During incoming inspection, compare the delivered products with the order: name and item code, size variant, species, surface quality, quantity, and orientation. Separately check for damage to thin carved parts. The presence of the required number of products in the box does not yet mean that the batch is fully suitable for installation.
If the overlays are paired, lay them face up in the future sequence. This quickly reveals situations where, instead of three left and three right elements, six parts of one side were delivered. For a long series, a photograph of the accepted set next to a measuring ruler and the order number is especially useful.
Then perform a dry fit on one panel of the type for which the batch was purchased. Check not only the front appearance, but also the fit, compatibility with the selected hardware, and the door's behavior when opening. The approved set can be used as a sample for further production. If the door dimensions or handle model change, the compatibility check is performed again.
What to include in the production specification
|
Specification field |
Example entry |
|
Door designation |
D-01, upper panel |
|
Name |
Carved wooden overlay |
|
Article number |
Exact SKU from the product page |
|
Sizes |
A × B × C, mm |
|
Material |
Beech or oak, selected option |
|
Orientation |
Symmetrical, left or right |
|
Finishing |
Enamel or approved clear finish |
|
Quantity |
Pieces per door and for the entire batch |
|
Installation location |
Diagram or drawing of the selected field |
|
Link to the product |
Exact STAVROS product card |
|
Reference sample |
Date and designation of the approved assembly |
Quantity is calculated by completeness, not by the total number of doors. For example, for 12 double-leaf doors with one left and one right overlay on each door, you will need 12 left and 12 right items, 24 pieces in total. Ordering simply “24 overlays” without specifying orientation is not enough.
For joinery workshops that need repeatable sets, it makes sense to agree on delivery terms and finishing parameters in advance. Information for professional buyers is collected in the section STAVROS for manufacturers.
Mistakes that force the decor to be redone
Choosing from a photo without a drawing. A photo has no reliable scale and does not show the mounting side. Before ordering, clarify dimensions A, B, C and the available product diagrams.
Measuring the panel together with the bevels. The part meets a profile that prevents it from sitting flush. Measure the flat mounting area specifically and leave room for edges and finishing.
Ignoring the carving depth. The overlay fits in width, but during opening it touches the wall or ends up too close to the hand. Check the thickness and the movement path of the leaf.
Random selection of left and right versions. The ornament on the two leaves ends up facing the same direction instead of forming a mirrored pair. Specify the orientation of each item in the order.
Buying several types of decor without an overall layout. Individually, the molding, rosette, and overlay look appropriate, but on the door leaf they begin to crowd each other. Before paying, put together a composition using at least paper templates.
Installation over an unprepared surface. The decor is held not by the wood but by the old paint layer, whose condition is unknown. First check the base and the permissible fastening technology.
Covering a movable panel joint. The overlay connects door parts that need to be able to move with humidity fluctuations. Place the decor within the structurally permissible surface.
No reference sample for the batch. Small discrepancies get copied onto dozens of doors. Before mass installation, approve one finished assembly with the chosen hardware and finish.
When it is better not to buy a wooden overlay
Not every door leaf needs carved decoration. If the door already has expressive panels, a wide casing, and an active wood grain, additional large ornament can overload the surface. In that case, the existing architecture of the leaf is enough.
You should refuse to buy the selected overlay or change the design when the flat mounting area is smaller than the dimensions of the part; the reverse side does not match the substrate; the relief falls within the hand zone or interferes with opening; the door has restrictions on modifications; the condition of the old finish is unknown and has not been checked. For a thin, damaged, or warped base, first solve the structural problem rather than masking it with decor.
If the task is only to emphasize rectangular geometry, it is sometimes wiser to buy a molding instead of a carved overlay. If one small accent is needed, a rosette will do. And with a very narrow field, high-quality painting and a clean panel line can look more convincing than any added element.
Where to buy overlays for wooden doors and what to check in the order
It is convenient to select ready-made carved elements for doors in the STAVROS catalog of wooden carved decor. The main section for those planning to buy decorative overlays for doors is Wooden decorative inlays. For frame trim, the following are separately available Wooden moldings и Decor for Molding.
In the product page of the selected item, check the exact SKU, dimensions, material, finish or surface preparation option, manufacturing conditions, and current price. One model may have different size versions. Even if they look almost identical in the photo, a difference of a few centimeters can change the entire choice for a door.
When placing an order for one door, it is useful to write down the dimensions of the installation field next to the SKU. For the workshop, add the number of parts per leaf, the distribution by left and right orientation, and a link to the approved sample. If you need to buy decorative molding for doors together with carved elements, make sure their shapes and mounting surfaces are compatible, and not just that they have a similar pattern.
As a visual reference, you can look at examples of doors with carved decor. They help assess the scale and composition, but do not replace measurements of the specific leaf. Before payment, also check the current delivery and payment terms.
The main sign of a successful choice is when, after fitting, there is no longer any need to figure out where to move the handle, what to fill the unevenness under the overlay with, and why the door has stopped opening freely. The decor must be coordinated with the construction from the very beginning.
Frequently asked questions about overlays for wooden doors
Can a wooden overlay be installed on a door with a veneer finish?
The possibility depends on the construction of the base, the condition of the veneer, its adhesion to the substrate, and the finish applied. An overlay cannot be considered safe for any veneered door leaf merely because of its external resemblance to solid wood. Before fastening, the permissible load and compatibility of the adhesive system are checked; for heavy elements, the solution is agreed with the door manufacturer.
Are carved furniture overlays suitable for an interior door?
Many wooden decorative overlays are used for both furniture fronts and doors. But the purpose stated in the catalog does not eliminate the need to check dimensions, the mounting surface, thickness, and operating conditions. For a door with a narrow panel, a large furniture element may turn out to be an unsuccessful choice.
Do I need to buy two identical overlays for two door leaves?
Not necessarily. If the design has no pronounced direction and both leaves are identical, two identical symmetrical pieces may be suitable. For a directional ornament, left and right versions are usually considered. On unequal leaves, different sizes or a different design principle are often required.
Can a wooden overlay be placed on an already painted door?
Sometimes yes, but first the condition of the coating and the fastening technology are assessed. Old lacquer, enamel, and oil behave differently. You should not attach a heavy overlay to an unknown decorative layer without checking adhesion and the approved preparation method.
What should I do if a suitable ornament is wider than the flat part of the panel?
First check whether the model is available in a smaller size. If not, choose a different shape — a vertical, compact central piece, or a rosette. It is not worth covering the bevels and movable joints of the panel with an overlay just to keep a design you like.
How do I order a small batch of identical elements for a door workshop?
Record the article number, exact size, species, orientation, quantity per door, and total quantity. First approve a control sample with the actual finish and hardware. For directional carving, calculate the left and right versions separately; for repeat purchases, verify the batch against the approved specification.
What should I choose for a door with an already installed molding frame?
If there is enough even area left inside the frame, a compact central overlay can be considered. If the accent is needed specifically at the intersections of the profiles — special elements for moldings. When the inner part is already small, additional decor may be unnecessary: the preserved free field often looks better than overloaded carving.
Overlays for wooden doors make sense to buy after the construction of the leaf, the actual flat area, the dimensions A × B × C, and the location of the hardware are known. Then the choice of beech or oak, the shape of the ornament, and the finish becomes informed, and the finished carving truly complements the door without creating problems during installation and use.