Article Contents:
- What is NPU-270 and why in this article only the size 611 × 120 × 18 mm matters
- Why service access is more important than beautiful symmetry
- How to check the service zone before ordering NPU-270
- Step 1. Record the initial position of the button
- Step 2. Remove the button strictly according to your model's instructions
- Step 3. Mark the maximum trajectory
- Step 4. Open access as much as required during normal maintenance
- Step 5. Add working clearance, not just a millimeter-wide passage
- Step 6. Return the button to its place and only then start marking the decor
- First effect — NPU-270 will look large
- Second effect — the slightest centering error is noticeable
- Third effect — tile joints become part of the composition
- Check 1. Side margins
- Check 2. Distance to the button
- Check 3. Height of the free field above the overlay
- Check 4. Joint grid
- Check 5. Review from a normal point of view
- Check 6. Shadow from the relief
- Where exactly to place the overlay relative to the flush button
- What changes if the key is wide, tall, or protrudes from the tile plane
- Wide horizontal key
- Tall compact key
- Key with a noticeable frame or protrusion
- If a horizontal joint runs under the overlay
- If the edge falls on the tile bevel
- If the tile is textured
- If the seams are asymmetrical relative to the box
- The surface must be clean and degreased
- The adhesive must be compatible with both polyurethane and tile
- Dry fitting is done before applying the adhesive
- Do not turn the decor into part of a load-bearing assembly
- The service area must remain as accessible after installation as it was before
- In the color of the tile or a close shade
- In the color of the grout
- White overlay on colored tiles
- Contrasting dark decor on light tiles
- The box is tall and visually empty
- The tile is large-format and calm
- The button is minimalist
- The bathroom has classic or neoclassical details
- The relief is visible from a normal viewing point
- The service opening ends up too close
- There is little free height above the button
- The tile has a very active pattern
- The box is already overloaded with accessories
- The relief falls into the constant splash zone
- It's impossible to choose a reliable mounting system for the existing tile
- The overlay is needed only because it's 'empty'
- Scenario 1: the service zone ends significantly below the template
- Scenario 2: the key removal trajectory comes almost flush with the NPU-270
- Scenario 3: the service hole extends under the intended overlay location
- How to avoid damaging an already finished interior during marking and installation
- Is it necessary to assemble a molding frame around the NPU-270
- Care for carved decor near plumbing fixtures
- Low box with a horizontal shelf on top
- Box up to the ceiling
- Installation inside a wide decorative niche
- Box next to furniture or countertop
- Even ceiling light
- Spot directly above the box
- Side light from the mirror
- Light glossy tile
- Matte large-format tile
- Back surface fit
- Actual shadow
- Re-check the button
- Cleaning check
- Side view
- Photo before installation
- Option A — buy exactly NPU-270 611 × 120 × 18 mm
- Option B — keep the idea but change the size or model
- Option C — leave the tile without decor
- Mistake: measured only the width of 700 mm
- Mistake: placed the decor as close to the button as possible
- Mistake: did not account for the tile joint under the edge of the overlay
- Mistake: decided that polyurethane's moisture resistance solves everything
- Mistake: centered only relative to the tile joint
- When the smaller NPU-270 may be more reasonable, although the article is dedicated to the 611 mm size
- What ultimately matters more: the box decor or unobstructed access to the installation?
- Final check on the day of installation
- Can NPU-270 be glued directly onto porcelain stoneware?
- Do I need to remove the flush button while installing the overlay?
- Can NPU-270 be made removable so that it covers part of the service opening?
- What to do if the button axis does not align with the center of the 700-mm box?
- Can NPU-270 be installed on tiles with a pronounced relief?
- Should the overlay be painted before or after gluing?
- Can an 18 mm relief interfere with cleaning the bathroom?
- If NPU-270 looks visually appealing, but service access is borderline, can everything be left as is?
- Is a molding frame needed around NPU-270?
- Can the same technique be used above the button in the guest bathroom without a shower?
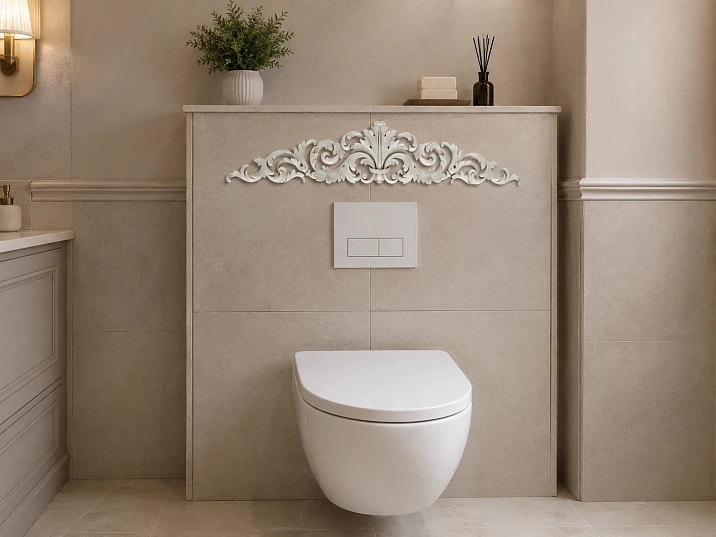
The concealed installation frame is already assembled, the tile is laid, the flush button is in place, and the smooth horizontal plane above it looks too empty. There is no desire to redo the cladding or assemble a full molding frame. In such a situation, a large carved decorative overlay NPU-270 measuring 611 × 120 × 18 mm can indeed become a standalone horizontal accent. But there is a limitation more important than aesthetics: the decor must not block access to the installation mechanism.
If the front plane of the frame is 700 mm wide, and the NPU-270 is installed horizontally with size A = 611 mm, the arithmetic looks convincing: 700 − 611 = 89 mm, meaning after centering, about 44.5 mm remains on each side. On paper, the product fits. However, 'fits in width' does not mean 'suitable for a finished installation.' The main pre-order question here is vertical: what happens to the flush button when removed, where does the actual service opening end, and does the lower part of the decorative overlay fall into the working path of the button or frame.
Therefore, the direct answer is this: the NPU-270 611 × 120 × 18 mm can be considered for a 700 mm wide frame if, after a full-size trial fit, the entire path for removing the button and access to the service opening remain free. If the overlay would need to be removed for installation maintenance, the location is chosen incorrectly. In that case, it is wiser to raise the decor higher, choose a smaller element, or abandon the overlay altogether in that specific area.
For the scenario in question, one large NPU-270 costing 5,880 ₽ is needed. Before purchasing, it is more useful to spend twenty minutes on marking than to discover after installation that the decorative relief interferes with standard maintenance. After checking the geometry, you can buy the carved NPU-270 overlay made of polyurethane specifically in the size 611 × 120 × 18 mm, without turning the choice into a comparison of all four model variants.
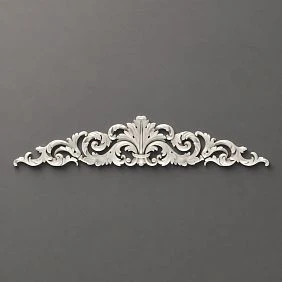
What is NPU-270 and why only the size 611 × 120 × 18 mm matters in this article
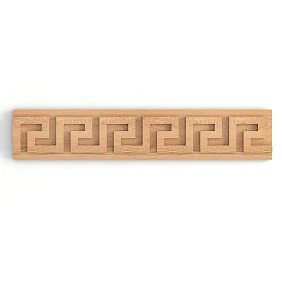
NPU-270 is a carved decorative overlay made of polyurethane. The product card includes several sizes, but for our node, the large variant 611 × 120 × 18 mm is fixed. This is important: the article answers not the question 'which NPU-270 to choose,' but another one — whether an already selected large overlay can be integrated into a finished installation frame without losing access to the equipment.
| Parameter | Significance for the considered variant |
|---|---|
| Product | Carved decorative overlay NPU-270 |
| Material | Polyurethane |
| Size A × B × C | 611 × 120 × 18 mm |
| Price | 5,880 ₽ per 1 pc. |
| Quantity in the base scenario | 1 pc. |
| Base in the article | Already tiled installation box |
| Critical condition | Preserving key removal and service access |
In the manufacturer's card for NPU-270, a polyurethane base, the possibility of painting, and adhesive mounting are specified. The product type itself allows for decorative wall application. For a bathroom, this makes the idea technically realistic, but it does not automatically resolve the compatibility issue with a specific installation.
The third dimension C = 18 mm indicates a noticeable volumetric relief of the product. For a practical check on finished tiles, this is enough to not be limited to a flat paper rectangle: when fitting, the volume must also be taken into account. If the button is removed with an upward tilt, if its decorative frame protrudes from the wall, or if the service cover must pass close to the surface, even a few centimeters of free space can matter.
That is why NPU-270 cannot be evaluated as an ordinary picture on the wall. In the installation zone, there are three overlapping layers of the task:
-
aesthetic — whether a large ornament looks good on a box 700 mm wide;
-
geometric — whether there is enough space in width and height;
-
service — whether the button can be removed and access to the mechanism obtained without dismantling the decor.
If the first layer is ideal and the third one fails, it is not worth buying the product for this place.




Why service access is more important than beautiful symmetry
The hidden installation is specially designed so that most of the equipment remains behind the cladding, and the user sees the toilet bowl and a compact flush button. Therefore, the button often performs not only a decorative function: through its mounting seat, access to the internal elements of the system is obtained.
The problem is that from the outside all keys look roughly the same, but they are removed differently. In one model, the panel is first shifted upward, then the lower edge is pulled away. In another, you need to press at a certain point. The third is held by latches. The size of the mounting frame behind the key may also differ. Therefore, there is no universal safe distance "from the button to any decor."
Hence the main rule of the entire article: do not determine the position of NPU-270 until you have removed the button at least once in the way provided by the manufacturer of the specific installation.
You need to see not only the already installed face panel, but also the full path of its movement. It is useful to note four boundaries:
-
the top point to which the key or frame rises when removed;
-
the bottom and side boundaries of the opening service hole;
-
the protrusion of elements that are pulled outward;
-
the space needed for the hand and tool during maintenance.
In the finished interior, there is a temptation to move the cover plate as close to the button as possible, because the decorative composition seems more compact that way. But if this gap is chosen only visually, a hidden defect arises: the bathroom looks finished until the first maintenance. Then it turns out that the key cannot be removed without hitting the relief.
In this case, the cover plate begins to act as a non-removable barrier in front of the service unit. This is an incorrect hierarchy: the engineering system must be serviced independently of the decorative element.
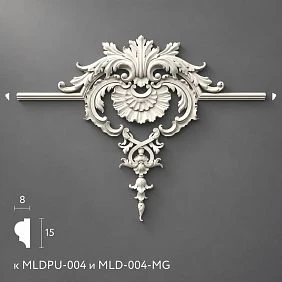
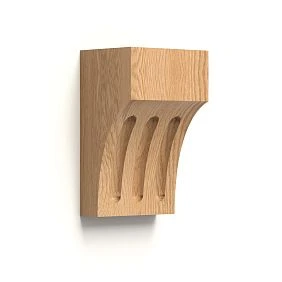
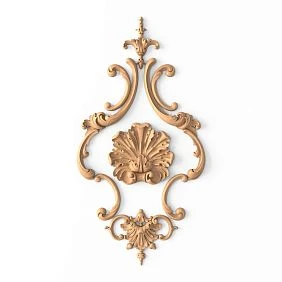
Our factory also produces:
How to check the service zone before ordering NPU-270
The check must be physical, not mental. Even if you have an installation drawing, the finished cladding, the thickness of the tile adhesive, and the actual installation of the button can slightly change the real geometry of the unit.
Get Consultation
Step 1. Fix the initial position of the key
Stick strips of masking tape nearby and transfer the top, bottom, and side edges of the key onto them. It is better not to draw on the tile itself with a permanent marker.
Step 2. Remove the key strictly according to your model's instructions
Do not try to guess the mechanism. If the instructions are lost, find the manual for the exact installation or key part number. We are interested not only in the result of "button removed," but also in the trajectory.
Step 3. Mark the maximum trajectory
If the panel first rises a few millimeters or centimeters, mark this top point. If it tilts outward after lifting, mentally extend the volumetric zone forward.
Step 4. Open access as much as required for normal maintenance
In some systems, after removing the front key, an additional frame or protective panel must be removed. NPU-270 should not interfere with this action either.
Step 5. Add working clearance, not just a millimeter-sized passage
If a part technically fits through a 2–3 mm gap, that is not yet good service access. The technician must be able to remove it without scratches, jamming, or the risk of touching the painted relief. The clearance is determined by the actual trajectory of your system, not by a universal number.
Step 6. Put the button back in place and only then start marking the decor
After this operation, you get the main thing: the actual forbidden zone that NPU-270 must not enter.
It is this sequence that distinguishes a correct purchase from a decorative experiment. If at this stage it turns out that there is little free height above the key, there is no point in arguing with the scheme. In the category, you can Choose decorative polyurethane overlays choose a smaller format or abandon the horizontal accent above the button.
Box 700 mm and overlay 611 mm: what the 44.5 mm field actually means
Now we can return to the horizontal geometry. In our example, the clean width of the front face is 700 mm. The NPU-270, when installed horizontally, occupies 611 mm along axis A.
The calculation is performed once:
700 − 611 = 89 mm of free field.
With symmetrical centering:
89 / 2 = 44.5 mm on each side.
This is an important figure, but it must be interpreted correctly. 44.5 mm is not a "mounting gap" or a standard. It is merely the geometric remainder between the extreme dimensions of the overlay and the edges of the 700 mm plane.
Such a field produces three effects.
The first effect — the NPU-270 will look large
The overlay occupies about 87% of the width of the 700-millimeter field. This is no longer a small decoration above the button, but almost a full horizontal dominant. If the box is narrow and tall, the element can balance the vertical shape well. If the face is very low, the large width can make the decor heavy.
The second effect — the slightest centering error is noticeable
With large free margins, a shift of 5–7 mm may go unnoticed. Here, the side margins are small. If one turns out to be 38 mm and the other 51 mm, the difference can be read, especially on a straight tile layout.
The third effect — tile joints become part of the composition
If vertical joints run near the edges of the NPU-270, additional graphics emerge. A symmetrical product on an asymmetrical tile grid sometimes looks worse than one slightly offset relative to the box but aligned with the joints. Therefore, the "center of the box" and the "center of the visual composition" do not always coincide automatically.
For the basic case, I still recommend starting with the geometric center of the 700-millimeter plane. Any offset is permissible only after a full-size mock-up and must be justified by the tile layout, button, or another interior axis.
Why the 611 × 120 mm template is mandatory specifically on tile
For a large overlay, a paper mock-up is more useful than a product photo, 3D visualization, or even an accurate drawing. It shows the product at real scale on the real box.
Cut out a rectangle of 611 × 120 mm from thick paper or cardboard. Then draw a schematic outline of the ornament on it, or at least mark the most protruding areas. If possible, add small strips of cardboard along the edge to simulate the volume of C = 18 mm. This won't give exact plasticity, but it will make you perceive the part not as a flat sticker.
The template should be checked not only for "fits / doesn't fit".
Check 1. Side margins
See whether approximately 44.5 mm on the edges seems like sufficient visual breathing room. On small-format tiles, this has one effect; on large-format porcelain stoneware, another.
Check 2. Distance to the button
Place the bottom edge of the template above the already marked service zone. Do not press it closer for the sake of aesthetics. First the technical aspects, then the composition.
Check 3. Height of the free field above the overlay
If the NPU-270 ends up squeezed between the button and the top edge of the box, it may look like a random insertion. The relief needs visual breathing room from above as well.
Check 4. Joint grid
Check whether the edge of the overlay falls exactly on a protruding joint, a plane transition, a decorative insert, or a spot where the tile has a pronounced bevel.
Check 5. View from a normal point
Step away from the wall. In a bathroom, a person rarely examines such an element from a distance of ten centimeters. You need to evaluate from the entrance, from the sink, from the passage — from where the box is actually visible.
Check 6. Shadow from the relief
In the evening, turn on the main lighting. Even a paper template won't show the real shadow, but you will see the direction of the light. The relief C = 18 mm will be much more noticeable after installation than a flat contour.
If after these tests the composition looks convincing and the service area remains free, you can order NPU-270 611 × 120 × 18 mm already based on a real mockup, not an image on the screen.
NPU-270 composition around the button and the plumbing axis
Where exactly to place the overlay relative to the flush button
The most logical scheme is horizontally along the box axis and along the key axis, if the key itself is also centered. But the vertical coordinate should be determined not by a beautiful proportion, but by two boundaries:
-
from below — the service zone of the button;
-
from above — with a free field up to the edge of the box, shelf, countertop, or another architectural boundary.
After fixing these boundaries, you can work with the composition.
If the free height is large, the NPU-270 is usually better not to be "pressed" against the button. Between the plumbing element and the ornament, a functional gap should be readable: below — a controlled key, above — a decorative accent.
If the free height is small, the situation is more complicated. A large overlay may physically fit, but visually fill the entire remaining space. Then there are three options:
-
raise the NPU-270 as high as allowed and check the balance;
-
choose a smaller decorative overlay;
-
leave the box without additional ornament.
The third option should be perceived as a full-fledged design solution, not as a failure. An empty tiled surface is better than a relief that interferes with service or looks cramped.
What changes if the key is wide, tall, or protrudes from the tile plane
Buttons of hidden installations differ noticeably in proportions. For the NPU-270, three types are especially important.
Wide horizontal key
It already creates a strong horizontal line. The NPU-270 can support this rhythm, but there must be enough free space between the two long elements. If placed too close together, you get a visual "stripe of stripes," and the ornament loses its independence.
Tall compact key
Here, the NPU-270 often looks more interesting: a small technical rectangle at the bottom and a wide decorative line above create a more pronounced hierarchy. However, the removal trajectory of the key upward needs to be checked especially carefully.
Key with a noticeable frame or protrusion
A three-dimensional button already provides shadow and relief. Adding the NPU-270 increases the number of levels on a small wall. In such a scenario, it is useful to paint the cover plate as calmly as possible and not enhance it with contrast.
The size of the button itself does not answer the question "can NPU-270 be used." It changes the composition and service trajectory, so it is always considered together with the instructions of the specific system.
Tile joints: a decorative detail that can ruin the installation
An already tiled box is a fundamentally different task than a smooth painted wall. The tile has joints, possible chamfers, relief, differences between adjacent elements, and sometimes the surface itself has a stone or wood texture.
For a cover plate 611 mm wide, the probability of crossing several tile layout zones is high. It is important to understand in advance how the base behaves under the entire contact area.
If a horizontal joint runs under the cover plate
This is not necessarily a prohibition. But if the joint is deep, part of the mounting surface may not have full contact with the base. The solution depends on the shape of the back side of the product and the chosen mounting system.
If the edge falls on the tile bevel
The bevel creates a local difference in height. The edge of the decorative relief may visually "hover" or produce uneven shadow. This defect is not always visible on the template, so before installation, the product itself should be dry-fitted.
If the tile is textured
The stronger the relief of the base, the more careful you need to be with bonding. The phrase "adhesive mounting" in the product card does not mean that any adhesive works equally well on any glazed or structured tile. The compound is selected for polyurethane and the specific mineral/ceramic base according to the technical documentation of the adhesive system.
If the joints are asymmetrical relative to the box
Do not try to align the NPU-270 with every line at all costs. First, maintain the connection with the button axis and the overall architecture. The joint is a secondary reference if it does not create an obvious conflict.
Mounting on already finished tile: what to check before applying adhesive
The main danger of a finished renovation is the irreversibility of a mistake. On a rough wall, the layout can be redone, the surface re-sanded, the decor removed and the base prepared again. On a tiled wall, any damage is more noticeable, and replacing an individual tile around the installation can sometimes be extremely inconvenient.
Therefore, before installation, it is worth undergoing separate inspection.
The base must be clean and degreased
In the bathroom, traces of cleaning agents, silicone, soap, and construction dust may remain on the tiles. Bonding on a contaminated surface is risky.
The adhesive must be compatible with both polyurethane and tile
Do not choose adhesive only based on the label "universal." You need to look at the technical purpose of the compound, adhesion to non-porous surfaces, and manufacturer recommendations.
Dry fitting is done before applying the adhesive
The NPU-270 itself should be applied to the surface, check for absence of wobbling, see the actual contact points, and re-check the markings relative to the key.
Do not turn the decor into part of a load-bearing assembly
Decorative overlay. It cannot bear the load of a shelf, accessories, or plumbing elements.
The service area after installation should remain as accessible as before installation
This is the final technical criterion. If the button becomes harder to remove after gluing, then the decorative solution has worsened usability.
For a broader understanding of where polyurethane decor is appropriate in wet areas and which zones are better not to overload with additional finishing, it is useful to look at the material molded decor for bathroom and toilet. There the issue is considered at the level of the entire room, whereas here we are solving only a specific unit above the installation.
Humidity in the bathroom: what really matters and what should not be exaggerated
The polyurethane base NPU-270 itself is suitable for interior decorative use and is characterized as moisture-resistant in the product card. But from this one cannot conclude that "in the bathroom it can be glued anywhere."
For our scenario, it is more important to distinguish between humid air and constant direct wetting.
The box above the wall-hung toilet is usually not a shower wall. If water does not pour onto it, the conditions for the decorative overlay are significantly calmer. However, in a small combined bathroom, the box may be located near the shower, bidet shower, or bathtub. Then the actual splashes and frequency of wetting need to be assessed.
The ornament should not be placed where water regularly lingers in the relief or constantly hits the glue line. Even the material's resistance does not negate the requirements for the adhesive bond, paint, and sanitary maintenance.
The other side of the issue is cleaning. Carved relief collects more dust and droplets than smooth tiles. If the bathroom is used intensively, it is worth deciding in advance whether you are ready to regularly wipe the decorative surface. This is especially important for white decor next to dark tiles, where dirt and limescale are more visible.
If you need a more general overview of finishing solutions, not just NPU-270, you can choose decorative elements for the bathroom taking into account the material, application area, and overall style of the room.
How the color of NPU-270 changes the perception of the 611-millimeter element
The 611 mm size on a 700 mm box already makes the overlay noticeable. Therefore, color becomes a way to regulate its visual impact.
In the color of the tile or a close shade
If the tile is painted in appearance, matte, and relatively calm, a close color reduces contrast. The relief is read through light and shadow. This is one of the safest options when the decor is large.
In the color of the grout
This solution can bring the grid of joints and the overlay into one system. But it only works with careful geometry of the tile layout. If the grout is sharply contrasting, NPU-270 can become too graphic.
White overlay on colored tile
The most noticeable scenario. A large ornament will become a full-fledged dominant above the button. It is not suitable for every bathroom: in a small space, the effect may be stronger than expected from the photo.
Contrasting dark decor on light tiles
This is already a complex design solution. Relief, size, and contrast combine, so any scale error is amplified. For a first experiment with NPU-270, I would not make contrast the main way to "save" the composition.
Color should not mask the size problem. If the 611 × 120 mm template looks too large, painting it in a matching tone will slightly soften the effect, but will not turn a large overlay into a small one.
How NPU-270 relates to the width of the wall-hung toilet itself and the button
There is another axis that is often forgotten: the box is considered separately, although there is a sanitary fixture in front of it. As a result, the overlay may be perfectly centered relative to the 700-millimeter plane, but look strange relative to the toilet bowl.
If the toilet, button, and box are on the same central axis, everything is simple: NPU-270 is centered along that same line. Then a vertical composition emerges:
center of the overlay → center of the button → center of the bowl.
This is a strong and clear scheme.
If the button is offset relative to the bowl, or the box itself is asymmetric due to a riser, niche, or adjacent cabinet, the geometric center of 700 mm may cease to be the main reference. In such a case, the full-size template should be evaluated not only with a tape measure, but also from the point of entry into the room.
A self-installed overlay should look intentionally placed. The most noticeable mistake is a small unexplained shift: not centered on the tile, not on the button, not on the bowl, and not on the seam. Such 10–20 mm is perceived by the viewer as an inaccuracy even without measurements.
When 611 mm on a 700 mm box looks good
Large size is especially convincing under several conditions.
The box is tall and visually empty
If a significant tiled surface remains above the button, the NPU-270 fills it not as a random ornament, but as a full-fledged architectural insert.
The tile is large-format and calm
On a large slab, the ornament has a clean background and reads better. Small active mosaic can compete with the carved pattern.
The button is laconic
The calmer the key design, the easier expressive decor works next to it.
The bathroom has classic or neoclassical details
If the interior already has a profiled skirting board, a mirror frame, brass elements, or paneled facades, NPU-270 gets support. In an ultra-minimalist space, it can become the only historical quote.
The relief is visible from a normal viewing point
If the box is hidden behind a door or positioned so close to a person that the entire ornament cannot be seen at once, the value of a large overlay decreases.
When it is better to avoid NPU-270, even though 611 mm physically fits
This block is more important than a promotional appeal because it protects against an incorrect purchase.
The service hole is too close
If the overlay falls into the path of removing a key or an additional service frame, do not try to "manage carefully." The decor needs to be raised, reduced, or removed.
There is little free height above the button
NPU-270 may fit in width but not have enough air above and below. Then it looks squeezed.
The tile has a very active pattern
Carved ornament and bright stone pattern can compete. Especially heavy look strong veins passing directly through the central composition.
The box is already overloaded with accessories
Shelf, paper holder, hygienic shower, niche, backlight, decorative button — all this already creates visual accents. NPU-270 may become an unnecessary fifth element.
The relief falls into the constant splash zone
In such a place, smooth tile is more practical. Do not worsen maintenance for the sake of decorativeness.
It is impossible to choose a reliable mounting system for the existing tile
If the base is problematic, the tile is coated with a low-adhesion compound, or the manufacturer of the selected adhesive does not allow the necessary pair of materials, it is better not to experiment.
The overlay is needed only because it is "empty"
An empty plane is not a defect in itself. If the interior is already assembled, adding a large ornament can make it worse.
Do not confuse the physical gap and the visual field
The example of 44.5 mm makes the difference between engineering and design geometry especially clear.
The physical gap answers the question: does the NPU-270 extend beyond the 700-millimeter plane.
The visual field answers another question: is there enough space around the ornament so it doesn't look squeezed in.
In width, the physical answer is positive: 611 mm is less than 700 mm. But the aesthetic answer depends on the tile, the height of the box, the button, and the style.
The same applies vertically. Between the cover plate and the button, there may be physically 20 mm, but that's not enough for service. Or technically 60 mm is sufficient, yet visually the two parts still seem fused into one heavy block.
An expert fitting always checks three fields separately:
-
installation — is there support and space for gluing;
-
service — can the equipment be maintained;
-
visual — does the composition look free and intentional.
There's no need to try to reduce them to a single universal number.
Three scenarios based on the service access check result
Scenario 1: the service zone ends significantly below the template
This is the most comfortable case. You remove the button, mark the trajectory, put it back in place, and see that there is enough free height above the service zone for the NPU-270 and visual air.
Then the procedure is simple:
-
center the 611 × 120 mm template along the button and box axis;
-
check the side margins;
-
evaluate the tile joints;
-
dry-fit the actual overlay;
-
mount it on a compatible adhesive.
In this scenario, the large size can be fully justified.
Scenario 2: the key removal trajectory comes almost flush with NPU-270
This is a borderline situation. Even if the button can technically be removed, leaving a millimeter working gap is unreasonable. During future maintenance, a technician may scratch the paint, catch the relief, or simply not understand at what angle to remove the frame.
The best solution is to first try to lift the overlay if the top margin allows. If not, move to a smaller element. You should not rely on "we will remove it carefully" as an operational strategy for years.
Scenario 3: the service opening extends under the intended overlay location
Here the answer is clear: NPU-270 is not suitable in this position. You cannot cover with a decorative element an area that must remain free for access.
Possible alternatives:
-
a smaller overlay higher up;
-
two small side accents outside the service area;
-
decor on the adjacent wall;
-
no decor above the installation.
This is a case where dropping a specific SKU saves money and future problems.
Working on an already finished surface: marking, frame, and further care
How to avoid damaging an already finished interior during marking and installation
Since the tile is laid, every operation must be reversible until the moment of gluing.
Use painter's tape for marking. You can mark axes, template boundaries, and the service zone on it. If you need to shift the position by 10 mm, you simply re-stick the strips.
Do not drill holes for "temporary fixation." NPU-270 is a decorative cover, and holes in the tile for a dry fit are not needed.
Before final installation, take a photo of the marking with a tape measure. This helps to see the asymmetry on the screen again and preserves the dimensions if the tape accidentally comes off.
Ask a second person to look at the composition. In a narrow bathroom, the person holding the template close often does not see the overall picture. A second observer from the doorway notices misalignment faster.
And only when the position is confirmed, the service is free, and the cover is dry-fitted, can you proceed to the adhesive.
Do you need to assemble a molding frame around NPU-270
For this topic, the answer is no, the frame is not mandatory. Moreover, the whole point of the scenario is to add one horizontal carved accent to an already finished box without redoing the cladding.
A molding frame makes sense if:
-
the front plane of the box is large and a single overlay gets lost;
-
the interior as a whole is built on frame compositions;
-
the tile joints allow for a neat contour;
-
the frame does not come close to the service area and plumbing elements.
But on a 700 mm wide box, a large NPU-270 itself takes up almost the entire width. Adding a frame can make the area overcrowded and reduce the free margins even further.
Therefore, the basic recommendation for an already tiled box is to first check a single NPU-270 as a standalone piece. It is worth complicating the system only if a full-size trial shows that the single element truly looks unfinished.
Care for carved decor near plumbing
A carved element has more recesses than smooth tile. This affects maintenance.
For regular cleaning, it is better to use a soft cloth and products compatible with the finish paint. An abrasive sponge can damage the painted surface of the relief more quickly.
If condensation forms on the wall, it is important not to leave permanent wet stains in the recesses of the ornament. The material itself is moisture-resistant, but the appearance is also determined by the finish coating.
Do not place holders or accessories nearby that the user will constantly hit against protruding parts. The mechanical strength of the material does not mean that the decorative ornament is intended for daily impact loads.
This operational part seems secondary at the time of purchase, but it is precisely this that determines whether the decor will look as neat in a few years as it did on the day of installation.
The type of box changes the composition: a low shelf, a tall box, and an installation in a niche
The same NPU-270 looks different on structures that technically belong to the same hidden installation. Therefore, before ordering, it is useful to specify the type of plane, not just its width.
A low box with a horizontal shelf on top
This option is often made when the installation is not enclosed up to the ceiling. Above the bowl, a protruding shelf is obtained, and the front tiled plane ends relatively low.
Here, the NPU-270 611 × 120 mm may turn out to be too large in height even with an ideal width of 700 mm. The reason is simple: visually, the plate has to share a short vertical field with the button. If the gaps between the top of the key, the plate, and the shelf are too small, all three horizontal lines merge together.
For such a box, it is especially important not only to make the contour of the NPU-270, but also to photograph the entire unit as a whole: the bowl, the button, the intended plate, and the shelf. In the photo, it is easier to see that the decorative element is "squeezed," even though the tape measure shows physical clearance.
Box up to the ceiling
On a tall vertical plane, the NPU-270 has a different role. It can become the center of a large empty surface, rather than just an insert above a button. Here, the size of 611 × 120 mm is often perceived as calmer because there is more air around it.
But another task arises: choosing the height. If you raise the overlay too high, the connection with the button and the plumbing axis will be lost. If you lower it too much, the risk of a service conflict returns. Therefore, on a tall box, the two-step rule works especially well: first exclude the service zone, then look for the visual center within the remaining field.
Installation inside a wide decorative niche
Sometimes 700 mm is not the entire protrusion of the box, but only the central part inside a wider niche. On the left and right, there may be shelves, cabinets, or vertical panels. In such a case, the side fields of 44.5 mm cannot be assessed in isolation from adjacent surfaces. The NPU-270 may seem almost equal to the width of the central panel and work very effectively, or it may visually "stick" to the side posts.
Box next to furniture or a countertop
If there is a cabinet, countertop, wardrobe, or tall tall cabinet nearby, there are already strong lines on the wall. The overlay should be oriented according to the architecture of the entire unit. For example, if the top of the button and the edge of the furniture facade line are almost at the same height, the NPU-270 should not create a third random horizontal line a few centimeters higher.
These options show why it is impossible to derive a single universal rule only from the width of 700 mm. The same physical size of the product can be excellent on a tall box and too heavy on a short front panel.
How lighting changes the relief of the NPU-270 on tiles
The carved overlay is perceived through shadow. On a flat product image, the ornament looks one way, but under a ceiling spotlight or side lighting, it looks completely different. For the NPU-270 with the third dimension C = 18 mm, this effect cannot be ignored.
Uniform ceiling light
With general diffused lighting, the relief reads calmly. If the overlay is painted in a color close to the tile or wall, it becomes an architectural texture rather than a bright object. For a small bathroom, this is often the best mode.
Spot directly above the box
Light from above intensifies the lower shadows of each carved element. The ornament becomes visually deeper. If the tile is dark and the overlay is light, the contrast is enhanced even more. That is why it is advisable to evaluate the pattern with evening light on, and after receiving the product, do a dry fit before painting and gluing.
Side light from the mirror
If the installation is near a sink and a mirror with backlighting, light may fall from the side. Then one side of the relief becomes more active than the other. On a symmetrical overlay, this is not a defect, but it can make a slight deviation from horizontal very noticeable.
Light glossy tile
On gloss, reflections already create an active surface. A white carved overlay on top adds another layer of highlights and shadows. In such an interior, it is useful not to enhance the decor with overly shiny paint.
Matte large-format tile
This is one of the most rewarding backgrounds. The relief gets a calm plane and reads well from a distance, without competing with reflections.
Lighting does not change service compatibility, but it changes the answer to the question "is the NPU-270 too large." Therefore, the final aesthetic check should be done under the light that the bathroom actually uses in the evening.
How to choose the height of decor without a made-up "ideal distance"
The buyer often wants an exact number: "leave 50 mm above the button" or "raise the panel by 80 mm." For different installations, such advice would be unreliable. It is more correct to determine the height through a sequence of boundaries.
First, mark the upper boundary of the actual service zone. It is obtained only after removing the key and checking the frame.
Then mark the lower boundary of the upper architectural element: a shelf, the edge of a box, a niche, a mirror cabinet, or simply the end of the available plane.
Between these two lines, there remains a working decorative field. Inside it, you need to place a rectangle of 611 × 120 mm so that:
-
it does not touch the service zone;
-
it does not look pressed against the upper edge;
-
it supports the axis of the button and the bowl;
-
it does not conflict with tile joints.
If after these constraints only one position remains for the template, the decision is almost made. If there are several positions, choose by visual balance. If no position remains at all, the large NPU-270 is not suitable for this box.
This method is more useful than universal centimeters because it takes into account the real object. It also protects against a common mistake: measuring the distance from the visible edge of the button without considering that when removed, it must rise higher.
Decision table before purchase
Before ordering, it is convenient to consolidate the fitting results into one table. It does not replace the technical installation instruction, but helps not to lose one of the criteria.
| Check | Result | Solution |
| NPU-270 fits within a width of 700 mm | Yes, with A = 611 mm, 89 mm remains in total | Proceed to vertical check |
| The key is removed without touching the template | Yes | Check the service frame |
| The service opening is completely free | Yes | Check the tile base |
| The overlay falls into the button's trajectory | No, there is a conflict | Raise, reduce, or decline |
| The back part fits stably against the tile | Yes | Select a compatible adhesive |
| The seam creates a noticeable transition under the edge | Yes | Change the position or base preparation |
| The side margins look symmetrical | Yes | Check the overall look with the toilet |
| The ornament looks too large | Yes | Consider smaller decor |
| The area is regularly splashed with water | Yes | Move the decor to a calmer area |
| After all tests, the service remains fully functional | Yes | The purchase is justified |
This table has an important advantage: it does not allow the aesthetic "really like" to automatically outweigh the operational conflict. If the service row gets a negative result, the decision cannot be considered ready.
What to check after a dry fitting of the actual product
The paper template is needed before ordering. But after receiving the NPU-270 and before gluing, a second control stage appears. It is especially important on tiles.
Fit of the back surface
Place the product on the marked spot without glue. It should not noticeably wobble due to seams or tile relief. If the contact is unstable, first address the base and mounting system.
Actual shadow
The real relief will immediately show how active the decor will be. Sometimes after a paper template, a person expects a subtle insert, but the three-dimensional ornament seems twice as noticeable.
Re-check the button
With an assistant, hold the overlay in the design position and remove the key again. This is the most valuable test before irreversible installation. If the hand, frame, or the button itself passes uncomfortably, the position needs to be corrected now.
Check cleaning
Imagine the movement of a cloth around the button and along the bottom edge of the overlay. If there is a narrow gap between the parts that is hard to reach, sanitary care will be inconvenient. Even with a technically sufficient service gap, this could be a reason to raise the decor higher.
Side view
Look at the box at an angle. This makes it easier to see how much C = 18 mm protrudes relative to the tile and whether the bottom edge seems too heavy above the key.
Photo before installation
Take several photos. Compare them with the shot without the overlay. If the decor truly makes the wall look more cohesive, rather than just "adding an object," the purchase fulfills its purpose.
Three commercial solution options after verification
After all measurements, the buyer does not necessarily have to come to a "yes" answer. There are three equally valid outcomes.
Option A — buy exactly the NPU-270 611 × 120 × 18 mm
Suitable if the service area is free, the large scale is convincing, the tile provides a normal base, and the bathroom is not in a constant splash zone. In this case, one overlay solves the task without a molding frame and without redoing the cladding.
Option B — keep the idea but change the size or model
If a horizontal accent is needed but 611 mm is too tall or visually overwhelming, it is better not to abandon the whole idea. The overlay category allows choosing a different format. This is especially reasonable on a short box with a shelf.
Option C — leave the tile without decor
Suitable if the service area takes up almost all the available field, the tile itself is active, or the interior is minimalist. Such a refusal saves not only the cost of the product but also future maintenance and care complications.
A mature decision is to choose one of the three options based on the check result, rather than considering the purchase mandatory just because the article topic is dedicated to NPU-270.
Practical algorithm: from the finished box to the "buy or not" decision
Below is a sequence that can be performed without dismantling the tile and without complex tools.
-
Measure the clear width of the surface where you want to install the decor. In our example, it is 700 mm.
-
Mark the vertical axis of the box and the axis of the button.
-
Remove the flush button according to the instructions for the specific model.
-
Record the maximum trajectory of its movement.
-
Open the service access to the extent of routine maintenance.
-
Transfer the boundaries of the area that must not be covered onto the painter's tape.
-
Put the button back in place.
-
Make a template of 611 × 120 mm.
-
Place it above the service area.
-
Check the side margins: with a 700 mm box, geometrically you will get about 44.5 mm on each side with precise centering.
-
Check the top margin.
-
See how the template crosses the tile joints.
-
Evaluate the composition from the doorway and other real vantage points.
-
Check that the location is not in an area of regular direct water spray.
-
Apply the product itself without adhesive and assess the actual relief.
-
Remove the key again with the overlay or precise volumetric template already in place.
-
Choose an adhesive system compatible with polyurethane and your tile.
-
Only after completing these steps make the decision on installation.
This algorithm allows answering not the abstract "is it beautiful," but a much more useful question: will the bathroom remain properly maintainable after adding the decor.
How much does the solution cost and when is this amount justified.
In the base scenario, one large NPU-270 is needed:
1 × 5 880 ₽ = 5 880 ₽.
Compatible mounting compound, surface preparation, and painting may add to this amount. But the economic choice still comes down not to the cost of the adhesive, but to the correctness of the SKU.
5,880 ₽ is justified if:
-
the large pattern truly enhances the empty surface;
-
the 611 mm size supports the width of the box;
-
service access is fully preserved;
-
the finish withstands normal use;
-
the decor matches the bathroom style.
The same amount is spent poorly if, after a month, it becomes clear that the button is inconvenient to remove, the element is too large, or it constantly needs to be wiped clean of splashes.
A commercially mature solution is not to "buy because it fits," but to buy after checking all constraints. If the NPU-270 passes the test, it becomes a clear purchase; if not, it is wiser on the site to You can buy ready-made stucco matching the Baroque style. Calculate the quantity: linear meters of cornices and moldings, number of rosettes, pilasters, consoles, corner elements. Add a ten to fifteen percent allowance for trimming. of a different format for the actual wall geometry.
Typical mistakes and how to avoid them
Error: only measured the width of 700 mm
Why it occurs: the large size of 611 mm is obviously less than 700 mm, and it seems the task is solved.
Consequence: the overlay may fall into the service zone by height.
How to check: remove the key before ordering and mark its actual trajectory.
How to avoid: check horizontal and vertical compatibility as two separate checks.
Error: placed the decor as close as possible to the button
Why it occurs: a compact block seems visually neat.
Consequence: the button or frame hits the NPU-270 when removed.
How to check: perform disassembly of the key with the volumetric template applied.
How to avoid: leave a real working margin along the trajectory of the specific system.
Mistake: didn't account for the tile seam under the edge of the overlay.
Why it happens: on the diagram, the wall looks perfectly flat.
Consequence: the edge may fit unevenly, resulting in a gap or wobbling during fitting.
How to check: dry-fit the product against the finished tiling.
How to avoid: assess the actual substrate, not just the wall dimensions.
Mistake: decided that polyurethane's moisture resistance solves everything.
Why it happens: the material's characteristic is perceived as permission for any wet area.
Consequence: problems may arise not with the polyurethane, but with the adhesive, paint, dirt in the relief, or constant direct wetting.
How to check: assess the actual splash zone and the recommendations of the chosen installation system.
How to avoid: separate product properties from the operating conditions of the entire assembly.
Error: centered only relative to the tile joint
Why it occurs: the joint is easy to use as a ready-made marking line.
Consequence: the overlay may be shifted relative to the button and the toilet bowl.
How to check: draw a common vertical axis of the plumbing unit.
How to avoid: use joints as a secondary, not primary, reference.
Final decision after all checks
When a smaller NPU-270 may be more reasonable, although the article is dedicated to the 611 mm size
We deliberately do not turn the material into a comparison of four sizes. But there is a situation where mentioning the smaller option is necessary: the large element fails the service check.
If after marking it turns out that 611 × 120 mm is too close to the button, reducing the size can provide two advantages at once:
-
more free vertical space;
-
more visual breathing room on the sides.
This doesn't mean you should automatically buy the next size up. The right approach is to go back to the category and create a template for the alternative again. The key is not to try to justify a pre-selected large SKU after the geometry has shown a conflict.
What ultimately matters more: the box decor or unobstructed access to the installation?
The answer is clear: access. A good interior doesn't force you to choose between beauty and proper equipment maintenance. If a solution requires tearing off the trim from the tile every time, it was fundamentally designed incorrectly.
The NPU-270 611 × 120 × 18 mm is interesting precisely because on a 700 mm box it can look like a full-fledged central horizontal accent. Margins of about 44.5 mm make the composition dense and expressive. But the same large scale increases the requirements for layout accuracy.
Before ordering, you need to perform not just one, but several different checks:
-
measure the width;
-
determine the axis;
-
remove the button;
-
mark the service area;
-
try on the template;
-
check tile joints;
-
assess humidity and maintenance;
-
select the mounting system;
-
re-check the key removal.
If all these conditions are met, the NPU-270 can be installed as a standalone decorative element above the button without a molding frame. If at least the service access fails the test, it is better to change the composition before purchasing.
Final check on installation day
Even after a successful try-on, it is useful to repeat a quick check immediately before applying the adhesive. The reason is practical: between measuring and installation, the button could have been removed, grout replaced, the wall repainted, or part of the marking erased.
First, draw the central axis again on the painter's tape. Then attach the NPU-270 and measure both side margins from the actual edges of the product, not from the paper template. After that, remove the key again and make sure its movement does not intersect with the relief. If an additional frame is removed for access, repeat that operation as well.
Check the bottom edge of the trim by hand: between it and the service unit there should be no gap that looks free only from the front but blocks part removal at an angle. Then inspect the contact with the tile along the entire 611 mm length. On a long element, local base unevenness is more noticeable than on a small trim.
Only after these steps does it make sense to secure the product. Such a re-check takes little time but covers the two most expensive mistakes: gluing the decor with an offset with side margins of about 44.5 mm, or discovering a service conflict only after the mounting compound has cured.
Conclusion
On a finished installation box 700 mm wide, the carved decorative trim NPU-270 611 × 120 × 18 mm physically fits in width: with precise centering, 89 mm remains in total, or about 44.5 mm on each side. This makes it a large, well-readable horizontal accent.
But the main criterion is not on the sides. It is located between the bottom edge of the trim and the flush button service unit. Before ordering, you must remove the key according to the instructions, open access to the mechanism, mark the actual working area, and only then place the NPU-270 template.
If the key and service frame are removed freely, the decor does not cross the opening, the tile provides a suitable base, and the composition with 44.5 mm margins looks convincing, one NPU-270 for 5,880 ₽ is a logical purchase. If the trim interferes with maintenance, you should not choose it for this location regardless of how beautiful it looks in the photo.
FAQ
Can NPU-270 be glued directly onto porcelain tile?
The possibility of installation is determined not only by the trim material but also by the specific surface and the chosen adhesive. For smooth or low-absorption porcelain tile, it is especially important to check the adhesive's technical documentation and surface preparation. It cannot be universally stated that any mounting adhesive will work.
Do I need to remove the flush button during trim installation?
This depends on the installation method and distance to the working area, but for marking, the button must be removed at least once in advance. Only then can you see the trajectory and service opening. During the actual gluing, temporary removal may be convenient to protect the key from adhesive and paint, if your system's instructions allow it.
Can NPU-270 be made removable so that it covers part of the service opening?
For the solution in question, this is poor logic. The decorative trim should be placed outside the service area, rather than turning it into an additional cover that must be removed during every maintenance. The NPU-270 card describes standard adhesive mounting of a decorative element, not a revision panel function.
What to do if the button axis does not align with the center of the 700-mm box?
The entire vertical line needs to be assessed: the toilet bowl, the button, the seams, and the box boundaries. Automatic centering of the trim only by wall width can result in a visual shift. In such cases, a full-size template is especially important.
Can the NPU-270 be installed on tile with pronounced relief?
First, the product should be dry-fitted. If the back surface does not achieve stable contact due to strong tile relief, the standard adhesive scheme may be unsuitable. The issue is resolved based on the actual surface and the requirements of the mounting compound.
Should the trim be painted before or after gluing?
There is no single answer for all finishing systems. Convenience depends on tile color, the need to touch up the joint, the type of paint and adhesive. The key is that the finish coating is compatible with polyurethane and bathroom conditions, and the mounting surface is not contaminated with paint where adhesive bonding is required.
Can an 18-mm relief interfere with bathroom cleaning?
Carved decor indeed requires more careful wiping than smooth tile. If the box is in an area of constant splashes or needs frequent washing, this operational factor should be considered before purchase.
If the NPU-270 is visually appealing, but service access turns out to be borderline, can everything be left as is?
Better not. Borderline access usually becomes an inconvenience over time: the finish gets scratched, the key is difficult to release from the latches, and the craftsman risks damaging the decor. In such a case, it is safer to change the installation height or choose a smaller element.
Is a molding frame needed around the NPU-270?
No, it is not required for this scenario. On a 700 mm wide box, a large overlay itself takes up a significant part of the surface. The frame should only be added if it is truly supported by the overall interior and does not reduce service areas.
Can the same technique be used above the button in a guest bathroom without a shower?
Yes, and in terms of humidity, this is often a calmer scenario because there are fewer direct splashes and steam. But the service geometry is still checked in the same way: the type of room does not change how the installation button is removed.