Article Contents:
- Why correctly selected products can produce an incorrect overall junction
- Why trim cannot be ordered separately from doors, panels, and furniture
- What counts as a wooden trim junction
- Why matching height and style is not enough
- Skirting board and casing: the main junction of the door area
- The position of the door frame changes the junction even with the same casing
- A concealed door requires a separate skirting board termination
- Skirting and wall panel: first determine the finished plane
- The transition from a painted wall to a panel must be designed separately
- Built-in furniture changes the boundaries of the skirting, moulding and cornice
- Skirting and furniture plinth: the two horizontal lines must have a hierarchy
- The cornice and a floor-to-ceiling wardrobe often claim the same space
- Moulding and furniture panel: continue behind the furniture or finish earlier
- Junctions directly affect the calculation of the amount of trim
- Junction map: how to find all critical points before ordering
- The junction schedule connects contractors with a single document
- What data to request from door makers, furniture makers, and panel manufacturers
- A full-size 1:1 trial junction shows what is not visible on individual samples
- A repeating hotel or residential junction is best approved as a standard
- A critical dimension is one whose change breaks the junction
- What to do if one of the adjacent elements has not yet been selected
- Contradictory dimensions from different contractors cannot be "averaged"
- The end of a complex profile must be designed before ordering
- Installation sequence is part of the assembly, not an organizational trifle
- The trade contractor schedule must be tied to information readiness, not just installation dates
- Practical example: baseboard thicker than the door casing on a repeating floor
- Practical example: wall panel changed plane after the project was issued
- Cornice and ceiling system: checking not only the cabinet but also the ceiling
- Decorative trim and built-in appliances: don't forget service zones
- Changing one adjacent element after node approval should trigger re-verification
- How to recalculate an order after approving furniture and panels
- When trim doesn't need to be purchased at all for a hidden area
- When it's better to choose a different profile instead of complex node compensation
- What to pass to the wooden trim supplier for complex nodes
- How to use the trim catalog without copying cards into the article
- Wholesale material purchasing should account for not only meters but also standard nodes
- What mistakes are most often discovered too late
- Pre-launch checklist for the main batch of wooden trim
- What information to pass to the distributor and manufacturer before ordering
- How coordinating junctions reduces consumption and the number of reworks
- How to make an approved detail a project standard
- When a separate detail needs to be redesigned rather than "patched up" during installation

On a large project, it is almost never the case that a single contractor is responsible for the entire interior from wall to furniture. Doors are made by one company, built-in furniture by another, wall panels by a third, and wooden skirting, moulding and cornice are purchased separately. Each party can perfectly execute its own part, and the finished junction will still turn out wrong.
A typical example: the project specified a wooden skirting board 20 mm thick. The door casing protrudes only 16 mm from the finished wall. Before installation, both elements look correct. After installation, the skirting board extends 4 mm forward relative to the casing, and a rough step appears in every doorway. The door installers did not make a mistake. The skirting board supplier did not make a mistake. The mistake is that no one checked the junction of the two works as a single assembly.
Therefore building materials distributor, the specifier, designer and client must work not only with the list of products, but also with their meeting points. Before ordering the main batch, it is necessary to determine the finished planes, critical dimensions, the method of terminating the profile, the installation sequence and who is responsible for the final approval of the assembly.
WOODEN MOULDINGS → JUNCTION POINT → ADJACENT ELEMENT → FINISHED PLANE → CRITICAL DIMENSION → TERMINATION METHOD → INSTALLATION SEQUENCE → TRIAL ASSEMBLY → APPROVAL → MAIN BATCH
The main principle: a correctly chosen skirting board, moulding or cornice does not yet guarantee a correct interior — it is the place where it meets the adjacent structure that must be checked.


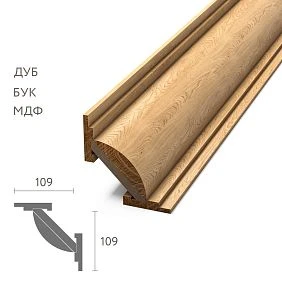
Why correctly chosen products can produce an incorrect overall assembly




Why mouldings cannot be ordered separately from doors, panels and furniture
Each contractor sees only their own drawing
The door company designs the frame, leaf, extension and casing. The furniture maker works with the carcass, side panel, front and plinth. The panel installer calculates the thickness of the frame, substrate, adhesive layer and cladding. The moulding order contains its own article number, material, size and linear metreage.
But the finished interior is not divided into these schedules. At a single point, several systems meet at once:
- skirting board and door casing;
- skirting board and concealed door;
- skirting board and wall panel;
- skirting board and furniture plinth;
- moulding and panel;
- moulding and built-in wardrobe;
- cornice and floor-to-ceiling wardrobe;
- cornice and ceiling profile;
- slat and door portal.
The error most often appears at the boundary of responsibility
The door supplier can confirm that the casing was made to the agreed size. The furniture maker — that the cabinet exactly matches its drawings. The moulding manufacturer — that the ordered profile has the correct cross-section. But if the designer has not determined how these elements meet, the installers have to improvise the junction on site.
The problem becomes expensive after production
Before ordering, it is enough to change the drawing, choose a different profile, shift the furniture panel, or clarify the termination. After production, you have to:
- rework the finished moulding;
- buy another size;
- repaint the ends;
- replace the furniture filler;
- move the joint;
- introduce an unforeseen shim;
- stop the adjacent crew.
Our factory also produces:





What counts as a junction node for wooden trim
This is not just the physical joint of two wooden parts
A junction node is any place where the trim ends, adjoins, intersects, or changes position due to an adjacent structure. Even if a gap remains between the elements, the decision about the shape and size of that gap is part of the node.
Main types of junctions
| Linear molding | Adjacent element | Main risk |
|---|---|---|
| Baseboard | Casing | Difference in thickness and protrusions |
| Baseboard | Hidden door | Unforeseen termination |
| Baseboard | Wall panel | Change of finish plane |
| Baseboard | Built-in wardrobe | Conflict with side panel or plinth |
| Molding | Wall panel | Step by thickness |
| Molding | Furniture | The profile goes behind the cabinet or breaks off at a random point |
| Cornice | Floor-to-ceiling cabinet | Two elements occupy the same space |
| Rail | Door portal | Inconsistent width or plane |
A critical point can be only a few centimeters long
The trim runs 12 meters along the wall, but the whole problem is concentrated in the last 50 mm near the door casing. So it makes no sense to check every meter in the same detail. You first need to mark all points of structural change on the plan and examine exactly those.
Get Consultation
Why matching in height and style is not enough
Thickness determines the frontal plane
The baseboard and the door casing can be made of the same oak, painted the same color, and have a similar relief, but the difference in thickness will immediately show at the junction. If the baseboard is thicker, its end protrudes. If it is thinner, it looks recessed.
The protrusion relative to the finished wall matters more than the catalog thickness
A 16 mm thick casing does not necessarily protrude 16 mm from the wall. Its position depends on the door frame, the extension, the installation depth, and the finished wall itself. Therefore, you need to compare the actual projection of elements from the same finished plane.
The profile and radius change the character of the end face
Two elements of the same thickness may join poorly due to their shape. A tall relief skirting board that ends at a flat casing requires a thoughtful termination. A simple straight cut often looks like an unfinished end face.
The finished plane should be a common coordinate system
For a disputed junction, dimensions are best reduced to a single base:
finished wall plane = 0.
Then record how far the casing, skirting board, panel, furniture side panel, or concealed door profile protrude from it. This reduces confusion between the “thickness of a part” and its actual position after installation.
Door junction: skirting board, casing, frame, and concealed door
Skirting board and casing: the main junction of the door area
We compare not names, but four geometric parameters
Before ordering the skirting board, you need:
- its height;
- thickness / maximum protrusion of the relief;
- thickness and protrusion of the architrave;
- the actual plane of the finished wall.
For a complex architrave, the radii and relief in the lower part are additionally assessed.
Example: skirting board 20 mm, architrave protrudes by 16 mm
At a straight junction, the skirting board will protrude forward by 4 mm. Possible solutions depend on the architecture:
- choose a thinner skirting board;
- change the protrusion of the architrave;
- create a pre-designed transition;
- apply the profile return to the wall;
- review the entire door assembly set.
It is impossible to automatically declare one option correct without a profile view and a project. But the problem must be identified before manufacturing hundreds of meters.
If the skirting board is thinner than the door casing
Such an assembly sometimes looks calmer because the skirting board meets a more protruding element. But even here a meaningful transition is needed: the top line, the relief, and the end face must look complete.
It is better to check the door casing and skirting board with a physical fragment
Even an accurate drawing does not always show how the relief reads at real scale. For repeating hotel rooms or apartments, a full-size sample of one door assembly is often cheaper than redoing dozens of identical junctions.
The position of the door frame changes the assembly even with the same door casing
A flush frame and an offset frame give different results
The casing is installed relative to the door frame and the finished wall. If the frame is offset in depth, an extension is used or the thickness of the finish changes, the final protrusion of the casing changes.
The rough wall thickness does not give a final answer
Need to consider:
- leveling;
- plaster;
- decorative coating;
- Panels;
- extensions;
- actual position of the frame.
The door assembly is best coordinated based on the actual finished plane
If the project has not yet reached door installation, you should at least fix the target geometry: where the face plane of the wall, frame, and casing will be. If this data changes later, the skirting junction is rechecked.
A concealed door requires a separate skirting termination
The absence of a standard casing does not automatically simplify the task
A concealed door may have an aluminum profile, a shadow gap, or another edge design for the opening. The baseboard still needs to end somewhere and visually connect with the door system.
The stopping point is determined before ordering
It is necessary to understand:
- whether the baseboard meets the aluminum profile;
- whether it stops in advance;
- whether an end return is required;
- whether there will be a technical gap;
- which line should continue through the doorway.
"We'll trim it on site" is not an architectural solution
The installer can indeed cut the profile. But they should not independently determine where the decorative line ends and how the exposed end looks in a repeating interior.
A reference is especially important for a series of identical concealed doors
If a project has 80 doors of the same type, the error must be caught on a single test unit. Once approved, the geometry and the termination method become the standard.
Wall panels and transitions between finished surfaces
Skirting board and wall panel: first determine the finished surface
When Distributor of finishing materials equips the project with different categories, it is especially important not to mix up the base thickness and the thickness of the finished finishing build-up.
The panel changes the position of the front surface
Before the panel, the wall has one plane. After installation, the following are added:
- frame or substrate;
- adhesive or fastening system;
- the panel itself;
- finish coating;
- technological gap, if provided.
The skirting board must align with the final face plane, not with the rough wall.
Four basic junction options
The baseboard can:
- run over the panel;
- butt against its end;
- partially tuck under the panel;
- end before the panel zone.
Each option affects the installation sequence, thickness, height, and amount of material.
If the panel was added later, the linear footage must be recalculated
You can't simply add a panel to the project and leave the old skirting schedule. The length of the sections, the terminations, and sometimes the profile itself change.
The transition from a painted wall to a panel must be designed separately
A single molding can cross two different planes
Part of the wall is painted, another part has a decorative panel. The designer runs a horizontal molding through both zones in one line. On the facade it looks beautiful, but once the panel thickness appears, the molding either gets a step or detaches from one of the surfaces.
Before ordering, you need to choose one of four scenarios
- the molding stays in one common plane, and a base is created in advance under the panel section;
- the molding changes its projection and has a designed transition;
- the molding ends at the panel boundary;
- the panel itself is designed so that the molding runs continuously without a step.
A random shim after panel installation rarely gives a good result
The solution of "let's put an MDF strip underneath to level it" may technically bring the profile forward, but it creates new problems: different support widths, a visible end face, unstable fastening, a shadow, or mismatched joints on adjacent sections.
If a shim is really needed, it must be part of a working assembly with a known thickness, material, length, and fastening method.
Critical dimension — the resulting level difference between surfaces
Let the painted wall be taken as 0 mm, and the front surface of the panel protrude by 18 mm. If the molding has its own projection of 20 mm and must visually remain continuous, the project must show what happens at the 0 → +18 mm transition. This level difference cannot be left unresolved until installation.
Built-in furniture, baseboard, molding and cornice
Built-in furniture changes the boundaries of the baseboard, molding and cornice
A cabinet is not a separate object if it reaches the wall and ceiling
A built-in cabinet becomes part of the architectural geometry of the room. Its side panel forms a new vertical boundary, the plinth a new horizontal line, the top panel or frieze a new ceiling zone.
Therefore building materials supplier must not receive the final trim order until the critical furniture boundaries are defined at least in an approved design version.
Baseboard behind the cabinet: there is no universal answer
There are at least three scenarios:
- the baseboard ends before the built-in furniture;
- the skirting board continues behind the cabinet for wall continuity or possible future removal;
- the furniture has its own abutment design that replaces the skirting board section.
The choice depends on the cabinet design, installation sequence, possibility of future removal, and architectural logic. One cannot assume that "it's hidden behind the furniture anyway" — sometimes that is exactly where a gap appears, preventing the carcass from fitting tightly against the wall.
If the skirting board runs behind the furniture, its thickness affects how the cabinet sits
A cabinet designed to sit flush against the wall may be pushed away from it by the thickness of the skirting board. This affects the filler side panel, the front line of the facades, and the gap at the adjacent wall. Therefore, the furniture maker must know the height and projection of the skirting board in advance.
If the skirting board ends before the cabinet, the end face needs to be designed
A straight cut of a profiled moulding may look accidental. The following may be required:
- returning the profile to the wall;
- a matching end cap;
- a joint with the furniture side panel;
- switch to a simpler profile section.
Baseboard and furniture plinth: two horizontal lines must have a hierarchy
Matching height does not always make the junction correct
For example, a wooden baseboard 100 mm high meets a kitchen or cabinet plinth of the same height. If the plinth is recessed 50 mm relative to the fronts, and the baseboard runs along the wall, the lines do not visually continue each other. A transition point is needed.
If the heights differ, the solution becomes even more noticeable
For example, a baseboard 120 mm, a furniture plinth 80 mm. Possible options:
- the baseboard ends at the side panel;
- the plinth rises to the height of the baseboard;
- a vertical transition appears between them;
- the furniture architecture is reconsidered.
You cannot choose the height based on individual catalogues alone. You need the facade of the unit.
A visible side panel of furniture is a full-fledged adjacent element
If the side panel of a wardrobe is visible in the interior, its thickness, projection and finish participate in the composition just as much as a door casing. It is precisely to this that the skirting board or moulding meets.
A cornice and a floor-to-ceiling wardrobe often lay claim to the same space
The conflict arises even before installation
A wooden ceiling cornice runs along the perimeter of the room. The furniture project later adds a floor-to-ceiling wardrobe. On one wall, both elements must occupy the upper zone.
Possible architectural solutions:
- the cornice ends before the wardrobe;
- the cornice goes around the furniture and continues along its facade plane;
- the wardrobe is made lower, leaving room for the cornice;
- the cornice becomes part of the furniture structure;
- the upper zone is completely redesigned.
The solution affects two orders at once
If the cornice must pass in front of the cabinet, the furniture maker needs its projection and height. If the cornice ends at the cabinet, the moulding supplier needs the exact termination point. One junction generates requirements for both the furniture and the moulding.
After the cabinet is manufactured, there is significantly less freedom
A finished carcass cannot be endlessly shifted downward or away from the wall. And an already manufactured relief cornice cannot always be aesthetically shortened. Therefore, a trial junction and drawing are cheaper than reworking either of the two systems.
Moulding and furniture panel: continue behind the furniture or terminate earlier
Continuing behind the furniture increases cost, but may be justified
If the furniture is expected to be dismantled or rearranged, continuous wall finishing preserves the versatility of the space. But if the cabinet is built-in and intended for the entire lifespan of the interior, a hidden moulding may prove to be an unnecessary expense and may even hinder a tight junction.
Termination before the furniture must be architecturally legible
The molding should not simply disappear 37 mm before the side panel due to a measurement error. The termination point is chosen relative to:
- the edge of the cabinet;
- the filler panel;
- the axis of the front;
- other decorative lines on the wall.
If the profile falls behind the headboard or nightstand
The hidden part may not matter, but the top and side lines of the frame must remain logical. For hotel rooms, it is especially useful to coordinate one repeating wall fragment with the furniture at full scale.
How junctions change the linear footage and order composition
Junctions directly affect the calculation of the amount of trim
The perimeter of the room often overstates the actual requirement
If the skirting board does not run:
- behind a built-in wardrobe;
- behind a fixed panel;
- inside a furniture niche;
- along doorways;
the "perimeter minus doors" calculation may still be overestimated.
Example Calculation
The room has a perimeter of 24.8 m. The doorway takes up 0.9 m. A built-in wardrobe along one wall — 3.2 m. Another 1.6 m of the wall is covered by a fixed panel structure where no skirting board is provided.
Net skirting board length:
24.8 − 0.9 − 3.2 − 1.6 = 19.1 m.
If you count only the perimeter minus the door, you get 23.9 m — 4.8 m more than the net requirement, even before accounting for cutting and reserve.
But sometimes adjacent elements increase the requirement
If the molding must wrap around a protruding furniture composition or transition onto a side panel, additional short sections and returns appear. Therefore, the precise calculation is performed after the assembly is approved, not before it.
The calculation is based on whole segments
Net linear meters are only the first step. For ordering, product lengths, joints, orientation, repeating frames, and the suitability of offcuts are taken into account. This is why the final schedule depends on the geometry of the junctions.
Junction map and schedule: how to collect data from different contractors
Junction map: how to find all critical points before ordering
When materials supplier can provide an accurate profile, but it does not see the entire interior of the site. The customer must provide information about the places where the profile meets adjacent systems.
Step 1. Take the plans and elevations
On them, we mark all the places where the wooden trim:
- ends;
- changes plane;
- enters the doorway;
- meets the furniture;
- transitions to the panel;
- intersects with a column or portal;
- meets the ceiling system.
Step 2. We don't check every meter of wall the same way
Instead, we create a list of critical points. On a typical hotel floor, there may be hundreds of meters of skirting, but only five types of junctions, repeated many times.
Step 3. We assign a code to each type of junction
For example:
| Code | Node | Where it repeats |
|---|---|---|
| U-01 | Baseboard + door casing | All numbers |
| U-02 | Baseboard + cabinet | Type A numbers |
| U-03 | Molding + panel | Corridors |
| U-04 | Cornice + floor-to-ceiling cabinet | Lobby |
Step 4. Check one reference of each repeating type
After approving U-01, it can be replicated to all identical doors if the doors, walls, and baseboard truly have the same configuration.
The junction schedule links contractors with a single document
No need for a huge matrix of hundreds of pages
For each critical junction, it is enough to record which systems are involved, which dimension is disputed, and which decision was made.
| Room | Linear molding | Adjacent element | Critical parameter | Solution |
|---|---|---|---|---|
| Corridor | Baseboard | Casing | Protrusion from the wall | Approve sample U-01 |
| Office | Molding | Wall panel | Plane difference | Check transition U-03 |
| Room number | Baseboard | Cabinet | end point | End at the side panel |
| Lobby | Cornice | Floor-to-ceiling cabinet | Height and projection | Shared junction U-04 |
Who maintains the schedule
This can be a designer, a procurement specialist, a technical customer, or a site manager. What matters is not the job title, but having one up-to-date document that shows which junctions have already been approved, which require data, and which have changed.
The schedule is especially useful after a project change
If the furniture maker increased the thickness of the side panel, it is immediately clear which assemblies require re-checking. Without a change map, the contractor may decide that their change only affects the furniture.
What data to request from door makers, furniture makers, and panel manufacturers
For doors
For a disputed junction, the following may be required:
- width of the casing;
- maximum thickness / relief;
- actual projection from the finished wall;
- size and position of the extension;
- position of the frame by depth;
- position of the aluminum profile of the concealed door;
- finished floor level.
For built-in furniture
- finished cabinet dimensions;
- side panel position;
- filler thickness;
- cabinet height;
- furniture plinth position;
- gap to the wall;
- front overhang;
- installation sequence.
For wall panels
- total thickness of the structure from the base wall;
- final front plane;
- exact panel boundary;
- method of finishing the end face;
- presence of a shadow gap;
- installation sequence;
- possibility of supporting or attaching the moulding to the panel.
Why design catalogue dimensions need to be rechecked
The drawing could have been issued before the selection of a specific door system, before a partition change, or before a change of furniture maker. Before ordering the main batch, critical dimensions must reflect the current construction.
Full-scale 1:1 detail and standard for repetitive rooms
A full-size 1:1 mock-up reveals what individual samples cannot show
A sample of a single product only answers questions about that product itself
A separate skirting board helps evaluate the profile, height, material and finish. A separate door casing — the shape of the door surround. A wall panel sample — the colour and texture. But none of them individually shows what will happen at the junction point.
Therefore, for a repeating or expensive junction, it is useful to assemble a full-size fragment:
finished wall + door casing + skirting board
Or:
finished panel surface + moulding + adjacent painted wall.
What the 1:1 mock-up checks
- the actual protrusion of the parts;
- the scale of the relief;
- the character of the shadow;
- exposed end;
- joint location;
- width of the expansion gap;
- impact of the finish;
- access for installation;
- installation sequence.
When a test assembly is especially worthwhile
It is especially useful if:
- the assembly is repeated dozens of times;
- the profile has a complex relief;
- a concealed door is used;
- the panel significantly changes the wall plane;
- built-in furniture reaches the ceiling;
- there is expensive prefinished cladding;
- several contractors use different drawings.
If the error is repeated across 100 identical rooms, the cost of one mock-up unit is incomparably lower than the cost of mass rework.
The mock-up unit must be assembled from real geometry
It is not enough to glue a piece of casing to a random board. You need to reproduce the target wall plane, the actual door projection, the panel thickness, and the furniture position. Otherwise, the mock-up confirms a different unit than the one that will later appear on site.
A recurring hotel or residential unit is best approved as a standard
One room becomes the reference for the series
For example, in a typical hotel room the following are repeated:
- the same door;
- the same skirting board;
- the same wall panel;
- identical headboard;
- identical wardrobe;
- identical ceiling cornice.
Instead of each contractor separately coordinating their details for 120 rooms, the project first assembles a single reference fragment and locks in the decision.
What needs to be locked in after the reference is approved
| Parameter | What is retained |
|---|---|
| Molding | SKU, material, profile, height / width, projection |
| Door | Frame position, casing, extension |
| Panel | Final thickness and boundary |
| Furniture | Side panel, plinth, height and position |
| ending | Method of finishing the skirting / moulding / cornice |
| Sequence | Which is installed first |
| Control | Photo, drawing fragment, detail code |
The standard works only under unchanged initial conditions
If later the door installers change the architrave, the furniture makers increase the thickness of the side panel, or the panel contractor changes the substructure, the reference detail must be rechecked. You cannot continue to replicate the old solution after a critical dimension has changed.
Critical dimensions, incomplete data and contradictions
A critical dimension is one whose change breaks the junction
Not all dimensions are equally important
A furniture drawing may contain dozens of dimensions, but only a few actually affect the skirting detail. In a door unit, too, not every dimension is important for the junction with the wall decor.
The following are often critical:
- protrusion of the casing from the finished wall;
- total thickness of the wall panel;
- position of the side furniture panel;
- height of the wardrobe up to the ceiling;
- height and projection of the furniture plinth;
- position of the concealed door profile;
- panel boundary;
- finished floor level.
A critical dimension must have an owner
For example, the casing protrusion is confirmed by the door contractor, the panel thickness by the panel manufacturer, and the wardrobe dimensions by the furniture maker. The specifier collects this data in one place and checks compatibility with the trim.
Unknown critical dimension — do not start mass production
If it is unknown how far the door casing will protrude, ordering 800 meters of skirting with the expectation of "we'll adjust it later" is risky. You can order a sample or a small test batch, but it is better to launch the main run after the junction has been finalized.
What to do if one of the adjacent elements has not yet been selected
It is not always possible to wait for the full design to be completed
The schedule may require ordering wooden trim before all the furniture has been approved. In this case, you cannot simply halt the project indefinitely, but you also cannot order blindly.
We define a "corridor" of acceptable parameters
Suppose the furniture has not yet been selected, but it is known that the side panel must end no closer than 120 mm from the door casing, and the furniture plinth must not intersect the existing skirting. These constraints can be recorded as requirements for the subsequent furniture design.
What can be defined in advance
- a prohibition on changing the wall plane in the critical zone;
- the maximum panel thickness;
- the minimum furniture setback from the profile;
- the height that cannot be overlapped;
- the endpoint of the skirting board;
- the area where the furniture must accommodate the already approved trim.
Changing these conditions requires re-approval
This is how an early order becomes manageable: the furniture maker receives not free space, but a set of critical boundaries that cannot be changed without checking the interface.
Conflicting dimensions from different contractors cannot be "averaged"
Typical conflict
The door drawing shows an 18 mm architrave projection. The interior elevation shows 16 mm. The on-site measurement is 20 mm due to the actual position of the frame. If the skirting board has already been ordered for 16 mm, the error may be systemic.
Sequence of resolution
- collect up-to-date drawings;
- identify which versions are in use;
- determine the actual construction;
- lock in one agreed-upon dimension;
- update the assembly and the schedule;
- only after that, release the linked item into production.
A verbal agreement of “about two centimeters” is not sufficient
For a single trial room, this might still work as a discussion. For a mass order, it does not. Critical dimensions must exist in a drawing, schedule, or another document that all parties can see.
We do not automatically choose “safely larger”
Sometimes it seems better to take a thinner skirting board or increase the filler “with a margin.” But changing one part can affect the relief, the position relative to the floor, or another element. The entire assembly must be coordinated, rather than locally hedging with size.
Ends of a complex profile and choosing a more suitable solution
The termination of a complex profile must be designed before ordering
For a simple flat profile, the end face can sometimes be left neutral
For a complex relief molding or skirting board, an open cut often looks like an unfinished technical surface. If it meets furniture, a hidden door, or a wall panel, a thoughtful way of finishing it is needed.
Possible options
- a straight termination at the adjacent element;
- returning the profile to the wall;
- an angled joint;
- a decorative end piece;
- a transition to another profile;
- termination in an architectural shadow or gap.
Which option is suitable depends on the specific profile and project. One should not create a universal “correct end face” for any shape.
Returning the profile requires additional length
If the skirting board should not simply end, but turn toward the wall with a small fragment, this affects the cutting plan and the amount of material. Mass repetition of such a detail on dozens of doors can add noticeable volume.
Open ends need to be counted before purchase
For example, in 60 rooms there are two free skirting board ends at built-in furniture. If each requires a separate return, the project gets 120 additional short elements that must be accounted for in the cutting plan.
Installation sequence, related trades schedule and change management
Installation sequence is part of the detail, not an organizational trifle
When delivery of finishing materials runs across several contractors, the same geometry can be assembled differently depending on who comes first.
Door first, then skirting board
The skirting board is cut to the actually installed door casing. This reduces the risk of error regarding the real protrusion, but requires that door installation be completed before the skirting board crew.
Skirting board first, then door
Such a scenario is only possible if the door unit is fully defined geometrically and the door installers are obliged to come to an already installed skirting board according to an agreed solution. Otherwise, the edge of the casing may not align.
Panels first, then molding
The molding sees the actual finished surface of the panel. This is convenient for precise fitting, but may complicate painting or access to fasteners — it depends on the technology.
Molding first, then panel
Then the panel installers must know the exact position and thickness of the profile so as not to overlap it and to correctly finish the end of the panel.
Trim first, then furniture
The furniture maker is obliged to take into account the already installed profile. If they did not receive its offset, the cabinet may not sit flush against the wall.
Furniture first, then trim
The trim can be cut to fit the actual furniture, but after installing the wardrobe, access for the cornice, molding, or fasteners may disappear.
The schedule of related trades must be linked to the readiness of information, not just to installation dates
Production of moulding can start before the physical installation of doors
This is normal if the geometry of the door unit has already been approved and does not change. The problem arises when production is started only because "it's time according to the schedule," and the door contractor has not yet confirmed the critical dimension.
Before launching a batch, it is useful to check four information statuses
| Adjacent trade | What should be known | Condition |
|---|---|---|
| Doors | Frame, casing, offset, concealed profile | Approved / to be clarified |
| Wall panels | Thickness, boundary, plane | Approved / to be clarified |
| Furniture | Side panel, plinth, height, setback | Approved / to be clarified |
| Ceilings | Finished level, profile, niche | Approved / to be clarified |
A single status of "project approved" is too general
The project may be approved conceptually, but one furniture assembly may remain unresolved. It is precisely this assembly that can block part of the cornice or molding.
Practical examples of conflicts on site
Practical example: skirting board thicker than the door casing on a repeating floor
Initial situation
The project has 40 identical doors. The skirting board is selected with a thickness of 20 mm. After installing the first door, the actual projection of the door casing from the finished wall is 16 mm.
Bad scenario
The main batch of skirting board has already been produced. In each opening, the installers begin making individual cuts, grinding down the end, or devising a short transition. Across 40 doors, slightly different solutions appear.
Correct logic before the main batch
- assemble one assembly;
- see the 4 mm difference;
- choose an architecturally acceptable solution;
- fix the end and the dimension;
- approve the reference sample;
- only then produce the entire volume.
Economic effect
The object solves a problem once, not 40 times at the installation stage. Moreover, the result looks the same in all openings.
Practical example: a wall panel changed plane after the project was released
Initial situation
The molding was designed for a painted wall. Later, panel cladding with a nominal thickness of 18 mm from the original finished plane was added to part of the room.
What happens without re-approval
The horizontal line of the molding reaches the panel and gets a step. The installer suggests placing an additional
We check the actual geometry of the concealed door profile
Before ordering, you need:
- front plane of the wall;
- position of the aluminum profile;
- width of the visible gap;
- height of the lower end;
- position of the door leaf;
- actual finished floor level.
It is best to check the lower corner of a concealed door 1:1
This is exactly where the floor, baseboard, door profile, and wall plane meet. A small error of a few millimeters can be more noticeable than on a conventional classic door casing.
Cornice and ceiling system: we check not only the cabinet but also the ceiling
The finished ceiling level may change after selecting a cornice
The design ceiling is often refined: a niche, shadow profile, stretch system, drywall box, light profile, or service hatch is added. If a wooden cornice was chosen earlier, its height and projection need to be rechecked.
The cornice may overlap the light or shadow profile
On the drawing, each system looks correct, but in the actual cross-section both occupy the same zone. It is especially important to check:
- the elevation of the bottom of the ceiling system;
- the projection of the cornice from the wall;
- the position of the light line;
- access for installation and maintenance;
- shadow gap;
- the height of the built-in furniture.
The junction of the cornice with a tall cabinet must account for the ceiling structure
Sometimes the cabinet, cornice, and ceiling profile converge at a single point. This is already a three-way junction. Solving it using a separate furniture drawing and a separate finishing drawing is not enough.
Decorative trim and built-in appliances: don't forget service zones
Beautiful molding should not block access
In a kitchen, bar, hotel room, or commercial interior, furniture contains built-in appliances, inspection panels, and service hatches. Molding, a rail, or a decorative frame may fall on the line of a removable panel.
Before ordering, we check which elements need to open
If a decorative frame crosses a front that needs to be removed for maintenance, the assembly must provide for:
- a break in the profile;
- a removable section;
- relocating the decorative line;
- another architectural composition.
Service access is just as critical a parameter as thickness
If it is not checked, the interior may look correct on handover day, but the first maintenance will require breaking the decorative profile.
Changing one adjacent element after the assembly is approved should trigger a re-check
Changed the casing — re-check the baseboard
Even if the baseboard has not changed, the new casing may have a different projection, relief, or bottom termination.
Changed the panel thickness — re-check the molding
Changing the substructure shifts the face plane. The old transition solution may become incorrect.
Changed the furniture filler — re-check the termination
The cabinet side moved 20 mm closer to the wall — there may no longer be free space for the baseboard end return.
A change should have a visible status
It is useful to use simple assembly labeling:
| Node | Condition | Reason | Action |
|---|---|---|---|
| U-01 | Approved | — | Can be replicated |
| U-02 | Double-check | Furniture side panel changed | New sample |
| U-03 | OPEN | Panel not confirmed | Wait for size |
This is not a complex change management system. It simply prevents the accidental use of an old solution after the input data has changed.
How to recalculate an order after approving furniture and panels
Step 1. Remove the sections where linear footage is no longer needed
Subtract from the original schedule:
- lengths behind built-in wardrobes, if it has been decided not to finish them;
- areas replaced by furniture plinth;
- zones where the wall panel has its own end;
- cancelled frames or cornices.
Step 2. Add new ends and returns
If each free end requires a return to the wall or a short additional part, these elements are added to the cutting list.
Step 3. Recalculate repeating nodes
For example, one number has:
- 2 plinth ends at the cabinet;
- 2 plinth junctions with door casings;
- 4 moulding ends at the furniture panel.
In 80 rooms this is already:
- 160 furniture plinth ends;
- 160 door junctions;
- 320 molding ends.
If even some of them require an additional short element or a special cut, the impact on quantity and labor costs becomes significant.
Step 4. Check the usefulness of the leftovers
Short fragments after return can be used on another identical end, if the length is sufficient and the profile orientation is preserved. Therefore, you need to count not only the total linear meters, but also the map of repeating parts.
When linear trim should not be purchased at all for a hidden area
Expert purchasing should be able to reduce the volume, not only increase it. If finishing materials wholesale are purchased for a large project, hidden zones especially strongly affect the total linear meters.
Typical areas worth reconsidering
- behind a fixed built-in wardrobe;
- behind a panel that fully covers the wall;
- in the area of a stationary furniture plinth;
- behind a solid decorative structure;
- inside a niche where the profile is not visible and not technologically required.
But "not visible" does not always mean "not needed"
A skirting board can serve as a finished junction, and the interior may require the ability to dismantle furniture in the future. Therefore, excluding an area from the schedule must be a deliberate design decision.
The phrase "it's behind the wardrobe anyway" is not sufficient
You need to understand whether the wardrobe is truly permanent, how it adjoins the wall, and what will remain after a possible furniture replacement.
When it's better to choose a different profile instead of a complex junction compensation
Not every conflict is worth solving with adapters and shims
If the baseboard is too thick for the door casing, it's sometimes easier to choose a different baseboard. If the cornice requires complex cutting around furniture, perhaps a different profile better suits the architecture.
Signs that the profile should be reconsidered
- the junction requires several hidden shims;
- the end face has to be manually finished in every room;
- the profile interferes with opening a door or panel;
- the joint requires modifying existing furniture;
- the visual transition remains rough even after the mockup;
- a single junction is repeated hundreds of times and creates a high risk.
Changing the profile before ordering is a normal design decision
This is not an admission of a wrong choice. The profile could have been perfect on its own, but turn out to be not the best element for a specific system.
What to pass to the supplier and how to use the mouldings catalog
What to pass to the wooden mouldings supplier for complex junctions
If finishing material suppliers they receive only the line “moulding — 300 m”; they do not know that part of the profile ends at a hidden door, part runs next to a wall panel, and part joins with a floor-to-ceiling wardrobe.
There is no need to send the supplier the entire architectural project
For critical items, it is enough to pass:
- article number;
- the material;
- main lengths;
- junction type;
- special termination;
- repeatability of the joint;
- an approved sample or fragment of the drawing;
- packaging requirements for individual parts, if any.
Complex short elements are best not mixed with regular straight linear trim without identification
If an order contains 160 short returns for one type of joint, they must be marked or separated so that the object does not mistake them for random offcuts.
Reproducible geometry is important to the manufacturer
The phrase "make it look nice near the cabinet" is not a production task. A dimension, shape, or approved sample is required.
How to use the linear trim catalog without copying product cards into the article
The STAVROS catalog includes Wood and MDF moldings of different types: baseboards, cornices, moldings, casings, battens, and other profiles. For a joint-focused article, it is more important not to list the assortment but to show the method for checking compatibility.
First, the functional geometry is selected
The profile must:
- fit in height and projection;
- have a clear termination;
- not conflict with the door and furniture;
- allow installation in the chosen sequence.
Then visual correspondence is checked
Material, texture, proportions and finish are evaluated in the context of the assembly, not as a separate product card.
For complex junctions, a sample is more valuable than an additional photo
A photo does not show the actual projection in millimetres or the shadow at the joint. A physical profile or a 1:1 fragment gives a more reliable answer.
Wholesale purchasing of materials should take into account not only metres, but also typical assemblies
If buy finishing materials wholesale For a large complex using a single consolidated meter schedule, it is easy to lose the specific details of repeating joints.
In the order, it is useful to separate
- main straight linear trim;
- short return pieces;
- special end caps;
- samples and a reference assembly;
- operational reserve;
- material for possible adjustment of repeating assemblies.
This does not mean creating a separate SKU for each end cap
The nomenclature can remain the same. The purpose and cutting are separated so that the assembler understands what a specific volume will be used for.
Errors and control before launching the main batch
Which mistakes are most often discovered too late
- The baseboard is thicker than the door casing. Each element was chosen correctly, but a protrusion appears.
- The baseboard is designed for a rough wall. The panel or cladding shifted the finished plane.
- The molding landed on the end of the panel. The boundary of the adjacent finish changed after the layout was issued.
- The cabinet overlapped the baseboard. The furniture maker did not receive its offset.
- The cornice and the cabinet occupied the same ceiling zone. The designs were made separately.
- The hidden door does not have an agreed baseboard termination. The end is being figured out during installation.
- The profile overlapped the service hatch. The decorative scheme was not checked against maintenance access.
- Different finished planes were used. One contractor measured from the substrate, the other from the finish panel.
- The panel thickness was changed without rechecking. The old detail continued to be replicated.
- The furniture was ordered before the junction. After it is produced, the trim has to be adjusted to fit the finished carcass.
- The decision was left to the installer. Identical rooms ended up with different terminations.
- Individual samples were not assembled into a single fragment. The incompatibility became apparent only on site.
Checklist before launching the main batch of wooden trim
| Control question | What should be clear |
|---|---|
| Have the doors been approved? | Frame, casing, extension, concealed profiles |
| Is the actual casing projection known? | Compared with the skirting board thickness |
| Has the finished wall plane been determined? | Not the base substrate, but the final finish |
| Is the thickness of the wall panels known? | Including the substructure and finish |
| Are the panel boundaries defined? | It is clear where the molding ends or changes |
| Is the built-in furniture approved? | Side panels, plinth, height, clearances |
| Are the floor-to-ceiling cabinets checked against the cornice? | No spatial conflict |
| Are the skirting board ends defined? | No random open ends remain |
| Are the moldings and cornice endings determined? | There is a solution for every recurring type |
| Has the sequence of works been agreed upon? | Installation access is not blocked by an adjacent element |
| Have complex junctions been checked 1:1? | If risk and repetition justify it |
| Are the latest project changes taken into account? | Old approvals are not used after dimensions change |
If a critical line remains open, it is better not to launch a mass batch just for the sake of a calendar date.
What information to pass to the distributor and manufacturer before ordering
If construction materials wholesale are being purchased for a complex interior project, the order for critical items needs to retain more than the SKU and total linear meters.
For a standard straight position, a product line is sufficient
Article number, material, length, quantity, finish, and object usually provide a clear basis. But if the profile has a special end or is related to furniture, a reference to the assembly is added to the order.
For complex junctions, an assembly card is useful
For example:
| Field | Value |
|---|---|
| Assembly code | U-04 |
| Molding | Cornice, article number ___ |
| Adjacent element | Floor-to-ceiling cabinet |
| Feature | The cornice ends at the side panel |
| ending | Per approved sample |
| Number of repeats | ___ |
| Drawing / photo | Link to the approved version |
So wholesale supplies of building materials do not turn into the handover of abstract meters without understanding which parts the project needs.
The manufacturer does not need to know the entire project, but they must see the non-standard requirements
If ten short elements require special end treatment, this should be listed separately. If the rest of the linear stock is standard straight — a standard specification is sufficient.
Economic effect of coordinating junctions
How coordinating junctions reduces consumption and the number of reworks
Accurate calculation eliminates hidden unnecessary meters
After the furniture is approved, it becomes clear that 3.2 m of skirting behind each built-in wardrobe is not required. For 40 identical rooms, this is:
3.2 × 40 = 128 m
potentially excess linear stock before accounting for commercial lengths and cutting.
But special ends can add material
If each wardrobe requires two short skirting returns, the savings on the hidden section are partially offset by additional parts. This is why the final order is formed after the junction, not by a single overall perimeter.
Coordination also reduces installation labor costs
A standard detail allows you to prepare the same cutting method, template, sequence, and set of parts in advance. Installers do not make the design decision anew in each room.
Reworking a single reference sample is cheaper than reworking a series
If the sample showed that the skirting board protrudes relative to the architrave, the decision can be changed before supply of construction materials the main batch. After installing hundreds of identical details, the same mistake turns into a large-scale claim between several contractors.
How to make an approved detail a site standard
We lock in one control version
After approval of a repeating detail, the following are saved:
- drawing;
- photo or mockup;
- article numbers;
- critical dimensions;
- finish planes;
- termination method;
- installation sequence;
- approval date.
All related trades receive a single version
Door installers, furniture makers, panel installers, the parts assembler, and the installers must not work from different PDFs sent on different dates. If a junction changes, the old version is explicitly withdrawn from use.
The standard does not replace verification of the actual condition
Even an approved junction does not work if the actual box is installed deeper than the design or the panel installer has changed the substructure. On the first repetitions, it is useful to compare the site against the reference and only then replicate the solution at scale.
When a specific junction needs to be redesigned rather than "patched up" during installation
When purchasing construction materials wholesale for a large interior, it is especially dangerous to replicate at scale a compromise that already looks weak on the sample.
Signals for redesign
- the profile has to be noticeably ground down at every junction;
- the furniture maker has to make a complex cutout solely for the trim;
- the exposed end cannot be made neat;
- the joint ends up in the main visual zone;
- the installation sequence becomes practically impossible;
- service access is blocked;
- the assembly works only with very precise manual fitting for each room.
The best solution is sometimes to change one of the original elements
You can choose a more suitable skirting board, change the position of the furniture panel, adjust the architrave, or finish the cornice differently. A successful interior does not have to preserve the original choice of every detail at any cost.
Final algorithm for coordinating wooden trim with adjacent works
1. CHOOSE THE TRIM
↓
2. FIND ALL ITS JUNCTION POINTS
↓
3. IDENTIFY ADJACENT CONTRACTORS
↓
4. OBTAIN CRITICAL DIMENSIONS
↓
5. BRING DIMENSIONS TO FINISHED CLEAN SURFACES
↓
6. IDENTIFY CONFLICTS
↓
7. DESIGN ENDS AND TRANSITIONS
↓
8. VERIFY INSTALLATION SEQUENCE
↓
9. ASSEMBLE COMPLEX UNITS 1:1
↓
10. APPROVE THE REFERENCE SAMPLE
↓
11. RECALCULATE LENGTHS AND QUANTITIES
↓
12. PROVIDE THE FINAL SPECIFICATION TO THE SUPPLIER
↓
13. WHEN AN ADJACENT ELEMENT CHANGES, RECHECK THE JOINT
For a large project, it is useful to keep a separate list of joints that are blocking procurement: for example, "J-02 — waiting for the actual casing offset," "J-04 — waiting for the cabinet height." Then the delay is visible as specific missing information rather than a vague "the trim hasn't been approved yet." This simplifies the work of procurement and helps launch ready items in parts without risking those where the interface is still open.
Conclusion: a good interior is designed at the boundaries between contractors
A wooden skirting board on its own can be chosen flawlessly. So can a casing. A wall panel and a cabinet too. But an interior is judged not by individual cards, but by how the elements meet in real space.
Therefore, before ordering, you need to go through all the critical points: the skirting board at the casing, hidden door, and furniture plinth; the moulding at the wall panel and built-in furniture; the cornice next to the cabinet and ceiling system. For each joint, not only the height and style matter, but also the actual offset from the finished plane, the thickness, the termination, the access for installation, and the sequence of work.
The best way to reduce risk is to assemble a complex recurring joint 1:1 once, record the critical dimensions, and make it a project standard. If the input data changes, the joint is rechecked before the new version goes into series.
So materials in bulk are purchased not as an independent set of products, but as parts of a single interior system. And building materials distributor, the specifier or the customer forms the main batch only after it is clear where each profile begins, where it ends, and what it physically meets.