Article Contents:
- Wooden decor for the woodworker — different parts for different tasks
- First determine the product, then the decor area
- Carved overlays: a local accent without redesigning the structure
- Wooden rosettes: the center and the joint
- Moldings and trim: how to calculate linear decor
- You need to calculate more than just the total length
- Where errors most often occur
- Nine steps before ordering
- How to determine a budget without false savings
- Can a carved overlay be cut and used as two corner pieces?
- Can wooden decor be installed on an already painted surface?
- Is it necessary to make all decorative pieces from the same wood species?
- How to avoid mistakes when reordering after several months?
- When is it better to avoid carved decor?
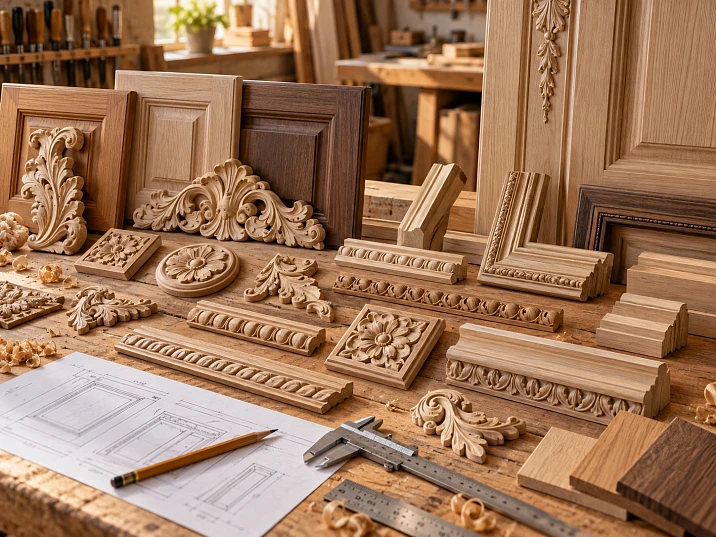
A workshop received an order for two chests of drawers, an interior door, and a frame for a large mirror. The client wants all the pieces to look like part of one interior: the same wood, a similar carving pattern, and restrained proportions. It seems enough to find a suitable collection of appliqués and order the required quantity. But on the chest of drawers, the decor will end up next to the handles and moving drawers; on the door, near the lock and rebate; and on the frame, on a narrow strip of wood around the mirror. The same element here can turn out to be a success in one place and completely unsuitable in another.
Joiners choose wooden decor based on the construction of the piece, not from a photo of beautiful carving. First, the free area is determined, then the purpose of the part: to close a joint, build a frame, highlight the center, finish a stile, or support the upper rail. After that, the size, relief projection, material, and finishing method are compared. Only an item that has passed such a check makes sense to include in the order.
For a small workshop, ready-made elements are especially useful where repeating a complex ornament by hand takes too long, and making your own templates and tooling does not pay off. At the same time, ready-made carving does not remove the joiner's work: it still needs to be properly integrated into the piece, processed, fixed, and coordinated with the other parts.
Wooden decor for the joiner — different parts for different tasks
The word “decor” brings together items with completely different purposes. A carved appliqué creates a local pattern, a molding draws a long line, a rosette defines a center or intersection, a capital finishes a vertical part, and a furniture leg simultaneously affects both appearance and construction. They cannot be chosen by a single principle.
It is convenient to divide ready-made wooden decor by the job it does in the composition:
-
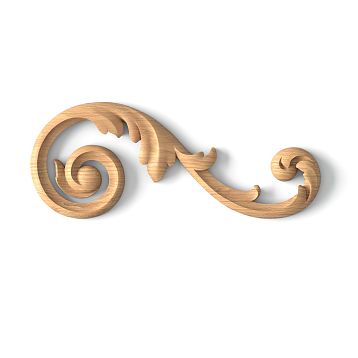
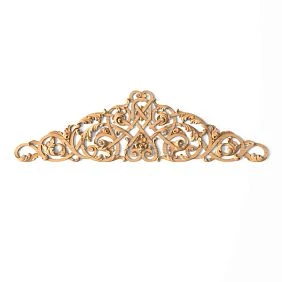
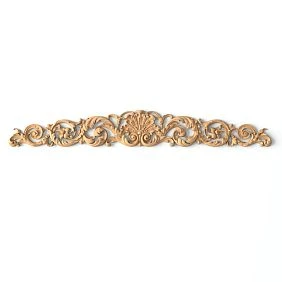
Planar accent. A carved appliqué is placed on a facade, door leaf, panel, or wide board. Its dimensions are matched to the free field.
-
Central or connecting element. A rosette marks an axis, the intersection of profiles, or the middle of a framed composition.
-
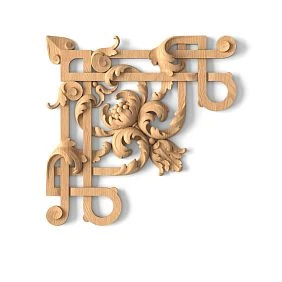
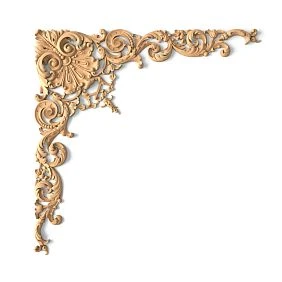
Corner treatment. A corner appliqué closes or emphasizes the junction of two directions. Its orientation and the actual installation angle are critical.
-
Linear decor. A molding, baguette, and profile form a contour, a division of the surface, or a transition between planes. Here, length, cross-section, and the method of joining are important.
-
A vertical architectural detail. A pilaster connects the base and the upper part of a portal or a large facade; a capital completes it at the top.
-
A finishing element. A finial, cornice, and certain types of brackets define the upper boundary of a structure.
-
A supporting or functional detail. A leg and a handle can support the overall design of the product, but must additionally meet requirements for strength, convenience, and fastening.
Among the ready-made solid wood products you can select both standalone elements and combinations of several groups. However, matching ornamentation does not yet mean mechanical compatibility: the profile and the overlay may differ in thickness, base, or the nature of the joint.




First determine the product, then the decoration zone
It is more useful to start with a drawing, even the simplest one. It marks the overall dimensions of the product, the opening parts, the hardware, the joints, the fasteners, and the areas that will be hidden after installation. Only the remaining surface can be considered a working field for decoration.
| Joinery product | Where the decor is placed | Which elements to consider first | What to check before purchase |
|---|---|---|---|
| Chest of drawers, wardrobe, sideboard | Facades, uprights, aprons, top rail | Overlays, rosettes, moldings, legs, handles | Drawer movement, hinges, handle grip, carcass joints |
| Interior door | Flat panel, raised panel, door top, casing | Overlays, moldings, rosettes | Lock, handle, rebate, hinges and opening trajectory |
| Mirror or picture frame | Front plane of the baguette, corners, center of the top bar | Baguette, profile, corner overlays, small rosettes | Mounting strip width, glass and suspension fastening |
| Wooden panel | Central field, perimeter, repeating sections | Moldings, linear trim, overlays, rosettes | Base seams, electrical outlets, adjacent surfaces |
| Portal or massive framing | Vertical posts and upper part | Pilasters, capitals, brackets, cornice | Part joining, fasteners, load, passage height |
| Staircase unit | Columns, railings, terminations | Balusters, columns, finials, individual carved parts | Safety requirements and the load-bearing function of the structure |
For example, for a cabinet door 430 mm wide, a single central overlay may be sufficient. For a portal post of the same width, an elongated vertical element makes more sense. The base size is the same, but the direction and purpose differ.
Another subtlety is visibility. The ornament at the bottom of a sideboard is viewed from close up and often at an angle. The upper part of a tall portal is seen from below. Therefore, the same relief depth gives a different impression. Sometimes simpler carving works better in the background than a fine ornament that gets lost anyway.
Our factory also produces:
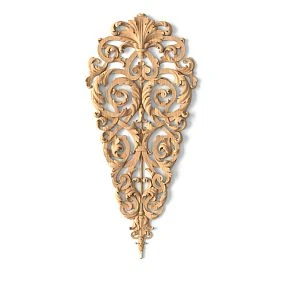
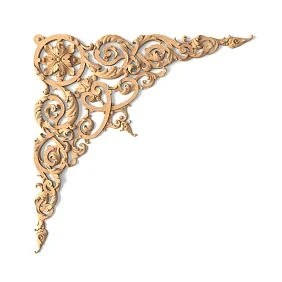
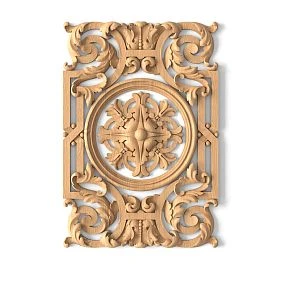
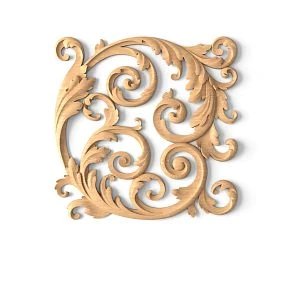
Carved overlays: a local accent without redesigning the structure
A carved overlay is useful when the surface already has enough free space and the goal is to add volume and pattern. It should not be used to mask construction defects, moving joints, or an uneven base: a protruding edge, a gap, and a poorly fitting back side will remain visible after painting.
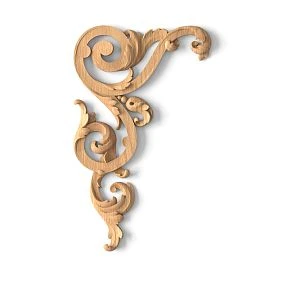
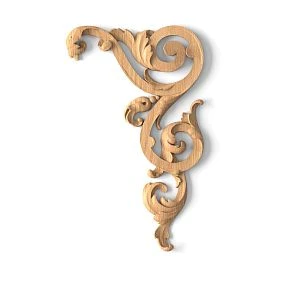
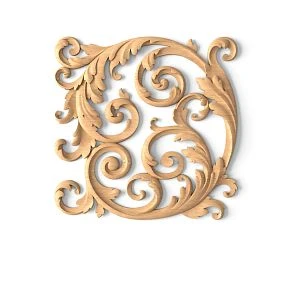
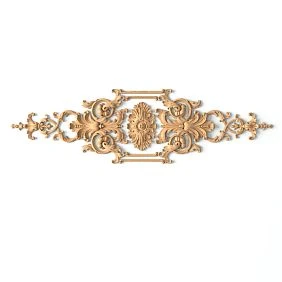
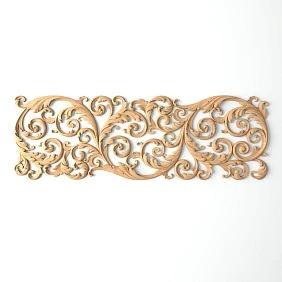
In the decorative wooden overlays you should start not with the pattern, but with the geometry. For a horizontal rail, look for an elongated piece; for a narrow wall section, a vertical one; for the corner of a panel, a corner piece. The central ornament must be aligned with the axis of the facade, and paired overlays also with their direction. An asymmetrical pattern may require left and right versions.
Let's imagine a cabinet door 440 mm wide. On the left, for the hinge side and its installation, the craftsman keeps a 45 mm strip; on the right, he leaves 35 mm of free edge. The width of the available field is 440 − 45 − 35 = 360 mm. This is not yet the overlay size: within these 360 mm, visual margins must be included, for example 30 mm each. The maximum convenient decor width according to such a preliminary sketch is 300 mm. If the overlay you like is 320 mm wide, it physically fits between the hinge and right zones, but violates the chosen margins. It is better to check a smaller size or change the composition rather than squeeze the ornament right up against the hardware.
The numbers here serve as an example calculation, not as universal installation standards. For each structure, the free area is marked out anew.
For a finished piece, check three values: height, width, and depth. In different product cards they may be designated by the letters A, B, and C; before ordering, look at the diagram so as not to confuse the directions. The size of the ornament in the photo can be misleading: large scrolls visually add width to the piece, and high relief adds bulk.
There are situations when an overlay is not needed. If the facade is already divided into several narrow framed fields, additional carving between them can create a fragmented pattern. If cabinet doors open almost flush against a side wall, a protruding overlay can restrict movement. In such cases, a small profile around the perimeter or even a smooth surface is preferable.
For a workshop that is planning to buy carved wooden decor, it is more useful to form a short list of two or three SKUs for one task than to gather dozens of items that look appealing. You need to compare not only the pattern, but also the shape of the back side, the availability of a suitable material, the possibility of reordering, and the finish.
Get Consultation
Wooden rosettes: center and junction point
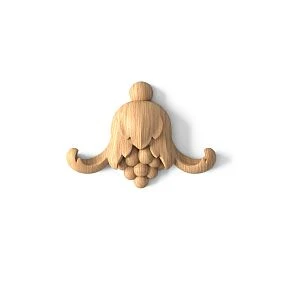
A rosette is especially appropriate where a composition needs a focal point for the eye. A round model with a radial pattern is perceived differently from an elongated overlay: it does not set the movement of a line, but gathers several directions in one place. A square or rectangular rosette can simultaneously frame the junction of profiles.
On a door leaf, the rosette is placed along the axis of the upper decorative panel. On a large frame, it is sometimes used to finish the middle of the top rail. On a wall panel, small rosettes can be repeated at identical nodes, creating rhythm. But repetition is justified only when the distances and sizes of these nodes are truly identical.
In the section wooden carved rosettes there are different shapes and sizes. Before buying, it is useful to place a paper outline of the rosette against the installation site: a circle 100 mm in diameter may seem small on a sketch, but in the center of a narrow door panel it can take up almost all the free space.
It is necessary to distinguish between a central rosette and a connecting rosette. A central one only needs its own mounting pad. A connecting one must also align with the profiles in height and at the point where they meet. If the molding is higher than the flat supporting part of the rosette, the joint will be stepped. Do not count on paint or filler to hide such a difference.
Moldings and trim: how to calculate linear decor
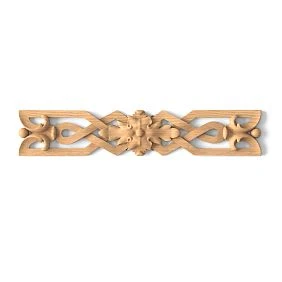
Moldings, baguette, and other decorative wooden trim solve a problem that cannot be covered by a single overlay: they draw a line across the entire surface. They form frames on doors and panels, separate the upper part of furniture, and finish edges and transitions. For these parts, you choose first of all the cross-section and length, and only then the decorative pattern.
The cross-section determines how much the profile protrudes from the base, what kind of shadow transition it creates, and how it meets neighboring elements. A wide profile with a pronounced convex part can visually reduce the inner field of a narrow panel. A thin strip only marks the boundary. For different tasks, it is worth comparing wood mouldings, cornices and linear trim, rather than applying a single profile to all items in the order.
You need to calculate more than just the total length
Suppose a workshop makes two rectangular decorative frames 1400 mm wide and 500 mm high. Each requires two horizontal pieces of 1400 mm and two vertical pieces of 500 mm. Total length:
2 × (1400 + 500) × 2 = 7600 mm, that is, 7.6 m.
If you order strips 2600 mm long, three pieces will give 7800 mm — arithmetically enough. But four horizontal parts of 1400 mm cannot be placed in three strips: two such blanks have a combined length of 2800 mm. This means you will need at least four whole strips, even before accounting for saw kerf width, end trimming and possible pattern matching. This is not over-ordering "just in case", but a consequence of the specific cutting plan.
The cutting of four strips might look like this: from two of them cut one 1400 mm part and two 500 mm parts each, and from the two remaining strips cut one 1400 mm part each. With this distribution there will be offcuts left over, but all the required parts will be produced. The example is calculated for straight cutting without complex ornament matching; for mitre cuts, the length of the parts is calculated based on the chosen reference edge and the actual angle scheme.
Other constraints also need to be taken into account:
-
at the corners the profile must meet without a break in the pattern or a difference in height;
-
for carved linear trim, adjacent pieces must match in the direction of the ornament;
-
short offcuts cannot be automatically counted as suitable material for visible areas;
-
if the profile will extend under a capital or corner overlay, the length is calculated along the actual abutment line;
-
for a series order, it is useful to establish in advance which ends remain open and which are hidden by connecting elements.
For strict geometric compositions, it may be suitable wooden plank. For a classic frame — a profile with a complex cross-section. The choice depends not on fashion, but on the thickness of the surrounding parts and the required depth of the pattern.
How to select ready-made elements for furniture
In furniture, a decorative element is in direct proximity to hardware, edges, and moving parts. Therefore, a simple check that “the overlay fits on the facade” does not solve the problem. Doors must open, drawers must extend to their full travel, and handles must remain convenient to grip.
For a chest of drawers, the overall architecture is determined first: where the horizontal lines of the drawers run, whether there is a protruding plinth, and how noticeable the top rail is. If central overlays are repeated on each drawer, they must match the height of the front panels specifically, not the overall dimensions of the carcass. For a tall buffet, by contrast, a large accent is often better concentrated in the upper part, leaving the lower facades calmer.
Legs and handles here cannot be considered merely decoration. The height of the supports changes the height of the entire item, the clearance for cleaning, and the position of the bottom drawer. The shape of the handle affects the grip point and the required distance from relief overlays. When selecting of wooden furniture legs check the mounting method and permissible load of the specific model, and when selecting Only the best sections of the trunk with uniform structure, free of defects and flaws, are selected. The wood is sawn taking into account the direction of the fibers — for maximum strength, the fibers should be aligned along the main axis of the product. — dimensions, fasteners, and ease of use.
A special case is narrow paired fronts. Identical overlays installed independently at the center of each door can create four competing verticals: two ornament lines and two handle lines. Sometimes a single unified composition in which the paired elements are mirrored looks more cohesive. But the carving must not cross the gap between the opening leaves: the decor should belong to its own structural part.
If the furniture already has profiled panels and expressive legs, additional carved elements may be superfluous. A successful solution does not have to use the entire catalog at once.
How to choose wooden decor for a door
A door leaf imposes restrictions on decor that a fixed panel does not have. It rotates relative to the frame, works alongside the casing, lock, handle, and sometimes a door closer. When choosing the design, these are the first points to check.
The marking sequence is as follows: leaf → existing panels or smooth fields → lock and handle → hinge side → rebate → free area for decor. If the door is double-leaf, add a check of the meeting edges and coordination of the right and left compositions.
For example, a craftsman selects a horizontal carved overlay for the upper part of the door. In the photo, the piece looks good, but its side scroll extends into the area where the leaf passes near the casing when opening. This is not a matter of aesthetics: the protruding relief may begin to catch on the adjacent part. They check not only the closed door, but also its movement in the actual opening. It is convenient to temporarily attach a cardboard mockup with a thickness close to that of the selected decor and open the leaf several times.
Moldings on a smooth door make it possible to assemble a framed composition without deep milling of the base. However, an applied profile does not automatically turn a smooth door into a true paneled one: the construction and the way the leaf operates remain the same. If the goal is to imitate panels, one should maintain the same profile height, check the symmetry of the frames, and avoid placing them over structural joints that may move.
Where mistakes especially often occur
Near the handle. In the drawing, the overlay may not intersect with the handle base, but fingers extend considerably beyond its outline when gripping. It is necessary to check the actual movement of the hand and access to the keyhole or cylinder.
On the hinge side. Assess the opening trajectory and the clearance to the frame and casing, especially for doors that open wide.
At the bottom edge. Protruding ornamentation often collects dirt, may catch on threshold elements, or make cleaning more difficult. In addition, the lower part of the door is seen from a different angle than the upper part.
On paired leaves. With an asymmetrical floral pattern, check the left and right versions. Two identically oriented overlays do not always produce a mirrored composition.
For an ordinary residential door with active daily use, moderate relief is often more practical than deep carving. If you need to highlight the upper panel, you can limit yourself to a single horizontal overlay; if you want to emphasize the geometry of the entire surface, choose moldings without a central ornament. This way, wooden door decor is governed by the operating conditions, not just the pattern.
Decor for a wooden frame and mirror
For frames, the main constraint is the width of the face strip where the decorative element will be placed. From the outside, the frame may appear wide, but part of that width is taken up by the rebate for the mirror, the inner edge, the profile transition, or the fastening area. You need to measure the flat mounting area specifically.
Let's take a frame whose visible strip width is 70 mm. Of that, 12 mm is taken up by the inner bevel, and another 10 mm by the outer profiled part. The conditionally flat area that remains is 70 − 12 − 10 = 48 mm. An overlay 55 mm wide will not get full support, even though formally it is already narrower than the strip itself. You will have to look for a piece with a smaller mounting base width, a different fastening scheme, or change the frame profile itself.
For the long sides, baguette or molding with a repeating pattern is appropriate. In the corners, specially designed corner pieces can be used, but you cannot automatically assume that they will cover an unsuccessful miter cut of the strips. First check the geometry of the frame and the reliability of its joints. If the corner does not align, applied carving does not fix the problem.
On wide wooden frames for mirrors and paintings a central upper accent sometimes looks convincing. However, a frame is usually viewed from a short distance: too deep a relief may protrude forward more than the composition intends, and on a mirror it may also produce a noticeable reflection along the edge.
Before approving the decor, separately check the placement of fasteners, hangers, back panel retainers, and access for mirror replacement. The decorative overlay must not cover a demountable joint or mask damage to the load-bearing part of the frame.
Wooden decor for panels: first the seams and module, then the ornament
A single interior panel often has a wide open center, but when working with several panels a different task arises: the pattern must transition from one module to the next without a break in height, width, or rhythm.
For a solid decorative panel, perimeter moldings, a central overlay, or repeating rosettes are suitable. If the panels frame a doorway, the profile should be coordinated with the architrave. If they run along a wall, first determine the position of switches, sockets, ventilation grilles, and access hatches. A layout that looks beautiful on an empty wall may prove unsuitable once the actual openings are made.
Let's imagine a wall with four identical panels, each 560 mm wide. Each has side frame lines. If the installer marks the centers independently, a small accumulation of errors causes the intervals between panels to visually "wander." It is more reliable to strike a common horizontal line and a single spacing, then tie the verticals to them. At the same time, the gaps between structural panels must not be mechanically covered by glued rigid decor if the base is designed for movement.
On a very tall panel, a compact overlay may get lost; on a short one, the same piece will cover most of the field. It is better to assess scale using a full-size template fixed in place, from the point where the panel is most often seen.
Particular attention is required at material junctions. Solid wood, plywood, and fiberboard react differently to changes in humidity. If a decorative strip runs across several substrates at once or crosses an expansion joint, the fastening method must account for their possible mutual movement. Rigid gluing "for reliability" in such a situation can lead to the seam opening, the overlay detaching, or the base deforming.
Brackets, capitals, and pilasters: finishing complex nodes
Some decorative details only make sense as part of a group. On a wide portal, a separately installed capital looks random if there is no corresponding shaft beneath it. In combination with a pilaster and upper cornice, it completes the vertical line: the eye reads the beginning, the support, and the ending.
When selecting, wooden capitals check the width of the upper and lower parts, the depth of the projection, the size of the mounting pad, and the actual width of the shaft. If the capital projects on the sides, this overhang must be accounted for in the overall drawing. The error is especially noticeable on paired columns: even a slight difference in overhang disrupts the symmetry of the portal.
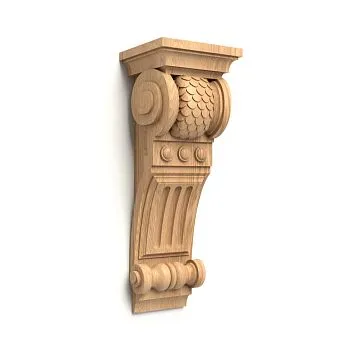
Wooden Brackets can be used as decorative accents under a cornice, shelf, or upper band of furniture. However, a decorative bracket cannot be considered load-bearing without confirmed characteristics and suitable fastening. If a shelf will bear significant load, its load-bearing scheme must be calculated separately. The presence of a massive carved element under a shelf does not by itself prove the strength of the assembly.
For a wide frame, it is convenient to mentally divide the structure into three parts: a vertical base, a transitional element, and a top line. Then it becomes clear where relief is needed and where a calm profile is appropriate, one that does not compete with the capital. Excessively complex carving at all three levels often impairs the readability of the structure.
A separate case is stair components. In the section staircase components and elements you can navigate the types of parts, but decorative finials and balusters should be selected taking into account the design of the entire railing. Safety parameters, fastening, and requirements for load-bearing elements are determined by the stair project; replacing a structural part with a visually similar ornament is unacceptable.
Why the same overlay is not always suitable for different products
Suppose a wooden overlay 170 mm high and 18 mm deep looks good on a chest of drawers. There is a temptation to repeat it on a door and on a wall panel to tie the interior together with a single pattern. The problem is that a matching product code does not automatically create the same visual effect.
On the front of a 600 mm wide chest of drawers, the part occupies a noticeable portion of the surface. On a door over two meters high, it may appear as a small spot. On a large wall panel with long linear profiles, such an accent may be lost altogether. Scale is assessed by its relationship to the working field and to neighboring elements, not by a single absolute dimension.
Next, the operating conditions differ. On a chest of drawers, the grip of the handle and the movement of the drawer are checked. On a door, opening relative to the frame. On a frame, the gluing area and the fastening of the mirror. On a panel, the seams of the base and the nature of the lighting. Even if the dimensions allow one overlay to be installed in all these places, the design does not always permit it.
There are also material differences. A small wooden overlay is relatively easy to place on a stable plywood or board base if installation is provided for by the manufacturer and the conditions are suitable. A large solid carved part, rigidly fixed across the entire width across the direction of the base grain, must already be evaluated taking into account the seasonal movement of wood. The fastening method cannot be chosen solely by the size of the back surface.
Therefore, in a common product series, it is reasonable to repeat the character of the ornament — for example, the shape of a leaf, the rhythm of a molding, or the pattern of a frame — while selecting the sizes and types of elements individually. The interior is perceived as cohesive even though doors, furniture, and panels are decorated with non-identical parts.
How to choose the size of a ready-made decorative element
With a ready-made decor piece, the size has to be matched against two things at once: the actual installation location and the proportions of the product. A model may physically fit but look excessively large; another may be visually successful but overlap the working area of a hinge or handle. These conditions should be checked separately.
Nine steps before ordering
-
Measure the product after finalizing the design. For a door, this is the size of the finished front, not the cabinet opening. For a frame, it is the width of the front mounting strip, not just the outer dimension.
-
Mark the fixed and moving zones. On the sketch, indicate the hinge axes, drawer edges, door rebate, panel joints, and fastening points.
-
Exclude the hardware along with the space needed to use it. For a handle, consider not only the base but also the finger clearance. For a lock, consider access to the key.
-
Find the working area. This is the surface where the decor does not affect the structure and can be properly fastened.
-
Set the compositional axis. It may coincide with the geometric center, but not necessarily: on an asymmetrical portal, the axis of the visible decorative part is more important.
-
Assign the offsets. Specify them in millimeters, separately for width and height. Do not leave the wording "approximately along the edges."
-
Compare dimensions A, B, and C with the product card. Check the dimension designation diagram and the presence of protruding side sections.
-
Make a full-size template. Print or cut out the outline from cardboard; for protruding relief, create a three-dimensional mockup or use a sample.
-
Perform a dry fit. Check the appearance from working distance, the movement of the doors, the position of the handles, the reflection in the mirror, and the side light.
Let's say the working field of the panel is 620 mm wide and 410 mm high. According to the design, a visible margin of at least 65 mm should remain on each side, and 55 mm at the top and bottom. Then the maximum dimensions of the decor in this scheme will be 490 mm in width and 300 mm in height. A part measuring 470 × 280 mm fits; one measuring 510 × 260 mm does not, although it fits in height. But even a suitable size does not guarantee a good result: you should apply the template and assess whether the pattern conflicts with the panel frame.
A pair of parts has another parameter — the distance between their centers. If two identical elements are located on adjacent fronts, their axes must be tied to a single scheme. Otherwise, the eye will see a misalignment even where each overlay was installed "almost in the center" individually.
A small calculation trick — do not confuse the overall dimension with the support area. A carved overlay may have openwork edges, while the back side consists of separate protrusions. A large external size does not mean a large adhesive area. Before buying, you need to understand what exactly the part will rest on.
Relief depth: what is not visible in the photo
The third dimension — the protrusion from the base — can be decisive. In a frontal photo, two overlays of the same height and width often look similar, although one protrudes by a few millimeters, while the other creates a deep shadow and noticeably brings the surface closer to the person.
On a door, deep carving can interfere with movement relative to the casing. On a chest of drawers, it can catch clothing near the handles or create a niche that is inconvenient for cleaning. On a mirror frame, it can unexpectedly reflect in the mirror along the edge. On a panel located opposite a window, high relief forms more contrasting shadows than under even overhead light.
Check not only the specified depth C, but also how that depth is distributed. A central protrusion with a smooth decrease toward the edges works differently from a high edge with an almost vertical wall. The latter can create a noticeable step at the junction with the molding and require separate edge treatment.
For a specific project, it is useful to make a small section on the drawing. Show the base line, the decor protrusion, the adjacent profile, the handle, or the edge of the cabinet. Such a scheme quickly reveals the intersection of volumes that is difficult to notice in a top view.
Do not try to correct excessive depth by heavy sanding of the back side. After material removal, the mounting geometry and the strength of thin thread sections may be compromised. If the item is too tall, it is safer to choose a different profile or agree on a design change with the manufacturer.
When painted, the relief will be perceived differently. Opaque enamel smooths out the color differences of the wood, but side light still reveals the depressions. Tinting and oil, on the contrary, preserve the visible grain pattern. Therefore, the sample is evaluated under the lighting where the product will be placed, not only on the workshop table.
Oak or beech: material for the future finish
For joinery decor, the wood species is chosen based on the intended coating, adjacent parts, and the required appearance. Contrasting oak and beech on a “better—worse” basis is pointless: they produce different results.
Beech has a relatively even, restrained texture. It is suitable for products that are planned to be painted with opaque enamel, especially if a calm surface without a pronounced pattern of large pores is needed. At the same time, the quality of the result depends on preparation: in carved parts, areas with fibers running in different directions may absorb the compositions differently. A test coat is needed even when the coating is completely opaque.
Oak is valued where the wood texture is meant to remain visible. Its porous pattern shows expressively under oil, lacquer, and transparent or semi-transparent tinting. However, achieving a perfectly smooth, visually uniform enamel surface on oak can be more difficult without suitable pore preparation. The choice of the finishing system depends on the desired effect, not only on the name of the species.
| Project conditions | What is usually more reasonable to check first | Why |
|---|---|---|
| The entire composition is painted with opaque enamel | Beech and compatibility with the priming system | The restrained texture makes it easier to achieve a calm surface pattern |
| Visible wood with expressive texture is required | Oak | Pores and grain pattern become part of the decorative effect |
| The front is already made of oak for a clear finish | Oak decor with similar grading | Different species can differ noticeably after tinting |
| The product combines different materials and is painted as a whole | Test samples on each material | The same paint on different substrates can reveal pores and texture differently |
Fiber orientation also matters. Small solid wood products change dimensions with humidity fluctuations; large parts are especially sensitive to storage and mounting conditions. If the decor is mounted on a wide solid wood surface, consider the grain direction of both the base and the overlay. Do not rigidly block the natural movement of wood without testing.
Do not assume that every item is immediately available in two species. The availability of beech, oak, other materials, production times, and possible sizes are shown in the product page for the specific model. If the product is produced serially, it is important to confirm in advance the possibility of reordering the same version.
Why the set must be selected before the final finishing
Painting the furniture and then selecting carved parts to match may seem like a convenient way to postpone the decision. But it is precisely at this stage that mismatches become noticeable that could have been eliminated earlier: different primer depths, unforeseen glue areas, a joint protruding under the enamel, extra holes, and chips in the finished coating.
In the workshop, it is more reliable to divide the work into checking the geometry and finishing.
First, a dry assembly. Place the moldings and overlays on the piece, check the joints, symmetry, thickness, and access to the fasteners. For temporary fixing, use methods that do not damage the surface and do not leave marks before painting.
Then, a test finish. Take an offcut of the same substrate and, if possible, a decor sample of the same species. Perform the specified preparation, priming, tinting, or painting. Pay especially close attention to the recesses of the carving: excess product in them can alter the pattern.
After approval, installation using the chosen technology and the final finishing. The specific sequence depends on the adhesive, coating, and construction. For one piece, it is more convenient to fix the wooden elements before priming and paint the composition as a whole. For another, first finish the individual parts and install them afterward using a compatible fastening technology. A single order cannot be applied without regard for the materials.
If wood glue is used, its compatibility with the substrate is checked separately. Gluing wood onto a surface already coated with lacquer or enamel is not equivalent to gluing prepared wood. Not all mounting compounds are suitable for every finish, and a large part may require additional mechanical fastening. In these matters, the instructions from the manufacturers of the adhesive, the coating, and the decorative part itself take priority.
After installation, check whether any open gaps, untreated ends, or places where the coating will be difficult to renew remain. For items used daily, also assess cleanability: an ornament with deep hard-to-reach recesses on a kitchen door may prove impractical, even if it looks convincing on a display sample.
How to assemble a test set for a new piece
On a first order, a new combination of materials, profiles, and carving always contains more unknowns than a familiar, repeatable model. Therefore, for the workshop it is more advantageous to test a small set on one piece or a separate panel than to immediately order decor for the entire series.
A trial set may include one central overlay, one socket, a section of the selected profile, and, if the project involves a complex vertical composition, one bracket or a sample capital. For a furniture piece with a new construction, the leg and handle are checked separately. It is not necessary to purchase the entire list: the set is formed according to the units that have not yet been worked out.
The trial must answer specific questions:
-
is there enough supporting surface for attaching the selected part;
-
do the cross-sections of the molding and the connecting element match;
-
can the intended trimming be performed without destroying the ornament;
-
does the relief match the scale of the finished product;
-
how the selected wood looks after trial finishing;
-
does the decoration interfere with opening, grasping the handle, or accessing the fasteners;
-
will it be possible to replicate the arrangement of parts on subsequent copies.
It is convenient to make a test board from the same material as the future base. On it, the installation lines are marked out, the trial element is attached using the adopted technology, and the planned coating is applied. After complete drying and holding according to the instructions, the seam, joints, and quality of the finish are checked. Such a trial is especially useful when combining solid wood with panel bases, non-standard glue, or complex tinting.
If the task is a small batch of doors, one beautiful sample is not enough. You also need to check repeatability: whether the next set will have compatible geometry, whether the required left or right orientation is available, and whether the actual size matches the working drawing. The verified trial assembly then becomes the reference for the remaining products.
Bill of materials: how to transfer the selected decor into an order
Once the layout is approved, the list of products is turned into a working bill of materials. Its purpose is to eliminate the situation where the craftsman ordered the correct ornament but in the wrong size, material, or quantity. For a small workshop, a table with the item code, article number, size, wood species, installation location, and finishing note is sufficient.
Below is a sample entry. The dimensions and codes are conditional; they illustrate the organization of an order, not the characteristics of any specific STAVROS products.
| Code in the project | Supplier SKU | Part type | Size for verification | Material | Quantity | Location and note |
|---|---|---|---|---|---|---|
| DK-01 | check in the product card | Carved overlay | A × B × C | Beech | 2 pcs. | Paired fronts; check the direction of the pattern |
| DK-02 | check in the product card | Rosette | A × B × C | Beech | 1 pc. | Central zone; check the base plane |
| PR-01 | check in the product card | Molding | Section and length of the strip | Beech | By cutting | Frame contour; attach the cutting plan |
| KR-01 | check in the product card | bracket | A × B × C | Oak | 2 pcs. | Portal; check the fastening and purpose |
The article number, material, and size must refer to one selected product version. If the overlay is produced in several wood species or lengths, the letters and numbers of the article number alone may not be enough. In the specification, record the execution variant as it is designated in the product card or as agreed with the supplier.
For linear mouldings, it is reasonable to attach a separate cutting map: how many long and short parts are required, where the cuts are, which sections will be visible, and which offcuts can be used. The order specifies the number of whole strips based on this map, not just the total number of meters.
If the product is repeated, it is worth keeping four things together with the specification: the approved drawing, photos of the dry layout, a record of the selected finish, and a list of the article numbers used. Then the next order will not have to be reconstructed from a photo of the finished wardrobe or door.
How to determine the budget without false savings
The cost of a decorative set consists of the price of parts in the required execution, the actual number of strips according to the cutting plan, delivery, and preparation and installation work. Even a cheap profile can turn out to be unprofitable if it yields many unusable short offcuts or requires complex manual joining.
To compare two options, it is useful to calculate the cost of one finished product rather than the price of one decorative overlay. The first option may have fewer elements but more labor-intensive carving for fitting; the second may have more standard parts but faster repeatable installation. This is especially noticeable on a series of identical doors or panels.
The calculation is convenient in this order: price of the selected items × quantity per the schedule; separately — the required linear footage per the cutting map; then — consumables, finishing, and labor. Current prices, availability, and lead times are checked in the product pages before confirming the purchase.
Where to buy wooden decor for joinery projects
To buy wooden decor without excess leftovers and rework, it is more convenient to assemble the order from a ready-made schedule rather than browsing categories in search of the most expressive details. First, open the product group that matches the structural task; then compare the sizes, materials, and compatibility of the selected items.
If decorative wooden elements are needed for flat surfaces, start with carved overlays and rosettes. If you need to design a long line on a door, frame, or panel — start with moldings and other linear trim. For a portal, look for matching vertical and top-finishing elements; for furniture, select legs and handles separately based on functional parameters.
When buying ready-made wooden decor for a joinery workshop, it is useful to clarify four practical things with the supplier: the availability of the required version, the actual dimensions, possible differences between batches of natural wood, and the reorder procedure. For paired overlays, additionally specify the side or the direction of the ornament. For long strips — the required length and cutting plan.
It is not always economically justified to buy the entire set at once. For a one-off job with an unusual material or profile, first take a sample, confirm the fastening and finish, and then order the main quantity. For a repeating model whose geometry has already been approved, it is reasonable to form the specification for the entire agreed batch at once.
A good order begins with a measured product. After marking out, the craftsman should be left not with vague wishes to “add carving,” but with specific notes: installation area, element type, item code, dimensions, material, quantity, fastening scheme, and finish. It is precisely from this data that you can buy decorative wooden elements so that they actually fit the furniture, door, frame, or panel.
Frequently asked questions when ordering wooden decor
Can a carved overlay be cut and used as two corner pieces?
Only if the shape and construction of the specific item allow it. Cutting may destroy the symmetry, expose an unattractive end, weaken thin elements, or make a neat joint impossible. For paired corners, it is usually more reliable to look for ready-made right and left pieces than to count on cutting a central ornament.
Can wooden decor be installed on an already painted surface?
Sometimes it is possible, but the fastening method must be chosen taking into account the existing coating and adhesion requirements. Wood glue intended for wood may not provide the necessary bond over a layer of enamel or varnish. Check the compatibility of the compound, the possibility of preparing the mounting area, and the consequences for the appearance. On a valuable finished product, first test the technique on a sample.
Is it necessary to make all decorative parts from the same wood species?
With a clear finish, the difference in species and texture is usually clearly visible, so their combination should be checked on real samples. With opaque paint, different species can sometimes be unified with a single color, but differences in porosity and preparation may remain visible. A single species simplifies coordination, but it does not replace a test paint.
How can you avoid mistakes when reordering after several months?
Keep the product codes, material variant, dimensions, layout plan, cutting map, processing method, and photos of the approved sample. Before a new purchase, confirm that the required items and finishes are available and that the specifications have not changed. For serial products, this is more reliable than relying only on the collection name or an old photo.
When is it better to avoid carved decor?
If the part blocks the working movement of the hardware, is located on a moving structural joint, interferes with a safe grip, requires an unverified load-bearing fastening, or leaves no proper mounting support, carving should not be installed just for appearance. Sometimes a calm wooden profile along the contour is enough; sometimes it is better to keep the surface smooth.