Article Contents:
- Which product group to open for your task
- Carved applique: choosing by location and direction
- When it is better to choose a wooden rosette
- Bracket: check the joint under a shelf or protrusion
- The capital is matched to the vertical and cornice
- Pilaster, column, and composite post solve different tasks
- Molding and trim: choose the profile, ends, and corners
- First, measure the working area
- How to read dimensions A, B, and C
- Beech, oak, and unfinished-ready finish
- Enter the left and right parts as separate lines
- When you need a sample before buying a set
- Specification: how to lock in a specific item code
- Piece items and linear stock are calculated differently
- Example order for one chest of drawers
- Example for a wardrobe or furniture portal
- What to compare in price and scope of delivery
- Where to buy wooden decor and how to place an order
- Additional questions before purchase
- Can a replacement for an old part be matched from a single photo?
- What should I do if the pattern I need is only available in a larger size?
- Can leftovers from different batches be used in one piece?
- How should I accept the set if painting will be done in another workshop?
- Is furniture decor suitable for an exterior door or a damp room?
- What should I keep for a repeat order several months later?
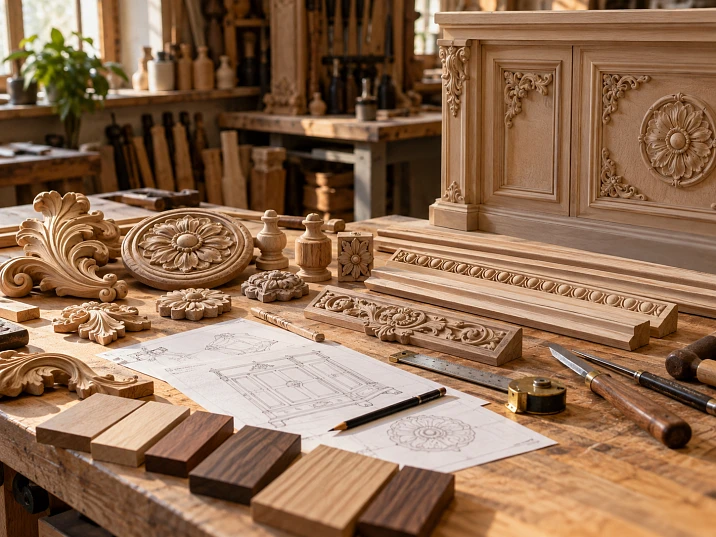
The cabinet already has defined facade dimensions, handles, and color, but the decor order currently says: “two carved parts on the sides.” With a note like that, you could buy completely different products — narrow overlays, pilasters, or framing elements. They sit on the surface differently, take up different depths, and require different adjacent parts.
Start with a specific place: which part of the piece the decor will be on and what it should do there. For a small accent on a door, one product group is needed; for a vertical from the plinth to the cornice, another. After that, you can choose the pattern, size, wood, and finish for the future coating.
A good selection result is a completed order line: the exact SKU, dimensions according to the drawing, material, finish option, and quantity. A photo of the ornament you like remains a useful reference, but by itself it does not replace that line.
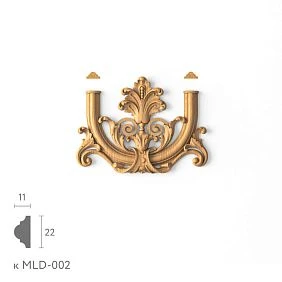
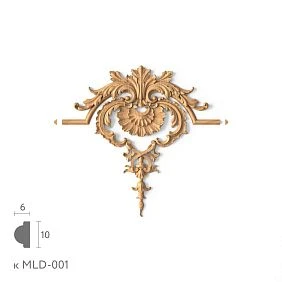
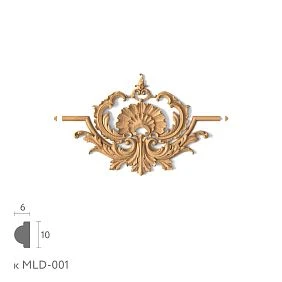
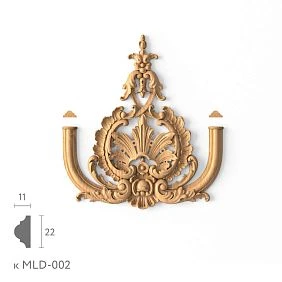
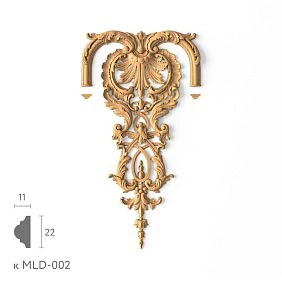
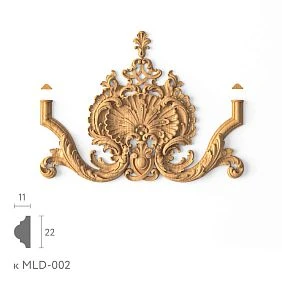

Which product group to open for your task
The STAVROS catalog has a general section wooden decorative elementsas well as individual groups of overlays, rosettes, capitals, brackets, and mouldings. To find the right part faster, phrase the task as a verb: highlight the center, finish a corner, draw a line, complete a post.
| What needs to be done | Which element to look for | What to check first |
|---|---|---|
| Highlight the center of a furniture facade or panel | An overlay or rosette | The shape of the free field and the position of the handle |
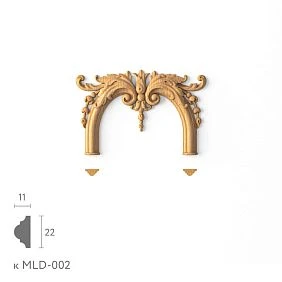
| Finish the corner of a frame | A corner overlay, corner element for molding | Pattern direction and alignment with the profile |
| Draw a long line along the facade | Molding or other suitable trim | Cross-section, strip length, and termination method |
| Form the vertical of the cabinet or portal | Pilaster | Available height, width, and mounting plane |
| Finish the pilaster or post at the top | Capital | Lower seating part and junction with the cornice |
| Decorate the space under the shelf or ledge | bracket | Depth, mounting surfaces, and purpose of the part |
| Assemble decorative frame | Moulding; for the corresponding construction — baguette | Corner joint profile, presence of the required rebate |
| Assemble a post, decorative rod, or composite turned part | Construction kit elements | Diameters, holes, and joint geometry |
A complex item will require several groups, but starting with all of them at once is inconvenient. For a furniture portal, first choose the verticals and the top finial. For a chest of drawers — parts related to support, drawer opening, and the actual dimensions of the fronts. Small accents are then selected to match this base.
If the task is broader than carved decoration and includes legs, handles, turned parts, start with the general catalog of wood and MDF products. Inside the product card, be sure to check the material: the name of a large section does not mean that all items presented in it are made of the same wood.




Carved overlay: selection by place and direction
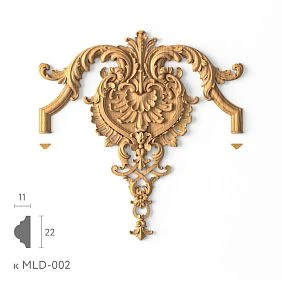
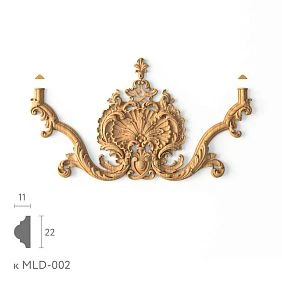
Carved decorative inserts for furniture They are suitable for the fronts of cabinets, chests of drawers, dressers, doors, panels, and furniture portals. They are convenient to choose when you already have a surface on which a separate relief element needs to be placed.
First, determine the direction. On a narrow side post, an elongated vertical piece is needed. Above a door, a horizontal one. In the corner of a frame, the pattern should turn inward into the composition and leave room for the profiles that meet it. The central overlay can be symmetrical about one or two axes; this is checked against the pattern itself.
Rotating the product in the photo does not always solve the problem. After turning, branches and scrolls may end up pointing downward, and a straight section of the ornament may move off the intended axis. Save the image in the working orientation and apply it to the facade drawing. This kind of review reveals an error faster than comparing cards in open tabs.
There is also a less obvious limitation — the support on the reverse side. A wide openwork overlay may have a relatively small contact area with the base. If there is a change in planes at the installation point or the frame profile protrudes, checking the outer width alone is not enough. A rear view or a drawing will be needed to understand where the piece actually fits against the surface.
For purchase, leave two or three options that fit by placement and geometry. From those, choose the pattern. Otherwise, a favorite overlay has to be shrunk on the screen until it conditionally fits, even though the corresponding size may not exist in the catalog.
Our factory also produces:
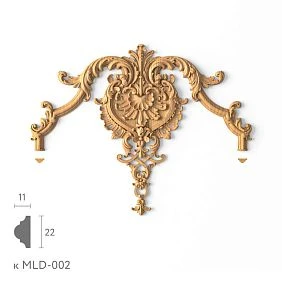
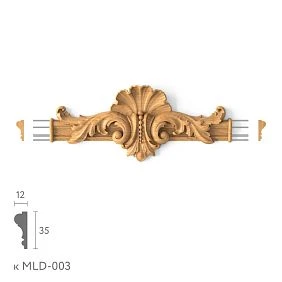
When it is better to choose a wooden rosette
A rosette is convenient for a compact accent: the center of a panel, repeating nodes, the intersection or endpoint of decorative lines. It is easier to fit into a square or nearly square field than a long overlay. In a group wooden rosettes look for a shape that corresponds specifically to this place.
For a round rosette, check the diameter and projection. For a square one, check the sides, the position of the pattern, and the orientation relative to the frame. Not every rosette allows arbitrary rotation: geometrically identical dimensions do not yet mean the same perception of the ornament in all positions.
If moldings meet the rosette, draw the joint at a large scale. The profile may butt against the side edge of the piece, fit under it, or stop with an offset — these are different solutions. The thickness and width of both products must support the chosen option. A small rosette into which wide moldings converge may simply disappear between them.
For a series of identical accents, check the extreme positions. There is usually more space in the middle of the panel; near the trim, side wall, or handle, the same element may not fit within the dimensions. It makes sense to confirm the quantity in the order after checking the entire row.
Get Consultation
Bracket: check the assembly under a shelf or protrusion
wooden bracket they are selected for a specific assembly under a shelf, cornice, countertop, or other protrusion. Here, two views are needed at once: front and side. The frontal photo shows the pattern, while the side geometry shows how the product will occupy the space between the vertical base and the horizontal part.
Compare the bracket height with the available section of the wall, and the depth with the shelf overhang. Look at where the fasteners run and which surfaces are provided for contact. A bracket may look suitable in overall shape but not have the required platform at the specific connection point.
The decorative appearance of a part does not confirm its load-bearing capacity. If a load is to be transferred to it, before purchase you need data on permitted use and a decision on fastening to the base. In the absence of such data, the support is calculated separately, and the wooden element is used according to its confirmed purpose.
For a pair of brackets, also check side visibility. In an open console, both parts are viewed from different sides; in a niche, some surfaces are hidden. This determines whether the chosen finish is sufficient and whether the relief matches the appearance that will remain after assembly.
The capital is selected to match the vertical and the cornice
A capital has two adjacencies: below is a pilaster, post, or column, and above is a cornice or another horizontal part. Therefore, the selection order is as follows: determine the vertical, take the dimensions of its upper part, select the capital, and check the upper junction.
In the section wooden capitals focus on the shape and dimensions of the selected version. The overall width of the product shows how much space the decor will occupy, but it does not always indicate the width of its lower junction. A capital with wide side scrolls may have a relatively narrow central part.
On the drawing, it is useful to mark three dimensions separately: the width of the vertical, the width of the lower part of the capital at the junction, and the maximum outer dimension. Then check the depth. If the top of the pilaster and the lower part of the capital are in different planes, a step will appear on the facade, which must be planned for in advance.
Round, semicircular, and flat parts cannot be considered interchangeable based on height alone. Their fit differs. The presence of the word "capital" in the name also does not make the product a ready-made support for a load-bearing structure: decorative and structural functions are verified separately.
A pilaster, a column, and a composite post solve different tasks
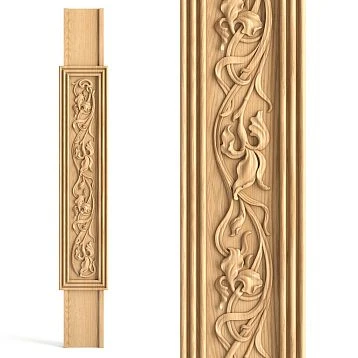
A pilaster is needed when the entire vertical of the furniture is being designed: from the lower base to the upper termination. It has length and a connection to neighboring elements. For a small free area on the facade, an overlay is often sufficient; for the side of a bookcase or a portal, it is more convenient to consider a full vertical composition.
Choosing Wooden pilasters and columns, distinguish between a flat abutment and a three-dimensional form. A column requires depth clearance and a different base solution. A half-column also protrudes more than a flat part. This is especially noticeable near an opening door: free space in the front view does not yet mean free movement of the leaf.
For a composite vertical, calculate the total height according to the connection drawing. If the elements are joined end to end without overlap, their heights are added. If one fits into another or overlaps it, the corresponding sections are subtracted from the sum. Simply adding all the dimensions from the cards in such a case will overstate the final size.
When the project includes a turned post, a decorative rod, or a set of separate three-dimensional parts, the following will be useful wooden constructor elements. Here diameters and holes need to be coordinated. The same wood species and a similar grain pattern do not guarantee that two parts will connect to each other.
Molding and trim: choose the profile, ends, and angles
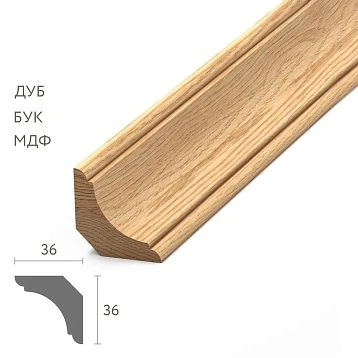
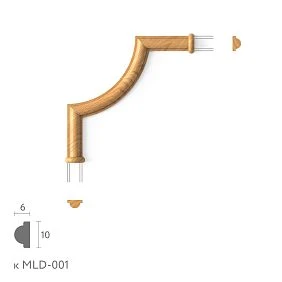
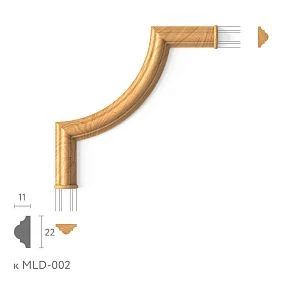
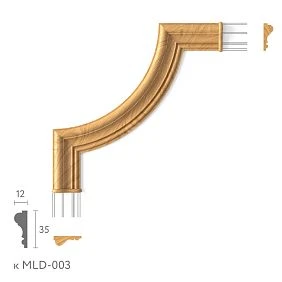
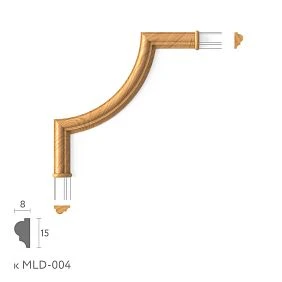
For a frame, frieze, or long border, go to wooden moldings and trim. For a long part, first evaluate the cross-section. It determines the width of the visible strip, the height of the relief, and how the profile will fit against the adjacent surface.
Look at the future end of the line. The moulding may terminate at the edge of the facade, meet an outlet, connect to another profile, or form a closed frame. If the end remains open, its appearance must be decided before ordering. Suitable corner and end pieces are sought among decoration for moldings, checking compatibility with the specific profile.
Two products with the same width may join poorly due to different heights and positions of the relief. One has a thin edge, while the other has a protruding bead in the same place. Therefore, the series name is useful as a hint, but the final decision is made based on the joint drawing or a trial assembly.
For a decorative frame on a surface, a molding is often sufficient. If the frame must hold glass, a mirror, or a panel, a construction with the appropriate seat is required. In this case, check the presence and dimensions of the rabbet on the selected baguette, or provide for it separately. A similar face pattern does not mean the same construction on the back.
First, measure the working area
The size of the entire door rarely matches the available space for the decor. Part of the surface is already occupied by the frame, the frame profile, the handle, the lock, or other details. You need the size of the area where the selected product can actually be installed.
Let's consider a conventional facade 500 mm wide and 700 mm high. If the side parts of the frame take up 40 mm each, the space between them is:
500 − 40 − 40 = 420 mm.
Suppose the design requires leaving another 25 mm from the frame to the edges of the overlay. Then the allowable width of the overlay in this area is:
420 − 25 − 25 = 370 mm.
This is a calculation for the selected example, not a universal offset standard. The height of the free area is calculated separately. If there is a handle inside the area, the available section may cease to be rectangular altogether: there is enough space at the top, but in the middle the ornament already intersects with the hardware.
A convenient order of checking:
- Mark the boundaries of the flat section and the position of the hardware on the front.
- Draw the axis of the intended decor and the selected spacings.
- Draw the outer contour of the part at full size.
- Check where its mounting areas, thin ends, and protrusions will be.
A paper template shows the area and position. To assess thickness, add a temporary spacer of the appropriate height or use a sample. Look at the item from the side from which it will be seen in the room: the same overlay may be perceived differently on a closed door and on an open one.
On a surface with a recess or bulge, also measure the difference in planes. A part that fits within the contour in the photo will not necessarily sit against the base without a gap.
How to read dimensions A, B, and C
The letters in the filter help narrow down products, but their meaning should be verified against the specific product's diagram. In different product groups, they may indicate height, width, depth, or thickness. Carrying over a familiar designation from an overlay to a bracket without verification is inconvenient and risky for ordering.
For flat decor, two dimensions describe the position on the surface, and the third describes the protrusion. For a bracket, depth is related to the shelf overhang, while for a capital it is also related to the mounting shape. It is useful to transfer both the letter designation and a clear label into the specification: for example, "width according to the diagram," "height," "maximum protrusion."
Dimension C cannot be automatically equated with the gap after installation. The final position is affected by the base, the mounting method, and other specified layers. You should compare the assembled unit: from the original furniture surface to the most protruding point.
Open the door to the required angle and check its movement relative to the adjacent front, side panel, and handle. For a pull-out drawer, the clearance under the countertop and the distance to neighboring protrusions are important. A static test fit with the furniture closed does not reveal all such intersections.
If the product page does not show the required view, check the available drawings and models or request the missing dimension. A photograph cannot be used as a dimensional drawing: perspective and image scale do not allow reliable reconstruction of the mounting geometry.
Beech, oak, and preparation for the future finish
The material is chosen together with the finish. For furniture intended for opaque enamel, beech is often considered; for a pronounced wood texture, oak. But these options do not exclude other solutions: beech can also be tinted, and oak can be painted with a covering coating. The question is what surface needs to be achieved and how much preparation it will require.
Under a clear finish, the color and pattern of the wood itself are compared. If the doors are oak, an oak overlay usually provides a closer basis for tone matching than a part made of another species. At the same time, the same material name does not guarantee the same shade after coating: the pattern, structure, and original color of individual blanks vary.
Under enamel, surface preparation and the requirements for the visible texture come to the fore. If a smooth surface without readable pores is required, this must be included in the preparation and painting system. The word "enamel" itself does not mean that one coat will hide the characteristics of the substrate.
In the description quality of STAVROS products finishes for enamel and for tinting differ. They have different requirements for selecting wood by color and texture. Therefore, it is not enough to specify only "beech" or "oak" in the order: transfer the available finish from the product card and coordinate it with the finisher.
Separately check whether the part is sold unfinished and what surface preparation is included in the selected option. Do not take an image of a painted product as confirmation that exactly such a finish is included in the price. When comparing offers, record the same scope of supply — otherwise the cheaper line item may refer to a different degree of readiness.
Enter the left and right parts as separate lines
A paired ornament is especially sensitive to direction. Two identical overlays may face the same way, although mirrored ones are required on the facade. A 180-degree rotation can also flip the pattern and fail to produce the needed pair.
If the manufacturer designates the sides with the letters L and R or with different item codes, preserve this designation in full. In your own list, add the Russian labels "left" and "right" and attach a facade diagram. It is necessary to understand the side the same way: for example, when looking at the closed furniture from the front.
For three identical cabinets, where each has one mirrored pair, three left and three right elements are required. The entry "overlay — 6 pcs." loses this distinction. It is especially inconvenient for a partial delivery or a repeat order, when the composition of the set can no longer be reconstructed from a single total quantity.
Corner elements are checked against all frame positions. Sometimes one pattern allows rotation, and sometimes different versions are required for the needed direction. The decision is made based on the layout diagram, not on the assumption that all four corners are necessarily identical.
When a sample is needed before purchasing a set
A sample is useful where a question remains that the product card does not answer: the actual depth of the carving, the appearance of the wood after finishing, a complex junction, or ease of access to the handle. For a simple repeat purchase of an already agreed part, such a check may be unnecessary. For a new item number for a furniture series, it helps limit the cost of a possible mistake.
Section product samples use it according to the purpose of the sample. A small fragment of material allows you to evaluate the texture and try the finish. The geometry of a bracket or the fit of a large overlay is checked on the product itself or on a reliable mock-up of the corresponding shape.
Fitting and test staining are different checks. First, place the part against the location, inspect the joints, and check that it opens. Then test the exact preparation and coating sequence planned for the order. A flat sample does not fully show how primer and paint will behave in the narrow recesses of the carving.
When working with tinting, compare the sample with the main furniture part after the same completed finishing cycle. Raw wood next to an already lacquered surface cannot be considered a full-fledged color test.
Label the approved sample: item code, material, finish, coating compositions, and date. It will be useful for reordering and will help the finisher reproduce the agreed result without guessing from a photo.
Specification: how to record a specific item code
The order schedule links the selected product to the installation location. Give each item a short code on the drawing: H-01 for the overlay, R-01 for the rosette, or any other clear designation. These internal codes do not replace the seller's item codes.
Below is a form to fill in, not a list of existing products. All designations in the “Item code” column must be replaced with data from the selected product cards.
| Position on the drawing | Item code from the catalog | Dimensions and orientation | Material and finish | Quantity |
|---|---|---|---|---|
| Н-01, left overlay | Enter the exact article number of the left part | A × B × C according to the diagram; front view | Selected species, finish-ready version | 1 pc. per item |
| Н-02, right overlay | Enter the exact code of the right part | A × B × C according to the diagram; front view | Same approved finish | 1 pc. per item |
| R-01, rosette | Enter the exact code | Field size and maximum protrusion | Selected species and finish | By facade scheme |
| KR-01, bracket | Enter the exact code | Height, width, depth per diagram | Selected species and finish | By the number of nodes |
| M-01, moulding | Enter the exact profile SKU | Cross-section and commercial length | Selected species and finish | According to the cutting map |
In the working table, also add a link to the product page, the price of the selected finish, and a note on the coating. For linear stock, keep the lengths of cut pieces separately. For several identical furniture items, two quantity columns are useful: per unit and for the entire order.
Save the parameters of the variant that was actually added to the cart. A single product page may offer several sizes and materials; a link to it without these details does not fully restore the order.
Before payment, compare the bill of materials with the invoice line by line. Pay especially close attention to similar product codes, mirrored pairs, units of measurement, and material designations. This is exactly where a substitution can be noticed before the parts end up on the assembly table.
Piece items and linear trim are calculated differently
For overlays, rosettes, and capitals, the basis of calculation is simple: the number of parts on one item is multiplied by the number of items. If four identical cabinets each have two identical rosettes, eight rosettes are required. A reserve for trial finishing or replacement of a damaged part, if needed, is added as a separate line with a clear reason.
For molding, first a list of segments is compiled, then they are laid out across stock bars. The total length shows material consumption, but does not guarantee that all parts can be obtained from the calculated number of bars.
Conditional example: five solid segments of 950 mm each are needed. For the example, let us take the stock length of a bar as 2400 mm. The total requirement is:
5 × 950 = 4750 mm.
Two bars yield 4800 mm — 50 mm more than this sum. However, from one bar only two solid segments of 950 mm can be obtained: three require 2850 mm even before accounting for saw cuts. From two bars, four segments will be obtained. For five, three bars will be needed if joining segments is not provided for.
| Bar in the conditional calculation | Required segments | Remainder before accounting for saw cuts and trimming |
|---|---|---|
| First, 2400 mm | 950 + 950 mm | 500 мм |
| Second, 2400 mm | 950 + 950 mm | 500 мм |
| Third, 2400 mm | 950 мм | 1450 мм |
In a real cutting plan, the kerf width, end trimming, profile direction, and the accepted measurement basis for angled joints are taken into account. For frames, it is recorded separately on which side the dimension is specified — along the outer, inner, or another agreed line. If the profile has a repeating ornament, pattern alignment is also checked.
The remaining offcuts can be assigned to short sections of another unit, but only if the profile, wood, and finish match. A nominal percentage allowance does not replace such a layout: in the example given, the reason for the third strip is the length of the solid parts.
Example order for one chest of drawers
Suppose the project has three wide drawers with two handles each, four legs, two decorative overlays, one central rosette, and molding frames. This is the selected configuration for the example. For another facade, some items may not be required.
| Group | Quantity in the example | What must be agreed before ordering |
|---|---|---|
| Legs | 4 pcs. | Height, mounting, purpose, and load conditions |
| Handles | 6 pcs. | Location, mounting dimensions, and grip area |
| Overlays | 2 pcs. | Whether they are identical or mirrored; free field |
| Central socket | 1 pc. | Exact location on the drawing, size and protrusion |
| Molding | By cutting | Profile, frame layout, segment lengths, and strips |
First, choose Wooden furniture legs and tie them to the carcass. They affect the overall height and the way the chest of drawers rests. Then fix Wooden furniture handles: each drawer must retain space for a comfortable grip. After that, the available area for carving and frames becomes clear.
Check one drawer in the assembled position. The overlay may fit freely between the handles but interfere with fingers when opening. It is enough to check this assembly on a full-size template with a real handle so as not to carry the mistake over to the remaining fronts.
The central rosette requires special attention. If it is on a fixed frieze, it is tied to the carcass. If it is on a drawer, it is tied to its front. The part must not accidentally overlap the boundary of two independently moving parts. In the overall drawing, such a break is easy to miss, especially when all surfaces are shown in a single color.
In this example, the chest of drawers specification contains six items if the left and right overlays are listed separately, while all other groups have one article number each. If the upper handles differ from the lower ones or two profiles are needed for the frames, there will be more lines. You need to count the versions to be ordered, not just the group names.
Example for a wardrobe or furniture portal
For a tall wardrobe, the sequence is different. First, the side verticals are determined, then their bases and capitals, and after that the cornice. Overlays on the doors and handles are selected within the already established boundaries. This order makes it possible to check the overall structure before purchasing small parts.
Draw one side vertical in section. Mark the carcass plane, the pilaster projection, the position of the capital, and the cornice overhang. Then add the trajectory of the nearest door. If it must open wider than a right angle, this is not visible on a single front drawing — a separate motion check will be required.
For the two sides of the portal, determine which elements repeat and which are mirrored. Pilasters can be identical, whereas the applied moldings facing them will require different versions. The "decor for the left side × 2" list only works after this symmetry has been verified.
Coordinate the height of the vertical with the overall height of the product and the space for the cornice. For built-in furniture, the actual niche dimension is added: it is checked on site, including surface deviations. You cannot choose a capital based only on the free space in the sketch if, during installation, a different gap remains above the cabinet.
If the project includes a protruding shelf or a cantilevered part, the question of its support is resolved before selecting decorative brackets. In the specification, it is useful to separate the parts that finish the visible joint from the fasteners and elements that make it work. Then, when purchasing decor, the necessary structural part is not lost.
What to compare in price and scope of delivery
Price is useful for comparison only together with the selected parameters. Two similar applied moldings may differ in size, wood, surface preparation, and whether a finish is included. For linear moldings, the unit of sale is added: the price per meter cannot be directly compared with the price of a whole strip.
Make up the cost of the set from the actually selected items. Separately account for the sample, the necessary reserve, delivery, and finishing work if they are not included in the delivery. For moulding, use the number of commercial strips from the cutting plan. Multiplying the net perimeter of the frames by the price per meter may underestimate the order amount.
When comparing two solutions, this question is useful: what work will have to be done after receiving it? One part fits in place right away; for the other, the frame must be redone or the handle position changed. In that case, the difference in the product price reflects only part of the costs.
Do not fix the assembly time based on a single status on the category page. Check the availability of the specific selected sizes, materials, and quantities. If the set consists of several groups, confirm whether all items will be ready by the required date and whether split delivery is acceptable for your project.
Where to buy wooden decor and how to place an order
If you need primarily carved wooden decor, it is convenient to continue your selection in the STAVROS catalog of carved elements. To place an order, prepare a schedule and a layout plan. Furniture images help explain the task, while product codes and parameters make it verifiable.
Workshops and manufacturers should review conditions for manufacturers. On this page STAVROS indicates shipment from a single piece. The availability of a specific version, the possibility of obtaining the required quantity, and the delivery time are confirmed with respect to your specific list.
Before payment, agree on the replacement of items, if it is permissible at all. A “similar element of the same size” may have a different mounting surface or join differently with the adjacent profile. The replacement must be returned to the drawing and checked under the same conditions as the original option.
See the terms of calculation and order receipt in the section payment and delivery. For long linear stock, clarify the transport dimensions and packaging in advance. If delivery goes directly to the site, determine who will receive the parts and verify them against the list before finishing begins.
Before sending the order, go through one chain: installation location → element type → dimensions and joints → wood and finish → exact article number → quantity. After this check, the cart contains a specific set for your project.
Additional questions before purchase
Can a replacement for an old part be found from a single photograph?
A photograph helps find a similar shape, but a replacement will require dimensions, a side view, and information about how it joins. Place a ruler next to the original part, photograph it without strong perspective distortion, and separately show the back side if it is accessible. For a surviving paired element, also compare the direction of the ornament. It is usually impossible to restore an exact match from the general appearance of the furniture alone.
What should I do if the required pattern is only available in a larger size?
First assess whether the free field can be changed without reworking the entire structure. Independently reducing a carved part can affect thin ends, symmetry, and attachment points. If trimming is not provided for by its design, it is more reasonable to choose another article number or separately clarify the possibility of manufacturing the required version. The availability of a standard product does not mean that a one-off order in an arbitrary size is possible.
Can leftovers from different deliveries be used in one product?
For opaque finishing, this is sometimes convenient if the profile, dimensions, and preparation requirements match. Under a transparent coating, first compare the wood and perform a test: differences may appear after tinting. Do not assign a leftover to a visible symmetrical area just because it fits along the length.
How should a set be accepted if painting will be done in another workshop?
Verify the item codes, dimensions, sides, and quantities before handing over to the finisher. Sort the parts by product or assembly and keep the labeling on the packaging. Along with them, hand over the specification sheet and the approved finish sample. The finisher must understand which elements form a single visible group and should be compared with one another.
Is furniture decor suitable for an exterior door or a damp room?
Such use must be agreed separately. Belonging to the furniture category and the chosen species do not confirm suitability for outdoor use, direct wetting, or constant high humidity. Before purchasing, describe the operating conditions, the location of the part, and the intended finish to the seller. The entire assembly must be checked: the wooden element itself, the base, the joint, and the surface protection. If the product's characteristics do not match these conditions or remain unknown, it is too early to choose it based on appearance alone.
What should be kept for reordering in a few months?
Keep the invoice, the item codes with the selected options, the layout drawing, and the signed finish sample. A photo of the finished furniture is useful for the overall look, but it does not replace information about the wood, dimensions, and execution. When reordering, check the availability of the same options and agree on any changes before payment.