Article Contents:
- 1. First identify the heating equipment: not every radiator can be covered
- Hot-water radiators
- Steam radiators
- Electric baseboard and fixed electric heaters
- A quick equipment decision table
- Why a removable screen matters
- The four layers of a well-planned radiator wall
- A material-by-material shopping decision
- Idea A: traditional window-wall millwork
- Idea B: transitional wood-slat screen
- Idea C: painted neoclassical wall panels
- Idea D: small apartment with the radiator visible
- Idea E: traditional entryway with durable detailing
- A practical ten-measurement survey
- Define an outside edge, not just an attractive width
- Understand inlet, outlet and face opening
- Calculate geometric open area without making a heating claim
- Why a solid shelf can change everything
- Cleanability is part of airflow
- MLDPU-001: delicate continuity with window casing
- MLDPU-004: subtle relief that reads from across the room
- MLDPU-002: a defined architectural line
- MLDPU-003: broader trim for larger wall fields
- MLDPU-027: clean half-round geometry
- Do not confuse similarly named materials
- Separate the product's decorative use from heater suitability
- Why decorative wooden rails and polyurethane trim work together
- Use the window as a visual reference, not as a structural support
- Give the baseboard a clean ending
- Keep decorative trim away from the functional openings
- Balance the blank spaces
- Example one: one wall frame measuring 60 × 38 inches
- Example two: two large 46 × 64-inch wall frames
- Example three: a 40-inch grille face with repetitive slats
- Step 1: confirm what the heater manufacturer permits
- Step 2: decide whether a physical cover is needed at all
- Step 3: prepare a measured elevation and section
- Step 4: choose the structural and decorative materials
- Step 5: address the wall substrate
- Step 6: mark and dry-fit the polyurethane trim
- Step 7: assemble only the permitted screen configuration
- Step 8: bond wall trim with a compatible product
- Step 9: finish joints, prime and paint
- Step 10: verify access, operation and the finished result
- Tone-on-tone white or warm neutral
- Painted wood grille with contrasting background
- Natural wood front with painted polyurethane wall trim
- Modern monochrome
- Living room: connect to the window wall
- Bedroom: prioritize quiet heating and clear access
- Dining room: coordinate with wainscoting
- Hallway: avoid projections and delicate low ornament
- Historic renovation: preserve serviceability
- 1. Building the cover before identifying the radiator
- 2. Treating a decorative grille as proof of adequate ventilation
- 3. Blocking the warm-air exit at the top
- 4. Making the front impossible to remove
- 5. Gluing polyurethane ornament onto the hot heater
- 6. Using an incompatible adhesive
- 7. Confusing structural rails with decorative molding
- 8. Ignoring the window sill and the baseboard
- 9. Overdecorating a small opening
- 10. Ordering from total footage alone
- 11. Assuming all STAVROS items are polyurethane
- 12. Forgetting room function and local rules
- 13. Painting without a materials plan
- 14. Presenting model-specific numbers as universal
- An order worksheet you can send to the seller
- Think about delivery of long pieces
- Can I make a DIY radiator cover from wood slats?
- Is polyurethane molding safe next to a radiator?
- Will a radiator cover reduce the heat in my room?
- Can I put a solid shelf on top of a radiator cover?
- What is the difference between a radiator screen and a radiator cover?
- How far should a wood-slat screen sit from a hot-water radiator?
- Can I attach polyurethane trim directly to an existing radiator cover?
- Which STAVROS polyurethane molding is best for the wall around a radiator?
- Is RK-001 a polyurethane molding?
- How do I calculate how many molding strips to order?
- Can I use polyurethane trim and natural wood in the same design?
- What if my radiator is an electric baseboard heater?
- Can I hide radiator valves behind a removable panel?
- Is polyurethane molding waterproof?
- Can I paint the heater and the molding the same color?
- Does STAVROS sell a ready-to-install radiator cover for every heater?
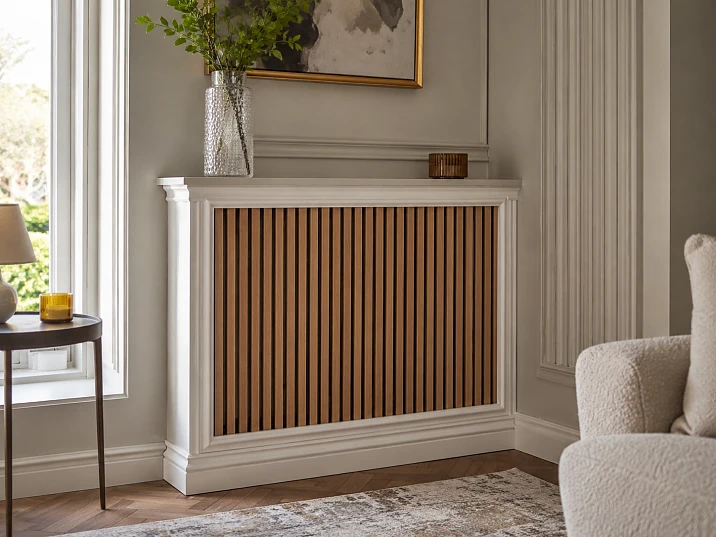
A radiator can be the hardest feature to integrate into an otherwise carefully designed room. It may sit beneath a beautiful double-hung window, interrupt a wainscoting layout, or break the line of a built-in cabinet. The temptation is to build a decorative box and make the heater disappear. Yet a good decorative radiator cover is not simply a box: it is a design decision that must respect how the heating equipment works.
For American homes with compatible hot-water or steam radiators, one possible approach is a ventilated wood-slat screen surrounded by restrained polyurethane wall molding. The wood or another appropriately specified material forms the removable screen and supporting frame; the decorative polyurethane trim belongs mainly on the adjacent wall, outside the appliance's required clearances. This division creates a traditional millwork appearance without pretending that a lightweight ornamental profile is a structural part, a heat shield, or a heater-rated component.
This guide explains the design, measurements, cut lists, material choices, ventilation questions, installation sequence, finishing, and buying decisions. It also shows when not to enclose a heater. The numbers in the design examples are illustrative layout calculations, not universally approved clearances. Always use the radiator or heater manufacturer's instructions and applicable local requirements to decide whether a cover is permitted.

1. First identify the heating equipment: not every radiator can be covered




Hot-water radiators
A hydronic radiator receives heated water from a boiler or other heating source. Some older units are substantial cast-iron sections; newer ones may be steel panels or fin-tube assemblies. Their heat reaches the room through a combination of radiation and air movement. A proposed cover changes both. Even an attractive, seemingly open enclosure can reduce output or prevent normal service access.
If the equipment manufacturer permits an accessory screen, use its instructions to establish clearances, air entry and exit, access to valves, and any required material properties. A cover cannot be approved merely because a piece of wood feels comfortable to the touch during a brief test. Actual surface conditions can change with boiler settings, weather, and operating cycles.
Наша фабрика также производит:






Смотреть весь Каталог продукции
Steam radiators
Steam equipment deserves additional caution. Valves, steam vents, piping, and radiator surfaces can become very hot. A decorative screen must not obstruct service or maintenance, and its materials must be suitable for the actual temperatures. If the radiator's identification or the building's system is uncertain, consult a heating professional before specifying a cover. The architecture should adapt to the machine, not force the machine into a sealed cabinet.
Получить консультацию
Electric baseboard and fixed electric heaters
Do not build a wood-and-polyurethane enclosure around an electric baseboard heater or fixed electric heater unless the heater manufacturer specifically authorizes that exact configuration. Electric resistance equipment can have different clearance and airflow requirements than a hydronic radiator. Covering the grille, trapping heat, or putting combustible material in the prohibited zone can create a fire hazard. An ordinary decorative radiator-cover tutorial is not an installation instruction for electric heat.
The U.S. Consumer Product Safety Commission has documented the dangers of blocked fixed-position electric heaters. Review its fixed-position electric heater safety research and, more importantly, follow the label and current manual for your heater. The familiar three-foot warning for portable space heaters is not a substitute for model-specific instructions for a fixed heater or hot-water radiator.
A quick equipment decision table
| Heating device | Initial design decision | What must be verified |
|---|---|---|
| Traditional hot-water radiator | Consider only a manufacturer-compatible ventilated and removable cover | Airflow, clearances, surface temperatures, valves and service access |
| Steam radiator | Request appliance- and building-specific advice before any enclosure | Hot surfaces, steam vents, access, approved materials |
| Electric baseboard heater | Do not assume a decorative screen is allowed | Exact manufacturer instructions and electrical/fire restrictions |
| Fixed electric wall heater or fan-forced heater | Keep its inlet and outlet unobstructed; no improvised enclosure | Product listing, clearances and servicing requirements |
| Radiator type unknown | Pause the cover design | Identify make, model and heating system first |
A safer design is often wall molding around the radiator area, with the radiator left completely exposed. That can deliver much of the visual benefit of architectural trim without changing the heater's enclosure.
2. What a decorative radiator cover can and cannot do
A cover can soften the visual impact of older equipment, coordinate a window wall with baseboards and applied panel molding, and provide a consistent architectural rhythm. A screen with deliberate proportions may read more like custom cabinetry than a piece of mechanical equipment. In a traditional home, it can connect the radiator area to chair rails, picture-frame molding and other millwork.
It cannot be assumed to improve heating efficiency. Concealing a radiator is rarely thermally neutral. A solid front restricts air movement and blocks radiant heat; a solid top may trap warm air; an undersized opening may create a bottleneck. Nor should the finished assembly function as a bench, shelf, child barrier, storage cabinet, or protective enclosure unless the complete design has been engineered and approved for that use.
Separate the goals before drawing anything. The visual goal is to make the heater feel intentional. The functional goal is to preserve the equipment's approved operation. The maintenance goal is to keep valves, vents, drains, joints, and controls accessible. If the first goal conflicts with the second or third, change the design rather than accepting an unsafe compromise.
Why a removable screen matters
A radiator is part of a building service system. A future technician may need access to a shutoff valve, air vent, connection, or the back of a panel. A front panel that can be removed without destroying surrounding trim is generally more practical than a grille permanently fastened behind decorative corners. Plan the release mechanism, lifting path, and finish tolerance before cutting the frame.
Magnets or concealed hinges may be considered for an appropriate cabinet-style screen, but the mounting system must suit the finished panel's weight and location. Avoid loose or unreliable catches, particularly in a busy hallway or a home with children. A removable part still needs to be secure in normal use. If a component must carry a load, use suitable structural hardware; polyurethane ornament is not that hardware.
3. Use wood for the screen system, polyurethane for architectural decoration
The materials have different jobs. A wood frame can form a stable enclosure when appropriately designed and approved for the installation. A suitable slatted or perforated panel allows air passage and can be removed for service. Polyurethane molding is valuable because it creates crisp decorative lines on the surrounding wall and can be coordinated with other trim. It is not a substitute for structural timber, ventilating grille material, heat-rated components or mechanical fasteners.
An important distinction: polyurethane is a family of materials, not an automatic heat-resistance certification. The fact that a product is sold as interior molding does not confirm that it can be mounted directly against a working heater. Adhesive and paint may have separate temperature limitations. The safest general way to use a product such as STAVROS MLDPU molding in this project is to make the wall behind and around the radiator part of the design, while keeping it outside all prescribed heater clearances.
The four layers of a well-planned radiator wall
Layer one: the existing heating system. Leave all manufacturer-required clearances, air paths and service points free. The radiator is the fixed element, not the decoration.
Layer two: the approved screen or cover. Where allowed, an independent structural frame and an appropriate open grille create the visible screen. Confirm how it is installed, removed and cleaned.
Layer three: wall finishing. Drywall, plaster, paint or an existing panel system provides the stable background. Any damaged or damp wall should be repaired before trim is installed.
Layer four: applied architectural molding. Decorative profiles on the adjacent wall align with the window casing, baseboard and neighboring wall panels. This is where STAVROS polyurethane molding profiles can contribute most naturally.
A material-by-material shopping decision
| Component | Appropriate material role | Why it matters |
|---|---|---|
| Structural frame | Properly specified wood or another approved structural material | Supports the screen and hardware without relying on ornament |
| Ventilated front | Suitable metal grille, slats or tested assembly where allowed | Maintains the specified air passage and removability |
| Outer decorative wall border | Polyurethane profile on a compatible wall outside hot zones | Adds architectural rhythm without becoming heater hardware |
| Front-panel edge trim | Material specifically approved for the panel's temperatures and service conditions | Edge details must not defeat ventilation or panel removal |
| Fasteners, hinges and catches | Hardware rated for load and operating conditions | Keeps the unit stable and serviceable |
| Adhesive and coatings | Products compatible with both substrate and expected conditions | Prevents premature bond or finish failure |
Do not use a generic statement such as “all polyurethane is waterproof and heat-resistant” to justify a material purchase. The properties of the finished assembly matter more than the category name.
4. Five radiator-cover design ideas for American interiors
Idea A: traditional window-wall millwork
In a living room with painted wood casing and a generous windowsill, a restrained ventilated screen can align visually with the existing window trim. Keep the cover's outer width subordinate to the window or use the same centerline. A slim polyurethane wall frame outside the heater zone can pick up the window casing's color, while a darker open grille adds depth.
The most polished result often comes from a small number of consistent lines: the window's vertical edges, the screen's vertical supports and perhaps one horizontal line that continues into nearby wainscoting. Resist adding multiple unrelated ornate motifs. The radiator wall will look deliberate when it belongs to the room's larger composition.
Idea B: transitional wood-slat screen
For a house blending traditional millwork with contemporary furniture, straight slats and a simple perimeter can be effective. White or warm-gray surrounding trim makes the wall quiet; a natural wood screen introduces texture. A narrow MLDPU-001 polyurethane molding can be considered for fine wall-frame accents, provided it is kept away from the hot appliance zone.
Here the gaps between slats are part of the visual design and the airflow review. They must never be selected solely because a photograph looks attractive. A heating professional may require a more open grille or a different cover configuration.
Idea C: painted neoclassical wall panels
A radiator below a wide window can be integrated into a wall of symmetrical applied panels. Decorative polyurethane molding can outline wall fields to the left and right of the window and continue at a consistent elevation elsewhere. The screen itself can remain simpler so that the wall's architecture supplies the ornament.
A medium-width profile such as STAVROS MLDPU-002 has more visible relief than a very narrow strip. It may suit nearby painted wall frames, but that does not mean it should be attached to the radiator cover's inner heat-exposed surfaces.
Idea D: small apartment with the radiator visible
In a compact bedroom or apartment, a full cover can consume valuable floor space and obstruct a heat source. One alternative is a painted wall frame above or beside the equipment, aligned with the sill and nearby furniture. The radiator remains accessible and unobstructed, and the molding visually organizes the space around it.
A finish chosen to match the radiator, wall and baseboard can also reduce visual clutter. Decorative improvement does not always require building a cabinet. For renters, skipping an enclosure is often especially sensible because alterations to heating equipment may be prohibited by the lease or building rules.
Idea E: traditional entryway with durable detailing
Hallways expose trim to shoes, bags, vacuum cleaners and furniture. Put robust, serviceable materials in the contact zone. If the radiator is part of a busy entry, decorative polyurethane molding placed high enough on the surrounding wall may help echo existing panel proportions without becoming a vulnerable low-mounted corner detail.
A radiator-cover design should never create a projecting snag point or a tripping obstruction. If the appliance stands proud of the wall, compare the intrusion of the proposed cover with the available walking clearance. Architectural symmetry is not a good reason to reduce safe passage or interfere with a doorway.
5. Measure the whole radiator wall before choosing trim
The most frequent planning error is measuring only the visible metal radiator. A useful drawing includes the window, finished sill, floor, baseboard, supply and return pipes, controls, thermostat, furniture and nearby door swing. The enclosure and the decorative wall molding must be planned as one composition, but the heater's restrictions determine what is possible.
A practical ten-measurement survey
- Record the radiator's overall width, height and depth, including valves and protruding connections.
- Measure the distance from the finished floor to the radiator's lowest point.
- Measure from the radiator's highest point to the underside of the sill or other obstruction.
- Record clear wall space at left and right, including any pipe runs.
- Measure the full window opening and its finished casing width.
- Locate the window centerline relative to the room wall, not only to the radiator.
- Note the sill's projection beyond the wall and any return details.
- Record baseboard height, projection and any corners that would conflict with the cover.
- Locate access to vents, valves, drain points, controls and service fasteners.
- Document the appliance make/model and relevant manufacturer clearances and air-opening requirements.
Take photographs with a tape measure in view, then sketch a front elevation and a side section. The elevation will show whether the proposed wall molding looks balanced. The section reveals the dangerous or inconvenient conflicts: a cover extending too close to the radiator, a top panel restricting rising air, or a decorative profile hiding a valve.
Define an outside edge, not just an attractive width
Window trim, slats and wall molding have their own physical widths. If the decorative surround is to sit two inches outside the proposed screen on each side, those two inches must be available after accounting for the screen's outside dimension and the molding's visible width. Otherwise the left and right borders can become uneven.
Decide whether each dimension refers to an outside edge, inside clear opening, or centerline. This is crucial for mitered picture-frame molding. A 50-inch outside dimension is not interchangeable with a 50-inch clear opening once a 1.38-inch-wide molding is installed along both sides.
6. How much ventilation does a wood-slat radiator screen need?
There is no single decorative slat spacing that is correct for every heating system. Equipment differs in heat output, convection path, surface temperature and manufacturer recommendations. Some radiators are not suitable for a fabricated cover at all. Others may accommodate a specific approved grille. Start with the device requirements, not with an arbitrary gap shown on a social-media photograph.
Understand inlet, outlet and face opening
Warm air tends to rise. A screen that allows air to enter through its lower area but blocks the top can still severely interfere with a convective heater. Likewise, an attractive front grille does not compensate for a sealed top when the equipment depends on upward air movement. The actual inlet and outlet location can differ by radiator type; determine them from its documentation.
The front opening deserves separate attention. Closely spaced boards create a much smaller clear opening than their appearance suggests. A woven cane screen, decorative mesh, perforated metal sheet and vertical wood slats can have radically different free areas despite covering the same rectangular opening. The percentage of visible gaps is a useful first measurement, but it does not predict acceptable heater performance by itself.
Calculate geometric open area without making a heating claim
Suppose a hypothetical slatted panel has a 40-inch clear width. It contains twenty vertical slats, each one inch wide, separated by nineteen one-inch gaps. The slats occupy 20 inches and the gaps occupy 19 inches. Another inch remains as half-inch side margins.
The simple horizontal gap fraction is 19 ÷ 40 = 47.5%. That is only a geometric ratio, ignoring cross rails, rear supports, edge framing, screws, and any other restrictions. It is not evidence that the radiator will receive enough air, that the materials will remain cool, or that such a screen meets a manufacturer's specification. A narrower actual opening can reduce free area further.
A more complete evaluation measures the unobstructed inlet, outlet and front surfaces separately and follows the heater documentation. If the documentation does not permit a cover, choose an architectural treatment on the surrounding wall instead. Never present one sample gap dimension as a universal recommendation.
Why a solid shelf can change everything
A broad solid top may seem useful for decor, plants or books. Above a radiator, however, it may interfere with warm-air discharge and accumulate heat. It also encourages people to put objects where they may experience excessive temperatures. A cover top must be part of an approved system, not an improvised display surface. Do not place candles, fabrics, electronics or water containers over the heater simply because the cover visually resembles a sideboard.
Cleanability is part of airflow
Dust buildup in a grille reduces useful openings and complicates cleaning. Consider the direction of the slats, the ability to reach behind them, and how the front panel will be removed. A beautiful, tight lattice that cannot be cleaned without dismantling the wall is a poor long-term choice. The goal is maintainable architecture, not a one-time photo.
7. STAVROS polyurethane moldings: verified profiles for the surrounding wall
The STAVROS catalog offers several paintable decorative wall moldings with published profile dimensions. These examples are relevant to wall trim near a radiator cover—not an endorsement for placing them in a heater's hot zone. Before ordering, review each product's current technical drawing, material, finish and permitted environment. Profile width and projection should be considered separately.
| STAVROS SKU | Face width × projection | Supplied length | Possible wall-design role |
|---|---|---|---|
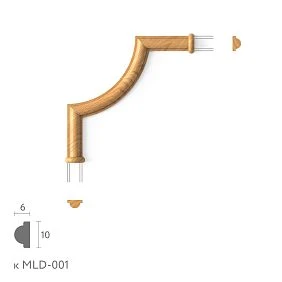
| MLDPU-001 | 0.39 × 0.24 in (10 × 6 mm) | 102.36 in (2600 mm) | Fine border near a window or small wall frame |
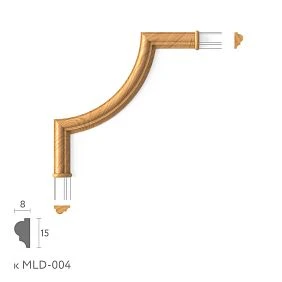
| MLDPU-004 | 0.59 × 0.31 in (15 × 8 mm) | 102.36 in (2600 mm) | Medium-fine wall frame with visible relief |
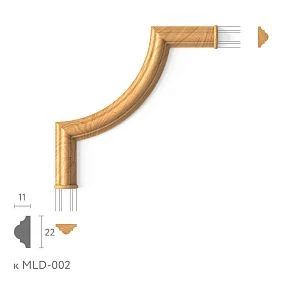
| MLDPU-002 | 0.87 × 0.43 in (22 × 11 mm) | 102.36 in (2600 mm) | Stronger primary decorative border |
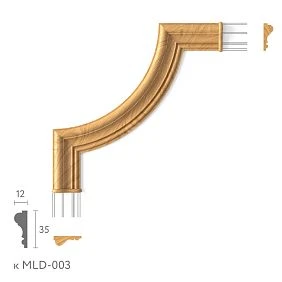
| MLDPU-003 | 1.38 × 0.47 in (35 × 12 mm) | 102.36 in (2600 mm) | Broad wall panel or larger surround |
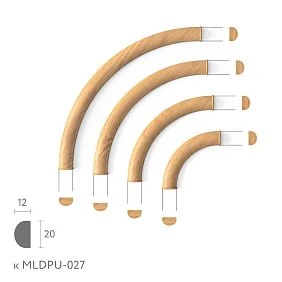
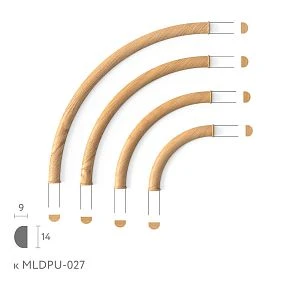
| MLDPU-027 | 0.55 × 0.35 or 0.79 × 0.47 in (14 × 9 or 20 × 12 mm) | 102.36 in (2600 mm) | Rounded, understated accent line |
These are polyurethane profiles, not wooden radiator grille slats. Their dimensional data come from the individual STAVROS product descriptions and are intended for design planning. A manufacturer-approved heater enclosure would require a separate materials and safety specification. Always recheck current catalog options when ordering.
MLDPU-001: delicate continuity with window casing
A fine profile can be appropriate when the existing window and baseboard are simple. It gives a crisp painted outline without overpowering the wall. For example, a framed field above a radiator can echo the width of another wall panel without pretending to be a full-scale door casing. Use the MLDPU-001 product details to check the actual cross-section before laying out mitered corners.
MLDPU-004: subtle relief that reads from across the room
At 0.59 inch wide, MLDPU-004 provides more visual presence than the 0.39-inch profile without approaching a deep classical surround. It may be useful on the wall around a moderate-size decorative screen. Pair it with consistent gaps to the nearby window casing and existing trim. The right spacing cannot be determined from the catalog image alone: make a full-size paper or cardboard mockup if the wall is narrow.
MLDPU-002: a defined architectural line
MLDPU-002 can give the composition a clearer border when the room already uses panel molding or traditional trim. The 0.43-inch projection creates a visible shadow. Remember that projection is also a physical clearance dimension; do not let the profile protrude into a required heater or service area. Compare the polyurethane MLDPU-002 profile with the adjacent door casing and baseboard before choosing.
MLDPU-003: broader trim for larger wall fields
MLDPU-003 is 1.38 inches wide. This scale can work on a large wall panel or a generous decorative field beside a window, but it may look heavy when squeezed between a radiator and a narrow sill. It is a wall molding, not a substitute for a manufacturer's radiator-cover perimeter. Try a sample against the finished wall and examine it from the normal viewing distance.
MLDPU-027: clean half-round geometry
MLDPU-027 has two verified sizes and a rounded face. It offers a more restrained look than stepped decorative profiles, especially in contemporary or transitional rooms. A half-round line can coordinate with vertical slats without copying their geometry exactly. Choose the smaller or larger version according to the scale of the entire wall, and retain the product variant on the purchasing list so the ordered pieces match.
Do not confuse similarly named materials
The STAVROS site also includes wood and MDF trim, as well as products made from other polymers. A number beginning with MLDPU refers to the specific polyurethane profiles discussed here, but never identify an unrelated MLD or RK product as polyurethane on the basis of its name or appearance. Read the actual material field. A consistent painted look can combine wood and polyurethane while keeping their different functions clearly defined.
8. Wood rails and the grille: use real product specifications
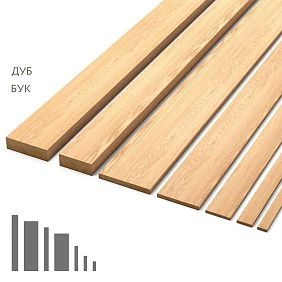
STAVROS lists the RK-001 wooden rail with beech and oak options and multiple cross-sections. The English product page shows a nominal 94.49-inch (2400 mm) stock length. Some variants are slender decorative strips, while others are much wider and thicker. These differences matter for weight, surface area, jointing and the appearance of a proposed slatted assembly.
For example, the 15 × 5 mm RK-001 option is approximately 0.59 × 0.20 inch; the 80 × 23 mm option is approximately 3.15 × 0.91 inches. Those are materially different pieces despite sharing the same family code. Do not assume the original article's reference to an “80 mm wooden slat” represents the only available version. Nor does listing an RK-001 wood rail certify it as a radiator screen grille.
Separate the product's decorative use from heater suitability
A rail that works beautifully on an accent wall may be too wide, too thick, or otherwise unsuitable for a heat-exposed cover. Ask for the wood species, section, finish, fastening details and suitability for the specific environment. If the appliance manufacturer calls for a particular open grille, use a product meeting that requirement instead of improvising with a furniture rail.
Wood can expand and contract with moisture and temperature changes. Paint or clear coating must be chosen for the actual service conditions. A wood-framed screen should allow for movement without jamming its removable front; narrow fit tolerances and a heavy finish build-up can make a once-removable panel difficult to open. For routine cleaning, a simple front is usually more useful than a grille with many inaccessible recesses.
Why decorative wooden rails and polyurethane trim work together
Their visual relationship can be excellent when they are used in appropriate locations. Wood contributes a real-grain surface, directional texture and potentially the structural support of an engineered cover. Polyurethane contributes reproducible ornament around the surrounding wall. Paint can make separate parts feel coordinated, but a shared color must not erase the distinction between structural and purely decorative components.
If you are buying both, create two shopping groups: wooden screen components and polyurethane wall decoration. That reduces the risk of receiving all the attractive trim before discovering that the actual cover lacks safe hardware, access or adequate ventilation.
9. Proportion rules: coordinate the screen with windows and baseboards
A radiator under a window rarely sits in a perfectly symmetrical opening. Pipes may emerge on one side; the sill may extend farther than the heating body; the window itself may be off-center. A successful composition acknowledges those constraints rather than making a fake symmetrical box that blocks hardware.
Use the window as a visual reference, not as a structural support
Center the visual composition on the window where appropriate, but do not attach a heavy cover to a decorative sill or a window frame without a proper structural detail. Windowsill material, attachment and load capacity vary. The sill is not automatically a suitable bracket. Where a cover is allowed, its structural anchorage should be selected on the basis of the actual framing and manufacturer-approved mounting method.
Give the baseboard a clean ending
A radiator-cover frame frequently intersects the room's baseboard. One solution is to terminate the baseboard cleanly at the sides of an independent cover; another may be to preserve a continuous baseboard behind a wall-only decorative composition. Which works depends on the cover's removal path and the heater's access requirements. Do not bury a service fastener behind an irreversible piece of molding.
Keep decorative trim away from the functional openings
A beautiful deep profile can cast a strong shadow, but that shadow may be a sign of a large physical projection. Check every dimension in the side section. A projecting wall molding should not encroach on an approved airflow passage, contact exposed heater components or prevent a front panel from lifting free. This is one reason narrow wall profiles are often more adaptable than oversized ornament at a crowded window wall.
Balance the blank spaces
The empty wall between casing and molding can matter more than the molding itself. Consider two symmetrical vertical lines outside the radiator area instead of one large decorative frame wrapping tightly around the heater. This approach makes the whole wall feel intentional and can preserve much more functional space than a box-shaped surround.
10. Cutting calculations: order molding by pieces, not just total feet
A polyurethane molding profile typically comes as a fixed stock length, and projects with repeated frames require a real cutting plan. A tape-measure perimeter calculation gives a useful first estimate, but it can undercount when the long cuts consume most of a stock piece. Corner miters, saw kerfs, trimming damaged ends and pattern alignment can make the difference between having enough material and stopping work.
Example one: one wall frame measuring 60 × 38 inches
Assume the dimensions represent the outside long-point dimensions of a decorative rectangle on the wall, well away from the radiator's restricted area. Its nominal perimeter is 2 × 60 + 2 × 38 = 196 linear inches, or 16 feet 4 inches. Each STAVROS profile in the table above is listed at 102.36 inches long.
A pure-length estimate is 196 ÷ 102.36 = 1.91, so at least two stock lengths appear necessary. An actual two-stock cut plan can work: cut one 60-inch side and one 38-inch side from each 102.36-inch length. That totals 98 inches per stock length, leaving approximately 4.36 inches before accounting for saw kerf and end trimming. Verify the long-point measurement convention and actual waste before cutting. Purchasing a spare length may still be sensible for a one-off project.
Example two: two large 46 × 64-inch wall frames
Now suppose the adjacent wall design uses two identical frames, each 46 inches wide and 64 inches high. Each requires two 64-inch sides and two 46-inch sides. Across two frames, the cut list is four 64-inch pieces and four 46-inch pieces.
The total is 4 × 64 + 4 × 46 = 440 linear inches, or 36 feet 8 inches. Dividing 440 by 102.36 gives about 4.30, suggesting five lengths by a naive linear-footage calculation. But a 64-inch vertical leaves only 38.36 inches of nominal stock, which cannot supply a 46-inch horizontal. Four lengths are needed for the long sides; two more supply the four short sides, two per length. That means the illustrated, unspliced cut plan requires six stock lengths, before any reserve.
| Cut group | Quantity | Finished size | Stock allocation |
|---|---|---|---|
| Vertical sides | 4 | 64 in each | One from each of four stock lengths |
| Horizontal sides | 4 | 46 in each | Two from each of two stock lengths |
| Total finished cuts | 8 | 440 linear in | Six lengths, subject to real saw/trim allowances |
The 46 + 46 = 92-inch pairing leaves about 10.36 inches per stock length before kerf. This plan deliberately avoids splicing a visible side. A different design could make use of short offcuts elsewhere, but it should not silently count them as full-length framing pieces. Check every cut on the final layout before ordering polyurethane wall trim from STAVROS.
Example three: a 40-inch grille face with repetitive slats
The geometric example from the ventilation section can become a procurement exercise once the heating professional approves an actual slat assembly. Twenty one-inch-wide visible slats and nineteen one-inch gaps take up 39 inches, leaving half an inch at each edge of a 40-inch opening. If the visible slat height is 24 inches, that is 20 × 24 = 480 linear inches of slat material before adding any concealed fixing lengths, test pieces or waste.
That is not the same stock calculation as polyurethane wall molding. The actual slat product may come in a different length and cross-section, and its approved mounting may require a continuous subframe. Calculate its stock yield separately. Most importantly, do not interpret these dimensions as approval for covering any particular radiator. They are an example of how to write a cut list after an acceptable technical design has already been selected.
11. A responsible installation sequence for a radiator-wall project
A decorative radiator cover involves two separate installation tracks: any approved screen or enclosure and the decorative molding on the nearby wall. The first affects heating equipment; the second is a finish-carpentry project. They should be planned together but never treated as interchangeable. The following sequence is a project-management guide, not permission to modify a heater that the manufacturer says must remain unobstructed.
Step 1: confirm what the heater manufacturer permits
Find the make and model, read the manual, identify its required clearances and service points, and ask a qualified heating professional when the information is incomplete. If the project is in a condominium, rental, or multifamily building, determine whether building management approval is required. A beautiful drawing does not override a building's heating-system rules.
If the appliance is an electric baseboard or fixed electric heater, do not move ahead with a generic wood-slat enclosure. Treat an absent instruction for decorative covers as a reason to keep the heater uncovered until the manufacturer provides appropriate guidance.
Step 2: decide whether a physical cover is needed at all
Before buying lumber or trim, compare three options: leave the radiator visible and repaint the nearby wall; install wall-only decorative moldings outside restricted zones; or, if fully permitted, use a ventilated removable screen. The wall-only treatment can often achieve the desired millwork effect at a lower level of mechanical complexity.
Step 3: prepare a measured elevation and section
Record the heating equipment, nearby sill, baseboard, pipes, thermostat and doors. Draw the permitted screen's outside dimensions, open air paths and release path. Show the wall molding separately, with its own dimensions. Do not set the position of the molding until its projection has been checked against every required service and clearance zone.
Step 4: choose the structural and decorative materials
Select approved structural materials, ventilated face components and hardware for the cover. Separately, select polyurethane architectural moldings for the wall. Confirm actual product dimensions, finish compatibility and stock lengths. Do not treat a lightweight foam or polyurethane ornament as a frame member, hinge support or mounting block.
Step 5: address the wall substrate
Molding needs a sound substrate. Check for flaking paint, water damage, loose wallpaper, friable plaster and uneven compound. A radiator wall may conceal past leakage or condensation. Correct and dry any damage before applying trim. Adhesive should not be asked to compensate for a crumbling surface or bridge a moving joint.
Step 6: mark and dry-fit the polyurethane trim
Mark all outside edges or centerlines consistently. Use a level for horizontal references but verify how the existing sill and baseboard relate to true level; older homes are rarely perfectly square. Cut sample miters and place the complete frame against the wall without adhesive. Confirm that the chosen visual borders look balanced when seen from the doorway and that the heater, access points and any approved removable cover remain clear.
Step 7: assemble only the permitted screen configuration
If the cover design has been approved, construct the supporting frame and removable front to the specified details. Test the fit, latching and access while the appliance is safely out of service and in accordance with its manual. Do not drill into the radiator, pipes, electrical wiring, window frame or concealed services. Do not relocate valves, vents, wiring or heating connections as part of a decorative project.
A qualified contractor may be necessary. A DIY-friendly wall molding installation does not automatically make the associated HVAC or plumbing work DIY-friendly.
Step 8: bond wall trim with a compatible product
Use the adhesive procedure specified for the particular polyurethane trim and the actual wall finish. Clean and prepare the mounting face, apply the appropriate adhesive, set the profile according to its instructions and provide any temporary support required. Do not invent a generic cure time. Adhesives vary in open time, cure and allowable temperature; use the product label and technical data, including requirements for freshly painted walls.
When fitting long profiles, dry-fit the corners first and keep their shadow lines aligned. Avoid excessive squeeze-out that will interfere with paint. A neat joint depends on accurate cuts and a stable substrate, not on filling a large gap with caulk afterward.
Step 9: finish joints, prime and paint
Once the adhesive has cured as specified, address visible joints using the appropriate finishing material. Sand only as permitted for the product and remove dust. Prime when required by the profile or coating manufacturer. Paint the moldings and nearby wall with an approved coating system. An ordinary interior paint should not be presumed suitable for hot appliance surfaces; the radiator itself is a separate finishing specification.
Step 10: verify access, operation and the finished result
Before considering the project complete, demonstrate that any removable cover opens or releases correctly, no fastener obstructs service, and all heating-system openings remain clear. Have the heating professional evaluate the installed arrangement where required. Check performance through normal operating conditions rather than relying on a single short test. If a problem appears, remove or modify the screen under appropriate professional guidance.
12. Paint and finish ideas for radiator-wall molding
Color is one of the most effective ways to make a radiator wall look intentional. A small amount of paint on surrounding trim can do more visual work than a large ornamental cover. Choose the paint scheme for the whole wall: window casing, nearby baseboard, adjacent panel molding and any approved screen. A finish that works in isolation may look disconnected when those elements meet.
Tone-on-tone white or warm neutral
Painting the wall and polyurethane molding in related whites or warm neutrals creates subtle relief. The shadow lines of an MLDPU profile remain visible, but the whole assembly reads as part of the architecture. This can be especially effective in historic-style homes where the window casing, baseboards and door trim share the same color family.
White is not the only neutral. A light greige, muted cream or soft gray can make a radiator more visually recessive. If the screen is a different material, test paint samples under the actual room lighting, because wood grain, paint sheen and substrate preparation can change the appearance of the color.
Painted wood grille with contrasting background
A darker void behind an open slatted screen can make the grille appear more precise. The effect is similar to a shadow gap in built-in furniture. Yet no finishing treatment should cover the radiator's required openings or compromise servicing. If painting around pipes or appliance surfaces, follow the heater manufacturer's directions and avoid coating components that must remain accessible or unpainted.
Natural wood front with painted polyurethane wall trim
Natural wood can be a strong contrast with white or painted trim, particularly in transitional rooms. The key is restraint. Keep the slat direction simple and repeat a related wood tone elsewhere in the space. Using a fine wall border such as MLDPU-004 polyurethane molding can introduce architectural order without competing with the grille texture.
Modern monochrome
A black or charcoal wall, matching molding and a relatively open, appropriately specified grille can produce a crisp contemporary appearance. However, dark surfaces can show dust, scratches and joint irregularities. Test finish adhesion and cleaning requirements before treating the entire assembly as one painting job. Coatings applied to polyurethane ornament, wood and metal may need different primers and preparation even when the final shade is identical.
13. Adjust the design for different rooms
Living room: connect to the window wall
In a living room, the radiator may be viewed from the sofa or from the entrance. Check both angles. A centered window composition with simple vertical lines and one restrained decorative frame is usually easier to read than an ornate grille combined with multiple wall panels. If the room already has crown molding, door casing and chair rail, borrow the established profile scale rather than introducing a completely new ornamental language.
Bedroom: prioritize quiet heating and clear access
In a bedroom, a cover that changes air circulation can reduce comfort at exactly the time occupants rely on heating. Keep furniture and bedding away from heat sources according to the relevant equipment instructions. A wall-only decorative border outside the radiator zone may be preferable to a full cover. If a permitted screen is used, it should still be easy to remove for cleaning and maintenance, not hidden behind a bed or heavy drapery.
Dining room: coordinate with wainscoting
A radiator can interrupt a continuous chair rail or lower wall panel. Instead of forcing the same panel size across the opening, treat the radiator as a designed pause in the rhythm. Keep the remaining panels aligned at their tops and bottoms, with consistent spacing. For a broader wall composition, MLDPU-003 polyurethane molding may provide enough visual weight. Confirm that the chosen line is on a wall zone appropriate for its intended use.
Hallway: avoid projections and delicate low ornament
A narrow hallway needs real walking clearance. Deep decorative trim is more vulnerable to impacts here, while a projecting cover can interfere with moving furniture or opening doors. Use a simpler composition and durable finishes. The heat source should remain accessible even when shoes, coats or storage furniture accumulate nearby.
Historic renovation: preserve serviceability
Older homes may have cast-iron radiators, irregular plaster and original trim. Document everything before altering the wall. A contemporary painted polyurethane frame can complement historical millwork, but it should not be represented as an original feature. If existing trim is valuable, minimize irreversible changes and keep all pipe and radiator connections serviceable. In protected or landmark interiors, consult the relevant renovation requirements.
14. When wall molding is better than a full radiator cover
A decorative cover is only one design option. In many homes, leaving a radiator uncovered is simpler, safer and visually successful. Use the wall around it as a frame: a narrow vertical molding on either side, a horizontal picture-frame element above, or coordinated lower wall panels placed beyond the appliance's required zones.
This is particularly compelling when the existing radiator is a distinctive cast-iron model. Painting the surrounding wall, refining window casing, cleaning the radiator and adding thoughtful decorative trim can make the equipment part of the room's character. It may also preserve heating output and easier maintenance, though any coating applied to the heater itself must follow its manufacturer's requirements.
Choose the wall-only option when the device manual disallows a cover, the heat source is electric and no approved cover is specified, the sill clearance is already tight, valves or vents are difficult to reach, or the room cannot spare the floor area. In a very narrow wall, even a beautifully made cover may be the wrong architectural decision.
For a consistent room-wide composition, explore STAVROS guidance on picture-frame wainscoting and lower-wall molding. The same principles of aligned panel tops, regular spacing and restrained profile scale can be used near a radiator without wrapping the appliance itself.
15. Common mistakes in decorative radiator-cover projects
1. Building the cover before identifying the radiator
A screen inspired by a photograph may not be allowed on the installed equipment. Find the model and instructions first. This is especially important for electric baseboard or fixed heaters.
2. Treating a decorative grille as proof of adequate ventilation
An open-looking pattern can have little actual free area after accounting for slats, rails, backing and a top shelf. Obtain the correct airflow requirements and check the real assembled opening.
3. Blocking the warm-air exit at the top
A seemingly practical solid top may interfere with convection. Do not substitute a visual design rule for the heater's manufacturer-specified path for moving air.
4. Making the front impossible to remove
If the cover must be destroyed to reach a valve or connection, the design failed a basic maintenance test. Plan the release mechanism before finishing the surrounding trim.
5. Gluing polyurethane ornament onto the hot heater
A wall molding is not automatically designed for the temperature of an operating radiator. Keep decorative profiles within their documented application and outside prohibited zones.
6. Using an incompatible adhesive
Adhesives vary with substrate, temperature and coating. A product that bonds well to dry painted drywall may not be appropriate near heat or on an unfamiliar factory finish. Confirm the complete bonding system.
7. Confusing structural rails with decorative molding
Wood supports, grille slats and polyurethane wall profiles are not equivalents. A wall molding cannot support a removable front or serve as an approved heat shield.
8. Ignoring the window sill and the baseboard
An enclosure may collide with the sill return, leave an awkward gap above the baseboard or interfere with a drapery panel. Draw the full elevation and a side section before ordering.
9. Overdecorating a small opening
Large brackets, corner pieces and heavy profiles can crowd a modest window wall. Start with one primary decorative line and add only the details that improve the overall composition.
10. Ordering from total footage alone
Stock lengths must accommodate actual long and short cuts. A project needing four 64-inch sides cannot get two of those from one 102.36-inch length. Use the cut list, not only the perimeter total.
11. Assuming all STAVROS items are polyurethane
The catalog includes genuine wood and other materials. For example, RK-001 is a wooden rail, while the MLDPU profiles in this article are polyurethane. Confirm each item's material on its own product page.
12. Forgetting room function and local rules
A cover may be prohibited by a building's policies or incompatible with a child's room, narrow hallway or appliance clearance. Do not create an obstacle or an apparent shelf that invites hazardous use.
13. Painting without a materials plan
Wood, factory-primed polyurethane, metal grilles and the heater itself may need different coating systems. Never assume one generic wall paint covers every component appropriately.
14. Presenting model-specific numbers as universal
A general recommendation such as “leave exactly two inches behind every radiator” or “a cover loses exactly 30% of its heat” is not trustworthy without the equipment and test conditions. Use documented clearances and professionally checked performance rather than invented rules of thumb.
16. How to shop for the complete design with STAVROS
A radiator-wall project can be divided into two purchases. The first is the heating-system side: any manufacturer-approved enclosure or screen, structural components, ventilated grille, removable fasteners, and appropriate finishing products. The second is the purely decorative side: polyurethane wall molding, coordinating trim and potentially wooden accent rails used only where their specifications allow.
STAVROS provides decorative elements, not a blanket certification that any combination is an approved radiator cover. Browse the STAVROS polyurethane molding collection for profiles and drawings, then use the project dimensions to choose the face width and projection. For a simple wall frame, start with MLDPU-001 or MLDPU-004; for a stronger architectural surround, compare MLDPU-002 or MLDPU-003; for a clean convex line, consider the two variants of MLDPU-027. The best profile is the one that suits your wall scale and the allowed installation zone.
If the design includes timber detailing, the STAVROS RK-001 wood rail product page shows multiple beech and oak sections and a stock length different from the polyurethane moldings. Specify the selected section exactly rather than asking for “a wooden slat.” A design involving several material families needs a separate cut list for each stock length.
An order worksheet you can send to the seller
| Item to record | Example of useful specification |
|---|---|
| English article/project reference | Decorative radiator wall with removable screen, if permitted |
| Heater information | Make, model, heating type and approved cover requirements |
| Decorative molding SKU | MLDPU-002; quantity determined by final wall cut list |
| Wood rail SKU, if applicable | RK-001; exact cross-section, wood species and finish |
| Profile selection | Face width, projection, supplied length and pattern |
| Installation area | Painted interior wall, outside heater-restricted zones |
| Finish | Compatible primer, paint or wood coating as specified |
| Accessories | Approved fasteners, suitable adhesives and any needed samples |
| Delivery | Destination ZIP code, packaging of long profiles, confirmed shipping terms |
Use verified dimensions and item codes rather than a general request for “polyurethane radiator trim.” The seller can confirm current products and shipping arrangements, while the heater manufacturer or qualified technician addresses appliance safety. These are different responsibilities.
Think about delivery of long pieces
A 102.36-inch decorative molding is more than eight feet long. Long trim may need special packaging and handling, and freight costs depend on destination. Do not assume ordinary parcel service, U.S. stock or a fixed delivery price. Ask STAVROS to confirm whether the specific items can be shipped to your U.S. location, the packaging method, current availability, and what to do if a piece arrives damaged.
Inspect the shipment before installation. Lay full lengths on a suitable flat support, check profile edges and finish, compare SKUs against the packing list, and keep any supplied technical documentation. Do not force a distorted piece into a wall frame or cut it before deciding whether it is acceptable. Photograph any visible transport damage and follow the seller's claim procedure.
17. Maintenance after the project is finished
A clean, serviceable design is more valuable than one that can never be disassembled. During the heating season, visually check that the radiator remains unobstructed and that any screen is secure. If the room becomes noticeably colder, the heater behaves abnormally, a finish changes appearance, or a new odor appears, stop treating the issue as cosmetic. Consult the heating professional and the equipment manual.
When cleaning, follow the finish manufacturer's care instructions. Use appropriate methods for the polyurethane wall molding, wood grille and heater separately. Avoid soaking joints, using harsh solvents on painted polyurethane or putting water near electrical parts. A removable panel should be handled in a controlled way so it cannot fall onto a child or pet. Check hinges, catches and any concealed fasteners for loosening or damage.
Seasonal inspection also offers a chance to look for moisture around pipes and window walls. Damp stains, peeling paint or softened substrate can indicate a leak or condensation problem. Repair the cause before patching the decorative finish. An attractive molding frame should not become a permanent lid over a maintenance issue.
18. Frequently asked questions about decorative radiator covers and polyurethane molding
Can I make a DIY radiator cover from wood slats?
Potentially, for some hot-water radiator configurations—but only if the radiator manufacturer and applicable rules permit that type of cover. The design must preserve the specified airflow, material suitability and access. Do not apply this general project idea to an electric baseboard heater or another device that prohibits enclosures.
Is polyurethane molding safe next to a radiator?
It depends on the exact profile, distance from the heat source, operating conditions, adhesive and coating system. The polyurethane products discussed here are selected as decorative molding on the surrounding wall, not as heater-rated components. Verify that the proposed wall location is outside restricted clearances.
Will a radiator cover reduce the heat in my room?
It can. The outcome depends on the radiator and on how the cover changes convection and radiant heat. Do not rely on a universal percentage. Ask for the actual equipment requirements and, where necessary, have the proposed arrangement evaluated by a heating professional.
Can I put a solid shelf on top of a radiator cover?
Do not assume this is allowed. A solid top can obstruct a heater's upward air path and may become hot. It can also encourage storage of objects near heat. Follow the manufacturer-approved enclosure design rather than treating the cover as general furniture.
What is the difference between a radiator screen and a radiator cover?
In common U.S. usage, screen often suggests an open front or grille, whereas cover may describe the whole surrounding assembly. The terms are not technical approvals. What matters is the actual geometry, mounting, materials, accessibility and effect on the heater.
How far should a wood-slat screen sit from a hot-water radiator?
There is no single spacing that can be specified safely for every model. Obtain clearances and material guidance from the particular manufacturer. The radiator type, temperature and intended airflow path determine the acceptable design; an arbitrary internet measurement does not.
Can I attach polyurethane trim directly to an existing radiator cover?
Only where the cover manufacturer and the trim, adhesive and coating manufacturers permit that application. For an unknown or heat-exposed cover, avoid direct attachment. A decorative wall frame outside the heater's required zones is often the more practical solution.
Which STAVROS polyurethane molding is best for the wall around a radiator?
It depends on the wall scale. MLDPU-001 is fine and subtle; MLDPU-004 offers a little more width; MLDPU-002 creates a stronger border; MLDPU-003 suits larger fields; and MLDPU-027 provides a rounded profile. These are decorative wall-design options, not approved heater components.
Is RK-001 a polyurethane molding?
No. RK-001 is a wooden rail offered in different dimensions and wood species. It should not be confused with polyurethane MLDPU profiles. Whether a particular RK-001 configuration is appropriate for a heat-exposed screen is a separate technical question.
How do I calculate how many molding strips to order?
Start with the perimeter of every proposed wall frame, then create a cut list of individual long-point dimensions. Compare that list with the actual 102.36-inch stock length of the selected MLDPU profiles. Miter cuts, saw kerf, pattern matching and unusable offcuts all affect the quantity. The worked examples above show why dividing total inches by stock length can underestimate the order.
Can I use polyurethane trim and natural wood in the same design?
Yes, visually they can work well together, particularly with restrained classical or transitional interiors. Keep them in their appropriate functional roles, confirm finish compatibility for each and do not assume that the polyurethane can replace structural wood or approved grille material.
What if my radiator is an electric baseboard heater?
Do not construct an ordinary decorative enclosure around it on the basis of a hot-water radiator example. Read the manufacturer label and manual. If an accessory is not specifically permitted, keep the heating equipment and its air openings unobstructed and consider wall-only decorative trim outside all restricted areas.
Can I hide radiator valves behind a removable panel?
Only if the final arrangement preserves the required access and can be opened reliably when service is needed. Do not permanently seal a valve or steam vent behind glued-in ornament. Consult the equipment documentation and the building's service requirements.
Is polyurethane molding waterproof?
The description moisture-resistant does not make every decorative polyurethane assembly waterproof. Adhesive, substrate, paint and joints have their own performance limits. Resolve leaks or condensation near radiators before decorating the wall.
Can I paint the heater and the molding the same color?
A matching color can be attractive, but the coating systems may differ. Polyurethane wall molding, wooden components, metal radiators and other heating equipment do not automatically accept the same primer or paint. Follow each product's instructions, especially around heat and moving parts.
Does STAVROS sell a ready-to-install radiator cover for every heater?
Do not assume so. The products linked here are verified decorative polyurethane molding profiles and wood rails. They are components to evaluate for an interior design, not a promise of a universal radiator enclosure. Confirm current offerings and specifications directly with STAVROS, and source any appliance-approved screen system separately when necessary.
19. Final checklist: a coordinated radiator wall without compromising the heater
Before purchasing or installing, make sure you can answer these questions:
- Equipment: Do you know the exact type and model of radiator or heater, and do its instructions permit the intended design?
- Airflow: Are every required inlet, outlet, grille and clearance represented in the plans without an invented universal gap?
- Access: Can a technician reach valves, vents, connections and fasteners without damaging permanent decorative trim?
- Structure: Is any permitted cover supported by its own appropriate framework and hardware rather than polyurethane ornament?
- Materials: Are polyurethane profiles, wooden rails, approved grille material, adhesives and finishes specified separately?
- Visual design: Do the wall frames align with the window casing, baseboard and other architectural features?
- Cut list: Have you counted real stock pieces, miter waste and reusable offcuts—not only total linear feet?
- Purchase: Are every SKU, dimension, finish, shipping method and destination confirmed before the order is placed?
- Completion: Is there a plan for inspection, cleaning, safe operation and easy removal of service panels?
Conclusion: let the wall carry the design, not the heat source
The strongest decorative radiator cover is a system in which function leads and ornament follows. Where the heating equipment allows an enclosure, a carefully designed open screen can coordinate with wood millwork and painted surroundings. Where a cover is unsuitable, a restrained architectural frame on the adjacent wall can still make the radiator feel like part of the interior.
For the decorative portion of that plan, shop STAVROS polyurethane wall moldings and compare their exact profile widths, projections and stock lengths. Use the RK-001 wooden rail details when a separate wood-trim specification is needed. Draw the complete wall, verify the heater's requirements, and prepare an itemized cut list before placing the order.
A radiator wall should look finished, remain comfortable and continue to work as intended. Good decorative design never needs to conceal an unresolved heating, access or safety problem.