Article Contents:
- Where to buy mouldings in Volzhsky: first the layout, then the cart
- Which polyurethane mouldings to choose for a long wall
- STAVROS wall mouldings: three SKUs for a single composition
- Decorative band: how it differs from ordinary wall frames
- How to measure a 4800 × 2700 mm wall before buying
- Four lower frames: how to keep margins and spacing equal
- How much profile you need: clean linear metres without mistakes
- Cutting plan for six 2600 mm strips
- Horizontal band joint: how to make the connection invisible
- One profile for the whole wall or two different ones: how the order changes
- How much wall molding costs: comparing three basic estimates
- Combined estimate: wide band and thin frames
- Do you need a seventh strip and when a reserve is justified
- Decorative corners and overlays: when to recalculate straight parts
- Color and texture of boiserie: how to emphasize the decorative rhythm
- How to combine lower frames with skirting, door and furniture
- How to create a STAVROS specification without forgotten parts
- How to send long moldings to Volzhsky and across the Volgograd region
- Rigid transport backing and profile protection, 2600 mm long
- Acceptance: what to check before signing documents
- Wall preparation and installation of the horizontal band
- 45-degree cuts, joints and painting
- Common mistakes when buying and ordering boiserie
- FAQ: buying STAVROS stucco in Volzhsky
- Summary: a kit for one wall and the next step in purchasing
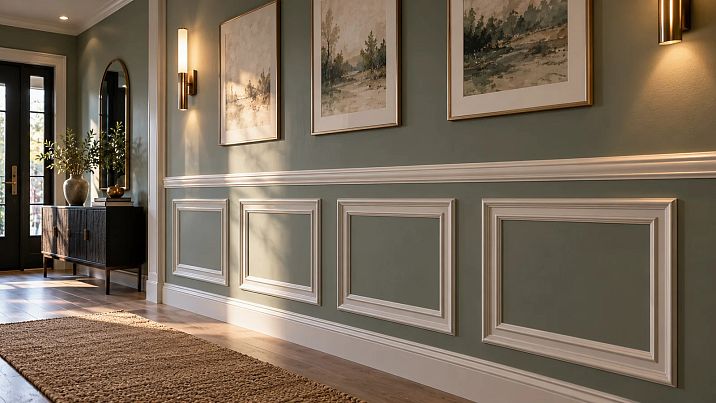
A long wall in an apartment does not necessarily require expensive wall panels or complex joinery. Sometimes it is enough to install one horizontal decorative band and place four neat frames beneath it to give the surface clear proportions. But between a photo you like and a finished interior there is practical work: measure the area, choose the profile, count whole planks, plan for the horizontal joint and arrange delivery. These are exactly the issues that matter most when products are ordered online and you want to finish the renovation without buying again.
The STAVROS catalog features Moldings for interior walls, doors, furniture and individual decorative zones. For a buyer in Volzhsky, it is more convenient to start not with abstract linear meters but with a specification for a specific composition. If you are planning Buy molding for one long wall, decide in advance whether the horizontal band and the lower frames will have the same cross-section or whether the band will require a more expressive molding. This affects both the character of the interior and the distribution of offcuts.
Let's work through a real-world example that is arithmetically sound but hypothetical in terms of the room: a wall 4800 mm wide and 2700 mm high, a horizontal line at about one meter, and four lower frames 700 × 500 mm. We'll calculate a six-plank layout, compare MLDPU-001, MLDPU-004, and MLDPU-002, show a combined option, and prepare a checklist of what to verify before ordering with delivery to Volzhsky. Prices apply only to profiles as of the verification date of October 28, 2026; shipping, installation, and painting costs are calculated separately.


Where to buy stucco molding in Volzhsky: first the plan, then the cart
For remote purchasing, the STAVROS catalog is convenient because it lets you compare item codes, dimensions, and materials. But every attractive molding strip has its own cross-section and length, so choosing a product by the single name "molding" is risky. Polyurethane, wood, MDF, and polystyrene items may sit side by side on the same catalog page. Our project uses specific MLDPU polyurethane products, not just any elements that look similar. The order should be placed with the exact item code, cross-section, and number of whole pieces.
If your task is — to buy stucco molding in Volzhsky for finishing an already painted wall, start with a strictly straight-on photo of the room. Mark the wall width, the position of the door, furniture, baseboard, outlets, and switches. Then sketch a horizontal line and four lower rectangles. Try to imagine what will be in front of the wall a year from now: a dresser, a table, a sofa, or a narrow console. The decorative grid should work with the furniture layout, not turn opening a cabinet into an awkward task.
Once the proportions are approved, move on to the products. Compare three profiles of the same factory length, check the photos and cross-section drawings, and confirm availability and protective packaging conditions. Then request the shipping cost to Volzhsky separately. A general statement about Contact us to confirm shipping to your destination. does not guarantee a specific rate for a long item: after packaging, the cargo unit may be longer than the nominal 2600 mm. It is especially useful to agree on this before payment so that an already assembled custom batch does not have to be split into two shipments.
Finally, check the cart contents against the project: six main strips, a possible spare, compatible installation adhesive, and materials for joints and finishing. Do not automatically buy corner decorative blocks just because they look good in the photo. Their dimensions and joint geometry can change the length of straight sections, and therefore the cutting plan. Below we consider straight profiles with standard 45-degree cuts and a separate straight joint for the horizontal band.




Which polyurethane stucco molding to choose for a long wall
A polyurethane decorative profile lets you create a fine line on a level base without installing a heavy gypsum panel. However, the product's light weight does not remove requirements for the wall: it must be dry, stable, cleaned of weak coatings, and prepared for the chosen adhesive. The material itself can tolerate normal household humidity fluctuations, but adhesive on a damp or peeling base will perform worse. Therefore, before ordering, it is important to check not only the color of the future decor but also the condition of the plaster or paint.
If you need wall molding with a graphic, almost imperceptible outline, it makes sense to look at narrow profiles. They leave more air around the furniture and work well for small apartments. A medium cross-section creates a more readable shadow along the frame outline. A pronounced molding can become the main architectural accent of a horizontal band, but on all four lower frames it sometimes looks overly massive. The decision depends on the scale of the room and the strength of side lighting, not just on the fashionable name of the style.
Gypsum stucco is interesting for historical restoration and projects with complex relief, but a long and thin gypsum element requires different logistics, more careful handling, and a different fastening technology. Wooden trim offers a beautiful natural texture, but it can react to changes in humidity and needs a finish designed for wood. Polystyrene products are offered on the market in different price ranges; they cannot be considered equivalents of STAVROS polyurethane profiles without clarification. For our estimate, it is fundamentally important to compare the same type of material.
When choosing a profile, it is useful to do a simple test on paper: draw lines 10, 15, and 22 mm wide on a sheet and hold it up to the place of the future band. This does not reproduce the three-dimensional relief, but it helps assess how actively the line divides the wall. Then look at a product photo of the profile under side lighting. With a relief strip, the visible shadow is often more important than the geometric width itself. For projects with two different article numbers, it is better to order one sample of each or check the actual drawings before approving the color scheme.
Our factory also produces:


STAVROS wall moldings: three article numbers for one composition
Suitable Moldings made of polyurethane STAVROS profiles differ in the width of the face line and the depth of the relief. For comparison, we selected models whose length of one item is 2600 mm. This simplifies cutting and makes the estimate transparent: all options are priced on the same six strips. At the same time, the factory length does not mean the same flexibility, weight, or suitability for arbitrary curved surfaces; the project applies only to straight sections.
MLDPU-001 — 10 × 6 × 2600 mm. The most delicate of the three compared profiles. It is convenient to use when the four lower frames should look like neat graphics rather than deep architectural panels. It reads well with contrasting paint and is less obtrusive when painted in the color of the wall. In a long horizontal band, a thin line can seem very calm: this is an advantage for a minimalist interior, but it is not always enough for visual separation of large color fields.
MLDPU-004 — 15 × 8 × 2600 mm. A medium-scale cross-section that works well for a single series of frames and horizontal wall division. It is more noticeable than MLDPU-001, but does not turn the design into a massive frame. In an interior with a lower painted zone and a calm upper part, the middle line helps unite the elements into a single rhythm. If you want restrained boiserie without complex overlays, this model is reasonable to include in a shortlist for comparison by samples.
MLDPU-002 — 22 × 11 × 2600 mm. An expressive profile for cases where the belt line should stand out clearly and work as an architectural horizon. On a large wall, such a line can be appropriate, especially if there is a smooth painted surface above it without unnecessary pictures. For the four lower frames, a wide molding is also applicable, but it visually weighs down the lower part of the wall. Therefore, below we will separately consider a mixed estimate: a wide belt line made of MLDPU-002 and thinner frames made of MLDPU-001.
| Profile | Cross-section and length | Price of one plank | Six planks |
|---|---|---|---|
| Molding MLDPU-001 | 10 × 6 × 2600 mm | 1 740 ₽ | 10 440 ₽ |
| Molding MLDPU-004 | 15 × 8 × 2600 mm | 3 190 ₽ | 19 140 ₽ |
| Molding MLDPU-002 | 22 × 11 × 2600 mm | 5 460 ₽ | 32 760 ₽ |
Prices are taken from the official STAVROS product cards as of October 28, 2026, and are provided only for comparing the cost of straight strips; they are not a promise of the final order price. Transport protection, adhesive, delivery, surface preparation, and craftsman labor are not included. Before paying, verify the price and availability once more: the assortment and sales terms may change. It is useful to download the profile drawings or save them with the order, since the same verbal description "thin molding" does not define the shape of its end face.
Get Consultation
Decorative belt line: how it differs from ordinary wall frames
An ordinary frame is a closed rectangle, for which four 45-degree joints and equal diagonals are important. A horizontal belt line works differently: it runs along the entire visible width of the selected wall and connects the lower and upper zones into a single architectural plane. The belt line has no right angles in the middle of the section, but a straight joint appears between two segments if one factory strip is shorter than the entire wall. This joint is often forgotten in a beautiful calculation of linear meters.
In our project, the line has a length of 4800 mm. Two strips of 2600 mm make it possible to obtain two straight segments of 2400 mm with nominal remainders of 200 mm. The joint is located in the center of the wall unless another design decision has been made. Installation must be planned so that the connection does not fall on a loose crack or an area with uneven filler. The straight ends must be even and cleaned, and the adhesive and finishing materials must be compatible with polyurethane and the wall paint.
A belt line at a height of about one meter is not a mandatory building standard. It helps create a low paneled zone, but the actual height is chosen based on furniture, the location of switches, door handles, baseboard height, and overall ceiling height. If the paneled zone is too low, the frames turn into random small inserts. If it is too high, the belt line may visually cut the wall near the level of the countertop or windowsill. Therefore, it is useful to first stick painter's tape on the wall along the future contour and look at the interior from normal viewing points.
The four lower frames under the belt line create an even rhythm but must remain separate figures. They should not be connected with vertical moldings to the horizontal line if the project provides for closed rectangles with independent offsets. Otherwise, the number of parts, cuts, and overall consumption change. This article is specifically intended for four separate frames of 700 × 500 mm plus one continuous belt line joined from two straight segments.
How to measure a 4800 × 2700 mm wall before purchasing
The first measurement is taken between the actual boundaries of the area suitable for installation, not according to the values from an old apartment plan. Check the length at the level of the future belt line, closer to the floor, and approximately in the middle of the wall. Ideally, the values match, but construction deviations occur even in new buildings. If there is a significant difference, it is better to build the decorative grid relative to the visual axis, without trying to replicate the nominal 4800 mm at any cost.
Then measure the ceiling height at several points and clarify the upper edge of the existing baseboard. The position of the horizontal line in this example is conventionally taken at about 1000 mm from the finished floor. This does not mean that the top of each lower frame must necessarily touch the belt line. On the contrary, separate rectangles with offsets look calmer and do not require additional complex junctions. You can place the frames, for example, at a height of 180 to 680 mm above the finished floor, leaving a significant gap to the horizontal line.
Before installation, be sure to measure protruding elements: door casings, baseboards, radiators, and decorative furniture panels. A molding 6–11 mm thick at a protrusion can interfere with a furniture door or prevent a heavy cabinet from being pushed flush against the wall. Leave a clear access zone for switches. If an outlet ends up inside the future frame, it can be made part of the composition only with careful geometry; the molding must not cross the outlet body.
A useful check is to mark all boundaries on a photograph of the wall and label the actual dimensions between obstacles. However, final installation is done using a level on the surface itself, not from a photograph, which may have perspective distortions. If the decorative line will run near a doorway, decide in advance where it ends: at the wall boundary, set back from the casing, or at a pre-agreed termination element. For each decision, the length of the band is recalculated if necessary.
Four lower frames: how to maintain equal margins and intervals
In the demonstration project, each frame has an outer width of 700 mm and a height of 500 mm. The four frames together occupy 2800 mm in width. On a free wall of 4800 mm, 2000 mm remains for margins and gaps. If you assign two outer margins of 400 mm each and three gaps between the frames also of 400 mm each, the total will be exactly 4800 mm: 400 + 700 + 400 + 700 + 400 + 700 + 400 + 700 + 400.
Such equal width of all gaps looks calm, but it does not have to match the actual setting. If a long sofa is planned in front, you can anchor the group of four frames to the axis of the furniture composition rather than to the geometric center of the bare wall. If the edge of the wall is occupied by a tall cabinet, it is important to preserve a visually sufficient margin next to it. Shifting only one frame while leaving the others unchanged is undesirable: the viewer quickly notices the disruption of rhythm, even without measuring the gaps with a ruler.
The dimensions 700 × 500 mm refer to the outer long points of the 45-degree cuts. This is critical for manufacturing: if the craftsman measures 700 mm along the inner edge of the strip, the final outer width will be larger than designed. For a profile with a face width of 22 mm, the difference is already noticeable. Therefore, the order and the technical drawing must specify the measurement method for all parts. One test corner on short offcuts will help verify the cut line before sawing the long blanks.
Also check whether the vertical distance between the frames and the band is sufficient. Excess empty space can be offset with a taller frame, while a gap that is too tight can make the design feel overloaded. In a small hallway, it is more useful to leave more open surface than to fill every centimeter with decor. In our example, the main task is to use four identical elements for rhythm, not to imitate a set of separate expensive wall panels.
How much profile is needed: clean linear footage without errors
The calculation begins with a separate count of long and short parts. For the horizontal band, 4800 mm of straight profile is required, which will be obtained from two 2400 mm lengths. For the four frames, eight horizontals of 700 mm and eight verticals of 500 mm are needed. That is 5600 and 4000 mm respectively. The total length of the finished parts is 14,400 mm, or 14.4 linear meters.
| Element | Number of parts | Length of one part | Total length |
|---|---|---|---|
| Horizontal belt | 2 | 2400 мм | 4800 мм |
| Horizontals of the four frames | 8 | 700 мм | 5600 мм |
| Verticals of four frames | 8 | 500 мм | 4000 мм |
| Total | 18 | — | 14,400 mm |
If you divide 14,400 mm by the length of one factory strip of 2,600 mm, you get about 5.54 pieces. Rounding up gives six strips. However, this division is only a preliminary check. It does not prove that all the required segments physically fit into six blanks: the long side cannot be assembled from arbitrary short offcuts without an additional joint, and every cut consumes some material. Therefore, a correct estimate requires a piece-by-piece cutting plan.
We have such a plan. The first two strips are used for the belt, the next four for the frames. Each frame strip yields two pieces of 700 mm and two of 500 mm, that is, 2,400 mm of finished segments and 200 mm of nominal remainder. Four frame strips will provide exactly eight horizontals and eight verticals. Together with the belt, this gives six source items. This conclusion follows from the specific dimensions, not from an arbitrary percentage allowance for trimming.
It is important not to confuse the net length with the purchased material. Six strips of 2,600 mm contain 15,600 mm of profile. The difference from the finished parts is 1,200 mm before accounting for kerf width and test cuts. The remainder cannot all be considered suitable for future repairs: individual short fragments do not replace the long sides of the frames, and installing additional joints solely to use up offcuts is not always reasonable.
Cutting plan for six strips 2,600 mm long
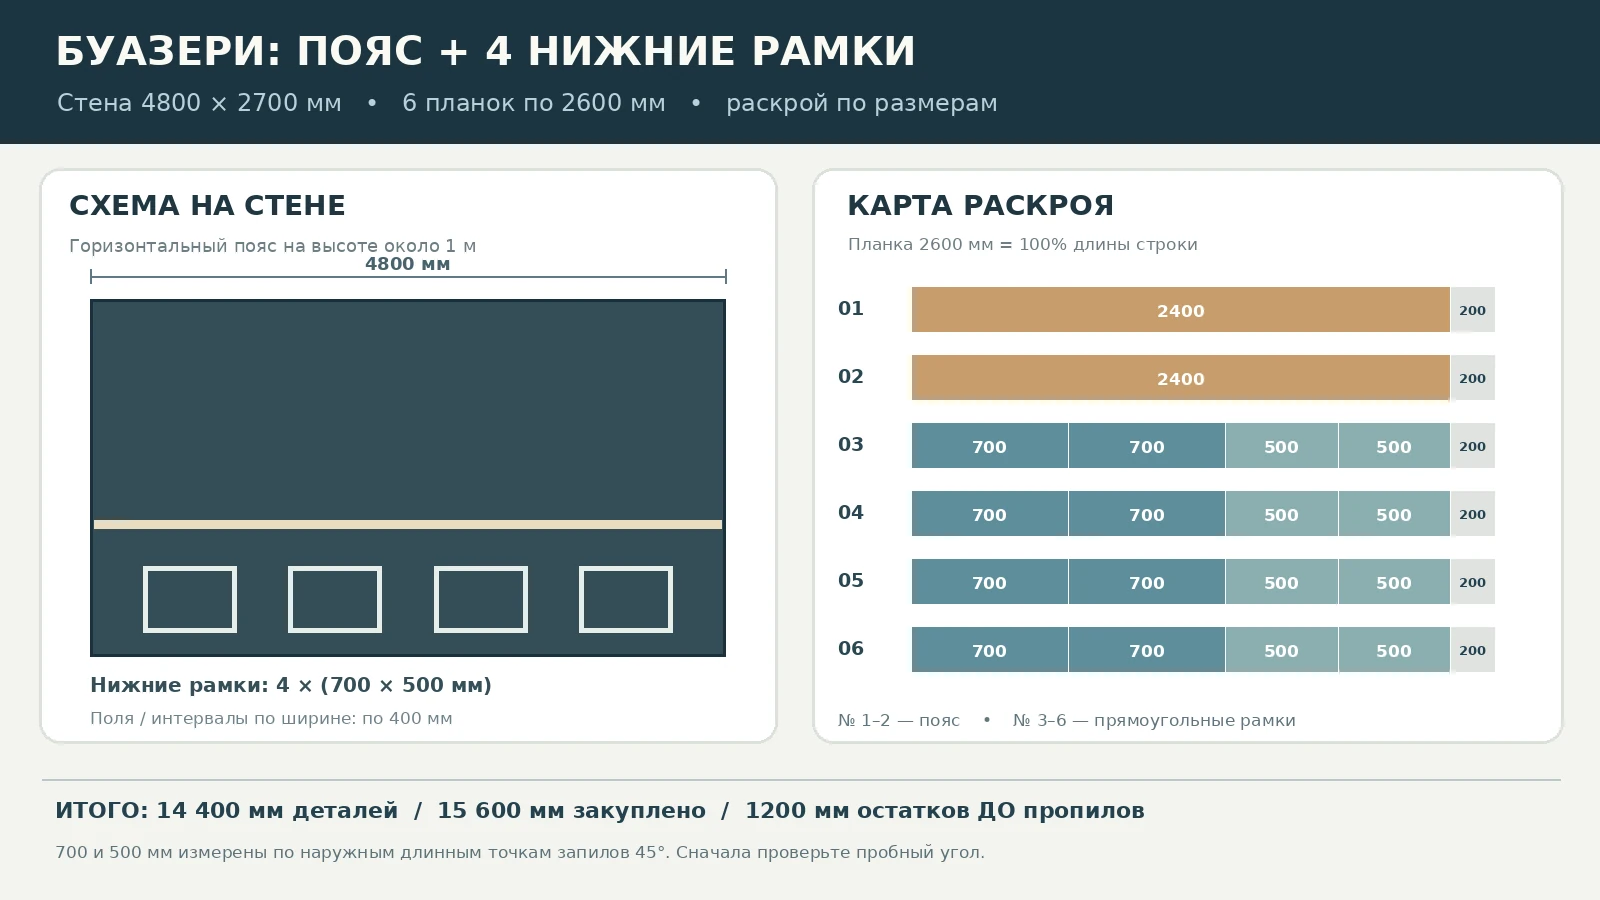
In practice, you should write the numbers and purpose on the blanks in advance, then cut one strip at a time. Do not start with mass-cutting short parts: in that case, you may accidentally use up a whole blank intended for the long belt. A simple control method is to attach a paper specification to the wall and mark off completed segments after each cut. All dimensions below are given by the outer long points of the cuts when referring to frame elements.
| Source strip | Installation parts | Net total | Nominal remainder |
|---|---|---|---|
| № 1 | belt 2,400 mm | 2400 мм | 200 мм |
| № 2 | belt 2,400 mm | 2400 мм | 200 мм |
| № 3 | 700 + 700 + 500 + 500 mm | 2400 мм | 200 мм |
| № 4 | 700 + 700 + 500 + 500 mm | 2400 мм | 200 мм |
| № 5 | 700 + 700 + 500 + 500 mm | 2400 мм | 200 мм |
| № 6 | 700 + 700 + 500 + 500 mm | 2400 мм | 200 мм |
| Total | 18 ready-made parts | 14,400 mm | 1200 мм |
Nominal remainders do not include saw kerfs. For example, if the actual cut width is 3 mm, then several consecutive cuts will reduce the remainder of each workpiece. With a 200 mm allowance this usually does not break the layout, but the exact number of kerfs depends on the tool used, the cutting order, and the method by which the mitred ends are formed. One cannot assume without verification that any craftsman will obtain the same lengths on the first cut.
Frame angles require especially careful work. A length of 700 mm means the distance between the far vertices of the two mitres. For the 500 mm section the same rule applies. When cutting with a mitre box or a mitre saw, the face of the profile must be oriented identically on all parts, and the direction of the mitre cuts must be mirrored where necessary. A single incorrectly oriented mitre can turn a finished long side into a short, unusable offcut. Therefore it is recommended to make a test corner from offcuts and check the joint profile on a flat surface.
This calculation should not be replaced by the universal rule of "buy 15 percent extra". For a simple pattern with known sides, a precise map is preferable. The reserve seventh strip is a separate decision based on the risk of damage, especially with remote delivery. It is not required for a theoretically correct cutting plan, but it can be useful if installation is being done for the first time, the openings have noticeable deviations, or re-delivering a single part would cost more than buying a spare.
Joint of the horizontal band: how to make the connection invisible
A horizontal line 4.8 m long does not fit into a single factory strip of 2.6 m. Therefore the project inevitably provides for at least one joint. In our example these are two sections of 2400 mm each, joined in the middle. This solution is convenient for a symmetrical composition: the central joint can be positioned above the gap between the second and third frames. However, the joint location should be chosen based on the evenness of the base and the possibility of neat finishing, not only on the mathematical centre.
A straight joint will require two clean end surfaces matching in cross-section. Sometimes craftsmen choose an angled connecting seam to visually reduce the visibility of the line, but such a technique changes the cutting plan and requires a separate length allowance. The current estimate provides for an ordinary straight joint of two 2400 mm sections. If you want a different joint, first clarify the technique and then recalculate the lengths. It cannot be promised that a straight and an angled joint will give the same result with an unchanged cutting map.
Before gluing, both elements are dry-fitted, and horizontality and alignment of the face pattern are checked. For profiles with pronounced steps, the cuts must match without a ledge. A skew must not be compensated for with a thick layer of filler: this will lead to a noticeable ridge under side light. It is better to correct the end, check the evenness of the wall, and only then fix the product. If in doubt, make a short practice assembly from offcuts of the same article.
After installation, the joint is treated with a compatible compound and painted together with the entire line. For a perfectly smooth finish, what matters more than the number of paint coats is a stable base and the absence of a step on the profile surface. When the horizontal band is painted tone-on-tone with the wall, small irregularities can become visible due to raking light. Therefore, before the final painting, switch on all wall sconces and assess the line from different angles, not only in daylight.
One profile for the whole wall or two different ones: how the order changes
Using a single article for the belt and all frames simplifies not only the calculation but also the visual perception. Joints and corners share one shape, the line feels like a single system, and offcuts from long pieces can potentially be used on short sections. This is especially convenient when the project is done on your own and the ability to replace a badly cut element matters. Choose this scheme if you want a calm wall with a single color plane and neat division by height.
A combined solution changes the hierarchy: the horizontal belt becomes more expressive, while the lower frames become thinner. For our example, you can take the wide MLDPU-002 for two sections of 2400 mm each and the narrow MLDPU-001 for four lower rectangles. In this case, cutting maps are kept separately for each article. Two wide profiles will form the belt, four thin ones will form all the frames. Offcuts of different sections cannot be joined into one continuous frame: even the same paint color will not hide the difference in shape.
By the number of whole strips, both solutions are formally the same: six. However, the price will differ due to the distribution of articles. It is precisely in this scenario that it is useful to draw up a list with two lines and ask to confirm their availability at the same time. If one article is in stock and the second is made to order, the overall ready date of the set may differ from the availability date of an individual item. For a renovation, it is more convenient to arrange a single shipment after final assembly than to receive a partial order and store elements that do not match each other.
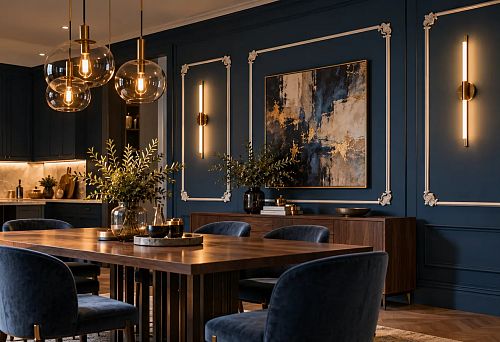
It makes sense to check the color of the future wall even before choosing between one and two profiles. On a graphite or deep blue background, even a small white molding creates a strong contrast. If the entire composition is painted in one color, the difference in profile width is read through light and shadow rather than through contrast. Therefore, "wider" does not always mean "more noticeable" in the finished interior: much depends on lighting, the matte finish, and the distance to the viewer.
How much does wall molding cost: comparing three basic estimates
A transparent estimate begins with the factory unit of sale — one 2600 mm strip. For our scheme, six items are needed. At verified prices, MLDPU-001 will cost 10,440 ₽, MLDPU-004 — 19,140 ₽, MLDPU-002 — 32,760 ₽. This is not an estimate for the entire finishing: it does not include primer, paint, glue, materials for finishing corners, transport backing, installer labor, or possible delivery across the Volgograd region.
Converting the cost to a linear meter is useful for preliminary comparison but does not replace an estimate. For example, the cost of all six strips can be divided by 14.4 meters of finished parts to get a conditional price per installed meter of profile without labor. It will be higher than the price of one linear meter of the original blank because there is cutting waste between them. Such a calculation helps compare selected projects by the same rules, but it does not mean that the store sells the profile in precisely cut meters.
If the buyer wants noticeable boiserie without large-scale decorative relief, a medium-section model may be a reasonable compromise. If the goal is a thin graphic line, paying extra for a wide profile is optional. If the decorative belt plays the main role and is finished in a contrasting color, a wider profile is worth considering on a small sample. The choice should be made based on the finished composition, not on the idea that an expensive strip is necessarily better suited for all interiors.
It is important to compare offers on the same points. When ordering six moldings from different sellers, check whether protective packaging is included in the final price, how damage during transportation is handled, and whether the item can be collected at the chosen pickup point. A discount on the strips themselves does not always cover additional costs for a bulky item. In the table below, we deliberately show only the cost of the items so as not to create a false impression of a known delivery price to a specific address in Volzhsky.
Combined estimate: wide belt and thin frames
Let us consider separately a composition in which the horizontal band is highlighted with the MLDPU-002 profile, and the four lower frames are made of MLDPU-001. For the two parts of the band, two strips of the wide profile are needed; their cost is 2 × 5460 = 10,920 ₽. For the eight horizontal and eight vertical parts of the lower frames, four strips of the thin profile are required, that is, 4 × 1740 = 6960 ₽. Total for straight products — 17,880 ₽.
| Element | Article | Quantity | Total |
|---|---|---|---|
| Horizontal band 4800 mm | MLDPU-002 | 2 pcs. | 10 920 ₽ |
| Four frames 700 × 500 mm | MLDPU-001 | 4 pcs. | 6 960 ₽ |
| Total straight profiles | Two SKUs | 6 pcs. | 17 880 ₽ |
This is 7340 ₽ more than the option with six MLDPU-001 and 1260 ₽ less than the option with six MLDPU-004. But the difference is not a direct price for "decorative quality": each solution has its own visual character. The combination is reasonable when an emphasized horizontal band and a lighter rhythm of the lower frames are needed. If all elements are equally wide and covered with contrasting paint, the pattern may become too active for a small room.
The combined scheme also requires discipline during installation. Do not mix up the blanks: the 2400 mm length belongs to the band made of MLDPU-002, while the 700 and 500 mm parts belong to MLDPU-001. On the draft plan, mark the two groups in different colors. After delivery, lay out the products separately, check that the factory lengths are identical, and make sure that the profile has not been replaced with another model. If questions arise about one SKU, it is better to pause cutting than to sort out a mismatch after the first installation.
Is a seventh strip needed and when is a reserve justified
A seventh strip is not needed in an exact cutting map: six products are enough with correct work and no defects. However, for self-installation, a reserve may be reasonable. For example, if you are cutting decorative moldings at 45 degrees for the first time, mistakes are more common on small parts. Damage to one strip during transport or an incorrect cut can disrupt the entire plan, even if the other leftovers are preserved. At the same time, reordering a single long-length item requires new coordination of packaging and transportation.
The price of the seventh strip varies by article number. For MLDPU-001, a set of seven pieces costs 12,180 ₽, for MLDPU-004 — 22,330 ₽, for MLDPU-002 — 38,220 ₽. In a mixed configuration, the reserve question must be resolved separately for each item: an extra thin strip will not replace a wide band, and vice versa. You can add one spare MLDPU-001 for frames or one MLDPU-002 for the band if you consider the corresponding installation stage more risky.
The reserve cannot be automatically included in all commercial estimates, otherwise the buyer does not see the difference between a mandatory purchase and insurance against errors. It is more correct to show two lines: "main cutting — six pieces" and "additional reserve strip — optional." For a professional installer with serviceable tools and clear markings, the reserve may be less relevant. For a remote order to a city where there is no possibility to quickly buy exactly the same profile, the reserve sometimes justifies the cost.
The short offcuts remaining after installation should not be thrown away immediately. They are useful for test painting, saw adjustment, glue testing, and practicing the finishing of a straight joint. Store them labeled with the article number: after a few months, similar white profiles are easy to confuse. If after the work a whole uncut strip remains, do not rush to remove the factory marking from it and break the packaging before deciding on a possible return, the terms of which must be clarified separately.
Decorative corners and overlays: when to recalculate straight parts
Decorative corners with ornament can replace a conventional 45-degree joint and make frames more elegant. But such an element is not a universal insert for any molding. The manufacturer may develop corner blocks for a specific series and a specific cross-section. If only the polyurethane shade matches, that is not enough: the transverse profiles must transition into each other without steps, and the finished block must have a suitable relief height and seat width.
If four ready-made corners are added to each of the four frames, up to sixteen corner pieces will be required. But straight sections can no longer be mechanically counted as 700 and 500 mm: corner inserts take away a certain length from each side. For a new calculation, you need a drawing of the corner, the length of the straight junctions, the type of joint, and confirmed compatibility with the selected profile. In this article, the given six-strip map refers to simple frames without ready-made corners and without central overlays.
Select Decor for Molding should be done after approving the geometry of the main composition. In interiors with four identical lower frames, sometimes one central ornamental accent on another wall is enough. If you decorate every corner and add an overlay to every frame, the calm rhythm may turn into a set of separate decorative objects. First determine why the ornament is needed: to emphasize the entrance, the door composition, the central axis of the room, or to add relief where there is little furniture.
For the estimate, decorative elements are accounted for as separate items with article numbers and quantities. Their cost cannot be included in the base 10,440, 19,140, or 32,760 ₽, since these amounts are calculated for clean straight profiles. Before ordering, request a joint diagram and, if possible, a photograph of the complete assembly. This is better than relying on an interior render, where decorative corners may look convincing but not correspond to the actual product range.
Color and texture of boiserie: how to emphasize the decorative rhythm
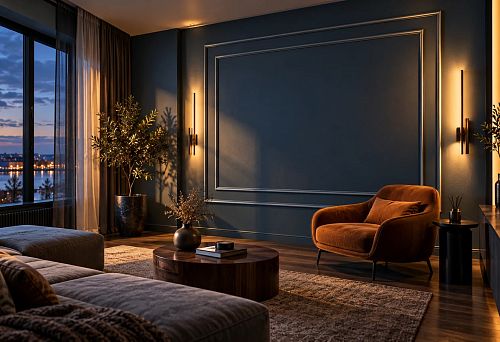
The calmest finishing option is painting the wall, band, and frames in one color. Then the lines are read through shadow rather than contrasting outline. This technique works well on deep blue-gray, graphite, olive, and muted green walls. But a dark palette shows dust and uneven joints more noticeably, especially under side lighting. Therefore, surface preparation and precise geometry become even more important than with a light coating.
Another option is a two-tone wall: the lower zone darker, the upper zone lighter, with a band completing the border. In this case, you need to decide what color to paint the molding itself. A contrasting white line can emphasize the horizontal and make a small room look visually lower. A band in the color of the lower zone looks calmer, while narrow lower frames can be painted together with the background. Before painting, use test patches on the actual surface, because a phone screen does not allow you to reliably assess the shade and matte finish.
For four frames, it is important to maintain a uniform line thickness. If one of the strips is coated with a denser layer or noticeably differently primed, side lighting will create an uneven texture. It is advisable to paint the products using a single technique, after checking the manufacturer's recommendations for primer and topcoat. Do not use aggressive solvents without checking compatibility: different chemistries of the substrate, adhesive, and paint can ruin the result regardless of how carefully the cutting was done.
Stylistically, such a composition is suitable not only for neoclassicism. Narrow frames and a single wall tone fit into restrained modern spaces, while a wider band can support the traditional proportions of a room with a high baseboard and a minimalist cornice. But the interior should not turn into a collection of random "expensive" details. If the adjacent wall already has many carved ornaments, a horizontal band with simple frames may be a more successful contrast than yet another layer of ornamentation.
How to combine lower frames with the baseboard, door, and furniture
The height of the lower frames — 500 mm — only makes sense relative to the existing baseboard. If the baseboard is high, the frames should not start immediately above it without sufficient margin. If the baseboard is narrow, the gap can be made larger so that the pattern does not look pressed against the floor. A practical solution is to apply tape along the future contour and check how the frames are visible from the eye level of a seated and a standing person. It is not necessary to set equal top and bottom margins: the position of the frames is determined by the entire interior composition.
On a wall with a door, it is important to understand whether the band will end at the door casing or continue beyond it onto the adjacent section. For our 4800 mm wall, a free continuous surface is assumed. If in reality the door breaks the horizontal line, the number of segments and the length of each section must be recalculated. You cannot simply take six strips from this example while ignoring openings and turns. The same applies to a wall with several windows, radiators, and niches: the template is useful for the calculation method, but does not replace a new plan.
With furniture, boiserie usually works better when its frames form a background rather than trying to highlight each individual item. For a long console, four lower frames can be positioned evenly across the entire wall. For a narrow chest of drawers, it is sometimes better to group two frames in the visible zone than to create the appearance of symmetry behind the furniture. If a large wardrobe completely covers two of the four rectangles, it makes sense to reconsider the composition and save not on the quality of the profile, but on the invisible decorative details.
Additionally, check whether joints and corner connections fall into areas of frequent contact with shoes, a vacuum cleaner, or a door handle. Polyurethane profile is not a protective bumper, and a decorative frame in an active passage area may receive impacts. For the low zone of a hallway, a well-prepared substrate, suitable paint, and the possibility of local coating repair are especially important. Do not promise absolute impact resistance: the durability of the actual finish depends on the specific cross-section, adhesive, and operating conditions.
How to compile a STAVROS specification without forgotten details
After the composition is approved, assemble the order into a single document. For a single profile, its main line looks like this: "polyurethane molding MLDPU-004, cross-section 15 × 8 mm, length 2600 mm, quantity six pieces." Separately state that two strips are intended for the band, four for the frames, and that the proposed cutting map is provided by the buyer for their own installation. This description does not mean that the company performs custom cutting: the availability and terms of such a service must be confirmed directly with the seller, not assumed by default.
For the combined option, there will be two lines: “MLDPU-002, 22 × 11 × 2600 mm, two pieces” and “MLDPU-001, 10 × 6 × 2600 mm, four pieces.” Check the total cost of the items — 17,880 ₽ at the prices on the date of writing — and ask about the availability of both items at the same time. In the request, it is useful to save the phone number, the contact person for receipt, the address of the selected pickup point, and the preferred shipping method. If the order is placed through a manager, ask them to send the final specification before payment so you can compare it with the original plan.
The list of auxiliary materials is no less important. Installation will require a suitable adhesive, products for preparing the substrate, materials for finishing joints, painting tools, and cutting consumables. The exact amount of adhesive cannot be universally assigned based on wall area: it depends on the width of the profile's supporting surface, the substrate, and the consumption rate of the specific compound. Instead of an arbitrary figure from the internet, follow the adhesive instructions and the total length of the parts to be glued, which in our project is 14.4 m.
Do not add random corners, sockets, or covers to the order just to get a discount on the set. Such items require verified compatibility. In a separate line of the specification, you can state “additional elements — not ordered; installation of straight 45° cuts.” This will prevent misunderstandings if, during product approval, the manager suggests a decorative replacement. Even a small modification to the frame shape can make the prepared cutting plan obsolete.
How to ship long moldings to Volzhsky and across the Volgograd region
STAVROS indicates the possibility of placing a purchase remotely and offers delivery options across Russia, including transport companies and courier services. However, the final route to Volzhsky, the choice of pickup point, the tariff, and the timelines must be confirmed specifically for the ordered profiles. Here you cannot rely only on the price of a small parcel: six 2600 mm strips form an oversized cargo unit, especially after adding a rigid backing or external protection.
On the official page Payment and delivery available ordering and receipt options are described. Before paying, it is advisable to clarify not only the carrier's name but also whether the specific destination accepts packaging of the required length. The difference between delivery to a terminal and to the door affects the budget and the arrangements for unloading. If the home is in a suburb or another settlement in the Volgograd region, an additional route segment may be needed; this will be agreed separately.
The request to the carrier must contain the actual length of the transport unit, not just the profile's nominal 2600 mm. It is useful to ask the seller to state the dimensions after packaging and the approximate weight, then clarify the tariff, insurance terms, and the procedure for handling damage. You should not promise a specific delivery date if the route has not yet been calculated. It is better to give the buyer a clear verification algorithm: confirm product availability, obtain the parameters of the packaged order, choose a suitable shipping method, and only then compare the final amounts.
It is cost-effective to coordinate one complete set for one wall all at once. If a forgotten strip is purchased a week later, its delivery cost may be disproportionate to the price of the part itself. For our example, this is especially obvious when choosing the thinnest molding: the cost of one strip is not necessarily comparable to the tariff for a separate long package. Therefore, checking the quantity before shipping is not bureaucracy but a practical saving of time and money.
Rigid transport backing and protection for 2600 mm profiles
The product pages for individual STAVROS polyurethane moldings provide for a pine transport backing costing 390 ₽ under certain order volumes. For example, MLDPU-004 and MLDPU-002 have their own quantity thresholds. Before placing an order, you need to check whether this additional cost applies to the selected set and how many such charges will appear on the invoice. The backing is not the same as the transportation service and does not replace the delivery calculation to Volzhsky.
For a long strip, support along the entire length, protection of the ends, and the absence of free bending inside the packaging are important. When carrying the load, you must not take hold of it solely by the middle, leaving the ends unsupported. On the outside, it is useful to mark the packaging as a long-length decorative profile, if such a marking method is provided by the seller and the carrier. At acceptance, pay attention not only to obvious creases but also to unusual bends, signs of crushing, and damage to the corners that will be visible after painting.
When agreeing on packaging, there is no need to demand vaguely "maximum strength." More useful are specific questions: is there a rigid base, how are several strips secured together, are the ends closed, and how much longer than the factory product is the shipping unit. If the transport company offers a separate crate, its cost, necessity, and compatibility with the seller's packaging should be discussed in advance. Duplicating two expensive protective structures without understanding their functions is not always justified.
If narrow and wide moldings are shipped in the same consignment, make sure the batches are not mixed up when the shipping units are formed. Plastic film and cardboard can hide colored stickers, so the invoice and packing list must retain legible article numbers and quantities. Upon receipt without opening, it is sometimes impossible to confirm all parameters; in that case, the order of inspection, photographs, and the recording of remarks directly with the carrier are of particular importance.
Acceptance: what to check before signing documents
First inspect the packaging at the point of issue. Check the ends, corners, long side edges, signs of impact, and severe creases in the cardboard. If damage is visible, record it with photographs before opening. Ask the carrier's representative about the procedure for drawing up a report and making notes in the documents; the conditions vary between transport companies. You should not sign the receipt document without remarks when obvious defects have already been found and have not been described.
Then verify the contents against the specification: exact article number, material, cross-section, length, and number of pieces. For the basic estimate, there should be six strips of one type. For the combination — two strips of MLDPU-002 and four of MLDPU-001. If a reserve was ordered, this should be reflected as a separate line rather than implied within the main quantity. Pay attention to the ends of the profiles: a small crack can become a big problem if the intended cutting uses almost the entire usable length of the element.
If a discrepancy with the order is discovered, keep photographs of the marking, packaging, and invoice. Do not start cutting the disputed goods until further actions have been agreed with the seller. In a quality claim, it is more useful to write precise facts — "five strips received instead of six," "an area of about 120 mm is damaged on end No. 3" — than an emotional assessment. Such documentation helps to determine more quickly whether replacing one part is sufficient or whether a different way of resolving the issue is required.
After inspecting the goods, move the items to a dry, heated room and place them on a level support. If the load was delivered in cold weather, you should not immediately open the adhesive compounds and begin installation. The temperature conditions of the product, the adhesive, and the substrate must comply with the manufacturers' instructions; there is no universal number of hours of conditioning for all circumstances. First wait for the conditions to normalize and make sure that no condensation forms on the surface.
Preparing the wall and installing the horizontal band
Installation begins with checking the substrate and marking. The paint must adhere firmly, the filler must be dry, and the surface must have no weak spots. If the wall is noticeably wavy, a long horizontal profile will emphasize its flaws. Therefore, it is useful to place a two-meter straightedge or level at the future height of the band and check for unevenness. Correcting the substrate often takes less time than trying to glue the molding so as to hide the unevenness with a thick layer of compound.
The horizontal line is set with a laser level, the height is checked at several points, and painter's tape is temporarily fixed along the line. Then the two belt pieces of 2400 mm each are dry-fitted, and the central joint and the position of the ends are assessed. Only after that is a suitable mounting compound applied according to the instructions. Some adhesives require temporary fixing, while others have restrictions on humidity and temperature. You must not transfer the instructions from one adhesive to any polyurethane decor without checking the composition.
After installing the belt, proceed to the four lower frames. For each one, first mark the outer boundaries of 700 × 500 mm, then check the horizontal and vertical. The pieces are cut at the long points of the mitred ends, assembled on the floor or dry-fitted to the wall, and the diagonals are compared. If the lengths and angles match, installation is significantly simplified. If a skew is detected, correct it before final fixing, because after the adhesive sets, removal can damage both the profile and the wall's finish.
A standard mistake is to install one frame perfectly and make the rest "by eye" relative to it. On a long wall, a small deviation gradually accumulates, and the outer gaps end up different. It is better to mark out all five vertical fields and all four frames at once, check the overall width total, and only then start gluing. This way you preserve the original composition of 400/700/400/700/400/700/400/700/400 mm regardless of the installer's habit of using neighbouring pieces as a reference.
45-degree cuts, joints and painting
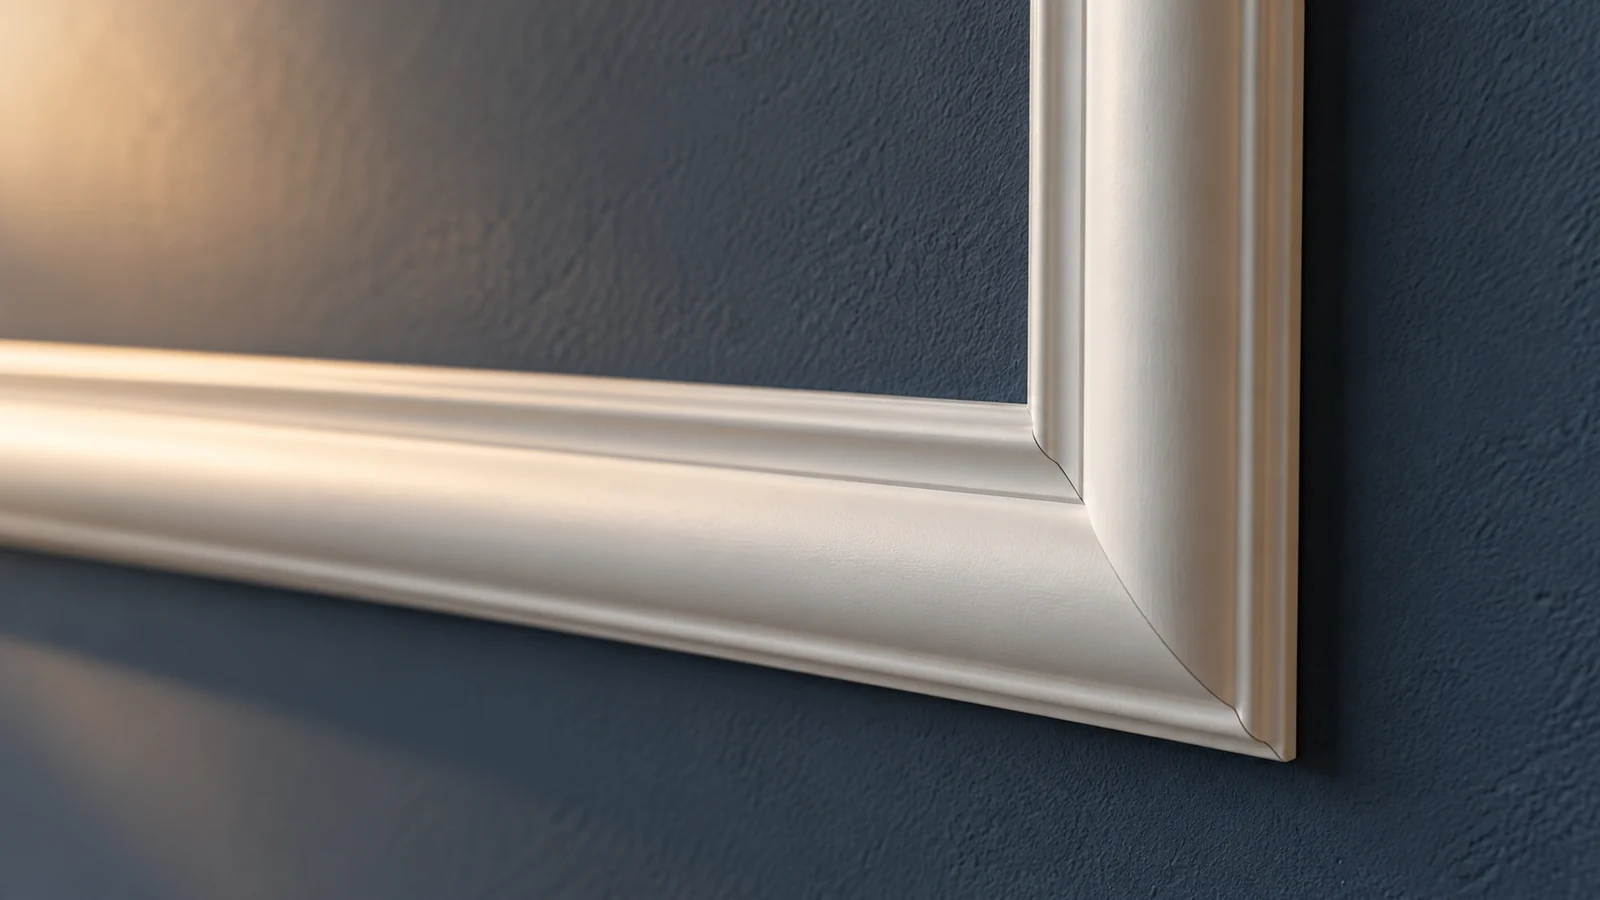
It is best to check the corner joint of a decorative frame on short test pieces of the same profile. The saw must have a working guide and a suitable blade, and the strip itself must have reliable support. On a narrow moulding, angle errors are noticeable even with a small deviation. The mitred ends must be joined without forcing the pieces to bend. If the wall angle is not exactly 90 degrees, that is no reason to change the geometry of the frame itself: the frame is built according to its own horizontal and vertical, and does not copy possible irregularities of the adjacent building corner.
After gluing, carefully treat the joint areas. The type of compound depends on the profile material and the future paint. Excess sealant must not cover the relief or form a raised bead over the joint. Let the adhesive and joint materials dry completely within the times specified by the manufacturer. Premature painting may hide an insufficiently dried area for several days, but later it may show up as a crack along the joint or uneven gloss.
For painting, it is convenient to test the primer and finish enamel on a leftover offcut. You can immediately see how the coating lies on the relief, whether runs form in the recesses, and how noticeable the transition from the wall to the profile is. In a single-colour composition, the same shade on different substrates sometimes looks different due to the different surface texture. Therefore, if necessary, agree on a suitable primer layer and paint the entire assembly sequentially, observing intercoat drying.
Finally, inspect the wall from different points and under different lighting. Check that the horizontal belt looks straight, the four frames have the same outer size, the corners do not diverge, and the middle of the belt does not stand out. Pay attention to areas near furniture and doors, where the decor may be subject to mechanical impact. If everything is corrected before handover, future care will be limited to gentle cleaning suitable for the coating, rather than constantly masking technological defects.
Common mistakes when buying and arranging boiserie
The first mistake is ordering only by total linear metres. The number 14.4 m describes the installed pieces, but does not show which exact segments can be obtained from factory strips. In our case, six pieces are confirmed by the cutting map, not by rounding "just in case". For a different pattern, even with the same linear metres, more items may be needed. Therefore, before changing the frame dimensions, recalculate the long and short sections for each blank.
The second mistake is mixing materials and similar product codes. The catalog lists items made of polyurethane, MDF and polystyrene side by side. The word "molding" in the name does not by itself determine the installation technology. The third mistake is installing ready-made decorative corners without recalculating the length of the straight pieces. The fourth is failing to check the central joint of the belt. The fifth is agreeing on a delivery date without confirming the dimensions of the actually packed product.
The sixth mistake concerns images. An interior visualization helps you understand proportions and palette, but it does not prove the shape of a specific product section, its availability in stock, or the exact compatibility of elements. To place an order, use the official product page, dimensions and, if necessary, a drawing. The technical diagram in this article reflects the arithmetic cutting of the selected composition, but it does not replace a test cut and an actual on-site measurement.
The seventh mistake is trying to save on surface preparation. An expensive polyurethane profile on peeling paint will not give a reliable result. The eighth is deciding to paint the decor immediately after cold delivery, ignoring the adhesive temperature and wall humidity. Avoiding these problems is usually easier than fixing them after the renovation is complete. A smart purchase is not only choosing a beautiful strip, but also coordinating the entire sequence from measurement to finish.
FAQ: buying STAVROS stucco in Volzhsky
Can I place an order without visiting the store? Yes, STAVROS describes remote ordering methods. However, this does not mean there is a local store or warehouse in Volzhsky. Select the exact products in the catalog, prepare a specification and arrange transportation to the actual address or to a suitable pickup point.
Why is it better to look at individual product pages for the query "Buy moldings"? Because general search results combine different materials and purposes. For a wall project, you need to check the polyurethane, factory length, section and price of the specific product code you have chosen, rather than relying on the lowest price of any decorative strip.
What should I check based on the wording "polyurethane moldings buy»? Make sure the specifications say "polyurethane", not polystyrene or MDF. For straight frames with a belt, additionally check the cross-section shape, adhesive compatibility, and whether you can get strips of the required single length.
How many moldings are needed for a 4800 mm wall? With the dimensions of the four frames given in the article, 700 × 500 mm, and a belt of 4800 mm, six strips of 2600 mm are required. Two make up the belt, and the remaining four yield sixteen frame parts. If you change the geometry or use ready-made corner blocks, a new calculation will be required.
Can five strips be enough? No, for the composition shown, five blanks of 2600 mm give only 13,000 mm of source material, whereas the finished parts require 14,400 mm even without cuts. Therefore, five strips are mathematically insufficient. This conclusion does not depend on which of the three compared profiles is chosen, since all have the same length.
Should I buy a seventh strip? For the base layout, no. It can be useful as a reserve, especially if you are cutting the profile for the first time or do not want to risk a repeat delivery. In the estimate, its cost should be shown separately from the six mandatory items.
Can two different product codes be used? Yes, if they form separate independent lines. In our combined example, the belt is made from two MLDPU-002, and the frames from four MLDPU-001. Joining different cross-sections within one continuous line without a specially provided junction is not recommended.
How can I find out the delivery cost to Volzhsky? Ask the seller to specify the actual packaging dimensions, then confirm the route and rate for long-length cargo. It is impossible to correctly quote a fixed price based on the city name and the number of strips alone.
Can moldings be glued to a painted wall? This depends on the strength of the coating, the condition of the substrate, and the requirements of the specific adhesive. First check adhesion and compatibility, and prepare the surface if necessary. Do not use trim to mask peeling plaster or dampness.
How can a horizontal joint be made less noticeable? Precisely fit the ends of the two parts of the band, ensure a single plane for the face profile, use a suitable compound for the joint, and paint after drying. Side lighting will help detect steps before final handover.
Summary: kit for one wall and the next purchase step
For a wall 4800 mm wide with one horizontal line and four lower frames 700 × 500 mm, six polyurethane strips of 2600 mm are required. Two strips provide straight band sections of 2400 mm each, and the other four provide two 700 mm segments and two 500 mm segments each. This yields 14.4 m of finished parts, 15.6 m of purchased profile, and nominal offcuts of 1.2 m before saw cuts. This is a calculation for a specific composition; it does not transfer automatically to other dimensions.
The most affordable option among those reviewed is six MLDPU-001 for 10,440 ₽ at prices as of October 28, 2026. The medium-section MLDPU-004 totals 19,140 ₽, and the more expressive MLDPU-002 totals 32,760 ₽. A combination of a wide band made of MLDPU-002 and thin frames made of MLDPU-001 comes to 17,880 ₽. The choice depends on the desired expressiveness of the lines, while packaging, delivery, adhesive, and installation costs remain separate line items.
To get a predictable result in Volzhsky, start by measuring the wall and drawing the frames. Then check the product pages, confirm the quantity and availability, request the packaging parameters, and get a delivery calculation. Only after that should you pay for the kit. This order makes a regional purchase practical: you are ordering not a set of random strips, but a complete, calculated decorative trim project for a specific room.