Article Contents:
- Coordination must happen before manufacturing the fronts, not after
- What exactly must be known before starting the front
- When a ready-made element is truly better
- When a custom detail is still needed
- How to translate the client's reference into a technical brief
- Why 3–5 options are usually enough
- The "no decor" option should also be shown
- Check not only the front view, but also the side view
- 1:1 scale is the clearest approval language
- Scale check at three distances
- Central, paired, and corner elements are approved by different rules
- An asymmetric facade should be approved based on the actual visible area
- For multiple modules, check the overall rhythm
- The handle must be coordinated together with the facade decor
- Moulding and central decor must be coordinated as a single composition
- Oak
- Oak
- The color on the screen is not an approved finish
- How to compare two finishes without subjective dispute
- The sample must have its own designation
- Separately record what the client does not choose
- The "approved" status must be unambiguous
- Why the version number matters
- Production "stop" after approval
- The most expensive changes
- What to do if the client changes the decor after approval
- Custom detail
- What the specification should contain
- What to do if the client can't choose between two options
- What the client doesn't need to decide
- Separately agree on exactly what remains visible after assembly
- What to keep in the archive after the order is completed
- For a repeatable furniture model, create a reference configuration
- Three questions before final approval
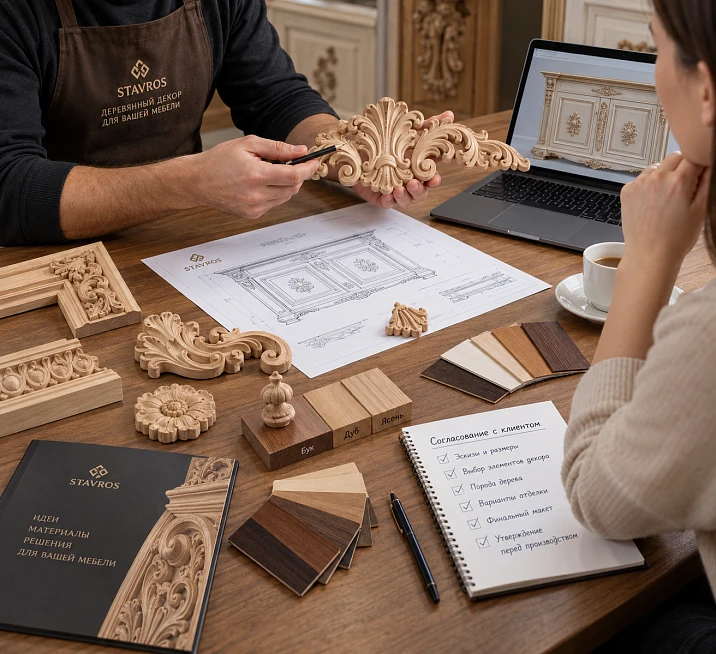
The most expensive decorative overlay replacement happens not at the moment of selection, but after the facade has already been cut, drilled, and painted. While only a sketch exists, changing the size or shape costs almost nothing. After the facade is manufactured, the same adjustment may require a new part, re-finishing, and a schedule shift.
That is why decor for custom furniture needs to be agreed upon earlier than it seems. Not after the carcass is built. Not after painting. And not even after final doweling.
The correct sequence looks like this:
furniture idea → role of decor → 3–5 real options → real dimensions → 1:1 scale fitting → material → future finish → sample → written approval → working drawing → production.
"Decor for custom furniture" here refers to ready-made or standard wooden elements that the workshop uses in the manufacture of individual furniture: overlays, rosettes, handles, legs, moldings, brackets, capitals, pilasters, and other parts. This is not a promise to manufacture any non-standard element from an arbitrary customer sketch. If the ready-made assortment does not fit, the question of individual manufacturing is resolved separately.
The main task of approval is to ensure that the client approves not an abstract picture, but a specific solution that can then be transferred into a drawing and ordered without ambiguity.
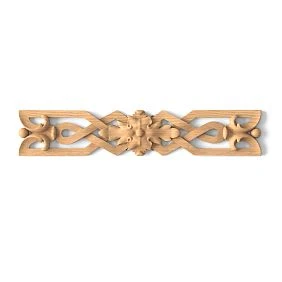
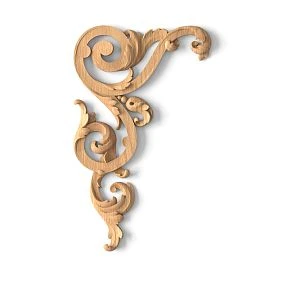

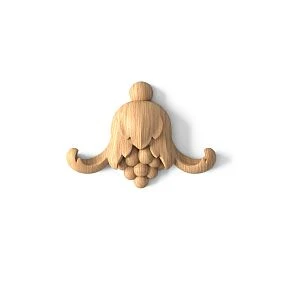
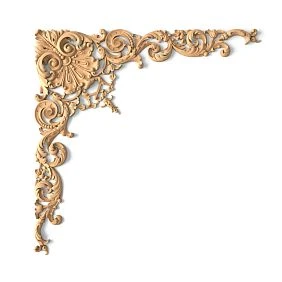



Approval must happen before the facades are manufactured, not after
The bad sequence is familiar to many workshops:
carcass is ready → facades are manufactured → furniture is painted → the client starts choosing decor.
At this point, almost any change becomes expensive. A large overlay may not fit between the moldings. A handle may end up too close to the carving. A capital may require a different pilaster width. A leg may change the overall height of the chest of drawers. A rosette may visually shift the composition if the center of the facade is already occupied by a handle.
It is better to do the opposite:
sketch → real decorative elements → dimension check → approval → working documentation → production.
With this order, the decorative element becomes part of the project even before the material goes to cutting.




What exactly must be known before launching the facade
Minimum set:
- which type of decor is used;
- specific article number;
- actual dimensions;
- the material;
- position on the facade;
- indents;
- the direction of the pattern;
- connection with the handle;
- connection with the molding;
- finish option;
- quantity.
If at least one of these points remains phrased as "we'll figure it out later," the facade is not yet ready to be considered finally approved.
Why early approval benefits both the client and the workshop.
The client gets the opportunity to see the solution before it becomes irreversible. The workshop gets a clear project composition, fewer reworks, more accurate purchasing, and the ability to order the required number of parts in advance.
Approval is not a bureaucratic stage. It is a way to transfer the design solution into physical furniture without losing meaning.
Our factory also produces:




Custom furniture does not mean that every decorative detail must be made individually
Bespoke furniture may well consist of an individually designed carcass, custom facades, a non-standard color, and unique proportions — while still using ready-made legs, handles, carved overlays, rosettes, moldings, brackets, and capitals.
Individuality is created not by the obligatory manufacture of every part from scratch, but by composition, proportions, material, finish, and the way ready-made elements are integrated into a specific piece.
For a workshop, this is an important economic principle. If a suitable element already exists, there is no point in paying again for design development, creating a control program, test parts, equipment setup, and a small individual batch.
Get Consultation
When a ready-made element is truly better
For example, a cabinet needs two symmetrical carved overlays. If the catalog has a suitable size and design, the workshop immediately gets repeatable geometry, a stable SKU, the ability to reorder, and a clear quantity.
Custom manufacturing is justified only when a ready-made solution does not cover the task.
When a custom part is still needed
This is a separate scenario:
- the required size is not available;
- a custom design is needed;
- an exact copy of a historical element is required;
- the ready-made ornament disrupts the composition;
- the element must continue the unique geometry of the furniture.
But you cannot automatically promise the customer that any non-standard element will be manufactured by a specific supplier. First, the possibility of such manufacturing must be confirmed separately.
First determine the role of the decor, and only then look for a specific item number
One of the common mistakes is to open the catalog and look for “something beautiful.” For custom furniture, that is not enough. First you need to understand why the element is needed at all.
| Task | What type of element is usually considered |
|---|---|
| Central facade accent | carved overlay or rosette |
| Frame on the facade | Molding |
| Vertical division | pilaster or profile |
| Furniture base | Leg |
| Top finish | cornice or capital |
| Facade opening | Handle |
| Supporting decorative unit | bracket |
This logic immediately narrows down the number of options.
If a client says, "I want decor like on a classic wardrobe," that is not yet a technical brief. You need to clarify exactly what they mean: a central overlay, a frame, a capital, a carved leg, or a combination of several details.
After that, the craftsman looks not for general "decor," but for a specific product group. For the general direction, you can use Carved wooden decoration, and only then move on to the required category.
One facade — one main decorative task.
If someone tries to place a large overlay, two frames, a prominent handle, a rosette, and additional ornament on a small facade at the same time, the composition quickly becomes overloaded.
It is useful to define the hierarchy in advance:
- main element;
- supporting element;
- background.
For example: a molding frame as the base, a small rosette in the center, and a handle as a functional element. Or: a large carved overlay as the main accent, with the frame serving only as a thin border.
This makes it easier for the client to choose between options.
How to translate a client's reference into a technical brief
Clients often come not with a list of details, but with a photo from the internet: a wardrobe, sideboard, kitchen, or console where they like the decor. The mistake is trying to find an exact copy of all the elements at once.
First, break down the reference by function.
For example, the photo shows:
- two vertical pilasters;
- upper cornice;
- central overlay;
- a frame on the fronts;
- carved legs;
- dark wooden handles.
Now, instead of the phrase "make it like in the photo," there is a proper technical description.
Then a separate solution is sought for each function. The central overlay may differ in pattern but match in scale. The pilaster may have a different cross-section but perform the same compositional role. The handle may differ in shape but maintain the required contrast.
This way the workshop does not promise a literal copy of someone else's product and at the same time understands what exactly the customer liked.
What to capture from the reference.
It is useful to write down five things:
- which part of the furniture the client considers the main one;
- how rich the decor should be;
- whether a symmetrical pattern is needed;
- whether the wood should remain visible;
- which elements are definitely disliked.
The last point is no less useful than the first four. Sometimes a client says "I want classic furniture," but does not like large carvings. Then a short list of options should immediately exclude heavy overlays and massive capitals.
A reference does not replace dimensions.
A photograph may be taken with a wide-angle lens, the facade may be significantly larger than the future one, and the decor may be made specifically for a particular item.
Therefore, a reference sets the direction but is not a blueprint.
Show the client 3–5 real options, not the entire catalog
The phrase “look through the catalog and choose what you like” shifts onto the client the work that a specialist should do. The customer is not obliged to understand the real size of the part, the mounting plane, the depth of the relief, the orientation, the material, the connection with the handle, and the possible finish.
The workshop must first filter out everything technically unsuitable. After that, the client is shown a short list.
For each option, it is useful to indicate:
- article number;
- photo;
- actual dimensions;
- the material;
- position on the furniture;
- intended finish;
- link to the product.
Why 3–5 options are usually enough
A single option turns approval into pressure: the client has nothing to compare. Dozens of options create the opposite problem — choice falls apart.
A short list lets you show real differences: larger or more compact, calmer or more active, oak or beech, central or paired, exposed wood or enamel.
For custom furniture, what matters is not the maximum number of proposals, but the quality of the preliminary selection.
The options should differ in meaning.
Five nearly identical overlays offer little value. It is better to show one calm option, one larger option, one with a different character of ornament, one more compact option, and one option with no central overlay at all, if appropriate.
Then the client compares not minor differences between cards, but different compositional solutions.
The “no decor” option should also be shown
Sometimes a workshop unconsciously pushes the client toward choosing one of the decorative options, even though the best result is to keep the facade calm.
Therefore, in a short list it is useful to sometimes include an option:
without a central overlay.
Especially if the facade already has:
- an active frame;
- an expressive handle;
- a shaped panel;
- a noticeable wood texture;
- an adjacent pilaster or capital.
This way, the client compares not "which decor to choose," but "whether additional decor is needed at all."
This improves the quality of the decision and reduces the risk of overloaded furniture.
Not all facades of the same furniture should have the same level of richness.
In a tall wardrobe, the central doors can be the main feature, while the side ones are calmer. In a buffet, the upper display cabinet and the lower base can have different rhythms. In a kitchen, the range hood portal can be richer than ordinary doors.
Therefore, the rule "one overlay per each facade" is not always reasonable.
First, determine the hierarchy of the furniture composition:
- main zone;
- supporting zones;
- calm background.
And only then distribute the decor.
A product photo does not show the real scale on furniture
On a white background, a large overlay may look neat and compact. On a 450 mm wide door, the same piece occupies almost the entire surface. This is one of the main reasons why decor cannot be approved based on a picture alone.
You need to see simultaneously the facade size, the element dimensions, the free space, the handle position, the frame, and neighboring pieces.
Scale example.
Let's imagine a conventional 600 × 900 mm front. A central overlay of 300 × 160 mm is chosen.
If you place it centered by width, the free space on the left and right is:
(600 − 300) / 2 = 150 mm.
At first glance, the margin seems large. But then a molding frame comes into play. Let's assume the inner width of the frame is 420 mm.
Now the 300 mm overlay leaves:
(420 − 300) / 2 = 60 mm
inside the frame on each side.
If a handle is also needed nearby, the space becomes even smaller. That's why the phrase "a 300 mm overlay fits a 600 mm front" is almost useless without checking the entire composition.
The depth of the relief also affects perception.
Two elements of the same width can look different if one is almost flat and the other has a deep relief. On a front, the second one casts a more pronounced shadow and visually appears heavier.
Therefore, when coordinating, it is useful to look not only at the width and height, but also at the depth. Especially on small doors, where a protruding part may come close to the handle or interfere with the adjacent front.
Check not only the front view, but also the side view
For a flat overlay, the front view is often sufficient. For a voluminous capital, bracket, handle, or deep carving, it is no longer enough.
The side view makes it clear:
- how much the element protrudes;
- whether it crosses the adjacent front;
- whether it interferes with opening;
- how it relates to the cornice;
- whether it is convenient to grab the handle;
- whether too heavy a shadow appears.
It is not necessary to show the customer a full technical section. Sometimes a simple side diagram with the actual depth is enough.
For large decor, a temporary volume mockup is useful.
If a capital or bracket protrudes far from the plane, a paper outline will not convey the full effect.
You can make a simple mockup from cardboard or foam based only on overall dimensions. Precise carving is not needed. The goal is to see the physical volume.
Such a mockup helps resolve the scale question before purchasing an expensive sample.
1:1 scale is the clearest language for approval
A beautiful sketch is useful for the overall idea. But for the size of a decorative element, a regular paper template is sometimes more informative.
Work sequence:
- take the actual dimensions of the selected item;
- build the outer contour at 1:1 scale;
- cut out a paper template;
- place it against the facade or its full-size layout;
- add a handle;
- show the molding;
- check the free margins;
- lock the position.
This is especially useful for large overlays, rosettes, paired elements, corner decor, capitals, and handles.
Why a template is better than a scaled-down image.
People poorly translate millimeters into a visual impression. The label "width 320 mm" is technically clear, but it does not give an instant sense of scale.
A 320 mm outline placed against a real door gives.
Checking scale at three distances
It is useful to evaluate decor not only right next to the facade.
Look at the composition:
- from approximately arm's length;
- from a typical furniture-use distance;
- from the far end of the room if the furniture is large.
From close up, the quality of the carving and the material are clearly visible. At medium distance, the proportion reads. From afar, the overall silhouette and rhythm remain.
A large applique may look beautiful up close, but from a distance it can turn the facade into one heavy blotch. A small rosette, on the contrary, may almost disappear on a tall cabinet.
This is especially useful when coordinating bookcases, tall cabinets, and furniture portals.
It is not necessary to show the client all dimensions as numbers.
Some clients understand millimeters well. Others find a visual diagram clearer.
Therefore, alongside the numbers it is useful to show:
- the outline of the element on the facade;
- indents;
- the central axis;
- the position of the handle;
- the border of the frame.
This way, approval remains technically precise but does not turn into reading a drawing by a person who is not required to be a designer.
That is why a single sheet of paper sometimes prevents a dispute that a beautiful render could not resolve.
If the furniture does not physically exist yet.
You can make a full-size fragment of the facade from cardboard, sheet material, or paper on a wall or temporary panel.
It is important that the client sees not a separate decor element, but the relationship:
decor ↔ facade ↔ handle ↔ frame.
Central, paired, and corner elements are approved according to different rules
The same approval method cannot be used for all types of decor.
Central element.
The central axis, height, width, distance to the frame, distance to the handle, and free field are checked. The client must see the exact position, not just “approximately in the center.”
Paired elements.
Additionally, check the left and right orientation, mirroring, distance between parts, equal height, and symmetry relative to the axis.
If the pattern is directional, the left and right parts may not be interchangeable.
Corner elements.
Pay special attention to the shape of the frame, each of the four corners, the direction of the ornament, the alignment with the molding, and equal spacing.
Corner decor can easily look good on a single fragment and bad after repeating in four corners. Therefore, the entire rectangle needs to be approved, not just one corner.
An asymmetric facade should be approved based on the actual visible area
Not every piece of furniture has a perfect center.
For example, next to the facade there may be:
- a tall side panel;
- an open niche;
- built-in appliances;
- an adjacent cabinet of a different width;
- decorative pilaster on only one side.
In such a situation, the geometric center of the door and the visual center of the composition may not coincide.
You cannot automatically place the overlay in the middle of the millimeter dimension if the entire furniture is perceived differently.
It is useful to create two options:
- strict geometric centering;
- visual alignment with the overall composition.
After that, the client chooses not an abstract "a little to the left," but a specific scheme.
For multiple modules, check the overall rhythm
If the furniture consists of three to five sections, a single beautiful facade does not guarantee anything yet.
Assemble the full layout of all the furniture and check:
- alignment of top lines;
- spacing of appliqués;
- position of handles;
- consistency of frames;
- repetition of material;
- overall rhythm of verticals.
A mistake that is almost imperceptible on a single door becomes obvious in a row of four identical elements.
Carved appliqués and rosettes: we coordinate not the product, but the place on the façade
Wooden carved appliqués they are especially often used on the façades of wardrobes, chests of drawers, sideboards, and furniture of a classical character.
But they cannot be chosen separately from the façade.
Check:
- total width;
- height;
- the depth;
- the direction of the pattern;
- presence of symmetry;
- mounting location;
- proximity to the frame;
- handle location.
Central overlay.
Most often it is safer to first build the working area of the facade and only then look for an element that fits there.
Bad order:
liked the overlay → enlarge everything else around it.
Good:
facade → free area → allowable dimensions → several real overlays.
Vertical overlay.
On a tall door, it can help maintain the vertical line well. But it is important not to collide it with the handle, pilaster, edge of the facade, or molding frame.
Horizontal overlay.
It often requires checking the upper and lower free areas. On a drawer of low height, a large horizontal piece can occupy almost the entire surface.
Paired overlays.
It is better to show the client both at once as a pair. A single piece on the product card does not convey how the two shapes will work relative to the central axis of the furniture.
Carved outlets from wood suitable for tasks that need a small center of composition: inside a molding frame, in the center of a panel, on a facade without a large overlay, or as a repeating motif across several sections.
The rosette seems simple precisely because it is compact. But even here questions arise: the exact center, diameter, distance to the frame, depth, relationship to the handle, and repetition on several facades.
a repeating motif.
If a cabinet consists of several identical sections, the rosettes must be at the same height, on the same axis, and with the same offset.
Several small elements reveal an error more strongly than one large one. A shift on one door is immediately noticeable in the rhythm.
Legs, handles, and molding must be coordinated as parts of one system
Wooden furniture legs affect not only the appearance of the lower part of the furniture.
They can change the final height, the clearance from the floor, the position of the carcass, the height of the plinth, the proportions of the facade, and the visual balance of the entire piece of furniture.
Therefore, the leg must be approved before the central overlay.
If, after the facade composition is approved, the furniture is raised by 80–120 mm due to a different support, the proportions change.
Conditional example.
A chest of drawers with a total height of 900 mm is being designed.
Initially, a 100 mm leg was assumed. The body together with the top part is designed for 800 mm.
The client changes the leg to 160 mm.
If the body is kept, the final height will become 960 mm.
If the total height of 900 mm is kept, the body will have to be reduced.
This already affects the drawers, facades, internal layout, and the position of the overlays.
Therefore, the leg is not a “final decorative trifle.”
For projects with a custom color, you can separately check from STAVROS open boundless possibilities for designers, furniture makers, and anyone striving to create unique high-quality furniture..
The handle must be coordinated together with the facade decor
Wooden furniture handles — the functional part of the composition. The handle cannot be left "for later" if the facade is already receiving decorative elements.
Before approving the overlay or frame, you need to know:
- where the handle will be;
- its dimensions;
- number of attachment points;
- distance between holes, if there are two;
- overhang;
- the grip zone;
- the material;
- the future color.
Conflict over space.
Imagine a narrow drawer. A carved overlay sits in the center. The handle must also be positioned in the center.
As a result, two elements require the same area.
This means the problem cannot be solved at the drilling stage. One of the layouts must be chosen in advance:
- handle above;
- handle below;
- the overlay is smaller;
- the decor is offset;
- a different type of handle is used;
- the central overlay is removed entirely.
The handle as part of the color scheme.
If the handle is to be painted together with the facade, the client must approve this before ordering. For such projects, there are unpainted wooden handles.
If the handle remains natural, it becomes a separate material accent. And this also needs to be shown in the sample.
The molding and the central decor must be coordinated as a single composition
Wooden moldings for furniture they form the frame and directly determine the size of the inner field.
Therefore, you cannot do this:
- today the client chose the frame;
- a week later — the central overlay;
- even later — the handle.
On a single facade, these solutions compete for the same space.
It is better to show at once:
outer facade → moulding frame → inner field → central decor → handle.
Conditional example.
Facade: 600 × 900 mm.
Outer frame: 500 × 800 mm.
The frame profile occupies approximately 35 mm on the plane.
Inner field:
500 − 70 = 430 mm in width and 800 − 70 = 730 mm in height.
If the overlay is 320 mm wide, the free space inside the frame in width:
(430 − 320) / 2 = 55 mm.
Now a handle is added. If its base and grip area require another 50–70 mm, the composition may turn out to be too tight.
This calculation must be done before approval, not after purchasing the elements.
What to show the client on a single sheet.
A single sketch should show:
- the boundaries of the facade;
- frame;
- central element;
- handle;
- the main indents;
- central axes.
If each element is approved with a separate image, the client does not see their competition for space.
Material and finish are approved simultaneously
The client can choose the shape they like, but the final appearance depends heavily on the material and finish.
Beech
It is often practical when an opaque enamel is planned, a single color for the facade and decor, patina over a painted surface, or a custom finish by the workshop.
This does not mean that beech is used only under enamel. We are talking about a typical production scenario.
Oak
It is especially interesting when the texture needs to be preserved, using oil, clear lacquer, stain, or tinting.
But oak can also be painted. The choice should come from the project.
Why the material cannot be approved separately from the finish.
Wording oak overlay does not yet describe the visual result.
Need to know:
- whether the wood will remain visible;
- what tone;
- what degree of gloss;
- whether there will be patina;
- whether the element matches the facade.
That is why the client specifies not just the species, but the combination:
element + material + finish.
The same material can look different.
For example, an oak overlay under clear lacquer preserves the natural grain. The same geometry under a dark tint is perceived as heavier. Under opaque enamel, the natural texture almost ceases to be part of the composition.
This means that an image of the product itself does not replace a sample of the future finish.
The color on the screen is not an approved finish
Even an accurate photograph does not replace a physical sample.
The perception is influenced by:
- monitor;
- phone;
- lighting;
- camera;
- gloss;
- thread depth;
- natural wood.
If color is critical, the workflow is:
SKU → sample → trial finish → actual facade → approval.
What to look for on the sample.
Not just “matched the color.”
Check:
- tone;
- undertone;
- matte finish;
- gloss level;
- depth of shadows;
- how visible the texture is;
- how the relief looks;
- how the element looks in daylight and artificial light.
Why relief matters.
The same color on a flat facade and in deep carving is perceived differently.
There is more shadow in the recesses. There is more light on the protrusions. If patina is used, the contrast becomes even stronger.
Therefore, a flat paint sample is useful, but for a complex carved detail it is better to verify the final decision on a real sample.
For physical verification, you can use Product samples, when applicable to a specific project.
How to compare two finishes without a subjective argument
If the client is choosing between two options, place them next to the same facade and compare by specific attributes:
- lighter or darker;
- warmer or cooler;
- matte or more glossy;
- the wood grain reads stronger or weaker;
- the texture looks deeper or calmer.
This shifts the conversation away from “this one is prettier” to the observable difference.
The sample must have its own designation
If the project has several color samples, label them:
O-01, O-02, O-03.
In the approval sheet, you write not “we chose the second brown,” but:
approved sample O-02.
The physical sample is then stored with the project until the order is completed. For a serial model, it makes sense to keep it longer.
If the finish is applied to different materials.
The same color on beech and oak may be perceived differently due to texture and porosity. Therefore, if different wood species are mixed in the furniture, a general stain test on one species does not confirm the result on another.
It is better to have a separate sample for each visible material if the difference actually affects the appearance.
What exactly the client must approve
The phrase "decor approved" is too vague. A month later, the parties may remember differently what exactly was approved.
A short approval sheet is needed.
| Field | What to fix |
|---|---|
| Furniture model | SK-01 |
| Element | Carved overlay |
| Article number | specific |
| Size | By card |
| Material | Beech |
| Position | center of the upper facade |
| Quantity | 2 |
| Finishing | enamel according to sample No. 2 |
| Sample | Approved |
| Date | approval date |
| project version | version 03 |
| Status | Approved |
Such a sheet is useful both for the customer and for production.
Attach an image.
It is better to add a photo of the element, a sketch of the facade, the position of the element, and, if necessary, a photo of the finish sample to the table.
Then the document does not turn into a set of codes.
What should not be overloaded.
The client does not necessarily need to see all the internal production documentation of the workshop. They need to approve what affects the result: shape, size, position, material, color, quantity, and overall appearance.
Working technological dimensions, the drilling map, and internal designations remain with the craftsman.
Separately record what the client does not select
A useful practice is to divide the approval sheet into two zones.
The client approves: appearance, material, color, position, number of visible elements.
The workshop determines: fastening method, technical clearances, internal hardware, production route.
This protects the project from a strange situation where the customer accidentally approves a technical solution they do not understand, and the workshop then treats it as a mandatory condition.
The "approved" status must be unambiguous
Before the physical sample, the following statuses can be used:
- SELECTED;
- SAMPLE NEEDED;
- AWAITING FINISH;
- APPROVED.
Only the latest status allows the decision to be moved into production.
If the client has approved the shape but not yet the color, this is not a full approval.
Approval always applies to a specific version of the project
It is not allowed to store the status "overlay approved" without clarifications.
More correctly:
Overlay DEK-01 | specific article | beech | position P-02 | finish O-04 | APPROVED
If the article, size, material, position, or finish changes later, this is already a different version.
Why the version number matters
Let's imagine:
version 02 — large overlay;
version 03 — reduced;
the client writes in the correspondence: "we keep it as agreed".
Without a number, it's unclear which variant is being discussed.
With a number:
We approve version 03.
Then the working drawing receives the same version.
Changing one element can affect neighboring ones.
If the overlay has changed, you need to check the frame, handle, spacing, and holes.
If the leg has changed — the overall height, body, and facade proportions.
If the molding has changed — the inner field and the size of the central decor.
Therefore, the version applies not only to an individual product card, but to a specific composition.
Production "stop" after approval
Before cutting, it is useful to perform a quick internal check of the project.
The designer or craftsman confirms:
- all decorative elements have item codes;
- all dimensions are entered;
- samples are approved;
- handles and holes are coordinated;
- legs are accounted for in the total height;
- frames and overlays do not conflict;
- quantity counted;
- the old version of the drawings has been removed from production.
After this check, the project version becomes the working one.
Thus, client approval and workshop launch are separated by one clear control step.
What to do with verbal edits after a production "stop".
Any edit puts the project back into change mode.
You can't just message the craftsman: "move the overlay a bit higher."
You need to:
- make a change to the document;
- update the version number;
- check related dimensions;
- obtain re-confirmation;
- only then return the project to production.
This seems like a formality only until the first expensive rework.
The later the decor is changed, the more expensive the correction
In the early stages, changes are almost free. After production starts, the price increases.
| Stage | What is usually required for a change |
|---|---|
| Sketch | change the image and variant |
| Short list of SKUs | replace the item |
| Template 1:1 | print a new one |
| Working drawing | add a new version |
| The facade has been cut | the part can be reworked |
| Drilling completed | check old holes |
| Facade painted | rework becomes noticeably more expensive |
| Furniture assembled | disassembly and remanufacturing are possible |
Main principle:
you need to agree when the change still costs a new sheet of paper, not a new facade.
The most expensive changes
Especially dangerous:
- a different handle after drilling;
- large overlay after the finished frame;
- another leg after the carcass calculation;
- material change after the approved finish;
- changing the layout after the finished drilling.
This doesn't mean nothing can be changed. But after each such edit, you need to honestly assess the consequences.
The cost of the change must be visible to the client before production.
It helps to explain a simple rule in advance: while design approval is in progress, replacements are part of the normal work on the project. Once production has started, any change is assessed based on the actual consequences.
This removes the false impression that replacing an overlay after painting is as easy as changing a picture in a chat.
What to do if the client changes the decor after approval
For custom furniture, this is a normal situation. What's not normal is continuing production according to the old version and hoping that everything will somehow fit together.
Procedure:
- stop the linked operation;
- record the new decision;
- check the new item number;
- verify dimensions;
- check the position;
- check the handles and holes;
- check the frame;
- recalculate the quantity;
- update the drawing;
- release a new version;
- obtain approval again.
What counts as a linked operation.
If the handle changes, the hinge drilling of the facade is affected.
If it is an overlay, the size of the facade field and the finish are affected.
If it is a leg, the geometry of the cabinet is affected.
If it is a molding, the cutting of the frame and the position of the central element are affected.
It is not always necessary to stop all production. You need to stop exactly those operations that may become irreversible.
The old version must not be left "in
Too late — the furniture is ready, but the required decor is not in stock.
Therefore, the workshop must determine its own order point for each type of element.
For example:
- legs — before the final calculation of the cabinet;
- handles — before drilling the facades;
- overlays — until the final frame and painting;
- molding — until the decorative frame is cut;
- finish samples — until the color is approved.
This way, purchasing stops being the last action and becomes part of the production schedule.
Do not pay for the batch before checking the control sample if the risk is high.
For a new large element, a non-standard finish, or a series of dozens of identical parts, one control sample can be much cheaper than a mistake affecting the entire batch.
After it, the following are checked:
- size;
- the material;
- surface;
- compatibility with the front;
- color;
- method of fastening.
Only then does it make sense to confirm the main volume.
Do not replace the item code just because it looks similar.
A new part must go through the same verification cycle:
size → scale → material → finish → position → sample.
Even an overlay with a similar pattern may have different dimensions and require new offsets.
Custom part
Considered if:
- no suitable size;
- a unique pattern is needed;
- an exact reproduction of historical decor is required;
- the ready-made assortment is too large or too small;
- a bespoke element is needed.
But the very fact that furniture is made to order does not automatically mean that the decor must also be made individually.
This is a separate production decision.
How to explain the difference to the client.
You can simply say:
the carcass and composition will be custom, while individual decorative elements can be standard if they fit the project precisely.
This does not reduce the level of custom furniture. On the contrary, it allows the use of complex repeatable parts without unnecessary development.
After approval, the decor is transferred to the working specification
Once the client has approved the option, the design stage ends. Next, the solution must become production-ready.
Not:
beautiful overlay on the upper fronts.
But:
DEC-01 | STAVROS | specific article number | beech | finish O-04 | 2 pcs.
Not:
wooden handles.
But:
HND-01 | specific article number | oak | clear finish | 6 pcs.
Not:
classic legs.
But:
LEG-01 | specific article number | beech | enamel | 4 pcs.
What the specification should contain
Minimum:
- internal designation;
- article number;
- manufacturer;
- the material;
- size;
- finishing;
- quantity;
- link;
- status;
- version.
If there are left and right parts, they are recorded separately.
If one element is used on several fronts, the quantity is indicated for each furniture model.
Why this matters for reordering.
A year later, the client may order a second chest of drawers, another wardrobe, a replacement for a damaged handle, or an additional section.
If the specification is saved, the craftsman does not look for "approximately the same part" from an old photo.
He reproduces the approved solution.
Link the specification to a specific facade.
If the furniture is complex, one general table is not enough.
It is useful to indicate exactly where the element is used:
DEC-01 — facades F-01 and F-02
HND-01 — drawers D-01...D-06
LEG-01 — carcass C-01
This way, when one facade is changed, you can see which decorative items need to be rechecked.
For paired parts, preserve the orientation.
Do not write:
overlays — 4 pcs.
if two of them are left and two are right.
Better:
DEC-02L — left — 2 pcs.
DEC-02R — right — 2 pcs.
This is especially important for directional threads and corner elements.
A small series requires even stricter coordination
For a single cabinet, a mistake affects one item. For five identical dressers, it is repeated five times.
Therefore, before a series, a scheme is useful:
first decor set → first facade → inspection → approval → remaining items.
Example.
A series of 6 dressers.
For each:
- 4 legs;
- 6 handles;
- 2 overlays.
Total:
- 24 legs;
- 36 handles;
- 12 overlays.
If the overlay is chosen incorrectly, the error will affect 12 parts and 12 installation locations.
If you first assemble one dresser as a control unit, the problem will be detected before repeating the entire series.
The quantity per item and the quantity per order are different things.
it is useful to store in the specification:
2 overlays per dresser
6 dressers
total of 12 overlays.
If a reserve is added:
reserve 1
for order 13.
So it's clear where the quantity came from.
When a reserve is truly useful.
There is no universal percentage.
A reserve may be justified if:
- the series is stretched out over time;
- reordering takes a long time;
- finishing is done in the workshop and defects are possible;
- one element is critical for warranty repair;
- the furniture model is planned to be repeated.
For one-off furniture, a reserve may not be needed at all.
How to complete approval in one meeting
For simple furniture, approval can be organized compactly.
Prepare:
- furniture sketch;
- 3–5 real decor options;
- dimensions of each;
- one or two 1:1 templates;
- material or finish samples;
- handle options;
- brief approval sheet.
At the meeting, the order is as follows:
role of decor → scale → material → color → position → final option.
Do not start with the question:
Which overlay do you like?
First show the front. Then the allowable size. Then the options.
This way the client makes a decision within the real geometry.
What to do if the client can't choose between two options
There's no need to continue an endless exchange with new images.
Reduce the difference to specific consequences.
For example:
Option A: the overlay is larger, the inner frame field shrinks, the handle must be shifted lower.
Option B: the overlay is more compact, the handle stays on the central axis, the front looks calmer.
Or:
Option A: oak with a clear finish — the texture is visible.
Option B: beech with enamel — the color fully matches the front.
With this wording, the client chooses not between two photographs, but between two clear outcomes.
The decision can be captured through its consequences.
In the approval sheet, it is useful to briefly note what changes along with the selected option.
For example:
DEC-02 selected. The handle is shifted 35 mm lower relative to the DEC-01 option.
This helps avoid a future question: “why did the handle end up not where it was in the first sketch?”
What the client does not need to decide
There is no need to make them choose the drilling technology, cutting map, type of machining, or internal part code.
This is the workshop’s responsibility.
Good approval gives the client control over the external result, but does not shift the designer’s work onto them.
How to capture the decision right at the meeting.
After choosing, immediately add it to the list:
- article number;
- the material;
- size;
- position;
- finish;
- quantity;
- version number.
If the decision requires a sample, the status should not be approved, but, for example, AWAITING SAMPLE.
This is better than a verbal “we seem to have decided everything.”
Typical mistakes when approving decor
Send the client the entire catalog.
Why it happens: it seems that this way the choice is wider.
Consequence: the client chooses a technically unsuitable part.
How to avoid: first filter the options.
Approve based on a photo without dimensions.
Consequence: the actual element turns out to be too large or too small.
How to avoid: show the overall dimensions on the facade.
Do not show the handle together with the overlay.
Consequence: two elements conflict for the same place.
How to avoid: one sketch should contain the entire facade composition.
Approve the color based on the screen.
Consequence: the actual finish differs.
How to avoid: a physical sample and a test paint patch.
Use the wording “decor approved”.
Consequence: it is unclear which SKU and which version.
How to avoid: a specific approval sheet.
Start drilling before the final handle.
Consequence: the new SKU does not match in mounting.
How to avoid: first a sample, then the drilling template.
Change the leg after the carcass is approved.
Consequence: the overall height and proportions of the furniture change.
How to avoid: legs are approved before the facade decor.
Do not lock in the material.
Consequence: the repeat batch arrives in a different species.
How to avoid: the material is written next to the article number.
Do not update the version after making changes.
Consequence: production works from the old file.
How to avoid: a new edit means a new version.
Where to buy decor for custom furniture
For a general selection of wooden decor, you can use Catalog of carved decor и wooden items for furniture.
By category:
- carved appliqués;
- carved rosettes;
- Wooden Brackets;
- wooden capitals;
- pilasters and columns;
- Furniture legs;
- Wooden handles;
- Wooden moldings.
Also useful for preparing the project drawings and product models, information about the quality of wooden products и conditions for manufacturers.
The main principle of ordering is simple:
do not buy decor immediately after the client likes it.
First, you need to go through a short chain:
catalog → 3–5 real options → 1:1 scale → material → finish → sample → approval → specification → purchase.
Then the furniture maker is no longer buying a “beautiful detail,” but a precisely approved component of a specific piece of furniture.
Separately agree on exactly what remains visible after assembly
Some decorative elements are partially overlapped by neighboring parts. For example, the top of an overlay may go under the cornice, the lower part of a pilaster may be hidden behind the plinth, and part of a bracket may go under a shelf.
On the product card, the client sees the element in full. In the furniture, only part of it.
Therefore, before approval, it is useful to show exactly the visible fragment after installation.
This is especially important if the pattern has a pronounced center or symmetry. Partial overlap can change perception more than a small difference in size.
If a part is intentionally overlapped, this must be recorded on the sketch. Then after assembly there is no question of why “part of the beautiful ornament was hidden.”
What to keep in the archive after order completion
When the furniture is handed over to the client, the project does not end from a repeatability standpoint.
Save together:
- final sketch;
- approval sheet;
- approved version;
- article numbers of all decorative elements;
- actual dimensions;
- the material;
- finish;
- photos of samples;
- position on the facades;
- quantity per item;
- fastening data;
- links to product pages.
A year later, such an archive allows the project to be restored without searching again.
This is especially important for handles and overlays. The client rarely remembers the article number. Usually they say: "I need the same one as on our dresser." Without proper documentation, the workshop starts the search from scratch.
For a repeatable furniture model, create a reference configuration
If a workshop sells the same model several times, it is useful to turn the first successful order into a standard.
For example:
Dresser K-03
- leg LEG-01 — 4 pcs.;
- handle HDL-02 — 6 pcs.;
- overlay DEC-03 — 2 pcs.;
- finish F-02;
- version 05.
So a new order begins not with choosing a finish, but with the question: are we repeating the standard or changing the configuration?
If we are changing it, the new version must go through approval again.
Three questions before final approval
Before setting the status approved, it is useful to ask yourself:
- Does the client understand the real scale?
- Can the workshop produce the furniture without changing the already selected finish?
- Can procurement order exactly this configuration in the required quantity?
If the answer to even one question is unclear, approval is not yet complete.
This is exactly what distinguishes random decor from professional custom furniture specification, where every decision can be precisely reproduced without a new search or guesswork.