Article Contents:
- Decor for wooden frames starts with checking the construction
- When to choose a ready-made frame and when to assemble one from baguette
- What dimensions to take from a painting or panel
- How to choose the width and pattern of the profile
- How to calculate wooden baguette by linear meter
- Why the total linear meterage is often sufficient only on paper
- When four identical overlays are suitable
- When left and right parts are needed
- Can decor be selected for wooden frames that are already painted
- Are furniture overlays suitable for framing a picture
- Should decorative strips be joined at exactly 45 degrees?
- Can the frame be enlarged by adding molding on the outside?
- How to keep the panel replaceable
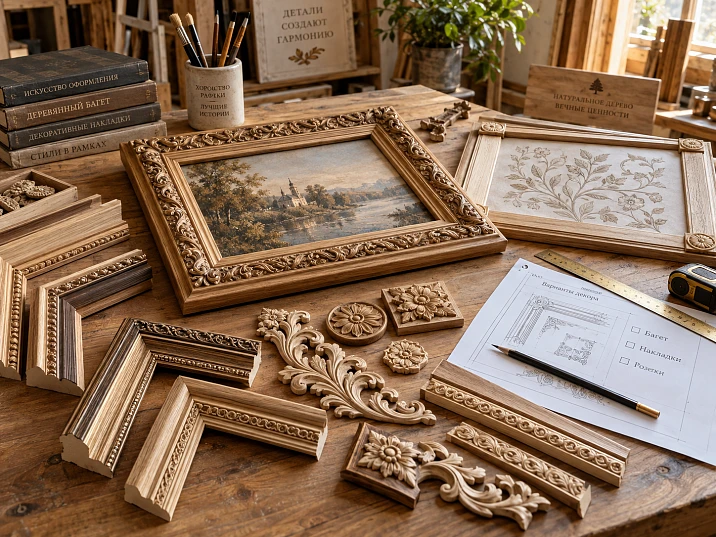
In the sketch, the corner overlay sits on the frame, but during a test fit its edge hangs over the curve of the baguette. There is nowhere to glue the piece with its entire back side. Such mismatches are best discovered before ordering: decor for wooden frames is selected together with the profile, checking not only the pattern but also the mounting location, the thickness of the relief, and the dimensions of the future framing.
For a painting or panel, the construction is determined first. If a ready-made frame fits, its opening and the method of installing the work are checked. If a custom size is needed, a profile is chosen, joints are developed, and the cutting plan is calculated. If the frame is already assembled, overlays and rosettes with a suitable mounting surface are selected for it. These solutions can be combined, but each has its own task.
It is useful to start with a simple action: place the image, a profile sample, and paper outlines of the intended decor side by side. Already at this stage it is clear how much space the framing takes up, whether it covers the edge of the painting, and whether there remains an area on the baguette for attaching carved details.
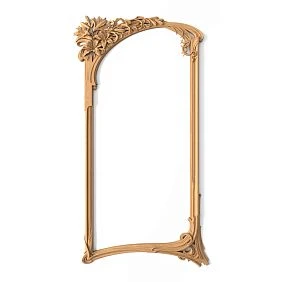
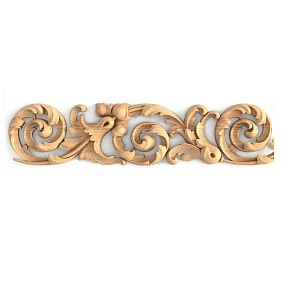
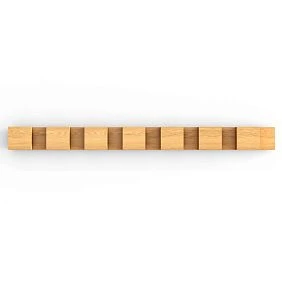
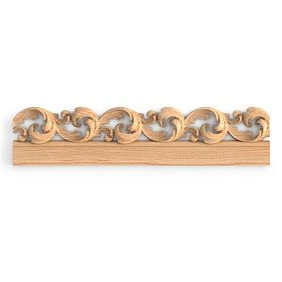
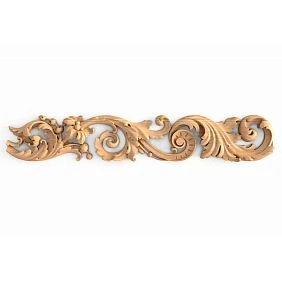
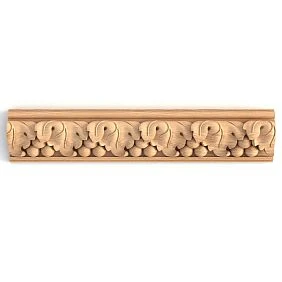
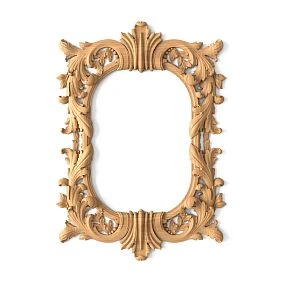
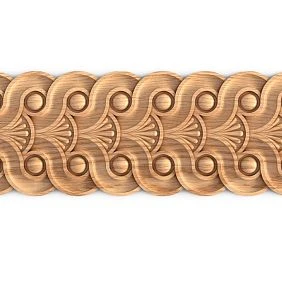
Decor for wooden frames begins with checking the construction
Baguette refers to various profiled products. Among them are parts for a standalone frame and narrow decorative strips that are installed on a ready-made base. The product name alone does not confirm that the profile has the required rabbet, can withstand the filling, and allows strong corners to be assembled.
The rabbet, or rebate, is a groove along the inner edge of the frame into which the edge of the work being framed or the assembled package fits. Decorative molding may not have such a groove. If you plan to make it yourself, you need to check the cross-section in advance: after processing, enough material must remain for joints, fastening, and rigidity.
| Initial task | What to choose | What to check before purchase |
|---|---|---|
| Need a frame without self-assembly of corners | A ready-made wooden frame | Mounting size, depth, opening shape, finish, and completeness |
| Need a non-standard size or a custom combination of profiles | A baguette or a base with decorative moulding | Cross-section, joints, slat length, and the ability to place the work |
| The base is already made | Overlays, rosettes, additional profiles | Mounting area, orientation, and protrusion of the decor |
For example, wooden moulding K-034 the product page specifies a cross-section of 10 × 6 mm. This size is useful for assessing a thin decorative line, but by itself it does not confirm the product's suitability as a load-bearing frame for a painting. For the chosen application, a well-thought-out base will still be required.
It is convenient to examine the frame in cross-section. Where does the panel rest? What holds it from behind? What is the hanging hardware attached to? On what surface does the overlay sit? If the answers currently exist only in the front view, it is too early to purchase the full set.




When to choose a ready-made frame and when to assemble one from moulding
A ready-made wooden frame is rational when its geometry suits the work and does not require significant reworking. This is especially noticeable with a complex outer contour: making shaped corners and matching the carved pattern can be more labor-intensive than selecting a ready-made product.
You need to check the specific configuration. A ready-made construction does not necessarily mean ready-made finishing, an installed backing, and included hanging hardware. If the workshop expects to insert the painting right away, these points are clarified separately. In the section STAVROS wooden frames select a model based on the drawing and the filling requirements; a single image in the catalog does not confirm compatibility with a specific stretcher.
Assembling from moulding is justified for a non-standard format and a repeating series of frames. You can choose your own border width, combination of profiles, and finish. But the cost includes cutting, joining the corners, surface preparation, and geometry control.
For a simple panel, a flat wooden base with a separately installed decorative profile can be convenient. Its construction is calculated for the panel, while the carved trim is responsible for the pattern on the front side. In such a solution, it is easier to provide wide flat areas for overlays than to look for them on complex relief moulding.
If you need to buy picture frames in a single format, compare the cost of a fully prepared set. Inexpensive moulding with lengthy processing is not always more cost-effective than a suitable ready-made frame. And vice versa: for several non-standard panels, self-assembly can reduce the number of size compromises.
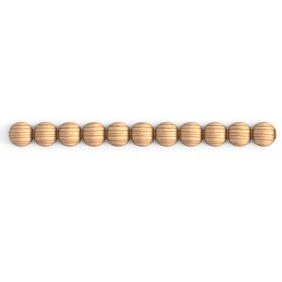
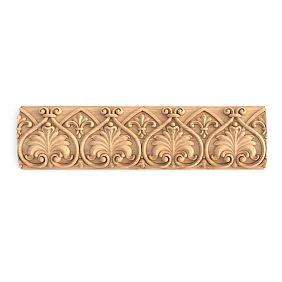
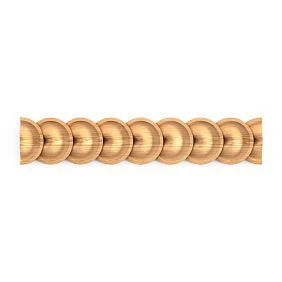
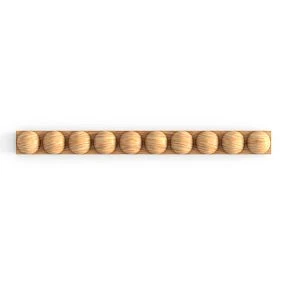
Our factory also produces:
What dimensions to take from a painting or panel
The label "painting 40 × 60 cm" is not sufficient for ordering a frame. It may refer to the size of the canvas, the visible image, or the work together with the stretcher. For fitting, you need the actual dimensions of what will be installed inside.
For a canvas, measure the width, height, and maximum thickness of the stretcher with the stretched fabric. Take into account protruding folds and other parts that fall within the fitting area. For a panel, check the thickness of the base and the location of the relief. For graphics under glass, determine the dimensions of the entire package with the mat and backing, if provided.
Three frame dimensions cannot be substituted for one another:
| Size | What does it mean | Where it is used |
|---|---|---|
| Clear opening | The visible window from the front side | To check which part of the image will remain visible |
| Mounting size | The internal space at the insertion point of the filling | To check whether the work or the framing package will fit |
| External size | The overall dimensions of the assembled frame along the outer edges | For placement, packaging and preliminary calculation of the sides |
With a standard frame that has an overlapping lip, the visible opening is smaller than the rebate. So the artwork may physically fit into the frame, but part of the image will end up covered. Pay especially close attention to the artist's signature, a thin line near the edge, and composition details that must not be visually cropped.
The overall profile depth is not the same as the rebate depth. Part of the cross-section is taken up by the face lip and the relief. The overall thickness of the moulding alone cannot tell you whether the stretcher will fit and whether there will still be room for rear fixing.
The fit is not made with a force clamp on the artwork. The structural clearance is chosen taking into account the material, size and fixing method; a universal allowance in millimetres does not work here for every panel. If the framing includes glass, space between it and the surface of the image is provided for in advance. A decorative overlay must not become an accidental spacer inside this assembly.
For valuable paintings, the method of contact with the frame and the fixing are agreed with a framing specialist or conservator. Test-fitting and finishing operations are carried out so that shavings, glue and coating do not get onto the artwork.
Get Consultation
How to choose the width and pattern of the profile
A wide moulding increases the overall dimensions and the prominence of the framing. But the same width can be perceived differently: a flat matte band and a tall carved profile with deep shadows occupy different places in the composition.
Compare two hypothetical options for a visible opening of 400 × 600 mm. With a visible framing width of 30 mm, the outer size of a simple rectangular frame will be 460 × 660 mm. With a width of 60 mm, it is already 520 × 720 mm. In the second option, compared with the first, 30 mm is added on each side. This is worth checking on the wall and in the intended packaging, not just on a small sketch.
Width is assessed together with the mat. A light field around the graphic already creates distance between the image and the outer contour. If you add a wide, active carved profile to it, the framing may take up most of the overall composition. For a canvas without a mat, the ratio will be different.
A simple profile is convenient when the image has a lot of detail or when the expressiveness is intended to be created by separate overlays. On a calm base it is easier to see how a single central composition or a pair of corner elements works.
Carved baguette is chosen when the continuous ornament itself should shape the character of the frame. In this case, additional details are selected more restrainedly. A corner rosette can complete the design, but it does not have to appear on every frame. Sometimes continuous carving looks more convincing without a second ornament layered on top.
Before deciding on the width, look at the sample in side light. The relief creates a shadow that visually thickens the border of the image. A frontal catalog photograph does not fully convey this effect.
How to calculate wooden baguette by linear footage
For a rectangular frame with four 45-degree joints, the calculation begins with the chosen measuring line. If the sight size and rebate size are mixed up, the error will carry over to all four sides.
Let's take a simple example: the sight opening is 400 × 600 mm, and the visible profile width from the edge of the opening to the outer boundary is 60 mm. All four sides have the same cross-section. Then the dimensions at the long outer miter points will be:
- two short sides: 400 + 2 × 60 = 520 mm each;
- two long sides: 600 + 2 × 60 = 720 mm each;
- total length: 2 × 520 + 2 × 720 = 2,480 mm.
The resulting 2.48 m is the sum of the dimensions of the finished parts along the outer side. This is not yet the amount of material to purchase. Trimming, saw kerf width, angle fitting, and the actual length of the commercial strips still need to be taken into account.
In general form for such a scheme:
Sum of the lengths of the four sides = 2 × (sight opening width + sight opening height) + 8 × visible profile width.
The formula applies to uniform rectangular framing with 45-degree mitre cuts. It does not describe frames with separate corner blocks, protruding crests, sides of different widths, or a complex outer contour. For these, a drawing is made for each element.
Why the total linear meterage is often sufficient only on paper
Suppose the required sides of 720, 720, 520, and 520 mm need to be obtained from one-metre strips without joined sections. Three strips give 3 m of material — more than the calculated 2.48 m. However, each one-metre strip can accommodate only one of these sides: even the two shortest ones together would require 1,040 mm without allowance for the saw cut. This means four strips are needed.
The same set can be distributed differently across longer blanks. With a nominal commercial length of 1,400 mm, each of two strips accommodates one 720 mm side and one 520 mm side. After the sum of 1,240 mm, 160 mm remains for the losses and remnant specified by the cutting chart. Whether this amount is sufficient is checked against the cutting method and the pattern of the specific profile.
| Source strips in the example | Total length | Result for sides of 720, 720, 520, and 520 mm |
|---|---|---|
| Three at 1,000 mm | 3,000 mm | Not enough individual lengths for four sides |
| Four at 1,000 mm | 4,000 mm | Each side comes from a separate strip |
| Two of 1,400 mm each | 2,800 mm | One bar on each long and short side, with waste check |
The bar lengths in the table are indicative and do not describe the assortment of a specific item. Before buying wooden picture frame moulding by the metre, find out the available stock lengths and the unit of sale. The price may refer to a linear metre or to a whole bar; these offers cannot be compared without conversion.
For carved moulding, the position of the repeating pattern is additionally noted. If the flower must be in the centre of the top side, cutting begins with this condition in mind. An attempt to achieve minimal waste may leave a whole motif at one corner and a random cut fragment at another.
Therefore, the allowance is set according to the cutting map. It includes the actual bars, four sides, cut locations and areas for pattern matching. A universal percentage does not replace this work.
How to match an overlay to the mounting area
Wooden carved appliqués are installed on a base that already fulfils the structural function of the frame. A central piece can highlight the top side, paired pieces can maintain symmetry, and corner pieces can connect adjacent lines. The choice begins with the contact area.
The overall width of the frame moulding is not equal to the width of the flat section on it. On a 60 mm wide profile, part of the space may be taken up by a bead, groove and chamfer. If the flat strip between them is only 24 mm, an overlay with a wide flat back does not get full support.
Suppose an overlay 30 mm wide is to be placed on a flat area 42 mm wide. When installed in the centre, 6 mm will remain on each side. This calculation is sufficient to assess the side margins, but the shape of the back and the protrusions of the ornament still need to be checked. An openwork scroll may extend beyond the width of its supporting part.
For an overlay that lies entirely on a flat surface, its mounting outline must fit within the available area. A decorative overhang beyond the edge is possible only as a pre-planned solution: with clear support and protection for the protruding part. A piece that rests on individual peaks of the relief cannot be glued without a suitable technique.
The central overlay is first oriented relative to the opening and the image. The geometric center of the wooden strip does not always coincide with the visually required position: on a shaped frame, the top side may include an extension or a protrusion. Test-fitting on the full contour shows this better than measuring a single segment.
If no suitable area is available, choose a smaller overlay, a different profile, or a separate flat section within the construction. Removing part of the relief from an already purchased moulding for a randomly chosen piece is usually more difficult than coordinating these elements before purchase.
Why the thickness of the relief is checked separately
In a front view, two overlays may occupy the same area, but one almost blends into the surface while the other protrudes noticeably. The difference affects the shadow, the perception of the picture's edge, and the handling of the finished frame.
Look at the composition from the side. If the overlay is placed on a protruding part of the profile, its own thickness adds to the existing projection. If it is installed in a recess, the resulting position relative to the adjacent relief will be different. Simply adding the maximum dimensions of two items without a shared cross-section can give an incorrect result.
The inner edge of the decor must not cover a significant part of the image or interfere with the installation of glass, if provided. Outer protrusions are taken into account when determining the overall dimensions: a frame with a top crest is taller than its rectangular carcass.
There is also the question of packaging. When the highest point falls on a thin carved scroll, a flat box lid may press directly on it. Supports and protection are arranged so that the load falls on the sturdy parts of the construction. The frame itself is carried by the base, not using the overlays as handles.
Protruding decor also prevents laying the frame face down on the workbench. Before assembly, provide soft supports under the structural parts. Otherwise, during installation of the backing, the already finished carving will be pressed against the workbench surface.
Rosettes and corner elements without random rotation of the pattern
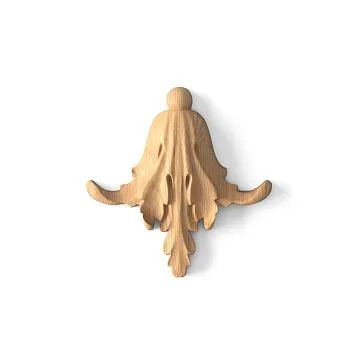
Carved outlets from wood are suitable for highlighting individual points of the composition. They can be placed in the corners, in the middle of a wide side, or on specially provided areas. But the round shape of the item does not yet mean that the pattern is perceived equally at any rotation.
For a floral rosette, compare the direction of the petals and leaves. For a geometric one, compare the position of the axes. If four identical pieces are rotated differently, a different pattern will appear at the corners. For a strictly symmetrical frame, this will be more noticeable than on individual pieces of furniture.
Check the diameter relative to the base. A rosette with a diameter of 50 mm on a 60 mm wide pad leaves 5 mm on two opposite sides if it is positioned exactly in the center. But on a corner pad, the offsets to both edges and the proximity to the light opening are additionally important. Comparing two numbers alone is not enough.
When four identical overlays are suitable
Four pieces of the same item number are suitable if their shape and ornament allow the desired composition to be achieved by rotation. Check all corners, not just the first one. A conditionally symmetrical contour may hide a directional leaf or scroll that, after rotation, ends up facing outward instead of toward the center.
Lay out the paper outlines and label the positions: top left, top right, bottom left, bottom right. Then mark the direction of the main motif on each one. This check reveals the error before purchase.
When left and right pieces are needed
Mirrored overlays may have separate versions. They are accounted for as different order lines. For the chosen composition, two left and two right pieces are sometimes required, but this ratio cannot be assumed in advance: the top and bottom of the frame may have different patterns.
Rotating a piece in the plane does not turn it into a mirrored one. Flipping it with the back side forward is also not a solution: the front surface and the mounting option change. First approve the layout, then count the quantity of each version.
Do not use a rosette as a substitute for a proper corner joint. Applied decor may cover the seam by design, but the strength of the frame must be provided by the structure itself. If the corners are coming apart, applying an ornament on top does not eliminate the cause.
How to preserve a cohesive composition
To begin, choose the main decorative element: a continuous baguette pattern, corner compositions, or a central overlay. Evaluate the remaining details by whether they support the chosen solution.
If the baguette already has active carving, try assembling the frame without any overlays at all. Perhaps an additional accent won't be needed. If the base is smooth, one expressive detail can change its character without complicating all four sides.
Compare the distances between motifs. On the long top side, the central overlay is separated from the corners by free sections. On the short side, the same elements may almost touch. Mechanically repeating a single scheme around the entire perimeter doesn't account for this difference.
It's useful to consider three options on a single template: profile only, profile with corners, profile with a central composition. Don't add everything at once. Then it will be clear which element truly changes the design and where excess density appears.
Color can also enhance the relief. Contrasting patina in the recesses makes the pattern more noticeable than uniform coloring. Therefore, a calm unpainted sample may turn out to be much more active after finishing. The decision on the amount of decor is finally made taking into account a test paint application.
How to make a full-size frame template
A template is especially useful when overlays are expensive, have a complex contour, or extend beyond the outer boundary of the base. It can be made on heavy paper or cardboard. Dimensions are taken from the project and verified product drawings.
Work sequence:
- Draw the light opening and mark the orientation of the painting or panel.
- Add the outer contour of the frame and the actual boundaries of individual profiles.
- Mark the flat mounting zones and the lines of the corner joints.
- Cut out the contours of the overlays and rosettes at a one-to-one scale.
- Lay them out in all the intended places, including the mirrored sides.
- Mark the outer protrusions and check the overall dimensions of the composition.
When printing the drawing, make sure the program has not changed the scale by fitting the sheet to the page. A 100 mm control segment should remain one hundred millimeters after printing. For a large item assembled from several sheets, also check the alignment of the parts.
The template shows the arrangement and margins, but not the height of the relief. For a preliminary estimate of the thickness, you can place a block of the appropriate size under the paper contour. Contact with the actual profile is still checked on a sample: paper does not reproduce either the rounding of the baguette or the back side of the overlay.
Photograph the approved layout and save the signed template. If one model has to be replaced before purchase, it can be compared with the finished composition rather than reconstructing the arrangement from memory.
Beech, oak, and combined finishing of parts
It is advisable to select the baguette and overlays with an understanding of the final coating. For dense enamel, differences in texture are less noticeable, but surface preparation requirements still remain. For a transparent finish, the grain and the original shade of the wood become part of the composition.
Beech can be considered for a painted frame when a calm surface character is needed. Oak is chosen if the pronounced texture should remain visible. However, the species does not replace the technology: smoothness, color uniformity, and the quality of the relief after coating depend on preparation and the application of materials.
The baguette and the carved overlay may differ in grain direction, pattern, and surface treatment method. Even the same species and the same tinting composition do not guarantee a complete match in shade. Compare the parts side by side after a test finish, not separately on different days.
On the STAVROS page, the quality of wooden products finishes for enamel and for tinting are described. They differ, in particular, in the selection of slats by color and texture. For a transparent coating, check the available finish of each selected item, including small elements.
An unpainted wooden moulding is convenient when the workshop plans to finish the base and decor according to its own scheme. Primer, color, gloss, and patina can be coordinated across the entire frame. But an unfinished blank requires time for processing, and the color solution must be verified before finishing the entire batch.
If gilding or another complex multi-layer finish is planned, choose a preparation system for the specific materials and technology. There is no universal sequence for all coatings. Thin relief should be tested on a sample: excessively thick layers can smooth out fine details.
Dry assembly and order of attaching the decor
After cutting, assemble the frame without final fastening and check the geometry. For a rectangular structure, check the corners, the dimensions of opposite sides, and the diagonals. Matching diagonals are assessed together with the other measurements: by itself, it does not replace checking the shape and dimensions.
Then attach the overlays and rosettes. Make sure they lie on the intended areas, do not rock on the peaks of the profile, and do not block the places needed for further operations. Check access to the back side and the fastening of the filling.
If the frame has a protruding finial, assess the entire outer contour. At the dry assembly stage, the position of the part can still be changed without restoring the paint. Here it also becomes clear how the product will rest on the supports during finishing and installation of the backing.
Fastening is chosen according to the materials and surface preparation. For a suitable wood-to-wood joint, wood glue may be used, but its suitability, preparation, and holding time are determined by the instructions for the selected compound. A finished coating changes the bonding surface; applying glue over varnish according to the usual scheme without testing is not advisable.
Before painting, decide which areas should remain for gluing and which parts are more convenient to finish separately. If everything is glued at once, it may be difficult to reach deep areas of the carving. If the parts are fully painted first, a pre-planned method for their subsequent fastening will be required.
Auxiliary compounds can be selected in the section materials for installation and finishing, and general recommendations are in tips on finishing and installation. The final decision is made based on the selected joint and the material's technical instructions.
The artwork must not be inside during trimming, sanding, and coating application. After the work is completed, check the cleanliness of the seating area, the absence of protruding adhesive, and the readiness of the finish for contact with the other framing elements.
What to record before buying the moulding and mats
A clear specification is enough for one frame. Its purpose is to link the dimensions of the work, the construction, and the products so that the already agreed parameters are not lost at purchase.
| Position | What to fix |
|---|---|
| Painting or panel | Actual dimensions, thickness, and orientation |
| Frame openings | Light and seating dimensions separately |
| Base | Profile, cross-section, joint drawing, seating depth |
| Molding | Article number, wood species, finish and available strip length |
| Layout | Four finished sides, placement on strips, losses and pattern matching |
| Overlays | Article number, dimensions, position, orientation and quantity of each finish |
| Rosettes | Article number, diameter, relief height and quantity |
| Finishing | Approved sample, materials and sequence of operations |
| Mounting and hanging | Diagram, compatibility with the base and weight of the entire structure |
The hanging system is calculated for the finished product with infill and decor. It must not be attached to a thin overlay: the load must be transferred to the designated structural elements. Even lightweight ornamentation is no reason to consider a weak corner suitable for hanging the entire frame.
The schedule retains references to product cards and the project approval date. Drawings and available models can be found in the section technical materials STAVROS. If the documentation does not contain the required cross-section, it is clarified before ordering rather than reconstructed from a perspective photograph.
To compare costs, add up the price of the strips based on the actual quantity, the cost of overlays and rosettes, fasteners, finishing, packaging, and delivery. Separately estimate the work for cutting and assembly. Consider leftovers as useful only when their length, profile, and future use are known.
Additional questions about frame decor
Can decor be selected for wooden frames that are already painted?
Yes, but first you need to check the condition of the coating and the method of attaching the new parts. A weak layer under the overlay may come off together with it. A compatibility test is performed on a suitable sample or an inconspicuous area, taking into account the value of the item. For an old artistic frame with historical finishing, independent alteration may be inappropriate.
Are furniture overlays suitable for framing a painting?
The purpose of the catalog section does not determine compatibility. Evaluate the size, shape of the back side, species, thickness, and the possibility of reliable installation. A carved overlay suitable for a flat furniture facade may not fit a curved baguette. They are selected based on the geometry of the specific assembly.
Do decorative strips need to be joined specifically at 45 degrees?
This is a common scheme for rectangular framing, but a construction with separate corner blocks is also possible. In that case, the strips may meet them differently, and their lengths are calculated according to the working drawing. You cannot simultaneously use cutting dimensions for a 45-degree miter and assemble a different joint scheme.
Can the frame be enlarged by adding molding on the outside?
An additional profile can change the outer dimensions and the pattern of the framing. However, the seating opening will not increase because of this. If the artwork does not fit inside, external decor does not solve the problem. To expand the front composition wooden moldings and profiles they are selected according to the method of connection with the existing base.
How to preserve the ability to replace the panel
Provide accessible fastening on the back side and do not cover it with overlays. The decor should remain part of the frame, while the filling should be removable in the intended way. If the ornament overhangs the opening, check the panel removal path in advance: the free space at the back may not be sufficient.
Where to buy decor for wooden frames for your project
Purchasing begins when the seating of the work, the base profile, and the ornament layout have been determined. For self-assembly, choose Wooden Picture Frame by cross-section and cutting map. In the request, specify the article number, wood species, finish, and the required quantity of commercial strips. If you need baguette without coating, separately record the requirements for subsequent finishing.
Overlays and rosettes are ordered according to the approved positions on the frame. Check the left and right versions, the diameter of the rosettes, the width of the support areas, and the height of the relief. For a complex composition, it is reasonable to first obtain the necessary samples: they are used to check surface contact and prepare the overall paint color.
If a ready-made model suits the artwork, compare it with the self-assembly option by full set of components and total costs. You should not buy baguette just because its unit price seems lower: cutting, joints, and finishing remain part of the project.
Coordinated decor for wooden frames must fit onto the base at the same time, support the image visually, and not interfere with installing the piece. Keep the drawing, layout, and list of item codes together. Then the next frame can be reproduced with exact dimensions and finish, and for a new panel, the necessary details can be changed deliberately.