





















Article Contents:
- CPU-5-6 or CPU-4-3: short answer
- What is a narrow ready-made stucco panel
- Ready format saves design time
- Width of 150 mm solves the narrow area problem
- Height of 2300 mm creates a full vertical rhythm
- Relief works with light
- Ready composition does not mean ready installation
- NPU.VRS-012 sets the central motif
- Molding brings the composition together
- Thickness 12 mm
- Wall and niche
- Door leaf
- When CPU-5-6 is especially appropriate
- Commercial output
- Polyurethane character of the set
- Thickness 11 mm
- Wall as the main scenario
- "Light" does not mean small size
- Application on door and in niche
- When CPU-4-3 is especially appropriate
- Commercial output
- Joint with door casing
- Niche
- Next to furniture
- Painting
- Visual lightness
- Pier between two doors
- Wall section 200 mm
- Wall section 300 mm
- Wall corner
- Switches and outlets
- Center of the wall section and center of the composition
- Example for a 2700 mm wall
- 2600 mm wall
- 2500 mm wall
- 2800 mm wall
- Ceiling without cornice
- Uneven wall height
- Do not cut the central ornament
- Maintain top and bottom balance
- First build a new layout
- Paired panels change identically
- When it's better to choose a different model
- Single panel
- Two panels on the sides of the door
- Two panels on the sides of the mirror
- Same or mirrored orientation
- How many sets to buy
- Spare part
- Central axis
- 150 mm contour
- Top and bottom lines
- Dry layout
- Part marking
- Panels outside the architraves
- Panels instead of side frame
- Double-leaf door
- Door opening
- Architrave protrudes more than the panel
- Architrave thinner than the panel
- Actual canvas height
- Panels and transitions
- Handle and lock
- Hinges
- Installation before hanging
- CPU-4-3 on door
- Panel on back wall
- Paired panels inside wide niche
- Lighting
- Shelves in niche
- Depth
- Niche painting
- Mirror above the console
- Floor mirror
- Width of composition
- Reflection of the side relief
- Between two cabinets
- Next to the hinged door
- Near the sliding wardrobe
- Above the cabinets
- Living Room
- Entry Hall
- Bedroom
- Office
- Dining Room
- Hallway
- Commercial interior
- Uniform polyurethane set
- CPU-5-6 and connection of different components
- Material joint
- Molding ends
- Repairability
- Separate preparation
- One finish shade
- Matte paint
- Semi-gloss
- White panel
- Contrast panel
- Painting after installation
- Painting before installation
- Concealing fastener traces
- Sample near the wall
- Painted wall
- Plaster
- Drywall
- MDF panel
- Door leaf
- Where to select materials
- Lay out the kit on the floor
- Assemble the outer contour 2300 × 150 mm
- Mark the center of the decorative element
- Make a paper template of the wall
- Check two panels simultaneously
- Wall preparation
- Axis marking
- Frame part installation
- Temporary fixation
- Control before curing
- Joint finishing
- Dust
- Wet cleaning
- Impacts and touches
- Local repair
- Ready-made set
- Self-assembly
- Random mix of parts
- CPU-5-6 and NPU.VRS-012
- CPU-5-6 and CPU-5-5
- CPU-5-6 and CPU-5-7
- CPU-4-3 and CPU-4-2
- Panel and regular molding
- Panel and solid wall slab
- Pier 250 mm between doors
- Niche 500 mm wide
- Pair on the sides of the door
- Wall height 2500 mm
- Panel next to the swing wardrobe
- Needs to be painted in the wall color
- Needs a contrasting pattern
- Needs a series of identical panels
- Needs to design a tall door
- Select only by collection name
- Consider panels interchangeable due to same size
- Ignore baseboard and cornice
- Cut without a pattern
- Buy one kit for paired installation
- Do not account for the switch
- Glue onto peeling paint
- Use one primer for different materials without testing
- Do not check thickness near the door
- Install panel on a curved wall
- Expect a mirrored pattern
- Mix Versailles and Versailles Light without a common scheme
- Start installation with the first part without a full contour
- Do not save paint reserve
- How is CPU-5-6 different from CPU-4-3?
- Are the panel widths the same?
- What is the height of both sets?
- Why does the thickness differ by only one millimeter?
- What is included in CPU-5-6?
- What is included in CPU-4-3?
- Is CPU-5-6 completely polyurethane?
- Can the panel be installed in a narrow partition?
- What minimum clearance should be left on the sides?
- Will the panels fit a wall with a height of 2500 mm?
- Can CPU-5-6 be shortened?
- Can CPU-4-3 be shortened?
- Is CPU-5-6 suitable for a door leaf?
- Can CPU-4-3 be used on a door?
- Can CPU-5-6 be installed in a niche?
- Is CPU-4-3 suitable for a niche?
- How to install two panels symmetrically?
- Are two product cards needed for a paired composition?
- Will the pattern be mirrored?
- How to paint polyurethane and MDF in one color?
- Can the panel be painted together with the wall?
- What glue will be needed?
- Can it be mounted on a painted wall?
- Is drywall suitable?
- Is a mounting template needed?
- Which model looks calmer?
- Which model looks more expressive?
- What to choose for the hallway?
- What to choose for the formal living room?
- Where to buy CPU-5-6?
- Where to order CPU-4-3?
- Where to buy wall molding for decoration?
- Can I order the layout?
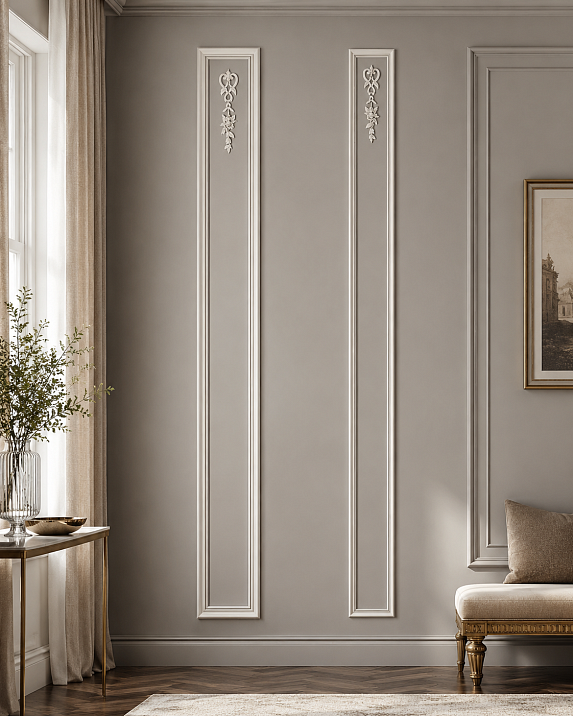
Two vertical compositions of equal height and width for a narrow wall space, niche, door, and paired opening design



CPU-5-6 or CPU-4-3: short answer
CPU-5-6 "Versailles" is worth buying when you need a more expressive narrow composition measuring 2300 × 150 × 12 mm with decorative element NPU.VRS-012 and molding MLD-003-MG. The set is considered for a wall, niche, and a suitable tall door leaf. CPU-4-3 "Versailles Light" is better to choose when you need a calmer classical rhythm and a minimum thickness of 11 mm. Its confirmed size is 2300 × 150 × 11 mm, the material according to the description is polyurethane, the main application is wall decoration. The difference of one millimeter does not determine the choice by itself: the pattern, composition, mounting surface, free height, and the ability to install the composition without breaking the ornament are more important.
Buy CPU-5-6 "Versailles" Buy CPU-4-3 "Versailles Light" Select ready-made compositions for walls Order panel layout on the wall
Both panels: height 2300 mm, width 150 mm. For one vertical, you need a section that accommodates not only the set itself but also side indents.
CPU-5-6: thickness 12 mm, collection «Versailles», composition includes NPU.VRS-012 and MLD-003-MG.
CPU-4-3: thickness 11 mm, collection «Versailles Light», material according to description — polyurethane; exact composition needs to be checked in the product card.
Free height: wall height minus baseboard, cornice, and top/bottom margins. The 2300 mm set cannot be automatically trimmed to any size.
A pair requires two sets. Before ordering, check the same pattern orientation, central axes, and position relative to the doorway, mirror, or furniture.
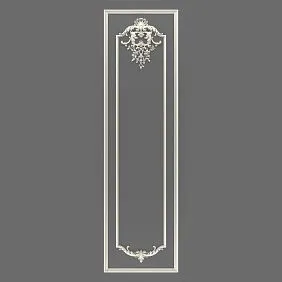
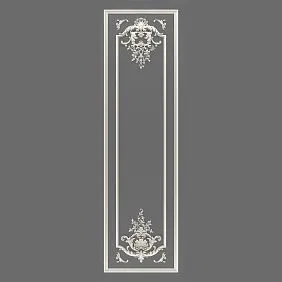
It is more difficult to buy a narrow molding panel than to choose a regular vertical molding. The finished set already defines the ratio of the frame, central decor, and height. The buyer receives a composition only 150 mm wide, which can fill the space between doors, elongate a niche, decorate the side part of a portal, or create a paired rhythm on the sides of a mirror. But a panel 2300 mm high requires precise marking: in a typical apartment, it can almost completely occupy the space between the baseboard and the ceiling cornice.
CPU-5-6 and CPU-4-3 are particularly interesting because they have the same frontal format. On the plan, both occupy a 150 mm strip, and both reach 2300 mm in height. Therefore, the buyer does not choose between a large and a small panel. He chooses between two artistic systems: the more saturated "Versailles" and the lightweight "Versailles Light" line, between a set with NPU.VRS-012 and MLD-003-MG and a kit described as polyurethane.
The same width does not mean the same result. The pattern can fill the inner field differently, the thickness of 11 and 12 mm gives a slightly different projection, and the composition affects the primer, glue, joint treatment, and painting. CPU-5-6 is intended for walls, niches, and door panels. For CPU-4-3, wall application is confirmed; the possibility of installing it on a door or in a niche must be separately verified in the product card.
To avoid assembling vertical decor from random parts, you can immediately go to the product cards and compare narrow panel 2300 × 150 × 12 mm и panel 2300 × 150 × 11 mm. Other ready-made schemes are collected in the section where you can Select ready-made compositions for walls.




What is a narrow ready-made stucco panel
A narrow molded panel is not a solid slab 150 mm wide or a single long overlay. It is a pre-assembled vertical composition of decorative elements and profiles. It helps achieve a finished design without independently searching for proportions between the molding, central ornament, top, and bottom.
Our factory also produces:


The ready-made format saves design time
When assembling yourself, you need to choose a molding, determine the width of the inner field, find the central overlay, calculate its position, and decide how to finish the composition at the top and bottom. In CPU-5-6 and CPU-4-3, the general format is already set. The buyer only needs to check the location, composition, and installation technology.
Get Consultation
The 150 mm width solves the problem of a narrow area
A large decorative panel does not fit between door trims, next to a furniture column, or inside a narrow niche. A 150 mm strip allows using molding where regular boiserie would require more space. However, the wall itself must be wider than the panel, otherwise the relief will be pressed against the edges.
The 2300 mm height creates a full vertical rhythm
The composition almost reaches the wall height in an apartment with a ceiling of 2500–2700 mm. Because of this, it does not look like a short insert. But the size requires considering the baseboard and cornice. The panel cannot simply be placed 'between them' without calculating the free zone.
The relief works with light
The thickness of 11–12 mm creates a noticeable but not massive shadow. With side lighting, the vertical becomes more expressive. On a very narrow wall, strong lighting can visually enhance the relief, so it is useful to evaluate the sample under real light.
A finished composition does not mean ready installation
The kit should not automatically include glue, primer, template, fasteners, and paint unless confirmed by the card. Before ordering, check the exact specification and prepare the base.
Confirmed specifications of CPU-5-6 and CPU-4-3
| Parameter | CPU-5-6 "Versailles" | CPU-4-3 "Versailles Light" | What the buyer should check |
|---|---|---|---|
| Size | 2300 × 150 × 12 mm | 2300 × 150 × 11 mm | Free height, side clearances, and overhang relative to the trim or furniture. |
| Collection | "Versailles" | «Versailles Light» | Compare photos, diagrams, and adjacent decor, rather than drawing conclusions only from the name. |
| Confirmed composition | NPU.VRS-012 and MLD-003-MG | Exact configuration is specified in the product card | Quantity of parts, length of profiles, and materials of each element. |
| Material | NPU.VRS-012 — polyurethane; MLD-003-MG requires a separate technology as a molding from the composition | According to the description — polyurethane | Can one primer and one adhesive be used for all components. |
| Application | Walls, niches, door panels | Wall decoration | Application of CPU-4-3 on a door or in a niche must be confirmed separately. |
| Style | Expressive classic line "Versailles" | More subdued "Versailles Light" line | Compare the richness of the ornament using real images or samples. |
| Painting | Technology will be coordinated for polyurethane and molding | Preparation for painting is being clarified | Primer, finish, joint treatment and acceptable application method. |
| Mounting template | Availability is being clarified | Availability is being clarified | Do not rely on the template until it is specified in the configuration. |
| Height change | The admissibility of trimming is checked according to the scheme | The admissibility of trimming is checked according to the scheme | Where the ornament is located and which elements can be shortened without losing symmetry. |
The comparison shows why the same format does not make models a complete analogue of each other. CPU-5-6 is revealed through a specific central element and molding. For CPU-4-3, the general polyurethane nature is confirmed, but the composition must be read in the current specification. This affects not only the product description, but also the practice: the installer must understand what bases and materials they are working with.
CPU-5-6 «Версаль»: when a more expressive narrow accent is needed
CPU-5-6 is built around the central decorative element NPU.VRS-012 and the molding MLD-003-MG. This combination makes the model clear to the buyer: the ornament defines the character of the composition, the molding forms a vertical frame and connects the decor with the wall, niche, or door leaf. The set is especially useful where a separate overlay would look incomplete and a wide panel does not fit.
NPU.VRS-012 sets the central motif
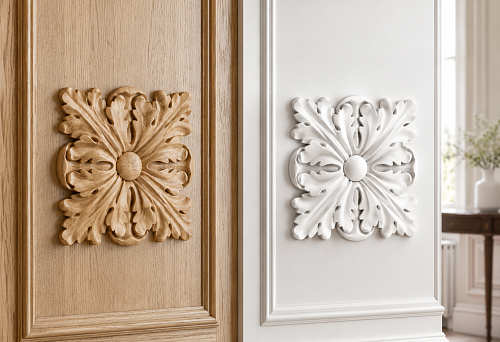
The confirmed size of the overlay is 55 × 254 × 11 mm, material — polyurethane. It is intended for walls, doors, and furniture. As part of CPU-5-6, this element becomes part of a tall vertical line rather than a standalone accent. It is useful for the buyer to view the central element of CPU-5-6, to better assess the relief and understand how well the pattern suits the interior.
The molding assembles the composition
MLD-003-MG forms the frame part. The exact length, number of segments, and preparation of the molding are checked in the set specification. You cannot order additional profile based on assumptions: first, you need to see the layout diagram and understand which elements are already included.
Thickness 12 mm
The extra millimeter compared to CPU-4-3 is small, but on a narrow wall, even a slight protrusion affects the side shadow and the joint with the trim. If the panel is installed next to a door or cabinet, check that it does not extend beyond the adjacent plane.
Wall and niche
CPU-5-6 is designed for wall and niche decoration. In a deep niche, the vertical can be placed on the back wall, on the side plane, or around the opening. Each scenario requires separate width and depth measurements.
Door leaf
The card allows use on doors, but the height of 2300 mm exceeds the height of many standard panels. Therefore, the model is more naturally suited for a tall door, a non-standard panel, or a scheme where the arrangement of parts can be changed. Trimming is not automatically assumed.
When CPU-5-6 is especially appropriate
This model is chosen for an expressive classic living room, an entrance portal, paired panels on either side of a door or mirror, a tall niche, and a composition where it is already used decor from the Versailles collection. Repeating one line helps avoid accidental combination of different patterns.
Commercial conclusion
If the project requires the central motif NPU.VRS-012 and a clear frame logic, you can Buy CPU-5-6 "Versailles", but before ordering, check the exact number of parts, molding, the possibility of changing the height, and the painting technology of the components.
CPU-4-3 "Versailles Light": when a calmer vertical is needed
CPU-4-3 has the same front format of 2300 × 150 mm, but a thickness of 11 mm and belongs to the Versailles Light line. The name suggests a lighter character, but the final conclusion about saturation should be made based on photos and the diagram. In the article, the model is considered as a calm alternative, not as a simplified or lower quality version.
Polyurethane nature of the kit
The card describes CPU-4-3 as a polyurethane kit. For the buyer, this is important in preparation and installation: when confirming a homogeneous composition, it is easier to match the primer and glue. But the exact list of elements still needs to be checked, because the general name of the material does not reveal the quantity and dimensions of the components.
Thickness 11 mm
The model protrudes from the wall slightly less than CPU-5-6. The difference of just one millimeter does not make the panel flat, but can be useful next to a thin trim, furniture facade, or narrow niche where every protrusion is noticeable.
Wall as the main scenario
Confirmed application — wall decoration. CPU-4-3 is suitable for a series of narrow piers, a paired composition on the sides of a mirror, a vertical rhythm in a hallway, and a calm classic panel between furniture sections.
"Light" does not mean small size
Height and width match CPU-5-6. Lightness is related to the artistic character and smaller thickness, not compactness. On a wall 2500 mm high, CPU-4-3 will still occupy almost the entire available vertical.
Application on door and in niche
Such scenarios should not be promised without checking the card. Geometrically, a width of 150 mm may fit a door panel or a niche, but the purpose and installation scheme must be confirmed for the specific surface.
When CPU-4-3 is especially appropriate
It is chosen for interiors where a classic vertical line is needed without an overly saturated accent: a light hallway, bedroom, corridor, a series of identical piers, a wall next to modern furniture, or a composition of several panels.
Commercial conclusion
For a calm wall rhythm, you can Buy CPU-4-3 "Versailles Light", after first clarifying the composition, surface preparation, possibility of trimming, and availability of a mounting template.
Direct comparison: "Versailles" or "Versailles Light"
| Task | Preliminary CPU-5-6 | Preliminarily CPU-4-3 | What determines the final choice |
|---|---|---|---|
| Expressive classic accent | Fits better due to the "Versailles" line and NPU.VRS-012 | May look calmer | Photos, diagram, and adjacent decor. |
| Light vertical rhythm | Possible, but the pattern is more active | Tentatively preferable | Actual pattern saturation. |
| Thickness of 11 mm is critical | No, 12 mm | Yes | Joint with trim, furniture, or niche. |
| Need NPU.VRS-012 | Confirmed in composition | Not confirmed | Exact decorative motif of the project. |
| Wall mounting | Confirmed | Confirmed | Style, composition and installation technology. |
| Installation in a niche | Declared | Check | Card purpose and niche depth. |
| Door installation | Declared for a suitable panel | Check | Leaf height, panel, handle, and schema change allowance. |
| Uniform material of all components | The composition includes NPU and MLD, the technology is checked separately | According to the description — polyurethane | Kit specification. |
| Paired panels | Suitable | Suitable | Pattern orientation, axes, and surrounding composition. |
Why a one-millimeter thickness difference still matters
Comparing 11 and 12 mm is easy to dismiss: the difference seems too small. However, thickness affects not only the overall volume but also the fit with adjacent parts. On a bare wall, one millimeter hardly defines the impression. Next to a trim, furniture front, niche shelf, or door handle, it can become part of a precise assembly.
Joint with door trim
If the trim protrudes from the wall by a small amount, the panel should not accidentally end up above its face plane or create an inconvenient pocket. A side cut shows the result better than a front photo.
Niche
Inside the niche, the thickness reduces the usable depth insignificantly but creates a shadow along the edges. With hidden lighting, this shadow can become brighter and visually increase the relief.
Near furniture
A cabinet door, pull-out front, or side panel may pass close to the wall. An 11 or 12 mm panel together with the adhesive layer should not interfere with movement. Check the actual protrusion of the finished assembly, not just the card size.
Painting
Primer and paint add minimal thickness, but their uniformity is more important. A thick layer on the edge can make the joint rougher. The relief is painted thinly and without drips.
Visual lightness
One millimeter does not guarantee that CPU-4-3 always looks lighter. The pattern can influence more than thickness. That is why models are compared using full-size images and samples.
How to measure a narrow wall section
A panel width of 150 mm is not a recommended wall width, but the dimension of the composition itself. The wall section should leave free space on the sides. Without it, the molding will visually appear squeezed between trims, corners, or furniture. First, measure the entire area, then subtract adjacent protrusions, and only then determine the panel axis.
Pier between two doors
From the total width, subtract the protruding architraves. Divide the remaining clear area in half and mark the central axis. Place a 150 mm wide panel so that the side fields are equal. If the clear pier is 250 mm, after installation 50 mm remains on each side. This margin may be visually sufficient, but it needs to be checked on a mockup.
Pier 200 mm
After installing the panel, only 25 mm will remain on each side. The relief will be very close to the edges, especially if the architraves protrude and create additional shadows. In such a place, CPU-5-6 may look denser, and CPU-4-3 calmer, but the solution still requires a full-size fitting.
Pier 300 mm
75 mm of free space on each side allows the verticals to read more independently. This width is convenient for a paired composition near doors and for a panel next to a window, if the slopes and curtains do not cover the decor.
Wall corner
Do not place the panel flush against the inner corner. The side relief will become harder to paint and clean, and the shadow from the corner will mix with the shadow of the molding. The offset is determined by the mockup and installation method.
Switches and sockets
Electrical installation products should not accidentally fall inside the frame. Moving a switch after installing the molding is significantly more difficult. Before ordering, mark all boxes, thermostats, sensors, and wall lights on the layout.
Center of the wall section and center of the composition
If adjacent door openings have different widths, the geometric center of the pier may not coincide with the visual center of the entire wall. In this case, the panel is tied to the main architectural axis — a door, mirror, console, or furniture group.
How to check the free height of 2300 mm
The wall height itself does not indicate whether the set fits. The panel is installed not from floor to ceiling, but between the baseboard, cornice, and provided gaps. The calculation is performed using the formula:
Free height = wall height − baseboard height − cornice height − top gap − bottom gap.
Example for a wall of 2700 mm
Wall height — 2700 mm, baseboard — 100 mm, cornice — 100 mm, top and bottom gaps — 80 mm each. Free vertical:
2700 − 100 − 100 − 80 − 80 = 2340 mm.
The 2300 mm set fits, but only 40 mm of total installation margin remains. If the wall or cornice has a deviation, the margin will quickly disappear. Before purchasing, you need to measure the height at several points.
Wall 2600 mm
With the same baseboard and cornice, 2240 mm remains before the offsets. The full 2300 mm panel does not fit. You cannot simply shorten it by 60 mm: you need to understand where the moldings and central ornament run, whether the pattern allows reduction, and how to maintain symmetry.
Wall 2500 mm
If the baseboard and cornice are 80 mm each, the free zone without additional offsets is 2340 mm. Formally, the set fits, but it almost touches both horizontals. Visually, the composition may look cramped, and the installation tolerance remains minimal.
Wall 2800 mm
A tall wall provides more freedom. You can leave noticeable top and bottom offsets and tie the panel to the proportions of a door or mirror. However, too much empty space above and below also requires thoughtful distribution.
Ceiling without cornice
The absence of a cornice increases the free height, but the top edge of the panel should not accidentally reach the ceiling. A clean offset is needed to complete the composition and facilitate painting.
Uneven wall height
Measure the left, center, and right points of the future installation. If the difference is noticeable, the panel cannot be aligned only to the baseboard or only to the ceiling. A laser axis and design offsets help choose a compromise.
Can the 2300 mm panel be shortened
The possibility of trimming depends on the design of the kit. If the height is formed by straight sections of the molding, they can technically be shortened. However, the position of NPU.VRS-012, the upper and lower elements, the repeat, and symmetry may change. For CPU-4-3, you first need to know the exact composition.
Do not cut the central ornament
The decorative overlay has a complete pattern. Trimming will disrupt the shape and create an unfinished edge. Height is adjusted using permissible straight sections, if confirmed by the diagram.
Maintain the upper and lower balance
If you remove all excess size only from the bottom, the central element will shift upward. Sometimes this is justified relative to furniture, but more often the composition loses balance. The reduction is distributed according to the project.
First, build a new layout
On it, mark the position of all parts after the reduction. Only then determine the cut length. You cannot start by trimming the molding and then try to place the remaining decor.
Paired panels are modified identically
Two verticals must have the same height and ornament position. All segments are marked according to one map. Even a difference of a few millimeters is noticeable along the upper horizontal.
When it's better to choose a different model
If the free zone is significantly less than 2300 mm and shortening ruins the composition, it is more rational to look at another set rather than reworking a finished panel. In the "Versailles" line, you can look at a more expressive vertical panel «Versailles» or compare other sizes; in the "Versailles Light" line — choose an alternative narrow panel «Versailles Light».
One panel or a symmetrical pair
One narrow vertical works as an accent on a pier or inside a niche. A pair creates an architectural frame around a door, mirror, console, or furniture section. For symmetry, it's not enough to buy two identical sets: you need to check the pattern direction and the overall layout.
Single panel
Suitable for a pier between two doors, an area next to a window, a tall niche, and a narrow field between cabinets. It must be aligned with the axis of the wall or furniture. Random offset makes the vertical look like residual decor.
Two panels on the sides of the door
Axes are measured from the center of the doorway. Trim may have different widths or the wall may have different lengths on each side. Symmetry is built relative to the door, not the nearest corners of the room.
Two panels on the sides of the mirror
First, determine the outer size of the frame and the free margins. The panel should not touch the mirror or look like an extension of its casing, unless intended. The height can be tied to the top of the frame or left independent.
Same or mirrored orientation
If the set does not have separate left and right versions, two panels may repeat the pattern identically. This is not always a problem, but mirroring cannot be expected without checking. The diagram or physical elements are compared before installation.
How many sets to buy
For a pair, two complete kits are required. Do not assume that one card includes two verticals. The exact composition and number of elements in one CPU-5-6 or CPU-4-3 are checked before ordering.
Spare part
For complex installation and subsequent repairs, it is useful to clarify the possibility of ordering a separate overlay or molding. NPU.VRS-012 has its own card, so it can be considered separately. For CPU-4-3 components, a specification must be requested.
Marking paired panels with a laser level
A tall composition of 2300 mm amplifies even a small deviation. The top can shift sideways by a few millimeters, and near the door it will be noticeable. A laser level helps build verticals and a common horizontal line, but does not replace checking the wall itself.
Central axis
First, mark the center of the door, mirror, or furniture. From it, set equal distances to the panel axes. If counting from different trims, their installation errors will transfer to the molding.
Outline 150 mm
On both sides of the axis, set 75 mm each. The outline helps to see if there is enough space and whether switches or furniture fasteners fall into the composition.
Top and bottom lines
They are built at the same level for a pair. If the baseboard has a slope, do not repeat it with panels. The difference is resolved with an offset or base preparation.
Dry layout
All elements are applied without glue and photographed. Check distances, position of the central decor, top and bottom. Only after approval, make installation marks.
Marking of parts
For a pair, the left and right compositions, top and bottom are labeled. After priming or pre-painting, elements should not be swapped.
Doorway framing
Paired panels on both sides of a doorway help turn an ordinary wall into an architectural composition. CPU-5-6 and CPU-4-3 occupy narrow strips and do not require wide boiserie, but their height and relief must align with the trims, cornice, and the door itself.
Panels outside the trims
This is the most understandable scenario. A free field is left between the casing and the molding so that the two profiles do not merge. If the casing is wide and carved, CPU-5-6 can create an overly dense ornament; CPU-4-3 looks calmer in advance.
Panels instead of side frame
In some projects, a narrow vertical becomes the main side decor of the portal. Then its center is tied to the cornice above the door and the bottom line of the baseboard. The joint with the upper decor is designed in advance.
Double door
A wide opening allows for a more expressive "Versailles". Paired CPU-5-6 can support the scale of the door, especially if there are other elements of the collection nearby. However, the width of the wall on the sides must accommodate 150 mm panels and free indents.
Door opening
The panel on the wall should not fall into the handle area of the open leaf. In a narrow corridor, the handle can hit the relief. Check the full radius of movement and install a limiter only as part of the overall solution, not as an attempt to protect an incorrectly placed decor.
Casing protrudes more than the panel
This is acceptable if the transition looks intentional. A side cut helps assess whether a deep dust-collecting gap will form. The thickness of 11–12 mm should be compared with the actual casing overhang after painting.
Casing thinner than the panel
The stucco will visually protrude forward. On a classic portal, this can emphasize the vertical, but on a simple door, it may look accidental. For such a node, CPU-4-3 with 11 mm may be more convenient, although the pattern remains the main criterion.
CPU-5-6 on a tall door leaf
CPU-5-6 is declared for door leaves, but the 2300 mm size requires special verification. Many interior doors have a smaller overall height, and the decorative field is even lower due to the top and bottom rails. Therefore, the card assignment cannot be understood as universal compatibility with all doors.
Actual leaf height
They measure not the opening or the frame, but the leaf itself. Then safe margins are subtracted from the top and bottom edges. If the decorative field is less than 2300 mm, an approved modification scheme is required.
Panels and transitions
Components must lie on one stable plane. If the molding crosses a panel, part of the profile may lack support. Re-marking must account for the door construction.
Handle and lock
The 150 mm panel width and the central overlay must not intersect the hardware holes. Even if the pattern visually passes nearby, the handle must be freely usable without touching the relief.
Hinges
Do not place decor in the area of hidden fasteners and adjustments. On a heavy door, additional mass and surface changes require coordination with the door manufacturer.
Installation before hanging
It is easier to mark and hold parts on a horizontally laid door. However, the finished relief must be protected during transfer and hanging. Work is performed only after verifying that the coating and adhesive are designed for a movable base.
CPU-4-3 on door
Such use is only possible after confirming the card and technology. Do not transfer the purpose of CPU-5-6 to another model due to the same size.
Designing a tall niche
The niche enhances the vertical effect because the side planes already form a frame. A narrow panel can be installed on the back wall, on one of the sides, or in pairs. CPU-5-6 is directly intended for niches; for CPU-4-3, the scenario is checked separately.
Panel on the back wall
It becomes the central accent. The width of the niche should leave enough free space, otherwise the composition will look like a profile accidentally inserted between the side panels.
Paired panels inside a wide niche
Two verticals can frame a mirror, sculpture, console, or decorative shelf. It is necessary to check whether the inner field becomes too narrow after installing two strips of 150 mm.
Lighting
The LED strip or spot should not overheat the material and create sharp glare. A relief of 11–12 mm casts a shadow that can enhance or distort the pattern. The placement of lights is checked on a sample.
Shelves in a niche
The panel should not pass under the shelf brackets or intersect their edges. If the vertical continues between several shelves, the composition is effectively divided into parts and loses the original 2300 mm format.
Depth
Even a small thickness affects usable space if the niche is intended for items. Measure not only the total depth but also the distance to the door, lighting, or back panel.
Painting a niche
If the decor and back wall are the same color, the relief is read through shadow. A contrasting color makes a narrow vertical more active. CPU-5-6 in contrast can become too saturated for a small niche, then CPU-4-3 looks calmer.
Panels on the sides of the mirror
A mirror is a convenient central object for paired moldings. High verticals stretch the wall and create a frame without needing to build a wide border. However, a height of 2300 mm often exceeds the mirror, so you need to decide whether to link the panels with its top or with the architecture of the entire wall.
Mirror above the console
The bottom edge of the panels can start at the baseboard level or above the console. If they go behind furniture, access for cleaning becomes more difficult. It is better to determine in advance whether the vertical should be continuous.
Floor mirror
A pair of panels can go almost the full height next to the frame. The side fields must be identical. CPU-5-6 supports an expressive classic frame, CPU-4-3 combines more easily with a more laconic mirror.
Composition width
Add two free margins and two 150 mm panels to the mirror width. The resulting total size should fit on the wall and not conflict with switches or furniture.
Reflection of the side relief
If the panels are placed very close to the mirror, an additional ornament appears in the reflection. This can beautifully double the pattern, but sometimes creates visual overload. The layout is evaluated from the front and at an angle.
Panel next to furniture
Narrow vertical decor is often installed between cabinets, next to a dresser, in the side area of a furniture portal, or on the wall near a tall display case. Here it is important to check not only the style, but also the opening of the facades.
Between two cabinets
CPU-4-3 can create a calm divider, CPU-5-6 a more noticeable central axis. Space is left between the panel and the sidewalls so that the relief does not look like part of a random furniture joint.
Next to a hinged door
The door in the open position should not hit the decor. The handle protrusion and hinge mechanism are checked according to the plan. The panel thickness is measured together with the glue and finish.
Near the wardrobe
A sliding door usually does not extend beyond the side plane, but trims, guides, and decorative strips may protrude. The stucco should not interfere with the maintenance of the mechanism.
Above the pedestals
Two panels can be placed above paired cabinets or on the sides of a central one
Application in Different Rooms
Living room
CPU-5-6 suits a ceremonial wall with a mirror, portal, or console. CPU-4-3 helps add classicism next to modern upholstered furniture without excessive ornamentation. Paired verticals work well on a long wall where a clear architectural axis is needed.
Hallway
Narrow piers between doors are a typical scenario. Here, handles, switches, and passage width are important. CPU-4-3 with its smaller thickness is more convenient in a tight area, but the pattern and color determine the final impression.
Bedroom
Panels can be placed on either side of the headboard, mirror, or vanity table. The calm line of "Versailles Light" more easily supports a soft composition, while "Versailles" suits a more decorative interior.
Cabinet
CPU-5-6 can highlight the piers between bookcases and support classic moldings. CPU-4-3 is convenient for a series of identical verticals that create rhythm but do not distract from furniture and art.
Dining room
Paired panels on either side of a sideboard, mirror, or doorway connect the furniture to the wall. When choosing, consider the height of the cornice and the distance to the chair backs so that the relief is not in the zone of constant contact.
Corridor
Several CPU-4-3 units can form a repeating calm rhythm. CPU-5-6 is better used selectively near the main door or mirror, otherwise the narrow space will become too busy.
Commercial interior
In a hotel, salon, restaurant, or showroom, narrow panels help to design repeating pilasters without individual development of each section. One control sample is mounted before the series, and cleaning, lighting, and coating durability are checked.
Polyurethane and combined composition: what changes in finishing
The material affects not only weight and installation. It determines the primer, seam behavior, paint absorption, and method of edge preparation. For CPU-4-3, a polyurethane version is confirmed. In CPU-5-6, the central NPU.VRS-012 is made of polyurethane, and the composition includes MLD-003-MG. For this, the material and factory preparation need to be checked separately.
Homogeneous polyurethane set
If all components of CPU-4-3 are indeed made of one material, it is easier to build a unified priming and painting technology. But even in this case, different relief shapes may accumulate paint differently. The composition does not eliminate the need for a test coat.
CPU-5-6 and joining different components
A polyurethane overlay and a molding from the composition may require different primers or preparation. The finisher's task is to achieve the same finish through different technological paths. One composition cannot be used solely for convenience if compatibility is not confirmed.
Material joint
The connection line must remain neat after changes in room temperature and humidity. Too rigid or thick putty may emphasize the transition. The specific material for the seam is chosen considering both substrates and the future paint.
Molding ends
After cutting, a new section of material is exposed. It is prepared so that the end does not differ in absorption and color. On polyurethane and MDF molding, this operation may be performed with different compounds.
Repairability
In case of local damage, it is sometimes easier to replace a separate overlay than to restore a complex relief. The presence of an independent card NPU.VRS-012 is useful for CPU-5-6. For CPU-4-3, it is necessary to find out whether components can be ordered separately.
How to paint CPU-5-6 in one color
A uniform shade helps perceive the molding and overlay as a single panel. The main challenge is achieving the same matteness and coverage on different substrates. Work begins with test samples, not with applying the final paint to an already installed vertical surface.
Separate preparation
Polyurethane is cleaned and primed with a compatible compound. The preparation of MLD-003-MG is checked against the card and instructions for the selected system. After priming, the surfaces should have comparable uniformity.
One finish shade
The same paint code does not guarantee the same result if the primer and gloss differ. Two small samples are fully painted and compared after drying under real lighting.
Matte paint
It more gently hides minor differences in the substrate and emphasizes the shape with shadow. On a narrow panel, a matte finish often looks architecturally calm. But the specific type of paint is chosen based on the room and material.
Semi-gloss
Semi-gloss finish emphasizes texture, joints, and preparation quality. For CPU-5-6, semi-gloss requires particularly careful finishing of the transition between the overlay and molding.
White panel
White color does not make defects invisible. Side light reveals primer runs and uneven seams. Before final painting, the panel is inspected from different angles.
Contrast panel
A dark or saturated color turns the vertical element into a standalone accent. On CPU-5-6, this will enhance the expressiveness of NPU.VRS-012. CPU-4-3 in contrast will also become more noticeable and may lose its intended 'lightness'.
How to paint CPU-4-3
A polyurethane kit is usually perceived as a single surface. This simplifies the artistic task but does not eliminate preparation. First, clarify whether factory primer is required, whether painting is possible after installation, and which compounds are compatible with the material.
Painting after installation
Suitable for panels matching the wall color. Finish the joints, then paint the vertical and surrounding plane as one composition. Avoid flooding the narrow relief or leaving a roller mark along the edges.
Painting before installation
Useful for contrast color. Access to ends and ornament is easier, but local touch-up of seams will be required after installation. Keep the technical data sheet and a small amount of finish paint.
Concealing fastener marks
If the project requires additional fastening, cover the locations with a compatible material and sand without altering the relief. Self-drilling elements without a diagram is risky.
Sample near the wall
The panel color is compared not only with the catalog, but also with the baseboard, cornice, trim, and furniture. Warm white on the wall may conflict with cool white decor.
How to choose glue
Adhesive is chosen not by the word 'stucco', but by the material of the element and the base. For CPU-5-6, a compound compatible with polyurethane and molding may be required. For CPU-4-3, one compatible with polyurethane and the wall. Concrete, plaster, paint, drywall, and MDF panels have different surfaces.
Painted wall
The adhesive holds the decor together with the paint layer. If the coating peels, the entire system is unreliable. Before installation, an adhesion test is performed and the area is prepared.
Plaster
The base must be dry, strong, and dust-free. Loose layers are removed. Irregularities are not compensated with a thick adhesive bead, otherwise the panel will become wavy.
Drywall
Light decorative installation is possible on a prepared surface, but sheet joints, primer, and paint must be stable. For additional mechanical points, the location of profiles or embedded elements is checked.
MDF panel
The surface may be laminated, primed, or painted. The adhesive must have adhesion to the specific finish. A test is performed on a smooth coating.
Door leaf
The base moves, experiences vibrations, and contact. The compound must be designed for both surfaces. For a heavy or tall composition, additional fixation may be required per the project.
Where to select materials
For the project, you can Select glue, primer, and painting materials. The choice is confirmed by instructions for specific compositions and a test on a sample.
Dry layout before installation
The panel cannot be assembled directly on the wall without preliminary checking. A dry layout shows how the elements form a height of 2300 mm, where the central ornament is located, and whether the composition can be changed for the actual area.
Lay out the set on the floor
Use a clean, flat surface. Check the number of components against the specification. A damaged or missing element must be detected before applying glue.
Assemble the outer contour 2300 × 150 mm
Check if the actual layout matches the card size. Measure the diagonals if the composition includes a frame. A difference indicates an error in placement or trimming.
Mark the center of the decorative element
On CPU-5-6, the position of NPU.VRS-012 must match the diagram. If the height is changed, decide in advance whether the overlay remains in the geometric center or is tied to furniture, a mirror, or a door.
Make a paper template of the wall
Transfer the baseboard, cornice, sockets, and switches onto it. Overlay the panel outline. Such a simple layout reveals conflicts before installation.
Check two panels simultaneously
For a pair, dry layout is needed for both sets. Compare the orientation of the pattern and the actual dimensions. Production elements should be repeatable, but installation segments are easy to confuse.
Installation sequence without turning the article into a dry instruction
The practical logic is the same: first the base and marking, then trial assembly, followed by fixing and finishing. The specific curing time, glue thickness, and need for fasteners depend on the chosen materials.
Wall preparation
The surface is leveled, cleaned, and primed according to a compatible system. A high molding will show even a slight wave. It cannot be pressed pointwise against a curved wall.
Axis marking
A vertical line is built with a laser, then a contour 150 mm wide. For a pair, a common top and bottom line is added. All dimensions are checked with a tape measure.
Frame part installation
In CPU-5-6, it is logical to first install the elements that define the geometry, and then the central overlay, if the scheme does not require a different order. For CPU-4-3, the sequence is determined by the completeness.
Temporary fixation
Long vertical elements may slide down. The support must not damage the face surface and the finished wall. The tape and stops are selected considering the coating.
Control before curing
While the compound allows adjustment, check the verticality, width, and position of the decor. After setting, correction may require dismantling.
Finishing of joints
Transitions are covered thinly and neatly. A wide strip of sealant around each element ruins the clear shadow. The joint material must be compatible with the paint.
General practical information is collected in the section recommendations for marking and installation.
Care for the painted decorative panel
After installation, the relief requires gentle regular cleaning. The care method depends on the finish paint. Unpainted or improperly prepared material should not be cleaned with aggressive agents.
Dust
It is cleaned with a soft dry brush or attachment without hard pressure. On the deep NPU.VRS-012, dust accumulates in the recesses more than on a straight molding.
Wet Cleaning
Permissibility is determined by the coating. First, test an inconspicuous area. Water should not seep into seams or remain on horizontal transitions.
Impacts and touches
In the hallway and near the door, the panel may be located next to bags, handles, and furniture. The placement is chosen so that the relief does not become a constant point of contact.
Local Repair
The paint code, gloss level, and technical data sheet are preserved. For CPU-5-6, it is useful to know if NPU.VRS-012 can be ordered separately. A damaged molding is sometimes replaced with a section, but the joint must be planned.
What to buy together with a narrow molding panel
CPU-5-6 and CPU-4-3 are already ready-made compositions, but a wall rarely consists of a single vertical line. The project may require adjacent moldings, additional overlays, a wider central panel, and installation materials. The set should be built around one collection and one scale.
| What to add | Why this is needed | For which scenario | What to Check |
|---|---|---|---|
| Decorative overlay NPU.VRS-012 | Repeat the central motif of CPU-5-6 in another zone or have a separate element for the project | Door, furniture, wall frame, symmetrical composition | Size 55 × 254 × 11 mm, position and quantity |
| Decorative Wall Moldings | Continue the frame grid beyond the narrow panel | Boiserie, long wall, door portal | Profile, thickness, material and combination with the ready-made kit |
| Polyurethane overlays for walls and doors | Add separate accents without a second full panel | Above the door, in the center of the frame, on the furniture front | Style, size and permissible installation location |
| More expressive panel CPU-5-5 | Create a main center near narrow CPU-5-6 | Long wall, living room, formal area | Full dimensions and height compatibility |
| Medium-format panel with double molding CPU-5-7 | Add an intermediate scale between narrow and wide composition | System of multiple Versailles panels | Rhythm, wall width, and overall molding pattern |
| Wider composition CPU-5-8 | Highlight the central field | Mirror, console, sofa area, large portal | Size, free fields, and height relative to CPU-5-6 |
| Another set «Versailles Light» CPU-4-1 | Assemble a wall in one lightweight collection | Bedroom, hallway, light living room | Custom sizes and pattern of the set |
| More complex composition CPU-4-4 | Add a main accent to calm CPU-4-3 | Central wall section | Size, amount of ornament, and overall scale |
| Glue, primer, and painting materials | Assemble a compatible installation and finishing system | Any installation of CPU-5-6 or CPU-4-3 | Material of the wall and each component |
| Panel layout on the wall | Check axes, height, quantity, and combination of kits | Paired installation, long wall, complex portal | Transfer the elevation, dimensions of furniture, doors, baseboard, and cornice |
Ready-made kit or self-assembly from moldings and overlays
Individual moldings and overlays offer more freedom but require design. A ready-made CPU panel reduces the number of decisions and helps maintain proportions. The choice depends on how non-standard the area is.
Ready-made kit
Suitable for a wall that accommodates a 2300 × 150 mm format. The buyer receives an agreed composition and does not waste time selecting a central element. The main checks are completeness and installation.
Self-assembly
Needed if the height is noticeably less than 2300 mm, the wall has an unusual width, or the ornament must be at an exact mark relative to furniture. In this case, you can buy decorative wall moldings и buy polyurethane wall and door overlays, but a full layout will be required.
Random mix of parts
This is the worst option. The molding, overlay, and top decor may look nice individually but differ in scale and style. A ready-made collection protects against such mismatches.
How not to confuse a narrow panel with similar products
CPU-5-6 and NPU.VRS-012
NPU.VRS-012 is a separate overlay measuring 55 × 254 × 11 mm. CPU-5-6 is a tall composition 2300 × 150 × 12 mm, which includes it along with the molding. Buying one overlay does not replace the entire set.
CPU-5-6 and CPU-5-5
CPU-5-5 is a more expressive panel and solves the task of the main wall section. CPU-5-6 is needed for a narrow pier or side vertical. They can be combined, but cannot be considered interchangeable.
CPU-5-6 and CPU-5-7
CPU-5-7 belongs to the medium-format composition with a double molding. If 150 mm looks too narrow and gets lost on the wall, it's worth comparing this model. All dimensions are checked in its card.
CPU-4-3 and CPU-4-2
Both models belong to "Versailles Light", but have their own pattern and configuration. CPU-4-2 cannot be selected as an automatic shortened or mirrored version of CPU-4-3.
Panel and regular molding
The molding forms a line but does not contain a complete vertical composition. The CPU panel combines a frame profile and a decorative pattern. For a simple minimalist outline, a ready-made kit may be excessive.
Panel and solid wall slab
CPU-5-6 and CPU-4-3 do not cover the wall with a solid material. The main plane of the wall remains between the elements. Its quality and color become part of the result.
Practical choice for specific situations
250 mm pier between doors
Both panels fit with side margins of 50 mm. CPU-4-3 initially looks calmer in a tight space. CPU-5-6 is chosen if the door and architraves already have a pronounced classic character.
A niche 500 mm wide
One panel will leave 175 mm on each side when centered. CPU-5-6 suits a confirmed niche scenario. For CPU-4-3, first check the admissibility of use.
A pair on the sides of the door
Buy two sets. Axes are built from the center of the opening, check handles and architraves. CPU-5-6 is suitable for a front door, CPU-4-3 for a long quiet corridor.
Wall height 2500 mm
The panel can only fit with compact baseboard, cornice, and offsets. Calculation is done based on actual dimensions. If the free zone is less than 2300 mm, trimming is agreed upon.
Panel next to a swing wardrobe
The main parameter is the trajectory of the facade and handle. The difference in thickness of 1 mm is secondary. First, check whether the furniture touches the finished relief.
Needs to be painted in the wall color
CPU-4-3 is simpler as a polyurethane composition, but the preparation is still specified. CPU-5-6 requires coordination of the primer for NPU.VRS-012 and MLD-003-MG.
A contrasting pattern is needed
CPU-5-6 with a central overlay gives a more pronounced accent. The contrasting color enhances the pattern, so on a narrow area it is important not to overload the wall.
A series of identical panels is needed
CPU-4-3 is suitable for a calm repeating rhythm. Before a large order, one test section is assembled, the composition and technology are checked.
A tall door needs to be designed
CPU-5-6 is declared for the door leaf. The actual height of the decorative field, handle, hinges, and the admissibility of changing the scheme are checked. CPU-4-3 is used for the door only after confirmation.
Errors when choosing CPU-5-6 and CPU-4-3
Choosing only by the collection name
"Versailles" indeed implies a richer classic style, while "Versailles Light" has a lighter character. But the final pattern should be compared using the diagram and photos. The name does not replace visual verification.
Considering panels interchangeable due to same size
The format 2300 × 150 mm matches, but the composition, thickness, and purpose differ. Replacing the model after wall preparation may require a different primer, adhesive, or installation scheme.
Ignore baseboard and cornice
A wall height of 2500 or 2700 mm does not equal free vertical space. After subtracting horizontal profiles, the kit may not fit.
Trim without a diagram
Shortening a straight molding seems simple, but the central ornament may shift. First, build a new layout, then cut.
Buy one kit for paired installation
One card does not mean two panels. The exact contents are checked, but for a symmetrical pair, two separate kits are usually needed.
Do not account for switch
Moving the electrical installation after purchase and marking can change the budget and timeline. All points are applied to the wall in advance.
Glue onto peeling paint
Strong glue does not reinforce a weak base. The decor will come off with the coating. The wall is checked and prepared.
Using one primer for different materials without checking
For CPU-5-6 this is especially important. The polyurethane overlay and molding may require different preparation. A uniform finish is achieved after compatible separate primers.
Not checking the thickness near the door
The panel together with the glue may protrude into the handle or trim area. The side assembly is drawn to scale.
Installing the panel on a curved wall
Long elements will show a wave and may come off. The base is leveled, not compensating for unevenness with a thick glue layer.
Expecting a mirror pattern
Two identical panels are not necessarily left and right. The orientation of the central elements is checked before ordering and dry layout.
Mixing "Versailles" and "Versailles Light" without a common scheme
Collections can only be combined deliberately. A random combination of different saturations creates inconsistency on one wall.
Starting installation with the first piece without a full outline
A small error in the bottom element will accumulate at a height of 2300 mm. First, build the axis and dry-lay the entire set.
Not keeping a paint reserve
Local repair after a few months may differ in shade and gloss. The technical card and remaining finish are preserved.
Who is CPU-5-6 "Versailles" suitable for
- expressive classical pier;
- tall wall niche;
- paired design of a formal doorway;
- suitable tall door leaf;
- composition with element NPU.VRS-012;
- interior where the Versailles collection is already used;
- wall with sufficient free height of 2300 mm;
- project where a thickness of 12 mm is acceptable;
- contrasting or rich decorative vertical;
- customer ready to agree on painting different components.
When it's better not to choose CPU-5-6
- free height is noticeably less than 2300 mm and trimming is not confirmed;
- the pier is too narrow for an active ornament;
- a fully homogeneous polyurethane system without specifying the composition is required;
- the door leaf is lower than the composition and the layout cannot be changed;
- the molding interferes with the handle, casing, or facade;
- the interior requires a very calm vertical line.
Who is CPU-4-3 "Versailles Light" suitable for
- for a calm classic pier;
- series of identical verticals;
- for a narrow wall next to modern furniture;
- a paired composition on either side of a mirror;
- project where the thickness of 11 mm is important;
- to the interior of the "Versailles Light" line;
- painted wall with rhythmic decor;
- to a hallway, bedroom, or bright living room;
- to a customer who needs a polyurethane kit;
- to a wall with confirmed free height.
When it's better not to choose CPU-4-3
- a specific NPU.VRS-012 element is needed;
- confirmed application on a door leaf is required;
- the project requires a rich "Versailles" composition;
- the exact configuration has not been verified;
- the panel must be installed in a niche without confirmation;
- the height of 2300 mm does not fit and the trimming is not approved.
What to Check Before Ordering
- part number CPU-5-6 or CPU-4-3;
- size 2300 × 150 × 12 or 2300 × 150 × 11 mm;
- the actual free height of the wall;
- the height of the baseboard and cornice;
- the top and bottom offsets;
- the clear width of the wall pier;
- position of trims;
- switches, sockets, sensors and lights;
- trajectory of the door handle and furniture front;
- exact configuration of one set;
- number of sets for a pair;
- composition of CPU-4-3;
- quantity of NPU.VRS-012 and MLD-003-MG in CPU-5-6;
- possibility of height adjustment;
- mounting template;
- preparation of components for painting;
- glue for each material and base;
- joint diagram;
- pattern orientation in a pair;
- current ordering and delivery conditions.
How to buy CPU-5-6 or CPU-4-3 on STAVROS
Start with a wall scan. Specify the room height, baseboards and cornices, wall width, doors, furniture, and electrical installations. After that, it will become clear whether the vertical 2300 × 150 mm fits and whether one or two panels are needed.
For an expressive line, open the card and buy CPU-5-6 "Versailles", after checking the composition, application, and permissibility of height changes. For a calmer wall decor, open the card and order CPU-4-3 "Versailles Light", specifying all components and preparation.
If the narrow format does not solve the problem, you can Buy Polyurethane Molded Decoration in a different scale or Select ready-made compositions for wallsFor a complex wall, it is reasonable Order panel layout on the wall.
Before payment, check the exact configuration, availability of the installation template, preparation for painting, and the possibility of ordering individual components. Terms of receipt are collected on the page payment and delivery terms.
FAQ: questions about CPU-5-6 and CPU-4-3
How is CPU-5-6 different from CPU-4-3?
CPU-5-6 belongs to the "Versailles" collection, has a thickness of 12 mm and a confirmed composition of NPU.VRS-012 and MLD-003-MG. CPU-4-3 belongs to "Versailles Light", has a thickness of 11 mm and is described as a polyurethane kit. Their height and width are the same.
Is the width of the panels the same?
Yes. Both compositions have a width of 150 mm. Installation requires a wall opening wider than 150 mm to leave side margins.
What is the height of both kits?
The confirmed height is 2300 mm. Before purchasing, you need to calculate the free space between the baseboard, ceiling cornice, and offsets.
Why does the thickness differ by only one millimeter?
CPU-5-6 has a thickness of 12 mm, CPU-4-3 — 11 mm. The difference is due to design and profile. It is important in the junction with the trim, furniture, and niche, but the visual pattern has a stronger influence.
What is included in CPU-5-6?
The composition includes the decorative element NPU.VRS-012 and the molding MLD-003-MG. The exact number of parts and the length of the profile are checked in the product specification card.
What is included in CPU-4-3?
The exact configuration requires verification in the current product card. The size, collection, polyurethane construction, and wall application are confirmed.
Is CPU-5-6 entirely polyurethane?
NPU.VRS-012 is made of polyurethane, while MLD-003-MG requires separate verification of material and preparation. The entire set should not be considered homogeneous without the specification.
Can the panel be installed in a narrow wall space?
Yes, if the clear width allows for 150 mm placement and leaves margins on the sides. On a 250 mm wall space, 50 mm remains on each side; on 200 mm, only 25 mm remains.
What minimum margin should be left on the sides?
There is no universal number. It depends on the architraves, corners, pattern, and lighting. A full-size template shows whether the panel looks cramped.
Will the panels fit a wall with a height of 2500 mm?
Sometimes yes, if the baseboard, cornice, and margins leave at least 2300 mm. The calculation is based on the actual clear height, not the overall room size.
Can the CPU-5-6 be shortened?
Only after checking the diagram. Straight sections of the molding may allow trimming, but the central ornament and symmetry must not be disrupted.
Can the CPU-4-3 be shortened?
The feasibility of changing the height must be confirmed based on the kit and installation diagram. Without knowing the composition, it is impossible to determine a safe cutting point.
Is CPU-5-6 suitable for a door leaf?
Such use is stated, but the panel has a height of 2300 mm. It is necessary to check the actual height of the leaf, the decorative field, the handle, hinges, and the permissibility of changing the layout.
Can the CPU-4-3 be used on a door?
Wall application confirmed, door application needs to be clarified separately. Same size as CPU-5-6 does not automatically transfer the purpose.
Can CPU-5-6 be installed in a niche?
Yes, the niche is listed among the scenarios. Check the width, depth, lighting, shelves, and the free space around the panel.
Is CPU-4-3 suitable for a niche?
Geometrically, the format may fit, but the possibility of such use must be confirmed in the product card or with a STAVROS manager.
How to install two panels symmetrically?
Determine the center of the door, mirror, or furniture, then set equal distances to the axes. Use a laser to create a common vertical line, top and bottom, then perform a dry layout of both sets.
Are two product cards needed for a paired composition?
For a pair, two sets of the same article are usually purchased. The exact contents of one set should be checked before ordering.
Will the pattern be mirrored?
Not necessarily. If there are no separate left and right versions, the two panels can have the same orientation. The layout is compared before purchase.
How to paint polyurethane and MDF the same color?
For each substrate, a compatible primer is selected, then one finish shade is applied. First, make two full test swatches and compare the color and gloss after drying.
Can the panel be painted together with the wall?
Yes, if the selected primer and paint are compatible with all components. This method is especially convenient for decor in the wall color.
What glue is needed?
It depends on the material of the elements and the substrate. For CPU-5-6, polyurethane and molding must be considered; for CPU-4-3, the confirmed composition of the set. A universal glue is not prescribed without verification.
Can it be mounted on a painted wall?
It is possible if the paint is firmly adhered and compatible with the adhesive. Peeling coating must be removed or prepared according to the technology.
Is drywall suitable?
Yes, with a strong prepared surface. If the project requires mechanical fixation, profiles or embedded parts are checked in advance.
Is a mounting template needed?
It simplifies marking, but its presence in the kit should not be assumed. If there is no template, build your own full-size diagram 2300 × 150 mm.
Which model looks calmer?
Preliminarily CPU-4-3 from the Versailles Light line. But the final impression depends on the pattern, color, lighting, and number of panels.
Which model looks more expressive?
Preliminarily CPU-5-6 thanks to the Versailles collection and the central NPU.VRS-012. Evaluate photos and a sample to scale.
What to choose for the hallway?
For a repeating calm rhythm, CPU-4-3 is more suitable. CPU-5-6 is better used pointwise near the main opening, mirror, or console.
What to choose for the formal living room?
CPU-5-6 supports a richer classical composition. CPU-4-3 is chosen if the furniture and other elements are already expressive enough.
Where to buy CPU-5-6?
In the card, you can Buy CPU-5-6 "Versailles" and check the current configuration.
Where to order CPU-4-3?
In the card, you can Buy CPU-4-3 "Versailles Light" for a wall composition.
Where to buy moldings for wall decor?
If the finished panel does not fit in height or width, you can buy decorative wall moldings and assemble an individual scheme with confirmed overlays.
Can I order a layout?
Yes. For a complex wall, a pair by the door, or a composition with furniture, you can Order panel layout on the wall.
Result: same format, but different selection scenarios
CPU-5-6 "Versailles" and CPU-4-3 "Versailles Light" solve one rare task: they allow you to install a full vertical stucco composition in a strip only 150 mm wide. The height of both models is 2300 mm, so they are especially appropriate on tall narrow piers, on either side of a doorway, near a mirror, and in the architectural system of wall panels.
CPU-5-6 is chosen for a more expressive pattern, NPU.VRS-012 and confirmed application on a wall, in a niche, and on a suitable door leaf. CPU-4-3 suits the calmer "Versailles Light" line, has a thickness of 11 mm, and is described as a polyurethane wall kit. Neither model should be ordered based solely on a photo: first, calculate the free height, side margins, position of electrical installations, and movement of doors or furniture.
STAVROS offers not only individual moldings and overlays, but also ready-made CPU compositions with specified proportions. Such a kit helps avoid building a narrow panel from random parts. The buyer only needs to choose the collection, check the specification, perform a dry layout, and agree on primer, glue, and paint. It is this route that turns a 2300 × 150 mm strip into a neat architectural vertical, rather than a set of disparate profiles.