Article Contents:
- Why plastic windows in a wooden house need decorative design
- What tasks do carved platbands around plastic windows solve
- Close the installation seam and gap between the frame and the wall
- Visually complete the window opening
- Add a traditional style to the house
- Connect the window with the facade, door, porch, and roof
- Make identical windows different
- How to choose carved platbands for plastic windows
- By trim width
- By ornament and style
- By material
- By carving type
- How to choose the trim width for a specific window opening
- What to measure
- Example calculation
- Trim height and top piece
- Color of trims for plastic windows: matching, contrasting, or wood-like
- White trims for a white frame
- Trims matching the facade color
- Contrasting door casings
- Natural wood color
- Types of houses for which window casings for plastic windows are relevant
- Log cabin
- Timber house
- Country house
- Bathhouse
- Gazebo
- What is included in the kit for decorating a plastic window with casings
- Side trims
- Horizontal casing (top and bottom)
- Connecting elements and rosettes
- Top piece
- Brackets
- Decorative appliqués
- What to combine window casings for plastic windows with
- With the front door
- With a porch and canopy
- With wooden baguette
- With roof color
- With shutters
- With facade board
- Installation of trims on plastic windows: important nuances
- Surface Preparation
- Sealing the joint before installing the trim
- Mounting methods
- Painting before or after installation
- Treatment of joints after installation
- Mistakes when choosing and installing trims for plastic windows
- Take cash without measuring the opening
- Do not account for frame protrusions
- Choose too wide decor for a small window
- Do not think through the paint color
- Mix plastic slopes and wooden decor without a unified solution
- Do not think through the set
- Do not budget for sealant and primer
- Design of different facade zones: from the main window to the bathhouse window
- Main facade
- Side and rear facade
- Attic and second floor
- Bathhouse with plastic windows
- Inspiration and ideas: how it looks in real projects
- Carved architraves and house carving as a decorative system
- Practical algorithm: from measurement to finished facade
- FAQ: Answers to Popular Questions
- Can wooden carved architraves be installed on plastic windows?
- Which architraves are best to choose for plastic windows in a timber house?
- Should architraves be white if the window is white?
- Can carved architraves cover installation seams?
- Are such architraves suitable for a bathhouse with plastic windows?
- How to correctly measure the opening for trim?
- Is primer needed for wooden trim before painting?
- How often should the coating on trim be renewed?
- About the Company STAVROS
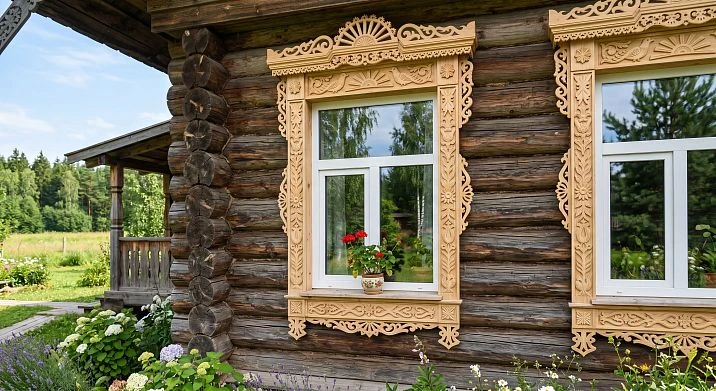
This is where carved trim for plastic windows — wooden decor that solves several problems at once: covers installation seams, visually frames the opening, connects the modern window with the traditional architecture of the house, and gives the facade what it was missing — completeness.
This article is a practical guide. Not a history of trim or lyrics about wooden architecture. Here are specific answers: how to choose trim for a plastic window, how to select width, color, and pattern, how to avoid mistakes during installation, and where to buy carved decor that will last a long time.
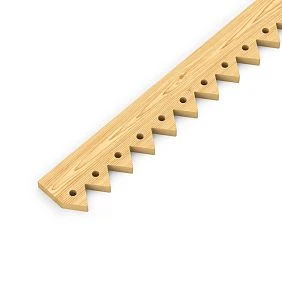
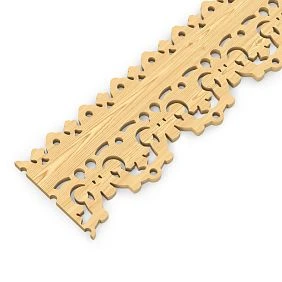
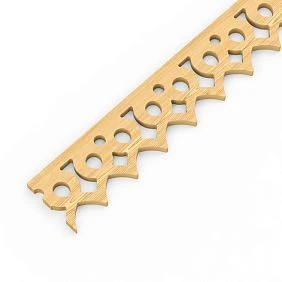
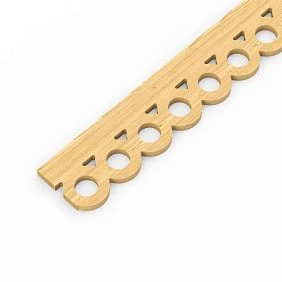
Why plastic windows in a wooden house need decorative finishing
Put yourself in the place of a person looking at a wooden house. A log cabin, timber with a warm texture, clapboard — and in the middle a white plastic rectangle with a faceless installation seam around the perimeter. No framing, no detail, no hint that anyone thought about this window as part of the architectural image.
This is not a matter of aesthetic pickiness. It is a matter of how the building is perceived as a whole. Architecture works when every detail is coordinated with the rest. A wooden house has a certain plasticity, a certain rhythm, a certain scale. A plastic frame without trim disrupts this rhythm as crudely as a white sticker on wooden furniture.
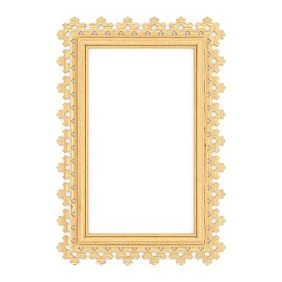
Wooden architraves on plastic windows fundamentally solve this problem. They do not mask the window or hide that it is plastic. They integrate it into the facade: create a frame, set the scale, add an ornamental detail, and make the window part of the overall architectural story of the house.
In addition to a purely decorative task, architraves also serve a practical one: they cover the installation gap between the frame and the wall—an area that, without trim, is exposed to water, wind, and freezing. A properly installed architrave with sealed joints significantly extends the service life of the installation seam and reduces the risk of drafts.




What tasks do carved architraves around plastic windows solve?
Before purchasing, it is important to understand: what exactly do you want to get from the decor? Architraves for plastic windows solve several tasks simultaneously, and each of them can be a priority in a specific situation.
Our factory also produces:
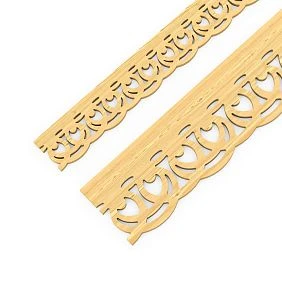
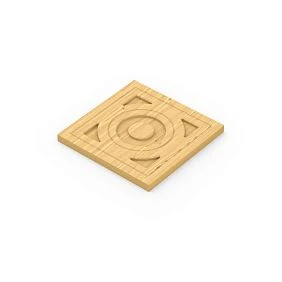
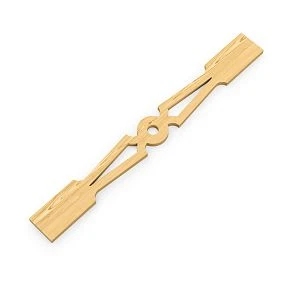
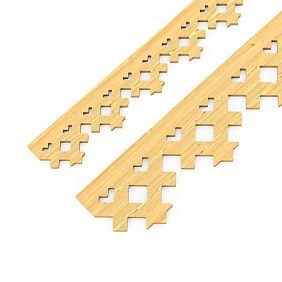
Cover the installation seam and the gap between the frame and the wall
This is the most obvious and practically important task. When installing a plastic window, an installation gap filled with foam always remains between the frame and the wall. From the outside, this gap must be protected from moisture and UV radiation—otherwise, the foam deteriorates, the seam opens, heat escapes, and moisture penetrates the wall structure.
Plastic external slopes technically handle this task, but they look even worse on a wooden facade than the window itself. A wooden architrave is an elegant and functional solution: it covers the seam, blending organically into the overall facade finish.
An important nuance: the architrave is a decorative element, not a waterproofing one. Technically, the installation seam must be sealed before installing the architrave. The foam is covered with a vapor-permeable tape or a special sealant on the outside, and the architrave is installed on top—as the final decorative layer.
Get Consultation
Visually complete the window opening
A plastic frame without casing looks "unfinished" — like a painting without a frame. The casing creates that very frame: it defines the boundaries of the window opening, adds vertical and horizontal accents, and makes the window a complete element of the facade.
This is especially important for the main facade — the one facing the street or the main area of the site. Here, every detail is in plain sight, and the absence of casing immediately catches the eye.
Add a traditional style to the house
A wooden house with plastic windows and carved casings is a combination that works. The casing shifts perception: the eye sees not a "plastic window in a wooden wall," but a "window opening with a wooden frame." The ornament on the casing references the tradition of house carving, creating a sense of historical continuity, even if the house is only a few years old.
Connect the window with the facade, door, porch, and roof
A good facade is a system. Casings, brackets, porch, front door, cornice — all these elements should echo each other in ornament, scale, and color. Carved decor for the facade in a unified style turns a set of building elements into an architectural image.
A plastic window in this system is just one of the elements. A wooden casing around it is a bridge between the modern construction and the traditional wooden facade.
Make identical windows different
Standard plastic windows of the same size, installed in a row, look monotonous. Casings with expressive ornament, especially with a "top piece" (upper decorative element), turn each window into an independent architectural accent. The front facade with such windows looks rich and festive — incomparably better than the same facade without any decor.
How to choose carved casings for plastic windows
Choosing a trim is a balance between aesthetics, opening size, and house style. Let's look at each criterion.
By trim width
The width of the trim determines how substantial the framing will be. A trim that is too narrow on a large window looks disproportionate and doesn't create the desired frame effect. A trim that is too wide on a small window overloads the opening and visually reduces it.
A general rule: the width of the trim should be between 8% and 15% of the width of the window opening itself. For a standard window 1000–1200 mm wide, the optimal trim width is from 80 to 150 mm. For large panoramic windows or wide openings, wider models can be used — up to 200 mm.
If you want to create a richer framing without increasing the width of a single trim, 'layering' is used: a narrow trim is placed on top of a wide one, creating a voluminous multi-layered frame. This technique is popular in classical and traditional styles.
By ornament and style
The ornament of the trim should match the overall style of the house. The rule is simple, but it's easy to break it in pursuit of a 'beautiful' product.
-
A house in Russian folk style, log house, rounded log — traditional plant ornament with rich carving, a top in the form of a semicircle or kokoshnik.
-
A house made of timber in Scandinavian or modern style — geometric ornament, restrained fretwork carving, without excesses.
-
A dacha, a small country house — moderately rich ornament, light openwork carving.
-
Bathhouse — neat medium-scale decor, without overloading forms.
It's important to consider scale: on a small house, a large ornament with rich carving looks heavy. On a large country mansion, a fine small pattern will be lost from a distance.
By material
Wooden exterior window casings for plastic windows must be made from stable material. The most common and correct choice is glued pine furniture board with knots and resin pockets removed.
Why is this important? Because regular pine lumber with knots is unstable: it warps with changes in humidity, knots fall out and cause cracks, and resin pockets show through any paint. Glued board lacks these drawbacks: it is uniform in density, does not warp, and accepts any finish well.
More details about what window casings and other decor are made from can be found on the page Materials and quality of STAVROS products.
By carving type
Window casing carving is divided into several types, each with its own aesthetic and features when installing on a plastic window:
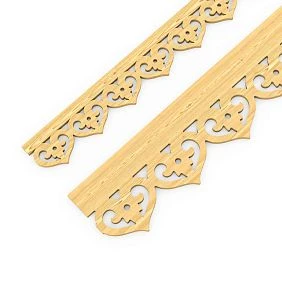
Through-cut (openwork) carving — ornament with through slots. Light, airy, reads well against any background. Looks great in contrast: white openwork casings on dark timber — flawless classic. When installing on a plastic window, openwork casings create an additional air layer between the casing and the wall — moisture can get in there. The bottom end needs to be treated especially carefully.
Applied (relief) carving — ornament protrudes above the surface, creating volume. Looks more prestigious, reads better from a distance. Well suited for the main facade.
Flat-relief carving — ornament is milled into the depth of the board, not protruding above it. More concise, modern, accepts paint well.
Geometric milled ornament is not so much "carving" in the folk sense as a decorative pattern. It is universal, suitable for modern homes, and looks good at any scale.
How to choose the width of a trim for a specific window opening
Choosing the width is not only about aesthetics but also technique. Before selecting a trim, you need to measure several parameters.
What to measure
-
The width and height of the window opening (from wall edge to wall edge).
-
The width of the plastic frame (profile).
-
The size of the installation gap (distance from the frame to the edge of the opening).
-
The thickness of the outer wall in the window area (important for deep openings where a slope is needed).
-
The protrusion of the frame relative to the wall plane (the frame can be flush with the wall or slightly protruding).
Knowing these parameters, it is easy to determine the minimum width of the trim: it must cover the installation gap with a margin of at least 15–20 mm on each side.
Example calculation
Suppose a window opening is 1200 mm wide. The plastic frame is 1100 mm wide. The installation gap on each side is about 50 mm. For the casing to overlap the gap with a margin, its working width (the part that goes onto the frame and the wall) should be at least 70 mm. The optimal width is 90–120 mm.
If you have a deep opening and the frame is recessed into the wall, an additional slope element may be needed. Discuss this with the catalog consultant when ordering.
Casing height and top piece
Casings are standardly supplied in lengths of 2000 mm. For most standard window openings up to 1600 mm high, this is sufficient. For taller openings or if you wish to install a top piece (decorative upper element), the length is planned considering joints and connecting parts.
The top piece is a separate element installed at the top of the window framing. It adds grandeur and completeness. For plastic windows on the main facade, the top piece is one of the strongest decorative techniques.
Color of casings for plastic windows: matching, contrasting, or wood-like
Choosing the color is a separate and very important discussion. The peculiarity of the situation with plastic windows is that the frame already has a fixed color (most often white or brown), and the casings should either support this color or deliberately contrast with it.
White casings for a white frame
The most logical and common solution: the casing for painting is painted white — the same shade as the plastic frame. As a result, the window with framing is perceived as a single whole: white frame + white casings = a solid white window block against the background of a wooden facade.
This technique works on any facade: on a dark log house, on timber with a natural coating, on clapboard. The white color of the casing matches the white frame and simultaneously contrasts with the dark wood of the wall — resulting in a classic and foolproof combination.
Nuance: white color for exterior use requires a good antiseptic primer and high-quality facade enamel. Cheap paint quickly yellows under UV exposure — and then "white trim" becomes yellow spots on the facade.
Trim in the color of the facade
The second common approach is to paint the trim in the color of the wall. In this case, they "dissolve" into the facade, remaining a decorative detail that is only readable up close due to the relief of the ornament.
This works especially well in monochrome solutions: the entire facade is dark gray, and the trim is dark gray. Or the entire facade is dark green timber, and the trim is the same shade. Such tonal consistency looks modern and expensive, even if the house itself is quite simple in shape.
The only difficulty: trim in the tone of the wall against a white plastic frame creates contrast between the frame and the casing. This is not a mistake — it is a design choice. But it must be made consciously.
Contrasting door casings
Contrast is the most expressive and the riskiest technique. Dark trim on a light facade, bright trim on a neutral one. When the contrast is chosen correctly, the result is captivating: the window becomes the main accent of the facade, lively and expressive.
Contrasting wooden trim on plastic windows works well on the main facade, on accent windows, above the entrance door. For this technique, it is important that the contrasting color of the trim echoes some other detail of the facade — the door, roof, shutters. Otherwise, the contrast will look not like a design intent, but like an accident.
Natural wood color
Another option is not to paint the trim with an opaque color, but to cover it with a transparent or semi-transparent glaze that preserves the wood texture. In this case, the trim looks "wooden" — natural, warm, organic.
This option is appropriate where the facade itself is wooden in a natural tone — timber or logs with a treatment that preserves the wood color. Wooden trim in the same tone creates a sense of integrity and natural harmony.
On a wooden house with natural window casings, the plastic frame remains white — and this is the only contrast that does not disrupt the overall picture, because the frame is perceived as a "window" rather than an "insert."
Types of houses for which window casings on plastic windows are relevant
Log cabin
A log cabin is the most "demanding" type of wooden house when it comes to decoration. Its architecture historically implies rich ornamentation: carved casings, valances, brackets. Plastic windows in a log cabin without casings are the most striking example of inconsistency.
For window design in a log cabin, casings with traditional floral patterns are recommended, preferably with a top piece. The width should be moderate or wide, depending on the scale of the log cabin. The color should be white or matching the log cabin's stain.
Buy Carved Door Stops for a log cabin means choosing a product that, in terms of pattern and scale, matches the dignity of this type of building.
Timber house
Houses made of profiled or laminated timber typically have a more modern architecture. Here, casings with geometric or moderate openwork patterns are appropriate, without excessive clutter. The color should match the timber or the roof, or classic white.
Timber pairs well with dark casings: anthracite, dark brown, or black casings on light timber create a strict and modern look.
Country house
A dacha is a space where formal rules work more loosely, and taste and mood are more important than strict rules. Casings for a dacha under plastic windows are chosen based on the desired image: a cheerful country house with blue or light blue casings, a rural estate with white decor, a modern dacha with dark accent framing.
The main thing at the dacha is not to overdo it. A small house with small windows does not need to be decorated with rich wide architraves with a multi-layered top. Moderate ornamentation, suitable width — and the result will be exactly what is needed.
Bathhouse
A bathhouse is a separate story. Here, architraves serve not only a decorative but also a practical role: they cover mounting seams from condensation and precipitation. Proper treatment is especially important for a bathhouse: antiseptic primer, moisture-resistant facade paint, thorough sealing of ends.
For a bathhouse with plastic windows, it is better to choose architraves of medium width with moderate ornamentation — without excessive openwork (rainwater will flow behind the architrave through the cutouts). Color — matching the bathhouse or contrasting white.
Gazebo
A gazebo with plastic windows is almost a full-fledged guest house. Architraves here complement the overall image of the building, creating a sense of neatness and completeness. Light openwork architraves are good for a gazebo — they add airiness to the structure.
What is included in the kit for decorating a plastic window with architraves
One architrave by itself is not a ready-made solution. A complete window opening design includes several elements.
Side casings
Two vertical elements framing the window on the sides. The basis of all decor. Standard length — 2000 mm, cut to the height of the opening.
Horizontal architrave (top and bottom)
The top horizontal architrave connects the two side ones and creates the top framing. The bottom (window sill) one is an optional element: in wooden houses, its role is most often performed by a wooden window sill.
Connecting elements and sockets
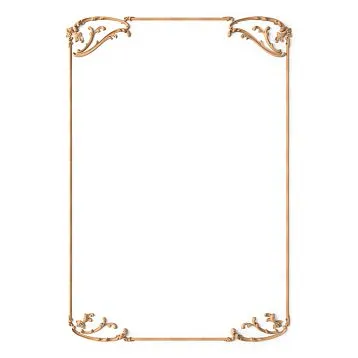
Corner connectors, sockets, and joining elements — these cover the corners and intersections of architraves. Without them, bare joints remain at the corners, negating all the beauty of the decor. When ordering architraves, be sure to check the availability of corresponding connecting elements in the selected series.
Finial
Top decorative element: semicircular, triangular, or complex in shape. A traditional element of Russian house carving that gives the window a grand, festive look. Especially appropriate on the main facade and on the windows of the entrance group.
Brackets
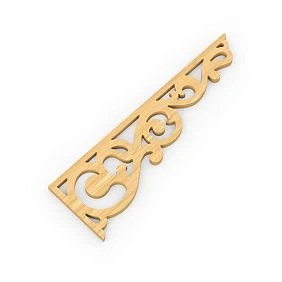
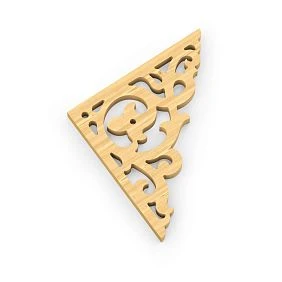
Decorative brackets under the canopy, under the cornice, or in the porch area — an element that organically complements the architraves and creates a unified decorative solution for the entire facade. carved facade decor includes a wide range of brackets for different types of architraves.
Decorative appliqués
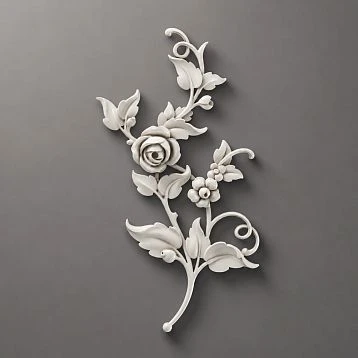
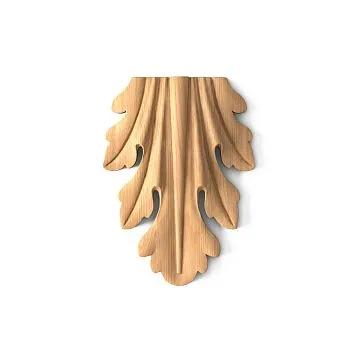
Wooden decorative inlays are used to decorate piers, gables, and areas between windows. They complement and expand the decorative program of the facade, creating a sense of richness and completeness.
What to combine architraves for plastic windows with
A single window with architraves is good. A coordinated facade is incomparably better. Let's break down how to build a system of decor.
With the entrance door
The front door is the main accent of the facade. If the window casings are painted white, the door is also white or a close light tone. If the casings are contrasting dark, the door supports this accent: dark, rich. The color connection between the door and the casings creates a cohesive image.
With a porch and canopy
A porch with carved balusters, brackets, and overlays in the same style as the casings is already a full-fledged architectural story. If the casings are from the same collection as the porch elements, the facade is perceived as a whole — and even the most ordinary house begins to look rich and well-thought-out.
wooden decorative elements for decorating porches, stairs, and entrance groups, they pair well with facade casings in a unified ornamental style.
With wooden baguette
wooden baguette for facade decoration is used to create frames, horizontal strips, and other graphic elements on the facade. In combination with casings, the baguette adds clarity and structure: the window receives not only side framing but also horizontal lines that connect it with other windows and the overall geometry of the facade.
With roof color
The roof sets the upper accent of the house. A dark roof 'demands' dark details in the lower part — or the creation of a visual link through color repetition in individual accents. If the roof is dark brown, brown casings will create a tonal rhyme. If the roof is anthracite, anthracite casings or brackets will support this tone.
With shutters
Shutters and casings are a traditional pair. Ideally, they are made in a unified ornament or at least in a unified color. If the shutters are white and plastic (which is often the case in modern houses), wooden casings should be painted the same white — creating a single white frame around the entire window.
With facade board
Clapboard, block house, or imitation timber combined with carved architraves is a classic combination for a wooden house. It is important to coordinate the color: if the facade board is coated with a dark stain, white architraves create a bright contrast; if the board is light, architraves in the same tone as the wall will give a soft, restrained solution.
Installation of architraves on plastic windows: important nuances
Proper installation is half the result. Even the most beautiful architraves, if installed carelessly, will spoil the impression.
Surface preparation
Before installation, the wall surface around the window must be leveled and cleaned. Remains of mounting foam, protruding edges of the casing, or wall unevenness — all this must be eliminated before installing the architrave.
Sealing the joint before installing the architrave
A technically important point: the installation joint (the space between the frame and the casing) must be sealed from the outside before installing the architrave. A vapor-permeable self-adhesive tape or a special acrylic sealant is used. This creates a waterproofing barrier, onto which the architrave is mounted as the final decorative layer.
Methods of mounting
Wooden architraves are attached to the wall and to the frame through pre-drilled holes. Self-tapping screws with a countersunk head are screwed into the wood, the holes are closed with wooden plugs or putty and painted over.
It is not recommended to rigidly attach the architrave directly to the plastic frame: a small gap (3–5 mm) should remain between the wood and PVC to compensate for thermal expansion. This gap is closed with a strip of acrylic sealant, which is elastic and does not tear when materials move.
Painting before or after installation
Professionals paint the trim before installation: this allows for high-quality treatment of the back side, ends, and all ornament areas. After installation, a final coat of paint is applied, and the joints are treated with sealant. Fastening points are puttied, sanded, and painted over.
Joint treatment after installation
After installation, all joints — between the trim and the frame, between the trim and the wall — are sealed with acrylic sealant. It is applied with a gun, leveled with a spatula, and painted over after drying. This stage is critical for durability: it is through unsealed joints that moisture penetrates under the trim, destroying both it and the installation seam.
Mistakes when choosing and installing trims for plastic windows
Mistakes cost money and time. Let's break down the most common ones.
Buying trims without measuring the opening
The width of the installation gap, the frame protrusion, the depth of the opening — all of this needs to be known before ordering. A trim bought "by eye" may turn out to be too narrow (does not cover the seam) or too wide (overlaps the frame and covers the hardware). Measure everything that can be measured.
Not accounting for frame protrusions
The plastic frame may protrude beyond the wall plane by several centimeters. If the trim lies flush against such a frame, a step will form where water collects. The correct solution: the trim is installed with a gap from the frame, and this gap is filled with sealant.
Choosing too wide a decor for a small window
A wide casing on a small window visually reduces the opening, making it heavy and cluttered. For small windows, use casings no wider than 80–100 mm.
Not planning the paint color
Painting casings after installation is inconvenient and often poor quality. The back side will remain untreated, the ends unpainted — the result is predictable: within a season, the wood will start to darken and deteriorate from uncovered areas. Plan the color before ordering and paint before installation.
Mixing plastic window reveals and wooden decor without a unified solution
Sometimes a plastic reveal is installed outside, with a wooden casing on top. These two elements don't fit well together: plastic expands when heated, wood does so differently. The joints separate, looking untidy. It's better to choose one solution: either plastic reveals without wooden decor (if only practicality matters), or wooden casings without plastic reveals (if aesthetics matter).
Not planning the complete set
Two side casings without a horizontal element, without connectors, without a top piece — that's an unfinished frame. Before ordering, plan the full set: side casings, top horizontal element, connecting parts, and a top piece if necessary. Only a complete set creates a finished and beautiful result.
Not budgeting for sealant and primer
Saving on preparation and sealing leads to rework costs in a year or two. Primer, antiseptic, quality facade paint, and acrylic sealant are not 'additional expenses' but a mandatory part of the project.
Designing different zones of the facade: from the main window to the bathhouse window
Main facade
The main facade is the face of the house, its first impression. The most expressive solutions are justified here: window casings with a top piece, wide decor, rich ornamentation. Carved window casings on the main facade with plastic windows turn modern structures into an organic part of the architectural image.
Brackets under the cornice are also appropriate here, and Wooden decorative inlays between the windows — a full decorative ensemble.
Side and rear facade
Here the decor is usually more modest. Window casings without a top piece, moderate width, a single ornament with the main facade — enough to maintain stylistic unity without overload.
Attic and second floor
On the attic and second floor, window casings are perceived differently: they are closer to the roof, and their color should be coordinated with the color of the roofing material. Lighter, openwork solutions are often appropriate here — they add lightness to the upper tier of the house.
Bathhouse with plastic windows
Decorating a bathhouse is a separate task. A bathhouse traditionally has small windows (for heat conservation), and the decor here needs to be neat, not overloading the small volume. Window casings of moderate width, high-quality antiseptic treatment, reliable sealing of joints — these are the three pillars of bathhouse decor.
If Buy house carving for the bathhouse in the same ornamental style as for the house, resulting in a unified architectural ensemble — an estate with a consistent style from the main house to the outbuildings.
Inspiration and ideas: how it looks in real projects
Before making a final choice, it's useful to see how the decor works in real projects. This helps to grasp the scale, evaluate the ornament in action, and try the color scheme on a specific type of house.
On the page Ideas for using carved decor examples of real projects are collected — from village houses to modern country estates. Here you can find solutions for timber houses, log cabins, summer cottages, bathhouses, and gazebos — with plastic and wooden windows, in different colors and ornaments.
This is not just a photo gallery — it's a visual answer to the question 'how will it look at my place'. The more examples you study before ordering, the more accurate your choice will be.
Carved window trims and house carving as a decor system
A wooden house with plastic windows, decorated with carved window trims, is just the beginning. When a taste for decor emerges, you want more: decorate the porch, add brackets under the canopy, adorn the gable, install decorative columns at the entrance.
This is exactly how the House Carving as a system: from the first window trim on the first window — to a full decorative ensemble that turns an ordinary house into an architecturally expressive object.
It is important from the very beginning to choose decor from one collection or one ornamental series. Then the window trims, brackets, overlays, balusters, and rosettes will echo each other, creating a sense of integrity and intent.
carved facade decor in the STAVROS catalog allows you to select a complete set for any object: from a modest summer cottage to a large country estate. Each collection includes window trims in several formats, connecting elements, brackets, and accessories.
Practical algorithm: from measurement to finished facade
To ensure the selection and installation process goes smoothly, use this algorithm:
-
Inspect the entire facade. Record how many windows need to be framed, where they are located, and their size.
-
Determine the style. Russian, Scandinavian, country, modern — this determines the ornament and the width of the trim.
-
Measure each opening. Width, height, installation gap, frame protrusion.
-
Choose the ornament and width. Use the ratio of trim width to opening width as a guide.
-
Determine the color. White, matching the facade, contrasting, natural — the choice should be coordinated with other facade details.
-
Select the kit. Trims, horizontal elements, connecting parts, finials (if necessary), brackets.
-
Order with a margin. Plus 5–10% for adjustments and possible cutting errors.
-
Prime and paint before installation. All sides, all ends — mandatory.
-
Mount with a gap from the frame. Fill the gap with acrylic sealant.
-
Apply the finishing layer and seal the joints. Check all corners and bottom edges.
FAQ: Answers to popular questions
Can wooden carved architraves be installed on plastic windows?
Yes, wooden architraves are one of the best ways to decorate plastic windows on the outside of a wooden house. They are not attached directly to the plastic: a gap is left between the wood and PVC, which is filled with acrylic sealant. This compensates for the different thermal expansion of the materials.
Which architraves are best to choose for plastic windows in a timber house?
For a timber house, architraves with moderate geometric or openwork patterns, medium width (90–130 mm), are optimal. The color should match the timber or be contrasting white. If the timber is dark, white architraves will create a bright and beautiful contrast.
Should architraves be white if the window is white?
No. This is the most common option, but not the only one. Architraves can be painted to match the facade, in a contrasting color, or in a natural wood shade. White is good because it creates a unified perception of the frame and trim, but other colors can be equally interesting, depending on the overall color scheme.
Can carved architraves cover installation joints?
Yes, architraves decoratively cover the installation joint area. But technical sealing—a layer of vapor-permeable tape or acrylic sealant directly on the joint—must be done separately, before installing the architrave. The architrave is a decorative finish, not a waterproofing element.
Are such trims suitable for a bathhouse with plastic windows?
Yes. For a bathhouse, it is important to choose products made from stable material (glued pine panel), ensure complete treatment of all surfaces with moisture-resistant facade paint, and carefully seal all joints and ends. Under these conditions, wooden trims will last a long time on the bathhouse.
How to correctly measure the opening for trims?
Measure the width and height of the window opening (from wall to wall), the width of the visible plastic frame, and the gap between the frame and the edge of the opening. The trim should overlap the gap with a margin of at least 15–20 mm. If the frame protrudes beyond the wall plane, account for this protrusion when choosing the fastening method.
Is primer necessary for wooden trims before painting?
Absolutely. Primer with an antiseptic protects the wood from moisture and biological damage, improves adhesion of the topcoat, and extends the service life of the painted product. For exterior wooden products, antiseptic primers on an alkyd or acrylic base are used.
How often should the coating on trims be renewed?
On the south and west sides of the house, where solar and moisture exposure is maximum, it is recommended to renew the topcoat every 4–7 years (depends on paint quality and operating conditions). Regular inspection of joints and ends — once a year after winter.
About the company STAVROS
When you are faced with the task of turning an ordinary wooden house with plastic windows into an architecturally expressive object, it is important to whom you entrust the choice of decor. STAVROS is a manufacturer of wooden carved decor that specializes specifically in facade products: trims, brackets, balusters, overlays, connecting elements, and other house carving products.
All STAVROS products are manufactured on CNC machines and hand-finished. The material is glued pine furniture panel with defects removed, which guarantees geometric stability, absence of resin spots, and an ideal surface for any topcoat.
The catalog features a wide selection of ornamental solutions for platbands, a complete set of connecting elements and accessories, as well as decor for designing the porch, gable, entrance group, and other areas of the facade. Learn more about the composition of products and production technologies on the page. Materials and quality of STAVROS products.
STAVROS works with private customers and professionals — builders, designers, contractors. If you are looking for carved trim for plastic windows for a wooden house, bathhouse, cottage, or gazebo — start with the catalog of house carving: here you will find a solution for any project, style, and budget.