
























































Article Contents:
- A wooden facade is already decor. How to work with it?
- Timber and log: what's the difference from a decor perspective
- House made of profiled or glued laminated timber
- House made of rounded logs (log house)
- Shrinkage of a wooden house: what it means for window decor
- Which window casings to choose for a timber house: a practical guide
- Style of ornament
- Casing width
- Length and connection
- Window casings for a log house: a special approach
- Scale matters
- Ornament for log house
- Color on log house
- Color of window trims for a wooden house: how not to make a mistake
- White window trims on a wooden house
- Contrasting dark window trims
- Trims matching the facade color
- Natural wood tones
- Color to match the roof, door and porch
- What to pair carved window trims with on a wooden house
- Carved brackets
- Decorative rosettes and corner elements
- Wooden Panels
- Wooden frame
- Facade board
- Porch and front door
- Canopy
- Carved decor for a timber bathhouse: a special case
- Trim for a country house: warmth, coziness, and a touch of celebration
- Common mistakes when choosing trim for a timber house
- Shrinkage not accounted for
- Selection without measuring the window opening
- Too fine a pattern for a massive log house
- Overload with different patterns
- Paint color not thought through
- Brackets and connecting elements not selected
- Purchased without calculating the window kit
- Carved decor for a wooden house facade: complete system
- How to properly prepare trim for installation
- Glued laminated timber house: a special case
- Cylindrical log: texture dictates the choice
- How to design windows of a timber house from the outside: step-by-step logic
- Frequently Asked Questions
- Which trim is suitable for a timber house?
- Can carved trim be installed on a log house?
- Which trim is best for a timber bathhouse?
- Do Wooden Trims Need to Be Painted?
- What is a casing and why is it needed?
- Can I use casings for glued laminated timber and for a chopped log house simultaneously — if I have a main house and a bathhouse of different constructions?
- How to calculate the number of casings for a house?
- STAVROS: carved decor that lives together with your home
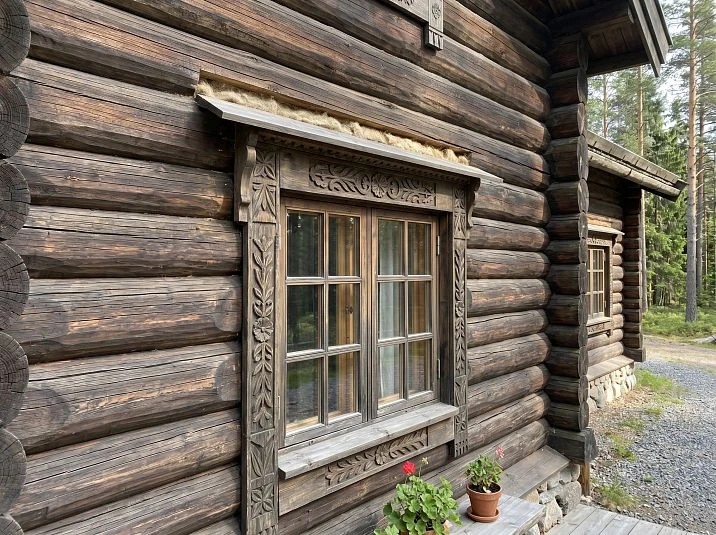
A wooden house is a living organism. It breathes, moves, changes with the seasons. And if you approach it with the same measure as a stone cottage or a plastered country mansion, mistakes are inevitable. This is especially true for window decor: what looks flawless on a concrete facade can be completely lost or, on the contrary, conflict with the living texture of timber or logs.
Carved casings for a timber house — this is not just decoration. It is an architectural tool that works on several levels at once: it covers installation gaps and technical transitions around the window opening, visually 'frames' the window, giving the facade completeness and character. But for the casing to actually work, and not just hang on the wall, it needs to be chosen correctly. Taking into account the type of wood, the width of the opening, the nature of the facade, and — necessarily — the features of the wooden structure, including shrinkage.
This is exactly what — in detail, genuinely, without general phrases — will be discussed in this article.
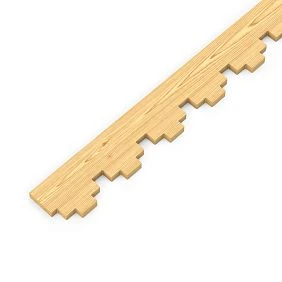
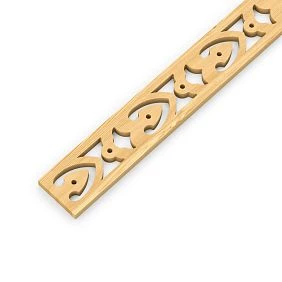
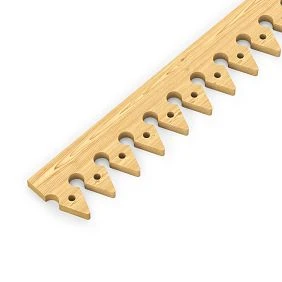
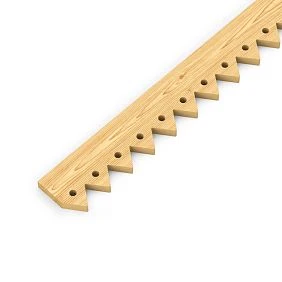
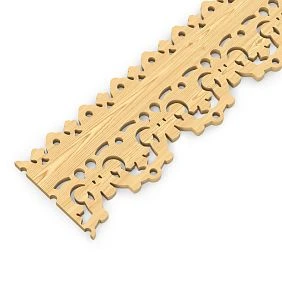
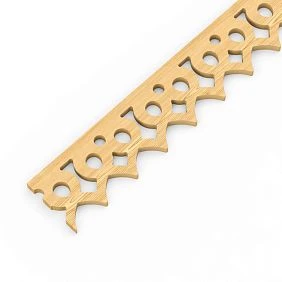
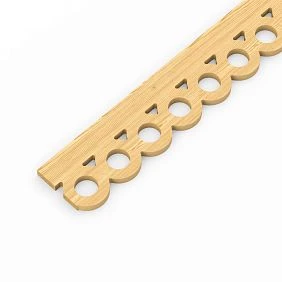
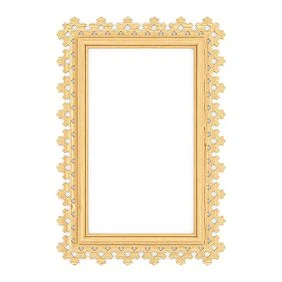
A wooden facade is already decor. How to work with this?
Before talking about choosing casings, it is worth understanding how the facade of a wooden house fundamentally differs from any other. This understanding radically changes the approach to decor.
A house made of timber already has an active visual texture. The horizontal lines of the log courses create a rhythm that is read across the entire facade. The wood grain, the color of the material, the corner joints — all of this is not a neutral background, but an expressive surface with its own plasticity. On such a facade, decor works differently than on smooth plaster: it enters into a dialogue with the material, rather than simply being placed on top of it.
What follows from this? Several important conclusions.
First: the trim should not 'shout' louder than the house itself. A timber facade is expressive in itself — it does not need to be shouted over with the most complex openwork ornament. The trim should accentuate the window, fit into the rhythm of the facade, create an expressive framing element — but not compete with the material for the viewer's attention.
Second: the horizontal lines of the timber require a certain vertical dynamic in the decor. A trim with side posts that have a clear vertical line responds well to the horizontal rhythm of the wall. This is not a strict rule, but a useful guideline.
Third: natural wood requires natural decor. House Carving Wood on a wooden facade is an organic unity of materials. Plastic or metal will look alien here, no matter how good they are individually.




Timber and log house: what is the difference from a decor perspective
A house made of timber and a house made of logs are not the same thing, although both belong to wooden house construction. The difference is important for choosing trims.
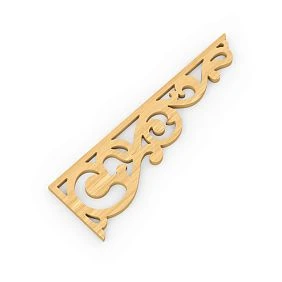
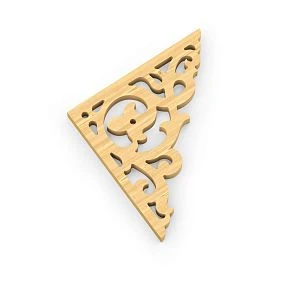
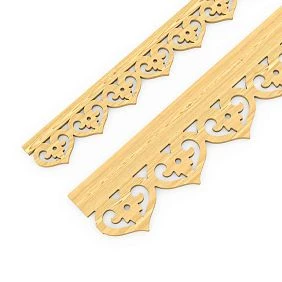
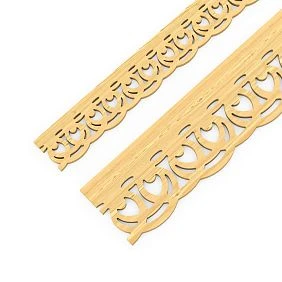
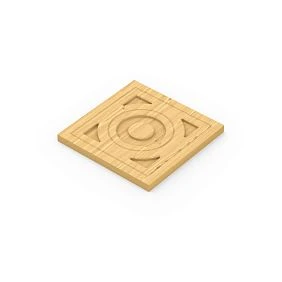
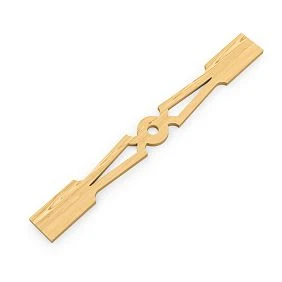
Our factory also produces:
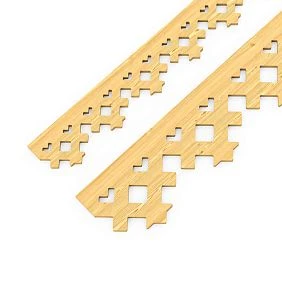
House made of profiled or glued laminated timber
Such a facade looks more even, almost geometrically precise. The horizontal lines are clear, the surface is relatively smooth. Against this background, both calm geometric ornaments and more complex plant patterns work well — the facade is restrained enough not to argue with the carving.
A feature of laminated veneer lumber is minimal shrinkage. This material is produced with stabilized geometry and practically does not change its dimensions after installation. This simplifies the installation of trim: there is no need to make special compensation gaps for the facade itself.
For rounded logs and profiled timber trim for a wooden house with clear geometric or restrained floral patterns create a neat, expressive design that does not disrupt the architectural logic of the facade.
Get Consultation
House made of rounded logs (log house)
Here the texture is different — rounded logs create a wave-like rhythm. The facade looks more massive, natural, and organic. And the trim must match this.
On a log house, a too thin, delicate trim will simply get lost. It will look like a thin ribbon glued on top of the powerful body of the house. Here, width and weight are needed. But at the same time, the pattern should not be overloaded with small details: against the background of a round log, fine openwork carving is poorly readable.
For a log house, medium or wide format trims with a clear, well-readable pattern are optimal — large geometric patterns, wide floral motifs, deep cut-out patterns with good chiaroscuro.
Shrinkage of a wooden house: what it means for window decor
Here is a topic that is often kept silent about when selling trims. But in vain — this is a fundamentally important point.
Any wooden house made from natural materials—kiln-dried timber, rounded logs, or hand-hewn logs—undergoes a shrinkage process during the first years of operation. The wood releases moisture, the fibers compact, and the entire structure "settles" slightly in height. For kiln-dried timber, this process is less pronounced—1–3%. For a hand-hewn log house made from raw logs, it is significantly greater, up to 7–10% in the first 2–3 years.
What does this mean for windows? In a wooden house, windows are not installed rigidly into the wall, but into a special structure—a casing frame, or window frame. This is a wooden frame that "floats" relative to the wall and absorbs shrinkage loads without transferring them to the window unit. A compensation gap is left above the casing—a space filled with soft insulation and later covered by trim.
And here is the key point. The trim visually covers this gap but should not fix it rigidly. If the trim is nailed firmly to both the casing and the wall simultaneously, it can either tear the fasteners during shrinkage or become deformed. Proper installation involves attaching the trim only to the casing, allowing vertical movement relative to the wall.
This, of course, is a question for the master handling the installation. However, when choosing trim, consider the width: a wider trim covers a larger compensation gap, providing more allowance for shrinkage. A narrow trim with a large gap may not fully cover it after several seasons.
For houses made of glued laminated timber, this issue is less relevant. For fresh hand-hewn log houses and houses made of natural moisture content timber, it is critical.
Which trim to choose for a timber house: a practical guide
So, the house is ready. The facade is clear. Shrinkage is accounted for. Which exactly trim for a timber house to choose?
Ornament style
For a strict, modern facade made of profiled timber—geometric ornamentation. Diamonds, straight lines, rhythmic cut-out elements. Such trim adds character without disrupting architectural restraint.
For a house in the traditional Russian spirit — a floral or mixed ornament. Leaves, shoots, floral motifs, curls. This is a lively, warm pattern that echoes the natural foundation of a wooden house.
For a massive log house — a large, well-readable ornament with pronounced relief. The depth of carving is important here: a flat pattern gets lost against the background of a rounded log, while a three-dimensional openwork ornament creates expressive chiaroscuro.
Casing width
This, as already mentioned, is one of the key parameters. The approximate logic is as follows:
-
Narrow casing (up to 90 mm) — for small windows, country houses, bathhouses with small openings. Light, delicate, does not overload a modest facade.
-
Medium casing (90–120 mm) — a universal format, suitable for most standard windows in timber houses. Works well with both simple and more saturated ornament.
-
Wide casing (from 120 mm) — for large windows, log houses with massive crowns, main facades with expressive architecture. Creates a monumental, weighty framing.
Length and connection
The standard length of a casing for sale is 2000 mm. For high window openings, typical for timber houses on the second floor or attic, a connection of two elements using a special connecting element may be required. This is normal practice — the main thing is that the connection is neat and not conspicuous.
Casings for log houses: a special approach
A log house is a special matter. A house assembled from rounded or hewn logs carries a completely different figurative program than a house made of profiled timber. Here everything is more powerful, more natural, more primordial. And the decor must respect that.
Scale matters
The diameter of a rounded log in a log house is usually 200–260 mm. This is a powerful horizontal band that sets the scale for the entire facade. A trim 60–70 mm wide against such a background looks like a thread stretched over the log. This is not a mistake — it is a mismatch of scales.
For a log house trims for a log house should be chosen with a width of 100 mm or more. Only then will they visually "hold" the window, creating a sense of completeness.
Ornament for a log house
Openwork, fine-detailed ornaments get lost on a log house. Here, designs with a clear, large structure are needed. The following work well:
-
Large geometric patterns with regular lines
-
Wide floral ornament with expressive curves
-
Deep carved pattern with good contrast between elements
The ornament should be readable from a distance of 5–7 meters — otherwise it simply won't be visible against the massive facade.
Color on a log house
On a log house made of rounded logs, typically light yellow or honey-brown in tone, trim in dark and contrasting shades looks especially striking. White trim is also good, but it requires regular refreshing: on natural wood, white quickly takes on a warm, creamy hue, which is beautiful in itself, but you need to accept this as part of natural aging.
Color of trim for a wooden house: how not to make a mistake
Color is not a decorative trifle. It's half the result. The most beautiful ornament won't work if the color is chosen incorrectly.
White trim on a wooden house
White is the eternal choice. It contrasts with any natural wood color, clearly reveals the carving pattern, and creates that picture-perfect image of a wooden house that most people imagine when they hear the words 'timber house with trim.'
White trim works well on houses with tinted facades — brown, golden, gray. On a light facade, white is less noticeable but creates a soft, gentle unity.
Practical point: for outdoor use, use a durable facade enamel with antiseptic properties. White color without UV protection quickly yellows.
Contrasting dark trim
Dark brown, graphite, chocolate, black — on a light or golden timber facade, this is a bold, expressive solution. It creates a strong visual accent on the windows, works well from a distance, and gives the house nobility and monumentality.
It is especially effective on houses with large windows and high facades: dark trim on such a facade literally "holds" the window, preventing the opening from dissolving into the wall.
Trim in the color of the facade
Monochromatic design — trim the same color as the facade surface — creates a restrained, refined look. The carving pattern works through relief and shadows, not through color contrast. This requires a deep, well-profiled ornament: a flat pattern almost disappears with monochromatic painting.
For a house made of tinted timber — this approach creates an aristocratic, calm beauty.
Natural wood shades
If the facade is coated with a clear antiseptic or tint that preserves the wood texture, the trim can be painted to match — in the same golden, honey, or silver-gray color. But it is important: the trim should stand out slightly against the wall, otherwise it does not fulfill its framing function. Make it slightly darker or slightly lighter — but not identical.
Color to match the roof, door, and porch
Here is a principle that experienced designers use constantly: the facade color scheme should not exist on its own. The color of the trim should be linked to the color of the roof, front door, or porch. This creates unity that is perceived as thoughtfulness and completeness.
A simple example: dark brown roof, dark brown trim, and a dark front door — three points of the same color that create the color "skeleton" of the facade. The house itself, made of light timber between these dark accents, looks expressive and cohesive.
What to pair carved trim with on a wooden house
The trim is not a standalone element, but part of the facade decor system. How organically it fits into the overall picture depends on what and how it is combined with.
Carved brackets
The bracket supports the cornice, canopy, porch awning — and simultaneously serves as a full-fledged decorative element. Paired with architraves, they create a cohesive facade story. An important condition: the bracket's ornament must be in the same style as the architrave's ornament. Not necessarily identical — but homogeneous in spirit. wooden decorative elements in the STAVROS catalog are selected so that different items combine well with each other.
Decorative rosettes and corner elements
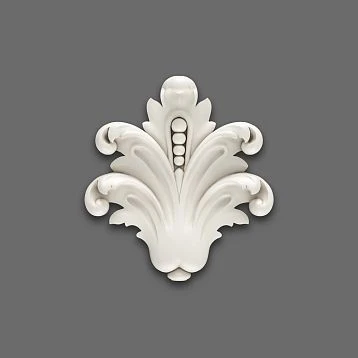
Where architraves meet at corners — at the top above the window, at the lower corners — rosettes or corner overlays are placed. This is not just a technical element: a good rosette with ornament turns the corner into an accent point that completes the window framing and gives it a finished look.
Wooden overlays
Wooden decorative inlays — flat carved elements that are mounted on various facade planes: on a wide board under the window, on the pediment tympanum, on the horizontal cornice. They allow creating a rich decorative surface without using complex solid panels. On a timber house, such overlays look good on wide horizontal boards in the porch area or above the entrance.
Wooden molding
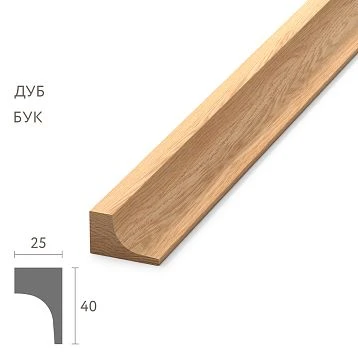
Wooden baguette for framing — a profiled batten that creates architectural clarity around a window or door opening. It adds depth, creates an additional "layer" in the framing, and helps visually structure the facade. On a timber house, the baguette is especially good: it creates a horizontal accent that echoes the lines of the log courses.
Facade board
On a wooden house, the facade board under and above windows is an element that is often overlooked. Yet it sets the horizontal rhythm of the facade and creates the base on which decorative overlays are attached. A well-painted wide facade board combined with a carved architrave and rosettes is already a complete facade composition.
Porch and entrance door
The entrance group is the main accent of any home. Here, the concentration of decor is justified and desirable. Brackets above the porch, architraves around the front door, carved overlays on the porch balustrade, a decorative canopy — all together create a festive, welcoming image of the entrance.
Canopy
A decorative canopy is another area where carved decor works to its full potential. Brackets with ornamentation supporting the canopy, paired with architraves, create unity in the entrance area.
Carved decor for a timber bathhouse: a special case
A bathhouse is not a house. It has a different architectural logic, a different scale, and different tasks. And it needs its own decor.
As a rule, a bathhouse is built from timber or smaller-diameter rounded logs than a residential house. The windows in a bathhouse are small — often 60×60 or 60×90 cm. The facade is modest in area. Therefore, the principle here is one: less is better.
For a timber bathhouse, narrow or medium architraves with simple ornamentation are chosen. Geometric motifs work well — they are light, do not overload the small facade, and still give character. Floral ornamentation is also appropriate, but not too detailed.
It is better to choose a color that matches the main house or is slightly darker. This creates unity for the entire architectural ensemble of the site. If the bathhouse stands separately and is not visually connected to the house, you can allow it its own, bolder palette.
A separate element for the bathhouse is the architrave on the front door. Small, neat, with ornamentation in the same spirit as on the windows. It is the door architrave that sets the first impression, especially if the bathhouse is located deep in the plot.
Architraves for a country house: warmth, coziness, and a bit of celebration
A dacha is a place of rest, and its decor should reflect that. Monumentality and architectural strictness are not needed here. What is needed is warmth, liveliness, and that special homeliness that is created precisely by carved wood.
For a dacha house made of timber or logs Wooden casings with a floral or mixed ornament is an ideal choice. Leaves, flowers, small curls — these are designs that carry natural joy. Exactly what a country house needs.
Format: as a rule, a narrow or medium platband. Dachas rarely have large windows, and a wide platband would look too heavy here.
Color: at a dacha, bolder, brighter solutions are acceptable than at the main country house. Blue, green, terracotta — all of this can work beautifully. The main thing is that the color is coordinated with the overall palette of the plot: the color of the fence, benches, gazebo.
An important point that is often overlooked: a dacha is often left unattended. This means that the coating on the platbands must be especially durable. Use high-quality facade compounds — they will protect the wood from dampness, UV radiation, and fungus in conditions where regular repainting is impossible.
Common mistakes when choosing platbands for a timber house
Each of these mistakes is a real experience of people who later had to redo things. It's better to study them in advance.
Shrinkage not accounted for
This is the first and most serious mistake. Rigidly attaching the platband to the wall of a new timber or fresh log house will inevitably lead to deformation. Remember: the platband is attached to the casing, not to the wall. And a width allowance is needed so that the compensation gap remains closed during the shrinkage process.
Choosing without measuring the window opening
It would seem elementary. But it happens. The casing is bought 'by eye', and during installation it turns out that it either does not cover the opening or extends too far onto the wall. Always measure: the width of the opening, the height of the opening, the distance from the edge of the opening to the corner, if the window is corner.
Too fine a pattern for a massive log house
Thin openwork carving against the background of a 240-mm log is unreadable. It simply disappears. This is not the master's fault, it is a mismatch of scales. For a log house, you need a large, well-readable pattern with expressive chiaroscuro.
Overload with different ornaments
Different windows have different patterns. The porch has a third ornament. The gazebo has a fourth. The facade turns into a collection of unrelated objects. A unified ornamental language is not an aesthetic whim, it is an architectural law.
Paint color not thought out
Buying casings and painting them with 'whatever is at hand' is a common scenario with invariably poor results. The color of the casing must be chosen in advance, in conjunction with the color of the facade, roof, and door. Preferably with samples.
Brackets and connecting elements not selected
The casings are bought, but there are no rosettes, connecting parts, or brackets. The installation will be ugly and unfinished. Always order a complete set: casings, corner rosettes, connecting elements, and — if needed — brackets.
Purchased without considering the window set
Two linear meters of casing for one window? Or four? And how many windows? Are connecting elements needed? Quantity calculation is a mandatory step before purchasing. Otherwise, either a shortage or extra expenses are inevitable.
carved facade decor of a wooden house: complete system
A well-designed facade of a wooden house is not a set of random elements. It is a system where every detail supports the overall look.
Let's look at this system as a whole.
Window level. Main casings — side posts and the above-window element. Corner rosettes at connection points. Connecting elements where length needs to be extended. Window sill casing — if provided by the design.
Entrance group level. Casings around the front door (usually wider and larger than window ones). Brackets under the canopy. Decorative overlays on horizontal elements of the awning. Carved balusters of the porch railing.
Gable level. Long decorative cornice with ornament. Overlays on the tympanum. Corner elements at junction points.
Cornice level. Decorative frieze, wooden baguette, cornice brackets.
This system can be implemented in stages — first the main casings, then brackets, then overlays. But it needs to be designed all at once, as a whole. Otherwise, there is a risk that at each stage the selected elements will not match the ornament and proportion of those already installed.
All necessary elements of this system, as well as Ideas for using carved decor for wooden houses, log cabins, bathhouses, and gazebos can be found in the STAVROS catalog.
How to properly prepare platbands for installation
This section is for those who are buying platbands for the first time and want to do everything correctly.
Wooden platbands are supplied without a finish coating. Before installation or immediately after — depending on the chosen installation method — they must be treated.
Step one: antiseptic primer. Apply a deep-penetration antiseptic. This protects against fungus, mold, and blue stain — especially important for exterior use. Apply in 1–2 coats, allow to dry completely.
Step two: cutting the ends. The ends of the platband are the most vulnerable spot: moisture penetrates the wood fastest through them. After cutting, the ends must be treated with an end sealant or an additional layer of antiseptic.
Step three: finish coating. Facade enamel with UV protection or facade varnish. Apply in 2 coats with intermediate sanding. The quality of the coating directly determines durability: good enamel protects the wood for 5–7 years without intermediate renewal.
Step four: installation. Fasten to the casing, not to the wall. For new buildings with active shrinkage, be sure to leave a vertical gap between the top end of the platband and the horizontal strip.
More details about materials and product manufacturing quality can be found in the section Materials and quality of STAVROS products.
Glued laminated timber house: a special case
Glued laminated timber occupies a special place among wooden building materials. It is made from dried boards glued under pressure into a single structural element. The geometry is stable, shrinkage is minimal, and the surface is smooth and clean.
The facade of a house made of glued laminated timber looks neat and modern. The horizontal lines are clear, the joints are even. This creates an interesting design situation: such a facade works well with both traditional folk ornaments and more modern, geometrically strict patterns.
For glued laminated timber, platbands with geometric ornaments are especially good — they echo the technological precision of the material itself. But traditional plant carving is also appropriate here: it adds naturalness and warmth, which glued laminated timber, as a synthetically precise material, somewhat lacks.
Shrinkage of glued laminated timber is minimal — 0.5–1%. This means that the compensation requirements for installing platbands are softer here, although the principle of "fastening to the casing" is still maintained.
Cylindrical log: texture dictates the choice
A house made of cylindrical logs is one of the most picturesque in wooden house construction. Smooth round rows, clear end cuts, expressive natural wood color — all this creates an image that does not need aggressive decor.
trims for a log house made of cylindrical logs should be proportionate to the scale of the house. As a rule, these are houses with large, spacious facades — and the decor here should not be thin and delicate, but confident and substantial.
Best combinations for cylindrical logs:
-
Wide platband with a large carved ornament — in dark brown color on a light log
-
Medium casing with floral ornament in white, creating a bright contrast
-
Geometric ornament with a clear rhythm on a tinted facade
Brackets in the porch area are mandatory: they create a vertical accent that is very needed on a horizontally oriented log facade.
How to design windows of a timber house from the outside: step-by-step logic
Sometimes it is useful to see not individual tips, but a sequence of steps. Here is the practical logic for choosing and installing casings.
Step 1. Assess the facade. Type of material (timber, rounded log, log house). Facade color. Number, size and location of windows. Is there any existing decor (roofing, porch, shutters).
Step 2. Determine the style. Traditional Russian ornament or modern geometric? Active decor or restrained? One accent (main facade) or a full decorative program?
Step 3. Choose the ornament and casing width. Based on the facade type, window size and house scale.
Step 4. Choose the color. In conjunction with the roofing, door, porch.
Step 5. Calculate the set. Number of linear meters, corner rosettes, connecting elements, brackets.
Step 6. Order everything together. It's better to buy everything in one place, from one series — this guarantees matching ornament, width, and thickness.
Step 7. Prepare the trims. Antiseptic, end treatment, final coating.
Step 8. Installation. Taking into account the features of the casing and shrinkage.
Everything you need carved facade decor — from trims to brackets and connecting parts — can be selected and ordered in the STAVROS catalog.
Frequently asked questions
Which trims are suitable for a timber house?
For a house made of profiled or glued laminated timber, medium-width trims with geometric or floral ornaments are well suited. The pattern is chosen depending on the style of the house — for a strict modern facade, geometric is preferable, for a traditional one, floral ornament. The main condition is that the trim should be proportionate to the window and the overall scale of the facade.
Can carved trims be installed on a log house?
Yes, and this is a very expressive solution. But for a log house, it is important to choose trims of sufficient width — at least 100 mm — with a clear, large ornament that is readable against the background of massive logs. During installation, the design of the casing and possible shrinkage of the house must be taken into account.
Which trims are best for a timber bathhouse?
For a bathhouse, narrow or medium platbands with a neat, simple ornament are recommended. A bathhouse is usually a small building, and overloading it with decor is not advisable. Geometric and simple plant patterns work well.
Is it necessary to paint wooden casings?
Absolutely. Exterior wooden platbands without protective coating quickly darken, turn blue from fungus, and deteriorate under the influence of moisture and UV radiation. The correct treatment order: antiseptic primer — finishing facade enamel or varnish in 2 coats. Coating renewal — as needed, usually every 5–7 years.
What is a casing frame and why is it needed?
A casing frame (okosyachka) is a wooden structure into which a window unit is inserted in a house made of timber or logs. It protects the window from loads arising during wall shrinkage. A compensation gap is always left above the casing. The platband visually covers this gap but is attached only to the casing, not to the wall.
Can platbands be used for glued laminated timber and for hand-hewn log houses simultaneously — if I have a main house and a bathhouse of different constructions?
Yes, this is a common situation. The main thing is to choose a single ornament for both buildings. The width of the platband may differ (wider for the house, narrower for the bathhouse), but the pattern should be the same. This will create visual unity for the entire architectural ensemble of the site.
How to calculate the number of platbands for a house?
Basic calculation: for a standard window 1200×1400 mm, you need two side elements of 1500–1600 mm each and one top element with a width of the window opening plus 150–200 mm on each side. Plus corner rosettes — 2–4 pieces per window depending on the design. It is recommended to take a margin of 5–10% for waste during cutting.
STAVROS: carved decor that lives together with your home
The STAVROS company produces wooden carved decor for facades, interiors, and garden architecture. The catalog includes platbands, brackets, decorative overlays, rosettes, connecting elements, Wooden baguette for framing, balusters and much more. Everything is made from glued pine panels on CNC equipment with manual finishing. No knots, no resin pockets, with precise dimensions and ready for any final coating.
The distinctive feature of STAVROS is a systematic approach. All catalog elements are developed in unified ornamental series, allowing you to select trims, brackets, overlays, and connecting parts in a consistent style without spending time searching for compatible items from different suppliers.
For a house made of timber, log house, bathhouse, gazebo, or summer cottage — a solution can be found here. View the full assortment, explore Ideas for using carved decor, calculate the set, and place an order with Contact us to confirm shipping to your destination. on the STAVROS website.