Article Contents:
- Define the batch result and the cost of a recurring error
- Approve the reference sample together with the installation method
- Identify the parameters critical for assembly
- Create a control map before setting up the equipment
- Inspection of every part and sampling inspection
- Example of detecting a deviation within a batch
- Finished leg as a locked project item
- Can a manual sample be replicated on a machine
- Can a part be approved from a photograph alone
- How to agree on acceptance when there is no tolerance in the catalog
- Is the average size of the entire batch sufficient
- What to do when two instruments give different readings
- Can a tested sample be included in the commercial set
- Can one batch be finished on different days
- How to resume processing after a long break
- Should rejected parts be kept
- Can leftovers from a previous production run be used
- Can parts from an already assembled set be reworked
- How to ship a set in multiple packages
- How to account for finishing by an external contractor
- How to distinguish a processing defect from storage damage
- Does one successful batch prove process stability
- Where to start a small workshop without complex accounting software
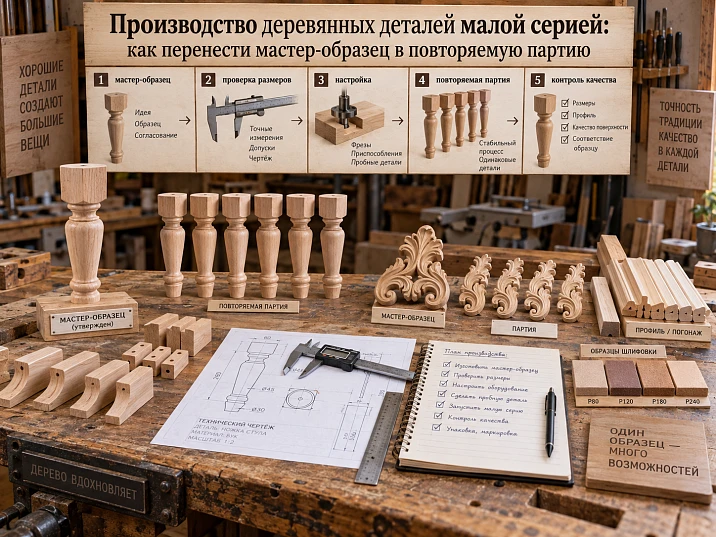
The first handle fit the facade, but that doesn't mean the next twenty will fit the same way. The sample's hole may have been adjusted by hand, its mounting surface slightly sanded, or its position changed during fitting. If these actions remain only in the craftsman's memory, the batch will start with a different part — visually similar, but made from an incomplete description.
Small-batch production of wooden parts requires turning a successful result into verifiable requirements. You need to know which dimensions ensure assembly, on which surfaces they are measured, how the finish is reproduced, and at what point work stops when there is a deviation. Then the approved leg, handle, or overlay becomes the basis of a repeatable process.
Ready-made components solve part of this task: a complex profile can be tied to a specific article number and finish. But incoming inspection, in-house processing, painting, and assembly still remain tied to the furniture project. Repeatability doesn't end at the parts warehouse — it ends with the assembled product.
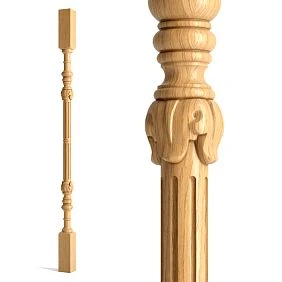
Define the result of the batch and the cost of a repeating error
For a workshop, small-batch production begins where one operation is repeated on several parts and its error spreads beyond the first instance. Five, ten, or twenty pieces are convenient examples of volume, but not a universal boundary between one-off and batch production.
For a one-off product, fitting can remain part of a specific craftsman's work. In a batch, you must decide whether it is acceptable at all, how long it takes, and how it will be reproduced. Otherwise, the production cycle calculation will be built on an operation the assembler only learns about at the last moment.
Discovering a nonconformity after finishing is especially costly. By that time, preparation, painting, curing, and movement between areas have already been invested in the wrong part. That is why it is useful to describe furniture parts production as a sequence of decisions: what result must be achieved after an operation and what allows the workpiece to be passed on.
Define the object of repetition. It may be a single handle, a set of four supports, or the entire decorative set of one facade. Each case has its own inspection result. A single good leg does not yet confirm that four supports are consistent; correctly cut slats do not confirm the geometry of the assembled frame.




Approve the reference sample together with the installation method
A master sample is a physical part or an agreed-upon set against which subsequent items are compared. It is approved after checking geometry, installation, finish, and position on the furniture. If only a profile without holes and coating is ready, this is an intermediate sample with limited purpose.
Keep its description next to the reference: item code or internal designation, material, dimensions, drawing, installation diagram, and finish designation. Add the approval date, project version, and responsible person. The note "sample is good" does not explain what exactly was approved and what result needs to be reproduced.
Appearance and geometry can be confirmed by different means. Color is conveniently compared with a finished sample, holes with a drawing and a checking fixture, and completeness with a specification. Do not try to replace all documentation with one beautiful part on a shelf.
At the approval stage, record all modifications made. If a handle fit only after changing the mounting area, this change must be included in the production version. If the sample was assembled with different fasteners, first approve the final assembly. In such a case, producing a batch according to the original drawing will not reproduce the already approved result.
For purchased elements, the following are useful drawings and models of STAVROS products. They are compared with the actual sample of the selected version and with your own furniture. A catalog drawing of a part does not replace the drawing of its installation in your cabinet.
Our factory also produces:
Identify the parameters critical for assembly
Not all features of a wooden part are checked in the same way. The height of a support affects the position of the cabinet. The distance between handle holes is related to drilling the front. The smoothness of a decorative transition is assessed differently: it may not determine assembly, but it remains essential for appearance.
Parameters are considered critical for a specific project if their deviation disrupts the required function, installation, or agreed appearance. First list the consequences of an error, then choose the measurements. This order helps avoid a long chart that records dimensions convenient to measure but omits the key hole.
For the leg, check the height, the top plate, the position of the mounting and the intended orientation. For the handle — the mounting type, the centre-to-centre distance for two-point mounting, the projection and the grip space. For the overlay — the dimensions, the contact plane, the direction of the pattern and the relief protrusion where an opening part passes nearby.
The parameters of adjacent elements are considered together. A handle and a front may each individually match their dimensions but assemble poorly due to inconsistent hole requirements. Therefore tolerances are assigned based on how the joint performs, not on the customary precision of the tool.
Numerical limits must follow from the design, drawings, technology and delivery conditions. A universal ruling such as “for wood, so many millimetres are allowed” does not apply equally to a decorative relief, a support height and a mounting hole. If the permissible deviation is not defined, the acceptance criterion is not yet ready.
Get Consultation
Draw up a control map before setting up the equipment
The control map links the parameter, the inspection method and the point at which a decision is made. It can be laid out as an ordinary table. The main thing is that the craftsman and the inspector understand in the same way where to measure, what to compare against and what to do with the result.
Below is an example structure for a hypothetical small batch. The specified inspection of each part relates to the selected critical characteristics of this example and does not establish a mandatory regime for any workshop.
| Detail | Controlled parameter | Basis for comparison | Inspection in the example |
|---|---|---|---|
| Leg | Height between specified surfaces | Size and tolerance on the drawing | Each part after dimensional processing |
| Leg | Fastening and its position | Assembly unit drawing | Each part before assembly |
| Handle | Center-to-center distance and fit | Drawing and verified fixture | Each part after drilling |
| Mirror overlay | Left or right orientation | Facade diagram and article number | Every part during receiving and layout |
| Molding | Profile cross-section and position | Drawing of the selected version | The first part and then according to the adopted plan |
Measurement conditions, the tool used, and the recording format are added to the table. For a numerical dimension, it is useful to keep the actual value where process changes are tracked by it. For orientation, an unambiguous conformity mark is sufficient. A "checked" entry without specifying the parameter quickly loses its meaning.
Inspection of every part and sampling control
In a small batch, measuring every part against several important characteristics may be simpler than developing and maintaining a complex sampling plan. This practical decision depends on the cost of inspection, its duration, and the consequences of missing a defect. It does not mean that every thread element on every item needs to be measured.
Sampling control requires predefined rules: how parts are selected, how many are inspected, based on what results a batch is accepted, and when inspection is expanded. A few convenient items from the top of the box do not confirm that the entire delivery conforms. Also, a sample for batch acceptance and periodic setup checks during processing serve different purposes.
Agree on measurements and check working templates
Before starting, have two operators measure the same part using the future inspection plan. If the results differ in a way that changes the accept/reject decision, sort out the method first. This is a simple preliminary check of consistency, not a full measurement system accuracy study.
Specify the datum surfaces, the part position, and the tool contact points. On a shaped leg, the diameter across the peaks of the profile and the diameter of the smooth reference band are different values. On a handle, the projection is measured from the designated reference plane, not from an arbitrary point on the convex back side.
The tool must suit the shape and the required accuracy. The number of digits on a digital indicator does not by itself prove the accuracy of the result. On a soft or coated area, the contact method also matters. The order of use is taken from the tool documentation and the accepted procedure.
Check the drilling template before a production run. If it was made with an error, all the incorrect holes will be identical. Check not only the template itself but also how it is located on the part: a reversed face or a different stop changes the result even when the guide positions stay the same.
Separate the working fixture from the protected reference standard. Constant use of a sample for setup and trial fits can alter its surface or mounting. For repeatable checks, it is more convenient to use a separate working sample or fixture whose condition is regularly compared against approved requirements.
Agree on the material and condition of the blanks
Wooden parts in small batches may come from different deliveries and have been through different storage conditions. Before processing, establish the species, the blank's construction, the surface condition, and compliance with the project requirements. A similar color does not confirm the same material or preparation.
Wood exchanges moisture with the surrounding air, and a change in moisture is linked to a change in dimensions. Storage conditions and the condition of the blanks therefore matter for repeatability. When working with assemblies that are sensitive to dimensions, moisture control and the material preparation sequence are included in the process; the conditioning period is not set the same for all parts and rooms.
Do not mix a new delivery with leftovers from the previous one without accounting for their origin. Even if the item code matches, keep the batch information until inspection and kitting are complete. If a discrepancy arises, it will be easier to determine whether it relates to a specific delivery, an in-house operation, or storage conditions.
The appearance requirements for the blank are also agreed in advance. In the description quality of STAVROS wooden products there are variants for enamel and for tinting: they differ in the approach to selecting lamellas by color and texture. The category name refers to the blank and does not mean a finished coating is present.
In the working documentation, the material is specified together with the finish type and subsequent finishing. If the project allows a change of species or blank quality, such a substitution is reviewed as a separate change, especially for visible parts under a semi-transparent coating.
Check the first part of each new run
The approved reference sample and the first part after equipment setup serve different purposes. The reference sample describes the agreed result. The first part shows whether this result can be achieved with the current settings, material, tooling, and sequence of operations.
| Sign | Approved reference sample | First part of the run |
|---|---|---|
| When it appears | When approving the finish type | After setting up a specific production run |
| What it's used for | Defines the accepted result together with the documentation | Confirms the result of the current process |
| What it relates to | With the project version and finish | With the batch, operation, and setup |
| How it affects operation | Defines the comparison requirements | Allows the verified stage to continue after acceptance |
Make the first part using the method planned for the rest. Hand finishing that is absent from the production route makes the check unrepresentative: it confirms the result of extra work, not of the accepted setup.
After dimensional processing, compare the critical parameters with the inspection chart, perform the specified trial fit, and record the decision. If the part fails, determine the cause, adjust the process, and make a new verification sample. Do not start the remaining parts hoping to fix everything during assembly.
The approval applies to the verified stage. Acceptance of the first drilled blank does not confirm the future coating color, and a successful paint test does not confirm the geometry of the mounting hole. If the finishing process has not yet been agreed, it receives its own check before the entire batch is processed.
A new setup after a change of tool, program, stop or significant production condition requires an assessment of the affected parameters. In the routing sheet, specify in advance the events after which a repeat first article is needed. Then the decision does not depend on how small the change seems to the operator.
Place inspection before expensive downstream operations
Final inspection detects the result of an error but does not recover the time already spent. In-process inspection is placed where a nonconformity can still be detected before further costs accumulate. The point is not a large number of checkpoints, but the correct placement of inspections.
| Stage | What is checked | What a positive result authorizes |
|---|---|---|
| Layout | Blank dimensions, orientation and specified allowances | Further processing along the route |
| Profile forming | Control sections and the assembly part | Drilling or the next profile operation |
| Drilling | Hole positions and joint compatibility | Preparation for finishing |
| Surface preparation | Surface condition and agreed processing areas | Coating application |
| Finishing and curing | Conformity to the sample and coating readiness for the next stage | Final inspection and assembly |
Before gluing the decor, a dry layout is additionally performed: orientation, coordinates and kit composition are checked. After an irreversible operation, the resulting outcome is checked before passing it on. A single check before starting is not enough if the operation itself can change the required parameter.
Example of detecting a deviation within a batch
Suppose 32 parts are being processed. The log contains inspection results up to and including the sixteenth. On the twenty-fourth, a hole offset was detected. Parts seventeen through twenty-four — eight pieces — are flagged as requiring inspection; the remaining eight are not yet processed using the previous setting.
Then the cause and the extent of the error are determined. If it cannot be confirmed that it occurred after the last checkpoint, the inspection is extended to earlier parts as well. Recording the number helps start the investigation, but by itself does not prove that the entire previous output is good.
After correcting the setting, the first part produced is checked again. The flagged portion of the batch is returned to the general flow only after a decision is made for each affected item. Otherwise, the process was stopped, but the incorrect blanks still ended up in the box with the good ones.
Repeat turned parts using reference cross-sections
For a turned leg or post, the overall silhouette is not enough for comparison. Two parts may have identical outer dimensions but differ in the position of the bead, the length of the taper, or the size of the mounting section. On a single item this is barely noticeable; side by side on the same piece, the difference becomes obvious.
On the drawing, define reference cross-sections from a common datum. For each significant area, determine the position along the axis and the required dimension. Compare decorative transitions with the approved profile using the established method. Inspection must account for both the geometry and the visible part after installation.
If a suitable component is already produced in series, finished turned elements they make it possible to eliminate in-house production of the corresponding profile. What remains in the workshop is then incoming inspection, the specified modifications, finishing, and assembly. Only the operation that the selected component actually replaces disappears entirely.
A finished leg as a fixed project item
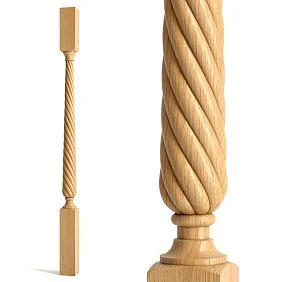
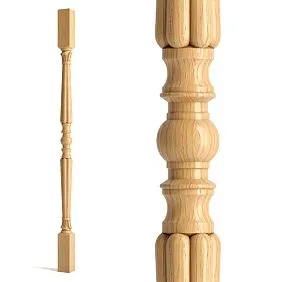
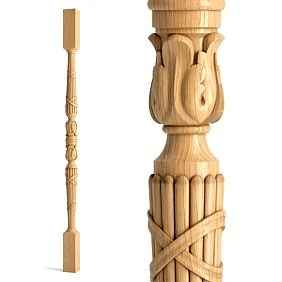
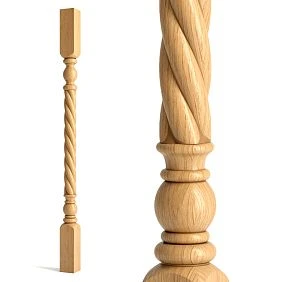
To buy wooden legs for furniture for a repeatable series, record the full article number, size, and finish. The wording "the same as on the previous dresser" does not preserve the material, surface preparation, or the completeness of the fastening kit.
If the workshop does its own finishing, the following are suitable for selection from STAVROS open boundless possibilities for designers, furniture makers, and anyone striving to create unique high-quality furniture.. Their accepted dimensions must be tied to the actual installation assembly, including the specified floor glides and mounting parts.
The four supports of one item are checked as a set if the project specifies exactly four. The installed height, finish, and mounting scheme are agreed upon. Different front and rear models retain separate items. Selecting compatible parts within the set must not conceal individual units exceeding the established tolerance.
If the project requires interchangeability, the arbitrary replacement of an accepted leg with another accepted leg of the same design must preserve the requirements for the assembly. When an individual selection of pairs is required, this is a separate production condition that is reflected in the configuration and subsequent replacement of parts.
Connect the wooden handle to the holes on the front
For a front series, the placement of handles is defined by a common scheme, so both sides of the connection must be checked. For a handle with two mounting points, the center-to-center distance and the position of the holes are agreed upon; for a single-point handle, the mounting geometry and the intended method of maintaining orientation are agreed upon.
Make a test assembly with the actual front thickness, the selected fasteners, and the approved layout. It helps evaluate the fit of the bearing surfaces, the handle projection, and the assembly of the connection. A single trial screw that fits freely into the hole does not reproduce the entire assembly.
Before buy wooden handles for furniture for the series, determine which dimensions relate to the handle itself and which relate to the preparation of the front. Link the fixtures of both sections to a single version of the drawing. Correcting the template in only one section may preserve the incompatibility.
For subsequent painting, select the appropriate design handles without coating. After finishing, check whether the assembly conditions have been preserved. If purchased Handles with a ready-made coating, the specification records exactly this design and the agreed appearance.
For the batch, a control fitting on a representative front is useful, but it does not replace the selected hole check of the remaining parts. A properly functioning template also requires condition monitoring and correct positioning.
Separate the mirrored decor and set the installation axes
The left and right overlays may have identical dimensions and the same number of parts in the box, yet serve different roles. Each orientation must have its own specification line and designation on the facade diagram. A total quantity without separating the sides does not confirm that pairs are present.
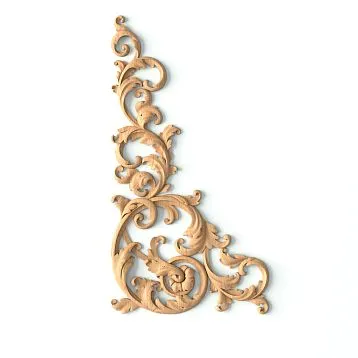
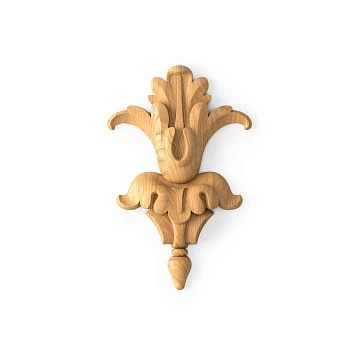
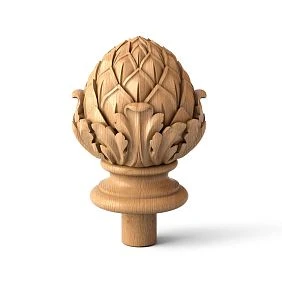
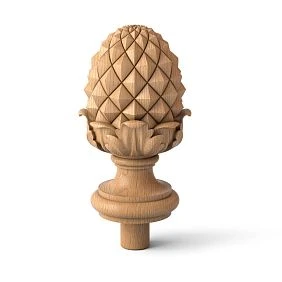
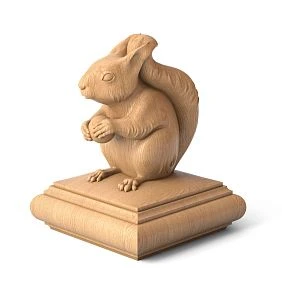
In the section — this is the decoration of cabinet fronts, chests, tables, and doors. Carved inlays allow creating a unique furniture design, adding individuality and expressiveness. The inlay N.VRS-014L gives furniture an elegant look, making it a true work of art. Using carved decoration on furniture adds luxury to the interior and highlights the owner’s taste. specific models are selected, then their finish is specified. For the series, check the grain direction, dimensions, the fit of the reverse side, and the areas that will end up next to the edge or the opening part of the furniture.
When laying out a mirrored pair, determine what the coordinates are set from: the facade edge, the composition axis, or the inner frame. Transferring the position sequentially from one overlay to the next is inconvenient: an error in the first installation can carry over. A common marking base keeps the connection to the project.
Wooden sockets and central elements require axis alignment. The center of the overall bounding rectangle does not always coincide with the visual center of a complex ornament. Approve the position on the first facade and transfer it to a template or diagram with coordinates.
For a decorative group, evaluate the dry assembly as a whole: two overlays, the central part, the frame, and the visible gaps. Individually acceptable elements can form an unsuccessful composition due to incorrect marking. This check is done before gluing and repeated according to the adopted production route.
Start the linear stock according to the cutting map and a trial frame
A repeatable frame begins with a list of finished segments. Specify the profile, length, measurement method, cut direction, and quantity. For an angled joint, it is especially important which edge the length is recorded along. A value along the outer side cannot be transferred to the inner side without recalculating the geometry.
In a conventional series of eight identical facades, each frame requires two long and two short strips. Assembly will require 16 long and 16 short segments. Their specific dimensions are taken from the project; the initial linear stock is calculated from the segment placement map, taking into account the cut and end preparation.
Before cutting the entire batch, make one complete frame. Check the size on the facade, the profile joint at the corners, the relief direction, and the geometry of the assembled contour. Four correct lengths do not guarantee a correct result if the angle or strip orientation is wrong.
The stop for a repeat cut is checked against a finished part, not just against the machine scale mark. The map records the base position and the method of placing the profile. If an asymmetrical molding is turned over, the same equipment setup can produce a different joint.
In the wooden moldings for furniture select the article and the available version by material and cross-section. Before purchasing the total linear meters, confirm the delivery lengths for the specific item. A finished profile reduces in-house profiling operations, but the cutting plan and frame assembly remain workshop tasks.
Lock in the finish and confirm it with a test
The phrase "paint it like the sample" describes the goal but not the way to achieve it. For a repeatable finish, you need a record of materials and the sequence of operations: preparation, priming if applicable, tinting or painting, intermediate treatment, and protective coating according to the chosen system.
Assign the agreed variant an internal designation, for example "Finish 01". This is a workshop reference code, not the name of a supplier's ready-made color. In the linked card, record the base material, the compositions used, their preparation and application parameters, the holding conditions, and a sample of the result. Values are taken from the material documentation and proven technology, not assigned uniformly for any products.
Before treating the entire batch, run a test on the corresponding wood with the same surface preparation. For a relief part, a sample of the required shape is useful: a flat board does not show how the coating looks in the recesses and on the protrusions. After the specified holding time, compare the result with the agreed reference.
Separately mark the surfaces that affect assembly. If the coating changes the fit or prevents close contact, the order of finishing and protection for these areas must be determined in advance. You cannot first paint the entire batch and then leave the assembler the task of removing the coating at every joint without an agreed operation.
Choosing Mounting and finishing materials, check the compatibility of the entire system. Replacing one composition, preparation method, or application condition may require a new test. The saved finish designation must lead to the current technology, not just to a photo of the desired shade.
Readiness for packaging is also confirmed by the coating requirements. A surface suitable for the next production stage is not necessarily ready for prolonged contact with packaging material. These states should be separated in the routing so that packaging marks do not become the last operation that changed the accepted appearance.
Agree on the limits of visual differences in the wood
A repeatable solid wood series does not mean identical placement of every grain. The goal is agreed geometry, finish, and visual compatibility of the parts. This is especially noticeable on clear coatings, where the wood remains part of the pattern.
A single reference sample shows the desired result, but it does not always explain the acceptable range. If differences in tone or texture matter for the project, agree in advance on examples of acceptable and unacceptable appearance. Clarify the comparison conditions: lighting, position of the parts, visible surfaces, and adjacency on the furniture.
Do not evaluate the front pair of legs only individually. Place them next to each other in the position in which they will be visible on the dresser. Handles of the same front or mirrored overlays are compared in the same way. A small difference may be perceived differently on adjacent parts than on opposite sides of the product.
Distribution into sets is permissible within the agreed requirements. It helps to combine the natural pattern, but it must not turn into a way to hide a defect. Requirements for hidden and face surfaces may differ in appearance; requirements for mounting surfaces, however, retain their purpose.
For a repeat batch, compare the result with the saved project materials. A new sample of "approximately the same color" must not imperceptibly become the next standard. Otherwise, each batch will resemble the previous one, and after several runs it will noticeably drift from the original solution.
Complete the inspection before handing the sets over to assembly
Final control combines the results of the previous stages and checks the condition of the part after all operations. Dimensional processing may have been successful, but finishing, storage, or transport between areas may have changed the appearance and suitability for assembly.
Verify the part designation, material, finish, critical parameters, and completeness of the fastening. Checks are performed to the extent provided for in the control card. For the relevant assemblies, use the accepted fixtures and trial fits, understanding their limits: a successful installation of a leg is not a test of the load-bearing capacity of the entire furniture item.
After inspection, assign a clear status. Parts awaiting a decision must not lie in the general flow without distinctive marking. For a small workshop, separate labeled locations and an entry in the batch card are sufficient if this makes it possible to exclude accidental issuance.
Then assemble the set for a specific product. The roles, quantity, project version, and finish must match. Check for the presence of mating elements and furniture hardware, if they are provided for. Eight suitable wooden parts do not form a set that still needs missing mounting elements.
Assembling by product does not require packing everything into one box immediately. A long molding and small handles can be stored separately, but must be linked by a single kit designation. The assembler must see where all its parts are located and which of them are already approved for use.
Link the batch card to the furniture specification
The specification answers the question of which parts are needed to produce the furniture. The batch card shows what happened to these parts and how many of them can be passed on. If only the total purchased amount is stored, rework and rejected items will remain hidden inside a nice-looking number.
Let's take a hypothetical project of eight identical chests of drawers. Each item is provided with four legs, six handles and a pair of mirrored overlays. The material and finish are agreed for the example; the actual item codes are specified in full in the working list.
| Position | Per chest of drawers | For 8 chests of drawers | Accepted after inspection | Current status |
|---|---|---|---|---|
| Leg of the selected finish | 4 | 32 | 32 | Approved for kitting |
| Handle of the selected finish | 6 | 48 | 48 | Approved for kitting |
| Left overlay | 1 | 8 | 8 | Approved for kitting |
| Right overlay | 1 | 8 | 7 | One awaiting a decision |
Although all the ordered wooden parts may physically be in the workshop, only seven complete sets are currently available. The eighth chest of drawers is not provided with an accepted right overlay. The part awaiting a decision is accounted for separately, preserving its link to the batch.
The batch card itself can be made compact:
| Field | What is retained |
|---|---|
| Batch designation | Unique number and launch date |
| Project | Furniture model and documentation version |
| Composition | SKUs, variants, and planned quantity |
| Material | Deliveries of blanks or finished components |
| First part | Inspection result and approved stage |
| Route | Completed operations and checkpoints |
| Finishing | Technology designation and approved sample |
| Total | Accepted, in revision, rejected, transferred to kits |
For measurable parameters, attach the results to the item record; for detected deviations, attach the decisions. A single final mark "batch inspected" does not replace information about which items are on hold and why.
The conditional 32 legs or 48 handles in the example represent the need for good parts for the products. Samples, process stock and reserves are planned separately when necessary. Their availability does not permit quietly excluding rejected parts from accounting: otherwise the causes of losses will remain unknown at the next production run.
Manage rework and replacements within a series
For a nonconforming part, first make a decision: whether rework by an agreed method is acceptable, whether a replacement is needed, or whether the design must be revised. The ability to physically assemble the unit after fitting does not yet confirm that the resulting outcome is acceptable.
A reworked part undergoes re-inspection of the affected parameters. After a hole is corrected, the joint is checked; after a surface is machined, its position and the related dimension are checked; after refinishing, the appearance and mating surfaces are checked. The result is recorded before the part is returned to the kit.
If the item code changes in the middle of a series, create a new item or a new version of the variant and mark the boundary of application. Specify which products received the previous component and which received the new one. This will be needed for final inspection, reordering and replacing a part in finished furniture.
Do not limit yourself to updating the name in the master table. Replacing a handle affects the holes in the front and the projection; replacing a leg affects mounting and installed height; replacing a profile affects the joints. Assess the related documents, fixtures and already manufactured parts.
If a change affects only part of a series, keep both versions separately and label the kits unambiguously. Mixing variants within a single item is permissible only when this is provided for and verified by the design. Accidental mixing does not become acceptable merely because the customer is unlikely to notice the difference at first glance.
Buy ready-made components for complex repetitive operations
Ready-made furniture parts are especially useful where a workshop would otherwise have to re-establish the reproduction of a complex shape. This may be a turned profile, carving, a shaped handle or moulding. The benefit is determined by the specific operation eliminated and the remaining route.
| Component | What to compare with buying a ready-made piece |
|---|---|
| A simple block or straight element | Your own short route, material and required precision |
| A complex turned leg | Setup, profile making, inspection and possible rework |
| carved overlay or rosette | Model preparation, processing, hand finishing and pattern repetition |
| A shaped handle | Geometry, drilling, surface and coordination with the facade |
| A profiled molding | Tooling for the profile, processing and cross-section verification |
Such a comparison does not prove that buying is always cheaper. Take into account production setup, operation time, inspection, losses, lead time, and the possibility of reordering. For an in-house part and a purchased component, compare the same final result, including the required preparation and finishing.
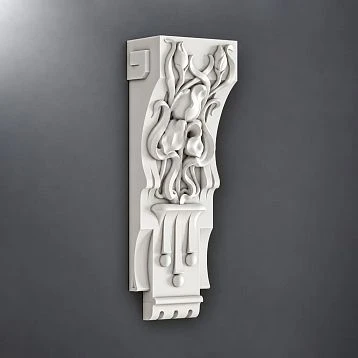
Select ready-made wooden parts for small-series production in the STAVROS catalog. To buy wooden decor for furniture, start with the section wooden carved elements. If such items are present in the project, consider separately Wooden Brackets. The purpose of a specific model is verified against its documentation: a decorative shape by itself does not confirm a load-bearing function.
Before ordering a sample, confirm the required version. Section product samples helps with available samples, but a material or color sample does not replace checking the mounting geometry of the part itself.
To buy wooden furniture elements for your own workflow, send the supplier exact item codes, dimensions, material, finish condition, and quantity. Agree any special requirements for parameters and acceptance before ordering. A workshop's internal tolerance does not automatically become the supplier's obligation.
For regular production, discuss conditions for manufacturers, confirmation of the selected versions, and the reordering procedure. The lead times and completeness of a specific delivery are verified against the offer and payment and delivery termsThe commercial objective here is to obtain a validated component that can be reliably incorporated into small-batch production of wooden parts.
Save the data for re-running
In three months, the workshop must be able to restore the process from documentation, not from the memory of the person who built the first dresser. Save the approved reference sample, the drawing version, the specification, the inspection plan, the routing, the finishing details, and the results of the accepted batch.
For purchased components, keep full part numbers, clean links to product pages, confirmed configurations, and delivery information. A link is convenient for searching, but the product description may change. Your own records must show exactly what was accepted for the project last time.
Also save information about rework and the causes of delays. If three parts required re-machining, the next run should begin by eliminating the cause or including a justified operation in the routing. Otherwise, not only the successful result but also the hidden labor will be repeated.
Before a new production run, check the condition of the reference samples and fixtures, the currency of the materials, and whether the available components match the saved configuration. A wooden sample is not a permanent measuring instrument, so critical dimensions are restored from the documentation and the approved inspection method.
Even a fully repeat order begins its own batch history. After setup, the first part is produced, inspected, and the corresponding stage is released. The archive reduces preparation uncertainty but does not replace confirmation of the current process.
Answers to practical questions about batch repeatability
Can a hand-made sample be reproduced on a machine?
Yes, if the result of machine processing meets the agreed requirements. First, determine which features of the hand-made sample must be reproduced and which should not carry over into the series. Accidental asymmetry does not become mandatory just because it is present on the first part. Shape changes are agreed upon before release, then the result of the chosen technology is verified.
Can a part be approved based on a photograph alone?
A photo is suitable for discussing the shape, position and composition of the set, but it does not replace measurements and a physical fit check. Color also depends on the shooting conditions and the screen. When approving remotely, separate what is confirmed by the drawing and measurement report from what requires a sample handed over to the customer.
How to agree on acceptance when the catalog has no tolerance
Do not treat the absence of a specified tolerance as a promise of zero deviation. Before ordering, explain to the supplier the purpose of the dimension, the required limits and the inspection method. Clarify whether delivery to these requirements is possible. If the connection parameters have not yet been agreed, order a suitable sample to check the design, keeping the question of serial acceptance open until agreement is reached.
Is the average size of the whole batch sufficient?
No, the average value does not show the extreme deviations of individual parts. Sizes above and below target can offset each other when calculating the average, even though some items will not fit the assembly. For acceptance, use the established requirements for each inspected part, and for process analysis, keep the sequence of actual measurements.
What to do when two instruments give different readings
Check whether they measure the same parameter from the same datums and in the same position. Then assess the condition, settings and suitability of the instruments according to the accepted procedure. Do not choose the reading that is more convenient for acceptance. Until the cause is identified, the result of the disputed measurement cannot be considered a reliable basis for releasing the part.
Can a tested sample be included in the commercial set?
This depends on the tests performed and the condition of the part afterward. Destructive testing rules out normal use of the sample, while other checks may leave damage or alter the connection. The decision is made based on the actual condition and the established requirements. Separately account for samples intended for setup, testing and subsequent delivery, if such are provided.
Can one batch be finished on different days
Yes, if the agreed technology has been maintained and the result of each stage has been confirmed. Record which parts were processed together, which materials were used, and which conditions mattered. Before combining, compare the finished parts according to the accepted procedure. The same finish designation does not eliminate the need to check the result after an interruption or a change of materials.
How to continue processing after a long interruption
First establish the state of the unfinished batch: completed operations, approved stages, and unresolved deviations. Check that the setup and fixtures are intact and inspect the condition of the workpieces. If significant conditions have changed, confirm the affected operation on the first part of the continuation. The resumption date and the check result must be linked to the same batch history.
Should rejected parts be kept
While the cause is being determined, it is useful to have the part itself or sufficient records and photographs showing the nonconformity. Store it separately from conforming parts with a clear label. The duration and method of further storage are determined for your specific task; there is no need to accumulate such parts indefinitely. After a decision is made, retain the information needed to prevent recurrence of the error.
Can leftovers from a previous production run be used
First confirm their origin, workmanship, condition, and compliance with the current project version. For finished parts, additionally assess their appearance next to the new batch. Conforming leftovers may be included in sets with a record of this decision. Unknown origin or lost marking require data recovery rather than automatic release from the warehouse.
Can parts from an already assembled set be reworked
If rework is approved, remove the affected parts from the accepted set and change its status. After correction, perform the required check and restore completeness. This way the assembler will not receive a kit that is listed as ready although one support is undergoing rework. Return to the set must be as unambiguous as its initial acceptance.
How to ship a set in multiple packages
Link each package to the product designation and the overall list of contents. State the number of packages and how the parts are distributed among them. Long planks, finished handles and fasteners may require different placement, but the recipient must assemble them into one set according to the document. Checking the number of packages does not replace checking the contents of each one.
How to account for finishing at an external contractor
Document the handover by item, quantity and finish version. The agreed requirements, a sample and information about surfaces that affect installation must be handed over together with the parts. On return, record the quantity received, the condition and the acceptance result. Handing over to a third party remains a stage of the overall route, not a break in the batch history.
How to distinguish a processing error from storage damage
Compare the condition at successive checkpoints and the conditions between them. Records of the accepted surface, photos of the damage found and information about movements help narrow down the cause. If the initial condition was not recorded, the defect cannot be confidently attributed to a specific operation. In the next run, add a check at the point where traceability was lost.
Does one successful batch prove process stability
It confirms the result of a specific run within the inspected volume. To conclude that results are repeatable across runs, you need information about subsequent batches and significant changes in conditions. Compare measurements, rework and losses over time. A few good units do not justify automatically cancelling inspection of other releases.
Where to start in a small workshop without complex accounting software
Choose one repeatable part and describe its full path: requirements, operations, checks and issue into the set. Assign those responsible for authorizing the next stage and for keeping current records. A simple spreadsheet is enough if it shows the batch status. After the first release, fix the gaps found and extend the working procedure to the remaining components.