Article Contents:
- First analyze the composition, then open the product pages
- Divide the interior into architectural zones
- Assign labels to the distinct elements
- How to recognize molding in a wall layout
- How ornamental trim differs when selecting
- How to analyze a cornice under the ceiling
- Ceiling medallion: shape, size, and relationship to the light fixture
- Appliqués, corners, medallions, and vertical decor
- Why perspective interferes with measurement
- How to use a known reference dimension
- Separate the visible from the assumed
- Make a short list of meaningful candidates
- Compare the items with each other
- The main profile determines the choice of compatible decor
- Assemble the ceiling into a separate system
- Check the scale in the model and the joints in the drawings
- Order samples for the remaining questions
- Link the labels on the photo to the actual product codes
- Mistakes that force you to repeat the selection
- From selecting by photo to specification and purchase

In a photo, you like everything at once: thin frames on the walls, a wide band under the ceiling, a rosette around the chandelier. But once you open the catalog, the coherent picture breaks down into dozens of similar products. One molding has the right width, another has the right pattern. The overlay you found looks convincing on its own, but next to the chosen profile it turns out to be too large.
Selecting stucco from a photo begins with analyzing this system. You need to understand which elements create the impression of the interior, what role each of them plays, and which relationships should be preserved in the new space. After that, finding actual products is much easier: each item gains a purpose, size constraints, and clear comparison criteria.
First analyze the composition, then open the product pages
Attention usually catches on the most noticeable ornament. Meanwhile, the foundation of the interior you like may consist of completely smooth profiles: they set the height of the wall panels, the repetition of frames, and the connection with doorways. If you replace this geometry with a random layout, even a rosette with a similar pattern will not restore the original impression.
Start with three questions. Where do the main lines run? What repeats? Which element draws the eye first? The answers will help separate the foundation of the composition from individual decorations.
Save the overall photo and several enlarged fragments. The overall view is used to check the relationships between parts of the interior; the fragments are used to check the profile shape, pattern, and joints. Enlarging a small image by itself does not add information: a blurry dark stripe may remain just a stripe, even if you stretch it across the entire screen.
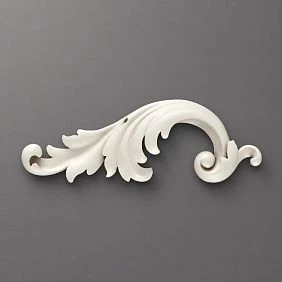
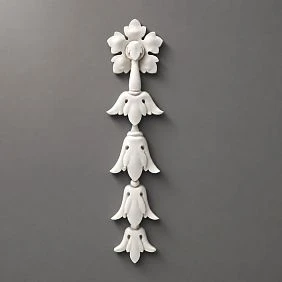
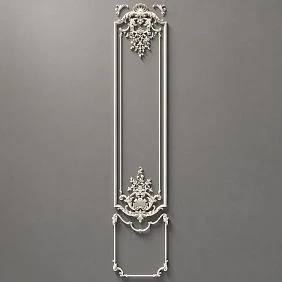
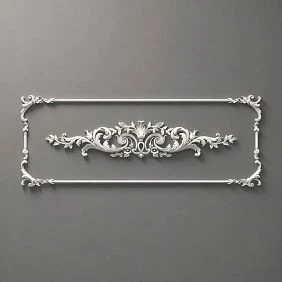
For an initial comparison, the section is useful wall decor: it helps you see how linear profiles and individual elements participate in a single composition.




Divide the interior into architectural zones
Work from large surfaces to details. The wall, the transition to the ceiling, the ceiling field, and the door portal require different products and different checks. The same plant motif alone does not make the elements interchangeable.
| Photo zone | What to highlight during review | What needs to be clarified |
|---|---|---|
| Wall | Frames, horizontal bands, individual overlays | Profile cross-section, panel boundaries, placement of frames |
| Wall and ceiling junction | Cornice, additional strips beneath it | Height, projection, number of individual parts |
| Ceiling field | Inner contours, corners, ornamental inserts | Layout dimensions and relation to the perimeter |
| Central ceiling zone | Rosette, medallion, light fixture surround | Dimensions, composition structure, center position |
| Door portal | Architraves, pilasters, capitals, upper termination | Composition of the framing and projection relative to the wall |
The zone boundary does not necessarily coincide with the product boundary. For example, a cornice occupies the transition between two planes, while a vertical pilaster may connect the door framing with the upper wall band. Such connections are noted separately: in subsequent selection they will require dimension coordination.
Our factory also produces:
Assign designations to the distinct elements
On a copy of the photo, place simple labels: F01 — main wall molding, F02 — cornice, F03 — ceiling rosette, F04 — central overlay, F05 — ornamental frieze. This is a conditional example; the composition of a specific photo may differ.
One repeating profile gets one designation. Five identical frames do not require five different product codes. If the inner frame has a different cross-section, it already needs a separate item. Left and right decorative parts are also distinguished when their shape is truly mirrored.
Next to each label, briefly write down the function: "outlines the main wall field," "completes the wall at the top," "emphasizes the middle of the frame." The name sometimes remains preliminary. A visible horizontal line may turn out to be a molding, a frieze, a panel joint, a paint boundary, or a shadow from a protrusion.
Such a map makes the discussion concrete. Instead of asking to "find everything similar," you can examine a specific item F02 while preserving its connection to the other parts of the interior.
Get Consultation
How to recognize a molding in a wall layout
A molding is usually read as an extended profile that outlines a frame, divides a plane, or forms an additional contour. For a smooth product, the cross-section is maintained along the length. In a photograph, its signs are a repeating band width, characteristic light and dark lines, and the identical construction of several frames.
For searching, you need the width, the cross-section shape, and the expected protrusion. Separately, determine where the profile itself ends: the shadow next to it is not included in the product width, and a double frame may consist of two independent moldings with a gap.
When viewing of polyurethane moldings compare the overall character of the line first. A wide flat band, a rounded bead, and a stepped profile create different light transitions. Matching outer width does not yet mean similarity on the wall.
Also check the inner field of the frame. Replacing a narrow profile with a wide one reduces the free surface inside the same outer contour; next to a painting or a sconce, this difference can be decisive.
How ornamental trim differs when selecting
With an ornamental band, you have to compare two features at once: the cross-section and the repeating pattern. Even if the width fits, a large floral scroll can create a completely different rhythm than small beads or short leaves.
In the section ornamental trim they look not only at a single motif. What matters is how many repeats fit on the future section, where the pattern meets the corner, and how it ends at the door frame. A repeat is the length of one repeating fragment of the ornament.
In a photograph, light sometimes hides the boundaries of repeats. If they cannot be reliably distinguished, do not calculate the repeat from random spots. Ask for a more detailed image or leave the parameter unconfirmed.
Before buying polyurethane moulding, check the pattern against the lengths in your project. A beautiful full repeat in the middle of the wall is of little help if randomly cut halves of the motif remain near both architraves.
How to identify a cornice under the ceiling
A cornice connects the wall and the ceiling, so it is identified by its position and its work with two planes. However, a wide band at the top of the wall may include the cornice itself, a separate frieze, and a thin moulding below. A shared shadow sometimes merges them into a single visual band.
Trace the boundaries across several areas of the photograph. A room corner is especially useful: there it is easier to notice which lines turn together and which belong to different levels. A fragment behind a curtain, by contrast, often hides a substantial part of the structure.
For the candidate found, check the height along the wall, the projection onto the ceiling, and the cross-section. From a frontal view, the actual projection usually remains unknown. It cannot be reliably calculated from the darkness of the lower shadow.
In a new room, the cornice may have different neighbours: a floor-to-ceiling cabinet, a curtain niche, a ventilation grille. These constraints set the permissible dimensions before the final choice of ornament. The photograph shows the desired character of the wall's finish but does not resolve the listed junctions.
Ceiling rose: shape, dimensions, and connection to the light fixture
A ceiling rose may be round, oval, elongated, or assembled from separate decorative parts. Therefore the word “diameter” does not suit every product. For a complex contour, two dimensions in the ceiling plane are needed, as well as the thickness or maximum projection according to the drawing.
Perspective also alters the visible shape: a circle in an angled photo looks like an ellipse. Before looking for an oval product, assess the camera position and other ceiling lines.
When comparing ceiling rosettes, note the density of the pattern, the number of decorative bands, and how filled the center is. The same outer size does not guarantee the same visual mass: an openwork composition and a solid relief are perceived differently.
For example, in the product page CRPU-070 the dimensions are given as 765 × 765 × 18 mm and the material is polyurethane. These are the initial data of a real candidate, and its similarity to a specific photograph still needs to be assessed.
The center of the rosette, the axis of the chandelier, and the geometric center of the room are checked separately. A photo does not prove that they coincide. The light fixture itself must have its designated mounting to the load-bearing base; a decorative rosette does not replace it.
Appliqués, corners, medallions, and vertical decor
A single appliqué has its own outline. It can complete a frame, highlight a corner, or occupy the middle of a straight section. For it, two dimensions in the plane, the projection, the motif, and the orientation are recorded. Dimension designations are checked against the manufacturer's diagram: letter labels alone do not explain the position of the part on the wall.
У decorative inserts pay especially close attention to the junctions with the linear profile. A similar scroll may turn out to be a standalone ornament that does not structurally continue the selected molding.
If part of a detail is hidden by furniture or cut off by the edge of the frame, the symmetry is not guessed. The map states: "left or right version not determined" or "lower termination not visible."
Vertical decor is also broken down into parts. A pilaster may include a base, shaft, and capital. A bracket has a pronounced projection that is hard to read from the front. A medallion is sometimes surrounded by a separate frame. Each standalone detail must be taken into account when selecting and subsequently completing the set, even if in the photograph they are perceived as a single ornament.
Why perspective interferes with measurement
The near frame on the side wall appears larger than the far one, although in reality they may be identical. Camera tilt brings verticals closer together, and wide-angle shooting changes proportions at the edges. Image cropping and subsequent processing add further uncertainty.
Therefore, comparing two strips in pixels is only valid with an understanding of where they are located. A size on the front wall cannot be automatically transferred to a side surface receding into depth. Even less should a wall door be used as a direct scale ruler for a ceiling medallion.
For assessment, several angles of the same interior are more useful: an overall view, an almost frontal shot of the wall, and a separate fragment of the ceiling. They allow observations to be compared and an error to be noticed that a single striking photograph hides.
Perspective correction helps to examine a plane, but by itself does not establish millimeters. If the image contains no object with reliably known dimensions, only proportions will remain after alignment.
How to use a known reference dimension
The reference is the dimension of exactly the object present in the photo: the measured height of a door leaf, the width of a specific panel, the distance between known axes. An assumed "standard door" is not such a reference. An error in it will carry over into all subsequent estimates.
Let us consider a conditional example. The front wall is photographed without noticeable perspective distortions. The known height of an object on this plane is 2400 mm, and in the image it is 800 pixels. With uniform scale, this gives approximately 3 mm per pixel. A molding strip 10–14 pixels wide then provides a guideline of 30–42 mm.
This calculation is suitable for preliminary screening. It requires a known size, a common plane, and comparable measurement directions; with significant perspective, a simple coefficient is already unreliable. A fuzzy profile boundary also widens the range.
A light fixture of an unknown model or a similar sofa from another catalog does not provide a reliable reference. If there is no exact dimension, it is more reasonable to keep a verbal estimate of scale and test several options in your own room.
Separate the visible from the assumed
For each item, it is useful to record what the conclusion is based on. The distinction between "visible", "approximately estimated" and "unknown" protects the project from false precision.
| Characteristic | What a photograph can provide | How to refine |
|---|---|---|
| Location and function | Usually distinguishable in the general view | Check adjacent areas and other angles |
| Width or height | Range with a reliable reference | Compare with the card and room dimensions |
| Cross-section | Individual features by light and shadow | Study the drawing and sample |
| Projection from the base | Often unknown | Check the dimensional diagram and mounting detail |
| Material | Usually unconfirmed | Look for information about the original object or choose a material for the new task |
White paint makes it impossible to reliably distinguish gypsum from polyurethane or painted wood. A strong shadow does not prove greater thickness: it is affected by the direction of light.
The catalog size C is also read from the drawing. It may describe the overall projection of the product rather than the depth of each decorative groove. If the profile is installed on an additional panel, the final projection relative to the wall is determined by the entire structure.
Make a short list of meaningful candidates
For one position, two or three options that differ for a clear reason are usually enough. One is closer in cross-section, the second preserves visual mass with a smaller width, and the third combines more conveniently with the other selected elements. If only one fits, there is no need to artificially add two more.
In our conditional range of 30–42 mm, we can consider molding MLDPU-003The card lists a width of 35 mm, a projection of 12 mm, and a strip length of 2600 mm. Falling within the range makes the product a candidate; identity with the profile in the photo does not follow from this.
Finding an exact copy sometimes has no solution at all: the original interior may have used historical plaster moulding or a custom model. In that case, a visual and functional analogue is selected, preserving the necessary relationships in the composition.
Immediately rule out options that do not fit next to the architrave, interfere with furniture, or do not meet the finishing conditions. Similarity to the photograph does not override the requirements of your project.
Compare the elements with each other
A set of individually successful products can produce an unsuccessful interior. For example, an assertive rosette, a wide cornice, and large overlays will all begin demanding attention at once, even though in the original photo the wall decor was an almost unnoticeable background.
State the hierarchy in words. This does not require conventional coefficients that create the impression of a precise calculation.
| Element | Possible role in the composition | A feature worth preserving |
|---|---|---|
| main moulding | Forms the wall fields | A confident, continuous line |
| additional moulding | Defines the inner contour | Less noticeable relative to the main one |
| Cornice | Completes the wall | More pronounced upper band |
| Overlays | Create local accents | Rare, meaningful repetition |
| Rosette | Draws attention to the ceiling | Dominance in the central zone |
This is an example of role distribution, not a mandatory scheme for a classic interior. In a specific project, the portal or wall medallion may become the main element.
Compare the empty areas as well. The distance between frames, the free field around the rosette, and the ornament's offset from the corner participate in the composition on par with the stucco. Increasing the number of details often destroys precisely these intervals.
The main profile determines the choice of compatible decor
If the interior is built on frames, the main molding is approved first. Its cross-section determines the corners, intermediate inserts, overlays and additional contours. Choosing a decorative corner without checking the profile can lead to mismatched lines in the most visible place.
Look for Decor for Molding indicating compatible models, then check the specific joint against the diagrams. For example, for the central overlay NPU-399.1 measuring 76 × 202 × 21 mm, the product page names moldings MLDPU-003 and MLD-003-MG. Such information gives grounds to consider the pair together.
At the same time, questions remain about the placement, orientation and dimensions of the frame itself. The stated compatibility does not dictate the composition on the designer's behalf.
There is also another sequence: the customer needs a specific medallion or an expressive ceiling center. In that case, the possibility of its placement is checked first, after which subordinate profiles are selected. The order is set by the main element of the concept.
Assemble the ceiling as a separate system
The perimeter cornice, inner contour, corner inserts and central rosette may be located next to each other, but they serve different purposes. In the selection map they get separate rows. Additionally, note which distances connect these parts: from the wall to the inner frame, from the frame to the rosette, from the decor to the light fixtures.
A ready-made set is useful as an example of a coordinated composition. For example, for CPU-P5 set the overall dimensions are stated as 2500 × 2500 × 83 mm, and the materials are polyurethane and primed MDF. The fact that a product is in the stucco decor section does not mean that all components are made of the same material.
When choosing a set, review its composition and layout. Clarify which elements it replaces in your layout and which ones still need to be selected separately.
Do not include both a ready-made system and the parts already contained in it as separate items in the same order, unless their additional quantity is provided for by the project. Otherwise, the same ceiling area will be counted twice.
Check the scale in the model and the joints on the drawings
Candidates are transferred into a model of your room with real dimensions. For this work, you can use the section 3D models and DWG drawings, checking that the files for the required products are available. You cannot stretch a ready-made model arbitrarily: the image will show a profile that does not match the product being purchased.
First assess the overall appearance from a normal viewing point. Then move closer to the wall and check the relationships with the door, furniture, and switches. When comparing options, keep the same angle, finish, and lighting. Otherwise, more contrasting light may give one profile an advantage without any change to its shape.
The drawing is needed for a different check: cross-section dimensions, mounting surface, junctions, and projections. Compare the molding with the architrave, the overlay with the profile, and the cornice with the ceiling niche. The mere presence of a DWG file does not yet confirm that the assembly will work — that is determined by the coordination of all the parts involved.
If a change to one element has affected neighboring ones, return to the overall model. Reducing the cornice, for example, may require revisiting the height of the upper frames so that a convincing gap appears between them again.
Order samples for the remaining questions
A physical sample is especially useful after the initial selection. By this point it is already clear what to compare: the visibility of the relief, the character of the shadow, the transition between the overlay and the profile, and the result of the chosen finish.
Review the available Samples and catalogs and clarify whether the required items can be obtained. The presence of a section does not mean that any item is provided as a separate sample or free of charge.
Compare products in their intended orientation and, where possible, against the background of the future finish. For a questionable junction, it is more useful to assemble a small fragment from two parts than to examine each one in your hands. On a ceiling and on a vertical stand, the same relief will receive light differently.
Record the result of each check separately. The geometry of the joint may be agreed upon while the color remains an open question. A single general word "approved" hides this difference and creates unnecessary disputes when the order is handed over to the order assembler.
Link the labels on the photo to the actual item codes
The working table should show not only the found products but also the status of the selection. Below is a conditional example of how to fill it in; it does not mean that the listed products have been verified for a specific project.
| Label | Element | Found candidate | What else is required | Final item code |
|---|---|---|---|---|
| F01 | main moulding | MLDPU-003, 35 × 12 × 2600 mm | Check the cross-section and frame scale | Not approved |
| F02 | Cornice | Selection in progress | Specify the allowable height and projection | Not approved |
| F03 | Ceiling rosette | CRPU-070, 765 × 765 × 18 mm | Check the ceiling layout | Not approved |
| F04 | Central overlay | NPU-399.1, 76 × 202 × 21 mm | Check the placement against F01 | Not approved |
| F05 | Ornamental frieze | Selection in progress | Confirm the motif, repeat, and edges | Not approved |
After approval, the full article number and the selected size variant are transferred to the last column. A link to the product page, material, finish, project designation, and decision date are added. The F01 label maintains the link to the original photograph, while the project designation connects the item to the drawings.
If no suitable analogue exists, they discuss changing the motif, preserving the proportions with a different pattern, or the possibility of custom manufacturing. The last option requires separate confirmation of feasibility and terms; a photograph alone is not a sufficient production brief.
Mistakes that force the selection to be repeated
Most often, the work is sent back because of a few very specific actions:
- They look for a similar ornament while skipping the analysis of the interior's basic geometry.
- They mistake a shadow for part of the profile and end up with an inflated width.
- They transfer the scale from the wall to the ceiling without accounting for the different planes.
- They record an unknown protrusion as a size supposedly measured from a photograph.
- They select the angle, overlay, and molding independently, without checking how they join.
- They approve each item separately, even though together the elements compete for attention.
- They count the finished set and its component parts twice.
- They send an image to purchasing instead of an exact list of the selected options.
There is also a less obvious mistake: endlessly refining the resemblance to the original photo after the real room has already revealed its limitations. If a wide portal does not fit between the door and the adjacent wall, another search for the same motif will not solve the problem. The composition needs to be changed and re-approved as a whole.
A useful control question at the end of the selection: can the prepared materials be used to understand unambiguously which product, in what size, and in what place should appear? If not, the work has not yet reached the ordering stage.
From selection by photograph to specification and purchase
After the products are approved, the technical sources become the cards, approved drawings, sample check results, and the specification. The photograph is kept as an explanation of the concept. Dimensions for installation are no longer taken from it.
The quantity is calculated for your own room: the lengths of the sections, the cutting of the commercial planks, the number of corners, overlays, and repeats. Even a simple example shows the difference. Four segments of 1800 mm give 7.2 m, but four whole segments cannot be obtained from three planks 2600 mm long. At least four planks will be required; the trimming, other parts, and reserve are checked separately.
Before buying polyurethane moldings or a ceiling rosette, verify the completeness of the set and the selected options. For ornamental runs, add a check of the pattern at the joints. To buy decor for moldings without mistakes, specify left and right versions where they are provided, and the link of each overlay to the profile.
For a consultation on selecting stucco, prepare an overall photo with markings, enlarged fragments, the dimensions of your room, and a list of mandatory requirements. The information for designers and architects will help you navigate working with STAVROS, and the selected items moldings from polyurethane can be transferred to the order one by one.
Selecting and buying stucco from a photo becomes easier when there is a verified map of elements between the image and the cart. It shows what is preserved from the original interior, what is adapted for the new space, and which specific products will be used to assemble the composition.