Article Contents:
- On the plan, it was 90 mm, but on site the pillar took up more space
- Short answer: no single figure can be read separately from the drawing
- What is confirmed about the carved pillar L-108
- Why L-108 has five parameters instead of the usual height, width, and depth
- How to read parameters A–E without guessing
- Find the letter designation on the dimension line
- Match one parameter to several views at once
- Separate the overall height from the working height
- Find the extreme points of the decorative part
- Check the document scale
- Do not draw in missing information
- Step 1. Record the actual installation point
- Step 2. Draw the product axis
- Step 3. Transfer the outline of the mounting part
- Step 4. Add the external silhouette of the carving
- Step 5. Draw the edge of the first step
- Step 6. Show the handrail line
- Step 7. Place the first baluster
- Step 8. Mark the clear passage boundary
- Step 9. Add surrounding objects
- Step 10. Check the plan at full scale
- Baseboard
- Wall panel
- Door casing
- Switch or socket
- Door leaf
- Painting possibility
- L-108 in beech
- L-108 in oak
- One material for the entire set
- Use 90 mm as the full dimension
- Move only the axis
- Draw only the base
- Check only the front view
- Do not take into account the wall finish
- Place the post before calculating the balusters
- Choose the handrail only by material
- Evaluate the passage only by the floor
- Do not show door opening
- Print template with automatic scaling
- Select material before geometry
- Assign L-108 rules of another model
- Do not account for packaging and delivery of the large product
- Leave the check to the installer
- Which of the five sizes of L-108 should be considered the main one?
- What do A, B, C, D, and E mean?
- Can 90 mm be taken as the width of the base?
- Why can the post be wider than the base?
- How to determine how much space L-108 takes up?
- Is a full-size template needed?
- Is it enough to make a base template?
- How to check L-108 at the first step?
- How to check the passage next to a column?
- Can L-108 be installed flush against a wall?
- What to do if the thread hits the baseboard?
- How to check the handrail approach to L-108?
- Which balusters are suitable for L-108?
- Can I order L-108 separately and choose the handrail later?
- What to choose: beech or oak?
- How does "Standard" differ from "Prestige"?
- Can the dimensions of L-108 be changed?
- Is the mounting hardware included in the set?
- Where can I see the current price for L-108?
- Where can I find out the production time and delivery?
- What should I send to the manager for verification?
- Can L-108 be checked without a finished staircase?
- What to do if L-108 doesn't fit?

On the staircase plan, everything looked convincing. Space was left for the support element at the first step, a handrail line was drawn nearby, the passage was preserved, and even a small indentation from the wall was provided. In the card for the carved column L-108, among five numerical parameters, there was a value of 90 mm. It was taken as the width, depth, or full mounting footprint of the product. The error was discovered only after transferring the dimensions to the site: the base fit, but the volumetric carving extended further, approaching the step, wall, or the path of a person's movement.
This is how one of the most unpleasant design errors arises. The buyer sees an exact number and trusts it, but uses the parameter without linking it to the drawing. The problem is not in the card or the size itself. The problem is in trying to read a complex carved column as an ordinary rectangular beam, for which it is enough to specify height, width, and depth.
For model L-108, the dimension line A × B × C × D × E is given: 1100 × 412 × 439 × 90 × 1056 mm. These are five separate parameters. None of them can be independently declared as the full width, base depth, carving height, or the size of the occupied space until the letter designation is matched with the official drawing. For an order, it is not enough to choose a convenient number. You need to read all projections, transfer the full external contour of the column to the plan, and check it together with the first step, handrail, balusters, wall, and the actually free passage.
The carved staircase column L-108 is a large decorative element that is perceived not only as a support point. It forms the beginning of the railing, sets the scale for the entire staircase, and affects how a person enters the flight. Therefore, the decision buy carved column L-108 should be accepted after design verification, not after a quick glance at a single number.
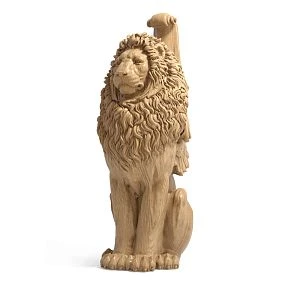
The plan showed 90 mm, but on site the column took up more space
The number 90 mm psychologically seems clear. It resembles the size of standard timber, base width, or support thickness. On a compact plan, such a value is easy to draw with a single line or a small rectangle. It seems that enough space will remain around it, and the column itself will occupy only a narrow area near the edge of the step.
But L-108 has a complex carved shape. Even if one of its structural parts is indeed related to the 90 mm dimension, this does not prove that the entire visible volume fits within the same boundary. Decorative protrusions, developed carving, transitions between sections, and the top part can extend beyond the compact mounting footprint.
Imagine not a column, but a table lamp with a narrow base and a wide shade. If only the base diameter is marked on the plan, the lamp formally fits on the nightstand, but the shade will hit the wall. A similar mistake occurs with a carved column: the base and the full silhouette are taken as the same thing.
On site, this manifests in different ways:
- the carved protrusion extends over the edge of the first step;
- the decorative part narrows the usable width of the passage;
- the column cannot be moved closer to the wall by the intended distance;
- the carving rests against a tall floor plinth or wall panel;
- the door leaf comes too close to the post when opening;
- the handrail arrives at a part of the product that was not intended in the sketch;
- the first baluster ends up squeezed between a large post and the flight;
- the decorative volume visually overlaps the beginning of the staircase.
None of these problems is solved by the phrase "we left 90 mm." The post must be checked along its full contour. The plan should show not only the axis and mounting point, but also the extreme points of the carved shape in the projections that affect the surrounding space.
This check is performed before placing the order, because L-108 is made to order. After manufacturing, changing the step position, widening the landing, or moving the doorway is incomparably more difficult than correcting a diagram on paper.




The short answer: no single figure can be read separately from the drawing.
The line 1100 × 412 × 439 × 90 × 1056 mm is not the usual notation of "height × width × depth." The card uses letter parameters A, B, C, D, and E. First, you need to open the technical drawing and see which lines, points, and projections each letter refers to.
The correct sequence looks like this:
- find the official drawing of model L-108;
- match letters A–E with the applied dimension lines;
- separately study the front, side, and top views, if present;
- determine the mounting location and extreme points of the decorative volume;
- transfer the full outline to the stair plan;
- check intersections with the first step, wall, door, and passage;
- mark the arrival point of the handrail;
- show the position of the first baluster and the continuation of the railing;
- make a paper or cardboard template to verify on site;
- only after this, agree on the material, sanding, and order.
The article deliberately does not assign an independent meaning to each letter. Without reference to the official drawing, it cannot be claimed that A is height, B is thread width, C is depth, D is base, and E is working part. Even if such an assumption seems logical, designing an expensive stair assembly by guesswork is not allowed.
For technical preparation, you can download drawings of stair elements and check what types and sizes are published for the required model. If there is not enough information, the drawing should be requested from the manager before approving the plan.
Our factory also produces:
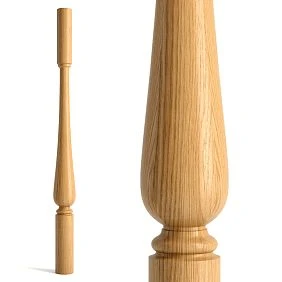
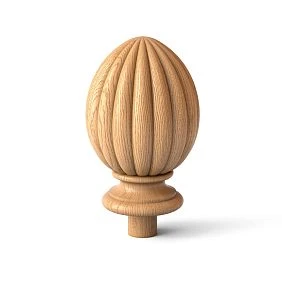
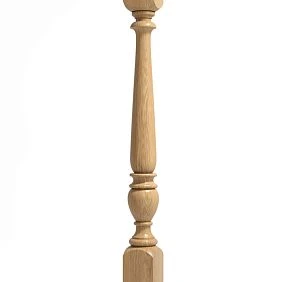
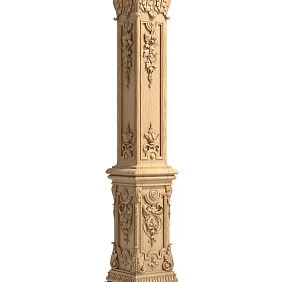
What is confirmed for the carved post L-108
| Parameter | Confirmed value | What to check before ordering |
|---|---|---|
| Article number | L-108 | Do not confuse the model with another stair post |
| Product type | Carved wooden post for stairs | Check the scale of the carving relative to the room and the flight of stairs |
| Dimensions A × B × C × D × E | 1100 × 412 × 439 × 90 × 1056 mm | Decode all parameters only according to the official drawing |
| Materials | Beech, oak | Coordinate the material with the post, balusters, and handrail |
| Sanding | "Standard", "Prestige" | Select surface preparation for future finishing |
| Beech finish in base configuration | For enamel | Clarify actual configuration and finishing system |
| Condition | Custom Order | Check current timelines, payment, and pickup conditions |
| Technical check | Dimensions are compared with the drawing | Do not use a single number as the full installation dimension |
The main feature of the card is five separate parameters. The buyer is offered not a simple rectangular blank, but a complex product whose geometry must be read by views and dimension lines. The specification row helps identify the model but does not replace the design projection.
Material and sanding quality are chosen after checking the dimension. There is no point in comparing beech and oak for a long time if the full decorative contour physically does not fit near the first step. First, the space issue is resolved, then the surface and finish.
Get Consultation
Why L-108 has five parameters instead of the usual height, width, and depth
A simple square column can be described with three numbers. It has height, width, and depth, and the outer contour barely changes along its entire length. A carved column is arranged differently. Its shape develops vertically: some parts narrow, others widen, decorative elements create protrusions, and working sections may differ from the most voluminous zone.
Five parameters are needed not to complicate the card, but to describe different parts of the geometry. It is important for the buyer to understand in which projection each number works.
One parameter may refer to the overall height, another to a specific section, a third to a decorative protrusion, a fourth to the support part, and a fifth to the distance between significant points. These are only examples of possible dimension scheme logic, not a decoding of specific letters of L-108. The exact value is shown only by the drawing.
The error begins when all five numbers are mentally translated into a familiar formula. A person picks the largest as height, the next two as width and depth, and the smallest as the base. Such an interpretation looks coherent but may not match the actual notation system.
It is more correct to ask not the question "which number here is the width?", but more precise questions:
- between which lines is the parameter drawn;
- on which view is it indicated;
- does the size refer to the entire product or a separate part;
- does it show the mounting footprint or a decorative protrusion;
- is the shape symmetrical relative to the axis;
- do the extreme points match on the front and top views;
- which zone interacts with the handrail;
- which part will end up closest to the passage.
This method of reading is slower than a quick glance at the card, but significantly faster than redoing the staircase.
How to read parameters A–E without guessing
Find the letter designation on the dimension line
The letter must be tied to a specific dimension line. Look at which point it starts and where it ends. If the line runs between the top and bottom of the product, the parameter describes a vertical distance. If it is placed on a top view, it refers to a horizontal projection. But even here, there is no need to rush: the line may relate not to the entire outline, but to a selected part.
Match one parameter to several views at once
The front view shows the outline of the thread in one plane. The side view can reveal a protrusion that is almost invisible on the frontal projection. The top view is needed to check the space on the room plan.
If the designer has studied only the beautiful frontal view, they may not see how far the decorative part extends toward the passage. For placement near the first step, the most important projection is the one that shows the actual space occupied on the horizontal plan.
Separate the overall height from the working height
Even when one of the values is clearly related to a vertical dimension, the question remains: does it show the full height, the height to a specific point, or the distance between structural sections? For anchoring the handrail, one general number is not enough.
The attachment point of the handrail must be shown separately. It cannot be assumed that the handrail automatically connects to the post at a convenient height without checking the shape and design of the railing.
Find the extreme points of the decorative part
For passage, not only the supporting edges are critical, but also the most protruding sections of the thread. On the drawing, they can be identified by the outer silhouette. It is these points that are transferred to the plan as the boundary of the occupied space.
Check the scale of the document
If the drawing is printed for making a template, the scale cannot be assigned based on the sheet size. After printing, measure the control dimension line and make sure it matches the specified value. Automatic printer scaling can reduce or enlarge the image.
Do not draw in missing information
If the drawing lacks the required projection, handrail attachment points, or installation diagram, this data should be requested. The silence of the document is not permission to choose the position independently.
The mounting footprint and the full contour of the post are different things
The mounting spot can be conditionally called the area through which the product rests on the base or is connected to the structure. The full contour is the extreme boundaries of the entire visible volume in the selected projection.
For a geometrically simple post, these two zones may be close. For a large carved product, a noticeable difference appears between them. The lower part can occupy a relatively compact space, while the decorative volume above expands.
| What is transferred to the plan | What it shows | Why this alone is not enough |
|---|---|---|
| The axis of the post | The center or the design installation line | Does not show width and protrusions |
| Attachment point | Structural reference location | Does not show decorative volume |
| Base contour | Area near the floor or step | Thread above may protrude further |
| Full outer contour | Extreme points of the product in plan | Requires an official drawing and correct projection |
| Contour with technological clearance | Zone for finishing, installation, cleaning, and operation | Determined by the specific project, not a universal number |
On the working plan, all significant levels should be shown. If the decorative part expands above the base, it is useful to draw it as a separate line or dashed contour. Then builders see why the column cannot be placed flush against the wall, even if the base formally fits.
A full contour is needed not only for passage. It affects the wall coloring, baseboard installation, switch positions, door opening, and the ability to service the surface after installation.
How to transfer L-108 to the staircase plan
Step 1. Fix the actual installation point
Start not with the decorative silhouette, but with the staircase structure. Determine where the column should connect with the first step, landing, or other base. The installation point is not chosen solely for the beauty of the facade view. It must be coordinated with the design of the specific stair assembly.
Step 2. Draw the product axis
The axis helps connect different projections. It shows how the column is oriented relative to the flight, wall, and railing line. If the product or its carving is asymmetrical, one axis is not enough, but without it, it is easy to lose the original reference.
Step 3. Transfer the mounting part contour
According to the drawing, mark the area that belongs to the base or fastening. Do not call this contour the full width of the product until the decorative projection is drawn.
Step 4. Add the external carving silhouette
Find the extreme points on the top view or another suitable projection. Connect them into a complete external outline. If the shape changes with height, use multiple lines or labels so the plan does not create a false impression of a constant cross-section.
Step 5. Draw the edge of the first step
The plan should show not an abstract line of the flight, but the actual edge of the step, including significant protrusions and overhangs if they affect the placement of the post. Check that the decorative outline does not intersect with the step and does not create an inconvenient narrow gap.
Step 6. Show the handrail line
The handrail cannot be drawn after the post is approved as a random continuation of the railing. Its profile, direction, and connection point must be coordinated with L-108. The plan and section record where the handrail comes from and in which zone of the post it should terminate.
Step 7. Place the first baluster
The large post sets the beginning of the row. The distance to the first baluster affects the rhythm of the railing. If the post takes up more space than expected, the first baluster may shift and disrupt the distribution of the entire row.
Step 8. Draw the boundary of the clear passage
Measure the passage from the extreme point of the decorative volume, not from the axis or the base. A universal allowable width cannot be assigned without a specific project and applicable requirements. The task of the article is to show the measurement principle: the calculation includes the actually free zone after the installation of all protruding elements.
Step 9. Add surrounding objects
The wall, trim, door, baseboard, radiator, switch, and furniture must be present on the plan if they are nearby. The post is not installed in empty space. Its contour interacts with the entire surroundings.
Step 10. Check the plan at full scale
Even a good drawing is hard to feel on a screen. A paper or cardboard template helps to see the real scale. It is placed on the floor or step, extreme protrusions are marked, and one walks nearby along the usual route.
Full-size template: the most visual way to check the occupied space
The template does not replace the drawing, but translates it into real space. For L-108, at least two projections are useful: the contour at the base and the maximum outer contour of the decorative part.
If you make only a square or rectangle of the base, the check will repeat the original mistake. A person will see that the mounting spot fits and again will not notice the thread extending further.
A practical template can be assembled from thick paper, cardboard, or several connected sheets. It marks:
- article L-108;
- column axis;
- direction to the stair flight;
- base contour;
- extreme points of the carved part;
- the side of the handrail approach;
- the nearest wall;
- the boundary of the first step;
- actually free passage.
The template is placed in the design position and several scenarios are checked. A person climbs the stairs, descends, turns to the adjacent door, passes with a bag or other bulky item. Such a fitting does not establish standards, but quickly reveals obviously inconvenient positioning.
For a vertical check, you can make a simplified silhouette on the wall or a temporary stand. It helps to understand whether a large carved post blocks light, a doorway, or the view of the stairs.
If the project is complex, it is more reasonable to order an L-108 check on the staircase plan. The design service is especially useful when the column is located near a door, wall panel, non-standard first step, or a railing of complex shape.
L-108 check near the first step
The first step is not just the nearest horizontal surface. It sets the beginning of movement and determines how a person steps onto the march. A large column can change this route.
On the plan, you need to check not only the intersection of parts. There is a big difference between the formal absence of intersection and a convenient position. The thread may not touch the step, but overhang its working area, visually narrow the entrance, or create a hard-to-reach gap.
The check is performed along several lines:
- edge of the step;
- the front line of the riser, if it affects the reference;
- step overhang;
- column axis;
- base;
- maximum decorative contour;
- human approach trajectory;
- handrail line;
- position of the first baluster.
Cleaning and finishing are evaluated separately. A narrow gap between the carving and the step can collect dust but prevent proper surface treatment. If the product is installed before final painting, access to complex areas is needed.
It cannot be stated that L-108 should always be at a certain distance from the first step. The position depends on the staircase design, the post drawing, the connection method, and project requirements. A universal figure here would create a new error instead of a solution.
How to measure the passage next to a carved post
The main trap is measuring from a convenient line. The designer takes the distance from the wall to the post axis or from the edge of the flight to the base and gets a good result. After installation, the most protruding part of the carving reduces the actual free area.
Measurement should be between real extreme obstacles. On one side, this could be a wall, furniture, railing, or door leaf. On the other, the outer contour of L-108 at the height where it affects movement.
It is useful to take several cross-sections:
- at the floor;
- at the level of the widest decorative part;
- in the handrail zone;
- at the point where a person turns toward the stairs.
This makes it visible that the passage can be wide at the base and noticeably narrow higher up. One measurement along the floor does not reflect the entire space.
After constructing the contours, a practical question should be asked: will a person pass straight through or turn? When turning, more free space is required because movement does not occur along a thin line. Shoulders, arms, and carried items occupy volume.
The article does not prescribe a universal passage standard. Exact requirements depend on the object, the staircase's purpose, and applicable regulations. Before approving the project, current requirements must be checked and compared with the actual free contour.
A column next to a wall: what can hinder installation
A wall on a plan is often shown as a single line. On site, a baseboard, decorative panel, trim, switch, finish unevenness, and technological gaps appear next to it. A carved column interacts not with an ideal plane, but with this entire set.
Floor baseboard
The baseboard protrudes from the wall and prevents the column base from being moved flush against it. If it is planned to be trimmed, the solution must be shown in advance. A random shaped cutout around the carving can ruin both parts.
Wall panel
The panel adds thickness. The design setback calculated from the rough wall decreases after finishing. If L-108 is ordered in advance, all future layers are included in the plan.
Door casing
The trim may end up next to a decorative protrusion. Formally, the column and door do not intersect, but a tight gap remains between them. Such a joint is difficult to finish and maintain.
Switch or outlet
Large carving can block access to an electrical installation device. Not only visibility is checked, but also the ability to remove the frame or perform repairs.
Door leaf
On the plan, the door should be shown in the open position. The leaf, handle, or casing must not approach the carved column at an arbitrary distance.
Possibility of painting
If the column or wall is finished after installation, working access must remain between the surfaces. A narrow gap looks like space saving only until painting work begins.
The handrail must arrive at the column, not just pass nearby
L-108 cannot be designed separately from the handrail. The post starts or ends the railing, so the connection point affects both parts.
It is necessary to determine in advance:
- from which side the handrail approaches;
- at what angle it arrives;
- at what height does its axis run;
- what part of the post is available for connection;
- does the connection not fall on a complex thread section;
- does the handrail profile match the scale of the post;
- how the joint will look from the side of the flight and the room.
A beautiful frontal sketch can hide a problem in the side projection. The handrail appears connected to the post, but in reality it passes by the working area or requires inconvenient trimming.
Therefore, after selecting L-108, you need to select a wooden handrail for L-108 and check the assembly on one drawing. The profile, material, and direction are considered together.
Do not transfer rules from another model to L-108 just because both products are called stair posts. The thread geometry, working sections, and methods of design anchoring may differ.
The row of balusters starts after the post but is calculated together with it
A large carved post sets the visual and geometric start of the railing. If its full outline takes up more space, the first baluster shifts. Then the gaps between all elements in the row change.
The error often develops as a chain:
- on the plan, too little space is left for the post;
- the row of balusters is calculated from the wrong boundary;
- after clarifying the outline of L-108, the first baluster has to be moved;
- the remaining length is no longer divisible by the selected step;
- the last gap becomes noticeably wider or narrower than the others;
- you have to change the entire rhythm of the railing.
Therefore, first the full outline of the post is fixed, then the available length of the railing, after which the balusters are distributed.
Visual scale also matters. A very thin and calm baluster next to a massive carved column can look random, even if it fits structurally. Conversely, an overly large row can overload the staircase.
In the category you can select balusters for L-108 made of beech or oak, and then check the rhythm on the railing layout.
The post, handrail, and balusters should be purchased as one design unit
| Element | What to coordinate with L-108 | Error when selecting separately |
|---|---|---|
| Handrail | Profile, material, direction, height, and arrival point | The handrail arrives at an inconvenient or decorative part |
| Balusters | Scale, material, first installation point, and rhythm of the row | After placing the post, the row no longer divides evenly |
| First step | Base position, step edge, and decorative protrusion | The carving overhangs the work area or narrows the entrance |
| Wall and finishing | All finish layers, baseboard, trim, and surface access | Post does not fit after finishing is completed |
| Finishing materials | Wood species, sanding, and future coating system | Surface is prepared for a different visual result |
Buying one expressive post without the other elements seems convenient: the main accent is already chosen, everything else can be selected later. In practice, late selection forces you to adapt the handrail and a series of balusters to the already fixed geometry.
It is more rational to assemble a preliminary set at the project stage. Ordering all items simultaneously is not necessary if production conditions differ, but compatibility should be checked in advance.
Beech or oak: the material is chosen after checking the geometry
L-108 is available in beech and oak. Both options allow for a carved column made of natural wood, but the material cannot be chosen based only on the name of the species.
First, the issue of the full contour is resolved. If the column does not fit on the plan, a more suitable wood will not fix the geometry. After confirming the dimensions, you can move on to finishing and combining with other elements.
L-108 in beech
For the beech version, preparation for enamel is specified in the basic configuration. This option is appropriate when the post, handrail, and balusters are planned to be painted with an opaque coating. Before ordering, you need to clarify the actual configuration, sanding quality, and future finishing technology.
Beech under enamel can support a white, colored, or interior-matched railing. The carving will be read through light and shadow, not through the natural grain.
L-108 in oak
Oak is chosen when the project requires a specific wood species or an expressive wood surface. However, the specific finishing option must be agreed upon separately. You cannot automatically promise a transparent coating, tinting, or a certain visual result without data from the product card and order.
If the column, handrail, and balusters must have a visible texture, all parts are checked together. Differences in species or coating within one railing are especially noticeable on the large initial node.
One material for the entire set
The most straightforward approach is to choose the post, handrail, and balusters from an agreed material. Mixing is only possible as a deliberate design decision. A random combination of a beech post, oak handrail, and other balusters complicates color and finish matching.
"Standard" or "Prestige": what changes the quality of sanding
The L-108 product card specifies the sanding options "Standard" and "Prestige". The choice should be linked to the future surface and project requirements, not perceived as an abstract scale of "ordinary — good".
A carved post has a complex relief. After applying the coating, light highlights every edge, transition, and recess. The more demanding the finish, the more careful the surface preparation must be.
Before ordering, it is useful to study how "Standard" differs from "Prestige", and then agree on the selected option for L-108.
You cannot independently promise that one category completely eliminates further preparation, while another requires a specific scope of work. The actual technology depends on the material, finishing compound, and requirements for the result.
For opaque enamel, the uniformity of the surface and the quality of complex thread areas are checked. For transparent finishes, control of fibers, shade, and wood's reaction to the composition is added.
The finish cannot be chosen after the post is installed
A large carved piece is inconvenient to fully prepare in a cramped stairwell. Recesses, back sides, and areas near the wall become hard to reach.
Before installation, it is necessary to determine:
- will the coating be covering or transparent;
- is a test paint-out needed;
- which surfaces are finished in advance;
- which areas must remain accessible for connection;
- how to mark the front side and installation direction;
- in what order the post, handrail, and balusters are finished;
- how to protect the finished carving during installation.
The article does not prescribe a universal painting technology, because it depends on the chosen materials and project. The main principle is different: the finishing method must be known before ordering the sanding quality and before the final attachment of the column to the wall.
How not to confuse the dimension with the direction of the post
Stair elements have different types of purchasing errors. One is related to size: a person does not transfer the full outline to the plan. Another is related to orientation: the product has a left or right version, or is turned with a specific side.
For L-108, the central task of the article is the occupied space. It cannot be automatically turned into a question of "left or right column." If the model is not marked with separate left and right article numbers, such a division cannot be invented.
To see the difference between the tasks, you can study the material about when the direction of the post is specified by a separate article. For models L-003L and L-003R, the side is checked. For L-108, this article checks five parameters and the full outline.
Orientation still matters for designing the handrail and thread, but it must be determined from the technical documentation, not by transferring rules from another model.
When a large carved post is truly appropriate
L-108 suits a project where the staircase should have a pronounced starting element. It can support a spacious hall, a large flight, a tall door portal, and rich wooden finishing.
But expressiveness cannot be assessed separately from the scale of the room. On the card, the carving is shown in close-up and seems like an independent object. On site, the post interacts with ceiling height, flight width, doors, and furniture.
Before choosing, it is useful to understand how to correlate the scale of the post and the room. After a general understanding, you need to return to the specific model and check its contour.
L-108 is worth considering if:
- there is enough space provided for the post;
- the full contour does not narrow the passage;
- the first step is aligned with the base and thread;
- the handrail can be correctly attached to the product;
- the row of balusters starts without an accidental narrow gap;
- the scale of the carving matches the room;
- the material and finish are coordinated with the entire railing;
- the project allows for custom manufacturing.
When it is better to choose a smaller stair post
L-108 should not be used automatically just because its height fits. The other option is more reasonable if the full decorative contour intersects with a passage, wall, or the first step.
Signs that the model requires replacement or serious project adjustment:
- installation requires shifting the staircase or door opening;
- the thread leaves an inconvenient gap near the wall;
- the handrail cannot be brought to a suitable part of the post;
- the first baluster shifts and disrupts the entire row;
- the full contour overlaps the edge of the step;
- the scale of the post overwhelms the compact flight;
- after accounting for finishing, the passage becomes insufficient;
- the full-size template visually overloads the space.
In this case, it is better to open the catalog of carved stair posts and compare L-108 with models of a different scale.
Rejecting an unsuitable article is not a loss for the project. It is a normal part of professional selection. It is much worse to order a large post and then try to reduce its impact with a random rotation or an awkward offset.
What to buy together with L-108
| What to add to the order | Why | What to Check | Section |
|---|---|---|---|
| Handrail | Assemble a continuous railing line | Profile, material, angle, and arrival point | Buy a handrail for the stair railing |
| Balusters | Continue the railing after the large post | Rhythm, material, scale, and the first installation point | buying wooden balusters for stairs |
| Finishing materials | Prepare a unified surface for the set | Compatibility with beech or oak and the selected sanding | Selected after finish approval |
| Technical drawing | Decode A–E and build the full outline | All necessary projections and print scale | Get STAVROS technical materials |
| Project review | Coordinate the post, passage, handrail, and first step | Full site plan and adjacent elements | Calculate the full outline of the carved post |
Associated items are not selected as a decorative addition after purchase. They are part of one stair assembly. If you order the post first and then look for the handrail and balusters based on the remaining space, the selection becomes significantly narrower.
Mistakes that cause L-108 not to fit into the project
Use 90 mm as the full dimension
The most obvious mistake is to take the minimum value from the line and assign it a convenient meaning. Without a drawing, it is unknown which part the parameter refers to. The full contour can be significantly larger than the mounting zone.
Transfer only the axis
The axis shows the position but not the occupied space. It is useful for alignment, but it does not protect against the thread intersecting with the wall or passage.
Draw only the base
A compact mounting footprint creates a false sense of free space. The maximum outer contour is added to the plan.
Check only the front view
On the facade, the column looks impressive and slender. The side protrusion remains unnoticed. For the plan, a top view is needed, and for the handrail, a section or side projection.
Do not take into account the final wall finishing
Panel, plinth, or trim appear after measurement and reduce free space. Dimensions are taken along the future finished contour.
Place the post before calculating balusters.
After installation, it turns out that the remaining railing length is not divisible by the chosen rhythm. The row is calculated after fixing the full contour L-108.
Choose the handrail only by material
Matching beech or oak does not guarantee a proper connection. The profile, angle, height, and arrival point are needed.
Assess the passage only by the floor
At the base there is enough space, but the thread above protrudes into the movement path. Several horizontal sections are checked.
Do not show door opening
The closed door does not intersect with the column. The open panel or handle comes too close. The opening arc is shown on the plan.
Print the template with automatic scaling.
The printer reduces the drawing to fit the page margins, making the template inaccurate. After printing, the control dimension is measured.
Choose material before geometry
The buyer spends a long time approving oak, tinting, and shade, but does not check the occupied space. First the outline, then the finish.
Assign L-108 rules of another model
The side, connection point, or meaning of the dimension is transferred from a similar column. Technical parameters are checked for the specific article.
Do not account for packaging and delivery of a large product
The post is manufactured, but it is difficult to bring it to the site or safely place it before installation. Delivery and handling conditions are agreed upon in advance.
Leave the check to the installer
The installer sees the problem already on the finished staircase. Solutions at this stage are limited. The full contour is approved before ordering.
What to specify in the request for manufacturing L-108
A request like "need an oak L-108 pillar" does not convey the design task. The manager and specialist need initial data that allows checking the set.
The request should include:
- article L-108;
- required quantity;
- the selected material — beech or oak;
- preferred sanding quality;
- planned type of finish;
- installation location on the plan;
- fragment of the stair flight and the first step;
- distance to the wall and door opening;
- point and direction of the handrail arrival;
- previously selected handrail profile;
- type and location of balusters;
- photos of the object;
- dimensions after finishing;
- questions on parameters A–E;
- necessity of design verification.
The more accurately the situation is described, the lower the chance of receiving a formally correct product that does not fit the specific assembly.
Before placing an order, you also need to study the manufacturing conditions for L-108 to order, clarify the current price, lead time, and method of receiving a large carved product.
Ready pre-purchase inspection checklist
- Open the L-108 card and record the confirmed specifications.
- Get the official drawing.
- Find the designations A, B, C, D, and E.
- Do not assign meaning to parameters without dimension lines.
- Construct the base contour.
- Add the maximum decorative contour.
- Apply the first step and the finish wall.
- Show the door opening if it is nearby.
- Check for clear passage at several heights.
- Determine the direction and attachment point of the handrail.
- Calculate the position of the first baluster.
- Make a full-size template.
- Apply the template to the object.
- Only after this choose beech or oak.
- Agree on "Standard" or "Prestige".
- Determine the finish.
- Assemble the set with the handrail and balusters.
- Provide the manager with the plan, photos, and questions.
- Check the current price and delivery time.
- Place the order after confirming project compatibility.
How to order L-108 on the STAVROS website
Start with the product card and check parameters A–E of pillar L-108. Verify materials, sanding options, and "on order" status.
Then open the technical materials and transfer the full silhouette onto the plan. If there is a first step, wall, door, or narrow passage nearby, do not limit yourself to the electronic diagram. Make a full-scale template.
After confirming the outline, select the handrail and balusters. Make sure the entire set is coordinated in material, scale, and finish.
Once the geometry is approved, you can order the carved L-108 post in beech or oakby providing the manager with all the project's initial data.
If L-108 does not pass the check, there is no need to adjust the ladder to fit the already selected model. In the category, you can choose a ladder post of smaller dimensions and repeat the check for a different article number.
FAQ: answers to questions about sizes and ordering L-108
Which of the five sizes of L-108 should be considered the main one?
No parameter can be called the main one without specifying the task. For overall height, one dimension line is important; for clearance, the external contour in plan; for the handrail, the position of the working area. First determine what exactly is being checked, then find the corresponding parameter on the drawing.
What do A, B, C, D, and E denote?
The exact value of each letter is determined only by the official drawing of L-108. The line 1100 × 412 × 439 × 90 × 1056 mm by itself does not allow reliably assigning height, width, depth, or base size to the parameters.
Can 90 mm be taken as the base width?
Without the drawing, no. Even if the 90 mm parameter refers to a specific narrow part, this does not mean that the entire column occupies the same space. The full external contour of the thread is transferred to the plan.
Why might the column be wider than the base?
The carved profile changes with height. Decorative protrusions can extend beyond the boundaries of the support or mounting part. Therefore, the base and the visible volume are considered separately.
How to determine how much space L-108 occupies?
Open the drawing, find the top view and the extreme points of the decorative shape. Transfer them to the plan along with the base, axis, first step, wall, and walkway line. If the top view is missing, request the necessary technical information.
Is a full-scale template needed?
The template is especially useful near the first step, wall, door, or narrow passage. It shows the real scale and helps detect intersections that are hard to sense from the screen.
Is it enough to make a template of the base?
No. A template of only the mounting footprint repeats the original mistake. It must show the maximum external contour of the carved part that affects the surrounding space.
How to check L-108 near the first step?
Mark the step edge, overhang, column base, and decorative contour. Check that the carving does not overhang the work area and that convenient access to the flight remains.
How to check the passage next to the column?
Measure the actual free distance from the most protruding part of L-108 to the opposite obstacle. It is useful to check several horizontal sections because the column may widen above the base.
Can L-108 be installed flush against the wall?
This is determined by the drawing and the specific project. You need to account for the baseboard, panels, trim, unevenness, finishing layers, and surface access. The formal absence of intersection does not yet mean a convenient joint.
What to do if the thread hits the baseboard?
Do not cut parts without a design solution. First, check the possibility of shifting the post, changing the baseboard, or choosing a different model. The joint must be shown on the drawing before installation.
How to check the arrival of the handrail to L-108?
Show the handrail on the plan and side projection. Fix the direction, height, profile, and connection point. The handrail should not fall on an unsuitable section of the thread.
Which balusters are suitable for L-108?
The choice depends on the material, scale, and railing project. First, secure the full contour of the post and the available row length, then distribute the balusters and evaluate the visual rhythm.
Can I order L-108 separately and choose the handrail later?
Ordering separately is possible, but it is better to check design compatibility in advance. After the post is manufactured, the choice of profile and handrail arrival point may be limited.
What to choose: beech or oak?
The material is chosen after confirming the geometry. Beech in the basic configuration is specified for enamel. Oak is considered in accordance with project requirements and agreed finishing. The post, handrail, and balusters should preferably be selected as a single system.
How does "Standard" differ from "Prestige"?
These are grinding quality options. Their exact description should be viewed in the quality section and coordinated with the future coating. It cannot be assumed that any grinding automatically excludes further preparation.
Can the dimensions of L-108 be changed?
The possibility of changes cannot be assumed. The model has confirmed parameters, and any non-standard requirements must be discussed separately with a manager before placing an order.
Is the mounting hardware included in the kit?
In the provided data, the inclusion of fasteners is not confirmed. The connection method and necessary materials need to be clarified for a specific stair assembly.
Where can I see the current price of L-108?
The cost is checked in the product card or clarified with a manager before ordering. Since the product is made to order, the price may depend on the selected material, grinding, and current conditions.
Where can I find out the production time and delivery?
Current conditions need to be clarified before payment. Provide the quantity, material, and delivery address in advance, and also check the possibility of safely bringing in and storing a large product at the site.
What should be sent to the manager for verification?
Provide the staircase plan, drawing of the first step, distances to the wall and door, photos of the site, direction of the handrail, selected balusters, material, and finishing method. Separately ask questions about letter parameters A–E.
Can L-108 be checked without a finished staircase?
Yes, if there is an accurate project with final dimensions. However, a template on the actual site provides additional confidence. If finishing has not been done yet, add its future thickness to the plan.
What to do if L-108 does not fit?
Do not reduce the passage or change the position of the first step without a full check. Consider shifting the node, adjusting surrounding elements, or another staircase column with a smaller contour.
Before ordering, transfer not the number but the entire column to the plan
The value of 90 mm can be accurate and at the same time completely insufficient for placing L-108. The error arises not from an incorrect number, but from an incorrect question. The buyer asks: "What size is most convenient to transfer to the plan?" — while they should ask: "What extreme points of the column affect the step, passage, wall, handrail, and balusters?"
A reliable check is built around the full contour. Five parameters A–E are compared with the official drawing. The base is applied separately from the decorative volume. The passage is measured from the protruding thread. The handrail and a row of balusters are designed together with the post. After that, a template is made and the node is checked on site.
L-108 is not suitable for every staircase, but in a properly calculated space it can become a strong starting element of the railing. Its large carving should work for the room's architecture, not take away passage or force redoing the first step.
STAVROS allows you to assemble a solution sequentially: obtain technical materials, check the model on the plan, choose beech or oak, agree on the quality of sanding, select the handrail and balusters, and then arrange manufacturing. Before purchasing, do not look for a single "main" number. Check the entire stair assembly — that is how the carved post will take its intended place and not extend into the passage.