
























































Article Contents:
- Support and starting posts
- Intermediate balusters
- Handrail, subrail, and bottom rail
- Railing Height
- Filling and child safety
- When a specialist is needed
- Basic notations
- Example calculation
- One or two balusters per step
- Why you cannot re-add end posts
- Fasteners and adhesive compounds
- Completeness and acclimatization
- Checking element geometry
- Pre-grinding and coating
- Checking steps and load-bearing part
- Baluster on horizontal step
- Baluster on inclined stringer
- Baluster on horizontal platform
- Side attachment to stringer
- Power node options
- Post installation sequence
- Attachment with wooden dowel
- Mounting on a double-threaded stud
- Mounting with a through screw from below
- Angled self-tapping screws
- Installation line on steps
- Trimming the bottom end
- Marking the top line
- Why equal length doesn't always work
- Step 1. Securing the posts
- Step 2. Calculation and trial arrangement
- Step 3. Drilling the base
- Stage 4. Preparing response holes
- Stage 5. Installing the lower assembly
- Stage 6. Temporary fixation
- Stage 7. Top trimming
- Stage 8. Under-rail and handrail
- Preparation and trial assembly of the section
- Fastening the lower rail
- Handrail with bottom groove
- Installation sequence through the under-rail
- Connecting the handrail to the posts
- Handrail joint along the length
- Turn and transition to the platform
- Where wood glue works
- What glue does not fix
- Sanding the handrail
- Oil, varnish, or painting
- Geometry
- Gaps
- Stiffness
- Surface safety
- Attaching the post only to the decorative step
- Mixing step and gap
- Corner trimming of the bottom on a horizontal step
- Drilling without a guide
- Enlarging the hole to correct the axis
- PVA on metal threads
- Tightening of fasteners
- Installing the handrail on fresh glue
- Identical trimming without on-site verification
- Handrail joint without support and tie
- Finish coating on glued surfaces
- Random brittle self-tapping screws
- Lack of numbered layout
- No spare part
- Selecting balusters
- Selecting handrail
- Selecting posts
- At what distance should balusters be installed?
- How many balusters per step?
- Do I need to cut the bottom end to match the staircase angle?
- What is better: dowel or threaded rod?
- Can I use a regular threaded rod?
- Do I need to apply PVA glue to metal fasteners?
- Can you do without support posts?
- How to install a post without access from below?
- Can you install a handrail without a subrail?
- When to apply the finish coating?
- How to eliminate railing squeaking?
- How to replace a damaged baluster?
- Can you attach the railing through laminate?
- How to check the quality of installation?
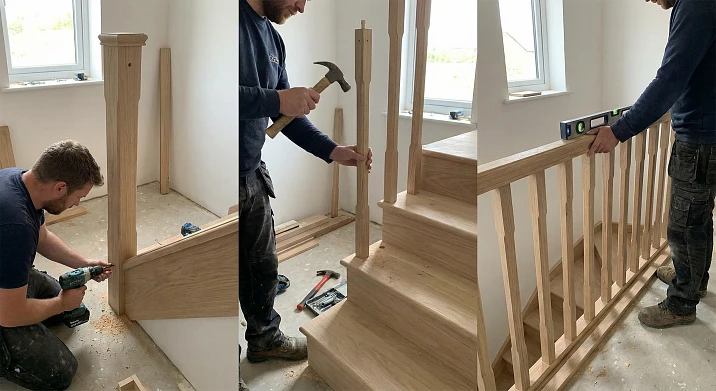
Installation of wooden handrails and balusters begins not with drilling steps, but with checking the railing project: handrail height, location of support posts, number of intermediate posts, clearances, method of transferring lateral load, and compatibility of parts. Only after this do they perform marking, secure the load-bearing posts, install balusters, trim their upper ends, and mount the handrail.
To assemble the railing, you can select wooden balusters for stairsSTAVROS handrails and support posts in a single material and stylistic solution. At the same time, decorative compatibility is only part of the task: the components must match the thickness of the steps, the location of stringers or stair strings, the type of wood, and the expected load.
The guide covers three main schemes: installation on horizontal steps, installation on an inclined stringer, and assembly of the railing on a horizontal platform. It separately shows the calculation of the number of balusters, the difference between the pitch on centers and the clear opening, the fastening of the support post, trimming of the posts, work with the handrail bracket, final finishing, and inspection of the finished structure.
|
Safety warning A stair railing is a safety element. If the post fastening assembly is not shown in the project, there is no access to the load-bearing part of the staircase, the base has cracks, or the railing protects a high open opening, the solution must be checked by a designer or an experienced staircase manufacturer. The diameter of a single pin does not guarantee strength without evaluating the entire assembly. |
What elements does a wooden stair railing consist of
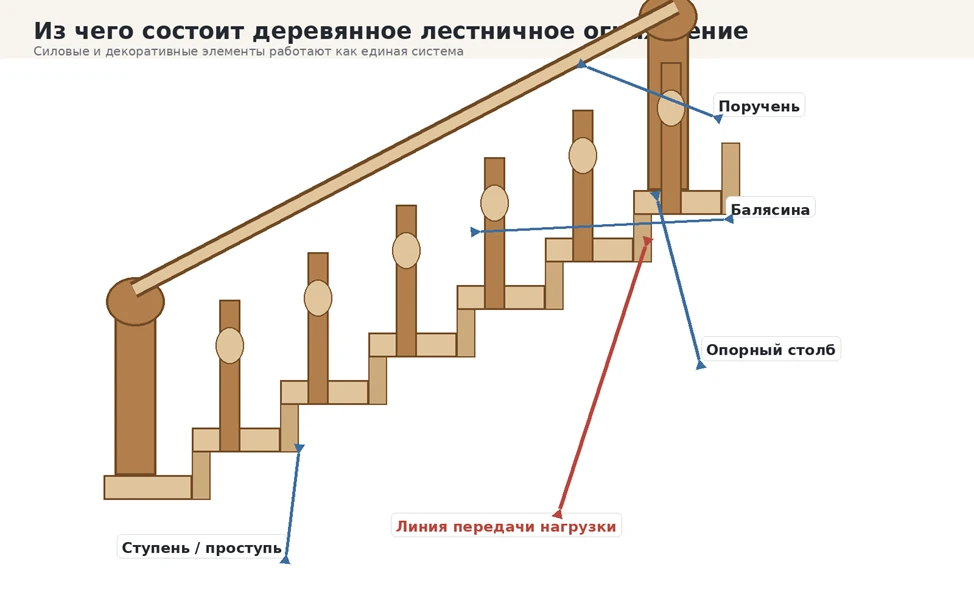
The railing is perceived as a single decorative object, but its details perform different functions. An error occurs when the support post, baluster, and handrail are attempted to be fastened with the same self-tapping screws. The intermediate post supports the infill, the post transmits significant lateral load to the base, and the handrail unifies the entire system.
|
What the diagram shows Support posts form the structural points at the beginning and end of the flight. Balusters fill the space between them. The handrail connects the vertical elements and transmits forces to the posts and the base. |
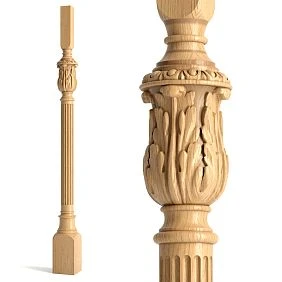
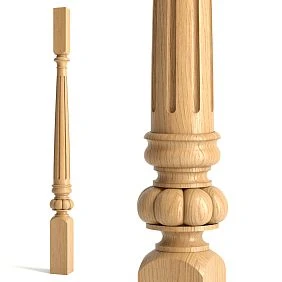
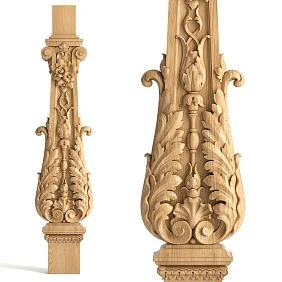
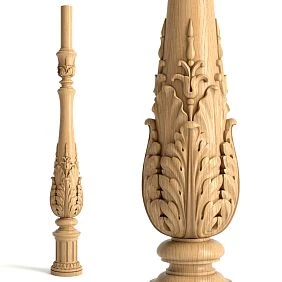
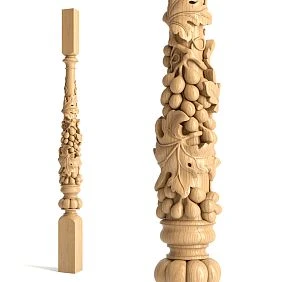
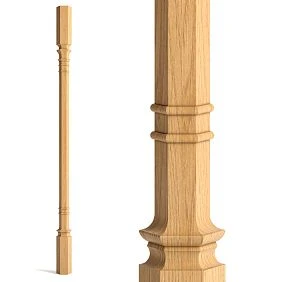
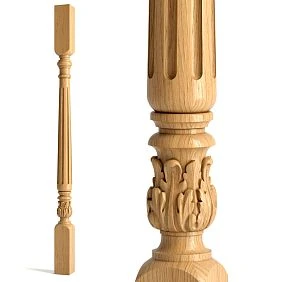
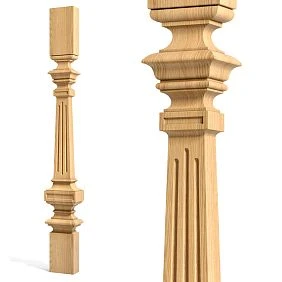
Support and starting posts
A support post is installed at the beginning and end of the flight, at turns, near landings, and at points where the handrail changes direction. On a long section, additional posts are provided by the project. Unlike an intermediate baluster, the post must be connected to the stringer, stair string, beam, embedded block, or floor slab.
The starting post often features carved or turned decoration and becomes the main accent of the staircase. However, complex ornamentation should not occupy the area where an internal tie rod, pin, technological hole, or handrail connection needs to be placed.




Intermediate balusters
Balusters form the infill and support the handrail between posts. Each baluster must have a lower and upper connection point. If only the lower part is secured, the top will wobble. If the baluster is merely inserted into the handrail groove without a strong lower connection, the load is transferred unpredictably.
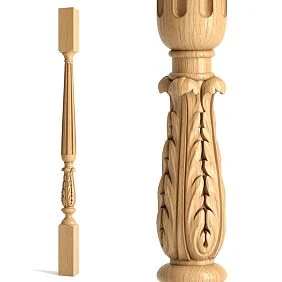
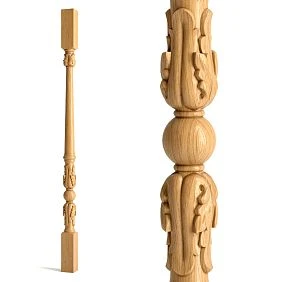
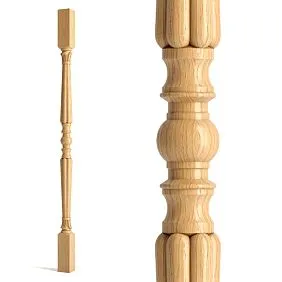
When selecting a baluster, the overall height, mounting platform width, length of straight sections at the top and bottom, pattern orientation, and the ability to trim without cutting into the carving or turned relief are important.
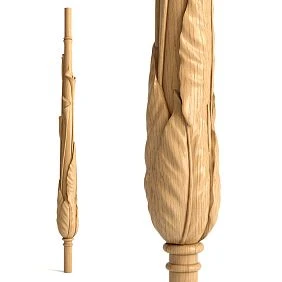
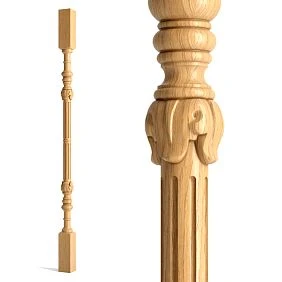
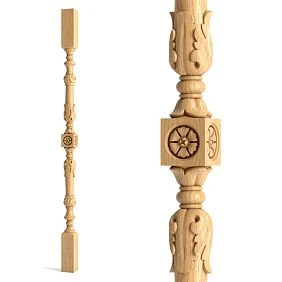
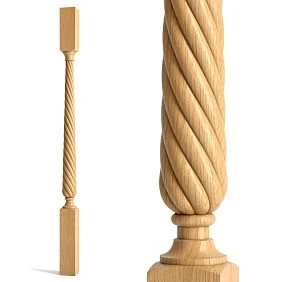
Our factory also produces:
Handrail, subrail, and bottom rail
The handrail serves as a working support for the hand. Its top surface must be continuous, smooth, and comfortable to grip. The lower part may have a groove for the subrail, balusters, or infill inserts. Profile compatibility should be checked before ordering.
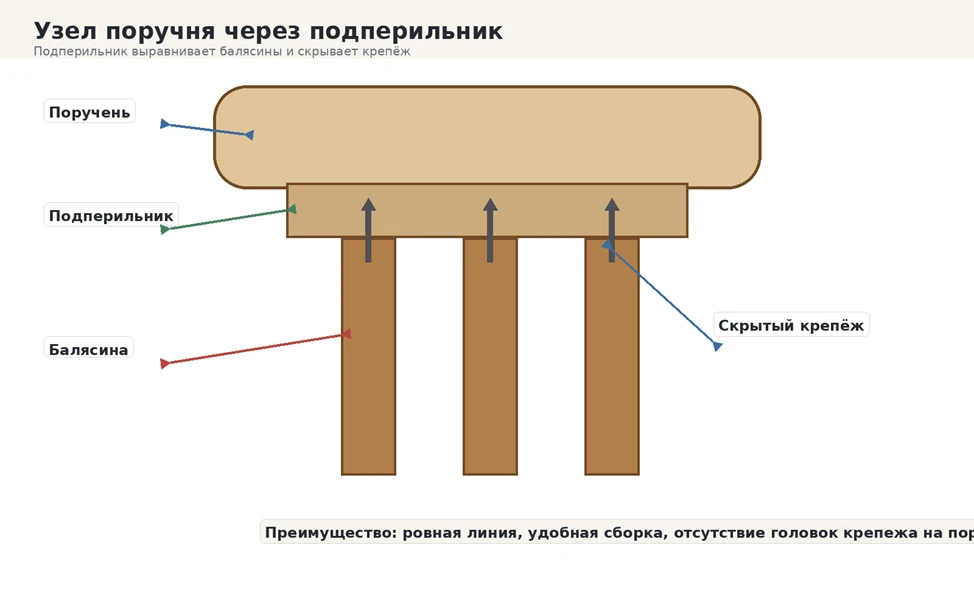
The subrail is a mounting rail under the handrail. The upper ends of the balusters are secured to this rail, after which the subrail is connected to the handrail with hidden fasteners. This solution simplifies alignment and prevents screw heads from appearing on the top surface.
The bottom baluster rail is used on an inclined stringer or on a horizontal landing. It is not a universal board that can be placed directly on the steps of a flight: horizontal treads form a stepped surface, not a straight one.
|
Element |
Main function |
Where the load is transferred |
What to check before ordering |
|
Support column |
Forms a force point |
Stringer, bowstring, beam, embedded part |
Cross-section, installation area, handrail direction |
|
Baluster |
Filling and support of the handrail |
To the lower node and the upper rail |
Height, width of platforms, possibility of trimming |
|
Handrail |
Arm support, system integration |
Through posts into the base |
Profile, groove, length, rotating elements |
|
Handrail bracket |
Leveling and hidden fastening |
Into the handrail and balusters |
Width, thickness, groove compatibility |
|
Bottom rail |
Fastening posts on stringer/landing |
Into stringer, beam or landing |
Angle, groove, fixing method |
Safety requirements and design clause
The height, filling, and strength of the railing are determined by the building's purpose, staircase design, and project requirements. You cannot mechanically transfer numbers from instructions for a public building to a private house or use requirements for metal railings as a universal technology for a wooden staircase.
For single-family residential buildings, the requirements of the current edition of SP 55.13330.2016 with amendments apply. The design horizontal loads on handrails are determined according to the applicable project and SP 20.13330.2016 with amendments. As of the date of material preparation, the document for handrails of residential buildings provides a standard value of horizontal load of 0.5 kN/m, but the specific node and base must ensure the operation of the entire system, not just one fastener.
|
Practical rule When repairing an existing private staircase, do not limit yourself to checking the height and gaps. Press on the steps, identify play, determine the location of load-bearing beams, and decide in advance what the posts will be fastened into. A weak step makes even an expensive railing kit unreliable. |
Get Consultation
Railing height
The height on a flight is measured vertically from the line connecting the front edges of the steps to the top surface of the handrail. On a horizontal landing, the measurement is taken from the finished floor level. Measuring along an inclined baluster or perpendicular to the handrail is incorrect: it will give a different value.
Before trimming the upper ends, mark the design height at least at three points. Then connect the marks with a straight batten or laser line. This allows you to see accumulated deviations of the steps and not repeat them with the handrail.
Filling and child safety
If there are small children, the filling is designed without dangerous openings and horizontal elements convenient for climbing. In practical private projects, they often aim for a clear opening of no more than 100 mm, but the final value is taken from the project and requirements applicable to the specific object.
Not only the central spans are checked. The largest opening may be near a post, wall, handrail turn, or at the junction of a flight with a landing.
When a specialist is needed
· the post is intended to be attached only to a thin decorative step without access to the load-bearing part;
· the steps are loose, have cracks, or are not rigidly connected to the staircase;
· the railing is installed on a metal frame without prepared embedded parts;
· the handrail changes direction in multiple planes or has a curved shape;
· it is necessary to drill stone, porcelain stoneware, glass, or a structure with hidden utilities;
· the staircase is spiral, cantilevered, or protects a high open opening;
· it is required to document the calculated strength of the structure.
Calculation of the number of balusters and installation spacing
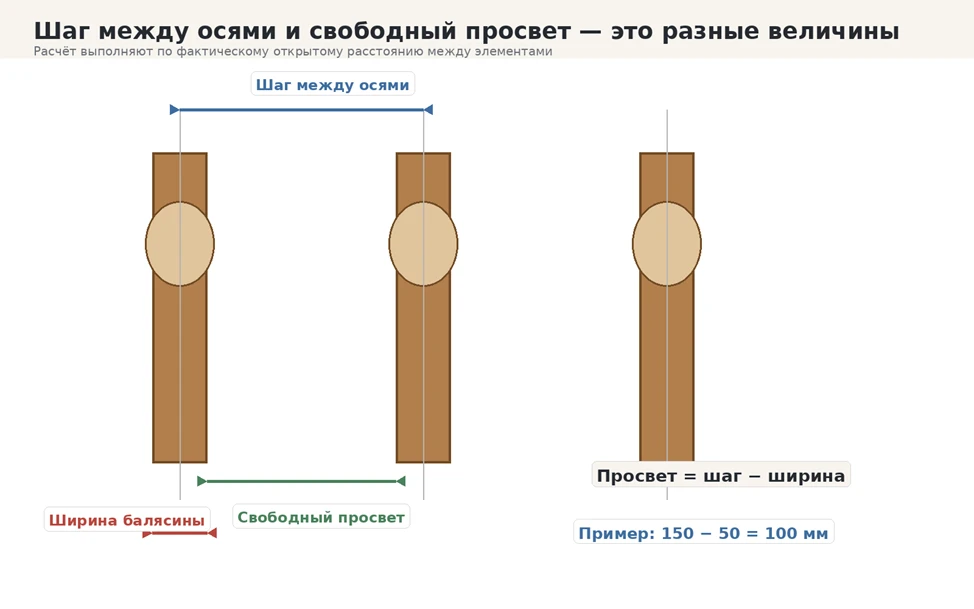
The main calculation error is mixing the distance between axes with the clear opening. If the post width is 50 mm and the centers are spaced 150 mm apart, the open distance between elements will be about 100 mm. Therefore, the phrase "100 mm spacing" without clarification has no unambiguous meaning.
|
What the diagram shows For safety assessment, the actual clear opening is used. The center-to-center spacing is convenient for marking, but it is always compared with the post width. |
Main notations
· L — clear distance between the inner faces of support posts;
· b — width of the mounting part of one baluster;
· g — maximum clear opening allowed by the design;
· n — number of intermediate balusters between two posts.
If all gaps, including the extreme distances to the posts, must be equal, the minimum number of balusters is determined by the condition: n is not less than (L − g) / (b + g). The resulting value is rounded up.
After selecting an integer number, the actual equal clear opening is calculated: (L − n × b) / (n + 1). The formula is suitable for a straight section between two inner faces of posts. It does not account for the complex shape of a carved baluster, so the result is checked with a physical template.
Example calculation
The clear distance between posts is 3000 mm. The width of the mounting part of the baluster is 50 mm. The accepted design clear opening is no more than 100 mm. Calculation: (3000 − 100) / (50 + 100) = 19.33. Round up and get 20 balusters.
Actual gap: (3000 − 20 × 50) / 21 = approximately 95.2 mm. This means 20 intermediate posts are installed between the columns, and the columns themselves are accounted for separately in the specification.
|
Parameter |
Value |
Explanation |
|
L |
3000 мм |
Distance between inner faces of columns |
|
b |
50 мм |
Width of baluster mounting part |
|
g |
100 мм |
Adopted maximum allowable gap |
|
n |
20 pcs. |
Result after rounding up |
|
Actual gap |
≈95.2 mm |
Equal spacing with uniform layout |
One or two balusters per step
One baluster per step simplifies marking but does not guarantee permissible clearance. The result depends on tread depth, post width, and flight angle. After temporary placement, measure the shortest open distance between adjacent elements.
Two balusters per step are used for deep treads, narrow posts, or a richer composition. Holes must remain at a sufficient distance from the front edge, riser fastenings, and each other.
Why you cannot repeatedly add end posts
If the calculation is performed between the inner faces of already provided posts, the number n includes only intermediate balusters. The error of the original method was that after calculating the number of gaps, support elements were repeatedly added to the result. The correct specification separately shows the number of posts and the number of balusters.
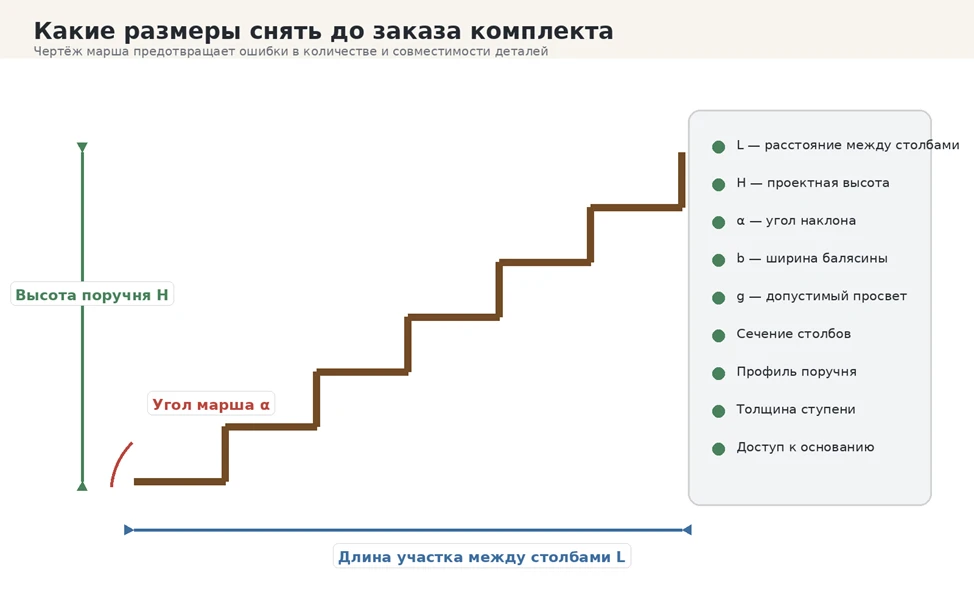
|
What the diagram shows The flight diagram should include distances between posts, handrail height, slope angle, step thickness, baluster width, and location of load-bearing elements. |
Tools and materials
The set of tools depends on the fastening method. For accurate results, the number of power tools is less important than having a drilling guide, templates, and geometry control tools.
|
Group |
What to prepare |
What it is used for |
|
Marking |
Tape measure, square, pencil, bevel, laser or string |
Post axes, height, flight angle |
|
Drilling |
Drill, screwdriver, wood drill bits, depth stop |
Holes for dowels, studs and screws |
|
Trimming |
Miter saw, fine-tooth saw, template |
Precise top and bottom ends |
|
Fixation |
F-clamps and band clamps, temporary batten |
Holding elements before assembling the handrail |
|
Finishing |
P120, P180, P240, vacuum cleaner, soft brush |
Sanding and dust removal |
|
Control |
Levels of different lengths, straight batten |
Verticality, handrail line, plane |
Fasteners and adhesive compounds
Use calibrated dowels, double-threaded studs, threaded inserts, through bolts with washers, special post and handrail connectors, and structural wood screws. Diameter and length are assigned based on the specific joint, not from a universal table without considering the base.
Carpentry glue D3 is suitable for internal wood-to-wood joints under normal humidity. For high humidity, use a compatible D4 system or other composition as per the project. PVA should not be considered a universal fixative for smooth or metric metal studs.
|
What not to do Do not replace stair ties with random black general-purpose self-tapping screws. Do not enlarge the hole to visually align a crookedly drilled post. Do not fill a large gap with a thick layer of glue: the tightness of the fit should be ensured by machining the parts. |
Wood preparation and stair inspection
Completeness and acclimatization
Lay out posts, balusters, handrails, handrail brackets, bottom rails, inserts, finials, and fasteners by section. Check not only the total quantity but also the lengths for each flight and landing. Turning elements and posts may have right and left versions.
Wooden parts are kept in the installation room on level spacers. They are protected from radiators, direct sunlight, and damp screed. Installing undried products or mounting dry wood in a very humid house increases the risk of gaps and deformations.
Checking the geometry of elements
Each baluster is placed against a straight surface and the bend is assessed. For turned posts, the alignment of the height of decorative belts is checked. For carved parts, the presence of sufficient straight mounting areas at the top and bottom is checked.
The post must have space for an internal tie or other fastener. If the thread occupies almost the entire lower part, the installation method is agreed upon before ordering.
Pre-sanding and coating
The main sanding of balusters is more convenient to do before installation. After assembly, access between shaped elements is limited. Ends, tenons, and grooves that will be glued are left without varnish, oil, or wax.
During factory coating, it is specified in advance which areas will remain technologically clean. Trimming a fully painted part requires restoring the coating on the end face.
Inspection of steps and load-bearing part
· steps must not move under load;
· treads must be firmly connected to stringers or carriage boards;
· there must be no cracks or hidden fasteners at drilling points;
· it is necessary to know the actual thickness of the step and the position of the riser;
· on the landing, beams or embedded parts under support posts are checked;
· before drilling, check for wiring, lighting, and other utilities.
A serious unevenness of the tread cannot be compensated by a layer of glue. If the vertical post does not contact the step with its entire plane, the base is corrected or individual adjustment is performed.
Selection of installation scheme
Baluster on a horizontal tread
When installing a vertical baluster on a horizontal tread, the lower end remains straight — perpendicular to the longitudinal axis of the post. The upper end is cut along the line of the inclined handrail or subrail.
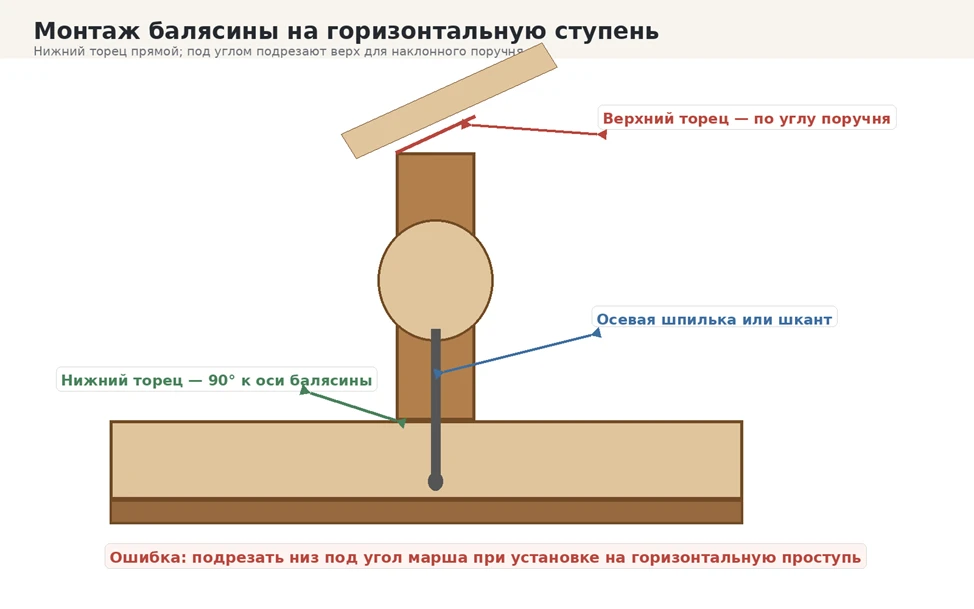
|
What the diagram shows The lower end does not follow the angle of the flight. If cut at an angle, the support area decreases and a wedge-shaped gap appears. |
Baluster on an inclined stringer
On the stringer or inclined lower rail, both ends are cut. The lower and upper lines are usually parallel, but the actual angle is taken with a bevel gauge directly from the structure. The calculated angle of the flight does not replace checking the actual base.
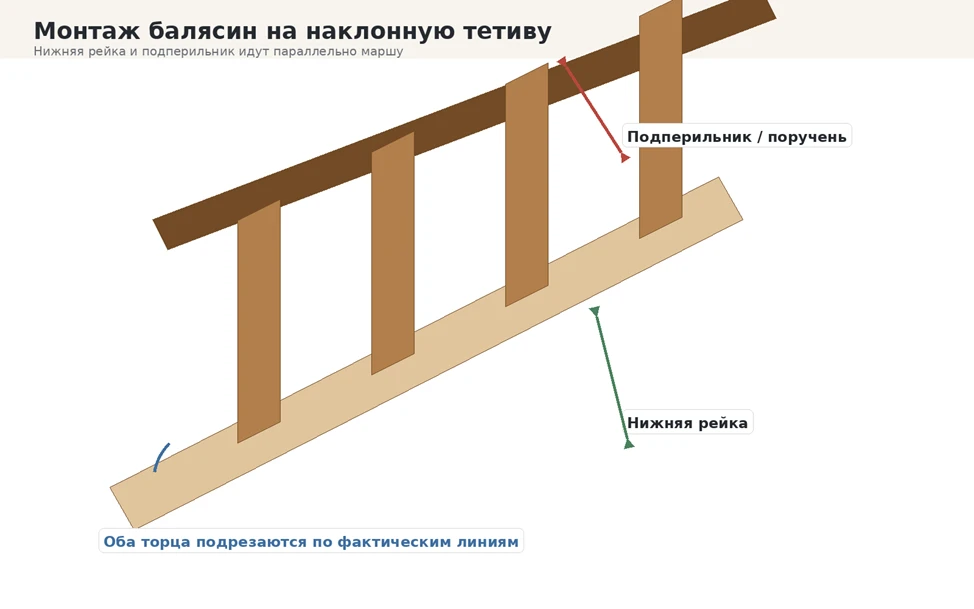
|
What the diagram shows In this scheme, the upper and lower ends have angled cuts. The posts can be assembled into a section between parallel rails. |
Baluster on a horizontal landing
On the landing, the lower and upper ends are typically straight, and the handrail is horizontal. All posts have the same finished height. Edge distances near posts and walls are checked separately.
Side attachment to the stringer
Side attachment changes the load direction and requires a special bracket, bolted assembly, or prepared side platform. A vertical dowel intended for top installation is not suitable for side mounting.
Installation of support posts
Posts are installed before intermediate balusters. They define the boundaries of the section, height, position, and direction of the handrail. An error in one post is transmitted to the entire fence line.
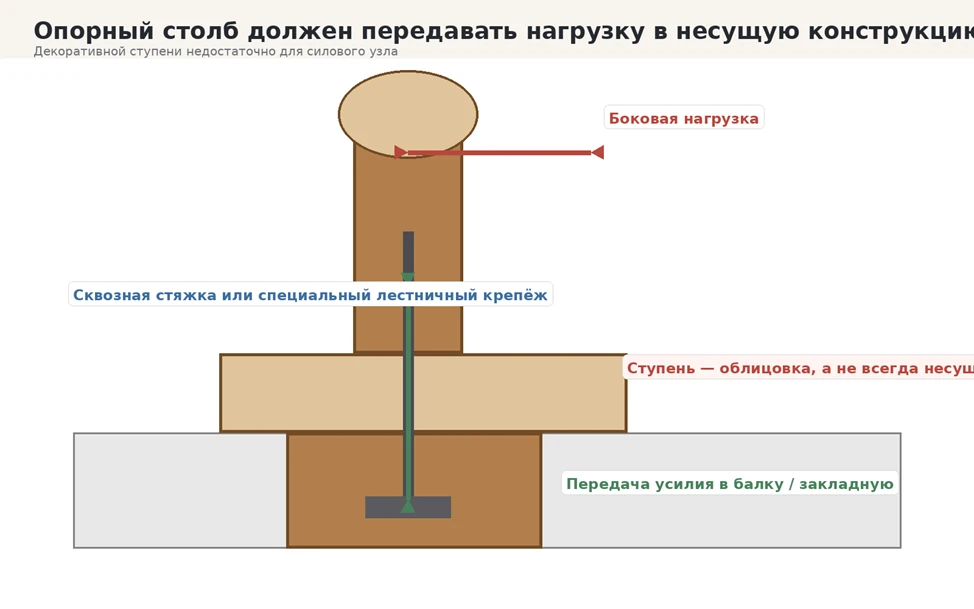
|
What the diagram shows A reliable joint connects the post to the beam, stringer, carriage, or embedded part. The tread may only be a facing and is not always capable of withstanding force. |
Options for the force joint
When access from below is available, a through bolt or screw through a reinforced plate is used. The washer distributes the load, and the nut provides controlled tightening. The technological recess is closed with a wooden plug after inspection.
A special stair tie allows pulling the post to the stringer or embedded part from the inside. Hole sizes, washer positions, and distances to edges are performed according to the system instructions.
A stud is acceptable if its lower part is securely fixed in the load-bearing element, and the upper part actually tightens the post. The formula "M12 to a depth of 80 mm" is not universal: the same stud works differently in an oak beam, a thin pine tread, and a glued panel.
Post installation procedure
1. Mark the post axes on the tread and the load-bearing part;
2. Check access to the fasteners and the possibility of tightening;
3. drill holes through the template;
4. assemble the assembly without final tightening;
5. align the post level in two planes;
6. check the position relative to the future handrail;
7. finally tighten the connection;
8. ensure that the post does not rotate or deviate around a single point
Methods for attaching intermediate balusters
|
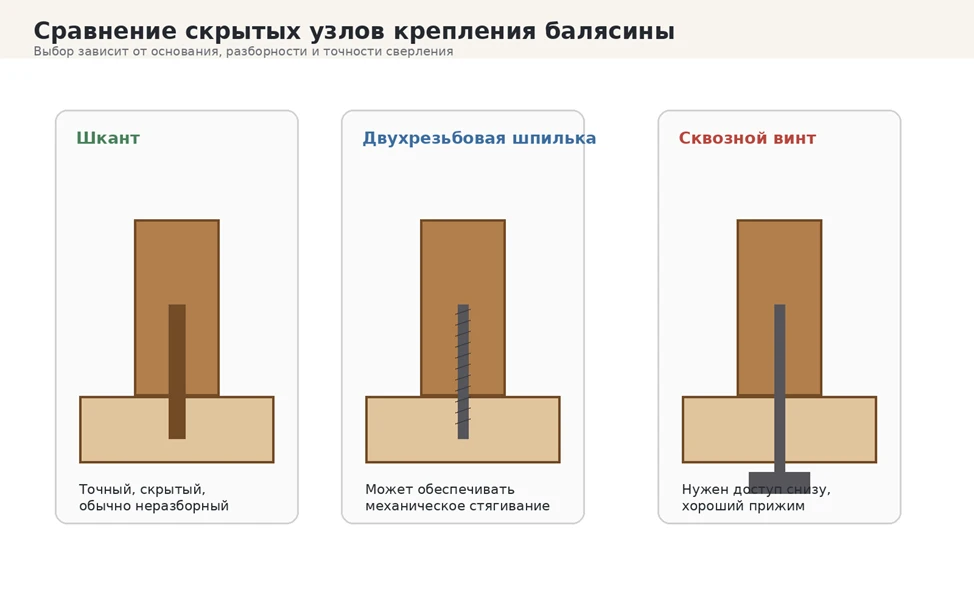
What the diagram shows A dowel creates a wooden glue joint, a double-threaded stud can provide mechanical tightening, and a through screw is convenient when access is available from the underside of the step. |
|
Method |
Where it is used |
Advantages |
Main limitations |
|
Dowel |
Solid wooden step or rail |
Hidden natural knot |
High precision, usually non-separable |
|
Double-threaded stud |
Step, stringer, prepared insert |
Mechanical fixation, may be separable |
Requires compatible bushing or tie rod |
|
Through screw from below |
Access available under the step |
Strong clamping and torque control |
Washer and bottom access required |
|
Special stair fastening |
Baluster, handrail or post |
Predictable technology |
Manufacturer's system must be followed |
|
Angled screws |
Auxiliary fixation |
Quick installation |
Risk of splitting and loosening |
Wooden dowel fastening
Dowel joints are suitable for solid wood parts with sufficient base area. Calibrated grooved dowels are preferred. Their diameter is selected so as not to weaken the lower part of the baluster and to maintain sufficient distances to the edges of the step.
Coaxial holes are drilled in the step and the end of the baluster using a guide. The diameter is assigned based on the actual dowel and adhesive system. Deliberately making the hole a few tenths of a millimeter looser without justification is not recommended.
A trial assembly is performed before gluing. The baluster should fully lower onto the step without strong impacts. A gap may appear due to a dowel that is too long, insufficient depth, chips, or misalignment. The cause is eliminated, not filled with glue.
Glue is applied moderately to the wooden surfaces and the dowel. After seating, the post is immediately checked with a level in two directions and secured with a temporary batten. Excess is removed before drying.
Fastening with a double-threaded stud
A wood-threaded stud is screwed into a pilot hole of the diameter recommended by the manufacturer. A hole that is too small increases the risk of splitting, while one that is too large reduces thread retention.
The mating part in the baluster may include a threaded insert, a concealed nut, or a special coupling. A simple smooth hole placed over a metal stud with PVA does not form a universally reliable joint.
A socket attachment or two lock nuts are used for screwing. Gripping the thread with pliers is not allowed: damage will complicate assembly and reduce the predictability of the joint.
Fastening with a through screw from below
If there is access under the step, the baluster is pulled tight with a screw through the tread. A recess for the head and washer is made from below. The washer must rest on a solid surface and not press into soft wood.
A guide hole is drilled in the baluster. When assembling the glue-mechanical joint, glue is applied to the contact area between the wood and the step, then the post is leveled and the screw is tightened. The force is controlled to avoid stripping the thread or splitting the base.
Angled screws
Two screws at an angle are sometimes used as auxiliary fixation, but this method cannot be called a universal strength solution. The fasteners may pass close to the edge, split the mounting platform, or gradually loosen under cyclic load.
If angled fastening is provided by the ready-made system, the length, angle, diameter, and guide holes are followed. In other cases, an axial or through joint is preferable.
Marking and trimming balusters
Installation line on steps
The centers of the posts are positioned at a sufficient distance from the front and side edges. The value depends on the width of the platform, fastener diameter, tread thickness, and grain direction. A hole too close may split the wood, while excessive offset reduces the usable passage width.
A thin cord is stretched between the posts, or a laser is used. Before drilling, it is useful to place templates made of blocks equal to the width of the balusters. This helps evaluate the rhythm, edge gaps, and alignment with the step geometry.
Trimming the bottom end
On a horizontal tread, the bottom end of a vertical baluster is straight. On an inclined stringer, it is cut to match the actual base line. These two schemes must not be mixed.
Top line marking
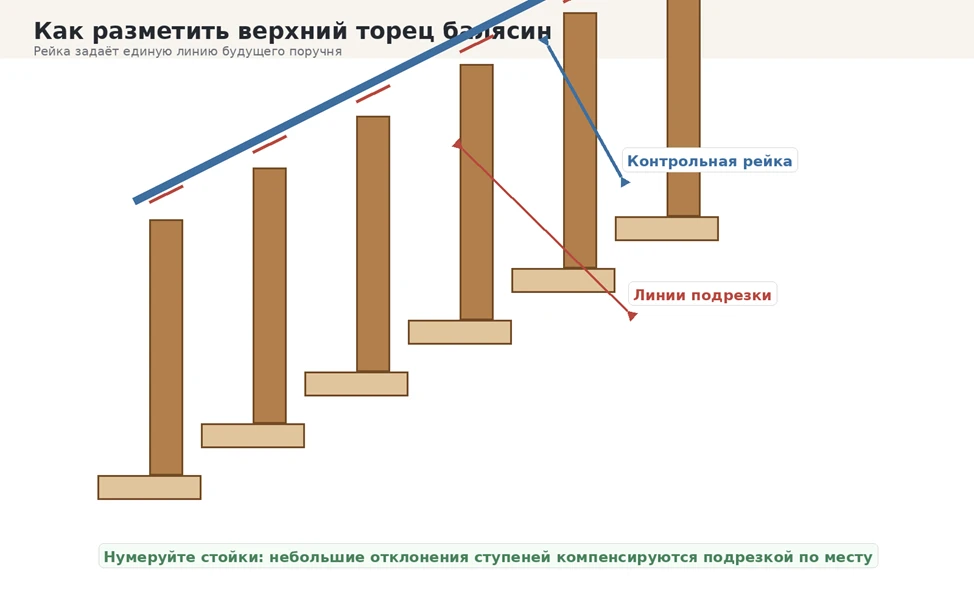
The most reliable method is to temporarily install the end posts, set the design height, and secure a straight rail along the bottom line of the future handrail. Intermediate balusters are installed with a margin, the line is transferred to them, numbered, removed, and trimmed.
|
What the diagram shows On-site marking compensates for minor deviations in the steps. Each baluster is returned to its numbered place. |
Why identical length doesn't always work
On an ideal staircase, all posts of the same pattern may have the same size. On a real flight, minor deviations in riser heights and tread planes accumulate. If the entire set is cut to one measurement, the handrail may develop waves or gaps.
Step-by-step installation of balusters on horizontal steps
Stage 1. Securing the posts
Install the bottom, top, and landing posts. Check verticality and the direction of connection with the handrail. Do not proceed to filling until the posts have play.
Stage 2. Calculation and trial arrangement
Based on the clear distance, calculate the number of posts, lay out templates, and measure all gaps. Pay special attention to the gaps near posts and the wall.
Stage 3. Drilling the base
Secure the guide. Set the same depth with the stop. Remove chips after each hole. Do not level the height of the posts with different seating depths.
Stage 4. Preparing mating holes
Fix the balusters in a prism or template. The axis of the hole must coincide with the center of the mounting pad. Number all parts and check with a dry assembly.
Stage 5. Installing the lower assembly
Assemble the selected joint. Seat the baluster through a wooden pad and immediately check along and across the flight. Do not apply excessive glue.
Stage 6. Temporary fixation
Before installing the handrail, connect the posts with a temporary straight batten. It holds the plane and protects the balusters from accidental displacement. Place the temporary batten fastening in areas that will later be hidden or easily restored.
Stage 7. Top trimming
Set the line with a batten, transfer the marks, remove the posts one by one and trim. Check the fit after each cut. The miter saw must have a serviceable blade without runout.
Stage 8. Sub-handrail and handrail
Secure the upper ends to the sub-handrail or directly to a compatible handrail. After assembling the line, connect the handrail to the posts and only then remove the temporary spacers.
Installation of balusters on an inclined stringer
On the stringer, use a bottom rail with a groove, sockets, or specially prepared platforms. The top line is formed by a sub-handrail or handrail. If the bottom and top rails are parallel, the section can be assembled on a workbench.
Preparation and trial assembly of the section
1. Trim the bottom rail and sub-handrail between the posts;
2. Mark the axes of the balusters and the length of the infill inserts;
3. Take the angle with a bevel gauge directly from the stairs;
4. Trim the first trial post;
5. Assemble the section without glue and check the gaps;
6. Only after checking, prepare the remaining elements.
Moving a large section is difficult. If its weight or length is large, assembly is done in parts directly on the stairs, or temporary reinforcement and a sufficient number of helpers are used.
Fastening the bottom rail
The rail is connected to the stringer according to the design system. It must fit tightly along its entire length and not detach under lateral force. Decorative inserts in the groove do not replace mechanical fastening of the rail.
Installation of the sub-handrail and handrail
|
What the diagram shows The sub-handrail connects the top ends of the balusters and creates an even base. The handrail covers the mounting rail, so no screw heads remain on the surface for the hand. |
Handrail with bottom groove
Measure the actual width and depth of the groove. Ensure that the sub-handrail or the top parts of the balusters fit without excessive play. Incompatible profiles cannot be compensated for with a thick glue seam.
Installation sequence through the sub-handrail
1. Place the sub-handrail on the trimmed posts;
2. clamp it with clamps and check straightness;
3. drill pilot holes;
4. secure the posts to the rail;
5. test fit the handrail and joints with the posts;
6. connect the handrail to the support posts;
7. apply glue to the designated wooden surfaces;
8. pull the handrail to the subrail with hidden fasteners.
Connection of the handrail to the posts
The rigidity of the line is largely determined by the joint with the posts. A mortise tenon, large dowels, hidden bolt tie, special connector, or combined glue-mechanical joint is used. A small external corner bracket is only acceptable as a temporary solution, but does not meet quality interior assembly standards.
Handrail joint along the length
It is preferable to place the joint over a support post. If the connection is between supports, use an internal tie and precise joinery fitting. A simple butt joint without reinforcement may open under load.
Turn and transition to the platform
For turning, use ready-made corner or curved elements, or segments connected with hidden ties. The top line should remain smooth, without sharp protrusions or steps that are unpleasant for the hand.
Glue, sanding, and finishing coat
Where wood glue works
Glue is effective in tight wood joints: dowel, tenon-and-groove, baluster end to wooden rail, handrail bracket to handrail, wooden inserts and plugs. Glue surfaces must be clean and untreated.
What glue does not fix
· too large or misaligned hole;
· weak cracked step;
· gap under the bottom end;
· insufficient fastening of the support post;
· unsuitable metal pin;
· lack of mechanical tightening where necessary.
Handrail sanding
The handrail is in constant contact with the hand. It must be free of burrs, sharp edges, and transverse scratches. The grit sequence is chosen based on the finish composition: excessive polishing may impair the absorption of certain oils and stains.
Oil, varnish, or painting
Oil preserves natural tactility and allows for local touch-ups. Varnish forms a more pronounced protective film but requires careful interlayer sanding. Opaque painting unifies parts with different grain patterns well but requires quality joint preparation.
It is convenient to do the main sanding and part of the preparatory layers in advance. The final layer is applied after sealing technological holes and restoring cut areas.
Inspection of the finished railing
The inspection is performed after the glue has set and the fasteners have been finally tightened. Manual inspection does not replace an engineering test if one is specified in the project, but it allows identifying obvious errors before operation.
Geometry
Inspect the railing from the bottom and top of the flight. Balusters should form an even rhythm, the handrail a continuous line without waves. Selectively check the verticality of the posts in two directions.
Clearances
Measure typical and extreme gaps, areas near walls, posts, and turns. On carved posts, account for the minimum actual distance between protruding parts.
Stiffness
Press moderately on the handrail in several places and directions. There should be no clicks, rotation of posts, opening of joints, or noticeable play. If movement is localized in one joint, repair it before applying the final coating.
Surface Safety
Check for protruding fastener heads, sharp edges, burrs, and uncovered technical holes. The handrail should be comfortable for continuous hand sliding.
Common Installation Mistakes
Attaching a post only to a decorative step
The post rocks the tread along with itself. The joint must transfer force to the load-bearing part.
Mixing Step and Clearance
The distance between centers is always compared to the width of the post.
Angular bottom cut on a horizontal step
A wedge-shaped gap appears and the support area decreases.
Drilling without a guide
A slight tilt of the hole becomes noticeable on a tall post.
Enlarging the hole to correct the axis
The baluster can be visually aligned, but the connection weakens.
PVA on metal threads
For metal, a mechanical system or compatible structural compound is required.
Overtightening of fasteners
Possible splitting, washer pressing through, or thread stripping in wood.
Installing the handrail on fresh glue
When adjusting the top line, the lower nodes shift.
Identical trimming without on-site verification
Deviations of the steps turn into gaps and waves of the handrail.
Handrail joint without support and tie rod
The end joint opens under lateral force.
Finish coating on glued surfaces
Varnish and oil impair the adhesion of wood glue.
Random brittle self-tapping screws
General-purpose fasteners are not always designed for load-bearing wooden joints.
Lack of numbered layout
After individual trimming, the posts are swapped and gaps appear.
No spare part
Damage to one baluster can halt the installation of the entire flight.
How to select STAVROS components
Before ordering, prepare a diagram of each flight and landing. Separately mark the bottom, top, corner, and intermediate posts, the direction of the handrails, and the joint locations.
|
What to specify |
Why this is needed |
|
Number and dimensions of steps |
Calculation of flight length and post placement |
|
Distances between posts |
Calculation of number of balusters and gaps |
|
Railing height |
Selection of workpiece lengths and cut line |
|
Step material and thickness |
Selection of fasteners and base assessment |
|
Wood Species |
Uniform color and coating behavior |
|
Handrail profile |
Compatibility with hand, under-rail, and balusters |
|
Finish type |
Allowance for sanding and clean glue zones |
Selection of balusters
The STAVROS catalog features turned, carved, turn-carved, and geometric models. Compare not only the appearance. Measure the lower and upper mounting platforms, overall height, straight sections for trimming, and pattern orientation.
View category: STAVROS wooden balusters
Selection of handrail
Check grip comfort, width and depth of the bottom groove, possibility of using a subrail, maximum length without a joint, availability of turning elements, and method of connection with posts.
Profile example: handrail PR-004
Selection of posts
At the bottom, there should be enough array for the power unit, and at the top, space for connection to one or more handrails. At the turn, it is determined in advance from which sides the guardrail line approaches.
Final installation checklist
|
☐ |
Design requirements for height, filling, and strength have been checked. |
|
☐ |
The base of each post has been determined: step, stringer, rail, or platform. |
|
☐ |
Support post assemblies have been developed with force transfer to the load-bearing part. |
|
☐ |
The number of balusters has been calculated based on the free clearance. |
|
☐ |
All products have been acclimatized, checked, and numbered. |
|
☐ |
The staircase has no play or cracks at drilling points. |
|
☐ |
Marking has been checked with templates before drilling. |
|
☐ |
Holes have been made through a guide and cleaned of chips. |
|
☐ |
The lower ends correspond to the base type. |
|
☐ |
The top line is marked in place using a control batten. |
|
☐ |
The handrail is securely connected to the support posts. |
|
☐ |
The adhesive is cured until the required strength is achieved. |
|
☐ |
Gaps, verticality, and rigidity are checked after assembly. |
|
☐ |
All technological openings are closed, the surface is safe for the hand. |
Frequently Asked Questions
At what distance should the balusters be installed?
Refer to the actual clear gap, not just the center-to-center spacing. The maximum value is determined by the project and specific site requirements. When the practical limit is 100 mm, the post width must be included in the calculation.
How many balusters per step?
One or two, depending on the tread depth, baluster width, and resulting gap. The finished grid is checked with a template before drilling.
Is it necessary to cut the bottom end at the angle of the stairs?
On a horizontal step — no. The bottom end of a vertical post is straight. An angled cut is required on an inclined stringer or bottom rail.
Which is better: dowel or stud?
A dowel is suitable for a precise wooden non-detachable joint. A stud is convenient if the system provides mechanical tightening or replacement of the post. The choice depends on the base.
Can a regular threaded stud be used?
A smooth metric stud does not hold in wood like a screw. A bushing, nut, special tie, or a designed structural compound is needed.
Is it necessary to apply PVA to metal fasteners?
PVA is primarily designed for joining wood. Metal is fixed mechanically or with a compound intended for a wood-metal joint.
Is it possible to do without support posts?
Only if a different load-bearing scheme is provided by the design. In a typical wooden staircase, the posts are the main points of load transfer.
How to install a post without access from below?
A hidden tie, side connection to the stringer, or a special mounting system is used. One top fastening to the decorative step is not enough.
Can a handrail be installed without a handrail bracket?
Yes, if the handrail profile and the top platforms of the balusters are designed for direct connection. The handrail bracket usually simplifies alignment and hides the fasteners.
When to apply the finish coating?
It is convenient to do the main sanding and part of the preparation in advance. Glue areas are left clean, and the final layer is applied after assembly and filling of the fasteners.
How to eliminate railing squeaking?
You need to find the loose joint: the post fastening, handrail joint, handrail bracket, or bottom connection of the baluster. Applying oil externally does not fix the mechanical cause.
How to replace a damaged baluster?
A dismountable pin joint or a system with rails simplifies replacement. A dowel joint usually has to be carefully drilled out.
Can the railing be fastened through the laminate?
The fastener must pass through the decorative covering and enter the load-bearing base. The floating covering cannot be rigidly clamped in a way that disrupts its thermal movement.
How to check the quality of installation?
They control the height, gaps, verticality, smoothness of the handrail, rigidity of the posts, absence of sharp parts, and quality of each connection. A design test is performed by a specialist if necessary.
Conclusion
Installation of wooden handrails and balusters is not a set of independent operations, but the assembly of a single structural and decorative system. Reliability is determined by how the force from the handrail passes through the posts and fasteners into the string, stringer, beam, or floor.
Work begins with checking the staircase, installing support posts, and calculating the infill. During calculation, the clear opening and the spacing between axes are distinguished. On horizontal treads, the lower end of the baluster is left straight, and the upper end is cut along the handrail line. On an inclined string, both sides are adjusted.
Dowels, double-threaded studs, through bolts, subrails, and special stair connectors give good results only in a suitable base and with precise workmanship. Angled screws and seating a metal stud on PVA should not be used as a universal replacement for a calculated joint.
High-quality marking, trial assembly, directed drilling, and control of each post allow for a smooth railing without gaps, waves, or loosening. The finish coating protects the wood and unites the balusters, posts, and handrail into a complete interior composition.