
























































Article Contents:
- Wooden support MN-243: why a table without an apron doesn't mean empty space underneath
- Before ordering legs, we collect data on the tabletop and monitor mount
- Three zones under the table: wooden supports, clamp, and access for assembly
- Bottom view: fixing the position, not approximate proximity
- Side section: checking what is not visible on the plan
- Four states that must pass the check
- Is MN-243 suitable for any desk with a monitor arm?
- Why does the absence of a crossbar not guarantee space for a clamp?
- What data is needed besides tabletop thickness?
- How to check access to the screw after installing the support?
- Can part of the spacer be sawed off?
- Does free placement prove safety?
- What is included in the calculation of four supports?
- What should be provided before ordering?

A monitor on a desk mount frees up space on top, but its clamp also needs area — on the underside of the tabletop. If you first install wooden supports and then look for a gap for the clamp, the mounting may hit the leg's mounting part, a crossbar, or a cable tray. Therefore, MN-243 is ordered after coordinating the underside of the table, not just based on an image of the future workspace.
Let's consider a hypothetical home project: the tabletop is chosen, the screen is planned to be attached to the rear edge, and wooden supports are not yet purchased. You need to decide where all elements will be placed and whether it will be possible to install, tighten, and later remove the monitor mount. Once this scheme is coordinated, you can determine the set of legs and the cost. If elements do not fit together, the design is changed before payment — without relying on cutting the crossbar during assembly.
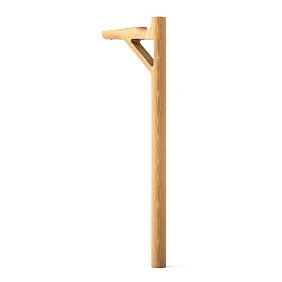
Wooden support MN-243: why a table without an apron does not mean empty space underneath
MN-243 is designed for tables without aprons. However, the support itself does not consist of just one vertical post: it has a horizontal mounting part and a diagonal crossbar. These elements must be considered near the monitor mount. Before buy wooden supports MN-243, fix the selected configuration.
| Parameter | MN-243 |
|---|---|
| Name | Modern furniture leg MN-243 |
| Size A × B × C × D | 764 × 240 × 45 × 740 mm |
| Wood | Beech or oak |
| Sanding | «Prestige» |
| The shown beech finish | "Under enamel" |
| Support mounting | Through three holes with countersinks |
These are card specifications, verified on September 5, 2026. Hole coordinates and the mounting outline for a specific layout are not set here: the detailed drawing via the card link could not be retrieved. The set of dimensions A × B × C × D does not replace such a drawing and does not confirm compatibility with the selected clamp.
For our project, the difference between two tasks is significant. The first is that the support is placed under the tabletop. The second is that suitable space for equipment remains nearby. A positive answer to the first does not say anything about the second.
Do not mark the leg on the plan only as a point of contact with the floor. Such a drawing hides the upper part of the structure, even though it is precisely that part the clamp may collide with. For verification, a full outline of the support in the accepted orientation is needed. Separately note where fasteners are accessible: the leg must also be installed without interference from already mounted devices.




Before ordering legs, we collect tabletop and monitor mount data
A request like "we need legs for a desk" becomes specific when details about the base and equipment are added. Tabletops with the same external dimensions may have different internal construction. And two clamps rated for the same thickness do not necessarily occupy the same space underneath.
Prepare a list. Mark unknown values as requiring clarification rather than filling them with dimensions of a similar product.
| What to record | What exactly to check |
|---|---|
| Tabletop | Material, construction, full size, existing holes, and embedded inserts |
| Clamp zone | Actual thickness between contact surfaces, base condition |
| Trailing edge | Edge shape, rounding, chamfer, decorative thickening |
| bracket | Exact model, version, permitted mounting method |
| Lower part of the clamp | Clamping pad, screw, handle, dimensions per documentation |
| equipment | Monitor and additional devices the bracket will support |
| Other elements | Cable tray, power supplies, holders, their mountings |
A decoratively thickened edge cannot automatically be assumed to be a solid load-bearing base of the same thickness. The cross-section must show what the upper and lower parts of the clamp actually rest on. If the clamp falls behind the thickened edge, that specific section is measured. If it falls on it, the construction of the thickening itself is checked separately.
An illustrative example is from the technical specifications of the ARCTIC Z1 Pro Gen3: for the tabletop, a range of 20–65 mm is specified. At the same time, the manufacturer separately recommends a reinforcement plate for honeycomb and sandwich structures with voids to prevent damage from clamping. This is a condition of the specific product, not a universal instruction for reinforcing any tabletop. The size and design of the reinforcement must be agreed upon; the provided specifications do not confirm the compatibility of this bracket with MN-243.
It is equally useful to determine the tightening method. Do you need to rotate a handle under the table, insert a tool from below, or work from the other side? The access area depends on this. A photo of a fully installed bracket often does not show how much space was required during assembly.
Save photos of the rear edge from the top, bottom, and side, preferably with a dimensional reference. They will help notice features that were lost in the overall record: an overhanging edge, a local cutout, or a protruding embedded insert. But a photo does not replace numerical data. A dimension read from a perspective shot is marked as preliminary until an actual measurement is taken.
Take bracket information for the specific product version. The included lower part or installation method may differ in visually similar models. Purchasing an "analog" after approval requires re-checking exactly those dimensions and operations that were used in the project.
If the tabletop is still being manufactured, provide equipment information before its design is approved. This way, the contractor can consider the assembly as a whole. If it is already finished, first inspect the existing base; the possibility of reinforcement should not be considered included in the purchase of the legs.
Our factory also produces:
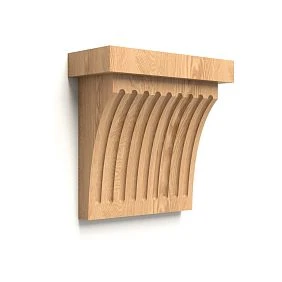
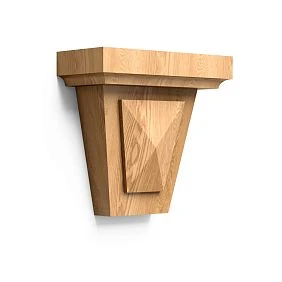
Three zones under the table: wooden supports, clamp, and access for assembly
The working diagram consists of a bottom view and a side section through the intended monitor mount. The first shows the arrangement of elements across the area, the second shows their relative position in depth and height. One nice frontal picture is not enough for this check.
Get Consultation
Bottom view: fix the position, not approximate proximity
Start with the countertop outline. Label the work side, back edge, left and right edges. Keep the names relative to the seated person: when switching to the bottom view, the sides are easy to confuse. Specify one base point for all dimensions so that the cabinetmaker and equipment installer do not measure positions from different corners.
Transfer the supports to this plan according to the confirmed drawing and accepted orientation. Then add the clamp: not only its axis, but also the contour of the lower clamping part. After that, mark the tray and other planned items. Until the exact geometry of any part is known, the corresponding area cannot be declared free.
| Zone | What it includes | What result is required |
|---|---|---|
| Supports | Mounting parts, stands, spacers, access to fasteners | Position of all legs is determined, adjacent elements do not interfere with assembly |
| Clamps | Clamp, clamping pad, and intended movements during installation | Fastening is located in an acceptable area of the base |
| Access and cables | Hand, tool, handle rotation, cables, tray | Tightening, inspection, maintenance, and removal are possible |
It is convenient to check the result sequentially. First, look for intersections of fixed parts. Then consider movements during assembly. Finally, add the real work of the hand and tool. Otherwise, there is a risk of leaving space for the screw but forgetting about the handle that needs to be turned around it.
Side section: checking what is not visible on the plan
In the section, show the tabletop with its actual construction, the upper and lower parts of the clamp, the nearest mounting part MN-243, and the spacer. If necessary, add the wall behind the table. Mark the direction from which the clamp is installed and the position of the tool.
Different situations are found here. The lower clamp may be freely positioned at the surface, but the diagonal of the support may be in the way of the hand. Or the spacer passes below the clamp and does not touch it, but prevents bringing the tool in. The opposite case is also possible: conditional contours intersect in the bottom view, but the parts are at different heights. Then the decision is made based on both views, not on a single drawing.
There is no universal gap between MN-243 and the clamp. It cannot be set as 10, 20, or 50 mm without the geometry of the specific assembly. The space that is actually required by the selected parts and the intended operation is checked. With a narrow gap, the accuracy of manufacturing and dimension transfer is taken into account: contours matching "flush" leaves no allowance for discrepancies between the actual assembly and the sketch.
Four states that must pass the check
Consider installing the clamp on the edge, tightening it, normal operation, and removal. For each state, write down what must remain accessible. The ability to screw on the clamp before the legs does not solve the maintenance problem if, after their installation, the screw can no longer be reached.
Separately check the cable tray. It should not accidentally take up the space left for the tool. If its removal is planned, assess access to its own fasteners and the ability to perform the operation without tension on the wires. The label "removable tray" is useful only together with a clear removal procedure.
Do not forget about the position of the table in the room. On a free workbench, the rear edge can be approached from any side; near a wall, this possibility disappears. If maintenance requires moving the furniture, plan this operation in advance: what is disconnected, how cables are freed, and where the table is moved. Do not assume that it can be safely shifted by holding the monitor stand.
The cable path is checked together with the connector. The wire may pass between parts, but its plug may not fit during replacement. Then initial assembly is only possible before installing the adjacent element, and this should be reflected in the work sequence. Do not lock a replaceable cable inside an assembly that would have to be disassembled inconsistently to extract it.
Paper templates at a 1:1 scale help verify the layout when dimensions are obtained from documentation. They do not confirm strength and do not replace a trial assembly at the contractor's site. The completed result of this stage is a diagram with coordinates and marked access zones, not a photograph where a gap is visible between parts.
What to change when zones intersect — before purchasing wooden supports
A detected intersection means the layout needs to be reconsidered. It does not prove that MN-243 is entirely unsuitable for work tables. First, determine which specific part or operation creates the conflict: the clamping plate, spacer, tool, or tray. The solution depends on the cause.
| Solution | Under what condition it is considered |
|---|---|
| Relocate the monitor mount | The new location is permitted by the tabletop design and the bracket documentation |
| Change the position of the supports | The furniture contractor verified the new mounting scheme and the operation of the structure |
| Reconsider the table design | It is not possible to combine the selected elements without unconfirmed modifications |
When moving the clamp, check not only the freed-up area underneath. The screen must reach the desired position in front of the user within the allowed range of the bracket. If the clamp had to be moved back, and the monitor now can only be installed with an awkward reach, the original task is not yet solved. Also check the available positions near the wall.
Moving the wooden support requires separate approval. You cannot simply move it closer to the edge to free up a few centimeters: this changes the placement of fasteners and the support scheme of the tabletop. Similarly, you should not rotate MN-243 arbitrarily just because the clamp fits after the turn.
If a different option is needed, you can buy wooden table supports after checking the new configuration. Compare mounting contours and fastening conditions, not just the external silhouette.
Sawing off a spacer, cutting a recess for a screw, and an accidental extra hole are not part of normal position adjustment. This is a modification of the part, for which there is no confirmed solution here. Do not include such actions in the assembly plan as a way to necessarily keep a model you like.
The clamp fits: separately check the tabletop, fasteners, and stability
Geometric compatibility answers the question "can elements be positioned and serviced." Structural suitability answers another: "can the assembled table work with the selected equipment." The first check does not replace the second.
For the furniture installer, prepare information about the tabletop, supports, bracket, and the actually installed monitor. Consider the entire load path: from the screen through the bracket and clamp to the tabletop, then through fasteners to the supports. A weak point in one component is not fixed by choosing more expensive wood for the other parts.
The position of the equipment matters. When moving the screen, the point of application of its weight changes relative to the mounting and table supports. Therefore, checking only with the monitor pushed against the stand is insufficient when it is intended to be used in another allowed position. The installer needs to know the planned operating range, not just the screen diagonal.
MN-243 fasteners are selected for a specific base and mounting assembly. The number of provided holes does not automatically indicate the screw length, its insertion depth, or the permissibility of fastening to any panel. To explore options, it is useful hardware for attaching wooden legs, but the overall material does not confirm the chosen connection instead of a constructor.
Do not calculate the load capacity of a work desk by summing the assumed loads on individual legs. Such a sum does not account for the tabletop, connections, equipment overhang, and structural stability. For the MN-243 combination with your monitor, neither a tested load nor a universal allowable table length is declared here.
Also distinguish between strength and ease of use. The absence of visible damage does not mean the screen will not noticeably wobble during typing. For a workspace, it is useful to agree in advance with the contractor on how the rigidity and behavior of the assembled table under normal user actions are assessed. The task is not solved by tightening all screws with arbitrarily high force: fastening parameters must match the adopted assembly.
During trial assembly, compliance with the agreed scheme and normal operation of the equipment are checked. Homemade tests with jerks, rocking, or additional weight are not needed: the acceptance procedure is set by the contractor. If the connection shifts or the table noticeably loses stability during normal adjustment, the equipment should not be used until the cause is clarified.
From scheme to configuration: material, finish, and MN-243 support feet
Once the design is agreed, the product part of the order is assembled. All supports have the same article number, size, selected wood, and surface preparation. Beech and oak are compared in relation to the desired finish and budget, without using the material as a substitute for checking fasteners.
In STAVROS designations, "for enamel" refers to the quality of blank lamination, and "Prestige" refers to surface treatment. Neither of these marks indicates the finished color of the leg. These parameters are detailed separately on the page "quality of wood and sanding».
For opaque painting, agree on color and gloss; for finishes with visible texture, also agree on the acceptable character of the wood grain. The sample is reviewed next to the tabletop. Matching the species name or shade in correspondence does not replace visual approval of the actual material.
Before finishing, provide the contractor with a diagram of functional surfaces: where the joints, recesses, and attachment areas are located. The order of preparation, assembly, and painting must be coordinated between the craftsmen so that finished legs do not need to be redone later for installation. The rate and timeline for these works are accounted for separately from the price of unpainted supports.
The recommended hardware MN-243 specifies FUR-022. In its own product card, this is a round floor glide with a diameter of 30 mm from the SUPER GLIDE series, with a sliding coating and screw-mount attachment. The decision buy the foot pad FUR-022 is made considering the floor and the project. The sliding floor glide is not an anti-slip fastener and does not secure the table to the floor.
If it is necessary to restrict the movement of the work table, this is a separate condition for the furniture maker. It cannot be considered fulfilled after adding the recommended hardware to the cart. The screw from the floor glide kit should also not be confused with the fastener for the upper mounting part of the support to the tabletop.
Cost of wooden supports: example order according to the approved diagram
For the arithmetic, let us take a hypothetical project with four MN-243 units. This is a specified quantity for the budget example, not a recommendation to place four supports under any tabletop. In a real request, the quantity is taken from the approved structure.
Product card prices were verified on September 5, 2026. The calculation was made without assumed discounts, finishing, or delivery.
| Execution | One MN-243 | Four supports |
|---|---|---|
| Beech, "Prestige" | 6 600 ₽ | 26 400 ₽ |
| Oak, "Prestige" | 7 690 ₽ | 30 760 ₽ |
The difference between the sets is 30,760 − 26,400 = 4,360 ₽. This difference is only for the selected wooden items; it does not show the full difference in finishing costs.
If the same conditional project includes four FUR-022 at ₽170 each, 4 × 170 = ₽680 is added to the product portion.
| Composition of the calculation kit | Beech | Oak |
|---|---|---|
| Four supports | 26 400 ₽ | 30 760 ₽ |
| Four support pads | 680 ₽ | 680 ₽ |
| Supports and support pads together | 27 080 ₽ | 31 440 ₽ |
These amounts are not the price of a finished writing desk. The full budget is assembled as follows:
Supports + provided support pads + tabletop + fasteners per project + finishing + necessary equipment + assembly + delivery.
Each additional line must have an executor and a basis for the calculation. If fasteners are already included in the workshop's proposal, they do not need to be counted again. If the tabletop and monitor were purchased earlier, separate already incurred expenses from the amount still needed to complete the project. When the number of legs changes, recalculate the corresponding items rather than keeping the total of the conditional four-element kit.
When comparing workshop proposals, bring them to the same degree of readiness. One calculation may include only painted legs, while another may also include tabletop preparation, fasteners, and equipment assembly. A lower final line without a breakdown does not show which option is actually cheaper for your project.
Separately discuss costs when changing a decision after fitting. For example, who pays for redelivery or additional processing if an agreed bracket is replaced with another. Amounts do not need to be made up in advance; it is enough to determine which changes trigger a new calculation and who approves it before work is performed.
Before payment, check current prices and availability of the full quantity. Displaying a single product item does not replace confirmation of the kit by the required date.
When to order MN-243 and when to choose another solution
An order can be placed when the location of the supports and clamp is determined, the base and fastenings are agreed upon, access to the clamp is maintained, and the material and finish are selected. All these decisions must relate to the same version of the project. You cannot combine an old sketch of the legs with a new tabletop and consider the previous check valid.
The purchase should be postponed if the tabletop structure is unknown, an approximate silhouette is used instead of a drawing, or the clamp is proposed to be installed with subsequent inaccessibility of its screw. Another reason to stop is the need to change the spacer without agreement. In such cases, first resolve the technical issue, then pay for the products.
If a different structure is required for the workspace, in the general section you can Buy wooden furniture legs after re-checking. The selected support changes, but the task itself remains: to leave space not only for the equipment but also for its installation.
Separate the request to the seller from the task to the table manufacturer. For ordering the product, a record like this is suitable:
MN-243 / 764 × 240 × 45 × 740 mm / material ___ / sanding "Prestige" / confirm gluing quality / quantity per agreed project ___ / support feet ___ / finish ___ / delivery ___. Confirm the configuration, current price, and readiness of the full quantity for shipment.
Specify the purpose separately: a work desk with a desktop monitor mount. Attach to the furniture maker's task a bottom view, side section, tabletop data, and bracket instructions. In the document, indicate the adopted mounting scheme, access zones, and the person who approved the structure. Supplying the legs alone does not mean the seller confirms the entire combination.
Agree on the place of receipt of the goods: an apartment or a workshop where finishing and assembly are performed. This helps avoid unnecessary transportation. Before placing the order, study the payment and delivery terms for the supportsand coordinate the table completion date considering all work, not just shipment.
Upon receipt, verify the article number, version, quantity, and visible condition of parts before sending them for finishing. After project approval, you can order wooden legs MN-243 as a specific set — with a defined place for the monitor and a clear order for further assembly.
Questions before purchasing wooden supports
Is MN-243 suitable for any desk with a monitor bracket?
There is no basis to promise universal compatibility. Even another owner's experience applies to their tabletop, support placement, and equipment. If at least one element is changed, compare the new combination with the approved scheme: the same leg name does not make different tables structurally identical.
Why does the absence of a crossbar not guarantee space for a clamp?
Besides the support itself, space may be occupied by holders and wiring installed later. Therefore, keep the access area clear even after assembly. Do not use a convenient empty spot near the clamp for a new cable tray until you have checked maintenance of the entire unit.
What data is needed besides tabletop thickness?
Its design, edge geometry, clamp model, and equipment information are needed. If the monitor has not been selected yet, an unknown configuration cannot be substituted with an assumed diagonal size. First, determine the specific equipment or agree with the contractor on the limits of future setup.
How to check access to the screw after installing the support?
The entire travel of the intended operation is checked, not just the possibility of touching the screw once. With a removable tray, it is additionally determined whether its fasteners can be released. The chain "to remove the tray, first remove an inaccessible clamp" means that the sequence of operations is not resolved.
Can part of the spacer be sawed off?
Such a modification cannot be assigned independently. There is no confirmation for the article that the modified part will preserve the required function of the structure. A written technical solution with the manufacturer or designer should be discussed, not the size of the section that seems small.
Does free placement prove safety?
No. The mock-up shows placement and accessibility but does not confirm the operation of connections under load. Even an accurate three-dimensional model without calculation or other necessary verification remains a geometric model. Clarify with the contractor on what basis the design of the finished table was adopted.
What is included in the calculation of four supports?
Only the listed product items. The totals with base plates apply when purchasing exactly four MN-243 and four FUR-022. Equipment already owned by the owner does not need to be purchased again, but its characteristics are still taken into account when agreeing on the table.
What should be provided before ordering?
Provide the seller with the exact product specification, and the table assembler with the agreed layout and equipment data. Specify the date or drawing version number. If the monitor position changes, send an update to all participants so that delivery and assembly are not performed according to different variants.