Article Contents:
- What a furniture capital is in a real furniture project
- Capital, overlay, and bracket — three different purposes
- Capital
- Overlay
- Bracket
- The capital matches the pilaster in width
- The capital projects intentionally
- The capital transitions into the cornice system
- Built-in wardrobe
- Library
- Classic kitchen
- Showcase
- Furniture portal
- Capitals only at the edges
- A capital above every vertical
- Oak
- Oak
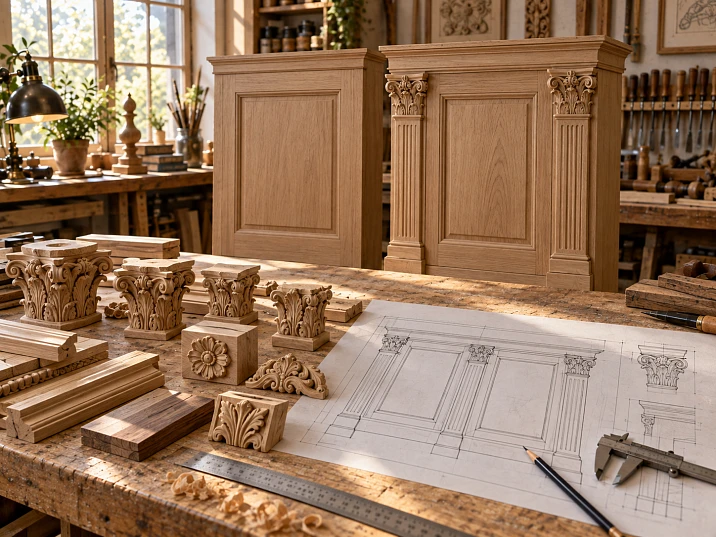
The cabinet has already been calculated, the pilasters are in production, the cornice has been chosen — and only after that does the idea arise to add a capital. On a sketch it goes in within a minute. In real furniture, something else becomes clear: the ready-made element is wider than the side panel, deeper than the facade plane, raises the cornice above the calculated level, and when the door opens it ends up too close to the facade's swing path.
It is better to choose the capital earlier.
In a furniture project, this is not a separate decoration that can be painlessly "added on top," but part of the upper decorative assembly:
vertical pilaster or column → specific capital SKU → dimensions A/B/C → cornice position → facade clearances → working drawing → test assembly → BOM → production → order.
If this sequence is followed, the capital, pilaster, and cornice come together as one system. If not, the workshop ends up with a set of beautiful parts that have to be fitted after the cabinet body is already manufactured.
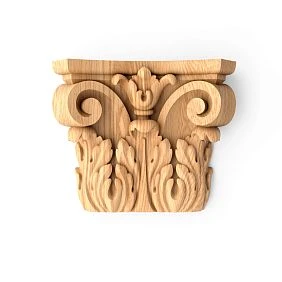
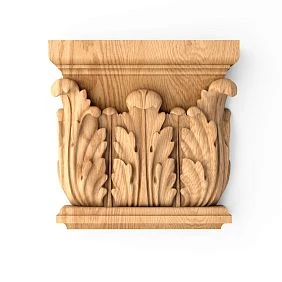
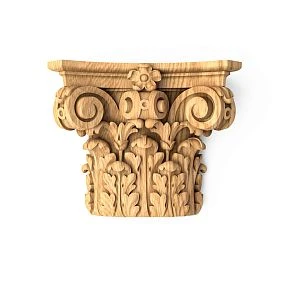
What a furniture capital is in a real furniture project
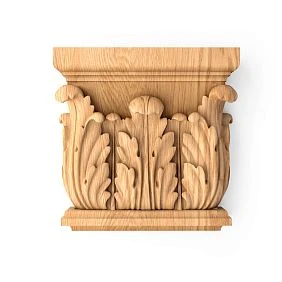
In a furniture construction, the capital completes a vertical decorative element — a pilaster, column, or post — and connects it to the upper horizontal: a cornice, frieze, top frame, or another crowning element.
For a furniture maker, this definition is sufficient. The history of the Doric, Ionic, or Corinthian order does not answer production questions:
- which SKU to order;
- how wide the vertical should be;
- how far the capital will protrude to the sides;
- how far forward it projects;
- where the cornice runs;
- whether there will be clearance for the door;
- how to represent this node in the BOM.
Therefore, one should start not with a stylistic name, but with the geometry of the specific product.
In the furniture capitals the craftsman selects the actual position, and then checks the leg, cornice, and front against it.




Capital, overlay, and bracket — three different tasks
In decorative furniture, these elements sometimes end up next to each other, but they cannot be treated as interchangeable.
Our factory also produces:
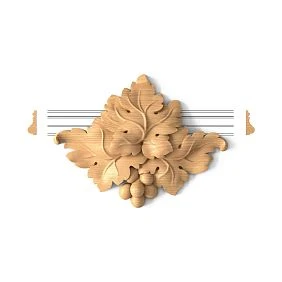
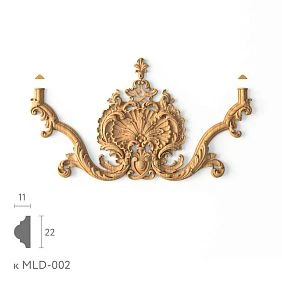
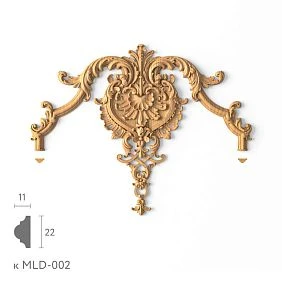
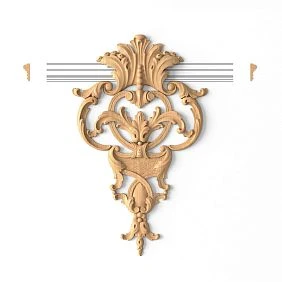
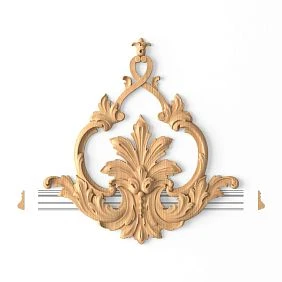
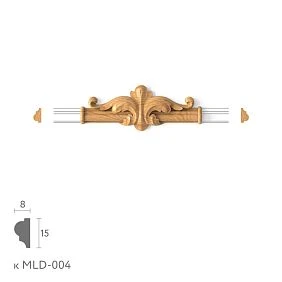
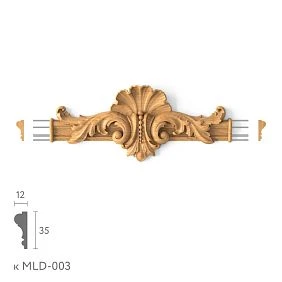
Capital
Completes the vertical.
Its logic reads from bottom to top: the leg or pilaster rises to the upper node and receives completion.
Get Consultation
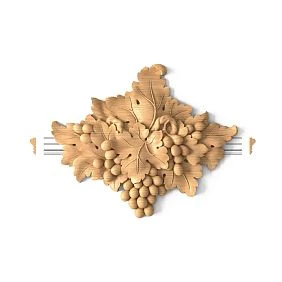
Overlay
It works primarily on the plane.
It can be located at the center of the front, in the corner of the frame, on a panel, frieze, or side. Its dimensions matter, but it does not have to connect the vertical with the cornice.
For such tasks, STAVROS has separate Decorative Inserts.
Bracket
It forms a standalone console or decorative unit. It can visually support a shelf, work under a cornice, or complete a separate composition, but its geometric role differs from that of a capital.
In a drawing, incorrect terminology quickly turns into an incorrect SKU. Therefore CAP-01, DEC-01 и BRK-01 it is better to keep them as different item types already at the furniture detailing stage.
The capital is designed together with the pilaster and cornice
The main production mistake is choosing the three elements independently.
First, the pilaster was liked. Then a capital was found for it. Then they tried to match a cornice on top.
This approach can work, but the designer is constantly forced to compensate for mismatches.
It is more reliable to consider the top of the furniture as a system:
PILASTER → CAPITEL → CORNICE.
For each part, the following are fixed:
- Project Code;
- Manufacturer;
- SKU;
- the material;
- dimensions;
- position relative to the facade;
- finish;
- APPROVED status.
If the pilaster has not yet been approved, the capital should not be considered final either.
If the cornice changes, the capital must be checked again: the new horizontal line may overlap the top of the element differently, protrude further forward, or require a different junction.
It is convenient to select the vertical part through the section pilasters and columns, and the upper horizontal line — through Wooden moldings and cornices.
Why the capital must be chosen before manufacturing the furniture post
The width of the vertical and the width of the capital are directly related.
If the pilaster is manufactured first and then a ready-made upper element is sought, the craftsman limits the choice to those positions that happen to fit the already specified width.
With early selection, the reverse logic is possible:
you like a real capital → check its B → design the pilaster width for it → check the cornice → approve the assembly.
This is especially important in small-batch furniture. Changing the width of a post in CAD before cutting is almost free. Reworking already manufactured elements is a completely different task.
The capital becomes an original production part, not an accessory that is selected after assembly.
Which capital dimensions need to be transferred to the drawing
In the working project, it is useful to preserve the dimension designations from the product card. For a capital, three overall dimensions are critical:
- A — height;
- B — width;
- C — depth.
Each answers its own design question.
| Size | What the furniture maker checks |
|---|---|
| A | the height of the upper unit and the position of the cornice |
| B | junction with the pilaster and section width |
| C | protrusion in front of the facade, side silhouette, and opening clearance |
This is not enough for every possible joint, but it is the minimum geometric basis.
If a specific SKU has additional dimensions, they must also be transferred to the drawing. Do not invent missing parameters from a photo or scale the product "approximately."
Width B: the capital must be aligned with the vertical
Frontally, it is B that most often determines whether the joint will look assembled or random.
Three normal schemes are possible.
The capital matches the pilaster in width
The result is a calm vertical without pronounced widening at the top.
The capital deliberately protrudes
A classical composition often uses a projection at the top. But the projection must be symmetrical and calculated in advance.
If the width of the pilaster P, and the width of the capital B, the side projection when centered:
(B − P) / 2.
A conditional example: pilaster 90 mm, capital 130 mm.
Projection:
(130 − 90) / 2 = 20 mm on each side.
The number itself is conditional; the method matters. These 20 mm must be clear and must not conflict with the adjacent facade, frame, or second vertical.
The capital transitions into the cornice system
Then its width cannot be assessed separately. You need to look at how the horizontal continues or overlaps the upper form.
In any case, dimension B must appear in the working drawing before vertical production.
Depth C: the parameter that is most often not visible on the facade
On the front drawing, the capital may look perfect. The problem shows up in the side section.
If C is large, the element may:
- protrude in front of the facade plane;
- come close to the door;
- change the depth of the top cornice;
- create an unwanted protrusion on the side panel;
- intersect the opening path of the facade.
Therefore, for a built-in wardrobe or kitchen, a facade view alone is not enough.
A side section is required:
carcass → facade → pilaster → capital → cornice.
It must show the actual planes.
Particularly careful checks are needed for furniture with floor-to-ceiling facades and narrow top gaps: the decorative assembly is located where free space is usually most limited.
Height A changes the entire upper composition
The capital occupies actual height.
If the top of the pilaster ends at 2200 mm and the capital is added above it, the cornice can no longer automatically remain at the same level.
Various solutions are possible:
- the capital is entirely below the cornice;
- the cornice runs along its upper part;
- part of the capital is overlapped by the frieze;
- the capital is part of the entablature composition.
But any option requires a dimensional chain.
Therefore, A must be checked relative to:
- façade heights;
- the top edge of the cabinet;
- the cornice mark;
- ceiling;
- the remaining frieze;
- adjacent sections.
A large capital above a low door can visually “eat up” the facade, even if it technically fits.
Where furniture capitals are used
Built-in wardrobe
A common scenario is two decorative verticals at the edges of the composition.
System:
left pilaster → capital → top cornice ← capital ← right pilaster.
Here, symmetry and equal height on both sides are especially important.
Library
In a multi-section bookcase, the verticals can repeat between modules.
Capitals set the rhythm along the top line and can work either only at the edges of the entire composition or above several uprights.
Classic kitchen
Capitals are appropriate near tall cabinets, tall wardrobes, hood surrounds, and other vertical accents.
Here, you need to carefully check the opening of the fronts and the proximity to the top cornices.
Showcase
A decorative upright is often fully visible, so any mismatch between the width of the pilaster and the capital is more noticeable.
Furniture Portal
This is the most systematic case: the pilaster, capital, and cornice are perceived as a single architectural frame.
This is exactly where it is easiest to see why the capital cannot be chosen separately.
Capital and furniture cornice: where the junction line runs
The upper cornice must have a clear connection with the capital.
In practice, one of the following scenarios must be chosen:
- the cornice runs strictly along the top of the capital;
- partially overlaps it;
- adjoins the side part;
- is located higher, via a frieze or an intermediate element;
- has its own projection that visually continues the capital.
No option can be declared universally correct.
The correct one is the one that:
- is coordinated according to the actual geometry;
- repeated identically across all furniture;
- does not conflict with the fronts;
- described in the drawing.
For the linear part of the assembly, you can use a ready-made Wooden trim, but its profile and commercial length must also be included in the BOM.
Capital and door: we check not the picture, but the opening trajectory
The door is closed — everything looks good.
The door opens — real mechanics appear.
Check:
- top clearance;
- protrusion C;
- cornice projection;
- hinge position;
- the direction of opening;
- adjacent facade;
- the handle, if it is close to vertical.
For a hinged front, not only its position in the closed state matters, but also the space it occupies during movement.
Conditional check:
door swing envelope ↔ capitel projection ↔ cornice projection.
If these zones intersect, the assembly must be changed before production.
Why a large capital above a narrow section requires special checking
A product's size cannot be assessed on its own.
Three relationships need to be considered:
capital width / pilaster width
capital width / section width
capital height / facade height
Imagine a narrow bookcase section. Even a capital carefully matched to the pilaster may visually appear too heavy relative to the door or open niche.
This does not mean that a large element is "wrong." Perhaps it is exactly what is needed for an accent central portal.
But then the neighboring sections are better kept more restrained.
The architectural rhythm of furniture is built by size relationships, not by beautiful details individually.
One wardrobe, two capitals: how to design a symmetrical unit
If the portal is symmetrical and one SKU is used:
CAP-01 × 2
In the drawing, both positions have the same:
- mark;
- orientation;
- the width of the vertical;
- the depth;
- connection with the cornice;
- finishing.
If the carved pattern has a pronounced direction, you need to check separately whether the item is truly symmetrical or whether there is a mirrored logic.
You should not automatically assume that any capital is "identical on the left and right" just because the specification lists one SKU.
First, the actual geometry of the specific product is checked.
Multiple library sections: how not to turn the top into a palisade of decor
Multi-section furniture has at least two workable strategies.
Capitals only at the edges
The composition is calmer.
The internal verticals remain subordinate, while the outer portal forms the overall frame.
A capital above each vertical
The rhythm becomes more architectural and richer.
Such a solution may be appropriate for a large library, especially if the sections are identical.
But the more repeating capitals there are, the more noticeable any error becomes:
- different level;
- uneven spacing;
- difference in the width of the verticals;
- shift of the cornice.
Therefore, in a series it is better to use a standard unit and repeat one approved SKU.
When CAP-01 and CAP-02 are needed in one project
Several SKUs are justified if they have a clear role.
For example:
CAP-01— outer portal posts;CAP-02— internal library dividers.
Or:
- large capital for the central block;
- a more restrained one — for the side sections.
It is bad when different capitals appear because “that is how it turned out during procurement.”
The difference must be part of the composition and the BOM.
Rectangular, square, and volumetric form: first the junction, then the style
A flat furniture pilaster naturally combines with a capital that has a clear rear mounting plane and a frontal connection to the vertical.
Useful for such tasks rectangular capitals.
Square and more voluminous forms require a different check.
If the vertical element is truly voluminous — for example, a column or a post with four visible sides — the form can be logical.
But if a deep voluminous capital is placed on a flat side panel of a cabinet, you need to understand how it terminates at the side.
On the front, everything may look convincing. On the side view — it does not.
Carved or geometric capital
A carved capital works through relief and ornament.
A geometric one — through proportion, planes, and pure form.
There is no need to choose between them as between “better” and “worse.”
Look at the entire furniture system.
If the facades already have:
- a complex panel;
- active molding;
- carved overlays;
- expressive handles,
another rich carved detail can make the top too heavy.
If the rest of the furniture is calm, the capital can become the main accent.
The ornament of the capital should speak the same language as the rest of the decor
A floral ornament next to a geometric frame is possible, but the transition must be deliberate.
It is convenient to look at repeated motifs:
- acanthus and other plant elements;
- volutes and scrolls;
- geometric steps;
- radiused transitions;
- symmetrical axial motifs.
If the capital is complex, the adjacent wooden rosette or the overlay can be calmer.
Decor does not have to be identical. It must be compatible.
How not to overload a furniture portal
There is a simple test.
Remove one secondary element from the visualization and compare the composition.
If, after removal:
- the structure reads better;
- the pilaster does not lose its termination;
- the cornice remains connected to the vertical;
- the main accent is preserved,
secondary decor may not be needed.
In classic furniture, a large number of details does not by itself create convincing architecture.
Hierarchy works more effectively:
main upper node → verticals → secondary overlays → handles.
The capital usually belongs to the first level, so its scale sets the tone for the rest of the decor.
Beech or oak: the capital material must match the production logic
The choice of material is not only about appearance.
Beech
It may be convenient in projects where opaque finishing is planned and the natural wood grain is not the main effect.
Oak
It shows its best when the project preserves visible texture and uses tinting or a clear finish.
But the final decision must be made based on the specific SKU and the workshop's technology.
You cannot automatically assume that any product is available in all materials.
The material must be specified in the BOM as part of an approved item.
A capital for enamel and a capital for tinting are different working scenarios
If the furniture is painted with enamel, the workshop can use the ready-made carved geometry and then include the capital in the overall painting cycle.
Chain:
finished part → preparation → single painting together with the pilaster and cornice.
With a clear or tinted finish, you need to look more carefully at:
- breed;
- pattern;
- adjacent cornice;
- pilaster;
- facades;
- shade of the sample.
Even the same stain can be perceived differently on parts with different relief: recesses stay darker, while protrusions catch more light.
That is why a physical sample is more valuable than a color square on a screen.
When it is worth ordering one capital before launching the entire furniture
A new SKU is better to check physically if:
- the capital is large;
- the relief is deep;
- the pilaster is narrow;
- the cornice is complex;
- the facade passes close;
- the material is planned to be tinted;
- the workshop is working with this part for the first time.
A single sample capital lets you check not the product "in general", but specifically your assembly.
You can attach it to the pilaster template, add a section of cornice, and immediately see what is hard to assess on a separate card.
A 1:1 test assembly is more useful than yet another render
Assemble a fragment:
pilaster + capital + section of cornice.
You don't have to make the entire cabinet.
To check, the real geometry of the upper assembly is enough.
Check:
- side protrusion;
- the depth;
- joint line;
- cornice position;
- free space of the facade;
- light and shadow of the relief;
- quality of the future finish.
If the joint is complex, add the door template in the open position.
Such a mock-up quickly shows whether there is a physical conflict.
How to record a capital in a furniture drawing
Not:
classic capital
But:
CAP-01 → STAVROS → SKU → A/B/C → Material
A short code can be left on the exploded view CAP-01.
In the specification, it is fully expanded.
Alongside it, the following must exist:
PIL-01
and:
CRN-01.
Then the upper joint reads as a system.
If the same SKU is repeated across multiple cabinets, the Project Code can be retained, while the quantity is aggregated in the BOM.
Furniture portal BOM
Example structure:
| Code | Element | SKU | Material | Qty |
|---|---|---|---|---|
| PIL-01 | Pilaster | specific | Beech | 2 |
| CAP-01 | Capital | specific | Beech | 2 |
| CRN-01 | Cornice | specific | Beech | By cutting |
| DEC-01 | Overlay | specific | Beech | 2 |
If necessary, the following are added:
- Finish;
- Room / Furniture Item;
- Sample Status;
- Revision;
- URL.
It is better not to combine the capital and the pilaster in one line portal — 1 set, if they are purchased separately.
Why the capital and the pilaster should be specified on separate lines
Architecturally, this is one assembly.
For purchasing — two items.
Separate lines allow you to:
- recalculate the quantity;
- replace only the capital;
- reorder a single item;
- check the price;
- track stock levels;
- link a separate SKU.
If a project has ten identical library sections, the pilaster and capital may have different quantities due to the layout. A shared "set" will hide this.
What to do if a ready-made capital doesn't fit the size
Don't try to arbitrarily scale a carved part.
For a finished product, Scale in CAD creates geometry that doesn't exist in the item.
The best order of solutions is:
- check another SKU;
- change the width of the furniture pilaster;
- reassemble the cornice assembly;
- change the composition;
- only then consider custom manufacturing.
Sometimes it is easier to add 10–20 mm to the width of the vertical element at the drawing stage than to commission a new carved part specifically for one cabinet.
But if this breaks the facade grid, a ready-made capital may indeed be an unsuitable solution.
When custom manufacturing is justified
Custom development makes sense when:
- a unique historical profile is needed;
- exact reproduction of existing furniture is required;
- the width does not match any ready-made SKU;
- an original ornament is needed;
- the capital is a central part of your own furniture product;
- it is impossible to adapt the pilaster and cornice to a ready-made part.
This is a normal scenario.
The purpose of the article is not to force the workshop to use a ready-made capital at any cost.
First, the catalog is checked. If the ready-made geometry solves the task, it saves development effort. If not, custom becomes justified.
What to do when replacing a SKU after furniture approval
Replacing a capital is not just a new procurement line item.
The following are rechecked:
- A;
- B;
- C;
- pilaster width;
- cornice;
- door clearance;
- side protrusion;
- finish;
- quantity.
After replacement:
new SKU → drawing check → 1:1 check if needed → BOM revision → APPROVED.
If the old one CAP-01 designated one item, and the new one has a different geometry, the change must be recorded by a revision.
Otherwise, the drawing and the order begin to describe different components.
Furniture maker's final checklist
Before launching a wardrobe, kitchen, or bookcase into production, check:
- the actual capital SKU is selected;
- A/B/C are transferred from the product card;
- width B is coordinated with the pilaster;
- depth C is verified in the side section;
- height A is coordinated with the cornice;
- the top horizontal line is drawn;
- the door gap is checked;
- the opening trajectory does not conflict with the decor;
- symmetric capitals have the same elevation mark;
- material is defined;
- finish defined;
- the ornament is coordinated with the adjacent decor;
- Project Code assigned;
- the pilaster, capital, and cornice have separate BOM lines;
- sample / mock-up completed, if needed;
- status = APPROVED;
- revision is up to date.
If at this stage the question "which capital will we install later?" is still being asked, the upper assembly is not finished.
How to buy furniture capitals for a project
Purchasing should be the final stage of the design decision.
First:
PILASTER WIDTH → CAPITEL SKU → A/B/C → CORNICE → DOOR CLEARANCE → 1:1 TEST → BOM → APPROVED.
Then:
Qty → availability → order.
Use the section for selection furniture capitals, and check the adjacent parts of the system in the categories pilasters and columns, wooden moldings and cornices и wooden trim.
If the project is rich in carved decor, it makes sense to check the overall Carved wooden decoration and order Product samples, when physical verification of the material and finish influences the decision.
The main principle for a furniture maker is simple:
the capital is chosen not after the cabinet is manufactured, but before the final calculation of the upper assembly.
Then the pilaster, capital, cornice, and facade exist in the project as one coordinated system, and in production all that remains is to accurately reproduce the already verified geometry.