Article Contents:
- Confirmed specifications of C.VRS-062
- Exact composition of set C.VRS-062
- Three layout scenarios for one set
- What is C.VRS-062
- Why you cannot choose a layout based only on a photo
- Why the composition must be checked before painting
- How to determine the center of the surface
- How to make paper templates
- How to check the full dimension of 2300 mm
- Why moldings are supplied with a margin
- How to read a two-zone composition
- C.VRS-062 on a wide furniture door
- C.VRS-062 on two wardrobe doors
- C.VRS-062 for a built-in library
- C.VRS-062 on a sideboard or display case
- C.VRS-062 for a kitchen portal
- C.VRS-062 on an interior door
- C.VRS-062 on a double door
- How to account for door handle and lock
- Installation of decor before or after hanging the door
- C.VRS-062 inside the wall frame
- Panel above the console
- Composition between two sconces
- Composition above the headboard
- Overlays on the sides of the mirror
- How to build a frame for a ready-made set
- Vertical Layout
- Can a horizontal layout be made
- Closed symmetrical composition
- Open composition
- How to direct a plant ornament
- How not to confuse top and bottom
- How to mark paired overlays
- How to repeat the composition on several facades
- How to account for inter-facade gaps
- How to account for the panel
- How to account for hinges
- How to check the scale on the wall
- C.VRS-062 or C.VRS-060
- C.VRS-062 or C.VRS-064
- When to watch C.VRS-065
- When is the best time to buy individual overlays
- Oak for C.VRS-062
- Beech for C.VRS-062
- Oak or beech for furniture
- Can oak overlays be combined with MDF
- Enamel or tinting
- How to avoid flooding the thread with enamel
- Patina on carved overlays
- Golden accents
- Marking with a laser level
- Installation on MDF
- Installation on solid wood
- Installation on painted wall
- Can it be attached only with glue
- How to hold the element until it dries
- How to remove excess glue
- How to close the installation joint
- Can the trims be removed
- How to replace one damaged part
- How to store the kit before installation
- How to accept a kit upon delivery
- Why one set is better than a random assortment
- How not to confuse a set with a single trim
- Mistake: considering 475 × 2300 mm as the box size
- Mistake: using the old URL
- Mistake: considering the set as a ready-made assembled panel
- Mistake: trimming carved modules
- Error: gluing parts one by one without a template
- Mistake: not considering the handle
- Error: crossing the sash joint
- Error: not accounting for panel drop
- Error: mixing oak and beech
- Error: painting elements on different days without a sample
- Error: ordering without a drawing
- Error: considering grinding as a finished coating
- Error: using outdoors without confirmation
- Error: making the panel too tight
- Error: filling missing elements with random overlays
- Who suits C.VRS-062
- Who the kit may not suit
- Practical choice: tall wardrobe door
- Practical choice: built-in library
- Practical choice: white interior door
- Practical choice: double door
- Practical choice: panel above the console
- Practical Choice: Boiserie in the Living Room
- Practical choice: commercial interior
- What not to do from scratch
- How to buy C.VRS-062 on STAVROS
- What to check before payment
- How to choose molding for C.VRS-062
- How to choose glue and materials
- Where to see painting recommendations
- How to design a doorway entirely
- How not to overload the interior
- How to save project data
- What to buy together with C.VRS-062
- How to check the lower module N.VRS-003
- How to check the upper module on a low ceiling
- How to align C.VRS-062 with the ceiling cornice
- How to choose a background for an oak composition
- How to choose a background for beech under enamel
- How to calculate the number of sets for a series of facades
- How to prepare a technical assignment for an installer
- How to accept a finished panel after installation
- How to check C.VRS-062 on a narrow panel
- How to prepare for a repeat order
- Final check before placing an order
- FAQ: questions about the C.VRS-062 set
- What is included in the C.VRS-062 set?
- How many items are included in the set?
- What is the overall size of the composition?
- What type of wood is the set made from?
- What to choose — oak or beech?
- Can the C.VRS-062 be used on a cabinet?
- Will the set fit an interior door?
- Can it be mounted on a wall?
- Do I need to use all the elements at once?
- Can I buy the parts separately?
- How to make a symmetrical layout?
- How to account for a furniture or door handle?
- Do I need to make paper templates?
- Can parts be painted before installation?
- Which glue is suitable for wooden overlays?
- Is mechanical fixation necessary?
- Which URL for C.VRS-062 should be used?
- Where can I see the drawing?
- How is the kit supplied?
- What is the production time?
- Can the kit be split between two doors?
- Can C.VRS-062 be installed outdoors?
- Where to buy C.VRS-062?
- Can I order a layout design?
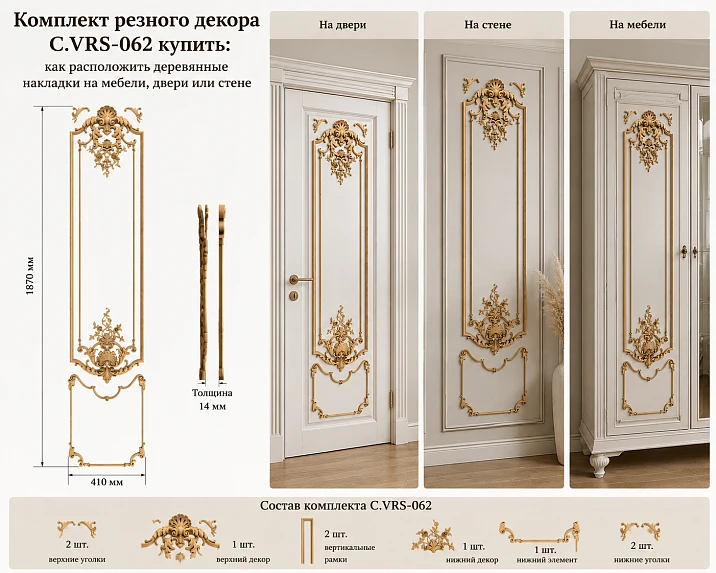
It is worth buying the C.VRS-062 carved decor set for a project where one overlay is not enough, and assembling a composition from random parts is risky. The set combines large floral elements, paired small overlays, and two types of wooden molding. In the original layout, they form a tall panel measuring approximately 475 × 2300 × 22 mm, so they work especially expressively on a tall furniture section, door panel, or wall.
Buy the C.VRS-062 decor set can be made from beech for enamel or oak for tinting, with "Standard" or "Prestige" sanding. The card confirms that the set does not come as a finished panel: the parts are supplied disassembled, uncut, and unglued. The moldings have elongated shoulders and extra length so that the craftsman can trim them to the actual field.
The buyer's main task is not just to choose a beautiful pattern, but to place 15 physical elements without skew or random gaps. To do this, measure the free field, check the composition against the drawing, make paper templates, mark the central axis, and only after a dry fit proceed to painting and fastening.
On a tall furniture door, C.VRS-062 forms a vertical architectural center. On an interior door, the full size may be larger than the available panel, so the layout is checked against the actual door leaf and decorative details are not shortened by eye. On a wall panel, the set can be placed entirely inside a boiserie or used as the basis for a design panel above a console, between sconces, or on the sides of a mirror.
Short answer. C.VRS-062 is suitable for a buyer who needs a ready-made set of wooden overlays with vertical symmetry, large upper and lower ornaments, and a frame of moldings. The full product composition is specified as 475 × 2300 × 22 mm.
Before installation, print the diagram, check the 15 elements, make a full-size layout, and check handles, locks, facade joints, sockets, and the molding frame. Do not glue parts one by one without checking the entire panel.
Buy C.VRS-062 kit View all decorative overlays Select molding for frame See door decor Order layout design project

Confirmed specifications for C.VRS-062
| Parameter | Confirmed data | What this means for the project |
|---|---|---|
| Article number | C.VRS-062 | Specification requires full article number with dots and hyphen |
| Product type | Carved decor kit with overlays and moldings | This is a composition assembly set, not a single ready overlay |
| Product layout dimensions | 475 × 2300 × 22 mm | A high free field is required; door or facade dimensions are checked before ordering |
| Materials | Beech or oak | Beech is chosen for opaque enamel, oak for tinting |
| Sanding | "Standard" or "Prestige" | "Prestige" involves more detailed manual preparation |
| Preparation of beech | For enamel | Specific color and finished coating are ordered separately |
| Oak preparation | For tinting | Visible texture can be preserved after color sample approval |
| Delivery format | Disassembled, uncut, and unglued | Layout, molding trimming, and assembly are performed on site or in the workshop |
| Moldings | Supplied with allowance and extended arms | Length is adjusted to the approved layout |
| Average production time for made-to-order items | 5–10 days | Finishing, drying, delivery and installation are accounted separately |
| Mounting template | Not confirmed as a finished paper kit | A working template is created based on the drawing and actual parts |
| Fastening | Not confirmed as part of the set | Glue and mechanical fastening are selected based on the base and project |




Exact composition of kit C.VRS-062
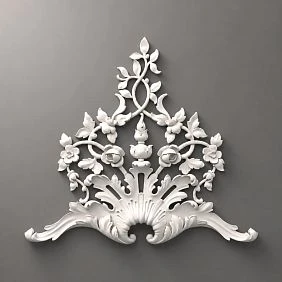
The drawing reveals the composition much more accurately than the general word "kit". The delivery includes 15 physical elements: five large decorative modules, six small overlays, and four molding segments. The dimensions in the table are given as they are indicated on the product diagram.
| Position | Size, mm | Quantity | Role in layout |
|---|---|---|---|
| N.VRS-001-1 | 635 × 168 | 1 | Upper central plant module |
| N.VRS-002-1 | 645 × 153 | 1 | Lower central plant module |
| N.VRS-001 | 355 × 342 | 1 | Upper architectural overlay |
| N.VRS-002 | 354 × 368 | 1 | Lower architectural overlay |
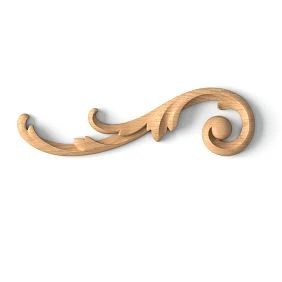
| N-362L | 49 × 26 | 2 | Left small connecting elements |
| N-362R | 49 × 26 | 2 | Right small connecting elements |
| N.VRS-002-4L | 109 × 91 | 1 | Upper left corner accent |
| N.VRS-002-4R | 109 × 91 | 1 | Upper right corner accent |
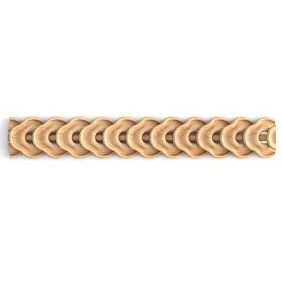
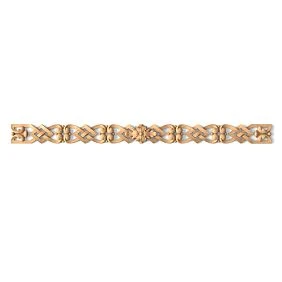
| MLD-001 | 10 × 6 | 2 slats, total 2.84 m | Inner thin frame |
| MLD-002 | 22 × 11 | 2 slats, total 3.7 m | Main outer frame |
| N.VRS-003 | 476 × 536 | 1 | Lower standalone decorative module |
| TOTAL | Product layout 475 × 2300 × 22 | 15 physical elements | High two-zone composition |
In the product table, the total width is specified as 475 mm, while in the drawing image, the overall dimension line A and module N.VRS-003 are labeled as 476 mm. The 1 mm difference does not affect the preliminary selection, but for frame production and precise fitting, the actual DWG must be used and the size confirmed before cutting the base.
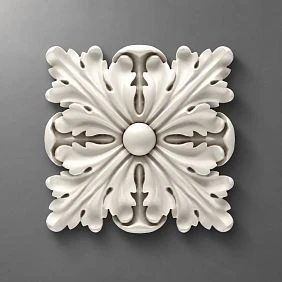
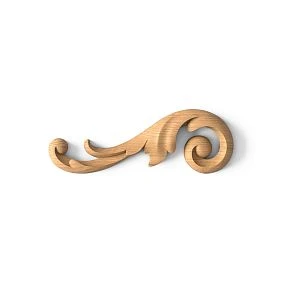
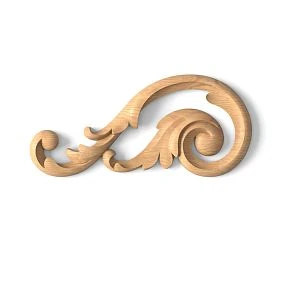
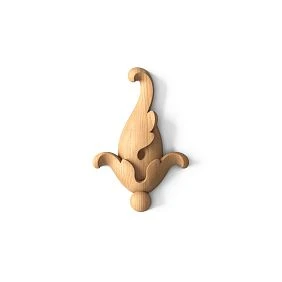
Our factory also produces:

Three layout scenarios for one set
| Criterion | Furniture front | Interior door | Wall panel |
|---|---|---|---|
| Suitable field | High leaf, library cabinet, central section | High panel or double-leaf composition after size check | Boiserie, narrow pier, panel above furniture |
| Main axis | Center of the facade or pair of doors | Center of the panel considering the handle and lock | Axis of the wall, furniture, mirror, or light fixtures |
| Main risk | Intersection of the gap, handle, or panel | Full dimension of 2300 mm does not fit in the working area | Panel is lost or conflicts with the cornice and rosettes |
| Moldings | Trimmed to the facade size according to the project | Must not interfere with the lock and edge of the panel | Connected to the general boiserie frame system |
| Finishing | In the color of the furniture or contrasting | In the color of the panel, casing, or with patina | In the color of the wall, wood, or as a separate panel |
| Practical check | Opening doors, hinges, handles | Lock, handle, panel, and door leaf transfer | Furniture, sconces, switches, and distance to ceiling |
Get Consultation
What is C.VRS-062
This is not one large overlay, but a construction kit of coordinated carved elements and two types of molding. The central modules define the top and bottom of the composition, small details connect the pattern to the frame, and the moldings form elongated fields.
This format is convenient when the buyer needs a complete ornamental language without having to independently search for a dozen similar details. However, the set is not assembled automatically: the lengths of moldings, intervals, and final boundaries depend on the actual surface.
The main advantage of a ready-made set is a unified style. The buyer's main responsibility is to transfer this style to the facade, door, or wall without distorting the proportions.
Why you cannot choose a layout based only on a photo
In a photo, a tall composition is compressed to screen size. The top module, long frame, and bottom panel all appear equally compact, although the full dimension reaches 2300 mm.
The image also does not show handles, door leaf joints, panel transitions, and actual distances to the ceiling. A detail may look great separately but not fit into the working area.
Before ordering, you need the surface dimensions and a full-size template. The photo helps understand the style, while the drawing and mockup help make a technical decision.
Why the composition needs to be checked before painting
Fifteen elements differ in role, direction, and quantity. Left and right parts can easily be confused if the set is unpacked without labeling.
Before priming, lay out the set according to the diagram and mark the back side with removable painter's tape. This way, after painting, it will be clear where the top, bottom, left, and right positions are.
If an element is missing or damaged, it is better to discover this before starting the finishing of the entire batch. After coating, handling claims and matching the color again become more difficult.
How to determine the center of a surface
The central axis is drawn along the clear field where the composition will be located. On a furniture door, this is not always the geometric center of the entire cabinet: the handle, panel, and paired door can shift the working area.
On the door, the axis is checked relative to the panel and frame molding. On the wall, relative to the console, mirror, sconce, or central section of the boiserie.
A laser line is needed not only during installation. First, paper templates are laid out along it to assess whether the pattern appears visually shifted.
How to make paper templates
Each large module is transferred to thick paper or cardboard according to the dimensions from the drawing. For moldings, strips with a width equal to their face cross-section are sufficient.
Templates are secured with painter's tape without glue and viewed from the working distance. The cabinet is viewed from the center of the room, the door from the corridor and the room, the wall from the main entry point.
The paper layout allows changing intervals and height without the risk of damaging furniture or finishes. After approval, the position is photographed and transferred to the working diagram.
How to check the full dimension of 2300 mm
A height of 2300 mm is suitable for a tall wall panel and a large furniture vertical, but may exceed the usable field of a standard door leaf.
Measure not the total height of the door or cabinet, but the free plane between frames, panels, handles, baseboard, and cornice. This is the field that should accept the decorative modules.
If there is no full space, you cannot simply cut a large overlay. It is permissible to change the length of moldings within the project, but restructuring the entire composition must be agreed upon separately.
Why moldings are supplied with a margin
MLD-001 and MLD-002 form straight sections of the frame, the length of which depends on the specific surface. The factory margin is needed for precise cutting and fitting.
The margin does not mean that any panel size can be obtained without restrictions. Large carved modules have fixed dimensions and set the minimum working field.
The cutting map is made after dry layout. First, the position of the overlays is determined, then the distances between the attachment points are measured, and only after that the moldings are cut.
How to read a two-zone composition
The upper part includes a large crowning ornament, an inner frame, and a lower floral module. Below is an independent module N.VRS-003 with its own frame logic.
Hierarchy must be maintained between zones: the upper elongated panel is perceived as the main one, the lower one as supporting. Randomly reducing the distance between them makes the pattern heavy.
On a furniture facade, the lower module may fall on the baseboard or panel. On a wall, its position is checked relative to the console and baseboard.
C.VRS-062 on a wide furniture door
The best furniture scenario is a tall door with a large flat field. The composition is placed along the central axis, and the moldings are trimmed to the actual height.
Before choosing, check the handle, hinges, edge of the facade, and the gap to the adjacent door. The carved element should not extend into the inter-facade seam or interfere with fingers.
For ready-made examples, you can select wooden overlays for the cabinet and compare the scale of the decor with real facades.
C.VRS-062 on two cabinet doors
Dividing one composition between two doors requires special care. The central joint will break the pattern each time it is opened.
If the project involves a paired layout, it is better to either repeat separate symmetrical compositions on each door or leave the central ornament on one fixed panel.
You cannot assume that the full set is automatically divided in half. First, create a facade layout and check each detail relative to the inter-door gap.
C.VRS-062 for built-in library
Tall bookcases provide sufficient scale for vertical design. The set can complete a central section, side panel, or decorative portal around shelves.
The ornament should not overlap the opening of glass doors and pull-out elements. Also check that the lower module does not align with the handle level.
Tinted oak ties the decor well with wooden shelves, while enameled beech allows for a uniform color with the built-in body.
C.VRS-062 on a sideboard or display cabinet
On a sideboard, the full dimension of 2300 mm rarely fits entirely, so the project often uses a large upper or lower module as part of the overall architecture.
Such a change cannot be made spontaneously. It is necessary to decide which elements preserve the completeness of the design and how the moldings close the frame.
Beneficial select decor for furniture facade and check if separate overlays are better for compact furniture.
C.VRS-062 for kitchen portal
The kit can be installed on a high side panel, decorative column, or portal around built-in appliances if the field is large enough.
Overlays should not be placed near areas of constant steam, heat, or frequent wet cleaning. The specific covering system must match the kitchen conditions.
In the kitchen, it is especially important to leave access to hinges, handles, and removable panels. The decor should not interfere with furniture maintenance.
C.VRS-062 on an interior door
The full product height of 2300 mm may exceed the standard door panel. Therefore, first measure the field between the top and bottom frame profiles, not the entire door height.
The handle, lock, and rebate area remain free. Even a thin overlay up to 22 mm thick changes the door relief and requires checking the opening.
Before designing, it is worth looking at examples of carved door decor and understanding how large elements work on tall panels.
C.VRS-062 on a double door
A double door allows creating a symmetrical pair, but does not necessarily require sharing one set. It is often neater to use two identical sets or separate elements on each leaf.
If one set is distributed between the panels, the central pattern must remain readable when the door is closed and not fall onto the rebate.
The number of sets is determined by the project. It cannot be automatically promised that one set is enough for two panels.
How to account for the door handle and lock
On the layout, not only the center of the handle but also the entire palm working area is marked. A protruding ornament near the handle can make the door uncomfortable.
The lock part and handle fasteners must not intersect with overlays or moldings. Drilling of hardware is performed before final installation of decor or according to an agreed sequence.
After a dry fit, the door is fully opened and checked to ensure the relief does not hit the casing, wall, or adjacent panel.
Installation of decor before or after hanging the door
On a removed panel, it is easier to lay out elements horizontally, hold them during gluing, and control the central axis.
However, a finished door with carved decor becomes more vulnerable during transport and hanging. Protruding leaves and curls need to be protected from impacts.
The master chooses the order. In any case, the hinges, lock, and geometry of the panel are checked before final fixation.
C.VRS-062 inside the wall frame
On the wall, the set unfolds most freely: a height of 2300 mm can be linked to a boiserie panel, a niche, or a high pier.
The moldings of the set form their own frame, but it needs to be coordinated with other lines of the room. Random profiles of a different scale should not appear nearby.
In this section you can view compositions for wall panels and evaluate the appropriate height, background, and distances.
Panel above the console
The lower edge of the composition should be connected to the furniture but not pressed against the countertop. A free field for lamps and decor is left between the console and the carving.
The central axis of the panel coincides with the axis of the console, mirror, or painting. With two sconces, the symmetry of the entire group is checked.
If the wall height is insufficient, a full set may overload the space. Then it is better to consider individual overlays from the category rather than artificially compress the panel.
Composition between two sconces
The fixtures create a strong frame around the decor. The distance between them should account not only for the total width of about 475–476 mm, but also for the side shadows from the relief.
A directional light beam can emphasize the depth of the carving or create overly harsh shadows. A test fitting is done with the evening lighting turned on.
Wiring, junction boxes, and sconce mounting hardware are marked on the wall before gluing the wooden elements.
Composition above the headboard
A tall panel can work in a bedroom if the ceiling and wall width allow for maintaining a free field. The carving should not hang over the bed so low that it creates a feeling of crampedness.
The center of the set is linked to the center of the headboard. Side fixtures, outlets, and switches are checked on the overall layout.
For a bedroom, a calm matte enamel or soft tinting without excessive contrast is more suitable.
Overlays on the sides of the mirror
One full C.VRS-062 is designed for a vertical central composition, not automatically for two side strips. Separation requires a separate design solution.
If the decor should surround the mirror, first choose its size and frame, then distribute suitable elements symmetrically.
Sometimes it is more rational to leave C.VRS-062 intact on the adjacent panel, and select separate overlays for the mirror.
How to build a frame for a ready-made set
The main frame is created from MLD-002, the inner one from MLD-001. The lengths are trimmed only after determining the position of the large overlays.
First, mark the outer dimension on the base, then the central modules, and only after them the straight sections. This order prevents a situation where the frame is assembled but the ornament does not fit into it.
The corners are mitered on a separate working segment and checked before installing the entire contour.
Vertical layout
The original scheme C.VRS-062 is built vertically. It emphasizes the height of the facade, door, or wall panel and works well on a narrow field.
The upper and lower modules must maintain a common center. The moldings connect them into an elongated architectural line.
The vertical layout should not be rotated 90 degrees without a new project: the direction of plant motifs and paired details will change the perception.
Can a horizontal layout be made
Technically, individual elements can be arranged differently, but the card shows a vertical two-zone composition.
Horizontal use will require a new balance, recalculation of moldings, and checking the direction of all leaves and curls.
If a horizontal composition is needed, it is safer to compare other sets or order a design rather than simply laying out vertical details along a wide wall.
Closed symmetrical composition
A closed layout keeps all elements within a single rectangular outline. It is suitable for furniture facades, doors, and boiserie panels.
This option looks cohesive and helps control margins to the edges. The main center is created by N.VRS-001-1 and N.VRS-002-1.
Before installation, ensure that the outer frame does not cross the panel or the technical gap.
Open composition
In an open layout, individual corner and plant elements may extend beyond the strict frame, creating a freer pattern.
This approach is suitable for a large wall but requires more free space and precise marking.
On a furniture door, an exposed layout is often dangerous: parts may approach the edge, hinges, or handle.
How to direct a plant ornament
Paired elements should mirror each other and support movement toward or away from the center of the composition, depending on the approved layout.
Left and right parts N-362 and N.VRS-002-4 cannot be swapped without visual inspection.
Before painting, lay them out on the layout and mark the back side so the direction is not lost.
How not to confuse top and bottom
The upper module has a crowning character and a more pronounced finish. The lower one supports the composition and connects it to a separate lower panel.
If the modules are swapped, the pattern will become visually heavy and lose architectural hierarchy.
A photo of the original layout should be near the workbench until assembly is complete.
How to mark paired overlays
First, draw the central axis, then mark equal distances to the left and right.
Paired elements are applied simultaneously. Marking one side followed by mirror transfer reduces the risk of accumulated error.
For several identical facades, make a rigid template rather than measuring each part anew.
How to repeat the composition on multiple facades
If C.VRS-062 is used on a series of cabinets or panels, the first layout becomes the reference.
Keep the distances, the position of the central axis, and the lengths of the moldings. It is better to order all kits in one batch and finish them together.
Even with identical facades, check each opening separately: furniture may have slight geometric deviations.
How to account for inter-facade gaps
No overlay should extend into the gap between doors. Otherwise, the doors will hit each other or the pattern will break.
The minimum offset is determined by the furniture design and the thickness of the relief.
On the paper template, mark not only the visible edge of the facade, but also the actual line of movement when opening.
How to account for the panel
On a frame-and-panel door or facade, the working plane may be located below the outer frame.
The overlay must have sufficient support on the reverse side. You cannot glue part of a part onto a drop without preparing the base.
If the relief crosses the panel, design a transition platform or choose a different layout.
How to account for hinges
The hinges are on the reverse side, but their cups, screws, and reinforcing zones affect permissible drilling locations.
The decor should not interfere with adjustment and removal of the door.
The mounting map is created together with the furniture documentation, especially for heavy, tall doors.
How to check the scale on the wall
A set with a height of 2300 mm almost reaches the height of many rooms. On a low wall, it may end up pressed against the ceiling and baseboard.
A full-size paper outline shows whether there is enough space at the top and bottom.
If there is little free space, it is better to choose a smaller set C.VRS-060 or C.VRS-064 after checking their cards.
C.VRS-062 or C.VRS-060
The customer can view another decor set C.VRS-060, if the scale and pattern of C.VRS-062 are not suitable.
You need to compare not only the appearance, but also the overall size, composition, material, number of elements, and trimming method.
You cannot transfer the configuration of one article to another based on photo similarity.
C.VRS-062 or C.VRS-064
Beneficial compare C.VRS-062 with set C.VRS-064 by height, width, and the nature of the central ornament.
Another set may better suit a low door, wide wall, or furniture section.
The final choice is made after a mock-up on the specific surface.
When to view C.VRS-065
For a large architectural composition, you can view the large decorative set C.VRS-065.
It should not be considered a direct replacement for C.VRS-062 without checking dimensions and composition.
The adjacent item is useful as an alternative if a different visual weight is required.
When it's better to buy individual overlays
The full C.VRS-062 is justified on a tall panel and in a project where a linked two-zone pattern is needed.
For a small door, dresser, or low wall, it is more rational to choose individual elements from the category.
You can Buy decorative furniture overlays and assemble a more compact composition.
Oak for C.VRS-062
Oak is chosen when you need to preserve a pronounced texture and achieve a translucent tint.
All elements of the set must be ordered simultaneously so that the shade and wood grain can be matched in one batch.
A test coating is performed on oak before processing the entire set.
Beech for C.VRS-062
Beech is suitable for opaque enamel and helps achieve a uniform color with the furniture front, door, or wall.
Under enamel, precise sanding and thin application of the coating are especially important to avoid losing the depth of the carving.
The actual shade and degree of gloss are approved on the sample.
Oak or beech for furniture
If the facade is veneered with oak and must retain its natural texture, the oak set looks more natural.
For a painted kitchen, cabinet, or MDF door, beech under enamel provides a more straightforward finishing route.
Before ordering, it is useful choose oak, beech, and surface preparation according to the project conditions.
Can oak overlays be combined with MDF
Yes, if MDF and oak are joined as a decorative system and the finish is coordinated.
Under a transparent tint, oak will remain noticeable against the painted MDF background. Under a covering enamel, the difference in materials visually decreases, but the preparation technology remains different.
Glue and primer are selected for both surfaces.
Enamel or tint
Enamel emphasizes the silhouette and allows all details to be tied to the color of the furniture or wall.
Toning preserves the oak texture and makes each leaf more material.
For a large composition, the solution is especially noticeable, so the test coating is evaluated from a distance, not just up close.
How not to flood the carving with enamel
Thick layers of primer and paint smooth out small veins and depressions.
The composition is applied evenly, controlling internal areas under side light.
After each layer, check for drips between leaves and curls.
Patina on carved overlays
Patina enhances the depth of the ornament and makes leaves, rosettes, and curls more noticeable.
On a large composition, the effect can easily become too contrasting, so first test one element or a separate sample.
The patina should be consistent in moldings, furniture, and adjacent decor, not look like random darkening.
Golden accents
Local gilding is only possible as a separate finishing project and is not automatically included in the product card.
It is better to highlight small relief peaks rather than covering the entire set without assessing the scale.
In a classic interior
Marking with a laser level
The laser sets the vertical and horizontal axes but does not replace measuring each element.
First mark the center, then the position of large modules, then small pairs and straight moldings.
If the surface has a slope or the door is installed unevenly, decide whether to align with the facade or the room.
Installation on MDF
MDF requires glue and fasteners compatible with its surface and finish.
If the facade is painted, check adhesion to the coating and the risk of it peeling off together with the overlay.
Mechanical fixation is not assigned universally: it depends on the facade thickness and the location of the hardware.
Installation on solid wood
The wooden base and overlays react to humidity, so a rigid connection must account for the properties of the materials.
The surface is cleaned, the markings are checked, and only then is the adhesive selected.
Points of possible mechanical fastening should not fall into thin petals and curls.
Installation on a painted wall
The adhesive will not adhere directly to the wall, but to a layer of paint or plaster.
If the coating is weak, it may come off along with the decor. The base is checked before installation.
For a large panel, the master evaluates the need for additional fixation and embedded elements.
Can it be mounted only with adhesive
The card does not confirm universal installation using only adhesive for any surface.
On a cabinet door, door, and wall, there are different loads and conditions. A large set includes long moldings and large overlays.
Adhesive can be part of the system, but the final decision is made by a specialist after checking the base.
How to hold the element until it dries
For lightweight parts, use painter's tape and temporary supports if the coating allows.
Large modules require reliable support that does not press on fine threads.
The fixing time is determined by the glue instructions, not by universal advice.
How to remove excess glue
Remove excess immediately using a method compatible with the glue and finish.
Do not spread the compound over porous wood or matte enamel.
Before installation, it is useful to test on an inconspicuous sample.
How to close the installation seam
A small seam can be finished with a suitable compound after full curing.
The filling should not cover the relief or change the color of adjacent areas.
On oak, the seam is more noticeable under a transparent finish, so precision fit is especially important.
Can the overlays be removed?
Removal depends on the glue, fasteners, and base. A fully glued part may peel off paint or veneer.
If the project involves restoration, the attachment method is planned in advance.
It is impossible to guarantee removal without a trace without a specific installation diagram.
How to replace one damaged part
The article number and size of the component are taken from the kit diagram.
The possibility of purchasing separately should be clarified with the manager; the product card does not guarantee automatic sale of each element.
The new part must match the installed composition in material, sanding, and finish.
How to store the kit before installation
Store elements in a dry room on a level surface and keep the factory packaging.
Thin curls are not loaded with other details, moldings are stored without bending.
After painting, a soft material that does not stick to the coating is placed between the elements.
How to accept a kit upon receipt
Check the overall article number, 15 elements, dimensions of large parts, four molding strips, and material.
Check left and right pairing, absence of chips, and condition of thin sections.
Before finishing, photograph the set and record any assembly issues.
Why one set is better than a random collection
In C.VRS-062, large and small parts are connected by ornament and scale.
A random selection may have different wood species, thread depth, and leaf direction.
A ready-made set reduces artistic errors but does not replace the project layout.
How not to confuse a set with a single overlay
The card shows the overall dimension of the entire composition, not the size of a single part.
The customer receives separate elements and moldings that still need to be trimmed and assembled.
The price and installation are calculated as a complete set work, not as gluing a single part.
Error: consider 475 × 2300 mm as the box size
This is the dimension of the product layout, not the packaging.
For delivery and storage, the actual format may differ because the set is supplied disassembled.
The delivery route is checked using packaging data when placing an order.
Error: use the old URL
The product has two addresses, but the new links in the article lead to the current section of carved decor.
The old path within solid wood products is not used in cross-linking.
Thus, the buyer and the search engine receive one consistent commercial route.
Error: consider the set as a ready-made assembled panel
The card directly indicates a disassembled, uncut, and unglued delivery.
The buyer needs layout, trimming of moldings, finishing, and installation.
If a fully finished panel is required, the scope of work is discussed separately.
Error: trim carved modules
Allowance is provided for moldings, not for all decorative elements.
Cutting a large overlay can destroy the ornament and symmetry.
Any modification of a carved module is agreed upon before work.
Error: glue parts one by one without a template
A slight offset of the first overlay accumulates and leads to frame skew.
First, the entire composition is approved, then the elements are fixed in the specified sequence.
Control lines remain visible until installation is complete.
Error: do not consider the handle
On furniture and doors, the user approaches the handle daily, so there should be a free field nearby.
A protruding sheet or molding can interfere with the grip and quickly become damaged.
The handle is shown on the layout in full size before the decor is approved.
Error: crossing the sash joint
A central ornament that falls into the inter-facade gap breaks every time it is opened.
Even if the pattern looks beautiful in the closed position, operation will be inconvenient.
The composition is shifted to one sash, or two independent symmetrical groups are created.
Error: do not account for the panel drop
The reverse surface of the overlay requires support, and the panel drop creates a void.
Attempting to fill it with a thick layer of glue does not replace a properly prepared surface.
Before ordering, check the door or facade profile in cross-section.
Error: mixing oak and beech
The species differ in texture and preparation. Under a transparent finish, the mixing will be noticeable.
All elements of one panel are best ordered in a single material and from the same batch.
If the furniture is painted with enamel, the difference still requires a coordinated primer system.
Error: painting elements on different days without a sample
Even the same color can differ by batch, number of coats, and gloss.
Large upper and lower modules particularly clearly show the difference.
The approved color sample and unified technology maintain completeness.
Error: ordering without a drawing
The photograph does not reveal component dimensions, molding lengths, or the direction of paired parts.
A drawing is needed for templates, cutting, and checking the free field.
The document version is saved together with the specification and order date.
Error: considering sanding as a finished coating
"Standard" and "Prestige" describe the quality of surface preparation.
They do not mean that the set is already painted, tinted, or varnished.
The finish is calculated and ordered separately.
Error: using outdoors without confirmation
The card describes interior use on furniture, doors, and walls.
Outdoor use, moisture-resistant adhesive, and warranty for the facade are not confirmed.
For an outdoor project, separate technical consultation is required.
Error: making the panel too tight
If the edge parts almost touch the molding, handle, or ceiling, the pattern looks cramped.
A free field allows you to see the intricate carving and facilitates installation.
The panel size should include not only the dimensions of the set but also visual margins.
Error: filling in missing elements with random overlays
A similar leaf or curl from another collection may differ in depth and scale.
If the completeness is compromised, first clarify the possibility of ordering the original component.
Random replacement is only permissible as a deliberate new project.
Who C.VRS-062 suits
The set suits the owner of a tall cabinet, large door, library, or wall panel with sufficient free space.
It is useful for a designer or furniture maker who needs a ready-made ornamental composition of oak or beech.
The set works particularly convincingly in classic and neoclassical interiors.
Who the set may not suit
For a small chest of drawers, low door, or narrow panel, the 2300 mm size is excessive.
A buyer who wants a single compact overlay without cutting moldings or assembly should choose a separate element.
A modern minimalist interior may also require more subdued decor.
Practical choice: tall cabinet door
Measure the net height and width of the facade, mark the handle and gaps.
If the full dimension fits with margins, use the original vertical layout.
If not, do not reduce large overlays: compare another set or order a project.
Practical choice: built-in library
The central section can be finished with an oak set tinted to match the shelves.
Check the glass doors, cornice, and handle level.
For side sections, the composition is repeated only if there is sufficient width and overall symmetry.
Practical choice: white interior door
Beech under enamel allows for a uniform light color.
The full template shows whether a two-zone composition fits into the panel.
The handle and lock are installed taking into account the relief, and the door is protected during transport.
Practical choice: double door
First, decide whether you need two complete sets or a separate new layout.
One set cannot be automatically split in half.
Symmetry is checked with the panels closed and open.
Practical choice: panel above the console
The center of C.VRS-062 is connected to the center of the furniture and lights.
The wall height should accommodate 2300 mm and leave air up to the cornice.
If the ceiling is low, choose a smaller set or individual modules.
Practical choice: boiserie in the living room
The set can be built into the central panel, repeating the profile of adjacent frames.
A color matching the wall makes the carving calmer, while oak tinting turns it into an independent wooden panel.
The overall project should include the baseboard, cornice, and furniture.
Practical choice: commercial interior
In a hotel, restaurant, or showroom, the decor must withstand regular cleaning and occasional touches.
Place the overlays outside narrow passages and cart areas.
Keep the component SKUs and finish recipe for future repairs.
What not to do from scratch
The buyer does not need to independently search for top, bottom, and paired elements, select two moldings, and achieve a unified pattern.
C.VRS-062 already combines these parts into one collectible composition.
The work focuses on measuring, cutting straight planks, finishing, and installation.
How to buy C.VRS-062 at STAVROS
Open the product page and select beech or oak, "Standard" or "Prestige."
Download the drawing, check the composition of 15 elements, and prepare the surface dimensions.
For complex layouts, you can order layout of C.VRS-062 kit before production is finalized.
What to check before payment
The order records the article, material, finish, number of kits, and deadline.
Finishing, component purchase options, packaging, and installation services are specified separately.
Current payment and delivery terms are checked immediately before ordering.
How to choose a molding for C.VRS-062
The kit already includes MLD-001 and MLD-002, so the outer frame should not be replaced with a random profile without reason.
If the panel is to continue into boiserie, adjacent moldings are selected by depth and style, but standard elements are not substituted.
For the overall system, you can buy a wooden molding for the frame after profile verification.
How to choose glue and materials
Glue is chosen based on the base: MDF, solid wood, painted door or wall require different solutions.
Primer, enamel, tinting and protective finish must be compatible with the selected wood species.
After the technology is approved, you can buy glue and materials for finishing the overlays.
Where to see painting recommendations
General rules help to understand the order of dust removal, priming, matting and finishing.
But the specific system always depends on the coating composition and operating conditions.
Useful recommendations for painting and installation, which supplement the project scheme.
How to design a doorway as a whole
Overlays on the canvas should match the casing, portal, and wall.
If the door becomes the main classical element, the composition should be seen together with the opening.
Additional material explains how to design a doorway with wooden elements.
How to avoid overloading the interior
The large set already contains rich floral carving and a double frame.
It is better to use calmer panels, furniture facades, and moldings nearby.
Ideas for using decorative elements help assemble carved decor without visual overload.
How to save project data
Save the drawing, list of 15 elements, lengths of trimmed moldings, layout photos, and finish recipe.
If the panel needs to be repeated, this data will be more important than the overall photo.
Before reordering, the card and available configuration are checked again.
What to buy together with C.VRS-062
The set already includes carved modules and two types of molding, but finishing materials, layout design, and adjacent interior elements may be needed for a complete project. All additional items are selected after checking the size and purpose.
| What to add | Why | For which scenario | What to Check | Link |
|---|---|---|---|---|
| C.VRS-062 | Get a complete set of 15 elements | High facade, door, or wall panel | 475 × 2300 × 22 mm, material and sanding | set of wooden overlays made of oak or beech |
| Overlay category | Select smaller or individual elements | Chest of drawers, narrow door, low panel | Size, ornament, and thickness | view all carved decor |
| C.VRS-060 | Compare another set | When C.VRS-062 is too large or does not match the pattern | Composition and dimensions of the card | view another decor set C.VRS-060 |
| C.VRS-064 | Evaluate alternative composition | Door or wall panel of a different scale | Pattern and proportions | compare C.VRS-062 with set C.VRS-064 |
| C.VRS-065 | Consider a larger decor | Spacious classic interior | Free space and composition | view the large decorative set C.VRS-065 |
| Door solutions | Check the decor on the canvas | Interior and double-leaf door | Handle, lock, and panel | looking at examples of carved door decor |
| Solutions for cabinets | Assess the scale on furniture | Library, wardrobe, display case | Leaves and inter-facade gaps | select wooden overlays for the cabinet |
| Boiserie | Link the panel with wall frames | Living room, study, hallway | Cornice, baseboard, and axes | view compositions for wall panels |
| Chests of drawers and cabinets | Understand when smaller decor is needed | Low furniture fronts | Do not try to fit the full set | select decor for furniture facade |
| Moldings | Continue the frame system | Boiserie and furniture portal | Section and depth of standard MLD | buy a wooden molding for the frame |
| Materials | Perform finishing and installation | Beech for enamel or oak for tinting | Compatibility with the base | buy glue and materials for finishing the overlays |
| Design project | Get an exact layout | Double-leaf door, cabinet series, boiserie | All dimensions and axes | order layout of C.VRS-062 kit |
How to check the lower module N.VRS-003
The lower module has its own frame shape measuring 476 × 536 mm and should not be perceived as a random extension of the upper panel.
On furniture, its position is checked relative to the base, drawers, and bottom handle. On the wall — relative to the console, baseboard, or furniture.
If the lower zone does not fit, you cannot simply reduce the carved frame. You need to choose a different layout or revise the project composition.
How to check the upper module on a low ceiling
The upper ornament visually expands due to paired corner details and a crowning element.
Even if the overall dimension technically fits, too small a gap to the ceiling makes the composition heavy.
On the wall, a mockup with a real cornice is needed, and on furniture — with the top rail or cabinet crown.
How to coordinate C.VRS-062 with a ceiling cornice
Large floral carving and a developed ceiling cornice can compete in scale.
It is better to leave a calm field between them or choose a cornice with a less active pattern.
Color and patina are also coordinated: two different golden or aged effects next to each other look random.
How to choose a background for an oak composition
An oak set is clearly readable on a calm painted panel, a veneered facade of a similar tone, or a contrasting dark background.
Too active wood texture of the base can conflict with small leaves.
A test fragment is evaluated in daylight and evening lighting.
How to choose a background for beech under enamel
Beech overlays can be painted to match the color of the door, furniture, or wall, creating a relief that is read through light and shadow.
A contrasting color makes every detail more noticeable and requires particularly precise marking.
On a large composition, a matte or calm semi-gloss finish often looks lighter than high gloss.
How to calculate the number of sets for a series of facades
One C.VRS-062 is designed for one complete composition. For several identical facades, the number of sets is determined by the number of repeats.
You cannot assume that leftover moldings will automatically form a second set: large overlays are presented one at a time.
For a series, it is useful to first assemble a control facade, then order the remaining sets according to the approved scheme.
How to prepare a technical specification for an installer
The document specifies the article number, composition of 15 elements, material, finish, surface dimensions, and the approved layout.
Add photos of dry fitting, center axes, molding cut lengths, and locations of handles, sockets, or hardware.
This way, the installer works according to a specific scheme, rather than reconstructing the composition from a photo in the card.
How to accept a finished panel after installation
Check symmetry, vertical alignment, equal gaps, quality of corners, and absence of glue on the front surface.
Doors and facades are opened several times to ensure the decor does not touch adjacent elements.
On the wall, the panel is examined from the main entry point and with the lighting on.
How to check C.VRS-062 on a narrow panel
A width of about 475–476 mm requires not only a technical match but also side margins.
If the decor almost touches the edges, thin elements look cramped and are more difficult to install.
On a narrow panel, it is more rational to choose separate overlays or a different set than to reduce the gaps to zero.
How to prepare for a repeat order
Save a photo of the finished layout, the lengths of the moldings after cutting, the article numbers of all components, and a sample of the finish.
When repeating on another object, the surface dimensions are checked anew.
Even the same set may require a different length of straight sections and a different installation scheme.
Final check before order placement
The buyer must know the exact surface size, chosen layout, material, finish, and installation method. If at least one parameter remains undefined, first complete the template and technical specification. This is cheaper and more reliable than adjusting an already painted set after trimming the moldings.
Before payment, double-check the drawing, composition, card URL, and current production deadlines.
FAQ: questions about the C.VRS-062 kit
What is included in the C.VRS-062 kit?
Five large decorative modules, six small paired overlays, and four molding strips of two profiles. A total of 15 physical elements.
How many elements are included in the set?
According to the current scheme — 15, if counting each strip and each paired part separately.
What is the overall size of the composition?
The product table indicates 475 × 2300 × 22 mm. On the graphic scheme, the total width is labeled as 476 mm, so an up-to-date DWG is needed for precise cutting.
What type of wood is the kit made from?
made of beech for enamel or oak for tinting.
What to choose — oak or beech?
Beech is suitable for opaque enamel, oak for finishes with visible texture.
Can the C.VRS-062 be used on a cabinet?
Yes, if the tall leaf or panel accommodates the dimension and the decor does not intersect handles, hinges, and gaps.
Will the interior door set fit?
Only after measuring the free panel. The full dimension of 2300 mm may not fit on a standard door leaf.
Can it be installed on a wall?
Yes, inside a boiserie or as a standalone panel, if the base and mounting scheme are designed for it.
Do I need to use all elements at the same time?
The original composition is designed as a set. Changing the composition is only possible after a design review.
Can I buy parts separately?
The card does not guarantee automatic sale of each component. The possibility needs to be clarified with a manager.
How to make a symmetrical layout?
Draw the central axis, install the large modules, then simultaneously mark the left and right parts.
How to account for a furniture or door handle?
Mark not only the center of the handle, but also the palm working area and the opening trajectory.
Do I need to make paper templates?
Yes. They help check the full size, intervals, and placement without damaging the surface.
Can parts be painted before installation?
Yes, it is more convenient to apply the main finish in advance, keeping the back surface compatible with the adhesive.
What glue is suitable for wooden overlays?
The type depends on the base, coating, and conditions. A universal composition cannot be recommended without testing.
Is mechanical fixation required?
Possible for large elements, but it is determined by the master based on the base and thickness of the parts.
Which URL should I use for C.VRS-062?
In the new links, a card is used inside the /products/reznoy-dekor/nakladki/ section.
Where can I see the drawing?
The product card includes a DWG file and images with composition and dimensions.
How is the kit supplied?
Disassembled, uncut, and unglued. Moldings come with extra length.
What is the production lead time?
The card shows an average lead time of 5–10 days for ordering.
Can the kit be split between two doors?
Not automatically. You need to check if the pattern is preserved and if the inter-fascia joint overlaps.
Can C.VRS-062 be installed outdoors?
Outdoor use is not confirmed. The article considers furniture, doors and walls indoors.
Where to buy C.VRS-062?
In the main product card of the kit on the STAVROS website.
Can I order a layout design?
Yes, the design service is especially useful for doors, facade series and wall panels.
Result: how to turn C.VRS-062 into a finished composition
C.VRS-062 is not a single overlay, but a kit of 15 elements designed for a high vertical layout. The product table indicates dimensions of 475 × 2300 × 22 mm, and the composition includes large plant modules, paired small parts and moldings MLD-001 and MLD-002.
For furniture, first check the facade, handles, hinges and joints. For the door, check the working panel, lock and door leaf height. For the wall, check the furniture axis, lights, baseboard and ceiling cornice. A full-size template and dry fitting are mandatory in all three scenarios.
Beech is chosen for enamel, oak for tinting. It is better to order and finish all elements in one batch. The kit is supplied disassembled, so the budget includes trimming of moldings, painting and installation.
On the STAVROS website, you can open the C.VRS-062 card, download the drawing, compare adjacent kits and order a layout project. The ready-made set eliminates the search for random parts, and the precise project turns it into a proportional panel for a cabinet, door or wall.