Article Contents:
- Can polyurethane moldings be glued directly onto aerated concrete
- Why aerated concrete is not the same as ordinary concrete
- Aerated concrete and foam concrete: similarity does not mean identical properties
- What rapid moisture absorption does
- When you can do without plastering
- Rigid polyurethane foam — a type of polyurethane
- What to consider with polystyrene profiles
- Polyurethane for wall frames and relief mouldings
- Inspect the masonry before finishing work
- Remove dust and loose particles
- Levelling, plastering and skim coating
- Primer — not the same for all walls
- Check the dryness and strength of the finished surface
- Can rigid polyurethane foam be glued directly to aerated concrete?
- Is plastering mandatory before installing moldings?
- Which is better — polystyrene or polyurethane?
- What to use to glue molding to aerated concrete block?
- Should an aerated concrete wall be primed?
- Can a large decorative stucco applique be installed?
- Why does polyurethane molding come unstuck?
- Which STAVROS moldings should I choose for an aerated concrete partition?
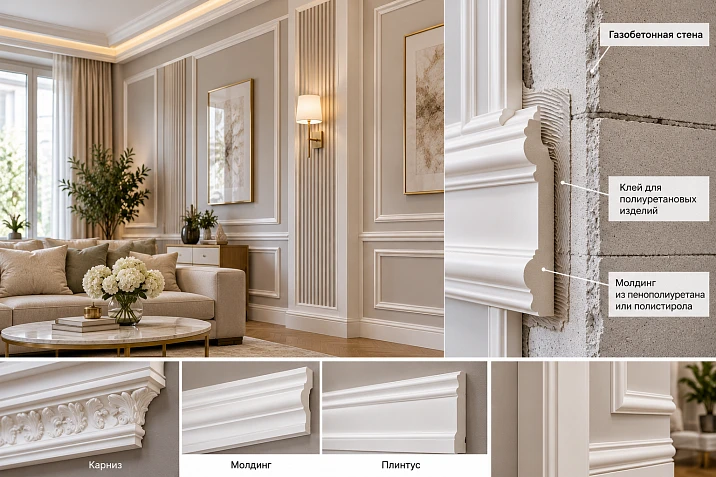
In the living room of a country house, aerated concrete partitions have already been erected, but there is no plastering yet. I want to mark out rectangular frames, glue polyurethane moldings, and immediately get a beautiful wall. At first glance everything is simple: the blocks are fairly even, and the decorative strips are relatively light. The problem shows up later — a thin layer of dust or of the block itself comes off the wall together with the molding.
A reliable option for most interior projects is to first prepare a strong, dry, and even finishing base, and then install the stucco. Gluing directly to aerated concrete can be considered only when the manufacturers of the primer and adhesive confirm that such a system is suitable for the specific blocks and decorative material. A label saying “strong adhesive” alone guarantees nothing.
Aerated concrete and foam blocks are handled differently depending on their condition. You need to assess the absorbency, surface quality, moisture content of the masonry, and the location of the seams. Only after that should you choose the molding: a thin one for small frames, a more textured one for the living room, or a decorative applique for the center of the composition. Let's start with the most common question — whether it is possible to do without plastering at all.
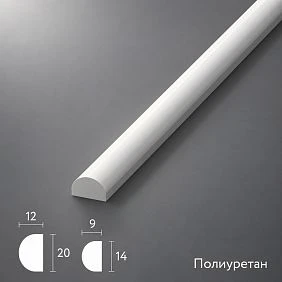



Можно ли клеить полиуретановые молдинги прямо на газобетон




Почему газобетон не равен обычному бетону
Газобетон имеет ячеистую структуру. Она уменьшает массу блока, но одновременно делает поверхность способной впитывать влагу и удерживать мелкую строительную пыль. У плотного монолитного бетона характер поверхности иной, поэтому способ подготовки, рассчитанный на гладкую бетонную плиту, нельзя без проверки переносить на пористые блоки.
После распила или штробления на стене остаётся тонкая пыль. Даже если она почти незаметна, клей может сцепиться именно с ней, а не с прочным материалом. Через время декоративная линия оторвётся вместе с рыхлым слоем. Поэтому очистка — обязательная операция, но сама по себе она ещё не превращает необработанную кладку в готовое основание под отделку.
Our factory also produces:




Газобетон и пенобетон: сходство не означает одинаковых свойств
Газобетон и пенобетон относятся к ячеистым бетонам, но различаются технологией получения пор и характеристиками конкретной продукции. В быту оба часто называют пеноблоками. Для ремонта это не повод выбирать один и тот же грунт, клей и способ крепления. На упаковке блоков или в документации проекта нужно проверить вид материала; характеристики основания уточняют по документации производителя.
Get Consultation
Что делает быстрое впитывание влаги
Если применяют водосодержащий материал, слишком интенсивное поглощение воды основанием способно изменить условия его схватывания и высыхания. Насколько это критично, зависит от состава. У одних клеевых систем предусмотрено нанесение на впитывающие поверхности, у других нужна определённая подготовка, у третьих такое основание вообще не заявлено.
Повторное обильное смачивание стены водой не является универсальным выходом: остаётся вопрос фактической влажности, прочности и совместимости слоёв.
Когда можно обойтись без штукатурки
If a small, lightweight decorative piece is planned, the base is solid, and the manufacturers of the specific materials confirm direct installation, a test area is permitted. But this is an exception, not a rule for the entire wall. A successful adhesion of a single sample cannot be considered proof of reliability for a large overlay or ceiling composition.
When you need a straight frame on a wall several meters long, properly prepared plaster is usually more convenient: it is easier to build the geometry on it, achieve a uniform surface, and spot defects before painting.
Polyurethane foam, polystyrene, and polyurethane: what to choose
Rigid polyurethane foam is a type of polyurethane
Polyurethane foam is produced with a cellular structure. Rigid molded varieties can be used in decorative products, while soft foam rubber belongs to a different type of polyurethane foam by purpose. Therefore, comparing "polyurethane foam" with "polyurethane" as two independent families of materials is technically incorrect.
The characteristics of a rigid product are determined by the formulation, density, surface layer, and manufacturing technology. The "polyurethane" label in the catalog does not automatically indicate whether a specific strip is a rigid foamed product of a certain density. For STAVROS moldings, the manufacturer's confirmed designations are used below without additional assumptions about the internal structure.
What to consider with polystyrene profiles
Polystyrene can be foamed or denser. With a soft foamed profile, the edges are easier to damage when trimming or pressing hard; denser products may behave differently. For polystyrene, the compatibility of the adhesive and cleaning agents is especially important: some solvents can damage the surface.
In an aerated concrete house, polystyrene does not become more reliable simply because of its low weight. The adhesive must still hold on the prepared base, and the joint must maintain correct geometry.
Polyurethane for wall frames and relief stucco
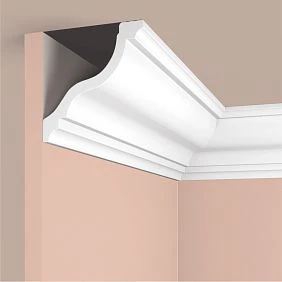
STAVROS offers thin and wide polyurethane moldings, overlays and decorative corners. Their advantage for a specific project is the choice of profiles and pattern-matched components. On a finished wall, a narrow profile draws a line, while a wider one creates its own shadow. But a good molding does not fix weak plaster: in that case it is not the product that gets damaged, but the layer it was glued to.
| What to compare | Rigid polyurethane foam | Polystyrene | STAVROS polyurethane profiles |
|---|---|---|---|
| Structure | Cellular, properties depend on the formulation | Dense or foamed | The product cards state "polyurethane" |
| Trimming | Depends on density and surface layer | Soft grades have a more vulnerable edge | Precise cutting and dry fitting are required |
| Glue | Selected to match the product and the wall | Avoid incompatible solvents | Check the conditions of the specific installation assembly |
| Painting | According to the manufacturer's recommendations | By coating suitability | Possible if the instructions for the product and paint are followed |
| Key points for aerated concrete | Prepare a solid substrate | Prepare a solid substrate | Prepare a solid substrate |
When choosing material for frames, it is wiser to first determine the design, dimensions, and number of parts. The weight of the decorative item is only one parameter of the mounting system; without assessing the surface, it says nothing about durability.
Why moldings do not hold well on unprepared blocks
Six outwardly similar defects arise for different reasons. If dust is found under the molding, the problem is not solved by an extra portion of adhesive. If a piece of plaster has come off, the finishing layer must be examined. And when a straight butt joint between two strips has opened up, the aerated concrete itself may not be the cause at all.
| What was found | Possible cause | How to check and prevent |
|---|---|---|
| Gray deposit on the back side of the removed strip | Installation over a dusty block | Remove dust before applying a compatible preparation |
| Block particles came off together with the adhesive | Loose surface layer | Check strength, remove weak material, restore the substrate |
| Adhesive remains on the strip, with almost no traces on the wall | Incompatibility or poor wetting of the substrate | Review the product's purpose and perform a test according to the instructions |
| The profile follows the waves of the masonry | Mounting strip is not aligned | Check with a rule and prepare a level surface |
| Damp spots are appearing on the wall | Masonry or finish is still damp | Find the source of moisture and wait for the substrate to reach an acceptable condition |
| A crack appeared after painting only at the joint | Incorrect butt-jointing or movement | Check the joint separately; do not confuse it with detachment from the wall |
You should not test strength only by pulling on an expensive installed trim piece: this can easily damage finish that is still intact. First inspect the accessible areas, study the boundary of the defect, and if necessary test a separate sample piece.
How to prepare an aerated concrete wall for stucco molding
Inspect the masonry before finishing work
Check the integrity of the blocks, masonry joints, corners and areas around doors. Mark the transition points to reinforced concrete columns, lintels and other substrates. If there are cracks whose cause has not been established, decorative finishing is not yet needed. The profile does not strengthen the wall and does not replace masonry repair.
On a newly built wall, it is useful to know the sequence of work in advance: first the main wet processes, then curing and monitoring the condition of the finish, and after that the decorative elements. The specific timeframes are determined by the materials used and the indoor climate of the room.
Remove dust and loose particles
Clean the surface with a suitable brush and an industrial vacuum cleaner. Do not spread dry dust over the entire area with a damp cloth. Run your palm over a test area: if it gets heavily soiled again or the top layer crumbles, the preparation is not yet complete. Treat the recesses of the masonry joints and the chased areas separately.
Simply coating a crumbling surface with primer is not enough. Primer should not be seen as a means of repairing a damaged block. The weak area is removed or restored using a suitable technology, after which its condition is checked again.
Leveling, plastering and skim coating
Long decorative lines require a stable plane. Place a straightedge against the future mounting strip in several positions. If there are noticeable uneven spots, do not try to fill them with a thick bead of mounting adhesive: its working thickness and ability to compensate for irregularities are limited by the instructions.
Choose a plaster system that is expressly permitted for the specific type of aerated concrete and the room conditions. For final painting, a compatible skim coat may be required after it. Do not replace full leveling with an arbitrary thin layer of mix that is not designed for such a thickness.
Primer is not the same for all walls
Absorbent aerated concrete and dense smooth concrete have different priming requirements. For example, compositions of the "concrete contact" type are often intended specifically for smooth, low-absorbency substrates; their name does not make them universal for cellular blocks. Check the scope of application, compatibility with plaster, and application sequence in the technical data sheets.
Do not set yourself a "mandatory three coats" in advance: the number of passes, permissible dilution, and drying time are determined by the manufacturer of the chosen composition. Too much primer can form an undesirable surface film.
Check the dryness and strength of the finished surface
Before gluing, the finish must reach the condition permitted by the manufacturers of the plaster, primer, and adhesive. The absence of a visible dark spot does not yet prove that all layers are sufficiently dry. For questionable objects, use the moisture control methods specified for the material, rather than the calendar rule of "wait a day."
Is plaster needed: three practical scenarios
Bare block. This is the riskiest option for wall moldings. Porosity, dust, unevenness, and residual moisture can impair adhesion. Direct fastening is considered only as a special solution when the system's compatibility is documented. For a spacious decorative wall, it usually makes no sense to skimp on surface preparation.
Suitable plaster. Once it has reached the required condition, it creates a more uniform base for marking and gluing. But the word "plaster" alone does not guarantee quality: a layer poorly bonded to the block may come off together with the molding. Therefore, check the adhesion strength of the finish to the masonry and the absence of delamination.
Filler and paint over a prepared base. This option is convenient when frames are needed on an already finished wall. You will have to check whether the paint holds well and whether the mounting compound permits gluing to the chosen coating. If necessary, prepare the mounting strip according to the adhesive instructions without damaging other areas of the finish.
| Wall condition | Preferred approach | What to Check |
|---|---|---|
| Bare aerated concrete | First prepare the finishing system | Dust, strength, moisture, compatibility |
| Plastered wall | Install after preparation is complete | Plaster adhesion and evenness |
| Painted prepared wall | Check the coating's suitability for adhesive | Paint strength and adhesive manufacturer's instructions |
The choice should be made before purchasing the moulding so that the estimate also reflects wall preparation. Sometimes the cost of a quality substrate is significantly more important than the difference between two moulding models.
Which STAVROS mouldings to choose for an aerated concrete house
For thin lines and frames in a small room, you can consider Molding MLDPU-001: width 10 mm, projection 6 mm. It creates a slight relief, so the neatness of the joints is especially noticeable on close inspection.
Molding MLDPU-004 measuring 15 × 8 mm looks more distinct. It is convenient to consider for small rectangles next to a door or for the inner contour of a composite composition.
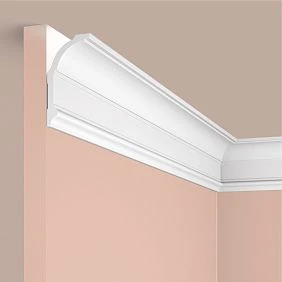
MLDPU-027 molding has a convex shape. The 14 × 9 mm option is suitable for a smooth line without complex relief transitions, and the catalog also includes a 20 × 12 mm section; prices for these options differ. When ordering, be sure to specify the selected size.
Polyurethane molding MLDPU-002 with a 22 × 11 mm section can be used for classic wall frames. For a large composition behind the sofa wide molding MLDPU-003 35 mm wide with a 12 mm projection creates a more pronounced shadow.
| Product | Section and length, mm | Price of one strip as of 26.10.2026 | Three strips |
|---|---|---|---|
| MLDPU-001 | 10 × 6 × 2600 | 1 740 ₽ | 5 220 ₽ |
| MLDPU-004 | 15 × 8 × 2600 | 3 190 ₽ | 9 570 ₽ |
| MLDPU-027, smaller option | 14 × 9 × 2600 | 3 990 ₽ | 11 970 ₽ |
| MLDPU-002 | 22 × 11 × 2600 | 5 460 ₽ | 16 380 ₽ |
| MLDPU-003 | 35 × 12 × 2600 | 7 580 ₽ | 22 740 ₽ |
Prices are taken from STAVROS product cards on the verification date. This is only the cost of the strips, excluding primer, plaster, adhesive, labor, packaging, and delivery. Each item here is given as an option for decorative finishing of a prepared wall, not as a product with guaranteed direct attachment to an untreated block.
If the composition requires corner turns with a smooth radius, you can explore the ready-made corner MLDPU-027U-1. It is designed for the MLDPU-027 series, but before purchasing you need to compare the cross-sections, the dimensions of the element and the actual geometry of the frame. The central Decorative Inserts are chosen according to proportions, and their mounting method is checked separately.
Five design options for aerated concrete walls
Three vertical frames. On the wall, after leveling, draw a common top and bottom horizontal line, then place three rectangles with equal gaps. MLDPU-001 is suitable for a thin outline. Do not start marking from the edge of a random block: the finished geometry of the room serves as the reference.
A large frame behind the sofa. One wide outline can be made with MLDPU-002 or MLDPU-003. Not only the size of the sofa matters, but also the free surface above it. A very wide profile in a small field visually takes away area; it is better to evaluate the mock-up on the wall before ordering.
A frame with a central overlay. The main outline and the stucco element form a composition with a center. For an accent, you can use items from the stucco decor catalog, but the central overlay may have a different area and type of mounting than a thin molding. Check the base for each element.
Horizontal band. A long profile divides the painted wall into two parts. Here deviations from the horizontal and butt joints are especially noticeable. Before installation, it is useful to fully complete the main leveling processes and mark the level against the finished floor, not against a row of blocks.
Double frame. The outer contour is made more expressive, the inner one thin. An equal gap is left between them, which is checked beforehand on a sample. This option requires more linear meters and careful calculation: two profiles with similar names are not necessarily matched in relief.
How to calculate the number of moldings: two lines of 3.6 m each
Suppose the finished wall is 3.6 m long. Two horizontal decorative lines of equal length must run along it. The total footage is 3.6 × 2 = 7.2 m. The STAVROS strips from the table under consideration are 2600 mm long. Dividing 7200 by 2600 gives 2.77; a minimum of three whole strips is needed, that is, 7800 mm of purchased length.
The practical cutting plan looks like this: the first and second strips of 2600 mm are kept for the long sections. Two 1000 mm pieces are cut from the third. Each line is made up of 2600 + 1000 mm and contains one butt joint. After two cuts, approximately 600 mm remains in the third strip, minus the width of the kerfs. If the width of two kerfs is taken as 3 mm each, the nominal remainder will be 594 mm.
But there is a practical limitation here. The two 2600 mm pieces have no allowance for trimming the factory ends. If the project requires clean cuts at both ends or installation allowances, the minimum of three strips may prove an inconvenient solution. In that case, the cutting plan should be reworked, and a fourth strip purchased if necessary. Do not automatically add "ten percent" to the footage: the specific lengths of the parts and the permissible joints are what matter.
For four strips the budget will change: MLDPU-001 — 6960 ₽, MLDPU-004 — 12,760 ₽, MLDPU-027 of smaller cross-section — 15,960 ₽, MLDPU-002 — 21,840 ₽, MLDPU-003 — 30,320 ₽. The extra strip gives freedom for clean trimming and may come in handy for correcting a mistake, but it is not needed by default in every order.
Before marking, measure the wall after plastering and painting; the actual length of the line may differ from the design. If decorative corners are planned, find out in advance how the usable length of the straight sections changes. The dimensions of ready-made overlays are not included in the linear meter calculation: they are counted per piece.
What to use to glue moldings to a prepared wall
The installation compound must be stated as suitable both for the decorative product and for the wall layer to which it is applied. If the profile is polyurethane and the base is painted plaster on aerated concrete, the system involves at least polyurethane, adhesive, paint, primer, plaster and block. The weakest layer will determine the result.
Water, solvents and curing conditions differ between adhesives. The composition for polystyrene must be chosen with particular care: no construction adhesive or degreaser can be assumed safe for its surface. Suitable mounting compounds exist for polyurethane products; their intended use must be checked in the technical data sheets. A convenient explanation of the difference between mounting adhesive and joint adhesive is given in the STAVROS material "What to use to glue polyurethane mouldings".
A test bonding is carried out on a prepared sample or a designated area, observing the curing time specified by the manufacturer. Assess not only whether the profile holds immediately after pressing, but also the condition of the layer under the adhesive after the holding period. If it peels off together with the plaster, changing the adhesive brand will not replace repairing the substrate.
For large overlays, the question of additional fastening is decided by the project: an ordinary self-tapping screw in aerated concrete without confirmed suitable fasteners is a poor universal recommendation. Data on weight, geometry, block type, load and the specific fastening product are required.
Step-by-step installation on a prepared aerated concrete wall
- Confirm the wall is ready. The plaster and putty must be strong, dry and suitable for subsequent finishing. Make sure there is no dust or peeling.
- Apply markings using the finished reference points. Check the position of the future frames relative to doors, ceiling, skirting board and furniture, not only relative to individual masonry blocks.
- Dry-fit the parts without adhesive. Compare the profile drawing, lengths and the location of all joints. Check long sections with a straightedge.
- Perform the cutting. Use a tool suitable for the specific profile. Check the geometry of the corners and the condition of the ends before applying the compound.
- Apply the adhesive according to the manufacturer's instructions. Do not arbitrarily increase the layer thickness to compensate for an uneven wall.
- Install the parts and secure them. Temporary fixation must be maintained for as long as the selected adhesive requires. Do not disturb the unfinished joint with pull-off checks.
- Finish the edges with a suitable jointing material. The seams between parts and the junction to the wall are different assemblies. Finishing putty must not substitute for a strong edge connection.
- Prepare the surface for painting. Remove contaminants, check the joints, then prime or paint according to the technology of the respective materials.
- Inspect the result after curing. If movement and detachment of the substrate are visible, do not conceal them with a thick layer of paint.
The general procedure for finishing corners and painting is in a separate STAVROS guide for installing polyurethane molding. For aerated concrete, the main additional requirement is to check the load-bearing capacity of the finishing surface itself, not just the neatness of the trimming.
Aerated concrete partitions: openings and junctions
A thin interior partition may experience service loads differently than a massive load-bearing wall. Additional loads and vibrations from closing the door leaf occur in the door area. If cracks are already appearing in the finish, a decorative frame must not become a way to mask them.
At the transition from aerated concrete to a reinforced concrete column or lintel, project-specified solutions for seams and junctions may be required. A continuous rigid molding glued over a moving boundary risks cracking or coming loose. When in doubt, it is better to divide the decorative composition at the substrate than to forcibly tie two sections together with a single profile.
If the wall frame runs near a door casing, leave the project-specified gap so that the elements do not interfere with each other. For long lines crossing between rooms, the layout is aligned to a common level, but the decor itself is not used as a tool for correcting the geometry of partitions.
How to coordinate moldings with the ceiling, baseboard and appliqués
Different decorative lines should be considered together. A ceiling cornice, a tall baseboard and a wall frame can create too dense a pattern if almost no painted field remains between them. Check the composition on the wall using paper strips of the actual profile widths: such a simple mock-up shows proportions more accurately than a list of item codes.
On a small wall, it is better to leave one prominent accent. In a spacious living room, wide frames and a central stucco appliqué are acceptable, but its dimensions need to be compared with the height of the furniture. If the appliqué is placed above the sofa, check that it will not end up almost completely hidden by a tall backrest.
Polyurethane moldings и Decor for Molding it is better to select them using drawings and actual cross-sections. A similar series name is a useful hint, but not a substitute for checking how the parts join.
Why molding can come loose after renovation
If the profile has come away together with the paint, first check the strength of the painted layer. If a fragment of plaster remains on its back side, the cause may lie deeper — in the adhesion of the plaster to the substrate. And when the molding itself is broken but the adhesive seam is strong, you will need to replace the damaged section rather than re-prime the entire wall.
| Nature of the defect | Check first | When replacement is needed |
|---|---|---|
| Comes away together with the plaster | Strength of the finishing system | If the profile is damaged during removal |
| Peeling off a painted wall | Paint condition and adhesive compatibility | If the part is deformed or broken |
| Crack between straight planks | Trimming and joining the ends | If the edges are damaged or joining is impossible |
| Gap between the profile and the wall | Evenness and stability of the base | If the profile cannot be installed correctly |
| Crack in the doorway area | The cause of mobility and the condition of the wall | After resolving the substrate issue |
Re-gluing onto the same dusty area is pointless. First eliminate the cause of the detachment, and only then assess whether the old piece is suitable for reuse.
Eight mistakes when installing stucco on aerated concrete
Gluing over construction dust. The adhesive holds the dust, not the wall. The fix begins with cleaning and checking the surface strength.
Working on damp masonry. Moisture can interfere with finishing and lead to hidden defects. The solution is controlling substrate readiness, not accelerated painting to hide stains.
Attempting to level the wall with construction adhesive. The adhesive joint thickness becomes uneven and the line wavy. Significant unevenness is eliminated in advance with a suitable finishing system.
Random primer. A product for smooth dense concrete is not necessarily intended for cellular material. Read the scope of application and prepare the surface according to the technical data sheet.
Choosing adhesive based only on the word "super strong". Bond strength with one material says nothing about performance on a specific plaster or paint. Check the entire system and application conditions.
Installing a large element without assessing the fastening. A large applique creates a different type of load than a narrow molding. If additional fastening is needed, it is selected specifically for aerated concrete.
Covering a movement joint. A decorative profile does not eliminate deformation at the abutment. First, the structural solution for such an area is determined.
Painting before treating the joints. Paint makes an uneven seam more noticeable. The ends and surface are checked, and the curing time is observed before finishing.
When it is better not to buy moldings yet
If the blocks are crumbling, the plaster is peeling off, or dampness persists on the wall, it is reasonable to postpone purchasing decorative strips. First, the causes of the defects must be eliminated and a prepared surface obtained. Even the most expensive stucco will not compensate for the condition of the substrate.
It is not advisable to order a large overlay before checking its weight, mounting method, and the size of the free field. For a thin partition with problematic abutments, it is sometimes more reasonable to limit yourself to painting or to choose decoration for the adjacent solid wall.
In other cases, the procedure is simple: finish preparing the aerated concrete, choose the cross-section, draw the layout, make a cutting map, and only then place the order. When ordering STAVROS polyurethane stucco, first verify the drawings, dimensions, compatibility of elements, and delivery terms. And if only a thin line is needed, buying central overlays and decorative corners is not mandatory.
Frequently asked questions
Can rigid polyurethane foam be glued directly to aerated concrete?
Only if the specific adhesive and preparation system allows this method and the surface meets its requirements. An untreated dusty block should not be considered a ready substrate.
Is plastering mandatory before installing moldings?
Not in all technically possible cases, but for long, even interior compositions, prepared durable plaster is usually preferable. The compatibility of the specific materials is what decides.
Which is better — polystyrene or polyurethane?
Choose by the required cross-section, edge quality, processing method, and confirmed adhesive compatibility. Both materials need a stable base.
How to glue molding to aerated concrete block?
There is no single safe answer based on the block name. First clarify its type, finish condition, and the adhesive manufacturer's requirements; a porous surface may require special preparation.
Should an aerated concrete wall be primed?
Priming is often part of a suitable finishing system, but the primer type, number of coats, and application conditions are determined by its instructions. Primer does not replace removal of the loose layer.
Can a large decorative molding applique be installed?
Possibly, if an allowable fastening method is calculated taking into account the product's weight and wall characteristics. A standard dowel cannot be recommended without verifying its suitability for aerated concrete.
Why does polyurethane molding come unstuck?
The cause may be dust, weak plaster, fragile paint, moisture, or incompatible adhesive. By the layer left on the removed piece, the point of failure can be preliminarily identified.
Which STAVROS moldings should I choose for an aerated concrete partition?
For a thin line, consider MLDPU-001 or MLDPU-004; for a noticeable frame, MLDPU-002; for a wide composition, MLDPU-003. But you should choose a product only after assessing the prepared substrate.