Article Contents:
- Can wallpaper be changed without removing decorative moldings?
- Wallpaper is glued inside a finished frame
- Molding is glued over the wallpaper
- The frame is painted together with the wall
- When only one panel can be replaced
- When dismantling will still be required
- Rigid polyurethane foam and other polyurethane products
- Polystyrene moldings
- What the STAVROS polyurethane profile offers
- Prepare the area and determine the coating type
- Separate the central part
- How to separate the canvas at the molding
- Water, steam and old adhesive residue
- The inner size is not equal to the outer size
- Example of two fields 850 × 1350 mm
- Safe trimming along the inner contour
- If only one side of the frame is damaged
- Can you re-paste wallpaper without removing polyurethane moldings?
- How to remove paper near an inner corner?
- What to do if the molding is installed over the wallpaper?
- Can water be used near polystyrene foam stucco molding?
- Which is more convenient for replaceable inserts — polystyrene or polyurethane?
- How to cut the new wallpaper evenly near the frame?
- Can a single damaged decorative corner be replaced?
- Do moldings need to be repainted after changing wallpaper?
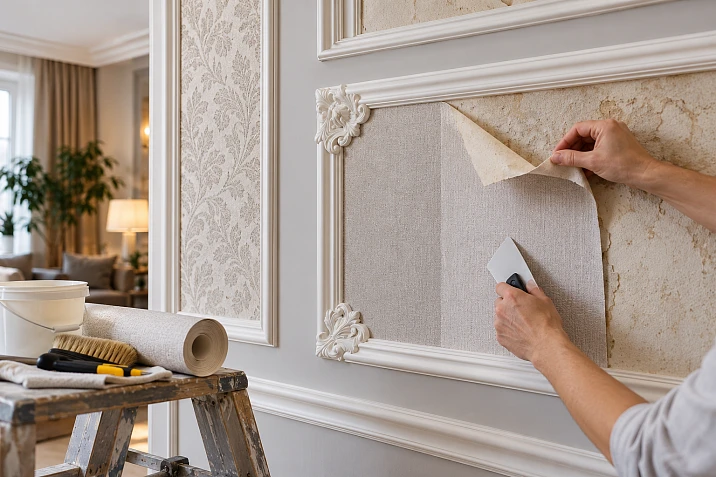
The living room has three decorative frames. The polyurethane moldings are painted to match the wall, the corners are even, and the wallpaper inside has long since stopped being pleasing. Taking down all the molding just to change the pattern is undesirable: afterward you would have to restore the seams, match the paint, and rebuild the rectangles from scratch.
Replacing wallpaper without dismantling the moldings is often possible — if the profiles are firmly fixed to the wall and the old wallpaper is accessible along the inner contour of the frame. It is more difficult when the molding is glued directly over the wallpaper: a strip of the old material ends up pinched under the profile. It must not be pulled out by force. Sometimes it is enough to carefully separate the visible part and preserve the firmly fixed hidden section; sometimes one strip will have to be removed and the base restored.



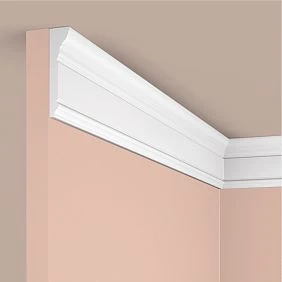

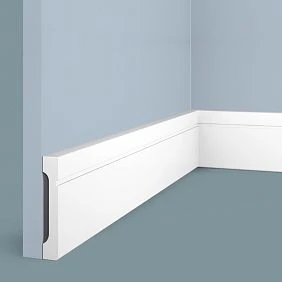
Can wallpaper be changed without removing decorative moldings?




Wallpaper glued inside a finished frame
This is the most convenient construction for repeat renovation. The profile is fixed to a prepared base, and the wallpaper ends near its inner edge. If a light inspection shows the frame is immobile, the covering can be changed one panel at a time without affecting the others. The finish behind the frame remains as before, so there is no need to match a new color for the entire wall.
Our factory also produces:
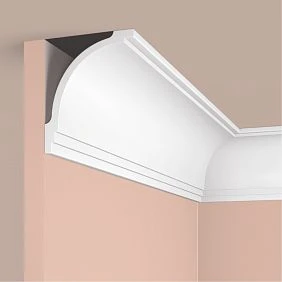

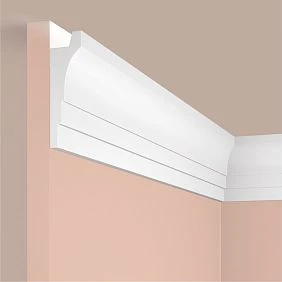
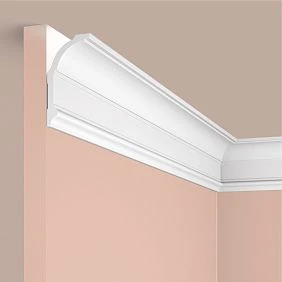


Molding glued over wallpaper
This happens when decorative lines were added after the room had already been wallpapered. A continuous layer of old wallpaper remains under the profile. If it serves as part of the base for the adhesive, pulling it out can weaken the fixing. Even a perfectly preserved polyurethane molding can come away together with the paper backing.
Get Consultation
The frame is painted together with the wall
In a monolithic painted composition, the junction line may be covered by paint and a thin finishing coat. You should not first try to “open” it with a screwdriver. The covering is first separated along the boundary with a neat, controlled cut only where this is permissible and where there is no risk of touching the profile. If the paint is peeling, first determine which area of it will need restoration.
When You Can Replace Just One Section
If the remaining inserts are intact, update only the damaged section. First check whether the original pattern and its shade can be matched. When there is no exact match, it is better to make one frame a deliberate color accent while preserving the overall geometry of the wall.
When Removal Is Still Necessary
If the strip is loose, the wall beneath it is crumbling, the wallpaper is peeling away together with the molding, or moisture is found behind the finish, cosmetic repair should be postponed. In case of severe damage, it may be necessary to remove part of the frame, repair the base, and reattach the profile. The promise of preserving any frame without removal is technically incorrect.
Polyurethane foam, polystyrene, or polyurethane: which material is more convenient for repeat renovation
Rigid polyurethane foam and other polyurethane products
Polyurethane foam is a type of polyurethane with a cellular structure. Rigid molded products can be used as decorative trim, but their density, coating, and resistance to specific products cannot be determined by the material name alone. Soft furniture foam and rigid decorative profiles should also not be lumped into the same category.
In the product listings for the MLDPU series, the manufacturer specifies the material as "polyurethane." This does not justify automatically calling every STAVROS profile foamed. For refinishing, what matters more is the actual condition of the face layer, the strength of the edges, and the mounting method.
Polystyrene moldings
Polystyrene comes in various forms: a lightweight foamed profile differs from a denser extruded product. On soft varieties, the thin edge is easier to damage with tools. Some solvents can affect polystyrene, so the adhesive remover should be chosen according to the instructions for the specific profile and paint, not according to the advice to use "any wallpaper product."
When removing the coating near a polystyrene molding, a protective plate between the working blade and the decorative surface is especially useful. It should not be pressed so hard as to deform the protruding relief.
What the STAVROS polyurethane profile offers
MLDPU products are available in several cross-sections; you can verify article numbers, dimensions and drawings before ordering an individual strip. If one side is damaged, it is not necessary to replace the entire set. But even a new profile with the same article number may differ from the old painted frame in shade before the final finish: after repair, the surface often has to be painted as a single area.
Thick protruding relief is harder to protect when trimming than a simple flat edge. This does not make wide moldings unsuitable for wallpaper inserts — it simply means you need more working space around them and must handle the adhesive more carefully.
| Criterion | What affects repeat repair |
|---|---|
| Edge integrity | Actual hardness, cross-section profile, paint condition |
| Cleaning off wallpaper adhesive | Compatibility with the coating and permissible cleaning moisture |
| Risk of knife damage | Relief and the ability to install a protective guide |
| Repeated painting | Adhesion of the old coating, primer and compatible paint |
| Local replacement | Availability of the same article number and matching cross-section |
| Convenience of future re-pasting | First of all, the availability of wallpaper under the molding, not the name of the polymer |
For a room where the inserts are expected to be changed regularly, it is more practical to pre-fix Polyurethane moldings on a sturdy prepared wall and finish the changeable fields separately. Then the new pattern does not require interfering with the fastening of the decorative contour.
How to check the old frame before starting work
Place a flashlight next to the frame and direct the light along the wall. Side lighting reveals cracks at the joints and peeling paint at the inner edge. Inspect the four corners, the long straight sections and the places where the wallpaper meets the profile. There is no need to press on the molding trying to "test its strength": this can damage a sound joint.
Make a test separation of the old sheet on a small area away from the borders. If the paper backing peels off in layers, mark the places that require careful additional cleaning. If the base itself begins to lift, stop work and determine the cause. Damp stains and crumbly putty are a separate problem that must not be covered with new wallpaper.
| What was found | How to proceed |
|---|---|
| The molding is firmly secured, the wallpaper ends at the edge | Keep the frame, replace the insert |
| The old wallpaper goes under the sturdy molding | Check the hidden base; if conditions allow, separate the visible part |
| The profile comes off together with the wallpaper | Restore the base and fastening, partial disassembly is likely |
| Only one corner element is damaged | Verify a compatible item code and replace locally |
| The paint on the edge is scratched | Prepare and touch up after finishing work |
| The wall under the frame is weak or damp | Fix the cause and restore the base before wallpapering |
How to remove old wallpaper inside the frame without damaging the molding
Prepare the area and identify the type of covering
Move furniture away from the wall and protect the floor and outlets. Before any wet work near electrical points, ensure the relevant circuit is safely de-energized; if in doubt, consult an electrician. Work with adequate lighting. Take a plastic scraper with a straight edge, a soft sponge, clean water, painter's tape, a suitable wallpaper removal product, and a tool for precise trimming. You will not need all of them at once.
Paper wallpaper often comes off after moderate moistening; on some non-woven coverings the top layer can be removed dry. Vinyl may delaminate, leaving the backing behind. These are general options, not universal properties: the specific technique depends on the material, the adhesive, and the base.
Separate the central part
First lift the loose edge in the middle of the panel or in an already damaged area. Pull in small sections without jerking. The goal is to understand how firmly the covering is attached. If only the face layer comes off, do not try to tear the paper backing out of the corner in one go. If necessary, moisten the backing moderately and locally, after first making sure the method is compatible with the wall and the molding.
On a drywall wall with an unprotected paper surface, excess water and rough scraping are especially risky. It is important to preserve the face cardboard and not wash away the joint compound. Where the plaster is already crumbly, the base needs repair first, rather than an increasingly aggressive tool.
How to separate the panel at the molding
On the last section, do not pull the wallpaper along the inner edge. First, check whether it ends before the profile or goes under it. In the first case, separate the covering up to the existing boundary with small movements. In the second, careful trimming of the visible section with protection of the profile is possible if the hidden backing is dry, strong and does not interfere with the repair. Guide the knife along a suitable rigid straightedge; do not run the blade along the decorative edge itself.
For a complex ornamental corner, prepare a short protective plate that can be repositioned along the fragments. Attempting to make one long cut along the curve of the relief often leads to cuts in the paint. If the boundary is inaccessible, it is better to stop and consider local dismantling than to cut through the face of the product.
Water, steam and old adhesive residue
A steam generator cannot be considered safe by default. Steam combines heat with moisture; the old adhesive seam of the molding and the painted filler may react to it differently than the wallpaper itself. Use heating only when material compatibility is confirmed and only when necessary, not as the first method.
Surface preparation inside the frame for new wallpaper
After removing the old sheet, the boundary looks deceptively ready: a flat wall in the center, white molding at the edges. But adhesive residue can form thin shiny stripes. New wallpaper paste applies unevenly over them, and the edge peels away first. Run your hand over the dry surface in a glove: noticeable grains and bumps require cleaning.
Weak filler is removed down to a stable layer. Small depressions are filled with a compatible repair compound and leveled. Do not sand the surface right up to the relief edge without protecting it: dust remains in the grooves, and the abrasive scratches the finish paint.
If cracks are found, it is necessary to understand whether they are local and whether the movement of the substrate continues. Covering an active crack with only a new layer of wallpaper is pointless. After preparation, prime according to the system specified by the wallpaper and adhesive manufacturer. The primer must not flood the joint between the molding and the wall or form drips on the relief.
Before wallpapering, wait for each layer to dry properly. There is no universal time for all substrates, adhesives and paints. Check the instructions for the specific materials and the actual condition of the surface, and do not rely only on the hours after application.
How to measure the wallpaper area inside an installed frame
The inner size is not equal to the outer size
Measuring along the outer side of the molding is convenient only for calculating the profile itself. For wallpaper, you need the visible inner rectangle. A frame with an outer size of 900 × 1400 mm and a molding 15 mm wide would theoretically give an inner opening of about 870 × 1370 mm if the profile is positioned evenly. But ornamental corners, uneven walls, and the actual point where the covering meets the frame change the size. Do not transfer this theoretical value into your cutting plan.
Measure the width at the top, in the middle, and at the bottom, and the height on the left, in the center, and on the right. Make a separate record for each insert. If the values do not match, investigate the geometry and plan for on-site trimming. For a relief corner, separately determine the line up to which the panel should extend: the rectangle may have small cutouts.
Example of two fields 850 × 1350 mm
For one frame, the area of the visible insert is 0.85 × 1.35 = 1.1475 m²; for two, it is 2.295 m². This is useful for comparing the finishing area, but it does not show the number of rolls: wallpaper is bought in strips of a certain width and length.
If you use a roll 106 cm wide, a field 85 cm wide can be done with a single vertical strip, provided that the actual width after allowances and pattern matching allows it. The excess width before trimming will be 21 cm per insert, if technological limitations are not taken into account. For two frames, you need two separate pieces of the appropriate height.
With a roll width of 53 cm, a field 85 cm wide will require at least two strips: 53 + 53 = 106 cm, from which the required width will be obtained after matching and trimming. For two fields, that is four vertical pieces. Between the two strips within each field there will be one seam, and it is sensible to coordinate its position with the pattern.
| Parameter | Wallpaper 53 cm | Wallpaper 106 cm |
|---|---|---|
| Field width | 85 см | 85 см |
| Strips per field | 2 | 1 |
| Stripes across two frames | 4 | 2 |
| Inner seam in each panel | Usually 1 | No, if the panel is a single piece |
| What to check before ordering | Pattern, matching of two strips, allowances | Usable width and pattern position |
The trimming allowance is taken according to the instructions for the selected wallpaper and the actual geometry, rather than cutting in advance "strictly 850 mm". For example, if one strip is conventionally allotted 30 mm at the top and bottom, its initial length will be 1410 mm before adjustment for the repeat. For four pieces this is 5640 mm, and for two — 2820 mm. This is the length of the cut strips, not a ready-made recommendation to buy a specific number of rolls. The repeat, pattern offset, defects and direction of the panel can increase consumption.
For large floral ornaments, use dry layout: mark where the central motif of each insert will be. If the composition is symmetrical, you sometimes have to sacrifice part of a roll so that the pattern in adjacent frames starts identically.
How to paste new wallpaper inside an installed frame
Lay out the cut panels in the order of pasting. Check the face side, the direction of the pattern and the batch number. Mark a plumb control line on the wall: the outer contour of the moldings does not always coincide with the vertical, and aligning the entire pattern to a crooked profile is risky.
Adhesive is applied in accordance with the wallpaper manufacturer's instructions: for some materials — to the base, for others — to the panel; the dwell time and adjustment time also differ. Excess adhesive near the moldings is no less dangerous than a lack of it: hard-to-remove marks may remain on the relief.
The first strip is hung according to the markings, leaving a sufficient allowance at the edges. Smooth it with a suitable tool from the middle to the edges without stretching the material. If the panel consists of two parts, bring the second one in according to the joining method permitted for the specific wallpaper. Do not try to correct a pattern error by pulling hard: after drying, the seam may open up.
Safe trimming along the inner contour
Place a protective metal or other rigid guide so that the blade passes along it rather than along the decorative profile. First test the technique on a less visible area. Use a sharp, serviceable knife and controlled light pressure; a suitable work surface must be provided under the panel so as not to cut through the base. On a complex corner, it is better to make several short precise cuts rather than try to go around the ornament in one motion.
After cutting, remove the narrow excess strip without pulling it out from under the molding. Remove fresh glue traces in accordance with the permitted wet cleaning and the wallpaper instructions. Do not rub water and glue over old paint, especially if it is already poorly adhering.
When the coating is dry, look at the inserts in daylight and under side artificial light. Side lighting especially well reveals lifted edges and bubbles. A small defect should be corrected in the manner permitted for the given coating; a non-adhered edge must not be masked with a thick layer of paint.
Which wallpaper looks best inside polyurethane frames
A plain textile-look coating helps highlight the profile through the difference in texture. In a small living room it usually looks calmer than large contrasting graphics. Especially if the frames are placed close to each other and each has a relatively small width.
A geometric pattern requires a precise axis. If the stripe of diamonds is offset relative to the center of the frame, the skew is more noticeable than a difference in shade. For two identical inserts, determine in advance whether the pattern should be mirrored or simply start from the same motif.
Large leaves and flowers work differently. In a narrow field, the pattern may be cropped at the edges so that only halves of large details remain. It is useful to make a paper template of the frame and overlay it on a photograph of the full repeat before ordering wallpaper.
How to refresh stucco molding at the same time as re-papering
If the moldings are intact, they do not necessarily need to be fully repainted. It is often enough to clean the inner edge and repair minor scratches. However, if there is a noticeable difference in gloss, a locally touched-up area will be visible even with an exact color match. In that case, it is more sensible to paint one side or the entire frame completely.
The order depends on the condition of the composition. If the corners need sanding and old seams need restoring, it is better to carry out the dusty work first, prepare and paint the profile, protect it after the coating has fully dried, and then hang the new wallpaper. If the frame is already painted and damage is discovered only during trimming, careful local finishing after wallpapering with protection of the wallpaper is acceptable.
Traces of wallpaper adhesive must be removed from the profile surface using a compatible method before painting. Do not paint over contamination: the new layer may go on unevenly or adhere poorly. If a crack is found between two moldings, first check the stability of the joint; decorative filler does not replace proper repair of separating parts.
Thin stucco on the wall may be perceived differently after the pattern is updated. A light solid background emphasizes the shadow from the profile, while a rich pattern distracts from it. Therefore, for decorative molding for walls the choice of new wallpaper is no less important than the selection of the molding cross-section.
Which STAVROS moldings are suitable for local repair
If one section is damaged after removing the wallpaper, first identify the old article number. Photograph the end of the surviving strip, measure the width across the face and the height of the projection, and compare the profile with the manufacturer's drawing. A width match is not enough: two moldings may differ in curvature, steps, and groove depth.
| STAVROS product | Cross-section and length | Price per piece as of 25.10.2026 | When to consider |
|---|---|---|---|
| Molding MLDPU-001 | 10 × 6 × 2600 mm | 1 740 ₽ | Restoring a thin line |
| Molding MLDPU-004 | 15 × 8 × 2600 mm | 3 190 ₽ | Compact-format frames |
| Polyurethane molding MLDPU-002 | 22 × 11 × 2600 mm | 5 460 ₽ | More prominent outline |
| Polyurethane molding MLDPU-003 | 35 × 12 × 2600 mm | 7 580 ₽ | Wide framing |
| Molded corner MLDPU-4U-1.1 | 145 × 145 × 14 mm | 1 790 ₽ | Ornamental element of series 004 |
Prices are given according to STAVROS product cards as of the verification date. These are prices for the products without delivery, packaging, adhesive, painting, and labor. For MLDPU-004, the product card indicates made-to-order preparation; actual availability and lead time should be checked when placing an order.
If only one side of the frame is damaged
Measure the distance between the surviving joints along the accepted measurement line, preferably using a removed sample. Separately account for the cut direction and losses during end processing. If the part fits within a 2600 mm strip, one piece may be enough to replace it. However, the new straight section must precisely replicate the profile, and the joints must be connected with the specified compound. Installing a "similar" profile often creates a more noticeable defect than the old chip.
The ornamental molding MLDPU-4U-1.1 is intended for the corresponding composition of series 004. It should not be selected based only on an external photo and considered a universal corner for all moldings. Verify the position of the straight elements and the junction with the finished corner against the drawings. If a different type of finish is needed, review Decor for Molding.
For future repairs, it is useful to keep a few centimeters of the old profile with an intact end, the paint label, and the article number. In the event of damage years later, such a small sample will identify a suitable replacement much more accurately than a photograph.
Five options for updating a finished decorative wall
1. Replace patterned inserts with solid-color ones. The calmest scenario: white moldings stay in place, the contours don't change, only the covering inside changes. If the base is in good condition, there's no need to buy new decorative pieces. The work focuses on removing the panels, preparing the fields, and carefully gluing them on.
2. Refresh only the central frame. Suitable if the side inserts are well preserved. The new field can be contrasting, but its color should be coordinated with the sides, otherwise the composition will look like a random replacement of a damaged area. Pay special attention to keeping the pattern at the same level and centered.
3. Repeat a single pattern in all frames. Here material consumption is trickier: a large repeat will have to be aligned to the same height. With two or three inserts, the price of a roll doesn't reveal the full cost of the solution without a cutting plan. Sometimes a narrower roll is more economical on paper but creates additional seams.
4. Remove the wallpaper and paint the fields. If the old base allows for quality preparation, the wallpaper is replaced with a washable or other suitable interior coating. This option doesn't require cutting out motifs or matching the repeat, but the surface must be flat enough for painting.
5. Keep the frames, replace the damaged corners. When only the ornament in one corner was damaged during the previous finishing, it's more useful to restore the exact detail than to rebuild all the frames. If an identical element is unavailable, it's sometimes wiser to change the finish of all four corners of one frame so the composition looks intentionally unified.
If the molding is glued directly over old wallpaper
First, find out where the visible part of the wallpaper ends. Sometimes the inner boundary can be identified by a thin paint trace or an old cut. Using suitable protection, separate the accessible area without letting the blade go into the profile. Leaving the hidden area is acceptable only after assessing its strength, dryness, and absence of bulges — this is not a universal permission to glue over old wallpaper.
If the molding is already lifting at the edge, there's moisture under the wallpaper, or the old finish needs to be fully removed, selective dismantling will be required. When doing this, don't tear off a long strip without first checking all attachment points. The removal method depends on the adhesive, the base, and the risk of damaging adjacent coverings. After restoring the wall, the new profile is attached according to its manufacturer's requirements, and the insert is finished as an independent finishing field.
For the future, it's more useful to separate the replaceable and permanent finishes. First prepare and finish the base under the decorative frame, attach the molding to a suitable solid surface, then install the wallpaper insert along the inner contour. This simplifies the next renovation, although even with this scheme, careful work at the edges will be required.
Eight mistakes when re-pasting wallpaper inside moldings
They tear the sheet off in jerks all the way to the corner. Paint or part of the adhesive bond may come up along with the paper. Inside the field, the sheet is removed gradually, and near the edge they switch to small sections.
They soak the entire frame abundantly. Water gets into the plaster and under the decor, and the result depends on the original adhesive. Moistening is allowed only in the necessary volume and when compatible with the substrate.
They cut directly along the molding relief. Damage may become noticeable only after drying and with side lighting. Use a guide, protect the face side, and avoid strong pressure.
They measure the outer rectangle. The new sheets end up too wide or too narrow. Record the actual inner dimensions of each frame at several points.
They ignore the position of the pattern. Different repeat start points are especially noticeable on adjacent symmetrical inserts. Before cutting, make a layout diagram of the motifs.
They paste over remnants of weak old covering. New adhesive will not strengthen crumbling putty. First restore the substrate, then apply the specified priming.
They try to hide a chip with a thick layer of paint. The relief loses its clarity, and the defect remains. First locally restore the geometry with a suitable compound, and only after preparation paint it.
They buy a profile of the same width but a different cross-section. A step forms at the corner that is hard to hide. Compare the end face, depth, and pattern, not just the overall dimensions.
Which is cheaper: change the wallpaper or redo the entire wall
Let's imagine two identical frames, each with an outer size of roughly 900 × 1400 mm. A rectangle requires 2 × (0.9 + 1.4) = 4.6 linear meters of profile. For two frames — 9.2 m. With a strip length of 2.6 m, purely mathematically four pieces are enough: 10.4 m of purchase. In practice, you can cut four strips according to the pattern 1400 + 900 mm from each — four long and four short sides, with a remainder of 300 mm per strip before accounting for saw cuts. This is a conventional pattern for straight parts without additional corner inserts; dimensions are measured along the accepted cut line.
For MLDPU-004, four strips at 3190 ₽ each will cost 12,760 ₽. For MLDPU-001 — 6960 ₽, MLDPU-002 — 21,840 ₽, MLDPU-003 — 30,320 ₽. These amounts are needed only for a complete replacement of the corresponding two frames and do not include installation. If everything is intact, there is no need to buy new moldings at all.
| Wall condition | What is actually required | Purchasing the molding |
|---|---|---|
| The frames are sturdy, only the inserts are worn | Wallpaper removal, preparation, new wall coverings | Not needed |
| One strip is damaged | Regluing and local restoration of the contour | Usually one suitable profile, taking cutting into account |
| The base or the entire frame is destroyed | Wall repair, new layout marking, replacement of profiles | After an accurate calculation of the composition's makeup |
Where to find stucco molding to restore decorative frames
In the STAVROS catalog you can Buy polyurethane molding by individual categories: moldings, ready-made corners, wall overlays. If you need only one piece, there is no point in automatically ordering a whole set. For complex corner decoration, it is better to study the product drawing in advance and check its compatibility with the selected trim.
The website has separate materials on combining polyurethane moldings with wallpaper and about that, how to make frames from moldings. They will come in handy if the old composition still has to be fully reassembled. To replace the wallpaper field without dismantling, it is more important to preserve the existing joints and not damage the profile border.
Frequently asked questions
Can wallpaper be re-pasted without removing polyurethane moldings?
Yes, when the frame is securely fastened, the base is dry, and the old covering is accessible along the inner contour. If there is a weak layer of wallpaper under the molding, partial dismantling may be required.
How do I remove wallpaper near an inner corner?
Remove the main sheet, then peel off the remainder near the border in small sections. If a cut is needed, use a suitable protective guide and do not run the knife directly along the relief.
What should I do if the molding is installed over the wallpaper?
Do not pull the wallpaper out from under it by force. Assess the fastening and whether the visible part can be separated evenly. If the base is deteriorating, it will need to be restored with partial removal of the decor.
Can water be used near polyurethane stucco molding?
Only taking into account the specific covering, adhesive bond, and base. The material of the decorative element itself does not guarantee that heavy moistening of the wall is safe.
Which is more convenient for replaceable inserts — polystyrene or polyurethane?
First of all, it is important that the molding is attached to a solid base separately from the wallpaper. Then assess the resistance of the front edge to damage, cleaning compatibility, and the availability of the same part for repair.
How do I trim new wallpaper evenly near the frame?
Leave an allowance, use a sharp tool in good condition and a rigid protective guide. First test the technique on a inconspicuous area, especially near complex ornamental corners.
Can a single damaged decorative corner be replaced?
Yes, if a compatible element can be found and the base beneath it is in good condition. Check the article number, the cross-section of adjacent strips, and the geometry of the joint; identical outer width does not confirm compatibility.
Do moldings need to be repainted after changing the wallpaper?
Not necessarily, if the paint has held up. For scratches, local restoration may be enough, but if the sheen or shade differs, it is better to repaint one side or the entire frame.