


















Article Contents:
- What Really Determines Polyurethane Molding Cost?
- Material Price
- Profile Geometry
- Stock Length
- Cutting Waste
- Installation Labor
- Finishing
- Shipping and Handling
- Custom Tooling and Setup
- Repeatability
- Custom Does Not Always Mean Better
- Avoid Unsupported Savings Claims
- Important STAVROS Material Distinction
- Create a Limited Profile Library
- Reuse the Same Profile in Different Ways
- Reserve Ornate Molding for Focal Points
- MLDPU-001: Narrow Decorative Line
- MLDPU-004: Compact Architectural Profile
- MLDPU-002: Medium Decorative Wall Molding
- MLDPU-003: Wider Architectural Molding
- Profile Comparison
- Purchased Length vs. Installed Length
- The Three Numbers Every Estimate Needs
- What to Measure Instead
- Separate the Architectural Zones
- Step 1: Select One Primary Profile
- Step 2: Establish the Frame Dimensions
- Step 3: Calculate One Frame
- Step 4: Calculate All 24 Frames
- Cutting Pattern A
- Cutting Pattern B
- Combined Cut List
- Purchased Length
- Installed Length
- Nominal Unused Material
- Room-by-Room Procurement
- Material Difference
- Illustrative Dollar Comparison
- What Does Not Change?
- Option A: 20 × 40-Inch Frames
- Option B: 24 × 36-Inch Frames
- Option C: 30 × 30-Inch Square Frames
- Comparing Equal-Perimeter Designs
- Should You Choose the Most Efficient Frame?
- Saw Kerf
- Mitered Corners
- End Squaring
- Pattern Alignment
- Damaged Material
- Reserve Quantity
- Example: Four Small Decorative Frames
- Cutting Efficiency
- The Cost of Isolated Cutting
- Ornamental Pattern Matching
- Living Room
- Dining Room
- Primary Bedroom
- Guest Bedrooms
- Home Office
- Entryway
- Hallway
- The Architectural Principle
- Beaded Molding
- Rope Molding
- Acanthus Leaf Molding
- Floral Onlays
- The Cost Principle
- Repeatable Layouts
- Clear Drawings
- Accurate Material Labeling
- Controlled Cutting
- Joint Planning
- Surface Preparation
- Compatible Adhesives
- Paint and Finish Planning
- Layout Labor
- Cutting Labor
- Installation Labor
- Joint Finishing
- Surface Finishing
- Protection and Cleanup
- Example Labor Formula
- An Illustrative Labor Saving
- Whole-House Cost Formula
- Value Engineering
- Strategy 1: Standardize the Primary Molding
- Strategy 2: Concentrate Ornamental Detail
- Strategy 3: Optimize Finished Piece Lengths
- Classify by Product Code
- Record Actual Length
- Identify End Conditions
- Store by Project
- Prioritize Useful Reuse
- Retain Finishing Samples
- Compare Freight Scenarios
- Packaging Protection
- Receiving Inspection
- Timing
- Verify the Delivered Price
- Confirm Product Availability
- Ask About Samples
- Request Technical Drawings
- Confirm Any Commercial Terms
- Using a Wide Profile Everywhere
- Forcing One Stock Length Onto Every Design
- Overusing Ornamental Trim
- Ignoring the Cost of Labor
- Mixing Incompatible Materials
- Sacrificing the Design
- Phase 1: Define the Decorative Scope
- Phase 2: Establish the Design Language
- Phase 3: Select Preliminary Profiles
- Phase 4: Review Physical Samples
- Phase 5: Prepare Dimensioned Elevations
- Phase 6: Generate the Material Takeoff
- Phase 7: Optimize the Cutting Plan
- Phase 8: Prepare the Bill of Materials
- Phase 9: Compare Delivered Supplier Quotations
- Phase 10: Coordinate Installation
- Phase 11: Track Consumption
- Phase 12: Close the Material Account
- Example Specification
- Data Required
- Useful Outputs
- What Software Cannot Decide Alone
- Use a Shared Project Schedule
- Substrate Condition
- Adhesive Compatibility
- Moisture Exposure
- Heat and Fireplaces
- Nonstructural Use
- Pre-1978 Homes
- Finish Compatibility
- How Much Does Polyurethane Molding Cost per Linear Foot?
- Is Polyurethane Molding Cheaper Than Wood?
- How Can I Reduce Polyurethane Molding Costs for an Entire House?
- Should Every Room Use the Same Molding?
- How Many Molding Profiles Should I Choose?
- Does Standardizing Molding Always Save Money?
- Can I Use Polyurethane Molding in Several Rooms?
- Does a 2,000-Square-Foot Home Need a Specific Amount of Molding?
- How Much Extra Molding Should I Order?
- Is 10% Molding Waste Normal?
- Can I Reuse Molding Offcuts?
- Does a Longer Molding Strip Always Reduce Waste?
- What Is the Best Way to Calculate Molding?
- What Is a Molding Material Takeoff?
- Can I Use Cutting Software for Polyurethane Molding?
- Is Ornate Molding More Expensive to Install?
- Does Beaded Molding Need a Separate Cutting Plan?
- Can I Combine Polyurethane and MDF Moldings?
- Is STAVROS Crown Molding Made From Polyurethane?
- Can I Order Polyurethane Molding in Bulk?
- Does STAVROS Offer Discounts for Large Projects?
- Can I Buy STAVROS Polyurethane Molding for a U.S. Project?
- Which STAVROS Molding Is Suitable for Whole-House Wall Frames?

A beautifully detailed interior does not necessarily require dozens of different molding profiles, custom-made ornaments, or an unlimited renovation budget.
In fact, some of the most convincing architectural interiors are built around a surprisingly small number of carefully selected trim profiles.
The same decorative molding may frame a living room wall, establish a rhythm along a hallway, define bedroom panels, and introduce architectural detail around a home office.
Different room layouts create visual variety, even when the underlying material remains consistent.
This approach is called molding profile standardization.
For homeowners, interior designers, remodeling contractors, and residential builders, standardization can simplify purchasing, improve visual consistency, reduce offcuts, and make installation easier to organize.
But the real financial advantage depends on how the project is designed and measured.
A lower price per linear foot does not automatically mean a lower installed cost.
A decorative molding sold in short sections may generate more waste than a longer stock profile. An inexpensive ornate molding may require additional labor to align its pattern. A custom corner detail may increase material cost while reducing installation time. Ordering by room rather than across the entire project may leave usable offcuts stranded in different locations.
These variables matter when planning a whole-house renovation.
Consider a 2,000-square-foot American home.
The project may include decorative wall frames in the living room, dining room, bedrooms, office, foyer, and hallway.
If every room uses a different molding profile, the contractor must track multiple products, cutting requirements, offcuts, installation details, and finishing specifications.
If several rooms share one architectural molding, the same stock lengths can be allocated across the entire house.
A piece left over from a living room frame may complete a bedroom panel.
One finishing specification can be repeated.
The purchasing schedule becomes easier to manage.
And a smaller number of carefully coordinated profiles can create a coherent design without making every room look identical.
This guide explains how to reduce the cost of polyurethane molding through smarter specification, purchasing, cutting, installation, and project management.
We will examine actual STAVROS product dimensions, practical material takeoffs, cost-per-linear-foot calculations, and a detailed example involving 24 decorative wall frames in a 2,000-square-foot home.
You'll also learn when standardization helps, when it creates unnecessary compromises, and how to evaluate decorative products before purchasing.
For project planning, explore the STAVROS polyurethane molding collection, decorative polyurethane trim, and polyurethane architectural onlays.
The objective is not to buy the cheapest molding.
The objective is to produce the best architectural result at the lowest defensible total project cost.




What Really Determines Polyurethane Molding Cost?
When homeowners search for polyurethane molding cost, they often focus on the advertised product price.
That is only one part of the overall expense.
A complete molding budget may include materials, cutting waste, shipping, installation labor, adhesives, joint finishing, paint, and future replacement needs.
For imported products, freight and customs-related expenses may also be significant.
The true cost is determined by the complete project, not an isolated product listing.




Material Price
The material price is the amount charged for each molding strip or decorative component.
Manufacturers may price products by piece, linear foot, or another unit.
STAVROS displays many polyurethane molding profiles as individual strips with stated dimensions and lengths.
Before comparing products, convert their prices to a consistent unit.
For American projects, cost per linear foot is usually convenient for straight moldings.
However, cost per purchased linear foot and cost per installed linear foot are not necessarily equal.
Наша фабрика также производит:


Смотреть весь Каталог продукции
Profile Geometry
A narrow, relatively simple profile and a wide, deeply ornamented profile may differ substantially in manufacturing cost.
They may also require different installation methods.
The more elaborate product is not automatically less cost-effective.
Its relief may provide the desired visual result without additional decorative layers.
Conversely, a restrained profile may be sufficient for secondary rooms.
Получить консультацию
Stock Length
Stock length affects cutting efficiency.
Consider two decorative profiles.
One is supplied in approximately 8.53-foot strips.
Another is supplied in approximately 3.28-foot strips.
Both may look appropriate in the project.
But their cutting schedules will differ.
Longer stock can reduce the need for end-to-end joints on long runs.
Shorter stock may be convenient for small decorative applications.
Neither is universally superior.
Cutting Waste
Molding is purchased in fixed lengths but installed in project-specific dimensions.
The difference creates offcuts.
Some offcuts can be reused.
Others are too short, damaged, or incompatible with the remaining cutting schedule.
Waste should be calculated from actual cut pieces rather than assumed to be a fixed percentage.
Installation Labor
Labor depends on layout complexity, number of cuts, corners, joints, substrate condition, and finishing requirements.
A simple rectangular frame may be relatively straightforward.
A complex composition with multiple decorative profiles, curved sections, and ornate corners may require considerably more preparation.
Finishing
Polyurethane molding is commonly painted as part of the interior finish.
The project may require substrate preparation, compatible adhesive, joint treatment, primer where appropriate, and finish paint.
Decorative glazing or metallic finishing introduces additional work.
Shipping and Handling
Architectural moldings may be relatively lightweight, but they can require substantial packaging because of their length and profile geometry.
Freight charges depend on shipment size, destination, packaging, carrier terms, and other factors.
For a U.S. buyer considering imported decorative trim, the delivered cost should be confirmed before making the final product decision.
Understanding Manufacturer Economics: Why Standard Profiles Can Be More Practical
Manufacturing a custom architectural profile often involves setup work that does not apply in the same way to an established catalog item.
Custom tooling, drawings, prototypes, testing, and quality-control procedures may need to be developed.
Those expenses must be recovered through the finished products.
Custom Tooling and Setup
Suppose a manufacturer develops a unique decorative molding profile for a single project.
The total quotation may include the cost of designing and preparing the required tooling.
If the project needs only a small quantity, these fixed costs can be substantial relative to the material order.
A standard catalog profile generally avoids commissioning that new tooling.
However, the price difference depends on the supplier and actual production arrangement.
Repeatability
A standardized profile can be used in numerous rooms and projects.
Its dimensions and visual character are already documented.
Installers can prepare repeatable cutting templates.
Designers can reuse approved specifications.
Purchasing teams can track one item across several work areas.
These practical advantages may be more important to a contractor than any assumed factory-level manufacturing savings.
Custom Does Not Always Mean Better
A custom profile may be justified when the project requires a particular historic restoration detail, unique geometry, or another result unavailable from stocked products.
But custom manufacturing should solve a genuine design problem.
Creating a slightly different molding for every room without a clear architectural reason introduces unnecessary complexity.
Avoid Unsupported Savings Claims
Standardizing a project does not guarantee a 20%, 30%, or 50% reduction in total cost.
The result depends on the actual design alternatives.
A disciplined estimate should show where savings occur.
Those may involve fewer purchased strips, less waste, reduced installation time, or lower freight expenses.
If the savings cannot be demonstrated in the bill of materials and labor estimate, they should not be treated as established.
Polyurethane Molding vs. Other Trim Materials
A cost comparison should begin by confirming that the products serve the same purpose.
Polyurethane, MDF, solid wood, and polystyrene are not interchangeable in every application.
| Material | Common application | Main specification consideration |
|---|---|---|
| Polyurethane | Decorative moldings, ornamental appliques, interior architectural relief | Coating compatibility, dimensional profile and attachment |
| MDF | Paint-grade millwork, wall panels, cabinetry and selected trim | Moisture exposure, edge preparation and fastening |
| Solid wood | Stain-grade architectural millwork and carved decorative elements | Wood movement, finish, species and workmanship |
| High-density polystyrene | Selected decorative ceiling and wall profiles | Product-specific impact resistance and coating requirements |
| Plaster | Traditional ornamental architectural work | Weight, substrate, handling and installation method |
A polyurethane decorative frame can be a good option when the design requires precise sculpted relief.
MDF may be appropriate when the project needs paint-grade panel construction.
Solid wood is useful when natural grain or authentic carved timber is a defining feature.
The correct selection depends on appearance, expected use, substrate, installation requirements, and full installed cost.
Important STAVROS Material Distinction
The STAVROS polyurethane molding category contains polyurethane decorative profiles.
Its separate crown molding collection includes HIWOOD products made from high-density polystyrene.
These should not be described as polyurethane crown moldings.
A coordinated project may use both materials, but the estimate and specification should identify each correctly.
Standardize Profiles Before You Calculate Quantities
The most important cost decisions are often made before construction begins.
A project that introduces new molding profiles during installation becomes harder to manage.
A better approach is to select the primary architectural elements at the design stage.
Create a Limited Profile Library
For many residential wall-molding projects, consider starting with a small profile library.
For example:
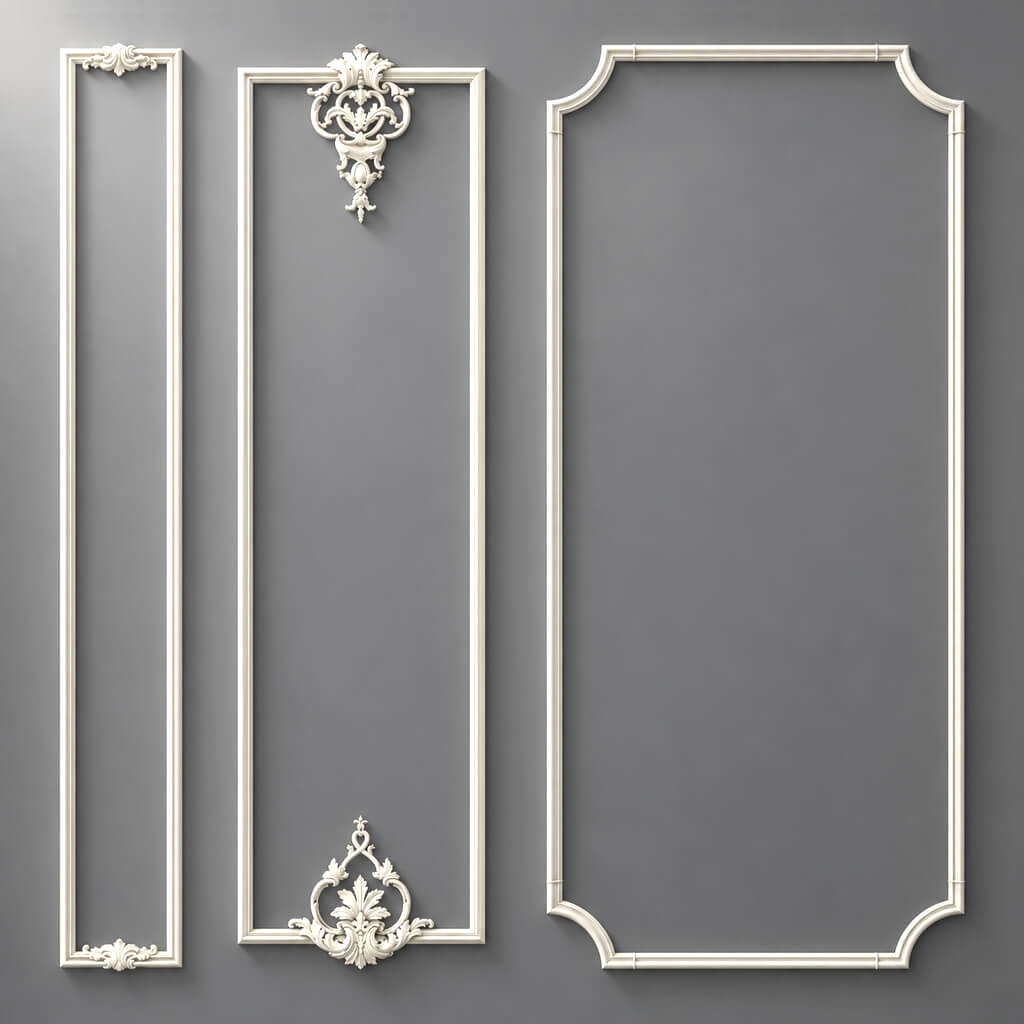
One primary molding for decorative wall frames
One narrow molding for secondary details
One ornamental profile reserved for feature areas
These are design roles, not a requirement to purchase exactly three products.
Some homes may need only one molding.
Others may justify a larger selection.
Reuse the Same Profile in Different Ways
One medium-width polyurethane molding can form different compositions.
In a living room, it might define large rectangular frames.
In a bedroom, it may create a restrained composition behind the headboard.
In an office, it can establish repeated vertical wall panels.
In a hallway, it may frame smaller decorative sections.
The profile remains consistent.
The geometry changes.
This creates visual variation without requiring a different product for each room.
Reserve Ornate Molding for Focal Points
Ornate molding does not need to appear throughout the entire home.
A detailed acanthus leaf molding or polyurethane floral onlay can be used selectively in a formal dining room or other feature area.
Secondary rooms may use simpler profiles.
This establishes a decorative hierarchy.
It also makes the more elaborate details visually meaningful.
STAVROS Polyurethane Molding Profiles for Whole-House Projects
Before developing a takeoff, review the actual stock lengths and dimensions.
Several STAVROS polyurethane moldings share a length of approximately 102.36 inches.
That is approximately 8.53 feet per strip.
This is useful for planning repeated rectangular frames.
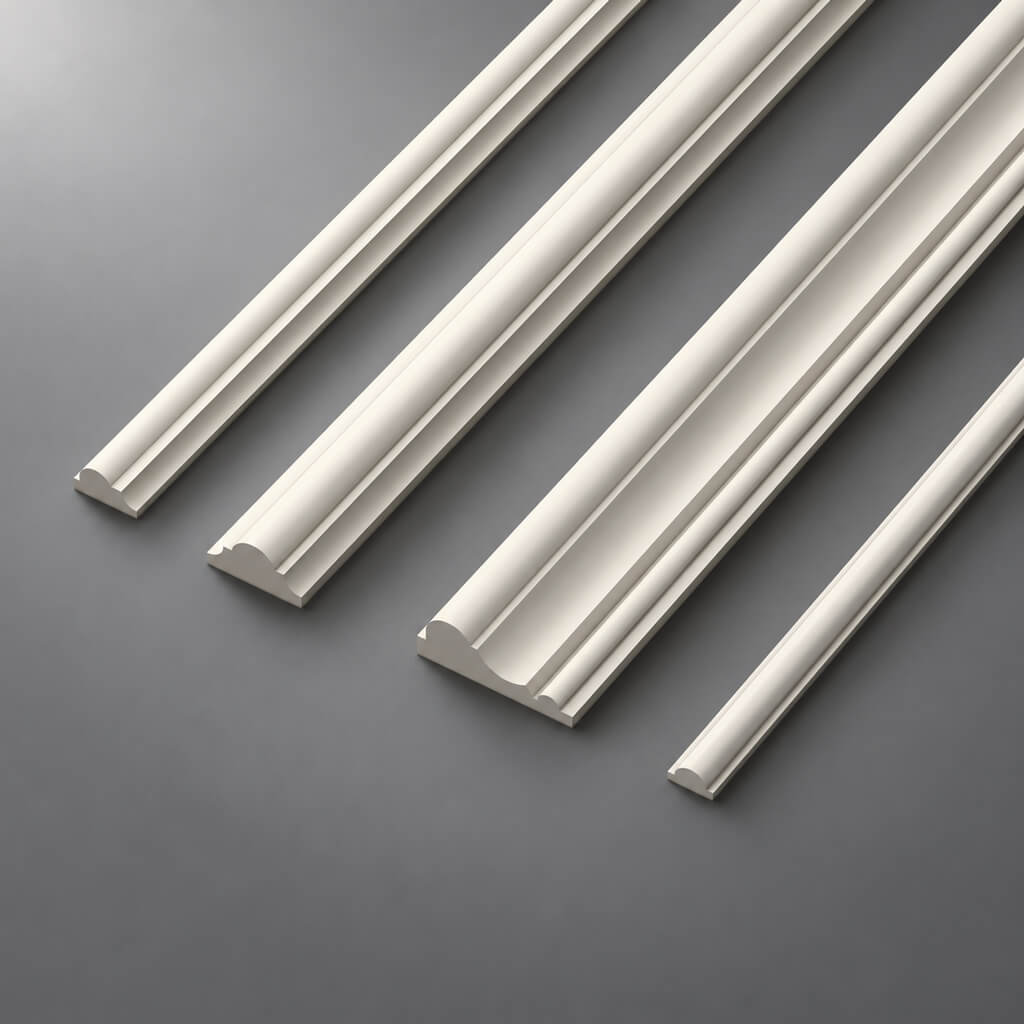
MLDPU-001: Narrow Decorative Line
The STAVROS MLDPU-001 polyurethane molding measures:
Face width: 0.39 inches
Projection: 0.24 inches
Stock length: 102.36 inches
Material: polyurethane
Its narrow semicircular profile is suitable for fine decorative lines, secondary contours, and smaller wall compositions.
It can also be considered for selected furniture-front and door-panel decorations.
MLDPU-004: Compact Architectural Profile
The STAVROS MLDPU-004 polyurethane molding measures:
Face width: 0.59 inches
Projection: 0.31 inches
Stock length: 102.36 inches
Material: polyurethane
This is a compact decorative profile with defined relief.
It may work well for restrained wall panels and secondary frames.
MLDPU-002: Medium Decorative Wall Molding
The STAVROS MLDPU-002 polyurethane molding measures:
Face width: 0.87 inches
Projection: 0.43 inches
Stock length: 102.36 inches
Material: polyurethane
Its stepped profile and central rounded detail create a distinct architectural contour.
It is a practical candidate for repeated rectangular wall frames.
MLDPU-003: Wider Architectural Molding
The STAVROS MLDPU-003 polyurethane molding measures:
Face width: 1.38 inches
Projection: 0.47 inches
Stock length: 102.36 inches
Material: polyurethane
This wider molding produces stronger visual relief.
It may be suitable for selected feature walls or larger architectural compositions.
Profile Comparison
| Profile | Face width | Projection | Stock length | Potential role |
|---|---|---|---|---|
| MLDPU-001 | 0.39 in | 0.24 in | 102.36 in | Fine decorative lines |
| MLDPU-004 | 0.59 in | 0.31 in | 102.36 in | Secondary wall frames |
| MLDPU-002 | 0.87 in | 0.43 in | 102.36 in | Primary wall frames |
| MLDPU-003 | 1.38 in | 0.47 in | 102.36 in | Feature compositions |
These profiles share a stock length but have different cross-sections and visual effects.
They should not be treated as identical products merely because their lengths match.
If a project uses multiple widths, each SKU needs its own quantity and cutting schedule.
The Right Way to Compare Molding Cost per Linear Foot
The first calculation is straightforward.
Convert the purchased strip length into feet.
For a STAVROS profile measuring 102.36 inches:
102.36 ÷ 12 = 8.53 linear feet.
The cost per purchased linear foot is:
Price per strip ÷ 8.53
For example, assume a hypothetical price of $60 per strip.
This is an illustrative figure for calculation, not a current product quotation.
$60 ÷ 8.53 = approximately $7.03 per purchased linear foot.
But this does not include installation waste.
Purchased Length vs. Installed Length
Suppose a project installs 240 linear feet of molding.
If it requires 30 full strips, the homeowner purchases:
30 × 8.53 = 255.9 linear feet.
The purchased material exceeds the installed length by:
255.9 − 240 = 15.9 linear feet.
At the illustrative $60 strip price:
30 × $60 = $1,800.
The effective material cost per installed linear foot becomes:
$1,800 ÷ 240 = $7.50.
This is higher than the nominal $7.03 per purchased linear foot.
The difference results from offcuts.
And installation labor, adhesives, finishing, shipping, and other expenses have not yet been included.
The Three Numbers Every Estimate Needs
A reliable material estimate should distinguish:
Installed linear footage — the amount visible in the finished interior.
Purchased linear footage — the total quantity supplied in stock strips.
Effective material cost per installed foot — the purchase cost divided by the installed footage.
This distinction is especially important for complex layouts.
Why a 2,000-Square-Foot House Does Not Tell You How Much Molding to Buy
A home's floor area is not the same as its molding quantity.
Two homes with identical floor areas may need very different amounts of decorative trim.
One may contain an open-plan living area with few interior partitions.
The other may have numerous small rooms, long hallways, and elaborate decorative panels.
Wall heights also differ.
An 8-foot room and a 10-foot room can have the same floor area but require different molding layouts.
What to Measure Instead
For each room, record the wall lengths and ceiling height.
Identify windows, doors, built-ins, and other interruptions.
Then document the actual decorative composition.
For picture-frame molding, record the dimensions and number of frames.
For ceiling perimeter trim, calculate the applicable wall lengths.
For ornamental appliques, count the individual elements.
For decorative borders, record each finished run.
The result is a material takeoff based on actual geometry.
Separate the Architectural Zones
A whole-house estimate should identify which rooms receive which level of decoration.
The main living areas may have more elaborate moldings.
Bedrooms may use a restrained treatment.
Bathrooms and utility spaces may require a different approach or no decorative molding at all.
The correct specification reflects the design and intended use.
It should not assume that every wall in the home receives identical decoration.
Case Study: Polyurethane Wall Molding for a 2,000-Square-Foot Home
Consider an illustrative American home with approximately 2,000 square feet of total floor area.
The renovation includes decorative wall frames in eight selected spaces.
The kitchen, bathrooms, closets, laundry, and other areas do not receive this particular wall-frame treatment.
The selected rooms are:
| Room | Decorative frames |
|---|---|
| Living room | 4 |
| Dining room | 4 |
| Primary bedroom | 4 |
| Guest bedroom 1 | 3 |
| Guest bedroom 2 | 3 |
| Home office | 2 |
| Entryway | 2 |
| Hallway | 2 |
| Total | 24 |
The example illustrates procurement and cutting efficiency.
It is not a claim that every 2,000-square-foot home should contain 24 identical frames.
The actual frame dimensions and positions must be established from room elevations.
Step 1: Select One Primary Profile
For this example, the project uses STAVROS MLDPU-002 polyurethane molding.
The stock length is 102.36 inches.
A single SKU will be used for the 24 decorative frames.
This permits offcuts to be shared across rooms.
Step 2: Establish the Frame Dimensions
Assume each frame measures:
Width: 24 inches
Height: 36 inches
For the calculations below, these are the required finished cutting lengths for the four sides, measured consistently to the specified reference points.
For a real mitered frame, the shop drawings must identify whether dimensions refer to the long points, short points, or centerlines of the cuts.
Step 3: Calculate One Frame
Each rectangular frame contains:
Two vertical pieces measuring 36 inches
Two horizontal pieces measuring 24 inches
Total molding per frame:
2 × 36 + 2 × 24 = 120 inches.
That equals:
120 ÷ 12 = 10 linear feet.
Step 4: Calculate All 24 Frames
24 × 120 = 2,880 inches.
In linear feet:
2,880 ÷ 12 = 240 linear feet.
The house requires 240 installed linear feet for these frames.
But this does not establish the number of stock strips.
The cutting schedule comes next.
A Real Cutting Plan for 24 Decorative Wall Frames
Each stock strip measures 102.36 inches.
The project needs:
Forty-eight 36-inch pieces
Forty-eight 24-inch pieces
The combined finished length is 2,880 inches.
Cutting Pattern A
One full strip can produce:
36 + 36 + 24 = 96 inches.
That leaves:
102.36 − 96 = 6.36 inches before saw kerf and trimming allowances.
This pattern provides:
Two 36-inch pieces
One 24-inch piece
Use the pattern on 24 strips.
The resulting pieces are:
Forty-eight 36-inch pieces
Twenty-four 24-inch pieces
All required vertical pieces are now accounted for.
Cutting Pattern B
The remaining requirement is twenty-four 24-inch pieces.
One strip can produce:
24 + 24 + 24 + 24 = 96 inches.
Again, 6.36 inches remains before cutting allowances.
Twenty-four horizontal pieces require:
24 ÷ 4 = 6 strips.
Combined Cut List
| Cutting pattern | Strips | Pieces produced |
|---|---|---|
| 36 + 36 + 24 in | 24 | 48 vertical pieces and 24 horizontal pieces |
| 24 + 24 + 24 + 24 in | 6 | 24 horizontal pieces |
| Total | 30 strips | All 96 pieces |
The project therefore requires 30 full MLDPU-002 strips under the stated assumptions.
Purchased Length
30 × 102.36 = 3,070.8 inches.
Installed Length
2,880 inches.
Nominal Unused Material
3,070.8 − 2,880 = 190.8 inches.
Waste as a percentage of purchased material:
190.8 ÷ 3,070.8 × 100 = approximately 6.21%.
This is a cutting-plan result, not a universal allowance for all projects.
The plan must still be checked against blade kerf, end trimming, miter requirements, damaged pieces, and installation conditions.
What Happens If Each Room Is Ordered Separately?
Now consider the same 24 frames.
The dimensions and profile remain unchanged.
But the materials are allocated independently to each room, without sharing the offcuts.
The required number of strips may increase.
For rooms containing four frames, a feasible isolated cutting schedule uses five stock strips.
For rooms containing three frames, four strips are needed.
For rooms containing two frames, three strips are needed.
Room-by-Room Procurement
| Room | Frames | Strips needed independently |
|---|---|---|
| Living room | 4 | 5 |
| Dining room | 4 | 5 |
| Primary bedroom | 4 | 5 |
| Guest bedroom 1 | 3 | 4 |
| Guest bedroom 2 | 3 | 4 |
| Home office | 2 | 3 |
| Entryway | 2 | 3 |
| Hallway | 2 | 3 |
| Total | 24 | 32 |
Ordering the rooms independently results in 32 strips under these cutting assumptions.
Pooling all the cuts across the house requires 30.
Material Difference
32 − 30 = 2 strips.
As a percentage of the room-by-room quantity:
2 ÷ 32 × 100 = 6.25% fewer purchased strips.
The saving comes from sharing usable lengths across rooms.
It does not come from a supplier discount.
Illustrative Dollar Comparison
Assume a hypothetical strip price of $60.
This is a calculation example, not an advertised STAVROS price.
| Procurement method | Strips | Illustrative material cost |
|---|---|---|
| Room-by-room allocation | 32 | $1,920 |
| Whole-house allocation | 30 | $1,800 |
| Difference | 2 | $120 |
The saving is $120 before taxes, shipping, packaging, adhesive, finishing, and installation.
It would be inaccurate to present that figure as a $120 reduction in the complete renovation budget.
What Does Not Change?
The completed design still contains 24 rectangular frames.
The number of visible corners is unchanged.
The total installed molding length is unchanged.
The labor required to position, join, and finish those frames may also remain essentially unchanged.
The demonstrated saving is a material-purchasing improvement.
That distinction is critical when evaluating whole-house cost optimization.
Can Frame Dimensions Reduce Cutting Waste Further?
Yes.
The shape of a frame affects how efficiently its component lengths fit into the available stock.
Consider three rectangular designs.
Each has a finished perimeter of 120 inches.
Therefore, each design uses exactly 10 linear feet of installed molding per frame.
Yet the number of stock strips required for 24 frames differs.
Option A: 20 × 40-Inch Frames
Perimeter:
2 × (20 + 40) = 120 inches.
For 24 frames, the project needs:
Forty-eight 20-inch pieces
Forty-eight 40-inch pieces
A feasible cutting plan uses:
Twenty-four strips cut into 40 + 40 + 20 inches
Four strips cut into five 20-inch pieces each
One strip cut into four 20-inch pieces
Total:
29 stock strips.
Nominal waste:
29 × 102.36 − 2,880 = 88.44 inches.
Waste percentage:
Approximately 2.98%.
Option B: 24 × 36-Inch Frames
This is the previous design.
The project requires 30 strips.
Nominal waste:
190.8 inches.
Waste percentage:
Approximately 6.21%.
Option C: 30 × 30-Inch Square Frames
Each square uses:
4 × 30 = 120 inches.
Twenty-four frames require 96 pieces measuring 30 inches.
One stock strip can produce three 30-inch pieces.
The project requires:
96 ÷ 3 = 32 strips.
Nominal waste:
32 × 102.36 − 2,880 = 395.52 inches.
Waste percentage:
Approximately 12.08%.
Comparing Equal-Perimeter Designs
| Frame dimensions | Installed length | Strips required | Nominal waste |
|---|---|---|---|
| 20 × 40 in | 240 ft | 29 | 2.98% |
| 24 × 36 in | 240 ft | 30 | 6.21% |
| 30 × 30 in | 240 ft | 32 | 12.08% |
All three designs use the same installed linear footage.
Yet the cutting efficiency changes.
This illustrates an important principle:
Molding cost depends not only on how much trim is installed, but also on the dimensions of the pieces being cut.
Should You Choose the Most Efficient Frame?
Not automatically.
A 20 × 40-inch frame has different visual proportions from a 30 × 30-inch square.
The shape affects the room's architecture.
If the square frame is clearly the better design, choosing a narrow rectangle merely to save a few strips may be a poor decision.
However, when multiple layouts are aesthetically acceptable, cutting efficiency becomes a legitimate selection criterion.
The designer and installer can evaluate those alternatives before the final drawings are approved.
Important Cutting Allowances
The calculations above use nominal finished piece lengths.
The final shop cutting plan needs additional checks.
Saw Kerf
Each cut removes a small amount of material.
The width depends on the blade and cutting method.
The nominal cutting patterns have limited remaining length, so the total kerf must be considered.
Mitered Corners
A mitered frame has angled ends.
The drawing must specify whether a dimension is measured to the long point, short point, or another reference.
A poorly defined dimension can invalidate the material takeoff.
End Squaring
Some installations require factory ends to be trimmed before use.
That consumes additional length.
Pattern Alignment
An ornamental molding with repeating beads, leaves, or rope twists may require extra material to align the pattern.
A calculation based on length alone may not be sufficient.
Damaged Material
Shipping damage or installation mistakes can introduce additional requirements.
The reserve should reflect the actual project risk.
Reserve Quantity
A fixed 5%, 10%, or 15% purchase allowance is not universally correct.
A simple project with repeated profiles and an approved cutting schedule may need a modest reserve.
A complex imported profile with difficult replacement logistics may justify more.
The reserve should be calculated intentionally rather than added automatically.
Short Decorative Trim Requires a Different Purchasing Strategy
Not every STAVROS polyurethane product has the same stock length.
The STAVROS KPU-105 beaded molding measures:
Width: 0.43 inches
Projection: 0.24 inches
Stock length: 39.37 inches
That is approximately 3.28 feet per strip.
This profile is intended for fine ornamental detailing.
It should not be treated as interchangeable with a much longer architectural wall molding.
Example: Four Small Decorative Frames
Suppose the project requires four square ornamental frames.
Each frame measures 12 × 12 inches.
The project therefore needs:
4 frames × 4 sides = 16 pieces.
Each piece is 12 inches long.
Cutting Efficiency
One KPU-105 stock strip can produce:
12 + 12 + 12 = 36 inches.
That leaves approximately 3.37 inches before cutting allowances.
To obtain sixteen pieces:
16 ÷ 3 = 5.33.
Rounded upward:
6 strips.
The Cost of Isolated Cutting
If each square frame were cut independently without retaining usable offcuts, the four 12-inch pieces would require two stock strips per frame.
For four frames:
4 × 2 = 8 strips.
Pooling the cuts across all four frames requires six.
That is two fewer strips.
This example illustrates why decorative trim should be calculated across the complete set of repeated elements.
Ornamental Pattern Matching
The calculation assumes that the decorative pattern and required miter orientation permit the proposed cuts.
Beaded molding may need careful visual alignment at the corners.
The actual cut list should therefore be approved before purchasing.
Standardization Does Not Mean Every Room Must Look Identical
One concern about whole-house molding standardization is that repeated profiles may create a monotonous interior.
This can happen when every room uses the same frame dimensions, spacing, and decorative hierarchy.
But the solution is not necessarily to introduce more products.
Instead, vary the composition.
Living Room
Use the primary molding in larger, carefully proportioned frames.
A focal wall may incorporate one additional decorative element.
The emphasis is on architectural presence.
Dining Room
Use the same primary molding in a more formal symmetrical arrangement.
A selected ornamental accent can establish the room's importance.
Primary Bedroom
Use the profile around a restrained headboard composition.
Keep the decorative pattern quieter than in the public rooms.
Guest Bedrooms
Repeat the molding in simpler panels.
The colors and proportions may vary without changing the profile.
Home Office
Use the molding to establish disciplined wall geometry.
The decorative layout can complement built-in furniture or shelving.
Entryway
A limited number of well-positioned frames can create a strong first impression.
There may be no need for ornate molding throughout the space.
Hallway
Use repeated frames to establish rhythm.
The spacing should relate to doorways, switches, and wall sections.
The Architectural Principle
The product is standardized.
The arrangement responds to the room.
This approach can provide continuity across the house without excessive repetition.
Where to Use Ornate Molding—and Where to Keep It Simple
Ornamental profiles should be selected according to their visual importance.
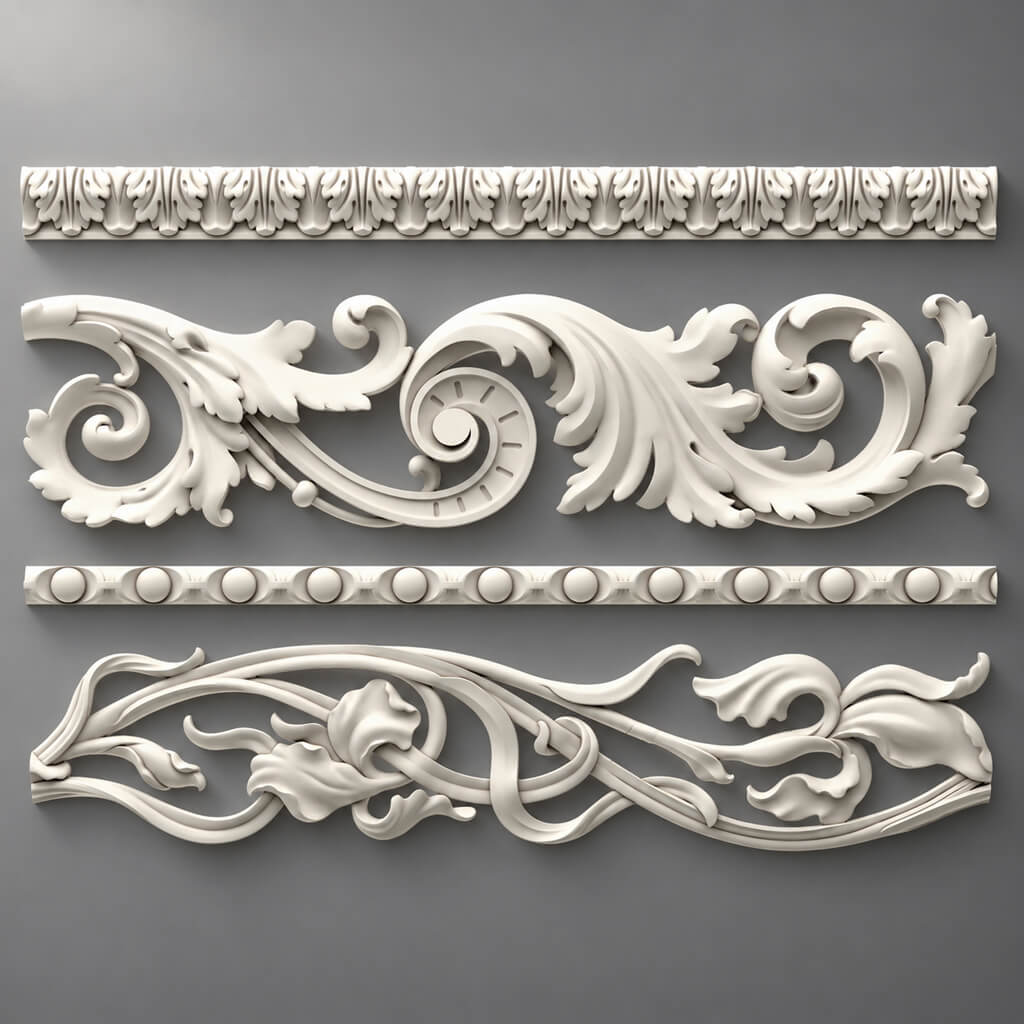
STAVROS offers ornate polyurethane decorative molding, including beaded and rope patterns.
These products are useful when a simple frame would not provide the desired detail.
Beaded Molding
The KPU-105 beaded molding has a narrow, repeating bead pattern.
It can be used as a secondary border on selected decorative panels.
Rope Molding
The KPU-125 rope molding has a twisted ornamental pattern.
Its dimensions are approximately:
Width: 0.35 inches
Projection: 0.20 inches
Length: 39.37 inches
It may be suitable for selected classical furniture and architectural accents.
Acanthus Leaf Molding
Acanthus motifs are associated with classical architectural decoration.
They may be appropriate in a formal living room or dining room.
However, applying elaborate acanthus ornament throughout every bedroom and hallway may add complexity without improving the overall design.
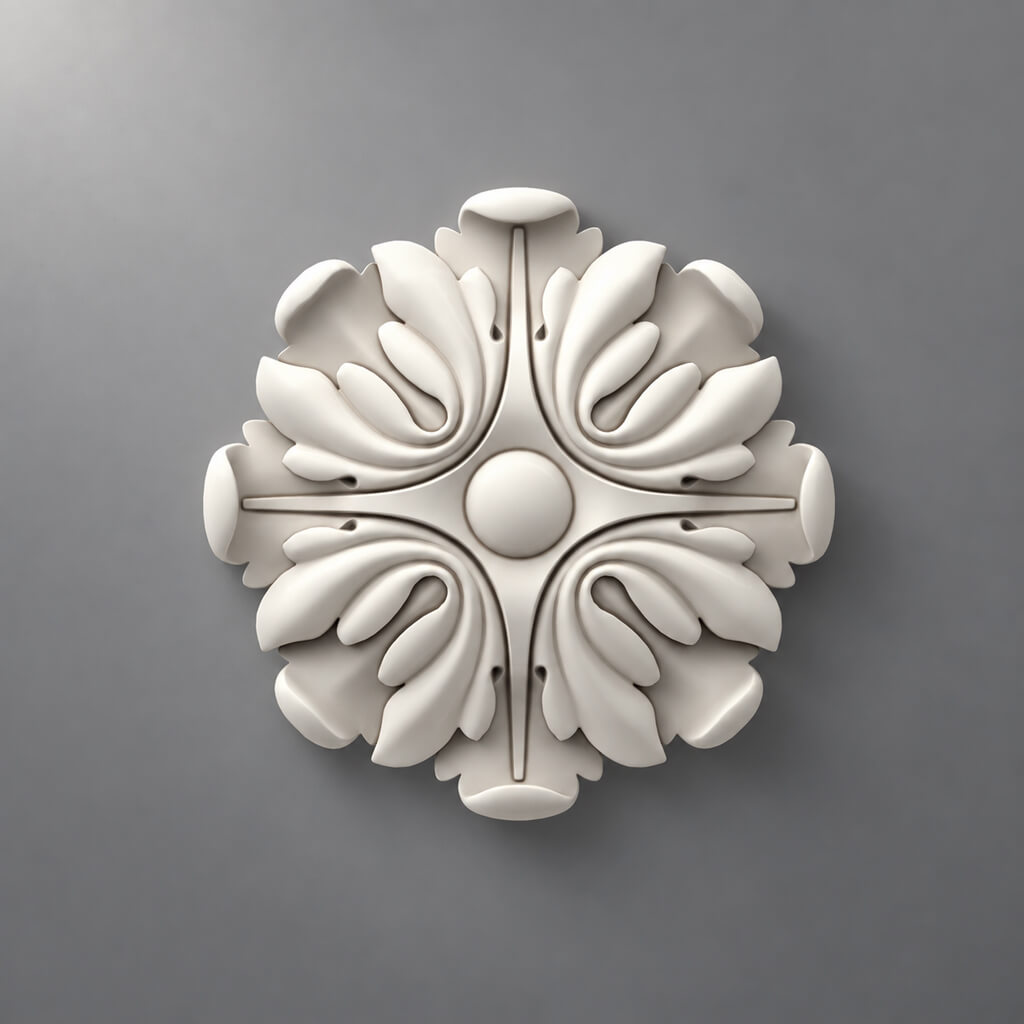
Floral Onlays
The STAVROS polyurethane onlay collection includes sculpted decorative elements that can introduce a focal accent.
One floral applique may provide sufficient ornament within a simple wall composition.
The Cost Principle
Use elaborate decoration where it contributes the most to the design.
Use simpler moldings where additional ornament has limited visual value.
A well-designed architectural hierarchy can be more effective than distributing expensive decoration uniformly.
How to Reduce Molding Installation Time
Material efficiency and labor efficiency are related but different.
Buying fewer strips does not necessarily reduce the number of installed joints.
Installation time depends on the actual construction sequence.
Repeatable Layouts
When several frames share a consistent design, the crew can use approved templates and repeated measurements.
This may improve consistency.
It can also reduce the likelihood of layout mistakes.
Clear Drawings
A dimensioned wall elevation should identify the position of each frame.
It should account for doors, windows, baseboards, switches, outlets, and architectural interruptions.
Unresolved dimensions can cause costly site decisions.
Accurate Material Labeling
Each cut piece can be assigned to a specific location.
For example:
BR-02 / MLDPU-002 / 36 in / vertical
The code can identify the room, molding SKU, finished length, and orientation.
This is particularly useful for multi-room installations.
Controlled Cutting
Where appropriate, pieces of the same length can be grouped in the cutting schedule.
However, all final dimensions must be checked against the actual installation.
A nominally identical opening may differ slightly due to wall irregularities.
Joint Planning
Minimize unnecessary end-to-end splices.
For picture-frame molding, the four corners are generally inherent in the design.
Using the same profile does not eliminate them.
Surface Preparation
Substrates should be suitable for the selected installation method.
Dust, loose paint, irregular surfaces, and unsuitable coatings can undermine adhesion.
Correct preparation is generally more economical than repairing failed trim later.
Compatible Adhesives
Use an adhesive approved for the molding material and substrate.
Some polyurethane installations also require specified joint adhesives or mechanical support.
Follow the product manufacturer's instructions.
Paint and Finish Planning
It may be efficient to coordinate the finishing of molding across several rooms.
But the sequence depends on the project's substrate, finish requirements, and installation method.
Do not assume that every polyurethane molding must be painted before installation or that every product requires the same primer.
How to Estimate Molding Installation Labor
A professional quotation should be more detailed than a single price per linear foot.
That price can be a useful summary, but it may conceal substantial differences between projects.
A practical labor model separates the work.
Layout Labor
Includes measuring, checking wall conditions, transferring elevations, and marking frame locations.
Cutting Labor
Includes measuring individual pieces, cutting miters, and preparing joints.
Installation Labor
Includes adhesive application, positioning, support where required, and alignment.
Joint Finishing
Includes treatment of seams, corners, and any approved filling materials.
Surface Finishing
Includes preparation, priming where necessary, and painting.
Protection and Cleanup
Includes protecting adjacent finishes, material handling, and cleaning the work area.
Example Labor Formula
A simplified labor estimate can be expressed as:
Total labor = layout hours + cutting hours + installation hours + finishing hours + cleanup hours
Then:
Labor cost = total labor hours × applicable labor rate
In an actual contract, labor rates may vary by trade and include overhead.
The formula is intended to make the cost structure transparent.
An Illustrative Labor Saving
Suppose better coordination eliminates three hours of otherwise necessary rework.
At a hypothetical loaded labor rate of $75 per hour:
3 × $75 = $225.
That is a possible saving under the stated assumption.
It should not be described as a guaranteed outcome of standardizing the molding profile.
The crew must actually avoid those hours for the saving to occur.
Compare Complete Installation Cost, Not Just Material Price
A lower material quotation may produce a higher final cost if the design requires more labor.
For example, one design uses a single decorative molding.
Another uses two separate moldings installed as a layered composition.
The second design may require additional cuts, adhesive, positioning, and finishing.
It may also introduce more joints.
The two designs should be compared on the same scope.
Whole-House Cost Formula
Total project cost = material purchase + freight and handling + installation labor + adhesives and supplies + finishing + required contingency
For international orders, include applicable import-related costs.
The final estimate should also identify what is excluded.
Value Engineering
Value engineering does not mean deleting decoration indiscriminately.
It means preserving the design's essential visual and functional requirements while evaluating less costly ways to achieve them.
Possible decisions include choosing a stocked profile rather than custom tooling, simplifying a hidden detail, reducing unnecessary decorative layers, or using a shared molding across several rooms.
However, a change that degrades the approved visual composition may not represent good value.
Three Ways to Reduce Decorative Molding Costs Without Losing Architectural Character
Strategy 1: Standardize the Primary Molding
Choose one main profile for most decorative frames.
Use room-specific layouts to create variety.
This makes whole-project purchasing and offcut management easier.
Strategy 2: Concentrate Ornamental Detail
Use detailed decoration in focal areas.
For example, a formal dining room may receive selected acanthus ornament.
Guest bedrooms may use the primary molding without additional decoration.
This provides a hierarchy of architectural importance.
Strategy 3: Optimize Finished Piece Lengths
Evaluate frame dimensions before approving the drawings.
When two proportions are aesthetically comparable, choose the one with the better cutting yield.
Do not change an approved architectural composition solely to improve a material-efficiency percentage.
Managing Offcuts: Turning Waste Into a Usable Inventory
Every molding project produces offcuts.
The objective is to retain useful pieces without creating an unmanageable collection of scraps.
Classify by Product Code
An offcut from MLDPU-002 is not the same material as an offcut from MLDPU-004.
Even if their lengths match, their profiles differ.
Each should be stored and recorded separately.
Record Actual Length
Measure the usable length after trimming damaged or unsuitable ends.
Do not record the original theoretical offcut length if the physical piece is shorter.
Identify End Conditions
A piece with one mitered end may have a different usable length for the next application.
Record whether the ends are square, angled, damaged, or otherwise prepared.
Store by Project
For an active whole-house renovation, organize reusable pieces so they remain available across rooms.
If every crew keeps its own offcuts separately, the benefit of whole-house optimization may be lost.
Prioritize Useful Reuse
A short piece might complete a window detail, small decorative frame, or other approved feature.
However, avoid introducing additional visible joints merely to consume scraps.
Sometimes discarding an offcut is more economical than spending significant labor to use it.
Retain Finishing Samples
Small offcuts may be useful for testing paint, glaze, adhesive, or joint-finishing materials.
This can prevent wasting full-length pieces on experiments.
A Practical Offcut Inventory
A simple spreadsheet can contain the following fields.
| Field | Example |
|---|---|
| Project | Whole-House Trim |
| SKU | MLDPU-002 |
| Available length | 18.5 in |
| End condition | One square end |
| Status | Usable |
| Storage location | Rack B-03 |
| Reserved for | Office panel detail |
An installer or purchasing coordinator can check the available material before ordering additional stock.
For larger contracting businesses, inventory can be managed across multiple projects.
However, the cost of transporting, storing, and handling offcuts should be considered.
A reusable piece has value only if it can be applied economically.
Consolidating Decorative Molding Orders
Ordering all components in one shipment may reduce administrative complexity.
It may also improve freight efficiency.
But order consolidation is not automatically the cheapest option.
Some carriers charge by dimensional weight or oversize-package rules.
Special packaging may also be required.
Compare Freight Scenarios
Request quotes for the actual shipment configuration.
For example:
One consolidated shipment
Two project-stage shipments
Separate shipments from different suppliers
The comparison should include packing costs, freight, potential handling charges, and the project schedule.
Packaging Protection
Architectural profiles can be vulnerable to damage if packaging does not protect projecting edges.
Reducing packaging volume at the expense of damage protection may increase the total cost.
A lower freight quote is not useful if the shipment arrives with unusable molding.
Receiving Inspection
Check the shipment against the purchase order.
Verify the correct SKUs and lengths.
Inspect for visible damage.
Document discrepancies before the materials are distributed to installation crews.
Timing
Materials should arrive early enough to avoid delaying installation.
But excessively early delivery can increase storage requirements and the risk of damage during other construction work.
Coordinate the delivery schedule with the actual project sequence.
Buying Polyurethane Molding for U.S. Projects From STAVROS
The STAVROS English-language catalog presents products with dimensions in inches and prices displayed in U.S. dollars.
This makes product comparison more convenient for American designers and contractors.
However, the published delivery information primarily describes shipments within Russia and certain neighboring markets.
Before placing a U.S. order, confirm the available international delivery options.
Verify the Delivered Price
Ask for a quotation identifying the exact SKUs, quantities, packaging, freight, and payment terms.
For imported goods, confirm customs and other applicable import-related responsibilities.
A price shown in U.S. dollars should not be interpreted as a confirmed domestic U.S. delivered price.
Confirm Product Availability
The cataloged product may be available for ordering, but the required quantity and delivery schedule should be confirmed.
Do not assume that a large project quantity is physically stocked for immediate U.S. delivery.
Ask About Samples
For a large decorative project, physical samples can help confirm profile scale, relief, and finishing requirements.
This is particularly important when the project drawings were prepared using photographs alone.
Request Technical Drawings
Product drawings help establish accurate cutting and installation details.
For a repeated whole-house molding, those dimensions should be incorporated into the project specification.
Confirm Any Commercial Terms
Bulk discounts, dealer programs, factory cutting services, special packaging, or staged deliveries should be included in a written supplier quotation if offered.
They should not be assumed from general marketing claims.
When Standardization Can Increase Costs
Reducing the number of SKUs is not always the best decision.
Using a Wide Profile Everywhere
A wide molding may look appropriate in a formal living room.
It can be excessive in a small hallway.
Using that same expensive profile throughout the house may increase costs unnecessarily.
Forcing One Stock Length Onto Every Design
Some decorative compositions may produce significant waste with a particular stock length.
A different product may have a better cutting yield.
Overusing Ornamental Trim
Fine beaded or rope molding may be available in shorter lengths.
Using it throughout long wall runs may create a large number of joints.
A simple longer profile may be more appropriate for the primary architectural lines.
Ignoring the Cost of Labor
A complex molding may have an attractive price but require substantial fitting and finishing.
The installed cost may exceed that of another option.
Mixing Incompatible Materials
A whole-house scheme may combine polyurethane, MDF, wood, and polystyrene.
That can be appropriate.
But each material has different finishing and installation requirements.
Treating every product as if it were identical can introduce rework.
Sacrificing the Design
A technically efficient cut list does not justify an awkward wall composition.
The final result must remain architecturally convincing.
Cost optimization should serve the design—not replace it.
Whole-House Trim Planning: A Recommended Workflow
A disciplined project process can reduce purchasing mistakes and late design changes.
Phase 1: Define the Decorative Scope
Identify which rooms receive molding.
Determine whether each space needs primary frames, secondary decorative borders, ornamental accents, or another treatment.
Phase 2: Establish the Design Language
Select the principal architectural style.
Choose the relative importance of each room.
Avoid selecting products before the intended composition is clear.
Phase 3: Select Preliminary Profiles
Choose a small number of candidate moldings.
Compare their actual dimensions and visual relief.
Review STAVROS polyurethane wall moldings and ornamental decorative trim.
Phase 4: Review Physical Samples
Where possible, inspect samples in the intended environment.
A profile that appears subtle online may be visually substantial on the wall.
Phase 5: Prepare Dimensioned Elevations
Record the position and dimensions of every decorative frame.
Show adjacent doors, windows, switches, baseboards, and other relevant features.
Phase 6: Generate the Material Takeoff
Calculate every required finished piece by SKU.
Do not combine different molding profiles into one total.
Phase 7: Optimize the Cutting Plan
Group the cuts for identical profiles across rooms.
Account for stock lengths, saw kerf, miters, and ornamental pattern alignment.
Phase 8: Prepare the Bill of Materials
Identify quantities of each SKU.
Include adhesives, finishing materials, and other approved accessories.
Phase 9: Compare Delivered Supplier Quotations
Compare the complete cost of obtaining the required materials.
Consider lead times and replacement availability.
Phase 10: Coordinate Installation
Provide labeled drawings, cutting schedules, and finishing requirements to the installation team.
Phase 11: Track Consumption
Record actual used quantities.
Retain useful offcuts.
Monitor changes to the design.
Phase 12: Close the Material Account
At the end of the project, compare the estimated and actual quantities.
Record waste and rework.
These observations can improve the next project estimate.
A Professional Polyurethane Molding Purchase Specification
For contractors and designers, a complete purchase specification is more useful than a list of product names.
It should identify exactly what must be supplied.
Example Specification
| Field | Requirement |
|---|---|
| Product | STAVROS MLDPU-002 |
| Material | Polyurethane |
| Cross-section | 0.87 × 0.43 in |
| Stock length | 102.36 in |
| Application | Decorative wall frames |
| Number of frames | 24 |
| Installed length | 240 linear ft |
| Optimized base quantity | 30 strips |
| Additional reserve | To be determined by project risk |
| Finish | As specified by designer |
| Required documentation | Product dimensions and relevant technical information |
| Delivery location | U.S. project address |
| Freight and customs | To be confirmed in supplier quote |
This creates a clear relationship between the product and the design.
It also makes later substitutions easier to evaluate.
If a different SKU is proposed, the project team can compare its cross-section, length, finish, and cutting yield.
Using Software to Optimize Molding Cuts
For a small project, a manual cutting schedule may be sufficient.
For a large whole-house installation, software can help.
The mathematical problem is commonly known as a one-dimensional cutting-stock problem.
The objective is to assign required finished lengths to available stock lengths while satisfying the project's constraints.
Data Required
A cutting optimizer needs:
Stock length
Required cut lengths
Quantity of each cut
Saw kerf
Any required end-trimming allowance
Minimum acceptable offcut length
Restrictions on mixing pieces
Ornamental pattern requirements, where applicable
Useful Outputs
A suitable optimization process can produce the required number of stock strips, a cutting schedule for each strip, and the amount of unused material.
What Software Cannot Decide Alone
The mathematically lowest-waste arrangement may not produce the best visible joints.
An ornamental frieze may require pattern continuity.
A long wall may benefit from fewer joints.
A particular offcut may be unusable because of its end condition.
The installer must review the proposed solution.
Use a Shared Project Schedule
A digital cutting plan should identify which finished pieces belong to each room.
The same information can be used for labeling and material distribution.
For larger contracting businesses, this can simplify coordination across crews.
Safety and Installation Considerations for American Homes
Reducing cost should never compromise installation suitability.
Substrate Condition
Decorative molding should be attached to a suitable prepared surface.
Loose paint, dust, damaged drywall, and other substrate problems may need correction.
Adhesive Compatibility
Use an adhesive approved for the specific polyurethane product and substrate.
Follow its application, support, curing, and environmental requirements.
Moisture Exposure
Polyurethane products can have different properties depending on their formulation.
Their suitability for humid locations should be confirmed from the product documentation.
The adhesive and finish must also be appropriate.
Heat and Fireplaces
Do not assume decorative polyurethane molding can be installed at any distance from a fireplace or other heat source.
Applicable clearances and material requirements depend on the equipment and local code.
Nonstructural Use
Decorative molding is not a substitute for structural trim or load-bearing components.
It should not be used to support cabinets, fixtures, or other loads without specific engineering and product approval.
Pre-1978 Homes
Older American homes may contain lead-based paint.
When work disturbs painted surfaces in covered pre-1978 housing or child-occupied facilities, the EPA's Renovation, Repair and Painting Rule may apply.
Paid contractors performing covered work generally need the appropriate certification and lead-safe practices.
Do not assume a small decorative remodeling project is automatically exempt.
Finish Compatibility
Primer, paint, adhesives, and joint materials should form a compatible system.
A decorative finish that fails or requires extensive repainting can eliminate the savings achieved through efficient purchasing.
Frequently Asked Questions About Polyurethane Molding Cost
How Much Does Polyurethane Molding Cost per Linear Foot?
The material cost depends on the specific product and its current selling price. Divide the price of one strip by its length in feet to calculate purchased cost per linear foot. For a complete estimate, account for cutting waste, installation, finishing, and shipping.
Is Polyurethane Molding Cheaper Than Wood?
Not necessarily. The answer depends on the profiles being compared, the finish, the installation requirements, and the local material and labor costs. Compare complete installed alternatives rather than product prices alone.
How Can I Reduce Polyurethane Molding Costs for an Entire House?
Standardize suitable profiles, prepare exact material takeoffs, optimize the cutting plan across rooms, and coordinate purchasing and installation. Verify any claimed savings through the actual project estimate.
Should Every Room Use the Same Molding?
No. Reusing one primary profile can simplify purchasing and create design continuity, but room dimensions and architectural hierarchy may justify different profiles or fewer decorative elements.
How Many Molding Profiles Should I Choose?
There is no universal number. A whole-house decorative scheme may begin with one primary profile, one secondary profile, and selected ornamental accents. Additional products should be justified by the design.
Does Standardizing Molding Always Save Money?
No. It can reduce purchasing complexity and waste, but savings depend on the cut schedule, material prices, labor, and actual design requirements.
Can I Use Polyurethane Molding in Several Rooms?
Yes, when the product suits each location and installation. The same architectural profile may be used in different wall-frame compositions.
Does a 2,000-Square-Foot Home Need a Specific Amount of Molding?
No. Floor area alone is insufficient to calculate molding quantity. The required amount depends on room geometry and the actual decorative layout.
How Much Extra Molding Should I Order?
Use a cutting plan and assess the project's risk. The appropriate reserve depends on damaged material, installation complexity, replacement lead times, and the availability of matching products.
Is 10% Molding Waste Normal?
Waste varies by project. In the worked example, 24 identical frames required 30 strips with approximately 6.21% nominal unused material. Other frame dimensions produced different results.
Can I Reuse Molding Offcuts?
Yes, when the offcut is long enough, undamaged, and compatible with another required cut. Reusing scraps should not introduce unnecessary visible joints or extra labor.
Does a Longer Molding Strip Always Reduce Waste?
No. Longer stock often provides useful flexibility, but the actual cutting yield depends on the required finished lengths.
What Is the Best Way to Calculate Molding?
Prepare a list of each finished piece by SKU and length. Then create a cutting schedule using the actual stock lengths, saw kerf, and joint requirements.
What Is a Molding Material Takeoff?
A material takeoff is a detailed list of the trim pieces and quantities required for a project. It provides the basis for cutting, purchasing, and installation.
Can I Use Cutting Software for Polyurethane Molding?
Yes. A one-dimensional cutting-stock optimizer can help assign finished pieces to stock strips. The result should be reviewed for joint placement, miter requirements, and ornamental pattern alignment.
Is Ornate Molding More Expensive to Install?
It can be, particularly when repeating patterns require careful alignment or the design contains additional decorative layers. The actual cost depends on the selected product and layout.
Does Beaded Molding Need a Separate Cutting Plan?
Yes. STAVROS KPU-105 has a different stock length and ornamental pattern from the longer MLDPU profiles.
Can I Combine Polyurethane and MDF Moldings?
Yes, when the products and design are compatible. However, the materials may require different preparation, attachment, and finishing methods.
Is STAVROS Crown Molding Made From Polyurethane?
The referenced STAVROS crown molding category includes HIWOOD high-density polystyrene products. These should not be confused with the company's polyurethane wall molding profiles.
Can I Order Polyurethane Molding in Bulk?
You can prepare a multi-room quantity request and ask the supplier to quote the required amount. Any bulk pricing, discounts, shipping arrangements, or other commercial terms must be confirmed directly.
Does STAVROS Offer Discounts for Large Projects?
Specific discounts or special terms should be confirmed through a current quotation. Do not assume a fixed percentage discount based solely on order size or profile standardization.
Can I Buy STAVROS Polyurethane Molding for a U.S. Project?
The English-language STAVROS catalog provides product information and ordering options. Customers in the United States should confirm international delivery availability, import-related costs, and applicable terms directly with STAVROS.
Which STAVROS Molding Is Suitable for Whole-House Wall Frames?
MLDPU-002 is a medium decorative profile worth considering. MLDPU-004 provides a narrower alternative, while MLDPU-003 offers more pronounced relief.
The final selection should be based on actual room proportions and sample review.
Choosing STAVROS Polyurethane Moldings for a Cost-Efficient Project
A successful whole-house specification begins with the intended architectural composition.
The next step is selecting profiles that can be used consistently and economically.
STAVROS provides several relevant product categories.
| STAVROS category | Project use |
|---|---|
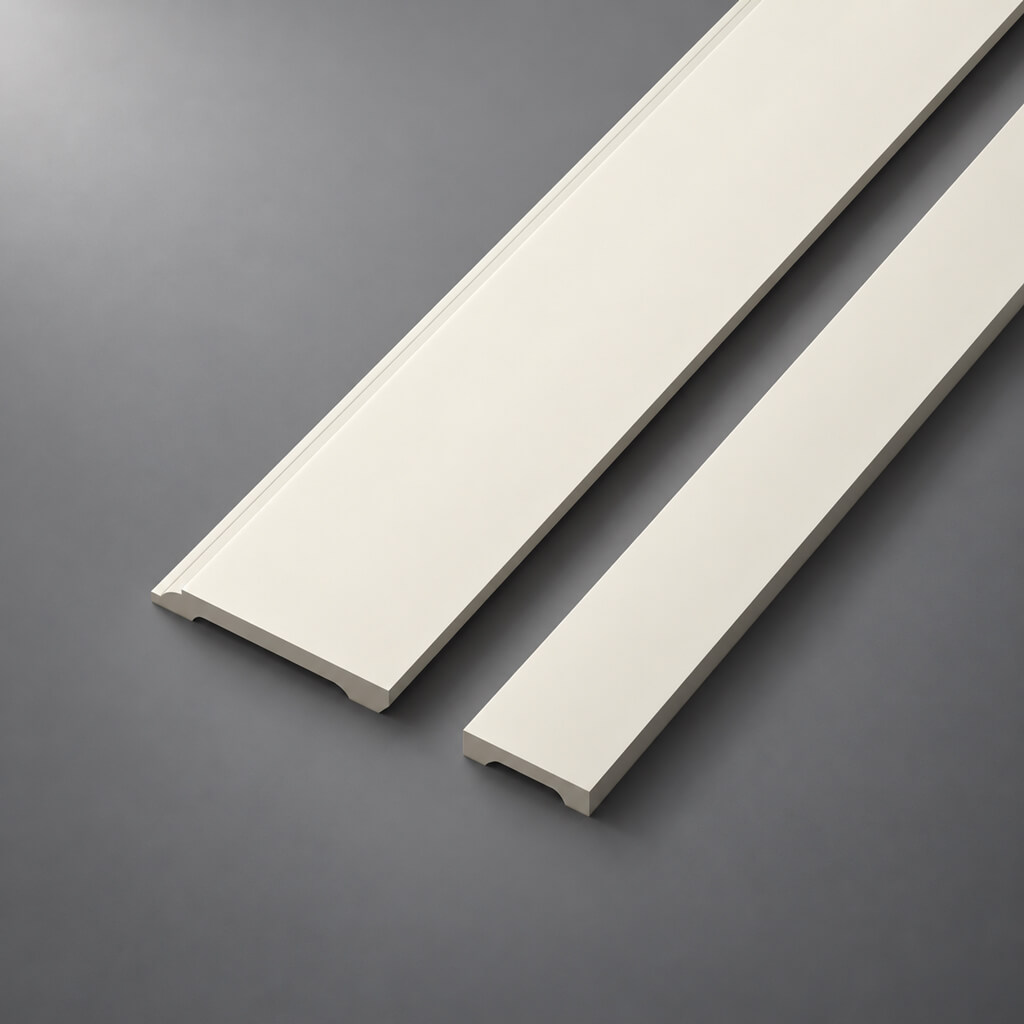
| Polyurethane Moldings | Primary and secondary wall frames |
| Decorative Polyurethane Trim | Beaded, rope and ornamental borders |
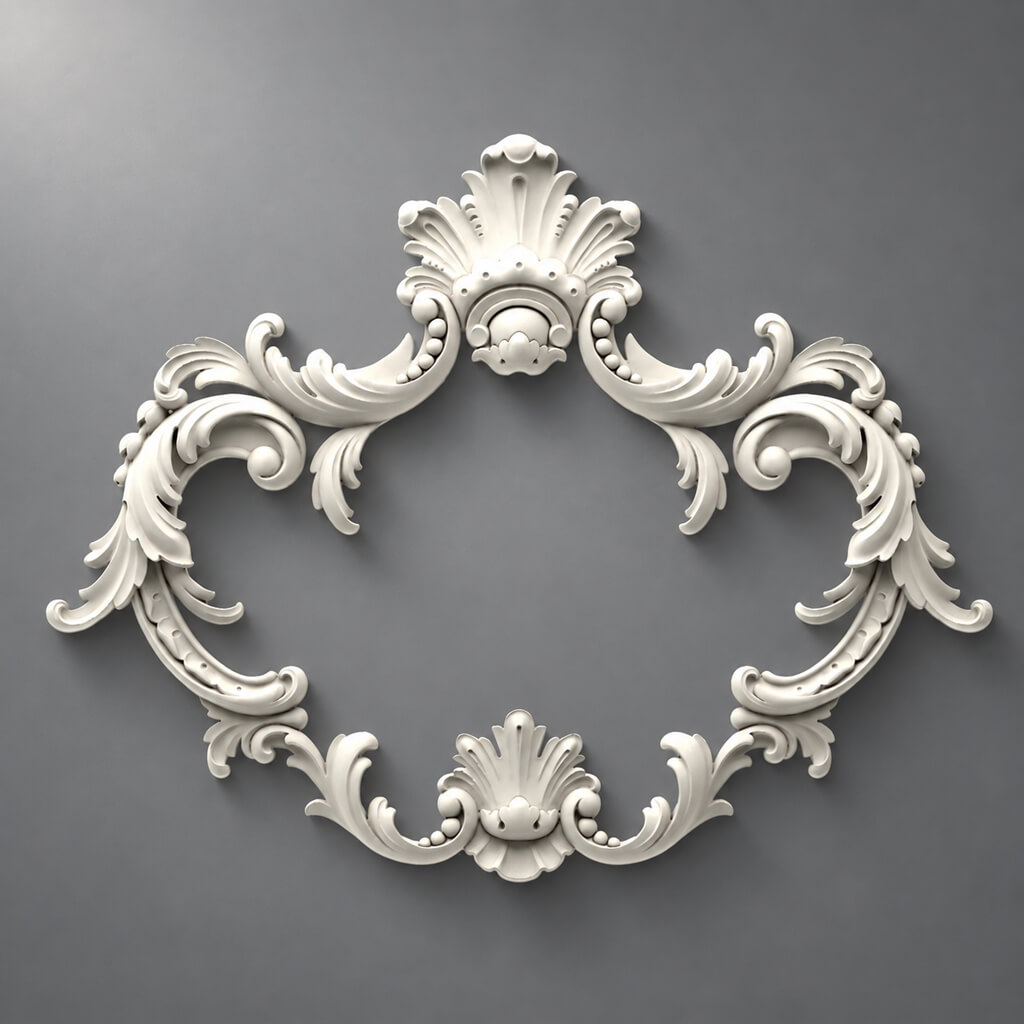
| Polyurethane Onlays | Selected focal accents |
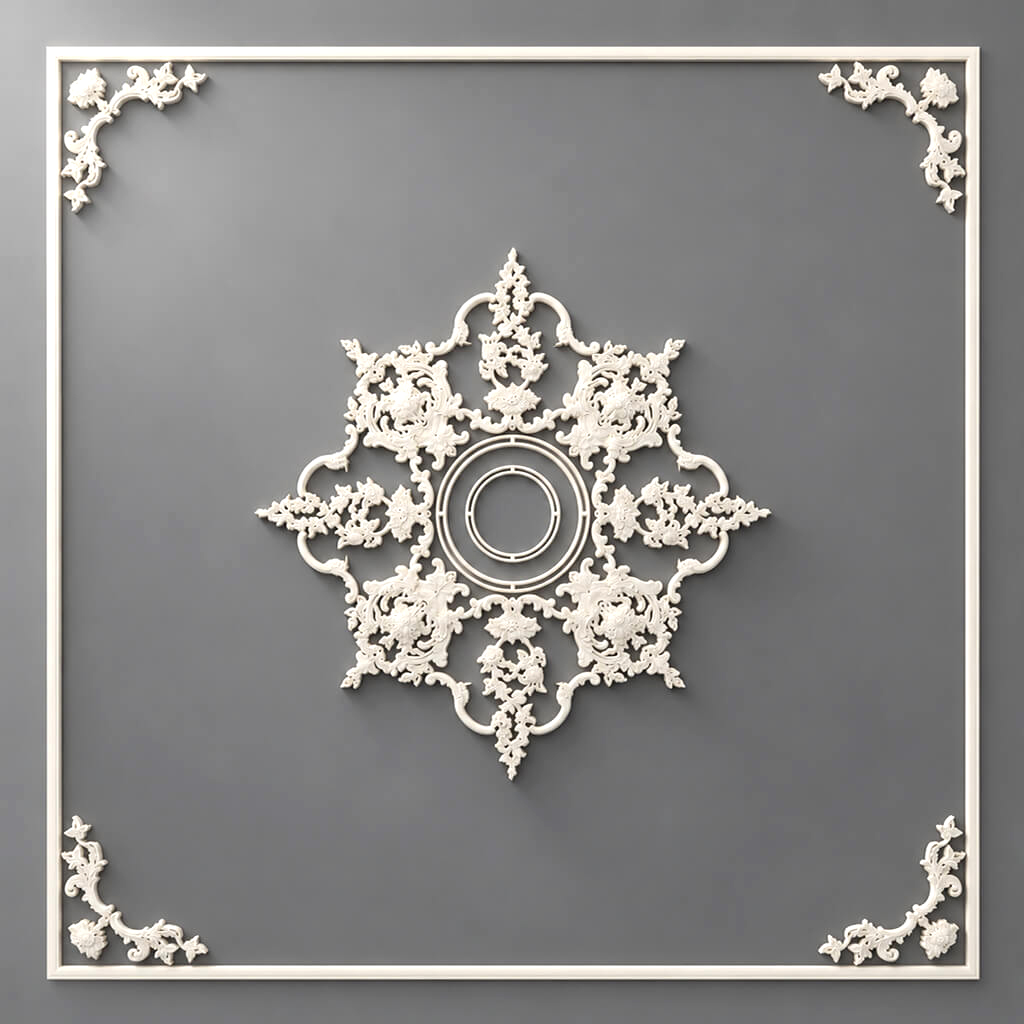
| Molding Corners and Decorative Accents | Compatible corner compositions and ornamental details |
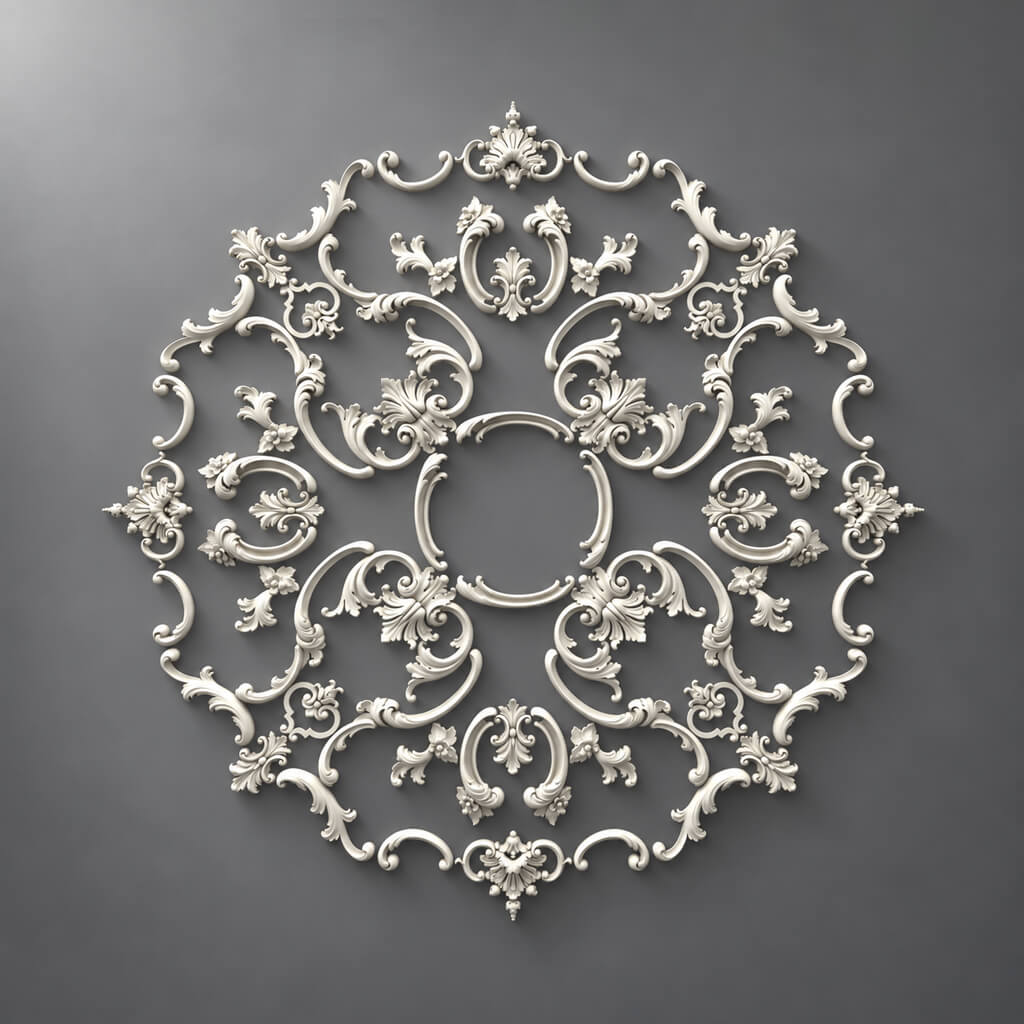
| Ceiling Medallions | Decorative ceiling focal points |
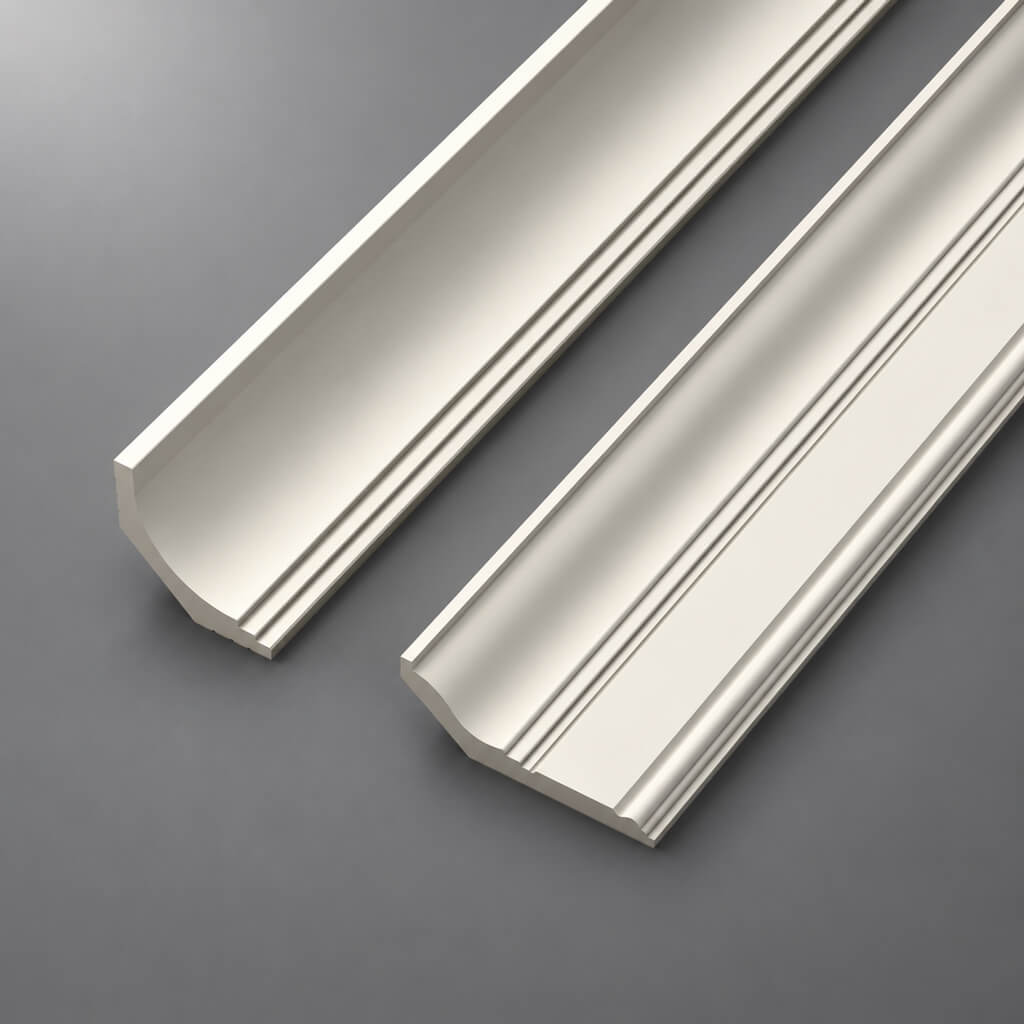
| HIWOOD Crown Moldings | Polystyrene ceiling perimeter profiles |
For a project that uses polyurethane wall molding in several rooms, it is often sensible to choose and approve the main profile first.
Then develop the room-by-room layouts.
Calculate the finished lengths.
Optimize the stock-strip schedule.
Finally, add ornamental details only where they support the design.
The result is a material specification that can be reviewed, priced, and installed without relying on assumptions.
Conclusion: Lower Molding Costs Start With Better Design Decisions
A cost-efficient architectural interior is not simply an interior with less decoration.
It is an interior in which each decorative component has a clear purpose.
The primary molding establishes continuity.
Secondary profiles introduce variation where needed.
Ornamental accents create focal points.
The cutting plan converts those design decisions into an efficient material order.
And the installation schedule connects the material quantities to real labor requirements.
The 2,000-square-foot house example demonstrates why this matters.
Twenty-four identical decorative frames required 240 installed linear feet of molding.
When the stock lengths were optimized across the whole project, the design could be cut from 30 STAVROS MLDPU-002 strips.
When the same rooms were allocated independently without sharing offcuts, the cutting schedules required 32 strips.
That is a measurable material difference—not an assumed discount.
The frame-dimension comparison showed another important result.
Three designs with identical installed linear footage required 29, 30, or 32 strips because their cutting patterns differed.
This reveals the real opportunity in whole-house molding planning.
The design, the product's stock length, and the cutting plan should be considered together.
Choose an architectural molding that suits the rooms.
Standardize where the design permits it.
Use ornate molding selectively.
Prepare exact takeoffs.
Compare actual delivered prices.
Calculate the labor required.
And retain the flexibility to choose a different solution when the visual or technical requirements justify it.
Explore STAVROS polyurethane moldings for the main architectural profiles, decorative polyurethane trim for detailed borders, and ornamental polyurethane onlays for selected focal decorations.
For American homeowners, contractors, designers, and residential builders, the most valuable purchasing strategy is not to minimize the number of products at any cost.
It is to create a coordinated, buildable design in which material, labor, logistics, and aesthetic quality are considered from the beginning.
Well-planned polyurethane molding is an architectural investment. The cost advantage comes from making every profile, every cut, and every installed linear foot contribute meaningfully to the finished interior.