Article Contents:
- Why black spots appear near moldings and cornices
- Cold wall and condensation
- Thermal bridges and insufficient air circulation
- Dust in recesses and damaged paint
- How to use measurements instead of guessing by color
- Exterior corner and strip under the ceiling
- Window reveals and the area above the opening
- Furniture, niches and interior cavities
- Bathrooms and kitchens
- If signs of dangerous hidden damage appear
- Can mold appear on polyurethane foam?
- Why does the ceiling skirting board turn black only in winter?
- What is a safe way to clean a polyurethane cornice?
- Do you need to remove the entire cornice if there is a stain in one corner?
- Will antifungal paint help permanently?
- Can only the damaged corner of the frame be replaced?
- What humidity level should be maintained at home?
- When can the stucco be reinstalled?
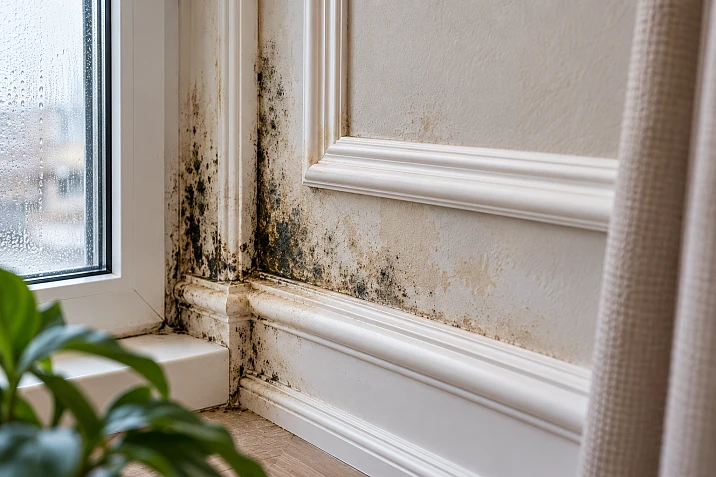
In the bedroom, a white cornice runs along the ceiling. In summer the surface looks clean, but by the end of winter grey dots appear near the outer corner. They are wiped off, the edge of the wall is touched up — and a few weeks later the marks return. Is the cornice itself to blame? Not necessarily. Ordinary dust sometimes settles on the relief, but recurring spots near a cold wall may indicate dampness and mould growth. A musty smell, damp plaster and discolouration behind the decorative profile are especially concerning.
The first step is not to buy a new moulding, but to determine the cause of the spots. If the area is being cooled, moisture from the room air can condense on its surface. If the damaged substrate is hidden behind the cornice, simply wiping the front side will not solve anything. Moreover, the black colour alone cannot reliably determine either the nature of the deposit or the type of microorganisms.
Preserving the stucco is often possible if the profile is intact, the coating allows safe cleaning, the wall has been put in order and the joint remains sound. In other cases, part of the decor will need to be removed, the substrate restored or the element replaced. The sequence depends on exactly where the problem is found: on the profile, at its edge or behind it.




Why black spots appear near mouldings and cornices




Cold wall and condensation
In winter, the inner surface of an exterior wall can be colder than the room air. The air near it cools, its relative humidity rises; when the dew point is reached, water vapour turns into droplets. A large ceiling cornice is not necessarily the cause of the cooling, but it can conceal an area where the first signs of dampness are hard to notice.
If the spots appear strictly during the cold season, it is useful to compare them with the position of the outer corner, window or floor slab junction. The presence of wet streaks on the glass and damp reveals strengthens the suspicion of an unfavourable humidity regime, although it does not prove the source of a particular spot.
Our factory also produces:
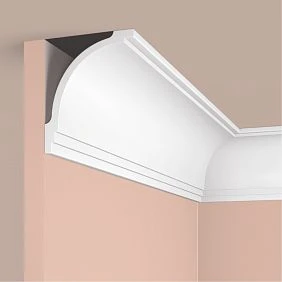

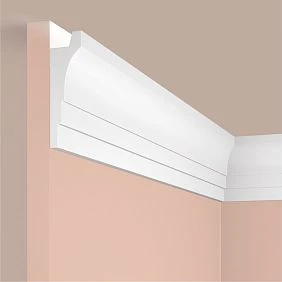
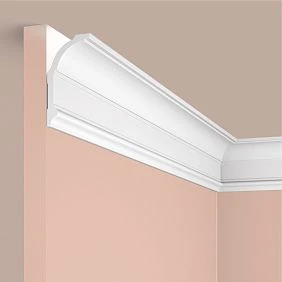


Cold bridges and insufficient air circulation
An external corner, a reinforced concrete belt, a lintel and an area with defective thermal insulation can cool more than the adjacent surface. A tall cabinet pushed tightly against the wall reduces the movement of warm air. As a result, a narrow strip above the furniture or near the cornice stays damp longer than the exposed part of the wall.
This pattern is especially characteristic when the spots do not run along the entire length of the moulding but only along the external wall. This is a reason to check the building envelope and air exchange, not to declare the profile material to be of poor quality.
Get Consultation
Dust in the recesses and damaged paint
Relief stucco collects dust on horizontal ledges. In the kitchen, a greasy film is added to it. Such a deposit may look grey or almost black without any biological growth. However, dust and other contaminants on a damp surface can also become a medium on which mould develops. Therefore, appearance alone does not give a definitive answer.
If the paint is peeling and the plaster beneath it is darkening, the likely location of the problem is no longer just the decorative profile. The surface layer may retain moisture or lose adhesion. Covering it with new paint before diagnosis is pointless.
Polyurethane foam, polystyrene and polyurethane: what the material changes
Rigid polyurethane foam is a cellular variety of polyurethane. Soft foam rubber belongs to the same polymer family but has a different structure and purpose. Calling polyurethane foam and polyurethane completely different substances is incorrect. In the STAVROS catalogue, MLDPU products are designated as polyurethane; their specific density and cell structure cannot be inferred from the article letters alone.
The polymer profile itself and its outer layers are different things. Even when the product material is sufficiently resistant to household moisture, mould can develop on dust, paint, adhesive residue, wallpaper and adjacent plaster. A decorative strip does not create a sterile zone around itself. The claim that a polyurethane moulding completely eliminates mould should not be used when choosing a finish.
Polystyrene also comes in dense and foamed varieties. A lightweight foamed element may have a more vulnerable edge; a dense profile usually withstands careful handling better, but the result depends on the specific product. Aggressive solvents can damage some polystyrenes, while strong products and abrasives can spoil the finish of polyurethane decor.
| What to compare | Rigid polyurethane foam | Polystyrene | Polyurethane MLDPU STAVROS |
|---|---|---|---|
| Product type | Cellular material, properties depend on composition | Solid or foamed profile | Manufacturer specifies polyurethane |
| Traces of moisture | Evaluate material, surface and adhesive separately | Evaluate coating and profile density | Evaluate paint finish, joints and substrate |
| Cleaning | According to instructions for the specific coating | Do not use unverified solvents | Gentle products compatible with the coating |
| Repeated painting | By surface suitability | By manufacturer's recommendation | After eliminating the cause and preparing the surface |
| Solution for hidden mold | Inspecting the wall matters more than the polymer's name | Inspecting the wall matters more than a small mass | Preservation is only possible with a sound substrate |
Shape matters too. A smooth, thin line is easier to inspect and wipe than deep ornamentation with hard-to-reach recesses. But replacing a beautiful relief cornice with a smooth one just to combat condensation is pointless: the profile itself will not fix the wall temperature or air humidity.
How to distinguish dirt from possible mold
Start with observations, without trying to diagnose from a single photo. Dark streaks on the top shelf of the cornice may be dust; spots with a blurred edge on a damp painted wall require more attention. A musty smell with a seemingly clean surface suggests a hidden problem. Color alone does not prove the presence of a specific type of mold.
| Observation | What this may mean | Next action |
|---|---|---|
| Even dust deposit only on the ledge | Household dust or grease contamination | Check the condition of the coating and the source of contamination |
| Dots on the outer corner in winter | Possible overcooling and condensation | Measure the conditions in the room, inspect the cold zone |
| The stain extends under the edge of the cornice | Possible wetting of the hidden base | Arrange an inspection without dangerous independent detachment |
| Paint is bubbling or the plaster is crumbling | Damage to the finishing layer from moisture | Do not paint; check the integrity and the source of moisture |
| Odor, recurring stains, spreading | A possible hidden or ongoing problem | Consult a qualified specialist |
Do not test a suspicious stain by rubbing it with a dry brush, scraping, or sanding. If mold contamination is possible, such actions can spread the contamination. If the area is large, recurring, or hidden, professional assessment is preferable. People with asthma, severe allergies, or weakened immune systems should not handle mold removal themselves.
How to use measurements instead of guessing by color
A thermo-hygrometer shows the state of the air but does not prove that the wall is dry. To diagnose cold spots, a specialist can compare the surface temperature with the room temperature and humidity. For example, with air at about 22 °C and 60% relative humidity, the dew point is around 14 °C. If the surface cools below this value, there is a risk of condensation forming. This is a calculated example, not a universal temperature limit for all homes.
Bringing a non-contact thermometer close to a textured cornice is not enough: instrument readings depend on surface properties, distance, and correct measurement. In addition, mold can develop with prolonged moistening of the material even without visible droplets. This means that the absence of water to the touch does not rule out hidden damage. If stains recur, it is more useful to compare conditions over several days and order an inspection of the problem area than to choose a new cleaning product based on advice from the internet.
Where to look for a source of moisture if there was no leak
Outer corner and the strip under the ceiling
In a room with two exterior walls, the coldest zone is sometimes found where they meet. A ceiling cornice hides part of the painted junction, so the visible stain may be only the edge of a larger problem. If the decor on the adjacent interior wall is clean, that is a useful clue but not a final diagnosis.
Window reveals and the area above the opening
Moisture can accumulate on a reveal because of a low surface temperature, a failure of the junction seal, or another construction defect. If a dark trace runs from the window to the cornice, check the window and the wall structure first. Do not use molding as a masking strip over a damaged reveal.
Furniture, niches and internal cavities
Behind a large wardrobe, air circulation is limited. A decorative niche or closed cladding can behave in a similar way. Inspecting the whole wall matters more than spot-bleaching the stain: sometimes next to a clean molding there is a damp reverse side of the wallpaper.
Bathrooms and kitchens
Cooking and showering increase the water vapor content. The extractor hood must actually remove air into the designated system, not just make noise. For a painted decorative profile, splashes, cleaning agents, the tightness of junctions and the condition of the substrate also matter. If there is damaged waterproofing behind the cladding, the decor here is secondary.
What to do if you find suspicious stains: order of actions
1. Document the picture before any repair. Photograph the overall view of the wall and a close-up, note the date, the weather, the position of the window and furniture. Note whether the marks appear in winter, after a shower, after cooking or after rain. Repeatability is often more useful than a single measurement.
2. Check the conditions in the room. A household thermo-hygrometer will show the air temperature and relative humidity. To prevent mould, the US Centers for Disease Control and Prevention recommend keeping humidity at no more than 50%; in a particular home during severe frosts an even lower level may be needed to avoid condensation on cold surfaces. A one-off reading does not describe the whole picture: observations in the morning, in the evening and while wet rooms are in use are useful.
3. Look for the source, not just the location of the stain. Assess the accessible reveals, external corners, the operation of the extractor hood, the condition of pipes and junctions. If moisture on the wall persists, the cause needs to be established — condensation, water ingress or another defect. In cases of possible failure of building structures, a specialist is needed.
4. Assess the extent in a safe way. Do not try to force off the cornice or open up a cavity next to electrical wiring. If the visible area of damage is significant, there is an odour, or there is a suspicion of hidden mould or contaminated water, it is better not to carry out cleaning yourself. Recommendations from the US Environmental Protection Agency treat an area of around 0.9 m² as one of the reference points for choosing between DIY cleaning and calling in specialists, but this is not a universal safety threshold.
5. Eliminate the source of moisture and only then restore the finish. For small, accessible contamination on a solid surface, gentle cleaning with a suitable product followed by thorough drying may be possible. Choosing the composition requires checking compatibility with the paint and polymer. Porous affected plaster, wallpaper and other materials may need to be removed or replaced. Paint or sealant must not be applied over suspected mould.
6. Check the result after changing the conditions. If, over several weeks with comparable weather, the humidity and the marks return, it is too early to consider the cosmetic repair successful. The return of the stains requires further investigation, not a thicker coat of enamel.
If signs of dangerous hidden damage appear
An inspection is needed especially quickly when damp electrical boxes, light fittings or wiring are visible, or when the fixing of a massive ceiling element is noticeably weakened. Electrical equipment in a damp area should not be touched with wet hands or dismantled yourself: a qualified specialist should be brought in and safe disconnection arranged according to the circumstances. A large cornice should not be tested with a tug — a falling part can injure a person.
Nor should you rely on a household moisture meter as an absolute answer. Different plasters, adhesives and paints affect its readings. The device helps to locate an area for further checking, but the conclusion about the suitability of the structure and the need to open it up is made from the combination of signs. Record the results together with the date and place of measurement.
Do mouldings and the ceiling cornice need to be removed?
Full dismantling is not always required. If the contamination is limited to the accessible painted surface, the fastening is stable, and the source of moisture has been identified, it may be possible to preserve the profile. However, a visibly clean cornice does not guarantee that the wall behind it is clean.
Signals prompting an inspection of the hidden area include an odor from the gap, a damp strip along the entire rear boundary, peeling plaster, and the regular return of stains. The method of opening is determined after assessing the fastening, height, and weight of the item. Ceiling elements can fall if detached; you should not pry up large moldings above your head on your own.
If only the paint is affected, it is sometimes sufficient to clean the undamaged profile and repaint it after the conditions have been restored. If the adhesive is coming off together with wet plaster, the wall is repaired first. When the material or coating cannot be safely cleaned, the profile is deformed, or it cannot be removed intact, replacement is considered.
How to restore the wall before reinstalling the molding
After eliminating the source of moisture, each layer must be checked: plaster, putty, primer, paint, and the mounting area. A surface that appears smooth at first glance may turn out to be unsound; when molding is glued to it, it is not the adhesive that will come off, but the entire finishing layer.
Materials affected by mold that cannot be fully cleaned and dried are removed using a safe technique. The scope of work depends on the substrate; there is no universal product that can be poured over any wall and immediately covered with a cornice. Porous materials require particularly careful assessment.
After the repair, check that there is no dampness and no signs of recontamination. The primer is selected according to the type of substrate and the adhesive requirements. The molding itself is glued only to a stable surface with a compatible composition and in compliance with curing conditions. For large elements and complex assemblies, the fastening decision must take into account the weight and structure, not just the availability of mounting adhesive.
Sometimes the right solution is to change the design scheme: for example, not to return a wide ceiling cornice above a cold problem area until the cause of the overcooling has been eliminated. Molding should not block inspection access, ventilation openings, or areas whose condition needs to be monitored.
Which STAVROS moldings to choose for a restored interior
When the wall is dry and ready for finishing, you can move on to the decorative choice. The catalog includes Polyurethane moldings different profiles. For an area that was previously difficult to clean, a simple line is often more practical than a complex multi-layered relief. This is a maintenance convenience consideration, not a stated antifungal characteristic of the product.
| Model | Size, mm | Price per strip on the date of check | When to consider |
|---|---|---|---|
| Molding MLDPU-001 | 10 × 6 × 2600 | 1 740 ₽ | Thin line, local frame |
| Molding MLDPU-004 | 15 × 8 × 2600 | 3 190 ₽ | Small contour with pronounced relief |
| Molding MLDPU-002 | 22 × 11 × 2600 | 5 460 ₽ | Classic decorative frame |
| molding MLDPU-003 | 35 × 12 × 2600 | 7 580 ₽ | Wider expressive contour |
| HIWOOD D22 molding made of polystyrene | 22 × 10 × 2000 | 350 ₽ | Comparison by size and price; limited order region |
For HIWOOD D22, the website states that ordering is available in Moscow, Moscow Region, Saint Petersburg and Leningrad Region. For all items, current delivery terms, price and availability should be checked before purchase. The dimensions given relate to specific product pages, not to all products made of the material.
If one damaged section of an old composition needs to be replaced, measure not only the face width but also the projection, profile shape, relief and the position of the bonding plane. Two 22 mm wide moldings will not necessarily join: their height and pattern may differ. The surface of the new product should match the chosen paint, but painting alone does not compensate for a mismatch in geometry.
How to choose decorative corners, overlays and cornices
In a fully restored room, individual parts can be replaced without reassembling all the frames. First, determine whether the damaged corner belongs to a specific profile section. In the category Decor for Molding there are ready-made elements, but their compatibility is determined by dimensions and drawings, not by approximate similarity of the pattern.
As a central accent on a dry, sturdy wall, you can consider a decorative overlay NPU-042 measuring 140 × 243 × 14 mm. The price at the time of checking is 2,010 ₽. Its detailed ornament requires more careful cleaning, so on a previously problematic cold surface such a piece is not always sensible.
For decorating large areas, the following are available Polyurethane decorative appliques. And the general category of polyurethane stucco allows you to compare wall products and ceiling solutions. None of these products can be presented as a means of eliminating condensation or mold.
A tall ceiling cornice above an exterior wall should only be reinstated after the hidden cause of the dampness has been eliminated. If the cause is related to the wall structure, replacing the cornice with another polymer is premature. Sometimes it is enough to keep the existing profile and refresh its coating after proper cleaning.
Calculation: how many strips are needed for a new 800 × 1200 mm frame
Suppose the moisture problem has been resolved, but one wall frame had to be dismantled. Its external dimensions, measured at the outermost points of the mitred parts, are 800 × 1200 mm. The total length along the external contour: 2 × (800 + 1200) = 4000 mm, or 4 m.
For moulding with a length of 2600 mm, cutting from two strips is possible: the first yields two parts of 1200 mm each, the second yields two parts of 800 mm each. If the nominal kerf width is 3 mm and two cuts are counted per workpiece, about 194 mm remains from the first strip and about 994 mm from the second. The actual remainder depends on the cutting method and the finish preparation of the ends; before sawing, you need to build a parts map based on the chosen measurement line and the orientation of the cuts.
If the profile is 2000 mm long, as with HIWOOD D22, two strips are not enough: their total length is exactly 4 m and leaves no material for the cuts. A practical option is three strips: from two, obtain 1200 mm vertically each, and from the third, two pieces of 800 mm each. The total purchase length will be 6 m, although the finished frame consumes only 4 m. Here you cannot choose the quantity by simply dividing the perimeter by the strip length.
| Profile | Strips for the frame | Cost of products, excluding delivery and labour |
|---|---|---|
| MLDPU-001 | 2 × 2600 mm | 3 480 ₽ |
| MLDPU-004 | 2 × 2600 mm | 6 380 ₽ |
| MLDPU-002 | 2 × 2600 mm | 10 920 ₽ |
| MLDPU-003 | 2 × 2600 mm | 15 160 ₽ |
| HIWOOD D22 | 3 × 2000 mm | 1 050 ₽ |
Prices do not include paint, primer, glue, wall preparation or possible packaging. For shaped and asymmetrical profiles, check the orientation of the parts and the compatibility of the corners. If one side of the old frame has survived, it is sometimes more economical to replace only its damaged section, but the joint must match across the entire cross-section.
How to decorate a restored wall to make it easier to maintain
Simple wall frames are more convenient than complex multi-layer compositions in rooms where dust quickly settles on decorative ledges. With the same overall wall width, narrow moulding creates fewer hard-to-reach internal corners. This does not mean it is better protected from mould: the advantage concerns accessibility for inspection and cleaning.
Moulding painted to match the wall colour allows a section to be locally restored without contrast between the old and new piece, but the shade and degree of gloss must match. If the profile is located next to an exterior wall, a hermetically sealed decorative niche should not be created where access is needed to monitor the condition of the surface.
Behind a sofa or wardrobe, a decorative composition looks different than on an open wall. If furniture blocks air circulation at a cold area, a beautiful relief will not offset the risk of re-dampening. First the placement of furniture and operating conditions are decided, then the pattern of the frames is approved.
Eight mistakes when restoring darkened moulding
- Painting over the stains. They are hidden visually, but the cause remains. The surface is inspected, moisture is eliminated, damaged materials are cleaned or replaced, and only then is it finished.
- Gluing a new profile to damp plaster. The adhesive bond may turn out weaker than the damaged layer. Reliability is checked after the base has been restored and dried.
- Treating black colour as proof of a specific fungus. The species cannot be determined from the shade. It is more important to assess the source of moisture, the scale of the problem and the condition of the materials.
- Scraping off extensive deposits dry. This can spread contamination. For hidden or significant outbreaks, a safe technique and a specialist are needed.
- Pouring a random solvent onto polystyrene. The surface may be damaged. Compatibility of the composition is checked against the documentation.
- Replacing the cornice without checking the exterior wall. The new decor will end up in the same conditions. First the cause of cooling and dampening is eliminated.
- Covering a weak layer with a decorative overlay. If the plaster delaminates, it may fall together with the adhesive. The base must remain sound.
- Buy the profile by width alone. Two products 22 mm wide can have different cross-sections and fail to align at the joint.
If the stain comes back after cleaning, that is no reason to buy a stronger cleaning product. You need to address the moisture and the condition of the wall again.
Which is more worthwhile: keep the molding or replace it
| Condition | A sensible solution | When to buy a new product |
|---|---|---|
| The profile is intact, the deposit is accessible and safe to clean | Keep it after eliminating the cause and treating | No purchase needed |
| Only the paint is damaged | Prepare and refresh the coating | Only if the profile is damaged |
| A single section of the frame cannot be preserved | Local replacement of the same cross-section | A matching strip will be required |
| The base behind the cornice is damaged | Dismantling as needed, wall restoration | After assessing the suitability of the old element |
| Moisture persists or there is a hidden source | Postpone decorative work, inspect the structure | It is too early to order stucco |
The benefit of local repair is determined not only by the price of the molding. Removing old paint, restoring the base, selecting compatible materials, and repainting can sometimes cost more than the profile itself. Buying a complete set is not mandatory if the surviving parts are clean and reliable. But you cannot cut corners on inspecting a damp wall just to save a single molding.
How to choose and order stucco after fixing the problem
The sequence is simple: eliminate the source of moisture, make sure the finishing base is suitable, measure the profile, create a map of the parts, and only then select the item codes. Using the catalog, you can Buy polyurethane molding for restoring a dry interior, but the choice of a specific model should begin with the geometry and condition of the wall, not with promises of mold protection.
For further use, it is helpful to rely on the STAVROS instructions on caring for polyurethane stucco, checking the composition of the products against your own coating. The issues of installation conditions and humidity are also covered in the material on the climatic specifics of stucco installation. At the same time, no decorative recommendation replaces a construction inspection of a damp wall.
Frequently asked questions
Can mold appear on polyurethane foam?
Mold can develop on dirt, paint, and adjacent materials in the presence of moisture. The properties of a specific rigid polyurethane foam should be assessed based on its documentation; its name does not guarantee the absence of surface growth across the entire decorative structure.
Why does the ceiling molding turn black only in winter?
A common possible cause is a cold surface near an exterior wall and moisture condensation. The humidity, surface temperature, insulation condition, and ventilation need to be checked; dust can also produce a dark trace.
What is a safe way to clean a polyurethane cornice?
For accessible minor soiling on a hard, undamaged coating, choose a gentle product approved by the coating manufacturer. If significant or hidden mold is suspected, do not limit yourself to wiping it yourself.
Should the entire cornice be removed if there is a stain in one corner?
Not necessarily. But if there are signs of hidden moisture, a specialist may need to remove a local section. The preservation of the rest of the molding is determined by the condition of the fastening and the substrate.
Will antifungal paint help permanently?
No. It can be part of a finishing system, but it does not fix a thermal bridge, a leak, or poor air exchange. You must not paint over mold or a damp substrate.
Can only the damaged corner of the frame be replaced?
Yes, if a compatible element in cross-section and relief can be found and the wall has already been restored. Sometimes precise fitting of a new part is impossible — then it is more rational to replace the side of the frame.
What humidity level should be maintained at home?
To limit the risk of mold, the US Centers for Disease Control and Prevention recommend not exceeding 50% relative humidity. In a cold climate, the optimal regime depends on the temperature of the external structures: condensation is assessed based on actual conditions.
When can stucco molding be reinstalled?
After eliminating the cause of moisture, safely removing the affected materials, fully drying, and restoring a solid base. The timeframe is determined by the actual condition of the structure and the instructions for the materials used, not by a conventional number of days.