Article Contents:
- Why new door casings disrupt the old decorative frame
- Polyurethane foam, polystyrene and polyurethane: which is best suited for restoration
- What to keep and what to replace: inspection without dismantling
- How to calculate the new position of the frame near the door casing
- How to reduce the old frame after installing a wide door casing
- How to join a wall molding with a door casing
- Which STAVROS moldings and elements are suitable for spot repairs
- Five ways to refresh wall decor without a full remodel
- Calculation: how many strips are needed if the frame has become narrower
- How to carefully remove damaged sections and prepare the base
- Installing moldings after door installation: order of work
- How to coordinate a new door, skirting board and wall stucco
- Mistakes that force you to redo the renovation
- Which is more cost-effective: preserving the stucco or redoing the wall
- Where to find moldings and stucco for wall restoration
- Frequently Asked Questions
- Can you replace just one side of an old decorative frame?
- What to do if a wide casing has covered the corner of the frame?
- Can a polyurethane molding be shortened directly on the wall?
- Is polystyrene molding suitable as a replacement for polyurethane molding?
- Can polyurethane foam be used near a door?
- How do you finish molding before a door casing?
- What should you do if the new frame turns out to look too narrow?
- Do all the moldings need to be repainted after a partial replacement?
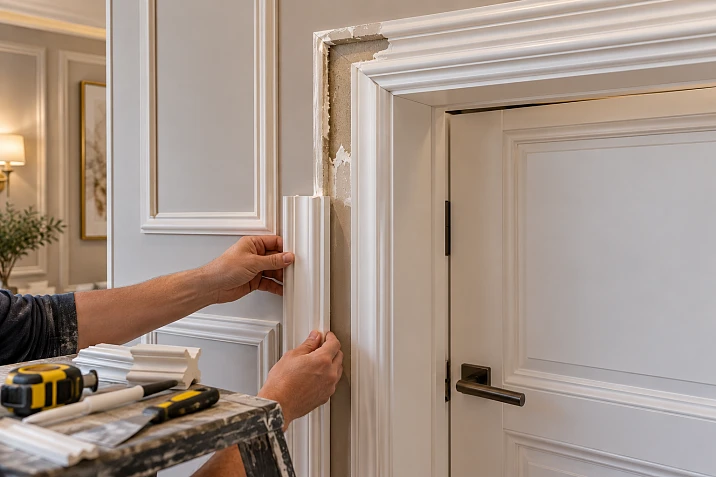
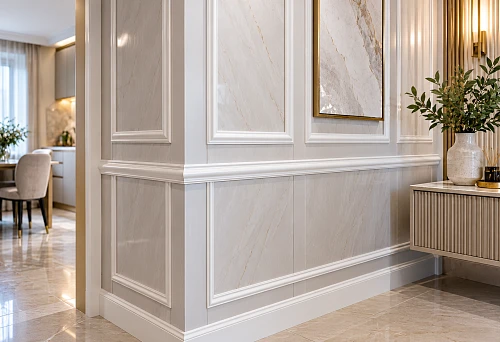
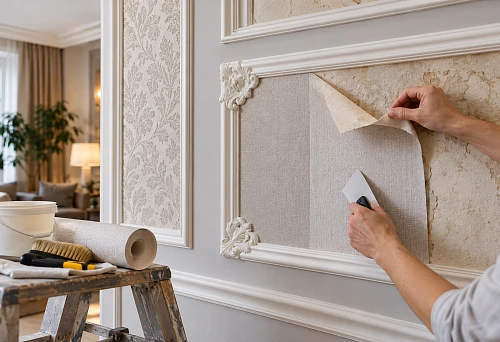
The door is already installed, the casings are snapped on or secured, and then an unpleasant detail turns up on the wall: the new trim overlaps the decorative frame. Previously, a neat strip of painted wall remained between the door and the molding. Now the corner of the frame is hidden under the casing, and its vertical line looks cut off.
You don't have to redo all the trim. If the base is solid, the profile has kept its shape, and the new door position leaves room for the decor, you can replace one or two sides of the frame or change its width. But sometimes saving money results in noticeable joints: people try to shorten the horizontal pieces, even though the entire vertical side is what needs to be moved.
Start with the finished door, not the old dimensions. Measure the width of the casing, the projection of its relief, and the free section of wall; only then decide what to keep. If the frame is not yet finally secured or the casings are temporary, it's too early to fit the moldings. The door unit must first take its final position.




Why new casings disrupt the old decorative frame
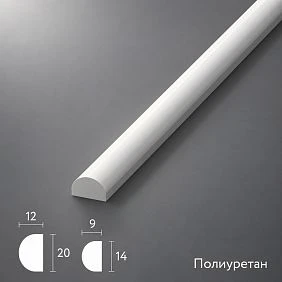
Let's imagine the wall section between the door and the corner of the room. The old casing took up 55 mm from the edge of the opening, the new one takes 80 mm. The extra 25 mm may seem trivial. But if the distance from the old casing to the frame was only 20 mm, the new piece will already overlap it by 5 mm. And if the casing has a convex face, the conflict will be noticeable even when there is formally no intersection on the drawing.
Width is not the only reason. After replacing the box, the position of the casing plane may change: it may protrude further from the wall, shift slightly relative to the reveal, or have a different cross-section. Against the backdrop of smooth old trim, the new relief sometimes looks too heavy. The opposite also happens: a narrow modern casing emphasizes disproportionately wide old stucco molding.
During the removal of the old door, chipping of the molding, damage to the paint, and detachment of the top layer of plaster near the glued strips are possible. Such a base cannot simply be covered with a new piece. First, determine whether the remaining decor is holding and whether it is coming off together with the paint.
Also check the opening direction. The new leaf may swing toward the decorated wall, and the door handle may end up closer to the protruding elements. The molding must not become a door stop or obstruct access to the hinges. If the handle comes close to the wall when opening, assess the need for a separate door stop installed taking into account the floor or wall construction.




Polyurethane foam, polystyrene, and polyurethane: which is better suited for restoration
Polyurethane foam is a type of polyurethane with a cellular structure, not a third independent polymer. Therefore, the comparison "polyurethane foam or polyurethane" without specifying density and manufacturing method does not give a precise answer. For repair, the specific product, its rigidity, the nature of the cut, the condition of the surface, and the mounting method are essential.
Polystyrene moldings also differ. A lightweight foamed profile and dense decorative polystyrene behave differently when cut. The former may crush or crumble with the wrong tool; the latter usually produces a cleaner edge but can chip under excessive pressure. For both, the compatibility of adhesive, primer, and paint is important. A solvent-based compound not approved by the manufacturer may damage polystyrene.
STAVROS polyurethane moldings from the MLDPU series are presented by the manufacturer as products made of two-component polyurethane. They cannot be called polyurethane foam based only on external similarity. When selecting a spare part, rely on its product page and drawing, not on the general name of the material.
| Criterion | Polystyrene moulding | Decor made of rigid polyurethane foam | STAVROS MLDPU moldings |
|---|---|---|---|
| Trimming | Depends on density; a suitable fine-toothed saw or knife is required depending on the product type | Depends on the structure and density; a test cut is required | Check the cleanliness of the end face and the integrity of the relief on a test section |
| Minor chips | Local repair with compatible filler is possible | Repairability depends on the surface and structure | Small fixed defects can be prepared for painting with a compatible compound |
| Painting | Only with compounds approved for the material | After checking the coating and the manufacturer's recommendations | On the prepared surface with compatible paints and varnishes |
| Section replacement | A matching profile is needed, not just the width | A match in shape and a suitable joining method are needed | You can find the article number for the series, but the old and new cross-sections are still compared |
For local restoration, the advantage goes not to the most expensive material, but to the one for which an exact replacement can be found. Even a good polyurethane profile will not help if the previous frame is made from a product with a different groove. In side light, a mismatch in the relief will reveal the repair faster than a slight difference in shade.
If the old moldings are intact, hold firmly, and do not interfere with the casing, there is no need to buy new ones. It is enough to restore the paint on the section of wall damaged during the door work.
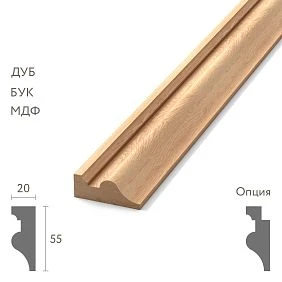
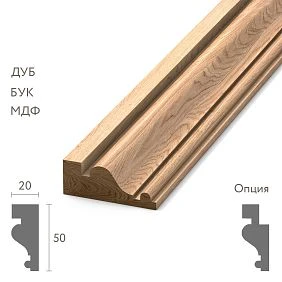
Our factory also produces:






What to keep and what to replace: inspection without dismantling
First, clean the wall of construction dust. Then inspect each side of the frame in daylight and in side artificial light. Under frontal lighting, paint chips may be almost invisible, but directional light reveals lifted edges and cracks along the glue seam.
Carefully check the fastening in several places without trying to pull the strip off. If the profile noticeably pulls away together with the coating, repairing a single joint is pointless: you will have to remove the weak section of the base and prepare the installation area again. Mark cracks, areas of detachment, and points where it meets the casing with a pencil.
| What was found | What is more reasonable to do |
|---|---|
| A sufficient gap remains between the casing and the frame | Keep the moldings, repair only the wall and paint |
| The casing overlaps one vertical side of the frame | Recalculate the width and move the corresponding side along with the adjoining corners |
| The end of one strip has chipped off, the rest of the frame is solid | Replace the damaged section or the entire side if the joint cannot be concealed |
| The decorative corner is damaged | Look for an exactly compatible corner element; if unavailable, change the corner design |
| Several strips are coming loose together with the plaster | Restore the base, then assess whether the parts can be reused |
| The frame has become too narrow or obstructs opening | Reconsider the composition as a whole; sometimes it is better to abandon the frame near the door |
On a painted wall, traces of old adhesive are often more noticeable than the new molding itself. See whether the exposed area can be properly leveled and repainted. If the finish is textured, the wallpaper is rare, or the paint has long faded, a local repair may be visually more difficult than replacing a few strips.
Get Consultation
How to calculate the new position of the frame near the casing
Measure not the door leaf but the actual wall plane. Take the outer edge of the already installed casing as the reference line. A meaningful gap should remain between it and the nearest edge of the decorative profile, unless the design provides for the parts to join. There is no universal mandatory offset for all interiors: it depends on the width of the wall section, the molding cross-section, and neighboring frames.
It is convenient to record four dimensions: the width of the free wall from the casing to the nearest obstacle; the desired margins on both sides of the frame; the outer width of the frame itself; and the projection of the profile from the wall. The last dimension is needed to assess the handle, the leaf, and possible contact between parts.
Suppose 820 mm remains between the outer edge of the casing and the corner. You decide to leave 70 mm of clear wall at the casing and 80 mm at the corner. Then 670 mm remains for the frame along its outer boundaries: 820 − 70 − 80. If the nearest piece of furniture covers 100 mm at the right edge, those 100 mm must also be subtracted. On a narrow wall section, furniture and the door shape the composition more strongly than abstract symmetry.
For multiple frames, keep a consistent alignment principle: for example, identical top horizontals and repeating offsets where space allows. But do not turn one cramped wall section into an implausibly narrow rectangle for the sake of equal sizes. Sometimes it is better to make one frame wider, remove its decorative inner contour, or leave the area near the door smooth altogether.
When the door is positioned almost flush with the corner, first check whether a full profile with two margins will fit. If the molding takes up 35 mm of face width and the free strip of wall is only 90 mm, there is practically no room for a standalone frame. Here a thin vertical line or no stucco at all may be more appropriate.
You cannot move the frame on paper while forgetting the baseboard. The top edge of a tall baseboard and the side edge of the casing define two visible boundaries. The lower part of the frame should not run into their junction with a random short offcut.
How to reduce an old frame after installing a wide casing
Let's consider the most common task: a decorative rectangle needs to be narrowed but kept at its original height.
- Mark the new outer boundaries. Use a level to mark the top and bottom horizontal lines. Measure the width at the outer points of the profile, not along its axis, otherwise the finished frame will end up wider than calculated.
- Determine which vertical will stay in place. If the new door covers only the left part of the composition, it makes sense to leave the right side untouched, provided it is solid and level. If the overall symmetry of the wall is disrupted, both verticals may need to be moved.
- Inspect the corners. Butt joints with a miter cut can be disassembled differently than a frame with large molded corner pieces. A finished corner has its own dimensions: it cannot be carelessly trimmed like a straight strip.
- Remove only the necessary parts. Cut through the old paint joint before separating the profile. If the adhesive holds the strip too firmly, preserving the strip itself may prove unreasonable compared with preserving the wall.
- Restore the surface at the former line. Remove loose plaster, adhesive residue, and blistered paint. After repairing the base, let the materials reach full strength according to the manufacturer's instructions.
- Do a dry fit. Lay out the new and preserved elements on the wall without adhesive. Check the corners, horizontals, the gap to the casing, and the alignment of the relief.
- Assemble the frame and paint it. After securing and finishing the fixed joints, compare the color under different lighting. If the difference is noticeable, it is wiser to repaint the entire frame, and sometimes the adjacent wall area as well.
Cutting the two horizontal strips directly on the wall is acceptable only when they can be cut cleanly without damaging the base, the old corner does not interfere with the work, and the new vertical will indeed be repositioned. Simply sawing off the protruding ends does not restore the rectangle — open ends remain.
When reusing old molding, check its back side. Hardened lumps of adhesive will prevent the piece from seating tightly against the new surface. Remove them carefully: trying to scrape off a thick layer by force sometimes damages the profile itself. Do not use heat or solvent without confirming compatibility with the material and finish.
How to join a wall molding with a door casing
There are two fundamentally different solutions. The first is to end the molding before the casing, leaving a visible section of wall between them. This works especially well when the pieces differ in shape and relief depth. The second is to create a deliberate architectural junction in which the lines meet according to a predetermined scheme.
A random abutment looks different: a thin molding butts into the middle of the convex part of the casing, and its end remains exposed. Such a joint is difficult to paint neatly, and it emphasizes the difference in profiles. If a decorative line ends openly, its end must be finished, and for a complex profile, consider the terminating element provided by the design.
Compare the cross-sections of both products. Matching visible width, for example 15 mm, does not yet mean that they have the same projection, corner radius, or position of the relief peak. When joining several profiles, this is exactly what creates a step. Draw the outline on the wall using the actual dimensions, not just the product photo.
After a preliminary dry fit, open the door fully as far as the hinges and layout allow. Check the handle, the leaf, the hinges, and the path of possible contact with the wall. The decor must not serve as a fastening for the frame, cover required technical gaps, or block access for door maintenance.
Which STAVROS moldings and elements are suitable for a localized repair
The catalog presents polyurethane moldings in several profiles. For new frames near a door, it is convenient to compare them not by how decorative they look in the photo, but by actual width, projection from the wall, and strip length.
| Article | Width × projection × length, mm | When to consider |
|---|---|---|
| MLDPU-001 | 10 × 6 × 2600 | A thin frame on a narrow wall section, a small additional contour |
| MLDPU-004 | 15 × 8 × 2600 | A noticeable but compact decorative line |
| MLDPU-002 | 22 × 11 × 2600 | Classic frame with pronounced relief |
| MLDPU-003 | 35 × 12 × 2600 | A large composition, if there is sufficient wall width for it |
All four items are listed by the manufacturer as polyurethane. They are not an automatic replacement for an old profile of unknown origin. If you need to fit a new strip between preserved parts, take a sample of the old molding and compare the shape, width, height, slope of the side faces, and the nature of the corner joint.
For frames with shaped corners, there are Decor for Molding. For example, corner MLDPU-001U measures 86 × 86 × 7 mm, MLDPU-004U — 135 × 135 × 10 mm. The corner's overall dimensions are the size of the entire decorative piece, not the length of straight profile that must automatically be added to each side. When preparing the cutting plan, use the drawing of the specific joint.
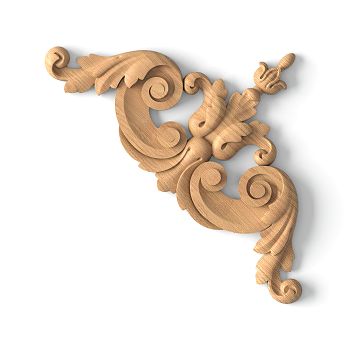
Polyurethane decorative appliques they are used where the composition needs a separate accent: for example, above a door or on a wide wall field. If the pier has become cramped after replacing the door, you should not add an overlay merely to mask an unsuccessful joint. A large ornament can emphasize the violation of proportions even more.
Five ways to update wall decor without a full remodel
Keep the old frames. If the wide casing does not overlap the decorative line, limit yourself to repairing the paint and minor damage to the base. New moldings — zero. Complexity is low, as long as the previous coating allows local restoration.
Narrow one frame. This is suitable when only the vertical nearest the door has shifted into the casing area. For the example with a 650 × 1200 mm frame, four sides will be needed; if one vertical could be preserved, you can use one old piece and three new ones. For narrow geometry, it is permissible to consider MLDPU-001 or MLDPU-004, but only if the cross-sections are coordinated. Medium complexity: careful wall restoration is required.
Combine two narrow frames into one. With a small pier, two frames can turn into cramped strips. One wider frame is perceived more calmly. The need for straight profile is determined by its perimeter; for example, for 800 × 1200 mm, 4 m is required along the outer long points. You can consider MLDPU-004 or MLDPU-002. The work is more difficult, since traces of the two old contours will have to be eliminated.
Rebuild the fields on both sides of the door. If the new casing has shifted, the previous symmetry may be lost. First compare the dimensions of the available sections on the right and left. Then set equal frame heights, and determine their width for each wall pier. For two frames of 600 × 1200 mm, the total perimeter will be 7.2 m; the number of strips is calculated separately based on the cutting plan. High complexity while preserving the old coatings.
Make the door and wall a single composition. Suitable for classic styling when there is room for a noticeable relief. Moldings MLDPU-002 or MLDPU-003 can define wall frames, while the top of the door serves as an independent architectural boundary. The number of parts depends on the full layout, ready-made corners, and distances to the baseboards. This is not local trimming but a partial redesign of the finish; high complexity.
Calculation: how many strips are needed if the frame has become narrower
Let's take specific dimensions. Before renovation, the outer width of the frame was 750 mm, and the height was 1200 mm. The new casing took up additional space, and it was decided to reduce the frame width to 650 mm. The height remains the same.
Perimeter of the new frame: 2 × (650 + 1200) = 3700 mm, or 3.7 m. For four sides, two vertical segments of 1200 mm and two horizontal segments of 650 mm are needed. If the length of the selected molding is 2600 mm, the minimum number of new strips when making the frame from scratch is two.
| Plank | Cutting by outer long points | Nominal unused remainder |
|---|---|---|
| First, 2600 mm | 1200 + 650 mm | 750 mm before accounting for saw cuts |
| Second, 2600 mm | 1200 + 650 mm | 750 mm before accounting for saw cuts |
Such a cutting plan leaves room for saw kerfs and minor adjustments. However, first check how the product sits in the mitre box and from which side the 45-degree cut is made. The dimensions 650 and 1200 mm in the example refer to the outer long points of the finished sides. If you measured centre lines or the inner opening, the blank lengths will be different.
For a simple rectangular frame without ready-made corners, two strips are sufficient in length. But that is not yet a reason to buy right away: one vertical or both horizontals may have been preserved. Then list the parts that actually need to be made and redistribute them across the strips again. Simply adding up the metres is not enough if a single continuous section is longer than the remaining offcut.
If the frame is assembled with ready-made decorative corners, the calculation changes: straight strips join the corner pieces at the designated points, and their dimensions must be subtracted from the perimeter according to the specific drawing. For an unknown old system, such a calculation cannot be done in advance.
Buying an additional strip is justified when there are many complex cuts, uncertain dimensions, or a need to match all parts with the same relief. In the simple example with two whole strips, the length reserve is already significant; buying a third one is not automatically required.
How to carefully remove damaged areas and prepare the base
Protect the installed casing with masking tape and a dense pad in the tool area. Remove construction dust and check for hidden fasteners. If electrical wiring runs nearby or switches are installed, avoid cutting deep into the wall without knowing the location of the utilities.
Cut the paint film along the moulding border with a utility knife, without going into the plaster. Then try to carefully separate the edge with a thin tool, distributing the force through the protective pad. If there is strong resistance, stop: the moulding may be glued to a weak layer of coating or over its entire area. A sudden pull can remove the finish over a large area together with the strip.
If the product cannot be preserved without serious damage, it is wiser to sacrifice a fragment of it rather than the wall or the new casing. The detailed technique has already been described in the STAVROS article “How to remove polyurethane mouldings from a wall”.
The base for the new installation must be dry, level and strong. Remove only the loose remnants of adhesive and coating, repair chips with a suitable compound, and wait for it to dry. New stucco moulding will not fix peeling plaster. If a textured border remains from the old frame, level it out before gluing the new strips: once installed, it will be harder to reach with a tool.
Installing moldings after door installation: order of work
First, make sure the door frame is secured, the casings are finally in place, and the finishing around the opening is complete. Mark the outer lines of the future frame using a level. Measure the diagonals of the rectangle: with accurate right angles and equal opposite sides, they should match. If the wall or the corner of the room deviates noticeably from a right angle, use the visually significant lines of the door as your reference and check each cut on site.
Dry-fit all four pieces without glue. Compare them with the existing moldings under side lighting; check for gaps under the back side. If necessary, trim the ends with a suitable saw and remove burrs without smoothing the profile itself. If using a corner from a ready-made series, first align its position with the straight sections.
Choose the mounting adhesive based on the molding material, the substrate, and the manufacturer's instructions. Be especially careful with polystyrene: not every adhesive suitable for polyurethane is approved for it. Apply the product in the amount and manner specified by the manufacturer, then allow the fixing time. Do not fill the moving parts of the door structure with adhesive.
After securing, check the plane and the angles. Prepare small fixed joints for painting with a compatible material. If the gap is caused by an incorrect cut or the parts move, a thick layer of filler will not solve the problem: the joint will have to be redone. Allow the drying time specified for the adhesive and finishing compounds.
Painting begins with a test area. Old frames often differ in sheen even when the shade matches. For an invisible result, it is sometimes necessary to paint the entire frame. After the installation is fully complete, open the door once more and make sure the protruding elements do not interfere with its operation.
How to coordinate a new door, skirting board, and wall moldings
A white door with white casings allows you to keep frames painted to match the walls. But if the wall is a warm shade and the door is a cool white, the same "white" paint on different surfaces can emphasize the difference. Choose the color based on a test patch under real lighting.
For a door with a wood grain, you do not necessarily need to look for moldings in the same color. Often it is enough to repeat the geometry: strict straight casings next to simple wall frames look more convincing than trying to add carved decor to them that is unrelated to the door. Contrasting dark casings require more careful checking of line thickness: a wide frame next to them can visually make the opening look heavier.
A tall skirting board also plays a part in the composition. If its top line is close to the lower horizontal of the frame, an accidental narrow strip of wall may form between them. Raise the frame or reconsider its height. It is not necessary to tie all dimensions to a single number, but intersections and line endings should look intentional.
On a narrow section of wall, it is safer to start with one new frame. Adding a second outline, corners and overlays is worth doing only after evaluating the result without them.
Mistakes that force you to redo the renovation
They buy profile by width only. Two moldings of 15 mm each may differ in shape and relief height. Before ordering, compare drawings or samples, especially if the new strip will continue the old one.
They mark the frame before installing the casings. Changing the position of the box shifts the reference point. Mark after the final installation of the door.
They shorten the strips without changing the geometry. Open ends and a cut corner give away the rework. First draw the entire new rectangle.
They ignore the door swing. The protrusion of the molding is checked together with the handle, the leaf and the stop, not separately on the wall.
They glue over crumbling plaster. A strong bond will not happen if the base layer itself is peeling. Restore it before gluing the decor.
They use unsuitable glue. Solvent-based compositions for polystyrene without confirmed compatibility are especially dangerous. Check the label and the manufacturer's recommendations.
They mask an incorrect cut with a thick layer of filler. Under paint, such an area may crack or differ in shape. Fix the end, not the thickness of the masking layer.
They paint only the new part. With a different sheen and accumulated layers of old paint, the patch remains noticeable. First make a test paint application; then determine the boundaries of repainting.
Which is more cost-effective: keeping the stucco molding or redoing the wall
If one short side of the frame is damaged, a local replacement usually requires less material and labor. If the entire outline is misaligned, consider not only the price of the new molding but also restoring the paint along the former lines. With a textured wall or complex wallpaper, the finishing itself may turn out to be the main part of the repair.
For a preliminary cost comparison, you can use the current prices from the STAVROS product cards. At the time of checking, the MLDPU-001 strip, 2600 mm long, was listed at 1,740 rubles. Two new strips for the frame from the calculation example come to 3,480 rubles for the moldings themselves. This amount does not include adhesive, finishing materials, possible protective packaging, delivery, or the craftsman's labor. The MLDPU-001 card separately lists a pine backing at 390 rubles for orders of up to 150 pieces; the order terms must be verified before payment.
Another approach—keeping the old parts and buying one additional strip—sometimes reduces material costs but can increase fitting time. And when the decor is peeling off extensively, a new composition is often more predictable than repeated attempts to glue the old one back on. Compare three estimates: local replacement; relocating one frame with wall repair; and a complete redo of the decorative section. Choose based on the total scope of work, not just the price of a single strip.
Where to find moldings and stucco for wall restoration
After measuring, record the outer dimensions of each frame, the number of straight sides, the number of ready-made corners, and the article number of the surviving profile, if known. Then you can look at Polyurethane moldings and compare their cross-sections with the previous finish.
If you need corners or overlays, select them together with the main profile, not after installing the frame. For those planning Buy polyurethane molding, it is more useful to check the drawings, compatibility, and number of parts in advance than to order an ornament that happens to look right in a photo. In general STAVROS molding decor catalog solutions are presented for local restoration and larger compositions.
The main sign of a successful renovation is not the new molding itself, but the feeling that the door and frames have always been in these places. Sometimes this requires two strips and a neat miter cut. Sometimes it only takes restoring the paint and deciding not to add anything.
Frequently asked questions
Can only one side of an old decorative frame be replaced?
Yes, if the other three sides are sturdy, their geometry fits the new door, and the new profile fully matches the old one. If the relief differs, it may be wiser to replace the entire frame.
What should be done if a wide casing overlaps the corner of the frame?
Check whether the nearest vertical can be moved. If the frame has ready-made corner elements, first recalculate the position and size of the corners themselves. Simply cutting off the overlapped part of the corner decor is usually not the best option.
Can a polyurethane molding be shortened directly on the wall?
Sometimes it is possible, but the risk of damaging the paint, the wall, or the casing is high. For a clean new corner, it is more reliable to remove the needed strip, make a miter cut according to the markings, and check the result without glue.
Is polystyrene molding suitable as a replacement for polyurethane?
Only if the cross-section, purpose, painting, and installation method are coordinated. When repairing one side of a frame, different materials may differ in relief and end treatment, even when the nominal width is the same.
Can polyurethane foam be used near a door?
Yes, if the specific decorative product is intended for interior use and the installation conditions match the manufacturer's recommendations. But the word "polyurethane" does not prove that the profile is compatible with the old frame.
How do you finish a molding before a door casing?
Provide a neat visible setback or a specially designed joint. The open end must be finished; complex reliefs may require a suitable end cap.
What should I do if the new frame looks too narrow?
Do not try to correct the proportion with additional overlays. Remove the inner contour, reconsider the frame width, or leave the wall section without a decorative rectangle.
Do all moldings need to be repainted after a partial replacement?
Not always. First, compare a test patch by shade and sheen after drying. If the new piece differs noticeably, painting the entire frame usually gives a more cohesive result than a separate color patch.