Article Contents:
- What to Buy for Furniture Makeover: A Complete Set at First Glance
- Which Furniture Can Actually Be Transformed
- Sliding Wardrobe and Hinged Wardrobe
- Commode
- Bedside Table and TV Stand
- Console and Writing Desk
- Kitchen fronts
- Built-in wardrobes and dressing rooms
- Wood or Polyurethane: How to Properly Divide Roles
- Where wood is irreplaceable
- Where Polyurethane Works More Precisely
- Transforming Specific Furniture Pieces: Step-by-Step Schemes
- IKEA or similar brand dresser: how to turn a simple one into a classic
- Classic hinged wardrobe: facades that change everything
- TV cabinet: a horizontal classic piece
- Buffet or display cabinet: remodeling a complex piece
- Technical nuances of furniture decorating
- How to prepare the surface
- How to properly glue moldings and stucco
- Order of mounting parts
- Furniture decorating: how to choose a style
- Classicism
- Neoclassicism
- Classic with relief (Empire, Baroque)
- Provence and French Classics
- Table: What to Do with Each Type of Furniture
- Mistakes in Furniture Redesign: Analysis of Typical Failures
- Buying Decor Without Facade Dimensions
- Choosing Too Large a Relief
- Mixing Different Styles of Handles, Legs, and Moldings
- Installing Polyurethane in Impact Zones
- Not Checking the Surface Material
- Not Buying Extra Profile
- FAQ: Answering Key Questions About Furniture Decorating
- About the Company STAVROS
There is a moment in the life of every person who cares about interiors: you look at a perfectly functional wardrobe or chest of drawers and realize it is correct but boring. Not broken, not outdated, not in the way. Just — faceless. Smooth fronts, cheap chrome-plated plastic handles, metal pin legs. Everything works. But not a single detail worth stopping your gaze on.
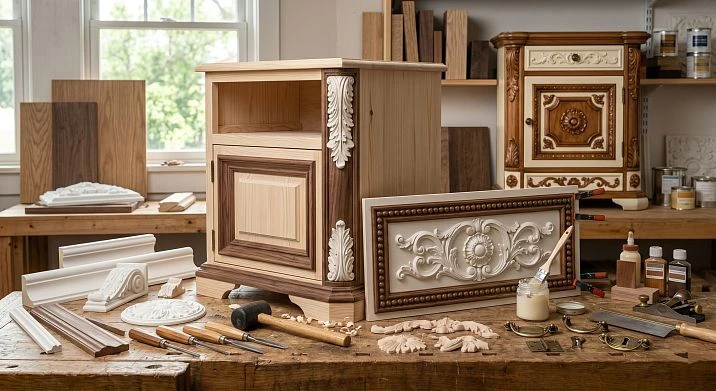
The good news: such furniture doesn't need to be thrown away. It can be redone. Not in the sense of a major renovation with disassembling the body — but in the sense of targeted decoration. New Furniture Handles made of solid wood, Wooden legs instead of metal pins, Moldings for furniture along the perimeter of the fronts, Polyurethane appliqués as decorative accents, a unified paint color — and mass-market furniture starts to look like a solid classic piece made to order.
This article is a practical guide for those who have already decided: furniture makeover starts with the right set of parts. We figure out exactly what to buy, in what order to proceed, and how not to ruin a good idea with wrong decisions.
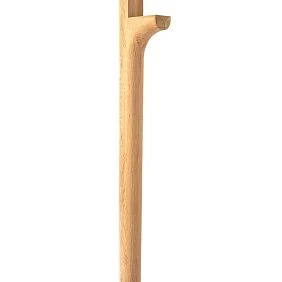
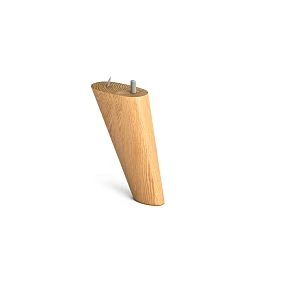
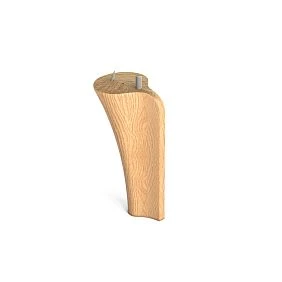
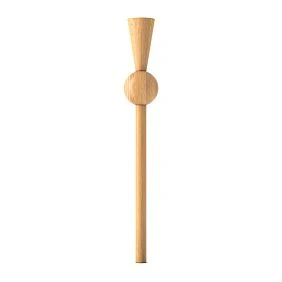
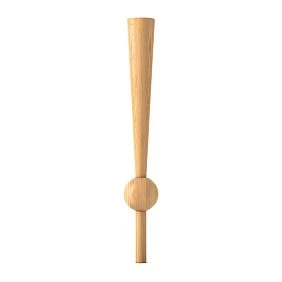
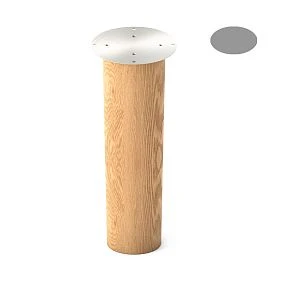
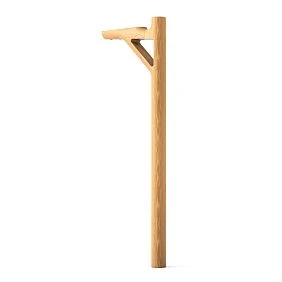

What to buy for a furniture makeover: a complete set at first glance
The rule of an experienced decorator and carpenter: before starting the makeover, gather everything at once. Step-by-step orders mean delays between work stages, the risk of color mismatch between paint batches, and hassle. A complete set — once and for good.
Wooden parts:
-
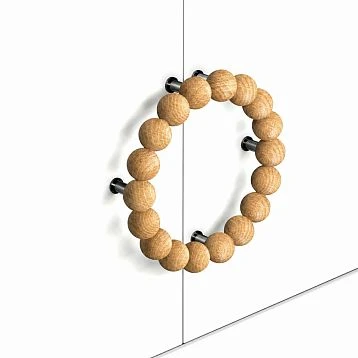
Furniture Handles — brackets, knobs, or pulls made of beech, oak, or ash solid wood;
-
Furniture legs — turned, tapered, knurled — for replacing standard supports;
-
furniture legs — reinforced, for high-load cabinets;
-
decor for furniture — carved overlays, relief inserts from solid wood;
-
Moldings for furniture — wooden profile strips for frame decor of facades.
Polyurethane parts:
-
Moldings made of polyurethane — frame profiles on facades, lower and upper body belt;
-
Polyurethane appliqués — central accents and decorative inserts;
-
Polyurethane moldings — relief elements for cornice and decorative zones;
-
Decorative stucco — medallions, cartouches, corner elements;
-
Decor for Molding — point inserts along horizontal profiles;
-
polyurethane decor — everything else around the perimeter of the body and side panels.
Installation and finishing:
-
M4 and M8 bolts for attaching handles and legs;
-
dowels and self-tapping screws for hanging elements;
-
assembly adhesive — what to glue polyurethane molding with;
-
acrylic sealant for profile joints;
-
adhesion primer for chipboard or MDF;
-
enamel or paint (depending on the desired finish);
-
varnish or oil for wooden parts;
-
spare decorative elements 15–20%.




What furniture can actually be redone
An honest answer right away: almost any. Furniture makeover is not the restoration of old antiques, where every scratch of the original matters. It is the transformation of a modern mass-produced item into a piece with a decorative character.
Our factory also produces:
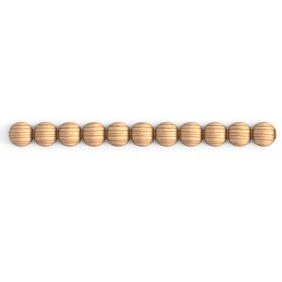
Sliding wardrobe and hinged wardrobe
A wardrobe is the largest object that benefits from a makeover. Simply because it occupies a huge wall area. The smooth facades of a hinged wardrobe are an excellent base for molding frames. Each door is divided furniture moldings into 2–3 vertical fields. Handles are replaced with wooden pull handles. Supports are replaced with Wooden legs or high-quality wooden supports. Final painting in a single color — and before you is not a wardrobe from a hypermarket, but case furniture with a classic character.
A sliding wardrobe with sliding doors is a limited option. Molding can be applied to sliding doors, but you must strictly ensure they do not touch each other when moving and do not fall into the mechanism groove.
Get Consultation
Chest of drawers
Furniture Decoration like a chest of drawers — this is a classic task: replace handles, add molding frames to the drawer fronts, change the legs. The front of each drawer is a separate field. A molding frame around the perimeter of the drawer with a 15–20 mm indent from the edge + a wooden handle in the center. New Furniture legs turned profile legs — and the chest of drawers is ready for a new life.
Bedside table and TV stand
A small object with great decorative potential. A TV stand is typically a horizontal body on low legs or without legs at all. Makeover: Wooden legs conical shape, Moldings made of polyurethane along the perimeter of the facades, small Polyurethane appliqués in the center of each door, new handles — and the horizontal cabinet acquires a furniture character of classic style.
A bedside table is small but very noticeable. It stands next to the bed, at eye level of a lying person. The quality of details is felt especially clearly here: handle, molding, leg. Everything must be neat.
Console and desk
A console is a straight tabletop on legs, with minimal cabinet volume. Decorating a console starts with furniture supports and ends with relief decorative elements for furniture on the ends and side inserts.
A desk is a more complex object because it has loaded legs and cabinets with drawers. But the result is more convincing: proper legs, handles, and molding frames on the cabinets — a chipboard table starts to look like office furniture with character.
Kitchen fronts
Kitchen facades are a separate story. Here, remodeling is possible in two formats: complete replacement of facades (new MDF with milled profiles) or decorating existing smooth facades. The second approach: Moldings for furniture Along the perimeter of each facade, new handles, primer, and painting in a single color. For the kitchen, an additional question is important: moisture resistance. Polyurethane moldings are moisture-resistant. Wooden ones require a reliable paint and varnish coating.
Built-in wardrobes and dressing rooms
A dressing room — typically several sections with smooth facades from floor to ceiling. Here, molding decoration works especially effectively: due to the height and length, molding frames create a truly architectural rhythm. The result is built-in furniture that looks like a classic wardrobe-library.
Wood or polyurethane: how to properly divide the roles
This question is asked most often. And the correct answer is not 'or', but 'and'. Wood and polyurethane perform different functions in furniture remodeling.
Where wood is irreplaceable
Wooden decoration — where strength, tactility, and durability under load are important.
Handles. A handle is taken in hand daily, repeatedly. Wood feels warm to the touch, does not slip, does not scratch, and does not cool the palm. Wooden handles made of beech or oak will last for decades without degradation.
Legs. wooden furniture legs — a load-bearing element. Here you cannot skimp on either the material or the cross-section. A turned beech leg with a diameter of 50 mm holds a load of 80–100 kg without deformation.
Brackets. A decorative wooden bracket is both a support and a decorative element at the same time. A polyurethane bracket cannot handle the load of a shelf.
Wooden moldings on facades. Moldings for furniture from the array — in areas with moderate mechanical load: the lower horizontal of the facade, the frame contour. Wood holds up better to impact than polyurethane.
Where polyurethane works more precisely
Polyurethane moldings — for decorative areas without constant load.
Frame moldings on facades. Applying an even molding frame from a wooden profile is a task that requires precise milling and perfect corner cutting. Polyurethane profile is cut with a knife at 45°, glued with assembly adhesive, joints are puttied with acrylic sealant. After painting, the difference between wooden and polyurethane molding on the facade is not visible.
The upper and lower belt of the body. The cornice at the top and the decorative profile at the base of the body are most often made of of polyurethane moldings. Lightweight, precise, and accept paint well.
Central overlays on doors. Relief Decorative stucco — a medallion, geometric rosette, ornamental cartouche — in the center of the door. This is a decorative area without grip and without load.
Side panels. polyurethane decor on the visible side panels of a cabinet or chest — frame molding, vertical accent. The side panel is not handled, does not experience impacts — an ideal area for polyurethane.
Redoing specific pieces of furniture: step-by-step diagrams
IKEA or similar brand dresser: how to turn a simple one into a classic
A typical item for redoing is a rectangular dresser on metal pegs with plastic handles. What exactly needs to be done?
Step 1. Take measurements.
Measure the width, height, and depth of each drawer. Record the distance between the handle holes (center-to-center distance). If there are no holes, decide where they will be. Handle placement: center of the drawer horizontally, upper third vertically.
Step 2. Choose handles.
Furniture Handles — brackets, center-to-center distance 64 or 96 mm. For a drawer 380–450 mm wide, use a 96 mm bracket. Material: beech, for white painting.
Step 3. Choose legs.
wooden furniture legs — tapered, beech, height 100–120 mm (a standard dresser on pegs sits at a height of 70–80 mm — new legs will raise it slightly higher, visually lightening the body). M8 bolt with threaded insert into the dresser body.
Step 4. Choose moldings for the drawer fronts.
Moldings made of polyurethane — profile 18–20 mm. Frame around the perimeter of each drawer with a 20 mm indent from the edge. Calculation for one drawer 400 × 180 mm: (400 + 180) × 2 = 1160 mm = 1.16 linear m. For 5 drawers × 1.16 = 5.8 linear m + 15% = 6.7 linear m.
Step 5. Select central overlays.
Polyurethane appliqués — a small relief insert for the two lower wide drawers, 60–80 mm. Optional: a simple dresser with molding frames already looks complete.
Step 6. Finish.
Primer for MDF/particleboard — 1 coat. Water-based or alkyd enamel — 2 coats. Wooden legs — separately: if for painting — same primer and enamel; if for natural wood — oil or wax.
Total for dresser: handles 5 pcs. + legs 4 pcs. + molding 6.7 linear m + primer + enamel + spare.
Wardrobe with hinged doors in classic style: facades that change everything
A standard wardrobe with smooth facades is the most common object for remodeling. What is important to know: moldings are glued onto the existing facade without removing it. The facade must be clean, degreased, and primed.
Scheme of dividing the facade with moldings:
Facade 600 × 2100 mm (door height to the top edge):
-
Horizontal division: top field 700 mm, bottom field 1200 mm (separated by a horizontal molding at a height of 750–800 mm from the bottom edge — slightly below the midpoint in height, creating a classic "short over long" proportion);
-
Frame molding on the top field: (600 − 40 mm offsets) × (700 − 40 mm) = 560 × 660 mm = (560 + 660) × 2 = 2440 mm;
-
Frame molding on the bottom field: (560 × 1160 mm) = (560 + 1160) × 2 = 3440 mm;
-
Horizontal dividing molding: 600 mm × 1 = 600 mm.
-
Total per facade: 2440 + 3440 + 600 = 6480 mm = 6.5 linear m.
-
For a 4-door cabinet: 4 × 6.5 = 26 linear m + 15% = 30 linear m.
It seems like a lot — but in the end, the result: a cabinet with molding frames, handles, and a uniform finish looks as if it was custom-made.
TV stand: horizontal classic object
TV stand 1400 mm wide, 2 doors + 1 open shelf in the center:
-
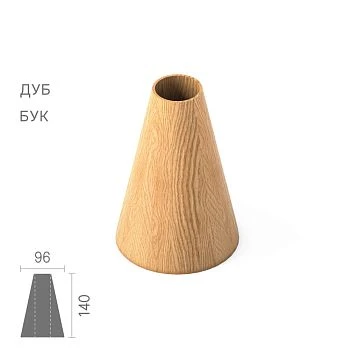
Wooden legs — 6 pcs (4 under the stand + 2 under the central niche), conical, height 80 mm;
-
Furniture Handles — 2 staples 96 mm for doors;
-
Moldings made of polyurethane — frame profile 18 mm on each door + horizontal top belt across the entire width;
-
Polyurethane appliqués — 2 central accents on doors, 70 mm;
-
Glue, sealant, primer, enamel.
Sideboard or display case: remodeling a complex object
A sideboard or display case in a mass-market version is typically a body with upper and lower parts. Remodeling a sideboard into a classic style requires a full decorative set:
-
Upper part: Moldings made of polyurethane along the cornice line + wooden glazing bead on glass fronts + knob handles for glass doors;
-
Lower part: frame moldings on solid fronts + pull handles + decorative elements for furniture as central accents;
-
furniture legs — 4–6 pcs. under the lower body;
-
Lower decorative belt of polyurethane decor.
Technical nuances of furniture decoration
How to prepare the surface
Furniture made of chipboard and MDF does not accept glue and paint well without preparation. Especially film surfaces. Preparation procedure:
-
Remove old hardware: handles, legs, supports.
-
Degrease the surface with a solvent or a special degreaser.
-
If the surface is glossy — light sanding with sandpaper P180–P220.
-
Apply adhesion primer. Let it dry according to the instructions (usually 4–6 hours).
-
Only after that — glue for moldings and overlays.
How to properly glue moldings and stucco
what to glue polyurethane molding with — a question that determines the quality of the result. Construction adhesive "liquid nails" is the basic solution. But for polyurethane elements on furniture facades, it is better to use specialized acrylic adhesive or polyurethane construction adhesive with a short setting time (5–10 minutes).
Gluing procedure: apply adhesive to the molding in a zigzag pattern, press against the surface, hold, and secure with painter's tape for 2–3 hours. Profile joints at corners — at 45°. Gaps in joints — acrylic sealant.
Installation order of parts
Rule: always start with handles, finish with moldings. Because the handle is a through hole in the facade. If you glue the molding first and then find that the handle bolt hits the profile, it is almost impossible to fix the error without damaging the decor.
Correct order:
-
Mark the location of the handles;
-
Drill holes for the handles;
-
Mark the moldings considering the handle locations;
-
Glue the moldings;
-
Install the overlays;
-
Prime the entire surface;
-
Paint;
-
Install handles after final paint drying;
-
Install legs.
Furniture decoration: how to choose a style
Classicism
strict symmetry. Moldings for furniture — straight profiles without active relief. Handles — rectangular or faceted cross-section brackets. Legs — fluted with fluting. Paint — cream, white, ivory. No extra overlays.
Neoclassicism
Geometry and lightness. Moldings made of polyurethane with a "shelf" or "chamfer" profile. Handles — buttons 35–40 mm in diameter or thin pulls. Legs — tapered straight. Small geometric Polyurethane appliqués — in the center of wide facades.
Classic with relief (Empire, Baroque)
Rich molding profile — heel, scotia, bracket. Decorative stucco — medallions, leaf motifs. Decor for Molding — every 250–300 mm horizontally. Legs — turned, with a rich profile. Finish — complex: light base color + gold or silver highlighting along the relief.
Provence and French classicism
Light wood, soft relief. Wooden decoration — delicate carved inserts. Moldings — thin, profile without aggressive relief. Legs — curved cabriole or turned on a high stand. Finish — white or gray-blue with light distressing.
Table: what to do with which furniture
| Furniture item | Legs | Handles | Moldings | Overlays | Priority of change |
|---|---|---|---|---|---|
| Commode | Tapered 100 mm | Staples 96 mm | Frames for each drawer | Central accent | Handles + legs |
| Swing wardrobe | Missing or 60 mm supports | 128 mm staples | Division of facades into 2–3 fields | Optional | Moldings |
| TV stand | Conical 80 mm | Staples 96 mm | Frames + top belt | Central accent | Legs + moldings |
| Bedside table | Turned 100 mm | 35 mm button | Frame on door | Minimal | Legs + handles |
| Sideboard/showcase | Supports 80 mm | Staples + buttons | Cornice + frames | Central accent | Cornice + handles |
| Kitchen fronts | — | Staples/rods | Frames for facades | Optional | Handles + moldings |
Mistakes when remodeling furniture: analysis of typical failures
Buying decor without facade dimensions
The most common mistake. A person sees a beautiful molding, buys 10 meters — and then it turns out that the width of the facade and the offsets don't match. Either there isn't enough molding, or it's clearly the wrong scale. First — measurements, then — purchase.
Choosing too large a relief
The drawer front is 380 × 160 mm. A molding with a projection of 12 mm and a width of 30 mm around the perimeter of such a facade means half of its width is taken up by the profile. Rule: the width of the molding profile should not exceed 6–8% of the facade width. For a 380 mm facade — a molding of 20–25 mm.
Mixing different styles of handles, legs, and moldings
Round turned legs in Baroque style + rectangular brackets for Neoclassicism + leaf-style Polyurethane appliqués in Rococo style. The result is visual chaos. All elements should belong to the same style family: profile lines echo each other, the shape of handles is coordinated with the shape of legs.
Installing polyurethane in impact zones
The lower belt of the TV cabinet is an area that gets accidentally kicked. polyurethane decor with a projection of 10–15 mm in an area that gets hit by a vacuum cleaner or foot during cleaning — it will chip. In impact zones (lower 150 mm of the body), it's better to use more durable Moldings for furniture made of wood.
Not checking the surface material
Laminated films on chipboard are a poor adhesive base. Some films (PVC, melamine) reject any glue without mechanical preparation. Before decorating: check adhesion, if necessary — sand the surface and use a specialized primer.
Do not take a profile reserve
Molding is cut at a 45° angle at each corner of the frame. At the slightest error or size shift — a new piece is needed. A 15–20% reserve is mandatory. For a kitchen with a multi-facade system — better 25%.
FAQ: answering the main questions about furniture decorating
Can simple furniture be transformed into classic?
Yes, and it is significantly cheaper than buying new. Replacing handles, installing wooden legs, applying of polyurethane moldings on the facades and a uniform paint job is the sufficient minimum to turn faceless furniture into an item with a classic character.
What to buy for furniture decorating?
Furniture Handles, Wooden legs, furniture legs, decorative elements for furniture, Moldings made of polyurethane, Polyurethane appliqués, glue, fasteners, primer, paint, and a 15% reserve.
Where is it better to use wooden decor?
В handles, legs, supports, brackets — everywhere where there is daily load and tactile contact. Wooden decoration — carved inserts in areas of moderate load.
Where is it better to use polyurethane decor?
On facades for painting, side panels, cornice belts, lower decorative belts, central accents of doors. Polyurethane moldings — everywhere where there is no constant mechanical load.
How not to overload furniture with stucco molding?
One main decorative element per piece of furniture: either molding frames, or central overlays, or rich legs. Not all three at once on one dresser. Small facades — minimal relief.
About the company STAVROS
The entire range for remodeling and decorating furniture — Furniture Handles, wooden furniture legs, furniture legs, decor for furniture, Moldings for furniture, Moldings made of polyurethane, Polyurethane appliqués, Decorative stucco и Decor for Molding — is produced and supplied by STAVROS.
STAVROS is a St. Petersburg manufacturer of architectural and furniture decor from solid wood and polyurethane. More than twenty years of production experience. Full production cycle in St. Petersburg. Completed projects: the State Hermitage Museum, the Konstantinovsky Palace, the Alexander Palace, the Trinity-Izmailovsky Cathedral. Catalog with exact parameters and photographs. Order from one unit. Contact us to confirm shipping to your destination.