Article Contents:
- What a "ready-made carved element" means
- How it looks in the catalog
- What is already resolved in a ready-made SKU
- Why it is especially difficult for a small workshop to do carving on its own
- What is added to this
- Conditional arithmetic
- When a ready-made carved element really makes sense
- What the manufacturer says about custom orders
- Which carved elements from the workshop can be bought ready-made
- Carved Inlays
- Carved wooden rosettes
- Wooden capitals
- Carved brackets
- Pilasters and Columns
- Carved moldings
- Handrails
- Function of the part first, beautiful ornament second
- How to use filters
- Example
- Dimensions A × B × C do not yet describe a carved element
- In the catalog, dimensions are named differently
- What to record
- How to check a carved element on the facade before ordering
- Template 1:1
- About light
- One overlay and ten identical ones: different tasks
- Position on the product
- Mirrored pairs
- Batch
- Beech or oak for finished carved decor
- What matters for carved decor
- One species in the composition
- Unpainted decor as a semi-finished product for a furniture project
- How to use it
- Preparing the carved surface
- Limitation
- How to assemble several finished elements into one composition
- Scheme 2 on real positions
- Scheme 4 and compatibility
- Principle
- How to avoid a "catalog on a single facade"
- Overload test
- When decor is unnecessary
- Serial article number or custom-made to sample
- Important limitation
- If a copy is needed
- Procedure
- How to add carved elements to the furniture specification
- Conditional calculation based on this list
- Why this entry is needed
- Separation of STANDARD and CUSTOM
- Why you should buy one sample first
- Conditions
- What to Check
- What to keep
- When a sample is not needed
- Calculating the purchase for a series
- Reserve
- Availability and lead time
- Where to buy ready-made carved wooden elements
- Conditions
- What to clarify with the manager
- Workshop questions

A workshop is assembling a batch of classic buffets: the carcasses and fronts are made in-house, and each door must have a carved overlay on top, with two capitals above the frame. No one wants to start carving for this order: there is no suitable model, no machine program, and preparation would take a week. The question is simple. Which carved parts can be taken ready-made so that only the carcass, front, and finishing remain in your own product?
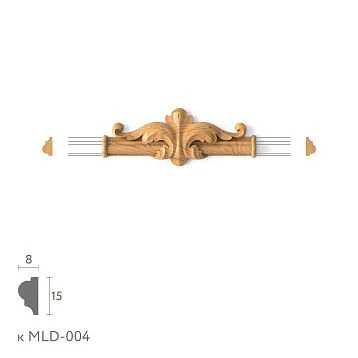
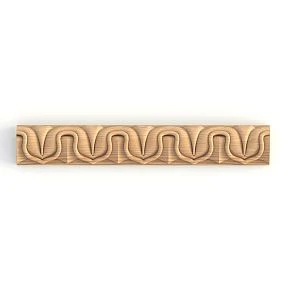
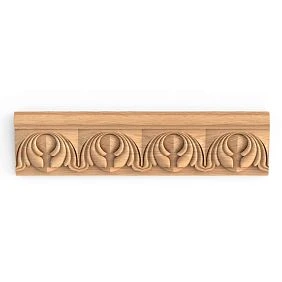
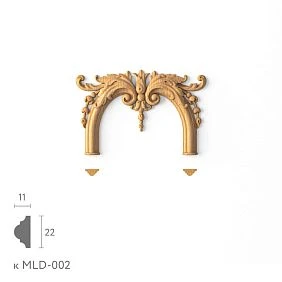
Ready-made carved elements are those that have a catalog article number, known dimensions, and a repeatable shape: overlays, rosettes, capitals, brackets, pilasters, carved moulding, and finials. The workshop does the rest: construction, finishing, composition. The chain looks like this: furniture area, decor function, type of carved element, ready-made article number, dimensions, actual contour, species, sample element, finishing, parts list, order. Below, we break down which catalog products suit each task, how to check a part on the front before purchase, and when a ready-made element loses to a custom order. A general overview of the types of carved elements is in the article about carved furniture elements from legs to decorations, while here we are talking about a specific production solution.

What “ready-made carved element” means
Let's start with the boundaries. A finished carved element is not an unprocessed piece of wood, nor a blank for future carving. It is not an individual three-dimensional model, nor a CNC machine service. It is an already formed decorative part that has a specific pattern, real geometry, a product code, dimensions, material, and a repeatable shape.
The distinction from a "blank" is fundamental for a workshop. A blank requires further shaping, whereas a finished carved element already has its final form. What remains for you is sanding if necessary, finishing, fitting on site, and installation. Being finished in form does not mean being finished in appearance: color, sheen, and patina are created by the workshop, as described in more detail below.




How it looks in the catalog
The STAVROS carved decor catalog contains several groups of such products. There are 544 decorative appliqués in the list, while the section text mentions more than 400 models in beech and oak. There are 65 rosettes in the list versus the stated 71 models. There are 75 brackets in the list versus more than 60 models in the text. There are 33 pilasters and columns, and 64 capitals. The discrepancies between the list counter and the text are probably explained by the fact that the counter includes sets, finish variants, and paired mirrored models, so rely on the filters and product cards rather than the overall number.
Common entry point: the section Carved wooden decoration. It brings together appliqués, rosettes, capitals, brackets, pilasters, finials, and carved mouldings.
Our factory also produces:
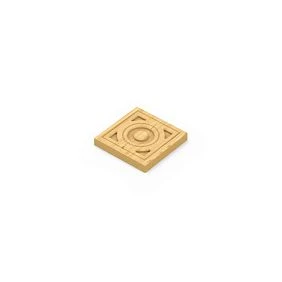
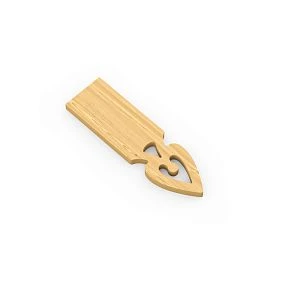
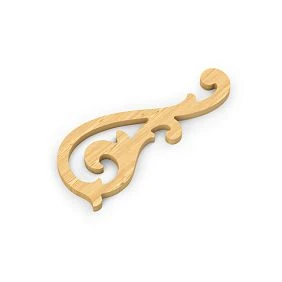
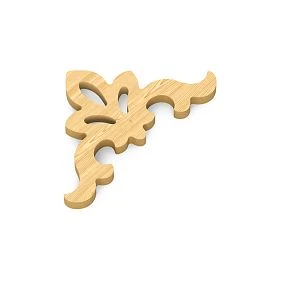
What is already determined in a finished product code
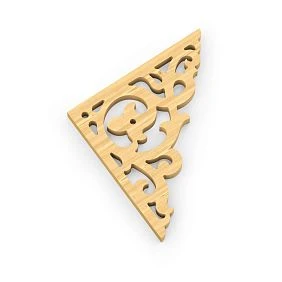
The ornament pattern, overall dimensions (in the catalog, dimensions are indicated by the letters A, B, C, and their meaning depends on the product group), the wood species from the options available on the product card, and the shape. That is why the same parts can be ordered by product code six months later. With custom carving, all of this must be created and preserved on your own.
Get Consultation
Why it is especially difficult for a small workshop to do carving on its own
Carving on a machine looks simple until you break down the sequence. Sketch, three-dimensional model, preparation of the control program, tool selection and setup, securing the workpiece, test pass, the milling itself, hand finishing, sanding. Each operation has its own timeline, and most of them are performed once regardless of the number of parts.
For a single element, this is a disproportionate load. For four overlays, six sockets, or eight fronts, the preparatory operations still make up the bulk of the labor costs. They cannot be sped up simply because there are few parts: the program is written once, the tool is set up once, and a test run is needed once. That is why the unit cost of a single part in a small batch rises rather than falls.
What is added to this
Manual finishing. Even precise milling leaves tool marks in recesses and on thin ornament elements, and these are removed by hand. Sanding the relief takes considerable time: a smooth front is sanded by machine, while carved relief is sanded by hand. Repeatability control: in a series of ten overlays, you need to make sure they are all identical, and that is a separate check.
There is also an organizational side. A CNC machine, if there is one, is busy with the workshop's own orders. If there is none, the carving will have to be outsourced, which means coordinating the model, waiting for a test sample, and accepting the result. A ready-made article removes this entire chain.
Conditional arithmetic
Estimate your own situation. Suppose preparation (model, program, setup, test run) takes conditionally six hours, and an hour of work is valued at 2,000 rubles: that is 12,000 rubles in one-time costs. Add material, machine time, and manual finishing for each part, say 900 rubles. Then a batch of eight overlays will cost 12,000 plus 7,200, that is 19,200 rubles, or 2,400 rubles per part. The catalog overlay N-316 costs from 1,750 rubles: eight pieces come to 14,000 rubles. All the initial numbers here are assumptions: substitute your own. The formula for the break-even point is this: one-time costs divided by the difference between the price of the finished part and your variable cost. At 12,000 rubles, a price of 1,750, and variable costs of 900, we get about 14 parts, after which making it yourself becomes more profitable. If your numbers are different, the threshold will shift.
When a ready-made carved element really makes sense
A ready-made element is rational when five conditions are met: a suitable shape already exists, the dimensions fit the project, the ornament matches the style, a small batch is needed, and your own carving is not a unique value of the product. If at least one condition is violated, it is worth considering another path.
Custom manufacturing is needed when:
-
a custom design is required;
-
a historical element must be repeated;
-
the required size is not available;
-
unique geometry is required;
-
the decor is a signature feature of the project.
| Criterion | Ready-made item | Custom part |
|---|---|---|
| Base | Catalog item | Drawing, sample, approval |
| Preparation | Not needed | Model, program, test part |
| Dimensions | Set by the card | Determined by the project |
| Repeat order | By article number | By drawing, if saved |
| Lead time | By product card: in stock or 5–10 days | Coordinated separately |
| Minimum order quantity | Order from 1 pc. | Usually a production run |
| When to choose | A suitable mold exists, the batch is small | The mold is unique or there is no required size |
A ready-made option is not always more cost-effective. If you need a single branded overlay that will become the face of the workshop, paying for custom development makes sense. If you need ten identical carved elements in a classic style, the catalog will most likely solve the task cheaper and faster.
What the manufacturer says about custom orders
In the pilasters and columns section, it is stated that in addition to standard options, custom projects can be ordered for your needs. For other groups, the conditions are not provided in the open text of the sections, and they need to be clarified with managers. Previously, on the pages of other sections, the manufacturer stated that non-standard items are accepted for production as a production run. Do not expect that a single part of any size will be made to order: this must be clarified before design.
Which carved elements from the workshop can be bought ready-made
We will break down the seven catalog groups and the tasks associated with each.
Carved Appliqués
The onlay is the most obvious furniture component. The section Carved decorative inserts for furniture contains central, corner, vertical, horizontal, and paired options. In the shape filter: square, round, oval, rectangular, asymmetrical, corner, straight, curved, C-shaped, S-shaped, crown, diamond, central, vertical, horizontal, triangular. Product types: onlay, mascaron, and decor set. Dimensions: A is width, B is height, C is thickness.
Three design features indicated in the section description are especially important for the workshop. There are models with mirrored left and right versions. There are modular onlays with joining elements for connecting to the catalog's profiled moldings. There are onlays and end pieces with a recess on the back that follows the molding profile, allowing the decor to be mounted on top of the profile. All three features solve typical assembly and fitting problems.
Prices in the list: from 950 rubles (N-506) and 1,410 rubles (N-093) to 8,340 rubles (N-276) and 15,480 rubles (N-422), decor set C-020 from 32,420 rubles (lead time 5–10 days). Data as of the time of checking.
Carved wooden rosettes
A rosette is used as the center of a facade, a repeating element, a frame node, or a panel accent. In the section Carved outlets from wood shapes: square, round, oval, rectangular. Types: rosette, connecting rosette, decor set. Dimensions: A height, B width, C depth. Prices are noticeably lower than for onlays: R-055 from 200 rubles, R-057 from 250, R-084 from 300, R-012 from 520, R-075 from 1,810, R-082 from 2,600. Rosettes are marked as "hit" and "new", but you should choose by size and pattern, not by the label. There are mirrored pairs R-063L and R-063R, R-067L and R-067R.
Wooden capitals
The capital crowns a pilaster or column and is used on cabinets, bookcases, kitchens, display cases, and portals. Section wooden capitals contains more than 60 models (64 items in the list). Shapes: square, round, rectangular, semicircular. Types: carved and geometric. Some items are designated as "for pilasters PLM": KL-004.02, KL-001.02, KL-014.02. Prices: from 1,950 rubles (KL-007) and 2,050 rubles (KL-004) to 16,120 rubles (KL-012). Check the compatibility of a capital with a specific pilaster by dimensions B and C, not by the series name.
Carved brackets
The bracket is used in cantilever assemblies, under shelves, cornices, and portals. According to the section description Wooden Brackets, they can be used to decorate kitchen furniture, cabinets, fireplace and door portals, as well as a support for a wall-mounted shelf. Each model has a size range and is available in beech and oak; asymmetrical models have a mirrored version. The list contains 75 items. Prices: KR-038 from 1,130 rubles, KR-044 from 1,330, KR-042 from 1,440, KR-060 from 5,040, KR-062 from 9,800, KR-064 from 10,410. There are also ready-made carved shelves: PKR-001 from 48,560 rubles, PKR-002 from 66,850 rubles. The manufacturer states that finished products are shipped from the warehouse in Saint Petersburg the next day; for some items in the list, a lead time of 5–10 days is indicated.
Pilasters and columns
When one overlay is not enough and a vertical system is needed, pilasters and columns are used. Section pilasters and columns includes bases for pilasters, columns, pilasters, half-columns, and connecting rosettes. 33 items in total. Prices: connecting rosette RS-001 from 500 rubles, base BS-009.1 from 840, pilaster PLM-014 from 2,210, pilaster PLM-018 from 9,740, pilaster DD-001 from 16,070, carved column IKN-019 from 24,910, half-column PLM-023 from 31,430.
Carved millwork
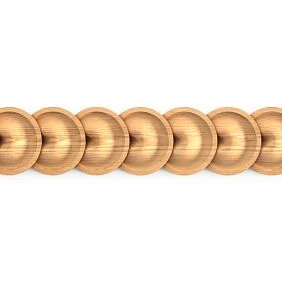
For repeating linear ornament, use Solid wood carved trim. This is a profile with an ornament that the craftsman cuts and joins. Details on moldings and profiles are covered in a separate article about figured molding, and see the parameters of specific items in the section cards.
Finials
Finials complete stair posts, cabinets, beds, portals, and decorative posts. In the section Wooden Caps shapes: square and round, types: turned and carved. Prices: L-022 from 1,380 rubles, L-057 from 1,560, L-081 from 2,110, L-105 from 22,530. An important feature is stated in the section text: the products have a flat square platform without a mounting tenon. This means the method of attachment to your product must be planned in advance.
First the function of the part, then the beautiful ornament
A bad algorithm looks like this: you liked the carving, now you think about where to put it. It leads to details that don't fit or don't do the required job. The correct order is the reverse: the area of the product, the function, the allowable dimensions, the suitable type of element, the ornament, the article number.
Correspondence of areas and types:
| Product area | Function | Element type |
|---|---|---|
| facade center | Composition focus | Rosette or central overlay |
| Frame angle | Close the joint, finish the corner | Corner overlay |
| Top of the cabinet | Crowning | Capital or finial |
| Vertical side | Architectural support | Pilaster |
| Linear zone | Repeating ornament | Carved molding |
| Cantilever joint | Protrusion support | bracket |
The manufacturer describes the functions the same way: central overlays are positioned in the center of the facade to make it a focal point, while corner ones go in the corners to give a finished look and hide the joints. These definitions are convenient to use when setting the task: first formulate what the part should do, then filter the catalog by the shape that performs that function.
How to use the filters
The shape in the overlay catalog (central, corner, vertical, horizontal) directly corresponds to the function. Filter by shape, then by dimensions, then by collection and ornament. This way you immediately cut off most of the catalog instead of scrolling through hundreds of items by looks.
Example
A workshop is making a chest of drawers with four drawers and two doors. The doors need a central accent, the drawers need horizontal overlays, and the top should be finished off. There are three areas, the functions are different, so the types are different too: a rosette or central overlay on the doors, horizontal overlays on the drawers, a finial or cornice on top. Only after that does the choice of ornament begin.
Dimensions A × B × C do not yet describe a carved part
For a simple rectangular part, overall dimensions are enough. For a carved overlay, this is not enough. The rectangle into which the overlay fits describes its bounding box, not its actual shape. An S-shaped overlay with protruding scrolls occupies only part of its rectangle, while the rest is empty.
Besides overall dimensions, you need to understand:
-
the actual contour: how the part looks when backlit;
-
open areas: where there is no carving inside the overall dimensions;
-
relief depth: it is not always equal to dimension C;
-
protruding parts: scrolls and leaves that extend beyond the main body;
-
orientation: for an asymmetrical part, it matters which side it is placed on;
-
axis of symmetry: where it runs and how it will align with the axis of the facade;
-
working mounting plane: which side the part rests on the base.
The phrase "the overlay fits within a rectangle" does not yet mean that it is compositionally suited to the facade. It may physically fit within the frame but look cramped or get lost on a large field.
In the catalog, dimensions are named differently
For overlays, A is width, B is height, C is thickness. For rosettes, capitals, and brackets, A is height, B is width, C is depth. For pilasters, C is thickness. This is easy to mix up when transferring dimensions to a drawing. Verify the definitions in the filter of the specific section rather than carrying over your usual scheme.
What to record
For each item in the project, record the actual dimensions from the product card, as well as your own measurements of the actual contour on the template. If there is a significant discrepancy between them, trust the template.
How to check a carved element on a facade before ordering
The verification procedure consists of eight steps.
-
Obtain the part dimensions from the product card, checking which letter means what.
-
Mark the overall dimensions on the facade with a pencil or tape.
-
Check the central axis: the part must align with the axis of the facade.
-
Mark the position of the handle and its grip zone.
-
Mark the molding or frame and their protrusion.
-
Check the free margins on all sides.
-
Make a 1:1 scale template and place it against the facade.
-
Approve the SKU only after this.
Pay special attention to the free margin. For example: a 240 mm wide panel and a 210 mm wide overlay leave 15 mm on each side. A 230 mm wide overlay will leave 5 mm, and the composition will look cramped, even though the part formally fits. These numbers are illustrative: what matters is that the free margin matches the other elements of the product.
1:1 template
A template is a full-size outline of a part on paper or cardboard. For an overlay, draw the actual outline with scrolls, not just a rectangle. Place it against the facade, secure it with painter's tape, and photograph it from three meters and from half a meter. This way you will see the proportion and how the part is perceived at a real distance.
About lighting
A relief a few millimeters deep almost disappears in diffused light, but in side light it casts a pronounced shadow. Assess where the light falls on the product. If it stands by a window, the pattern will read better. For a shaded corner, choose a deeper relief or a contrasting finish.
One overlay and ten identical ones: different tasks
For a single item, small differences can be compensated manually. If the overlay is slightly wider, we adjust the field. If the relief is slightly shallower, we select the patina. The craftsman keeps these adjustments in mind.
For a series, this method does not work. In a series, the rule applies: same article number, same orientation, one layout scheme, one material, one finish. Any deviation becomes a difference between products. Therefore, the workshop needs to assign an article number, dimensions A, B, C, material, quantity, and position on the product to each item.
Position on the product
People often forget to record the position. Two identical overlays on two doors can be at different heights if the craftsman marked each one by eye. In a series of ten chests of drawers, this results in ten different heights. Record the distance from the edge to the axis of the part in millimeters and make a marking template for installation.
Mirrored pairs
If the product has a symmetrical composition, a pair is needed: a left and a right part. The catalog includes overlays with mirrored reflection, and rosettes have paired designations R-063L and R-063R, R-067L and R-067R. Order both sides at the same time and record them in the list as two article numbers, not as “two identical ones.”
Batch
Order the entire series in one delivery. Carved parts from different batches may differ in wood color, which is especially noticeable with a clear finish.
Beech or oak for finished carved decor
Here it is purely practical logic: the species is determined by the future finish. The catalog states that overlays and brackets are made of beech and oak, and for brackets both species are available to choose from.
Beech is the rational choice when enamel is planned, a calm, uniform surface is needed, and the texture should be minimally noticeable. Dense, non-porous wood accepts an opaque finish evenly, and the fine relief reads clearly.
Oak is suitable when the natural texture is preserved and oil, lacquer, or a transparent tint is used. The pronounced grain of oak works together with the relief. For large surfaces and large overlays this is an advantage, but on small ornaments the texture can compete with the carving.
What matters for carved decor
Thick enamel clogs fine relief, so for delicate carving apply thin coats. Patina requires an even base: the dark compound is worked into the recesses, while the raised areas are wiped. For tinting, test how beech behaves on a sample: its dense structure can cause blotchiness.
One species in the composition
If there are several carved elements on the facade, the species must be the same. Different species under a transparent finish show a noticeable difference. They can be mixed only under opaque enamel.
For a price comparison of species, check the card of the specific item: prices and finishes vary. A detailed comparison of beech and oak for supports is covered in the material about furniture legs, and we do not repeat it here.
Unpainted decor as a semi-finished product for a furniture project
A carved element may be ready in form but not ready in finish. This is an important distinction. The form is ready, but the final appearance is created by the workshop.
What this gives you. The part can be painted to match the facade color, tinted to imitate the desired wood, coated with lacquer, aged with patina, or combined with the overall finish of the piece. A ready-made SKU does not mean someone else's ready-made design: two craftsmen who buy the same overlay will end up with different pieces, because their finish and composition are different.
How to use it
Plan the finishing of carved parts together with the rest of the product, as one system. Then the color and sheen match without adjustment. To check, do a test finish on one part and compare it with the facade in daylight.
Preparing the carved surface
Before coating, check the surface: remove small tool marks in the recesses by hand. Dust removal is especially important for relief: dust remains in the recesses and shows through under the coating. Prime thinly so as not to clog the details.
Limitation
Not all products in the catalog are supplied the same way. Some items are in stock, while others are made in 5–10 days. Check the delivery status and sanding level in the product card: the amount of preparation depends on it.
How to assemble several ready-made elements into one composition
Do not put everything on the facade at once. Ready-made SKUs should form a system, not a collection of favorite details. Below are five schemes, from simple to complex.
| Scheme | Composition | When it works |
|---|---|---|
| 1 | One central overlay | Small facade, one accent |
| 2 | Rosette plus a frame made of profile | Doors, framed facades |
| 3 | Center plus four corner elements | Large facade, grand composition |
| 4 | Pilasters, capitals and upper cornice | Cabinet, library, portal |
| 5 | Carved moulding plus central accent | Long facades, bands |
Scheme 2 on real positions
The R-084 rosette starts at 300 rubles, and the frame is assembled from profile from the moulding section. Such a composition is inexpensive and repeats well in a series. It is important that the diameter of the rosette leaves a free field inside the frame.
Scheme 4 and compatibility
The pilaster and capital must match in cross-section dimensions. The catalog has capitals marked “for PLM pilasters”: KL-004.02, KL-001.02, KL-014.02. This is a hint, but not a guarantee: check B and C of the specific pair and take into account the pilaster base (for example, BS-001 or BS-006) and the connecting rosettes RS-001 and RS-002.
Principle
One main accent, the rest is support. Secondary elements should be simpler than the main one and echo its motif. If the main accent is an acanthus overlay, the rosettes and moulding nearby should be more restrained or share the same pattern.
How to avoid a "catalog on a single facade"
A common mistake: an overlay, a rosette, a capital, a bracket, a moulding, and another overlay on a single piece. Each detail is beautiful on its own, but together the facade is overloaded, and the eye doesn't know where to look.
Control five parameters.
Scale: details should be proportionate to each other and to the piece. A large overlay next to small rosettes loses hierarchy.
Hierarchy: there should be one main element, one or two secondary ones, and a background. Three equal accents compete.
Repetition: repeating elements should be identical, not "similar." Three different rosettes on three doors look random.
Negative space: there should be air between the details. A densely packed facade looks heavy.
Motif: no more than two ornaments. Acanthus and vine together are acceptable, but acanthus, vine, and geometry are overloaded.
Overload test
Photograph the facade with templates of all the parts and remove half. If the composition has improved, keep removing. If it has lost its meaning, then you removed the necessary ones. Sometimes the best option is one good applique instead of three.
When decor is unnecessary
If the piece is sleek, modern, with minimalist hardware, a carved part may fall out of style. If the facade is covered by other furniture, the decor will not be visible. If the budget is limited, one high-quality part is better than several mediocre ones.
Stock item code or custom-made to sample
Two different user requests need to be separated.
The stock item code is in the catalog. Advantages: known geometry, item code, possibility of reordering, no need to create the shape from scratch. The lead time is determined by the product page: in stock or 5–10 days.
A custom part requires a drawing, photo, or sample, approval, and a separate production task. It cannot be considered an automatic extension of the catalog.
Important limitation
You cannot assume that any stock applique is made in any size. The size range in the catalog is fixed, and for brackets the manufacturer explicitly specifies a wide size range for each model. But changing the size of an applique or rosette beyond the range is a separate task. Check the conditions with the manager before specifying a non-standard size in the project.
If a copy is needed
A copy of an existing element, such as an antique overlay, requires a sample, and sometimes a model. This is an individual task with separate conditions. For repair and restoration, there is a separate logic, which is described in detail in the material about decor for furniture restoration.
Procedure
First, search for the article number in the catalog by function and dimensions. If there is no suitable one, check whether the project can be changed by a few millimeters to fit a neighboring model. If not, move on to the individual option and clarify the minimum order quantity and lead time in advance.
How to add carved elements to a furniture specification
Carved decor stops being a note to “add beautiful carving” when it enters the parts list as a normal production component.
| Project code | Article | Type | Size | Material | Quantity |
|---|---|---|---|---|---|
| DEC-01 | N-316 | Overlay | A×B×C from the product card | Beech | 2 |
| DEC-02 | R-067L, R-067R | Rosette (pair) | A×B×C from the product card | Oak | 1 + 1 |
| DEC-03 | KL-004.02 | Capital | A×B×C from the product card | Beech | 2 |
| DEC-04 | PLM-014 | Pilaster | A×B×C from the product card | Beech | 2 |
For each line, add the position on the item, finish grade, status (SAMPLE or APPROVED), revision, and inspection date.
Conditional estimate based on this specification
At the "from" prices at the time of checking: two N-316 overlays come to 3,500 rubles, a pair of sockets R-067L and R-067R comes to 3,320 rubles, two KL-004.02 capitals come to 5,340 rubles, two PLM-014 pilasters come to 4,420 rubles. Total is about 16,580 rubles for one decorative set for one item. The compatibility of the specific pilaster and capital in this example has not been checked and is not guaranteed: the figure shows the order of costs. The actual amount depends on dimensions and finish, and for a series multiply by the number of items.
Why keep such a record
Six months later, the client asks for five more of the same items. You open the specification and order the same article numbers without re-marking. Without it, you would have to search for the parts again and risk a mismatch. Keep marking templates and photos of the approved composition separately.
Separating STANDARD and CUSTOM
If an item includes both catalog parts and custom parts, separate them in the specification. Catalog parts can be repeated within a day, while custom parts depend on drawings and agreements with the manufacturer. This immediately shows the timeline and the risk.
Why you should first buy one sample
Especially if the batch consists of 8, 12, 20, or 40 parts. One physical sample shows what is not visible in a photo: the real scale, the character of the carving, the depth of the relief, the surface quality, how light works on it, how it behaves during finishing, installation, and how it matches the facade.
The scheme is as follows: SAMPLE, fitting, trial finishing, installation on a mockup, APPROVED, batch. Skipping any step turns the series into an experiment.
Conditions
The catalog accepts orders starting from a single piece, so you can buy a sample without committing to a batch. Keep the lead time in mind: in-stock items ship quickly, while items with a 5–10 day lead time require time. Plan your sample in advance so it doesn't delay the launch of your products. For large carved items such as IKN columns, the sample price itself is significant, and here it makes sense to first check with the manager about fitting options.
What to check
Dimensions and contour: compare with the template. Relief: clarity of lines, absence of chips. Surface: tool marks in the recesses. Behavior during finishing: how the color and patina take. Installation: mounting method and seating plane. Combination with the facade: color, scale, position.
What to keep
The sample with the tag, photos, a record of the finish, and the inspection result. This is the batch reference and the basis for a repeat order.
When a sample is not needed
For an article already tested in your workshop, a repeat sample is unnecessary. It is also not needed for a single part in a single product.
Purchase calculation for a series
The formula is simple: the number of parts per product multiplied by the number of products. Ten sideboards with two overlays each give 20 overlays. Ten sideboards with one rosette per pair give 10 left and 10 right.
| Detail | Per product | Products | Base purchase |
|---|---|---|---|
| Overlay N-316 | 2 | 10 | 20 |
| Rosette R-067L | 1 | 10 | 10 |
| Socket R-067R | 1 | 10 | 10 |
| Capital KL-004.02 | 2 | 10 | 20 |
At "from" prices, this is 20 × 1,750 = 35,000 rubles for the overlays, 10 × 1,660 × 2 = 33,200 rubles for the sockets, 20 × 2,670 = 53,400 rubles for the capitals. Total 121,600 rubles excluding pilasters, finishing, and installation. The numbers show the order of magnitude: check prices and availability in the product cards before ordering.
Reserve
Determine separately and by risk. Carved parts for patina are damaged more often than for enamel. If the test finishing showed defects, allow for more. Record the reserve as a separate line.
Availability and lead time
Some items are in stock, some take 5–10 days. For a series this matters: if one item is pending, start assembling the rest, and plan finishing after receiving the full set so that everything is treated with one system.
Where to buy ready-made carved wooden elements
The purchase order follows the project: function and area, item code, sample, batch.
-
Carved wooden decoration: general catalog.
-
carved appliqués for facades, doors, and panels.
-
carved rosettes for centers and joints of frames.
-
wooden capitals for crowning pilasters and columns.
-
Wooden Brackets for console joints and shelves.
-
pilasters and columns for vertical systems.
-
Carved Trim for repeating linear ornament.
-
Newel posts for posts, cabinets and beds.
Conditions
Purchase is possible from one piece. Contact us to confirm shipping to your destination. or pickup from the warehouse, showrooms in Moscow and Saint Petersburg. A loyalty program is available for manufacturers and designers, according to the brackets section data. Before placing an order, check the current price and availability in the product card.
What to clarify with the manager
Availability of the complete set in one delivery. Compatibility of pairs (capital and pilaster, overlay and molding). Terms of custom manufacturing if a catalog part is not sufficient. Procedure for reordering and preservation of item codes.
Workshop questions
Which ready-made carved elements can be used in furniture?
Overlays, rosettes, capitals, brackets, pilasters and columns, carved moldings, finials. The choice is determined by the function of the part on the product: center, corner, top, vertical, line.
Where to buy carved wooden products for furniture?
In the STAVROS carved decor catalog, in the sections appliqués, rosettes, capitals, brackets and others. Ordering is possible from one piece.
What is more profitable for a small workshop: a ready-made overlay or custom carving?
It depends on the batch size and uniqueness. Preparing the carving is done once regardless of the number of parts, so for small batches a ready-made item is often cheaper. For a signature custom part, in-house development is justified. Calculate the break-even point using your own data.
What types of carved elements are there for furniture fronts?
Central, corner, vertical, horizontal, and paired overlays, rosettes, decor sets, as well as modular overlays with connecting elements for moldings.
How to choose the size of a carved overlay?
Check dimensions A, B, C taking into account what each letter means in this section, verify the free fields, axis, handle area, and molding. Make a 1:1 template with the actual contour, not just the overall dimensions.
How to check a carved element on a front before purchasing?
Apply the overall dimension to the facade, check the axis and margins, place the 1:1 template, photograph from different distances, evaluate under real light. Then order one sample.
What to choose: beech or oak?
Beech for enamel and a smooth surface, oak for oil, lacquer and tinting with visible texture. The species must be the same within a composition.
Can finished carved elements be painted?
Yes. The shape is ready, and the finish is created by the workshop: enamel, tinting, lacquer, patina. For fine relief, apply thin layers and do a test.
Should I buy one sample before ordering a batch?
For a new article, yes: the sample checks scale, relief, surface and finish. For an already tested article, no.
How do I add carved decor to a furniture specification?
Record the project code, article, type, size, material, quantity, position, finish, status and revision. Separate catalog and custom parts.
Data on models, prices, shapes, lead times and product features were verified against the STAVROS catalog sections at the time of preparation. Calculations are conditional, prices are indicated as "from".