Article Contents:
- What is a wooden glazing bead: precise definition
- How a glazing bead differs from other wooden profiles
- Where wooden glazing bead is used: all application scenarios
- Doors with glass
- Furniture display cases and sideboards
- Cabinets with glass fronts
- Kitchen fronts
- Wooden windows
- Mirror and Picture Frames
- Decorative panels and inserts in furniture
- Glass partitions
- Restoration of old furniture
- How to choose the size of a wooden glazing bead
- Key Parameters
- Section profile: rectangular or with a rebate
- Groove depth
- Cutting allowance
- Wooden glazing bead for a door with glass: a professional's choice
- When the glazing bead is visible from the front side
- When the glazing bead is hidden in the groove
- Glazing bead for a classic door
- Installation of the glazing bead in the door
- Glazing bead for a display case: delicacy as a requirement
- Glazing bead size for a display case
- Showcase glazing bead cover
- Glazing bead in a classic sideboard
- Replacing glass in a showcase
- Glazing bead for frames and decorative inserts
- Mirror frame
- Decorative insert in a wall panel
- Photo frames and small decorative objects
- Wooden glazing bead in a wooden molding system
- Glazing bead and wooden trim
- Glazing bead and molding
- Glazing bead and wooden corner
- Glazing bead and wooden molding in general
- Material and coating of wooden glazing bead
- Wood species
- Coating options
- Glazing bead and humidity
- Installation of wooden glazing bead: step-by-step technique
- Cutting
- Installation sequence
- Finish nails vs glue
- Touch-up painting after installation
- Mistakes in choosing and installing glazing bead
- Where to buy wooden glazing bead
- FAQ: Answers to Popular Questions
- About the manufacturer

Wooden trim — is one of the most functional profiles in the wooden molding system. It does not directly decorate the space, does not create decorative lines on walls, does not frame openings. Its task is stricter and more specific: to secure. To hold glass, a panel, or an insert in the groove of a frame, door, or facade. To do this neatly, reliably, and so that the result looks professional.
But a wooden glazing bead is not just a technical solution. In classic furniture, doors with decorative inserts, display cabinets, and sideboards, it also carries a decorative load: it creates a clear line along the perimeter of the glass, sets the rhythm of the frame framing, and adds neatness and completeness. That is why choosing a wooden glazing bead is not about "taking any one that fits in size," but a conscious decision considering the task, size, material, and finish.



What is a wooden glazing bead: a precise definition
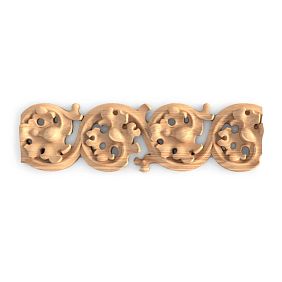
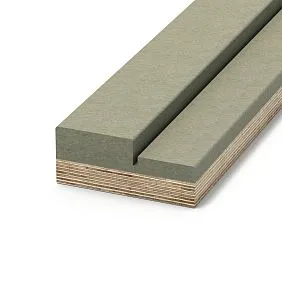
wooden trim — is a narrow rectangular or profiled wooden profile designed to fix glass, a mirror, a decorative insert, or a thin panel in the groove of a frame, door, display case, cabinet, or decorative structure.
The principle of operation is simple: the insert (glass, mirror, plexiglass, decorative element) is placed into the groove of the frame. On the open side of the groove, a glazing bead is nailed or glued — it presses the insert and holds it in place. Without the glazing bead, the glass is held only by friction in the groove and, at the slightest impact or vibration, starts to rattle or fall out.
The cross-section of the glazing bead is rectangular, square, or with a slight profile: bevel, quarter-round, or rounded. Sizes: from 6×6 mm to 20×20 mm and more — depending on the thickness of the glass and the depth of the groove.
The length of the strip is standardly 2000–3000 mm. It is cut to size on site.




How a glazing bead differs from other wooden profiles
A question that comes up constantly. We will answer clearly.
Glazing bead vs. batten. wooden plank — is a universal straight-line profile without a specialized purpose. A batten is attached to walls, ceilings, and creates slatted decor. A glazing bead is a specialized profile for fixing inserts. A batten does not replace a glazing bead in a door or display case: it is too wide or of the wrong shape.
Beading vs. layout. wooden floor — a wider profile with a decorative function: it divides the facade plane into sections, creating a frame pattern. The layout does not fix the glass — it is applied to the surface. The glazing bead specifically presses and holds the insert from inside the groove.
Glazing bead vs molding. wooden molding — a decorative profile with a shaped cross-section for creating lines and frames on the surface. The molding has no fastening function relative to the glass. The glazing bead does.
Glazing bead vs corner profile. Wooden angle — an L-shaped profile for corners and edges. The corner profile works on the outside of the corner, the glazing bead works inside the groove.
Conclusion: the glazing bead is a highly specialized profile with a specific task. Replacing it with another profile means getting unreliable fixation, poor appearance, or both.
Our factory also produces:




Where wooden glazing bead is used: all application scenarios
The scope of application of the glazing bead is wider than it seems. Let's break down each scenario.
Get Consultation
Doors with glass
An interior door with glass inserts is the most common application of wooden glazing bead. The glass (clear, frosted, patterned, stained) is inserted into the groove of the door leaf and pressed with a glazing bead on one or both sides.
Wooden glazing bead for a door with glass must:
-
exactly match the depth of the groove;
-
press the glass tightly without play;
-
have a coating matching the door color or be painted together with it;
-
be made of the same wood species as the door leaf.
The size of the glazing bead for a door is determined by the glass thickness: 4 mm glass — 8–10 mm bead. 6 mm glass — 10–12 mm bead.
Furniture display cases and sideboards
A sideboard or display case with glass doors is a classic piece of furniture. Each glass door has a wooden frame with a groove for the glass. The glass is fixed with a glazing bead from the inside.
The glazing bead for a furniture display case is delicate, narrow, with a neat profile. It should not "eat up" the glass area — only hold it around the perimeter. Optimal size for a display case: 6×8 mm, 8×8 mm, 8×10 mm.
A special detail: in classic sideboards and display cabinets, the wooden glazing bead is visible from the front. This means it carries a decorative function: it must be neat, even, and match the frame's tone. Sometimes the bead has a slight profile — a bevel, quarter-round, or small rounding — which adds to its decorative expressiveness.
Cabinets with glass fronts
A classic cabinet with glass doors — in the kitchen, living room, study, or bedroom. A framed front with a groove for the glass and a glazing bead to secure it is a standard construction.
The glazing bead for a cabinet can be simple rectangular (8×8 mm) or with a small decorative profile. Important: the bead should be easy to remove — so that if necessary, the glass can be replaced without disassembling the entire front.
Kitchen fronts
A kitchen front with an insert — frosted glass, decorative panel, plexiglass, metal mesh — requires a glazing bead to secure the insert in the frame of the front. In the kitchen, the bead must be moisture-resistant — therefore, a lacquer or wax coating is mandatory.
Wooden windows
In wooden windows, the glass or double-glazed unit is also secured with a glazing bead. A window bead is somewhat larger than a furniture bead: width 10–15 mm, height 8–12 mm. It presses the double-glazed unit against the frame and creates a seal.
Frames for mirrors and pictures
wooden frames For mirrors or paintings — another application of the glazing bead. The frame has a groove in which the mirror or glass with the painting is held. The bead secures the contents of the frame from the back. In this case, the bead is not visible from the front — but the reliability of the entire structure depends on the quality of its installation.
Decorative panels and inserts in furniture
A decorative insert in a furniture panel — fabric, rattan, patterned plexiglass, metal mesh — also requires a glazing bead. The principle is the same: the insert goes into the groove, and the bead holds it around the perimeter.
Glass partitions
Wooden partitions with glazing in country houses, offices, restaurants are structures where the glazing bead secures large sheets of glass in a wooden frame. Here the glazing bead is larger: 15–20 mm, with possible profiling.
Restoration of old furniture
An old sideboard or cabinet with glass, where the original glazing bead has dried out or broken, is a direct request to purchase a new wooden glazing bead. The restoration task: to select a profile as close as possible to the original in size and wood species.
How to choose the size of a wooden glazing bead
The size of the glazing bead is not "approximate." Millimeters matter here.
Key parameters
Profile width. This is the distance the glazing bead overlaps the glass on the front side. For thin furniture glass — 6–8 mm. For door glass 4–6 mm — 8–10 mm. For window double-glazed unit 20–24 mm — 12–16 mm.
Profile height. This is the depth the glazing bead enters the groove and presses the glass. The height of the glazing bead must be at least the glass thickness + 2–3 mm for reliable pressing.
Glass thickness as a starting point:
| Glass/insert thickness | Recommended glazing bead |
|---|---|
| 3 mm (plexiglass, thin glass) | 6×6 mm or 6×8 mm |
| 4 mm (standard glass) | 8×8 mm |
| 5–6 mm (thick furniture) | 8×10 mm or 10×10 mm |
| 8–10 mm (tempered, door) | 10×12 mm or 12×12 mm |
| 20–24 mm (double-glazed unit) | 15×15 mm or 15×20 mm |
Cross-section profile: rectangular or with rebate
Rectangular glazing bead — the simplest and most versatile. Suitable for any task where there are no decorative profile requirements.
Glazing bead with a bevel — one edge is cut at a 45° angle. Creates a light decorative transition. Used in classic-style furniture and doors.
Glazing bead with a quarter — stepped cross-section. Allows pressing the glass with a stop — more reliable mechanical fixation. Popular in window structures.
Glazing bead with a rounding — soft rounding of one edge. A delicate decorative option for classic and modern furniture.
Groove depth
Before purchasing a glazing bead, you need to measure the groove depth in the frame: this is the distance from the inner edge of the frame to the bottom of the groove. The glass should fit into the groove by 3–5 mm. The remaining depth is for the glazing bead. The glazing bead should not protrude above the frame surface and should not be loose in the groove.
Margin for trimming
When calculating linear footage, add 10–15% for cutting at 45° at the frame corners. Each corner consumes 2–5 cm of material. In a glass door with multiple inserts, this adds up.
Wooden glazing bead for a door with glass: a professional's choice
A door with glass inserts is a structure where the glazing bead works simultaneously in two modes: technically (holds the glass) and aesthetically (forms a visible line around the glass perimeter).
When the glazing bead is visible from the front side
In most interior doors, the glazing bead is nailed on one side — either the front or the back. If on the front, it is visible, and its appearance matters. Choose a glazing bead with a bevel or a rounded edge: it looks much neater than a straight rectangular profile.
The tint of the glazing bead matches the door leaf. A solid oak door — a glazing bead made of oak with the same tint. A painted white door — a glazing bead for painting in white.
When the glazing bead is hidden in the groove
In some designs, the glazing bead is installed on the inner side so that it is not visible from the front. In this case, its decorative qualities are less critical — only the precision of size and reliability of installation matter.
Glazing bead for a classic door
A classic door with decorative inserts — stained glass, frosted patterned glass, engraved glass — requires a glazing bead with a delicate profile. Here, a glazing bead with a bevel or a slight rounding is appropriate: it creates a fine decorative line around the perimeter of the glass insert.
paired with wooden moldings around the perimeter of door panels, the glazing bead creates a system: the molding sets the frame, the glazing bead secures the insert inside the frame.
Installation of glazing bead in a door
The glazing bead in the door is fastened with finishing nails (brads) or construction adhesive. Finishing nails are more reliable and allow disassembly when replacing glass. Adhesive — cannot be removed without damage.
Nail spacing: 150–200 mm along the length. Nails are driven at an angle, closer to the glass — this way the glazing bead presses the insert better. The heads are countersunk with a nail set.
Glazing bead for a display cabinet: delicacy as a requirement
A display cabinet is an item that aspires to elegance. The glazing bead here should be almost invisible. Narrow, neat, precisely fitted.
Glazing bead size for a display cabinet
For display cabinets and cabinets with 4 mm glass — a 6×8 mm glazing bead. This is the minimum width that ensures reliable fixation while remaining almost invisible behind the glass.
For thin 3 mm glass in lightweight decorative frames — a 6×6 mm glazing bead can be used.
Glazing bead coating for a display cabinet
The glazing bead for a display cabinet is coated to match the frame. In a sideboard with dark tinting — a dark glazing bead. In a white kitchen — a white one. A mismatch in the tone of the glazing bead and the frame immediately catches the eye — the glass appears to be "inserted hastily."
Glazing bead in a classic sideboard
A classic sideboard with carved elements moldings и pilasters requires a glazing bead with a decorative profile: a slight bevel or quarter round. This adds a subtle shadow line along the perimeter of the glass — a detail that makes the display cabinet resemble antique furniture.
Replacing glass in a display case
The wooden glazing bead in the display case should allow glass replacement without destroying the structure. This means: installation only with finishing nails or removable adhesive. No permanent PVA glue.
Glazing bead for frames and decorative inserts
wooden frames — a separate topic. A frame for a mirror, a painting, a decorative panel — all use a glazing bead to hold the contents.
Frame for mirror
A wooden mirror frame has a groove on the inside. The mirror is inserted into the groove and secured from the back with a glazing bead. The glazing bead is not visible here — but must securely hold the mirror. For a 4 mm mirror — an 8×8 mm glazing bead. For a thicker 6 mm mirror — 10×10 mm.
Decorative insert in a wall panel
A decorative panel with an insert made of plexiglass, fabric, or metal mesh is an interior technique where a wooden frame structure holds the decorative element using a glazing bead. Here, the glazing bead may be visible from the front and serve a decorative function.
For such a task, it is better to choose a glazing bead with a bevel or a rounded edge — it creates a neat decorative line along the perimeter of the insert.
Photo frames and small decorative objects
For small handmade wooden frames — a small glazing bead 6×6 mm or 6×8 mm. Thin and neat.
Wooden glazing bead in the wooden molding system
The glazing bead is part of the system. It does not work in isolation from other profiles. Let's consider what it pairs with.
Glazing bead and wooden layout
wooden floor divides the facade plane into sections, creating a frame pattern. The glazing bead secures the glass or insert inside the frame formed by the layout. Together they create a frame facade system: the layout on the outside, the glazing bead on the inside.
Glazing bead and molding
Molding creates a decorative frame around the glass insert. The glazing bead holds it from the inside. Molding on the outside, glazing bead on the inside — a classic combination in furniture manufacturing.
Glazing bead and wooden corner
Wooden angle is used to cover panel ends and sheathing corners. The glazing bead is for securing glass inserts. They work in the same interior but solve different tasks.
Glazing bead and wooden molding in general
Wooden trim is a unified system of profiles for wooden interiors. The glazing bead is one element of this system. All profiles must be from the same wood species and the same tint. This is a mandatory condition for a professional result.
Material and coating of wooden glazing bead
Wood species
Pine. The most affordable and popular material. Soft wood, easy to work with. Pine glazing bead paints and stains well. For painting tasks — the optimal choice.
Beech. Dense wood, holds shape well. Beech glazing bead hardly deforms with humidity changes — good for kitchens and areas with humidity fluctuations. The dense structure of beech allows for thin profiles without loss of strength.
Oak. Premium wood. Oak glazing bead under clear varnish or dark stain — for classic furniture, wooden doors, and antique items. Oak does not deform or crack.
Spruce. Used mainly for window structures — lightweight, easy to work with, inexpensive.
Coating options
Uncoated (for painting). Sanded pine or spruce glazing bead — the most popular option. Painted together with the door, furniture, or frame — becomes an invisible, organic element.
Clear varnish. For oak or beech glazing bead where wood texture is important. Protects against moisture, preserves natural color.
Stain + varnish. Toning to the desired color. Pine glazing bead under dark walnut is almost indistinguishable from oak.
White enamel. For white doors, white furniture, and kitchen fronts. White glazing bead in tone — a delicate invisible detail.
Glazing bead and humidity
Wood reacts to humidity: when high, it swells; when low, it dries out. In normally heated rooms with humidity of 40–60%, any glazing bead behaves stably. For kitchen areas and wooden windows, a varnish coating is mandatory as moisture protection.
Installation of a wooden glazing bead: step-by-step technique
Installing a glazing bead is a technically simple operation, but requires precision and care.
Cutting
The glazing bead is cut into pieces along the length of the glass perimeter. At each corner, cut at 45°. Use a miter box for precise cutting. Dry-fit each piece before installation.
Installation sequence
-
Insert the glass into the frame groove
-
Start with one of the long sides — apply the glazing bead, ensure the corner cuts are accurate
-
Apply assembly adhesive or use finishing nails
-
Press the glazing bead against the glass — do not press hard to avoid cracking
-
Install the adjacent sides — check the corner joints
-
The last side closes the perimeter
Finishing nails vs glue
Finishing nails are more reliable and allow disassembly. Spacing 150–200 mm, nails with a diameter of 1.2–1.6 mm. Nail length = bead thickness + 10–15 mm into the frame.
Mounting glue — for cases when nails leave marks. The glue sets quickly, but the bead cannot be removed later without damage.
Touch-up after installation
If the bead was installed before painting — touch up the nail points after installation. If after — carefully paint the bead with a brush along the perimeter, without touching the glass.
Mistakes when choosing and installing the bead
Let's list the mistakes — briefly and to the point.
Buying a bead without measuring the glass. The glass thickness determines the profile height. Without measuring, you risk buying the wrong one.
Not accounting for the groove depth. A bead too high for the groove won't fit. Too low — the glass will rattle.
Confusing the bead with a regular batten. A batten does not replace a bead in a display case or door: different profile, different size, different function.
Choosing too wide a profile for a thin frame. A wide glazing bead covers most of the glass — the display case or door looks heavy and opaque.
Not checking the coating before installation. If the glazing bead needs painting — paint it before installation, leaving the back side. After installation, it will not be possible to neatly paint over the joints and nail heads.
Mixing different wood shades. A glazing bead in a dark tint on a light frame — visual discord. A uniform tone for all wooden elements is a rule without exceptions.
Not counting linear meters. Count the perimeter of each glass insert, multiply by the number of inserts, add a 15% margin. Otherwise, there won't be enough for trimming.
Forgetting about corner cutting. 45° joints at corners are mandatory. Straight ends at corners are unsightly and unprofessional.
Where to buy wooden glazing bead
Buy a wooden glazing bead from a manufacturer that provides exact profile dimensions and coating options — without the guesswork of "will it fit or not."
In the Stavros catalog — Wooden trim made of solid wood, including glazing beads of various sizes and profiles. Next in the catalog — Wooden planks, Wooden moldings, Wooden corner pieces, wooden floor и wooden frames — a complete system of wooden profiles for doors, furniture, frames, and interior decor. The entire catalog wooden products for interiors — in one place.
FAQ: Answers to popular questions
What is a wooden glazing bead?
A narrow wooden profile of rectangular or shaped cross-section. Used to secure glass, a mirror, a decorative insert, or a thin panel in the groove of a frame, door, furniture, or display case.
What is a glazing bead for?
To hold glass or another insert in the groove of a structure: door, furniture front, display case, frame, window unit.
How is a glazing bead different from a batten?
A batten is a universal linear profile without specialization. A glazing bead is a special profile for fixing inserts in a groove. Different cross-sections, different tasks.
How does a glazing bead differ from a layout?
A layout strip decoratively divides the plane of the facade. A glazing bead holds the glass from inside the groove. One is on the outside, the other is inside the frame.
How to choose a glazing bead for glass?
Measure the glass thickness and groove depth. Glazing bead height = glass thickness + 2–3 mm. Width = 6–15 mm depending on the design.
Is a wooden glazing bead suitable for a furniture display case?
Yes. A glazing bead of 6×8 mm or 8×8 mm is the optimal choice for furniture display cases. If necessary, with a decorative profile (bevel, rounding).
Can I use glazing bead for a door with glass?
Yes, this is one of the main uses. The size depends on the glass thickness: for 4 mm glass — bead 8×8 mm, for 6 mm — 10×10 mm.
Can you paint a wooden glazing bead?
Yes. Uncoated bead is painted with acrylic enamel or tinted with stain. It is recommended to paint before installation.
How to calculate the amount of glazing bead?
Measure the perimeter of each glass insert, sum them up, add 15% allowance for cutting and corner joints.
Where to buy wooden glazing bead?
In the STAVROS catalog: solid wood millwork with delivery across Russia.
About the manufacturer
STAVROS is a Russian manufacturer of wooden profiles, moldings, and solid wood products for interiors, furniture, and finishing. The company's catalog includes Wooden trim a full range of profiles: glazing beads, rails, Moldings, corners и wooden frames. If you are looking wooden trim for glass, doors, display cases, or furniture fronts — in the catalog STAVROS you will find the required size, profile, and coating with the quality guarantee of natural wood.