





















































































Article Contents:
- Two ways to get a relief wooden panel
- When milling the entire pattern is justified
- When ready-made elements are stronger
- Make-or-buy must be recalculated for each product
- Conditional example
- Asymmetric panel: when the central axis only gets in the way
- Conditional calculation
- Corner and molding
- Finish Code
- What you can do without an expensive prototype
- A — working width
- B — working height
- C — thickness / depth
- Example BOM for one panel
- Conditional example
- What the trial module checks
- Practical scenario: six identical panels for a cabinet
- Conditional example
- Finishing as a separate production stage, not a decorative formality
- Order control and service stock
- Final algorithm
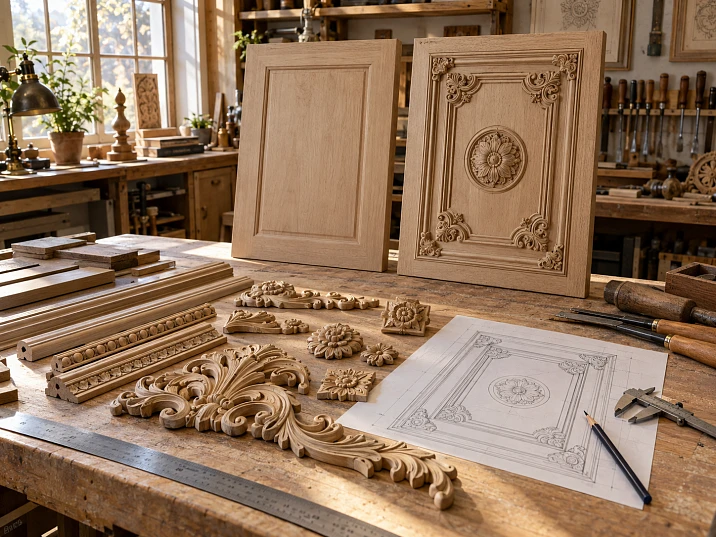
A 900 × 1800 mm panel can be made in two completely different ways. The first is to carve the entire relief directly into the board: build 3D, prepare CAM, run the CNC, then manually refine the recesses, edges, and transitions. The second is to keep the base relatively simple and assemble the volume from separate ready-made elements: moulding, a central overlay, corner details, and a rosette.
Visually, both paths can lead to the same decorative idea. In production, they are structured differently.
For a small joinery workshop, the second method is especially interesting where a unique continuous relief across the entire surface is not needed. The complex carving already exists as a repeatable SKU; the workshop designs the panel itself, the layout, the joints, the finishing, and the installation.
Workflow:
panel base → composition grid → real SKUs → A/B/C → 1:1 template → layout → moulding / overlays / rosette → trial assembly → unified finish → BOM → order.
This is how a wooden panel becomes a composite joinery product. Its authorship is determined not by the fact that every curl is carved into a single board, but by how the craftsman assembled their own geometry, rhythm, and proportions from real components.
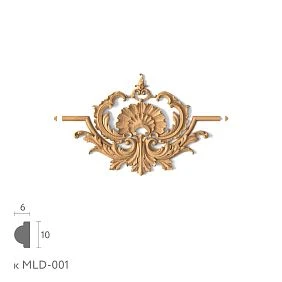
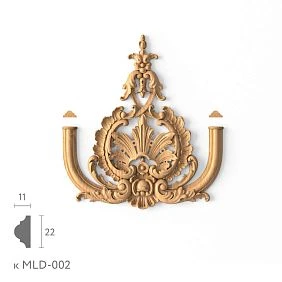
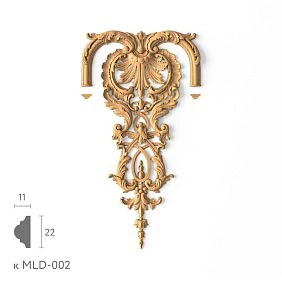
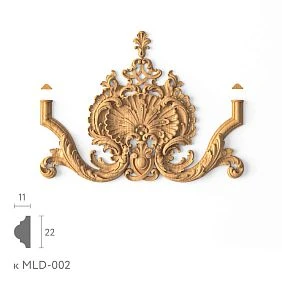
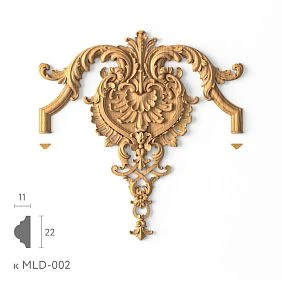
Two ways to get a relief wooden panel
The first approach is to integrate the decorative relief into the base itself.
In this case, the production chain looks approximately like this:
sketch → 3D/CAD → CAM → tool → CNC → finishing pass → hand finishing → sanding → finish.
The second approach:
flat or profiled base → ready-made overlays → rosette → molding → trim → unified composition.




When milling the entire pattern is justified
A solid relief is stronger if:
- the ornament must be continuous;
- the surface must look monolithic;
- the pattern is unique;
- the workshop already has a model and CAM;
- the series is large enough to justify preparation;
- the solid carving technology itself is part of the product.
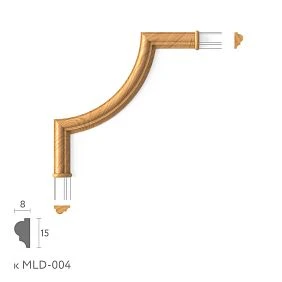
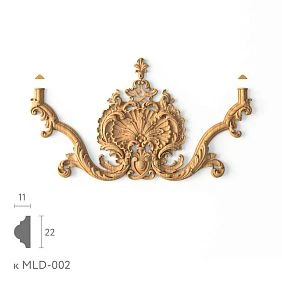
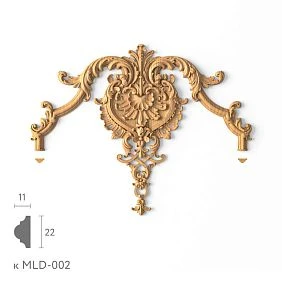
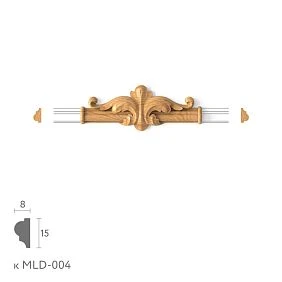
Our factory also produces:
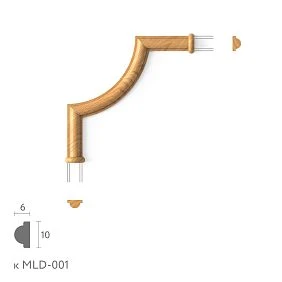
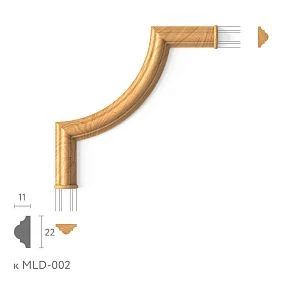
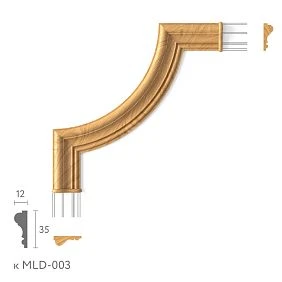
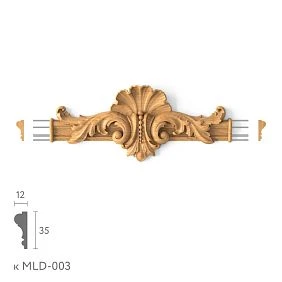
When ready-made elements are stronger
A composite system is more convenient if:
- the object is one of a kind;
- the batch is small;
- the complex ornament already exists in the catalog;
- you need to quickly check the proportions;
- the workshop does not want to remodel the carving;
- replaceability of individual elements is important;
- one base panel should be able to receive different decorative variants.
The main difference.
With integral milling, the relief and the base are a single part.
With a composite panel:
- base;
- molding;
- overlay;
- rosette;
- Corner Elements
remain separate entities.
This changes the entire downstream process: from design to BOM and repair.
Get Consultation
When ready-made elements are especially advantageous for a workshop
The smaller the batch and the more complex the decorative geometry, the more noticeable the cost of preparing your own relief.
A single custom panel for an office is not the same as 200 identical fronts.
One object.
The workshop needs:
- one central overlay;
- four corner ones;
- one rosette;
- several meters of molding.
Launching separate modeling of each carved element for a single product is not always rational.
Small batch.
Suppose five identical facade panels are needed.
Serial overlays already have a repeatable shape.
The workshop repeats only:
- position;
- layout;
- finish;
- Installation.
Custom furniture.
A ready-made part does not make the product "generic." The same SKU can be built into completely different:
- proportions;
- frames;
- the axes;
- materials;
- Color solutions.
The composition remains original.
Restoration order.
If the task does not require museum-accurate reproduction of lost carving, a ready-made applique or rosette sometimes covers the function faster.
An exact historical copy of the original requires a separate custom process.
Panel with several decorative layers.
Serial components allow experimenting on a mockup:
- remove the rosette;
- replace the central applique;
- narrow the frame;
- change the corner elements.
With one-piece milling, each such change is more strongly tied to a single shared 3D model.
When it is better to mill the panel as a whole
Ready-made SKUs should not be turned into a universal answer.
There are panels where separate elements fundamentally make the task worse.
Continuous relief.
If the ornament runs across the entire surface without visible boundaries, individual overlays can destroy the integrity.
Seamless surface.
Some projects are designed specifically so that the relief comes directly out of the base.
Then applied decor will be perceived differently.
Unique pattern.
If a workshop sells its own ornament as part of the product, a mass-produced carved element reduces uniqueness.
Large production run.
With a large number of identical panels, CAD/CAM preparation is spread across the entire series.
The economics can become more favorable for in-house CNC.
A ready-made program already exists.
If the relief has already been produced, the comparison does not start from scratch.
There is no need to account again for the full cost of modeling and CAM as a new project.
Make-or-buy must be calculated anew for each product
Conditional formula:
Make = Fixed Setup + Qty × Variable Production.
Buy = Procurement Setup + Qty × Ready Component Cost.
В Fixed Setup for an in-house relief include:
- Modeling;
- CAM;
- setup;
- trial run.
В Variable Production:
- machine time;
- tools;
- manual finishing;
- sanding;
- risk of rework.
For finished elements, the following remain:
- price;
- delivery;
- incoming inspection;
- own finish;
- Installation.
The main criterion is not the cost of the wood, but the entire cycle.
First the size of the base, then the decorative composition
A composite panel does not begin with a beautiful overlay.
First, the working plane must be fixed.
Minimum:
- total width;
- overall height;
- the thickness of the base;
- visible part;
- fields;
- the installation direction;
- junction points.
Conditional example
Panel:
W = 900 mm
H = 1600 mm.
A clean border is needed along the edges:
50 мм.
Then the working field:
W_work = 900 − 2 × 50 = 800 mm
H_work = 1600 − 2 × 50 = 1500 mm.
It is this field that should contain:
- frame;
- central element;
- rosette;
- corners.
Why you shouldn't start with a large central element.
If the overlay is chosen first, the craftsman starts fitting the entire panel to it.
Sometimes this is acceptable.
But more often it's better to first determine the overall dimensions of the product and the available field, and then filter SKUs by actual sizes.
Furniture panel and wall panel are different scales.
A cabinet front of 450 × 1800 mm and a wall panel of 1200 × 2600 mm require different decor densities.
The same overlay can:
- dominate on the front;
- look small on the wall.
Therefore, scale is assessed only in the context of the actual base.
Compositional grid: axis, frame, center, and corners
A symmetrical panel is easiest to build from the axes.
Work sequence:
panel axis → central element → frame → corner elements → additional bands.
But this is not a universal law. For an asymmetrical project, the base may be different.
central axis.
For a panel with a width of W:
X_center = W / 2.
if:
W = 900 mm,
that:
X_center = 450 mm.
The central rosette or overlay can be aligned to this axis.
The geometric center is not always the visual center.
If the panel overlaps the furniture plinth at the bottom and there is a tall cornice at the top, the visible field may be asymmetrical.
Then the compositional axis along Y may differ from the geometric center of the entire shield.
frame.
It defines:
- inner field;
- border;
- rhythm;
- distance to the edges.
If the frame is built with molding, its width cannot be considered a conditional line.
The actual profile cross-section changes the entire geometry.
angles.
Corner elements are checked already inside the actual frame contour.
Especially if L/R exist.
Asymmetrical panel: when the central axis only gets in the way
Not every composition should be built symmetrically.
Let's imagine a furniture panel with a width of:
W = 1000 mm.
On the left, a tall cabinet adjoins it; on the right, the edge remains open. The visible part of the panel is actually perceived not as a symmetrical rectangle, but as a field with a heavy left boundary and a free right one.
If you mechanically place the socket at the geometric center:
X = 500 mm,
it may appear offset relative to the actually visible composition.
In that case, it is better to first determine the visible architectural base, and only then build the axis.
Practical order.
- mark hidden and open edges;
- apply furniture, doorways, adjacent panels;
- determine the actually visible field;
- choose the reference axis;
- only then install the overlay or rosette.
One hidden edge.
If the left part of the panel goes behind furniture, it is pointless to strive for equal margins on the left and right of the full shield size.
What matters more is what a person will see after installation.
Corner composition.
On the panel near the outer corner, the central overlay may not be needed at all.
The following may work better:
- vertical overlay;
- straight decorative band;
- molding;
- one corner element.
This is an example where abandoning the mandatory “center” makes the panel more logical.
Several identical panels in one interior.
If three panels stand next to each other, a new level of composition emerges.
Each can be symmetrical on its own, but the whole group must have a common rhythm.
Checked:
- same height of centers;
- same outer margins;
- one molding profile;
- consistent relief depth;
- the same Finish Code.
A small error on one panel becomes more noticeable precisely because of comparison with neighboring ones.
Modular grid for a group.
For example, three panels:
P1
P2
P3.
You can fix:
Y_center = 900 mm
for all three.
And let the panel widths differ.
Then the central elements form a single horizontal line, while the side margins adapt to each width.
When one SKU doesn't fit all panels.
If the center panel is twice as wide as the side panels, the same socket may look too small in the center.
There's no need to keep a single SKU just for the sake of formal unification.
Possibly:
P1/P3 → R-01
P2 → R-02.
At the same time, the centerline and style remain consistent.
The asymmetry must be documented in the Drawing.
Phrase:
shift slightly to the right,
is not a production task.
You need to:
- base point;
- X;
- Y;
- orientation;
- Project Code.
Then the asymmetric panel remains reproducible.
Why this scenario matters.
Most composite panel errors occur not on the beautiful central field, but where the panel meets real architecture:
- cabinet;
- a door;
- corner;
- adjacent panel;
- open end.
Therefore, a 1:1 layout should show not only the panel itself, but also the immediate context.
Central overlay: the first complex SKU in the composition
central overlays it makes sense to use as the focal point of the panel.
Before choosing, real A/B/C are needed.
Conditional calculation
Inner field after the frame:
W_inner = 600 mm.
Overlay:
A = 320 mm.
Free space:
(600 − 320) / 2 = 140 mm
on each side.
If the next overlay has:
A = 520 mm,
will remain:
40 мм.
Formally, both fit.
Visually, these are two different systems.
What to check besides width.
- B — height;
- C — depth / thickness;
- axis;
- adjacent molding;
- socket;
- the edge of the panel;
- handle, if it is a furniture front.
Why C is especially noticeable on the panel.
The deeper the relief, the stronger:
- side shadow;
- protrusion;
- difference from a flat base.
Two overlays with the same width but different C are perceived differently.
Corner and paired elements: L/R must be included in the layout from the start
For a symmetrical frame panel, the four corners seem obvious.
But if the decorative element is asymmetrical, one physical SKU cannot be automatically mirrored in production.
If there is:
DEC-L
и
DEC-R,
that:
L ≠ R.
BOM.
For example:
DEC-02-L × 2
DEC-02-R × 2.
Why they cannot be combined.
Line:
corner overlays × 4
does not tell purchasing which exact four.
reserve.
If the workshop decides to take a reserve:
Spare L
and:
Spare R
are counted separately.
Corner and molding
It is not only the overlay that is checked.
You need to understand:
- whether the molding reaches the corner;
- whether the corner element covers the joint;
- at what angle the profile is cut;
- whether a visible gap remains.
These issues are resolved during the 1:1 layout, not during final installation.
Straight and vertical overlays: a composition does not have to have a single center
Straight decorative overlays and vertical elements allow you to build a panel not only around a central medallion.
Can create:
- upper frieze;
- lower band;
- vertical axis;
- elongated ornament;
- repeating module.
Vertical composition.
Especially suitable for:
- tall wardrobe;
- furniture portal;
- narrow wall panel;
- door leaf.
Horizontal band.
Works on:
- long panel;
- headboard;
- dresser;
- furniture front.
Why this is useful for a workshop.
A single base panel can be decorated with different SKU sets without changing the entire base technology.
This turns the panel into a modular platform.
Wooden rosette: center, node, or intersection point
Wooden sockets solve a different problem than an elongated applique.
A rosette more often works as:
- a central point;
- intersection of frames;
- a composition node;
- a repeatable accent.
A rosette and an applique are not the same thing.
The overlay can be:
- elongated;
- corner;
- asymmetrical;
- vertical.
A rosette more often builds a radial or central focus.
When to use both.
For example:
- the vertical overlay sets the direction;
- the rosette fixes the center;
- the molding forms the frame.
When it is already too much.
If the central overlay is large enough, an additional rosette can overload the field.
The panel should not become a showcase of all types of carved decor.
The number of elements is governed by the composition, not by the assortment.
Molding and wooden trim: the panel frame must be built according to the actual profile
On a drawing, a frame easily turns into four lines. In the workshop, lines do not exist — there is a real profile with width, depth, cross-section, and commercial length.
Therefore Wooden moldings it must be chosen before finalizing the frame geometry of the panel. STAVROS directly describes solid wood moldings as the basis for panel systems; this is exactly the scenario where the profile becomes not an “afterthought” but the foundational geometry of the composition.
The profile width changes the inner field.
Conventionally:
W_outer = 700 mm.
Molding:
b = 35 mm.
With a simple frame:
W_inner ≈ 700 − 2 × 35 = 630 mm.
If the profile is replaced with:
b = 55 mm,
that:
W_inner ≈ 590 mm.
The difference:
40 мм.
These 40 mm can determine whether the center overlay fits, how far it stands from the frame, and whether additional decor is needed at all.
Profile depth changes the light and shadow.
Width is responsible for the planar geometry.
Depth is responsible for the relief.
If the molding protrudes significantly less than the overlay, the central element dominates.
If the profile itself is deep, the frame begins to compete with the center.
Therefore, a well-assembled panel is checked not only from the front, but also under angled light.
The cross-section affects the joint.
At the corners, there can be:
- a simple miter;
- direct abutment;
- corner covered by a decorative element;
- separate corner element.
You cannot choose a joining method out of habit alone. It depends on the actual profile and the chosen composition.
Decorative moulding is not just "meters of wood."
Wooden trim can work as:
- inner frame;
- outer band;
- vertical post;
- horizontal layout;
- transition between panel zones.
For a panel with multiple frame levels, this is especially useful: one profile defines the architectural boundary, another defines the internal rhythm.
Why choose the SKU first, and then draw the frame.
If the panel is already designed for a nominal 30 mm profile, but the actual product is 42 mm, the internal geometry will shift.
Then the following change:
- corner overlays;
- central element;
- width of the free field;
- cut lengths.
Therefore, the frame is built around the actual profile.
Base and decorative material: MDF and solid wood can be combined, but the finish must be planned in advance
A composite panel does not have to be made entirely of one material.
Working scenario:
MDF base + wooden overlays + wooden moulding + unified opaque finish.
another:
solid wood panel + oak decor + clear coating.
Both are possible as design schemes, but they lead to different requirements.
MDF base + wooden decor.
The advantage is a relatively stable flat base and the ability to build complex relief on top of it.
But the workshop must take into account:
- different material structures;
- surface preparation;
- priming;
- transitions;
- the behavior of joints;
- the selected coating system.
One cannot assume that a unified color automatically makes materials technologically identical.
Array + array.
Here the visual match depends more on:
- wood species;
- pattern;
- grain direction;
- tone;
- batch;
- finish.
If the base is oak, a beech overlay under a clear coat will not become oak just because the color looks similar.
Panel for a single enamel finish.
For opaque finishing, this scenario is especially interesting:
base → molding → overlays → rosette → single color.
Then the composition reads through:
- relief;
- the depth;
- shadows;
- proportions.
The material difference visually recedes into the background, but the technological preparation remains.
Panel with natural oak.
If the texture is to be visible, each element must be viewed as part of a single wood picture.
Matters:
- direction;
- shade;
- density of the pattern;
- adjacency of details.
This is especially noticeable on the large central overlay and the long molding.
Beech and oak cannot be ranked universally.
The question "which is better" is too general.
More correctly:
- which finish is actually available for the selected SKU;
- which FINISH is needed;
- whether the wood grain should be visible;
- what the base is made of.
The material follows the design, not the wood species rating.
Finish Code
For a repeatable panel, it is useful to keep:
PN-DEC-01 / SKU / F-02.
PN-MLD-01 / SKU / F-02.
PN-R-01 / SKU / F-02.
This way, one finish ties different product items together.
1:1 layout: the cheapest way to test an expensive texture before installation
On screen, a composition easily seems harmonious because the monitor does not convey the real scale.
A panel 800 mm wide may occupy 300 pixels on screen. An overlay 250 mm wide looks neat. On a real board, it already takes up almost a third of the working width.
Therefore, before fixing the new composition, a 1:1 template is useful.
What can be done without an expensive prototype
- draw a panel diagram;
- render the outlines of the elements at full size;
- transfer them to paper, cardboard, or a work board;
- mark the molding at its actual width;
- place the central and corner elements;
- step back to the viewing distance;
- check the density of the composition.
What such a layout shows.
- is the central overlay too large;
- is there enough margin;
- do the corners "stick" to the frame;
- is there too much decoration;
- is the center aligned;
- is a second decorative layer needed.
Why the outline is useful even without a physical part.
It does not show the relief.
But it already checks the most expensive mistake — the wrong scale along X/Y.
After that, a physical sample is needed for C, surfaces, and real light and shadow.
Example.
Panel:
W = 1000 mm.
Inner frame:
W_inner = 720 mm.
Central overlay:
A = 480 mm.
remains:
(720 − 480) / 2 = 120 mm.
On screen, 120 mm may look spacious.
At a 1:1 scale, the craftsman will see how much the field truly "breathes" next to the deep ornament.
Layout on the wall and layout on a furniture facade are different checks.
For a wall panel, the viewing distance matters.
For a furniture facade, there is also the interaction:
- with the handle;
- adjacent door;
- edge;
- opening.
The same SKU must be checked in its real context.
A/B/C and relief depth: a catalog image does not replace geometry
For a composite panel, decorative elements are selected as real objects.
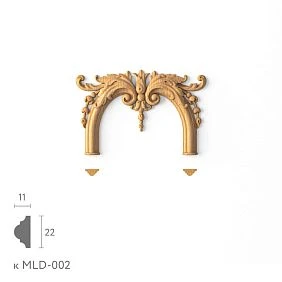
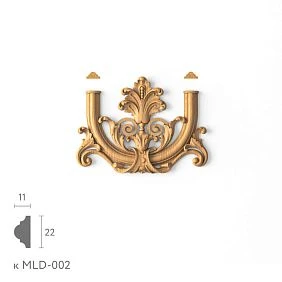
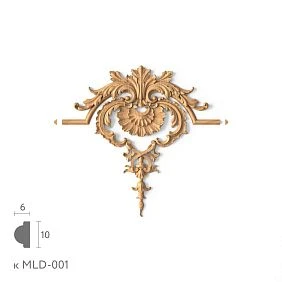
The official STAVROS catalog of decorative elements and overlays uses dimensional parameters A/B/C; this is convenient specifically for production selection.
A — working width
It determines:
- horizontal space;
- free field;
- distance to the frame;
- compatibility with the adjacent element.
B — working height
Important for:
- central compositions;
- vertical overlays;
- friezes;
- connection with a rosette.
C — thickness / depth
An often underestimated parameter.
It affects:
- chiaroscuro;
- total panel projection;
- adjacency;
- the ability of the adjacent door to open;
- installation logic;
- visual weight.
A single A/B without C can produce a false shortlist.
Two overlays:
A = 300 mm
B = 180 mm.
Identical on the plan.
But:
C1 = 12 mm
and:
C2 = 42 mm.
In reality, the second one creates a much deeper relief.
Do not scale the actual SKU.
If the required geometry does not fit:
- look for another size;
- change the composition;
- switch to custom.
You cannot reduce the model and continue specifying the original product.
The photo is needed for the pattern, not for dimensions.
A catalog photo helps evaluate:
- ornament;
- carving density;
- general shape.
But the dimensional model is built on technical values.
Project Code and BOM: the panel must be assembled from unambiguous product lines
When the composition becomes more complex, labels like "large overlay," "center rosette," and "molding" stop working.
Codes are needed.
For example:
PN-DEC-01 — center overlay.
PN-DEC-02L — left corner.
PN-DEC-02R — right corner.
PN-R-01 — rosette.
PN-MLD-01 — molding.
Project Code does not replace SKU.
On the drawing:
PN-DEC-01.
In the BOM:
PN-DEC-01 → Manufacturer → SKU.
Purchasing works with the actual item number.
Example BOM for one panel
| Code | SKU | Type | Material | Qty per panel | Unit |
|---|---|---|---|---|---|
| PN-DEC-01 | … | central overlay | beech | 1 | pcs |
| PN-DEC-02L | … | corner L | beech | 2 | pcs |
| PN-DEC-02R | … | corner R | beech | 2 | pcs |
| PN-R-01 | … | rosette | beech | 1 | pcs |
| PN-MLD-01 | … | moulding | beech | By cutting | lengths |
Why BOM is especially important for a composite panel.
Because visually it is perceived as a single product.
From a purchasing standpoint, it is five different product groups.
If you write:
panel decor — 1 set,
it is impossible:
- order one additional overlay;
- replace the socket;
- check L/R;
- recalculate the molding;
- see the material.
Revision.
If the central overlay is being replaced:
PN-DEC-01 REV01 = SKU-A
PN-DEC-01 REV02 = SKU-B.
But after replacement, you need to recheck more than just the BOM.
You need to reopen the 1:1 layout, because the new A/B/C can change the entire composition.
Count molding not in meters, but in segments: the cut plan changes the actual order
For a framed panel, the question of quantity seems simple: measure the perimeter and buy the required linear meters.
In practice, moulding is sold as physical strips, and the frame consists of specific segments.
Therefore:
geometric length ≠ Order Qty.
Conditional example
The panel has a frame with four sides:
- 1200 mm;
- 1200 mm;
- 600 mm;
- 600 mm.
Sum:
3600 мм.
If the nominal length of one strip is, for example:
2400 мм,
Mathematically:
3600 / 2400 = 1,5.
But you can't buy one and a half strips.
The minimum is two.
But even two are not always guaranteed to be enough.
If you need:
1200 + 1200 + 600 + 600,
two strips of 2400 mm can be distributed conveniently.
If the set is different:
1700 + 1700 + 1000 + 1000,
Sum:
5400 мм.
Three strips give:
7200 мм.
But the actual cutting layout needs to be checked, because two 1700 mm pieces won't fit into one plank.
What to store in the cut plan.
| Segment | Length | Qty | Profile | Source Length |
|---|---|---|---|---|
| M1 | 1200 | 2 | PN-MLD-01 | stock |
| M2 | 600 | 2 | PN-MLD-01 | stock |
useful remainder.
If a long piece remains after cutting, it can be used:
- on the second panel;
- on the inner frame;
- on another front of the same project.
But the remainder is considered usable only if the following match:
- SKU;
- the material;
- finish;
- length;
- the orientation of the pattern, if it matters.
Why an automatic 10% allowance is weaker than a cut plan.
The percentage doesn't know which pieces are needed.
For moulding, this works more strongly:
segments → stock lengths → nesting → waste → reserve.
For individual overlays, the logic is completely different.
Individual decor.
For example:
PN-DEC-01 = 1 pc. per panel.
For a series of five panels:
Calculated Qty = 5.
If the workshop decides to take one spare:
Spare Qty = 1.
Order Qty = 6.
Not:
5 + 10% = 5,5.
Trial panel: one module must pass testing before launching the series
A new set of several SKUs is better first assembled in one physical module.
It is not necessary to make the entire object at once.
You can use:
- one furniture facade;
- one panel;
- 1:1 fragment;
- test panel.
What the test module checks
Scale.
Is the overlay too large?
depth.
Does the socket compete with the molding?
Joints.
How does the frame meet the corner elements?
Installation.
Is there a proper contact surface?
finish.
How do different materials look after a shared finish?
Visual density.
Are there too many elements in one field?
Why a separately tested overlay is not enough.
An overlay can be beautiful on its own.
On the panel, it can:
- appear too large;
- overlap with the frame;
- clash with the socket;
- cast too deep a shadow.
That is why a product sample and a panel prototype are different checks.
First Article Inspection.
If 12 identical panels are needed, the first one becomes the reference.
Checked:
- all SKUs;
- coordinates;
- L/R;
- molding;
- finish;
- installation;
- BOM.
After that:
PANEL-A REV03 / RELEASED.
Golden Sample.
For a repeatable series, it is useful to save:
- a small finished fragment;
- one panel;
- a set of samples;
- high-quality photos;
- Finish Code.
This way, the next batch is compared not with the craftsman's memory.
What to record after the trial assembly.
- Drawing Revision;
- BOM Revision;
- Finish Code;
- Project Codes;
- approved sample;
- installation comments.
If one part failed the test.
There is no need to automatically change the entire composition.
First determine what exactly is not working:
- size;
- depth;
- ornament;
- the material;
- joint;
- finish.
After replacement, only the affected node is rebuilt, but the final panel is checked again.
Practical scenario: six identical panels for a wardrobe
Conditional project:
- a wardrobe with six tall doors;
- each door receives the same frame composition;
- one central overlay;
- four corner elements;
- one rosette;
- one molding around the perimeter.
The task seems simple: assemble the composition once and repeat it six times. In practice, this is exactly where it is important not to confuse an identical composition with an identical purchase.
First, one facade is designed.
Let the working panel size be:
W = 520 mm
H = 1900 mm.
After the outer margins and frame, the inner field:
W_inner = 360 mm
H_inner = 1540 mm.
Selected central overlay:
A = 220 mm
B = 480 mm.
Free field by width:
(360 − 220) / 2 = 70 mm.
In terms of height, the composition also depends on the rosette and corner elements, so a single calculation is not enough — a full layout is required.
Step 1. Central axis.
X = 260 mm.
All central elements are built relative to it.
Step 2. Frame.
The molding is selected based on the actual profile, after which the inner field is refined. If the profile changes, the calculation above is recalculated.
Step 3. Central overlay.
Not only A/B is checked, but also C: a deep relief may come noticeably closer to the handle.
Step 4. Corners.
If the corner elements have left and right versions:
2 L + 2 R per door.
For six doors:
12 L + 12 R.
Step 5. Socket.
If one is used per front:
1 × 6 = 6 pcs.
Step 6. Center overlay.
1 × 6 = 6 pcs.
Step 7. Molding.
Do not multiply "one panel's linear meters × 6" without checking the cutting layout. First, a cut plan for one panel is created, then optimization across the entire series is checked.
Total BOM for the series.
| Code | Qty per panel | Panels | Calculated Qty |
|---|---|---|---|
| PN-DEC-01 | 1 | 6 | 6 |
| PN-DEC-02L | 2 | 6 | 12 |
| PN-DEC-02R | 2 | 6 | 12 |
| PN-R-01 | 1 | 6 | 6 |
| PN-MLD-01 | by cut plan | 6 | By cutting |
Why start with one master panel.
If you mark out six doors at once, an error in axis or scale is multiplied six times.
Therefore, first:
PANEL-A-01
gets the status APPROVED.
After that, the coordinates and Project Codes are repeated.
What to do if the two central doors are wider.
Then these are no longer six identical panels.
A second type is created:
PANEL-A
and:
PANEL-B.
You cannot simply "stretch" the composition of the first type.
A new facade requires its own check:
- of the inner field;
- central overlay;
- frames;
- Outlets;
- offsets.
SKUs may remain the same, but the coordinates and possibly the molding quantity will change.
Why this is especially important for furniture.
On a wall panel, a small discrepancy in the field may go unnoticed from a few meters away.
On six adjacent doors, any difference is compared directly.
This is exactly why a facade series requires stricter control of axes and repetition.
Panel for furniture, cabinet, and wall: one SKU system behaves differently
User requests around wooden panels mix several scales.
In production, they need to be separated.
furniture panel.
This could be:
- facade;
- side panel;
- furniture portal;
- insert;
- decorative panel.
Here, the following are especially important:
- handle;
- opening;
- adjacent door;
- thickness;
- decor overhang.
Cabinet panel.
The tall facade makes the vertical composition especially prominent.
Checked:
- alignment of adjacent doors;
- mirroring;
- the position of the handle;
- molding line;
- repetition of central elements.
If two doors meet at the center, the decor must be designed as a pair.
Conditional example
Two doors:
W = 450 mm each.
On each, a vertical overlay with width:
A = 140 mm.
If the overlays are placed symmetrically relative to the central joint, the coordinates on the right and left doors must be mirror-related.
An error of 10 mm becomes immediately noticeable because the two vertical lines are compared side by side.
furniture portal.
On a larger surface, decorative details can be larger, but new junctions appear:
- upper cornice;
- side posts;
- connection to the body;
- base.
Wall decorative panel.
This is already a different scale of observation.
A person sees the composition from several meters away.
Fine carving can visually get lost, while large-scale carving works convincingly.
Current section of STAVROS wall panels belongs to ready-made panel systems. A panel assembled independently from individual SKUs is a different production path: the workshop designs the base and composition itself.
Door.
The plan of overlays and molding on the door leaf must be checked together with:
The Finish Schedule is responsible for the finish.If the panel is painted in a single color:
F-01.
If natural oak:
F-02.
Source of Truth.
| Data | Main source |
|---|---|
| Position | Drawing |
| SKU | BOM |
| product dimensions | verified product data |
| cut plan | Cut Sheet |
| finish | Finish Schedule |
| revision | Issue Register |
What should not be left only in the chat.
- “the socket was raised higher”;
- “the left corners were replaced”;
- “the molding is different now”;
- “the central overlay was removed”;
- “they decided to keep the oak natural”.
Any decision that affects production must be documented.
Revision Lock.
Before launch:
DRAWING REV04
BOM REV04
CUT REV04.
If the BOM is updated but the layout remains old, release is blocked.
Zero-Ambiguity Test.
Give the kit to a colleague.
They should understand without questions:
- what to buy;
- where to install;
- how many L/R;
- which molding;
- how many planks;
- which finish;
- what revision.
If you need to call the author, the package is not ready yet.
Finishing as a separate production stage, not a decorative formality
When a panel is assembled from different components, the finish unifies them visually, but technologically it may require different handling.
For opaque enamel, it is important to decide in advance:
- whether the elements are installed before or after painting;
- where the joints should be closed;
- how the internal corners are treated;
- whether a deep relief can be painted with quality after assembly;
- whether installation will damage the already finished coating.
For a transparent finish:
- how the parts are distributed by tone;
- how the fibers are oriented;
- how close the batches are;
- whether the overlay will contrast with the base.
Two workflows.
Route A — assembly first, then a single finish.
Stronger where color uniformity matters.
The risk — it is harder to work in deep joints and around relief.
Route B — separate finishing of components, then installation.
Stronger where full access to every surface is needed.
Risk — damage to the coating during assembly and visibility of the joint.
You cannot assign a single route for all projects.
Finish Sample 1:1.
For a complex panel, it is useful to make a small fragment:
- part of the base;
- one molding;
- a piece of the overlay;
- the selected finish.
This checks:
- coverage;
- shadow;
- joint;
- the visual difference between materials.
Why a photo of the sample is not enough.
On a flat sample, the paint may look even.
On deep carving, the side surfaces and shadows are perceived differently.
Therefore, the finish is checked on real geometry.
The Finish Code must be stored together with the BOM.
For example:
F-01.
And do not write:
white, as last time.
This way, a repeat series gets a reproducible process.
Typical mistakes of a composite wooden panel and where to buy the elements
A composite system seems simpler than solid 3D milling, but it has its own mistakes.
| Mistake | Consequence | How to prevent |
|---|---|---|
| choose decor from photos | incorrect scale | check A/B/C |
| the frame is drawn with a dashed line | the field changes after selecting a profile | use the actual cross-section |
| L/R are combined | incorrect set | separate BOM lines |
| molding is measured in meters | not enough full planks | make a cut plan |
| decor is scaled in 3D | project does not match SKU | choose another product |
| sample is checked separately | conflict of elements on the panel | assemble test module |
| different materials are painted "by eye" | finish varies | make Finish Sample |
| SKU is replaced only in purchasing | drawing becomes outdated | issue a revision |
Error: too many decorative centers.
An overlay, rosette, mascaron, and two bands can be beautiful separately.
Together the panel loses hierarchy.
Before adding a new element, ask yourself:
what new function does it perform?
If the answer is “another beautiful ornament,” it may not be needed.
Mistake: repeating the same density at different sizes.
A large wall panel and a small facade require different scales.
Do not transfer the composition mechanically.
Mistake: not taking the overall projection into account.
Base:
C_base.
Molding:
C_mld.
Overlay:
C_dec.
The visible maximum projection is determined by the deepest element.
This is important for:
- cabinets;
- doors;
- narrow passages;
- adjacent facades.
Error: treat the base and decor as independent after approval.
If the panel size changes, the composition must be checked again.
Old coordinates may lose their meaning.
When a composite panel is not needed.
if:
- the relief must be seamless;
- the ornament is completely unique;
- standard elements do not fit in scale;
- joints are fundamentally undesirable;
- a large production run already justifies having your own CNC.
Then solid milling or custom is stronger.
Where to choose components.
For a working shortlist, you can use:
- decorative elements for wooden panels;
- decorative inlays for furniture;
- central overlays;
- Wooden sockets;
- Wooden moldings;
- Wooden trim;
- Product samples.
Order control and service stock
After approval, the BOM panel must be converted into a real order without losing its structure.
For one-off items, the following are checked:
- SKU;
- L/R;
- the material;
- Qty;
- Spare Qty;
- Finish Code;
- Panel Type.
For molding:
- SKU;
- stock length;
- number of planks;
- cut plan.
Calculated Qty and Order Qty.
They are not always the same.
For example, a series of eight panels requires:
PN-R-01 = 8 sockets.
This:
Calculated Qty = 8.
If the project is remote and reordering is difficult, the workshop may deliberately order one spare:
Spare Qty = 1.
Then:
Order Qty = 9.
The reserve must have a reason.
Service Spare.
For an expensive custom panel, one spare central element is sometimes more useful than a universal "10%."
It can be stored:
- at the client's;
- in the workshop;
- together with the project documentation.
But it is important to label:
PROJECT SPARE.
Otherwise, the part can easily end up in another order.
Incoming QC.
The received batch must be checked before painting and installation.
Check:
- article numbers;
- sides L/R;
- quantity;
- damage;
- A/B/C;
- the material;
- visual compatibility of the set.
If an error is found after applying a complex finish, fixing it is more expensive.
What to do with natural wood.
Before clear finishing, lay out the elements by specific panels.
If there is natural variation in shade or pattern, it can be distributed deliberately.
For example, four corner elements of one panel are best selected as a visually connected group.
Procurement Status.
Convenient statuses:
HOLD
READY FOR ORDER
ORDERED
RECEIVED
APPROVED FOR ASSEMBLY.
HOLD used if:
- sample not approved;
- replacement not checked;
- quantity not closed;
- Cut plan not released.
This is why procurement does not start an item just because it has already appeared in the table.
Final algorithm
- Determine the size and purpose of the base.
- Decide whether you need a solid CNC relief or a composite system.
- Build the compositional grid.
- Choose a real molding.
- Determine the inner field.
- Select the central overlay by A/B/C.
- Add corner / straight / vertical elements.
- Check whether an outlet is needed.
- Separate L/R.
- Create a 1:1 layout.
- Order samples for new SKUs.
- Assemble the test module.
- Approve the material and Finish Code.
- Create the BOM.
- Create a cut plan for the molding.
- Conduct a First Article Inspection.
- Freeze the revision.
- Order the exact quantity.
- Save the Golden Sample and project data for a repeat series.
Check before reordering.
Even if the panel has been produced before, do not carry over the previous BOM automatically. First, the current SKUs and material variants are verified, then the Drawing Revision and Finish Code. If one element has been replaced by the supplier, the entire composition does not necessarily need to be redone, but its A/B/C and position must be rechecked. This especially applies to central parts: a slight increase in width or depth can change the free field and light-and-shadow. A reorder is considered a true repeat only when the workshop can reproduce the same panel from the documents without a new selection of "similar" elements.
Final formula:
BASE PANEL → READY MOLDING → READY OVERLAY → ROSETTE → REAL A/B/C → 1:1 LAYOUT → BOM → UNIFIED FINISH → ORDER.
A composite wooden panel allows the workshop to keep a simple base in its own production while purchasing complex carved geometry as separate repeatable SKUs. This is not a universal replacement for CNC milling, but a different production tool. It is especially strong where the series is small, the composition is assembled from independent elements, and the workshop values verification speed, repeatability, and the ability to change individual parts without completely reworking the panel.





