Article Contents:
- When the ready-made decor from the catalog is not enough
- A specific size is needed
- A historical motif needs to be replicated
- The decor must match custom furniture
- A special profile is needed
- The ornament needs to be continued
- A unified motif is required for several pieces
- Sketch
- Working drawing
- Visualization
- Photograph or historical reference
- Physical sample
- Dimensions insufficient for complex relief
- Specify the actual quantity
- Describe the installation location
- For the first discussion — a sketch and references
- For dimensions — a working drawing
- For complex shapes — 3D
- For exact reproduction — a physical sample
- Polyurethane
- Natural Wood
- MDF
- How to choose without mistakes
- Non-standard molding
- Custom overlay
- Wall composition
- Ceiling composition
- 1. Is there a ready-made analogue
- 2. Does the scale fit
- 3. Can a composition be assembled from several items
- 4. Are there ready-made corner and paired parts
- 5. Can it be adapted with finishing
- 6. Is the order volume sufficient for a new product
- Non-standard layout
- Alternative color solution
- Combination of elements
- Non-standard orientation
- Connection of different materials
- Technical check
- Adjustment without losing the idea
- Prototype
- Why a render is not enough
- Why the sample needs to be labeled
- What “approved” means
- Break the composition into elements
- Determine the real scale
- Find catalog matches
- DWG is useful for
- 3D is useful for
- The main risk is different versions
- Statuses
- Do not use the same name for different versions
- Single item
- Small series
- Standard product
- Geometric Complexity
- Depth of Relief
- Size
- Material
- 3D Modeling
- Tooling and production preparation
- Prototype
- Quantity
- Finishing
- Installation requirements
- Mistake 1. Providing only a pretty picture
- Mistake 2. Scaling the ornament without checking
- Mistake 3. Not specifying left and right versions
- Mistake 4. Not accounting for ornament repeat
- Mistake 5. Approving 3D without a physical scale
- Mistake 6. Ordering a series without a prototype
- Mistake 7. Not locking in the finish
- Mistake 8. Not checking the installation
- Mistake 9. Confusing the concept with the approved version
- Mistake 10. Making a new element before checking the catalog
- Step 1. Define the task
- Step 2. Check the catalog
- Step 3. Prepare the source file
- Step 4. Lock in the dimensions
- Step 5. Choose the material
- Step 6. Specify the quantity
- Step 7. Get a technical assessment
- Step 8. Prepare a model for approval
- Step 9. Approve the prototype
- Step 10. Finalize the specification
- Step 11. Start production
- Step 12. Save the data for reordering
- Designer furniture
- Restoration
- Hotels and restaurants
- Representative spaces
- Network facilities
- Interior with a historical prototype
- The task is standard
- The difference from a ready-made element is unnoticeable
- The project has not yet been approved
- One inexpensive element is needed
- No precise source data
- Can decor be ordered using only a hand-drawn sketch?
- Can an element be made from a photo?
- What is better to send — DWG or 3D?
- Is a prototype needed for a single part?
- Can a custom molding be made?
- Can an old carved element be replicated?
- What should be included in a request for custom decor?
- Do I need to choose the material right away?
- Where can I see ready-made options before placing a custom order?
- Where can I get the project files for ready-made decor?

Designer's sketch-based decor is needed not when you want "something unusual," but when a ready-made catalog element doesn't solve a specific project task. This could be a non-standard size, a custom profile, a reproduction of a historical motif, a carved detail for furniture, an ornament with a specified repeat, a decorative composition around a door, or an element that must precisely match the geometry of an already approved interior.
In a custom order, the transition from concept to production data is essential. A beautiful reference is not enough. The manufacturer needs to understand: what exactly to make, what size, from what material, with what relief depth, how the element will repeat, where it is mounted, and how many identical parts are required.
The working sequence looks like this:
sketch / visualization / drawing / sample → technical review → material selection → exact dimensions → digital model or working drawing → prototype → approval → specification → production → repeat order if necessary.
Before launching a new product, it makes sense to first check ready-made solutions. The STAVROS catalog includes Polyurethane moldings, carved wooden decor, moldings, overlays, rosettes, cornices, and other standard elements. If a suitable profile already exists, the project usually gets a shorter path to purchase. Custom production is justified where the catalog truly does not cover the geometry, scale, or custom motif.
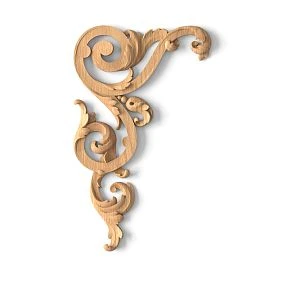

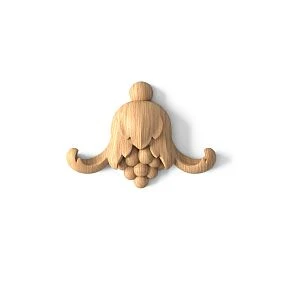
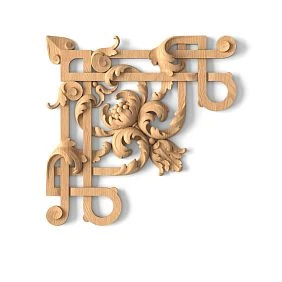
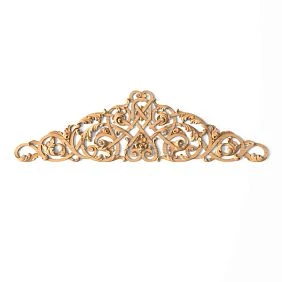
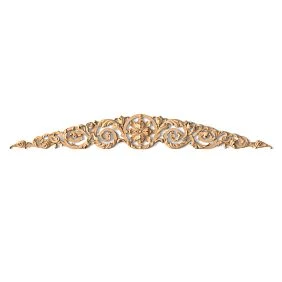
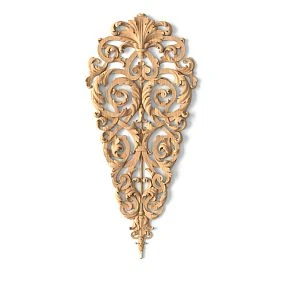
When ready-made decor from the catalog is not enough
A catalog element is convenient because its geometry is already defined: there is an SKU, size, material, and a clear appearance. For most standard interior tasks, this is enough.
But a design project sometimes has situations where a standard SKU does not work.




A specific size is needed
For example, a wall composition is built around the axis of a doorway, but a standard overlay is 30–40 mm wider than the allowable field. The scale of the element is already beginning to conflict with the door casing, furniture, or adjacent molding.
In this case, you cannot simply "slightly reduce" the part in the visualization. You must either find another ready-made element or consider manufacturing a decorative element based on a sketch with real dimensions.
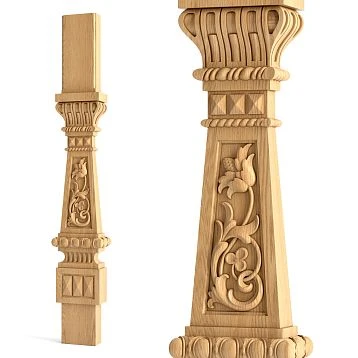
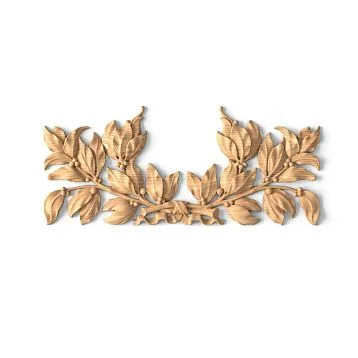
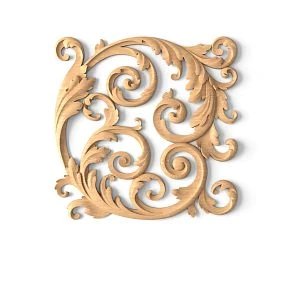
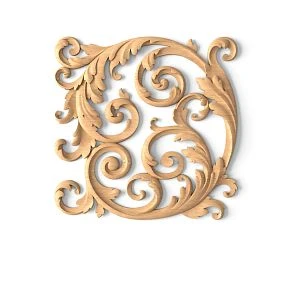
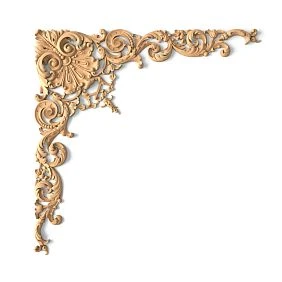
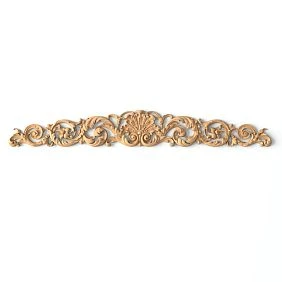
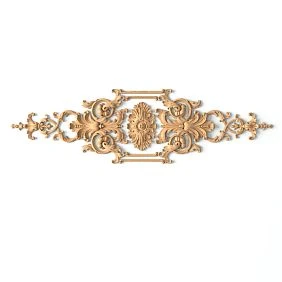
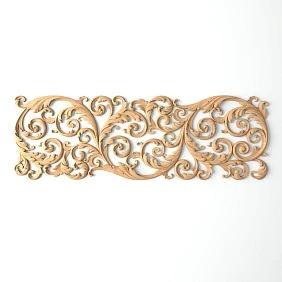
Our factory also produces:
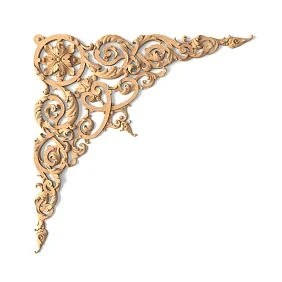
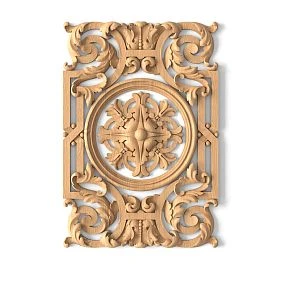
The historical motif needs to be replicated
In restoration and stylized interiors, the task is often the reverse: first there is a sample, a photograph, a fragment of an ornament, or a surviving part, and then its shape needs to be restored.
Then the starting point becomes not a catalog, but a sample → measurement → geometry reconstruction → prototype.
Get Consultation
The decor must match the custom furniture
If the furniture is created according to an individual project, a standard overlay may be stylistically close but not match in scale, depth, or repeat.
For example, the pattern on the facade is built on a 120 mm grid, while the ready-made central overlay has dimensions that disrupt the rhythm. Here, custom decor becomes part of the furniture's construction rather than an ornament added after design.
A special profile is needed
For molding, not only the facade pattern is important, but also the cross-section. The profile determines the shadow, the depth of the frame, the joining of corners, and how massive the framing will look.
If a ready-made profile is close but systematically unsuitable, a custom option may be justified.
The ornament needs to be continued
A complex composition may require a straight element, a corner element, a central element, and left and right end pieces. If you use only one beautiful applique without understanding how the pattern continues, the wall or furniture composition "breaks off."
A unified motif is required for several pieces
A design studio can develop a signature ornament that repeats on furniture, wall panels, doors, the reception desk, and decorative inserts. Here, the value of an individual piece lies not in the uniqueness of a single detail, but in the repetition of the motif across the entire object.
How the production of decor from a sketch begins
Custom production does not begin with a machine or with choosing paint. The first stage is to determine the quality of the source data.
The same decorative element can be designed starting from a sketch, a drawing, a visualization, a photograph, or a physical sample. But the accuracy each source provides is different.
Sketch
A sketch is suitable for discussing an idea. It can show the overall silhouette, the direction of the ornament, the compositional center, symmetry, the character of leaves, scrolls, or geometry, and the place of the detail in the interior.
But a sketch without scale is not a production document. If the designer drew an applique "approximately 600 mm" long, the manufacturer still needs the actual dimensions and constraints.
Working drawing
A drawing is needed when the geometry must be precise.
Minimally useful:
-
front view;
-
width;
-
height;
-
depth;
-
profile;
-
axes;
-
symmetry;
-
repeating dimensions;
-
mounting surfaces;
-
junction points.
For a linear element, the cross-section profile is especially important. For an overlay, the frontal geometry and maximum depth matter. For an element that is part of an assembly, the installation dimensions are key.
Visualization
Visualization clearly shows the scale relative to the wall, furniture, and room. It helps to understand how large the decor is, where the composition begins and ends, and how it interacts with light.
But a render cannot be used as a substitute for precise dimensions. Perspective and camera scale can visually distort the detail.
Photograph or historical reference
A photo is useful for stylistic reconstruction, but weaker for geometry. If at least one real dimension is known, the image becomes much more useful: proportions can be reconstructed from it.
Physical sample
A surviving detail provides the maximum information about the shape. It can be measured, and its profile, depth, pattern, and junctions can be studied.
But even a sample does not replace the technical specification: the manufacturer needs to understand whether an exact copy is required or an adaptation by size, material, and installation method.
What should be included in a designer's technical specification
A good technical specification reduces the number of approval iterations. It does not have to be a twenty-page document, but it must answer production questions.
| Parameter | What to provide |
|---|---|
| position name | working name of the element |
| Width | actual size in mm |
| Height | actual size in mm |
| Depth | maximum relief in mm |
| Length | for linear products |
| Material | intended material |
| Ornament | sketch, file, photo, or sample |
| Scale | 1:1 or exact dimensions |
| Quantity | pcs. or linear m |
| Repeatability | single element / series |
| Finish | finished / for further finishing |
| Installation | surface and installation method |
| Lead time | required date on site |
| Related items | molding, cornice, furniture, panels |
Dimensions are insufficient for complex relief
The size 400 × 200 mm describes the rectangle that accommodates the overlay, but not the plastic itself.
For a complex element, the maximum depth, nature of the protrusions, geometry of the back side, thickness of thin sections, and joining logic are additionally required.
Specify the actual quantity
"First one, then possibly many" and "need 180 identical parts" are different production scenarios.
Production volume affects how critical repeatability is, whether tooling is needed, how to organize a sample, and how detailed the approved configuration should be documented.
Describe the installation location
The same overlay on a wall, furniture, and door has different constraints. For furniture, the facade thickness and finish matter. For a wall — scale, substrate, and adjacent moldings. For a ceiling — installation and visual perception from below.
Sketch, drawing, or 3D model — which is best to send to the manufacturer
The best format depends on the stage.
For the first discussion — a sketch and references
At the start, it's more important to understand the idea. That's why the designer can send a sketch, visualization, reference, photo, and layout diagram.
The goal of the first stage is to determine whether the idea is feasible and what data needs to be prepared next.
For dimensions — a working drawing
The drawing captures the geometry that must not change between approval and production.
Axial dimensions, overall size, profile, repetition pitch, symmetry, and mounting plane are especially important.
For complex sculpting — 3D
A three-dimensional model is useful for volumetric ornament, complex carving, and asymmetrical details. But it must be at real scale.
If a model is made solely for visualization and contains simplified geometry, it cannot automatically be considered production-ready.
For precise reproduction — a physical sample
If the task is to copy an existing part, the sample is often more important than the render.
At the same time, you need to decide whether the material is repeated, whether the size is preserved, whether old deformations need to be removed, whether a mirrored pair is required, and whether the new part should look “new” or match the historical surface.
How to choose a material for custom decor
Material is chosen after form and function. The same ornament can be represented in different materials, but this does not mean that every option is equally manufacturable.
Polyurethane
molded decoration made of polyurethane suitable for interior decorative elements where expressive relief, repeatability, and subsequent finishing are important.
In a polyurethane project, overlays, moldings, rosettes, cornices, wall compositions, and ceiling decor can be used.
Before custom production of a specific element, the manufacturability of the shape and the order volume must be confirmed separately. It cannot be automatically assumed that any complex object from a 3D file can be converted into a serial product without changes.
Natural wood
Carved wooden decoration logical when natural texture, joinery finishing, furniture application, or historical character are important.
Wood is especially appropriate for furniture overlays, rosettes, capitals, brackets, finials, architraves, pilasters, and carved panels.
In wooden decor, it is necessary to decide in advance whether the texture should remain visible. If the product will be covered with dense enamel, one material system may be more rational than another.
MDF (740–760 kg/m³, emission class E1/E0) provides ideal geometry, uniformity, and better base for enamel: high adhesion, smooth surface, absence of knots and cracks.
MDF is suitable for some geometric interior and furniture parts, especially for painting. Its strength is controlled geometry.
But a complex deep ornament or a part designed for expressive natural texture may require a different material.
How to choose without making a mistake
Ask three questions:
-
What should be the main focus — form or texture?
-
A single element or a serial one?
-
How will it be finished and installed?
The material is chosen after these answers, not out of habit.
Custom stucco molding based on a designer's project
The request “custom stucco molding” can mean several different tasks.
Non-standard molding
You need a profile that is not in the standard catalog. Then the key source is the exact cross-section.
Before developing a new profile, it is worth checking Moldings made of polyurethane: sometimes a close ready-made profile solves the task without new production.
Custom overlay
For the central decorative element, the overall dimensions, depth, symmetry, compositional center, edges, and the way the pattern is finished are important.
If a series of left and right elements is required, this must be specified immediately.
Wall composition
Sometimes individuality is created not by a new SKU, but by a composition of ready-made elements. In the section Polyurethane wall decor you can first check existing sets and elements.
Only after such a check does it become clear which part of the project really needs to be individual.
Ceiling composition
In the ceiling area, the scale from below is especially important. A detail that looks large on a table may be perceived as much more subdued at a height of several meters.
For comparison of ready-made solutions, it is useful to look at Polyurethane ceiling decoration and individual rosettes.
When it's better to choose a ready-made element rather than produce a new one
Custom production is not a goal in itself.
Before creating a new product, it's worth going through a quick filter.
1. Is there a ready-made equivalent?
Check the catalog. If the shape differs only minimally, you need to decide whether that difference is truly critical for the project.
2. Does the scale fit?
Sometimes the problem isn't the ornament, but the size. Perhaps the catalog has another element in the same style.
3. Can a composition be assembled from several items?
Two ready-made moldings and a central overlay can produce a custom result without developing a new shape.
4. Are there ready-made corner and paired parts?
This is especially important for frames and wall panels.
5. Can it be adapted with finishing
An element in the wrong color does not necessarily require new production. Color and patina can be addressed at the finishing stage.
6. Is the order volume sufficient for a new product
If you need one small decorative element, developing complex custom geometry may be less rational than adapting a ready-made solution.
Expert choice sometimes means deciding against custom production.
How to adapt ready-made decor for a bespoke project
A unique interior does not always require a unique SKU.
Non-standard layout
The same moldings can be used in different frame proportions. Authorship is created by the composition.
Alternative color solution
The element can be painted to match the wall color, in a contrasting shade, with a patina, to resemble metal, or in a complex multi-layer finish.
Combination of elements
A molding, overlay, and rosette can form a composition that does not exist as a ready-made set.
Non-standard orientation
Some elements can be used in a different orientation, as long as this does not disrupt the logic of the pattern and installation.
Connection between different materials
A wooden furniture piece can support the motif of polyurethane wall decor, even if the products are not copies of each other.
How to manufacture decor according to an architect's drawing
An architect's or designer's drawing translates an idea into controlled geometry.
Workflow:
drawing → technical review → adjustment → digital model → prototype → approval → production.
Technical review
At this stage, what is evaluated is not beauty, but feasibility:
-
minimum thicknesses;
-
undercuts that are too deep;
-
weak thin elements;
-
joints;
-
repeatability;
-
installation;
-
Material.
If the shape requires adjustment, it is better to do it before the prototype.
Adjustment without losing the idea
Technological adjustments should not turn the designer's decor into a different object.
Therefore, it is useful to define what constitutes:
-
critical geometry;
-
an acceptable simplification;
-
a second-level decorative detail.
Prototype
A prototype is needed when the volume cannot be confidently assessed from a drawing.
On it, the designer sees the real depth, shadow, scale, edges, and junctions.
Prototype and sample before the main order
For a single simple part, a separate prototype is not always rational. For a series or a complex ornament, it is critically useful.
The sample should be checked for:
-
overall dimension;
-
depth of the relief;
-
scale of the ornament;
-
quality of the edge;
-
geometry of the back side;
-
junction;
-
color after finishing;
-
installation;
-
perception at real distance.
Why a render is insufficient
In 3D, deep relief can be made visually softer or harder with light. A real sample shows the actual shadow.
Why the sample needs to be labeled
After approval, it is useful to record on the sample the project code, position, version, date, material, finish, and the status "approved".
Without this, within a few months it's easy to confuse an early test with the final version.
What "approved" means
Once approved, you cannot quietly change the depth, size, profile, ornament, material, or finish.
Any change creates a new version.
How to approve custom decor based on a visualization
A visualization answers the question "what does the client see," but it doesn't contain all the production information.
The correct process:
visualization → identification of decorative elements → search for ready-made analogues → decision on which items are custom → measurement → drawing → prototype.
Break the composition down into elements
In a render, a decorative wall may look like a single object, but in production it consists of straight moldings, corner elements, overlays, a central rosette, end pieces, and repeating details.
Determine the real scale
If the wall width is known, the proportions can be roughly estimated from the visualization, but the final dimensions still need to be fixed in the drawing.
Find catalog matches
Sometimes 70–90% of the composition is assembled from standard items, and only one or two details remain custom.
This reduces the complexity of the project and makes future reordering easier.
DWG and 3D in a custom project
DWG and 3D are needed not for a “professional file package,” but so that different project participants work with the same geometry.
In the section DWG drawings of decor drawings and 3D materials are available for finished STAVROS products. For a custom item, the logic is the same: the file must be linked to a specific approved version.
DWG is useful for
-
wall anchoring;
-
sizes;
-
axes;
-
joints;
-
layouts;
-
installation;
-
handover to builders.
3D is useful for
-
plastics;
-
light and shadow;
-
complex terrain;
-
integration into visualization;
-
scale verification.
The main risk is different versions
A designer can update the 3D model but leave the drawing outdated. The specifier will send one version, and production will receive another.
Therefore, it is useful to include the revision in the file name:
DEC-01_v03_APPROVED
Status matters more than a nice file name.
How to create a specification for custom decor
A custom item does not yet have a standard catalog SKU, so it needs a project code.
| Field | Example |
|---|---|
| Code | DEC-01 |
| Name | Central decorative overlay |
| Image | preview of the approved version |
| Size | W × H × D |
| Material | approved |
| Quantity | 12 pcs. |
| Room | Hall |
| Zone | reception wall |
| Finish | for painting / finished |
| Installation | By node |
| Status | Approved |
| file | DEC-01_v03 |
| Note | left/right version if needed |
Statuses
It is useful to use four statuses:
CONCEPT → PROTOTYPE → APPROVED → PRODUCTION
This eliminates the dangerous situation where a conceptual file accidentally goes into an order.
Do not use the same name for different versions
“Large overlay” is a bad identifier.
If the version has changed, the code or revision should reflect this.
Single item or series
Economics and quality control depend on quantity.
Single item
For example:
-
central panel;
-
cap;
-
unique portal part;
-
restoration of lost decor.
Here, the precision of the specific piece matters more.
Small batch
For example:
-
18 identical furniture overlays;
-
24 sockets in a restaurant;
-
40 elements for doors.
You need a reference and repeatability control.
Serial product
If the decor is repeated in hotel rooms, a restaurant chain, a furniture collection, or across several of the studio's projects, the individual item becomes your own standard.
Then you need to store:
-
the final file;
-
reference sample;
-
material;
-
finishing;
-
packaging method;
-
acceptance rules;
-
reorder code.
What affects the cost of custom decor
Without a specific brief, an accurate price cannot be quoted.
Cost is influenced not only by material and size.
Complexity of geometry
A simple flat surface with a shallow pattern and a complex multi-layered ornament require different amounts of modeling and production.
Relief depth
The deeper the relief, the greater the demands on geometry and manufacturability.
Size
A large element may require splitting into parts, additional tooling, packaging, and transportation.
Material
Polyurethane, wood, and MDF have different technologies.
3D modeling
If the source is only a sketch or photo, the geometry still needs to be developed.
Tooling and production preparation
A new production mold requires preparation that cannot be assessed as the price of a single finished part.
Prototype
A test sample is a separate stage if it is needed for approval.
Quantity
The larger the series, the more important it is to separate:
-
one-time preparation;
-
unit cost;
-
reprint.
Finishing
Painting, tinting, patina, and other finishes require separate operations.
Installation requirements
An element with simple gluing and a part with a special hidden fastening are different tasks.
Practical mistakes when ordering decor based on a sketch
Mistake 1. Providing only a beautiful picture
Cause: the designer considers the shape obvious.
Consequence: the manufacturer has to guess the dimensions and profile.
How to avoid: add at least the overall dimensions, depth, and installation location.
Mistake 2. Scaling the ornament without checking
Reason: it seems that a 20% reduction automatically preserves quality.
Consequence: thin elements become disproportionate or technologically weak.
How to avoid: after scaling, recheck the detailing.
Mistake 3. Not specifying left and right versions
Reason: in the visualization, elements appear mirrored automatically.
Consequence: only one orientation appears in the order.
How to avoid: list L/R as separate items.
Mistake 4. Not accounting for pattern repeat
Reason: an individual fragment looks correct.
Consequence: during assembly, the lines do not continue.
How to avoid: check at least two or three repeating modules together.
Mistake 5. Approving 3D without physical scale
Cause: on screen, any element can be enlarged.
Consequence: on the actual object, the decor looks too small or too large.
How to avoid: print a 1:1 outline or make a test fragment.
Mistake 6. Ordering a series without a prototype
Cause: wanting to save one iteration.
Consequence: one mistake is repeated dozens of times.
How to avoid: first an approved sample, then the batch.
Mistake 7. Not fixing the coating
Cause: "we'll paint it later."
Consequence: different contractors interpret color and gloss level differently.
How to avoid: a finish sample and coating code.
Mistake 8. Not checking installation
Cause: the product is considered separately from the surface.
Consequence: the relief interferes with fastening, the base is weak, or there is no tool access.
How to avoid: specify the installation assembly before series production.
Mistake 9. Confusing the concept with the approved version
Cause: the files have the same name.
Consequence: the old version goes into production.
How to avoid: revisions and statuses.
Mistake 10. Creating a new item before checking the catalog
Cause: a custom solution seems more prestigious.
Consequence: the project pays for developing something that already exists.
How to avoid: first compare the existing catalog and only then open a new position.
How to order custom decor for a design project
The final algorithm must be clear to the designer, architect, procurement specialist, and manufacturer.
Step 1. Formulate the task
Not “we need a beautiful overlay,” but:
A central element 620 × 280 mm is needed for the panel above the console, symmetrical, up to 35 mm deep, for painting, 6 identical items.
Step 2. Check the catalog
First, look at the ready-made elements. For a wall composition — decorative polyurethane elements, for a wooden project — wooden decorative elements.
If a suitable element is found, a custom order may not be needed.
Step 3. Prepare the source file
This could be:
-
sketch;
-
a drawing;
-
3D;
-
photograph;
-
sample.
It is better to provide several types of data at once.
Step 4. Confirm the dimensions
Minimum:
width → height → depth → mounting plane.
For the profile:
section → length → joint.
Step 5. Choose the material
Not final at will, but after technical verification.
Step 6. Specify the quantity
One part, 12 pieces, and 400 pieces require different approaches.
Step 7. Get a technical assessment
At this stage, constraints and possible adjustments are clarified.
Step 8. Prepare a model for approval
This can be a working drawing, 3D, or a set of files.
Step 9. Approve the prototype
For a complex or serial product.
Step 10. Lock the specification
Version, dimensions, material, quantity, finish, status.
Step 11. Start production
After approval, not in parallel with ongoing edits.
Step 12. Save the data for reordering
The design studio should retain the same package used to manufacture the element.
When custom decor is especially useful
Custom Furniture
If the front, legs, frame, or panel have their own motif, a ready-made overlay may be stylistically out of place.
Restoration
The lost element needs to be reproduced from a sample or photograph.
Hotels and restaurants
A repeating motif can become part of the interior's identity.
Representative spaces
A reception desk, meeting room, or office may require a unique coat of arms, ornament, or architectural composition.
Chain properties
An individual element becomes a repeatable standard used across multiple locations.
Interior with a historical prototype
When stylistic accuracy matters, a "similar classic overlay" is not always enough.
When individual decor is not needed
There are situations where the right decision is to choose a ready-made catalog.
The task is standard
A simple molding frame, a standard ceiling rose, or a ready-made overlay may already fully match the project.
The difference from a ready-made element is imperceptible
If individual reworking does not change the composition, scale, and function, it may not justify development.
The project has not yet been approved
A unique part cannot be started while the walls, furniture, and main axes are still changing.
One inexpensive element is needed
Complex development for one small part may be disproportionate to the task.
No precise source data
If the dimensions and installation location are unknown, manufacturing is premature.
FAQ
Can decor be ordered from a hand-drawn sketch only?
A sketch is suitable for an initial discussion, but production usually requires actual dimensions and technical verification. The more complex the relief, the more important it is to supplement the sketch with a drawing or 3D.
Can an element be made from a photograph?
A photograph can serve as an initial reference, especially if a motif needs to be restored. For precise geometry, at least one known dimension or a physical sample is needed.
What is better to provide — DWG or 3D?
DWG is convenient for dimensions, profiles, and references. 3D is for complex shapes and relief. For a complex order, both formats are useful.
Is a prototype needed for a single part?
Not always. For a simple single item, it may be excessive. For complex relief, an expensive product, or a future series, a prototype reduces risk.
Can a custom molding be made?
If a ready-made profile is not suitable, a custom molding is considered based on the exact cross-section and volume. First, it is worth checking the catalog of ready-made profiles.
Can an old carved detail be replicated?
Yes, a surviving sample, photo, or drawing can serve as the working basis. For accurate reproduction, it is necessary to record the dimensions, material, and the degree of permissible restoration adaptation.
What should be included in a request for custom decor?
At minimum: an image or file, width, height, depth, material or material preference, quantity, installation location, and the required date.
Should the material be chosen right away?
It is advisable to state a preference, but the final decision is best made after a technical evaluation of the shape.
Where can ready-made options be viewed before placing a custom order?
Start with the catalog STAVROS: a ready-made element can solve the task without new development.
Where can project files for ready-made decor be obtained?
On the page 3D decor models catalogs, DWG files, and STAVROS 3D materials for project work have been collected.
Final checklist before handover to production
Before approving a custom element, check:
-
project code is present;
-
final image is present;
-
dimensions in millimeters;
-
depth is specified;
-
material agreed;
-
quantity is confirmed;
-
left/right versions are separated;
-
profile and repeat verified;
-
installation is clear;
-
coating is defined;
-
prototype approved, if needed;
-
file has a version number;
-
specification matches the file;
-
status changed to APPROVED;
-
old version excluded from working exchange.
Only after this does individual decor become not an idea, but a manageable production item. For the designer, this is the main thing: to preserve the author's intent while passing enough precise data to the manufacturer so that the result can be produced, verified, repeated, and, if necessary, ordered again.