Article Contents:
- Why a lobby requires its own decor scheme
- Divide the lobby into zones before choosing products
- Choose the main focal point and the elements subordinate to it
- Design the wall behind the reception desk together with the desk itself
- Check the decor from three distances
- Profile width and its projection work differently
- A high ceiling requires checking scale, not adding many ornaments
- A cornice can tie several zones together with one repeating element
- First coordinate the ceiling with the lighting and equipment
- Align the ceiling outlet with the chandelier and the overall composition
- In the waiting area, leave space for furniture and people
- The elevator portal should work together with the signage
- Make the transition to the corridors gradual
- Use ornament where it supports the main concept
- Assemble a small core set of products
- Review the 3D model along the entire guest route
- Check the main wall on a test section
- Consider contact with luggage, cleaning, and future repairs
- Transfer the approved decision into the specification
- Count identical linear profiles together across multiple zones
- What to check before ordering decor for the lobby
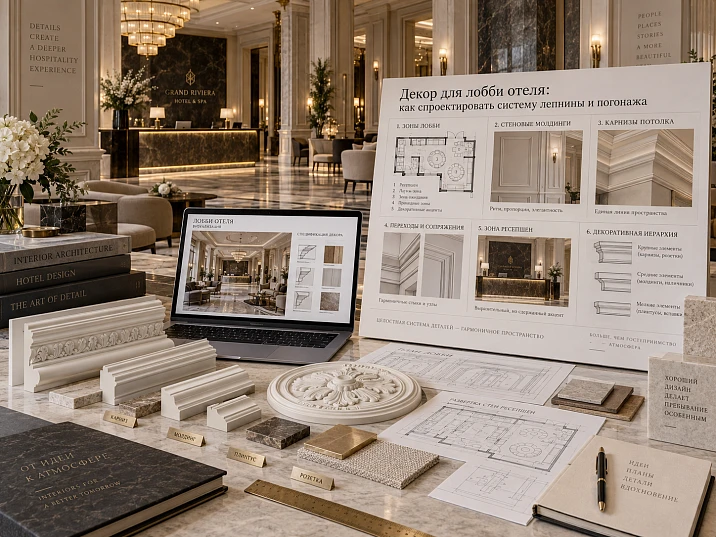
A guest enters the hotel with a suitcase and tries to figure out where to check in. If the wall behind the desk, the elevator portal and the ceiling medallion all attract attention equally, finding the right point becomes harder. Individually, all three compositions may look convincing. Together they compete with one another.
Lobby decor for a hotel should account for this first glance and the route that follows. The lobby is the shared entrance area of a hotel, where the reception desk, waiting areas and passages to other rooms are located. Here, stucco is viewed from different distances, behind furniture, in motion and under changing lighting. That is why the choice begins with the layout of the space, and specific products are selected for already clear tasks.
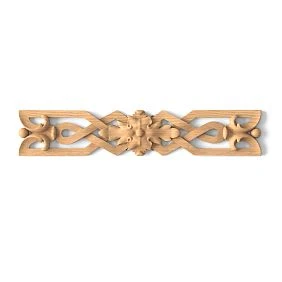
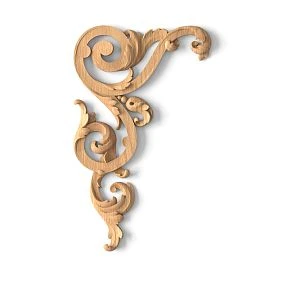

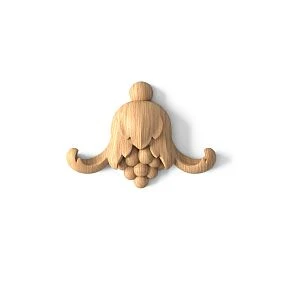

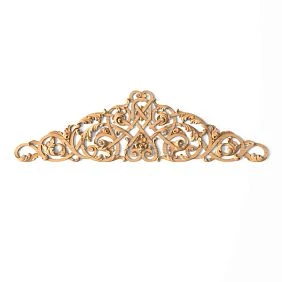
Why the lobby requires its own decor scheme
In a living room, a person usually lingers and examines the interior from several familiar points. In a lobby, some guests quickly pass through to the elevators, others stand at the desk, and others sit in armchairs. One wall turns out to be either a distant background or a surface within arm's reach.
Molding — a narrow or wide decorative profile — helps divide a wall into fields, frame a panel, and connect several sections with a common line. A cornice frames the upper boundary of the wall at the ceiling. Linear profiles are such extended products supplied in strips of a certain length.
For a large entrance space, consistency of these details is important. A small carved insert may look good up close but not affect the overall view from the entrance door. A wide smooth band, by contrast, will be noticeable from afar even without a complex pattern.
Start with the movement plan and the main viewing points. Decor can help with orientation, but it does not replace clear signs and room designations.




Divide the lobby into zones before choosing products
On the plan, mark the entrance, reception desk, waiting areas, elevators, passages and ceiling sections above them. Then determine what role the decor plays in each zone.
| Zone | What the guest does here | Purpose of the decor |
|---|---|---|
| Entrance | Looks around and chooses a direction | Signal the transition into the hotel space |
| Reception desk | Approaches the staff member and checks in | Create a clear visual focal point |
| Waiting | Sits, talks, examines the details | Create a calm backdrop for furniture and light |
| elevator lobby | Looks for the right elevator and information | Organize the portals while keeping the signage readable |
| Ceiling | Perceives the overall volume of the space | Connect the zones or emphasize one of them |
| Transition to the corridors | Continues moving toward the room | Gradually reduce the intensity of the decor |
Such a map does not obligate you to decorate every area. Sometimes the entrance only needs a clear frame, and in the waiting area only a repeat of the main profile remains.
Section wall decor it is useful to review it with this map already: then it becomes clear for which place and which impression the composition is being chosen.
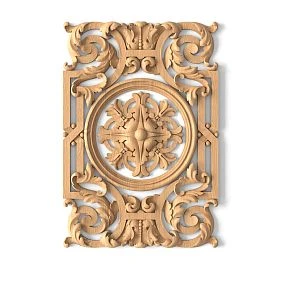
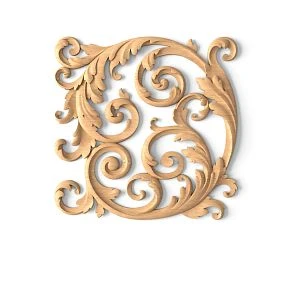
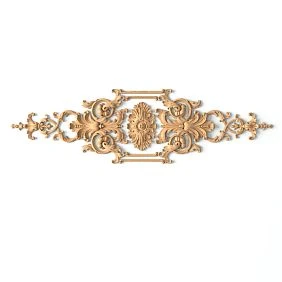
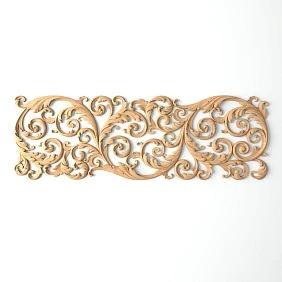
Our factory also produces:


Choose the main focal point and the elements subordinate to it
The dominant element is the main element that first draws the eye. In a lobby, this is often the wall behind the reception desk, but this role can also be played by a staircase, a large portal, or a ceiling composition.
The choice depends on the hotel's layout. If the desk is located to the side of the entrance, it needs to be made noticeable in the actual direction of movement. Strictly aligning all decorations along the center of the room may prove useless here.
Decor hierarchy is the order of visual significance of elements. It arises through size, pattern, color, light, and the number of details. To highlight the desk, it is not necessary to use the most complex ornament on it. Sometimes a larger wall field and free space around the hotel name are enough.
Check the other zones against this background. If the elevator portal becomes brighter than the reception area, decide whether this matches the guest's route. All noticeable elements should have an explainable role, rather than appearing only because they were liked in a catalog.
Get Consultation
Design the wall behind the desk together with the desk itself
The reception area is the guest check-in area with a registration desk. Its furniture, wall background, and lighting need to be considered simultaneously. A ready-made molding grid rarely accommodates a desk of arbitrary width well, especially if there is a service door nearby.
Let's imagine a wall 7200 mm long. On the left, a service opening occupies 900 mm, so the free section begins after it. The middle of the entire wall is at the 3600 mm mark, while the middle of the remaining section is at 4050 mm. A difference of 450 mm is large enough for accidental symmetry to become noticeable.
If a desk 3200 mm wide is placed along the axis of the free section, a wall field 4000 mm wide will leave 400 mm on each side of the desk. This is a conditional construction example, not recommended dimensions for any hotel. Passages and the employee workspace are checked separately.
For the logo, allocate a separate clear field. Take into account its actual width, lighting, and position above the furniture. The frame should support the lettering without pressing the letters against the relief.
Check the decor from three distances
A close-up of the profile shows the pattern, but says little about how it will work across the entire lobby. You need at least three viewing scenarios tied to your space.
| Where the person is looking from | What they primarily notice | What to check |
|---|---|---|
| Next to the wall | Surface, joints, fine relief | Neatness of joints and finishing |
| From the nearest furniture area | The frame as a whole and its neighbors | Field proportions, spacing, relationship with furniture |
| From the entrance or the opposite edge of the lobby | Overall silhouette, major lines, key accents | Recognizability of the main area and compositional order |
Universal distances in meters are not needed here: a small urban lobby and a spacious hotel hall have different viewing points.
Also check the seated visitor. From an armchair, the lower part of the wall may be hidden by a table or sofa, while the ceiling cornice, by contrast, becomes more noticeable. A successful composition should retain its meaning through these changes, not just from one chosen camera position.
Profile width and its projection work differently
Width determines how noticeable a band the molding creates on the surface. The projection from the base affects volume and shadow. At the same time, the character of the shadow also depends on the cross-section — the shape of the profile in cross-section — as well as on the direction of light.
For example, MLDPU-003 dimensions are specified as 35 × 12 × 2600 mm. At MLDPU-002 — 22 × 11 × 2600 mm. These are real polyurethane profiles that can be considered for different tasks. The first is wider, but the difference in projection is only one millimeter: expecting a proportional increase in shadow depth would be a mistake.
Compare candidates on a wall of the required size, with real doors, panels, and furniture. For one lobby, a 35 mm profile may become the main outline; for another, an additional line within a larger composition.
When choosing of polyurethane moldings do not assign a role to a product based only on the word "wide" in its name. That role is determined by its surroundings.
A high ceiling requires checking scale, not adding many decorations
In a room with great height, small frames can get lost. But adding new rows of ornament will not necessarily fix the situation. Sometimes larger fields and long, calm lines work more convincingly.
Scale is the relationship between the sizes of the decor and the room and neighboring objects. Density of decoration is the number of details and the distances between them. These are different characteristics: a large composition may consist of just a few profiles.
Check the wall first without individual decorations. Is its division legible? Do the fields correspond to the height of doors and furniture? Is there enough free space between the frames? If the main geometry is unconvincing, the overlays will only add pattern on top of an unresolved problem.
Pay especially close attention to the upper fields. They may fill a tall volume well, but after the cornice and equipment are placed, the free height will decrease. Dimensions must be checked against the final geometry of the room, not an early scheme.
A cornice can tie several zones together with one repeating element
A single cornice repeating above the reception desk, waiting area, and passage to the elevators helps the lobby be perceived as a unified space. Its line sets a common upper boundary even where the lower parts of the walls are arranged differently.
At the same time, continuity must be justified. Ceiling level changes, door portals, and niches require a thoughtful termination or transition. An open end on a random section damages the impression more than a deliberately designed break.
Polyurethane moldings and cornices are compared together: by scale, character of the relief, projection and finish. They may differ in complexity, but must maintain a clear relationship. The cornice does not have to repeat the ornament of every frame.
On the cornice product page, check the wall height and ceiling projection separately. A general photograph does not show these dimensions accurately enough. For junctions — places where different parts meet — dimensional diagrams are needed.
First coordinate the ceiling with the lighting and equipment
Ceiling stucco can be limited to a perimeter cornice, include an inner frame, or highlight a central area. The perimeter is the outer boundary of the room; the inner contour runs at an offset from the walls. It is not necessary to use all possible levels at once.
Before approving the design, overlay it on the ceiling equipment plan. It should show light fixtures, ventilation grilles, sensors, fire suppression devices and access hatches. Combining the drawings reveals conflicts before ordering products.
The decor must not cover equipment or obstruct access to it. The required distances and permissible placement are checked by specialist engineers for the specific system. Moving a device for the sake of beautiful symmetry requires the same approval as any other change to the engineering design.
Studying ceiling decor, evaluate not only the central design. The free areas around it must accommodate lighting, equipment and the necessary access passages for maintenance.
Match the ceiling medallion with the chandelier and the entire composition
A ceiling medallion is a decorative element or assembled composition, often positioned around a light fixture. It can support the main axis of the space, but the geometric center of the ceiling and the required position of the chandelier do not always coincide.
In the ceiling rose compare the outer dimensions, the density of the pattern and the free central field. For a complex shape, width and length are needed, not a conventional "diameter."
For example, CRPU-068 It measures 1325 × 1325 × 18 mm and is a prefabricated polyurethane composition. These data help estimate the space it occupies, but do not confirm its suitability for any high-ceilinged hall.
Before buying a ceiling rose, check it together with the chandelier, adjacent ceiling lines and equipment. The light fixture itself receives its designated mounting to the base: the decorative composition does not replace the load-bearing fastener.
In the waiting area, leave space for furniture and for people
Sofas, armchairs, side tables, floor lamps and textiles already create a rich picture. Wall decor here often works better as a calm foundation: it echoes the main line of the lobby, supports the scale of the furniture, but does not demand constant attention.
Position the frames relative to the actual backs of the sofas and armchairs. If the lower band is almost completely hidden by furniture, consider what function it serves. A partially visible overlay may be perceived as an accidental cropped fragment.
Check the wall from the seated guest's position. At close range, joints, paint transitions and fine relief are more noticeable. An overly dense ornament near the eyes can overload an area that looks empty in the overall view.
Calmer does not necessarily mean smaller. A large smooth frame can be less active than several small carved inserts. It is better to maintain the connection with the reception area through a repeated profile, color or height of the main lines.
The elevator portal should work together with the signage
A portal is the architectural framing of an opening. In an elevator hall it sits alongside call buttons, displays, floor indicators, technical doors and other mandatory elements. Their positions are taken into account before the decorative layout — the placement plan for the parts — is finalized.
The framing can be assembled from linear profiles or complemented with pilasters. A pilaster resembles a flat column projecting from the wall; the capital is its upper decorative part. Such a set is justified if its scale matches the opening and the overall character of the lobby.
For repeated elevator openings, it is advisable to develop a single standard assembly, that is, a uniform solution for joints and dimensions. At the same time, the actual geometry of each opening is verified: external similarity does not guarantee matching dimensions.
The decor should not hinder the reading of information or access for operation and maintenance. The call panel should not be placed in a gap left over by chance between the trims. First coordinate the functional elements, then build the framing around them.
Make the transition to the corridors gradual
The main entrance area can be rich, while the guest room corridor can be considerably calmer. The abrupt disappearance of all shared lines sometimes creates the feeling that a person has entered a different building.
To create a connection, it is enough to retain one recognizable element: the main molding, the character of the cornice, the height of the horizontal band, or the finish. At the same time, the number of frames and ornamental inserts can be reduced.
Observe exactly where the finish changes. An opening, a turn, or a change in ceiling height provides a clear boundary. An arbitrary termination of the profile in the middle of an open wall looks less convincing and complicates finishing the detail.
This way, the decor for hotel projects remains unified, even though the lobby and guest room corridors serve different purposes. The connection does not require repeating the main entrance trims on every floor. It is important to retain a few shared rules that are recognizable when moving from one area to another.
Use ornament where it supports the main concept
Ornamental trim differs from smooth trim by its repeating pattern. The repeat is the length of one full repetition of this pattern. It affects how the strip terminates at a corner, opening, or central element.
In the lobby ornamental trim can be concentrated at the reception desk, on the main portal, or in a single ceiling band. It is not necessary to continue a complex motif through all zones: repetition around the entire perimeter can weaken the significance of the original accent.
Individual pieces Decorative Inserts are usually selected after the main frame system. First the geometry of the field becomes clear, then the size and position of the ornament. Compatibility with the profile is checked against specific products.
The reverse order is also possible if a specific medallion or artistic composition serves as the starting idea. Then it is deliberately taken as the main element and the rest of the design is subordinated to it. This is a design decision, not a random purchase of a liked detail.
Assemble a small core set of products
A new profile on every wall complicates perception and work on site. You have to store more samples, distinguish similar items, and provide separate parts for repairs.
For the lobby, it is convenient to create a core set. The project code is a short label in the drawings, while the SKU is the designation of a specific product from the manufacturer. There must be an unambiguous link between them after the selection is approved.
| Project item | Possible role | Where it repeats |
|---|---|---|
| M-01, main moulding | Sets large frames and main lines | Reception desk, part of the waiting area walls |
| M-02, additional molding | Defines the inner contour | Individual frames and calm zones |
| K-01, cornice | Unites the upper boundary of the walls | Several connected lobby sections |
| P-01, ornamental trim | Creates an extended accent | Main wall or selected ceiling band |
| R-01, rosette | Frames the ceiling center | One coordinated zone |
| D-01, overlay | Highlights individual parts of the composition | Main wall or portal |
This is an example composition, not a mandatory set of six purchases. Some items can be excluded. To help with combinations, use Decor collections, but belonging to the same collection does not remove the need to check dimensions and joints.
View the 3D model along the entire guest route
A three-dimensional model, also called a 3D model, allows you to check the interior in volume. For a lobby, one beautiful image of the wall behind the reception desk is not enough. You need a sequence of views: the entrance, the approach to reception, the waiting area, the elevators, and the transition into the corridor.
Check whether the main accent remains noticeable along the way, whether it is blocked by furniture, and whether a stronger composition unexpectedly appears from the side. Check daytime and evening lighting, since the relief can change in visibility when different light fixtures are turned on.
Electronic drawings are used for precise joints. DWG is one of the formats for such files. In the STAVROS downloads section you can search for project materials by product, checking the selected item code and size version.
Drawings are used to check junctions with panels, doors, the reception desk, and ceiling niches. The product model should not be arbitrarily stretched to fit a suitable image: the ordered profile will retain its factory dimensions. If the scale is not suitable, the product or composition needs to be changed.
Check the main wall on a mock-up area
Before placing a large order, it is useful to assemble a full-size fragment of the most important composition. The mock-up area should show the main profile, the joint with the overlay, the intended finish and the lighting conditions.
Checking only a short white sample on a table is not enough if the project includes a painted wall with side lighting. The finish and the direction of light affect how visible the relief, joints and unevenness are.
Start with technically suitable candidates, then check the availability of the required items in the section samples and catalogs. The availability of a specific product and the terms of delivery are confirmed separately.
Record the result of the check: product codes, placement of parts, finish option, lighting and approval date. Walk past the area, look from the waiting area and from the entrance. This makes it clear which details work in the real space and which are noticeable only on close inspection.
Consider contact with luggage, cleaning and future renovation
In a lobby, walls sit alongside suitcases, carts, movable armchairs and cleaning equipment. A decorative overlay near the floor or in a narrow passage requires a different assessment than the same element high above the reception desk.
Mark the areas of likely contact. For these, consider a calmer relief, a protected location or a different structural solution. Do not assume that any polyurethane decor is impact-resistant just because of the material name: the shape, the thickness of thin parts and the installation conditions matter.
Clarify the material and finish requirements for the specific public space. The suitability of the selected products is verified against the project conditions and documents, and the appropriate cleaning method against the recommendations for the product and coating.
Repairability means the ability to restore a damaged area with a clear scope of work. Repeatable article numbers, a saved finish sample and a separate repair stock are useful for this. A whole plank can replace a long post, whereas several short offcuts are unsuitable for this.
Transfer the approved decision to the specification
A specification is a list of products required to implement the project. It includes the project code, manufacturer, article number, dimensions, material, finish, application area and quantity.
For linear products, the calculated length and the number of whole planks to order are stored separately. Rosettes, overlays and corners are counted per piece or in sets, in accordance with the supply of the specific product. Left and right versions are separated if they are provided for by the selected model.
Link each item to the elevation drawing — a flat drawing of the wall with dimensions — and to the ceiling plan. Then the quantity can be checked against specific areas, and if one zone changes, it is clear which lines need to be recalculated.
The presence of a product in the preliminary list does not yet mean it is approved. The final order includes approved versions with verified completeness. If a cornice remains unselected, it cannot be substituted in procurement with an approximately similar product without returning to the related assemblies.
Calculate identical linear lengths together across several zones
Cutting is the distribution of the required segments across whole product planks. When one article number is used at a post and in the waiting area, a combined calculation sometimes allows the remnants of long pieces to be used for short ones.
Conditional example: four segments of 2100 mm and eight of 400 mm are required. The total length of the parts is 11.6 m, and the product length of a plank is 2600 mm.
| Calculation method | Distribution of parts | Battens for a separate reserve |
|---|---|---|
| Zones are calculated independently | Four battens for long parts, two for eight short ones | 6 pieces, or 15.6 m |
| A common cutting plan is used | Four battens each hold a pair of 2100 + 400 mm; the remaining four short parts occupy the fifth | 5 pieces, or 13 m |
The common option is applicable if the remaining 100 mm on each long pair is sufficient for the specified cuts and trims. The scheme is confirmed before ordering. For ornament, pattern matching is additionally taken into account.
Only identical products with suitable finishes and a coordinated work schedule can be combined. If parts arrive at different stages and the leftovers are unavailable to the next crew, the calculated savings may not materialize. Installation and future repair reserves are assigned separately.
What to check before ordering decor for the lobby
Return to the first view from the entrance door. Is it clear where the reception desk is? Do the other zones retain a subordinate role? Are the main lines visible from a distance, and are the details neat up close?
Common mistakes are easily spotted during exactly this kind of check: every wall becomes an accent, furniture covers the lower frames, the ceiling pattern conflicts with the equipment, and the transition to the corridor breaks off without completion. Separately check whether different SKUs have appeared where a single repeatable profile would suffice.
To order mouldings for a lobby, prepare approved drawings, a list of products and a quantity calculation. You can select and buy polyurethane mouldings for specific wall tasks, buy polyurethane trim with the overall cutting plan in mind, and buy individual ornaments for the approved installation locations.
If you need to buy polyurethane mouldings for the entire space, use the STAVROS catalog as the basis for selection and confirm the composition, availability and delivery terms for the order. A successful result begins with a clear role for each zone and ends with a precise set of products that fulfil that role.