Article Contents:
- Three installation routes for wooden decor
- A dry fit should precede the final finish
- Record the position of the part before removing it
- Drilling, cutouts and trimming are determined before coating
- Carved overlays: when to paint them together with the facade
- When it is better to finish the overlay separately
- The adhesive is chosen for both surfaces at the time of installation
- Rosettes: axis and position relative to the frame first
- Moldings: cutting and dry frame first
- Molding decor is checked together with the entire frame
- Brackets: two contact planes and access to the fastener
- Capitals and pilasters are test-fitted as one system
- Handles and legs are included in the test fit even if installed later
- One finish result does not always mean one recipe
- A test coat must replicate the actual part
- Dry to the touch does not yet mean ready for assembly
- Marking and paired parts: keeping the set together through finishing
- How to create a process sheet for decor
- One control front before the series
- When final installation should be postponed
- Where to buy decor for furniture making

The front is already coated with enamel, the oak overlay is finished with oil, and the method of joining them has not yet been chosen. At this stage it turns out that the intended wood glue is designed for prepared wood. Now the fastening has to be changed or the contact areas reworked, risking damage to the finished surface.
Such a conflict is resolved before finishing. Decor for furniture making is first trial-fitted in its place, the fastening and access to it are determined, and the necessary drilling and trimming are performed. Then a route is chosen: attach the element before general painting, finish it separately and join it later, or install it during final furniture assembly.
The difference is significant. The overlay can receive its final fastening while still on a separate front, long before the hinges are installed. A handle of the same color usually remains removable and is returned to its place after finishing. Combining them under a single command "assemble everything after painting" is inconvenient: each item has its own point of readiness for the next operation.
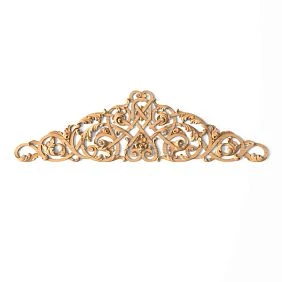

Three installation routes for wooden decor
The article number, size and location of the element must already be approved. Now it is necessary to determine what state both surfaces will be in at the moment of joining and whether access to the fasteners will remain after the cabinet body is assembled.
| Route | When it is considered | What to check in advance |
|---|---|---|
| Installation before general painting | The overlay and the front panel must receive a single covering finish | Compatibility of the joint with the finish, adhesive removal, access to the relief and the seam |
| Separate finishing and subsequent joining | A contrasting color, visible texture, or a clean boundary between elements is required | Condition of the contact areas, method of positioning and pressing |
| Installation at final assembly | The element is removable, interferes with assembly, or must be installed after the adjacent parts are in place | Tool access, readiness of the holes, ability to protect the finish |
The second and third routes differ in where the operation takes place. A finished socket can be secured to a removed front panel on the workbench. A long handle is sometimes easier to install after the door has been hung. The decision is determined by the furniture's construction and the chosen fastening, not by the name of the decorative part.
In the process sheet, the surface condition and the assembly stage are recorded separately. The wording "after finishing, on a separate front panel, before installation into the carcass" is far clearer than the instruction "at the end".




A dry fitting must precede the final finishing
A dry fitting is a check without final fixing. The entire set that affects the relative position of the parts is installed on the front: mouldings, overlays, rosettes and the handle. A single element lying on a free panel does not yet show how the composition will work.
Check the item codes and size versions, the left and right sides, the axes, the free margins. Then check the furniture in motion. A protruding relief may fit on a closed door and catch on the adjacent front when opening. You need the actual hinges, their adjustment and the gaps specified by the project.
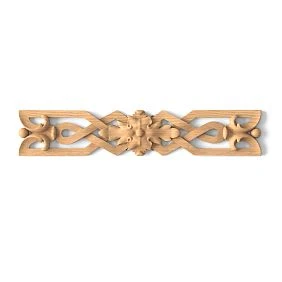
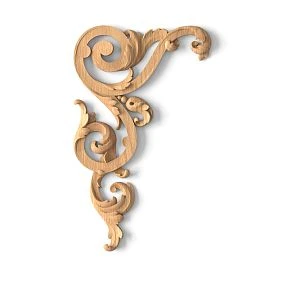
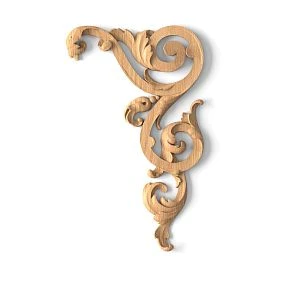
For example, in the product page carved overlay N-002 there are versions 140 × 77 × 12 and 200 × 110 × 17 mm. These are different dimensions of the same model. A template from the smaller part cannot be transferred to the marking of the larger one without checking.
For a nominal field of 300 × 180 mm, the 200 × 110 mm dimension, when centred, leaves 50 mm on each side in width and 35 mm in height. This is how placement is checked. The bonding area is not calculated from this rectangle: a carved overlay may have a different shape of the contour and the reverse side.
Our factory also produces:
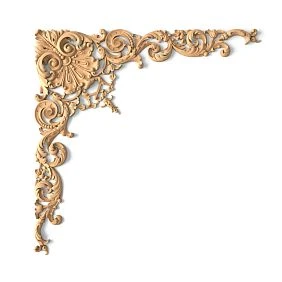
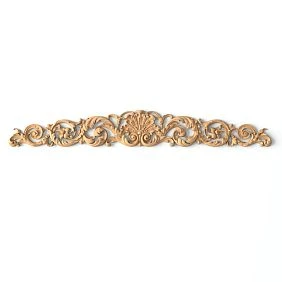
Keep the position of the part until it is removed
After a successful fitting, the decor is often removed and then they try to put it back using a photo. A photo preserves the general appearance but does not replace measurements: perspective does not allow small offsets to be reliably restored.
For re-positioning, choose permanent bases — for example, the bottom and left edges of the front. Record the distances from them to the axis or the mounting points. Mark the top of the part and the installation side. For a series, prepare a template with stops that rest on the same bases.
If the part is glued and may shift during pressing, the position must be held until setting with the specified device. The fixing method is checked on a test assembly. Adhesive tape, temporary fasteners and stops leave different marks; they must not be applied to the finished enamel without checking.
Save a photo of the overall layout together with the dimensions and the facade marking. This way the next person carrying out the work will see both the composition and the exact position of the elements.
Get Consultation
Drilling, recesses and trimming are determined before coating
Before priming, you need to know all mounting holes, recess depths and fastener locations. It is more convenient to complete the main mechanical preparation at this point: chips and tool marks can still be removed without local restoration of the finish layer.
Check more than just the drill diameter. For a blind hole, its depth and the remaining material thickness matter. For fastening from the reverse side, the position of hinges, connectors and internal parts matters. On a thin carved overlay, the thickness at the edge may differ from the maximum dimension stated in the product card.
Ready drawings and product models help to coordinate the assembly, but they do not mean that any decorative part may be drilled or milled at will. Modifications are checked against the actual cross-section and purpose of the element.
The technology may specify some operations after finishing. In that case, they are tested in advance on a sample with the same coating, and the method of protecting the surface is recorded. This is a planned operation, not an attempt to fit random fasteners to already painted furniture.
Carved overlays: when to paint together with the facade
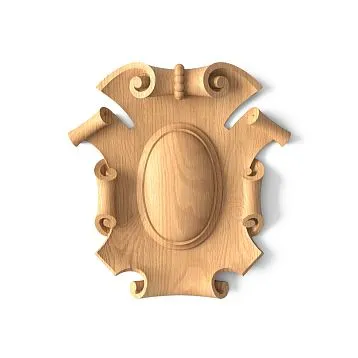
Painting together is considered when Carved decorative inserts for furniture they should be perceived as part of the facade. A shared enamel binds the plane and the relief in one color, especially if no contrasting border around the perimeter is intended.
The working sequence is as follows: dry fitting, preparation of contact surfaces, final assembly, holding of the joint, preparation of the seam, priming and painting. The specific holding times and seam treatment are set by the selected materials.
Before gluing, check access to the recesses. If after installation a brush, spray, or sanding tool cannot reach an area, this must be accounted for in the process. A thick layer of primer does not replace preparation: it can fill fine relief and make the edges less crisp.
A single color also does not guarantee that the joint will disappear forever. The overlay remains a separate wooden part, and the behavior of the joint depends on the substrate, geometry, and operating conditions. If the project requires a visually continuous surface, it is checked on a control facade, including the abutment area after the full production cycle.
When it is better to finish the overlay separately
A separate route is convenient if the oak texture should stand out against a painted background, a different tint is used, or a crisp color transition is needed along the edge. It also provides access to the side surfaces that will be difficult to reach after installation.
Before handing over for finishing, determine which areas must remain suitable for bonding. If the selected adhesive requires clean wood, it is not enough to keep only the back side of the overlay unpainted. The mating area of the facade must also meet the requirements of this adhesive.
The boundaries of such areas are set according to the actual contact zone. They must remain hidden after installation and provide the specified bonding area. It is not acceptable to mask approximately the entire overall rectangular footprint of the carved element: the unpainted field may be visible between the protrusions of the ornament.
It is useful to draw up a separate surface map. Below is a conditional route for an overlay with a clear finish on a painted wooden facade, if the joint involves bonding on clean wood.
| Section | Condition before final installation |
|---|---|
| The face side and visible side surfaces of the overlay | A finished clear coating with a curing time that allows installation |
| Designated contact zones on the reverse side | Prepared wood without coating or contamination |
| Mating contact zones of the front | Prepared wood matching the jointing scheme |
| Exposed front surface around the overlay | Finished enamel with no visible uncoated areas |
For a different substrate or adhesive, this scheme is reviewed. The zone separation does not replace verification of the bonding area. If the contact area turns out to be too small or cannot be reliably concealed, the joint or the finishing route must be changed before the batch is launched.
After separate finishing, the overlay is returned to the verified template. Before applying adhesive, its position and fit are checked once more. On a finished surface, correcting a misalignment is more difficult: adhesive marks, scratches, or a damaged coating boundary may remain.
The adhesive is selected for both surfaces at the time of installation
The entry "wood adhesive" is too general for a process sheet. The joint may involve untreated wood, primer, enamel, lacquer, oil, veneer, or a panel substrate. It is necessary to understand which layer the adhesive actually contacts on each side.
В the recommendations of the manufacturer of Titebond wood glues It is stated that most of its formulations are intended for untreated wood. When bonding painted surfaces, the result is limited, among other things, by the adhesion of the coating to the wood. This explains why the successful bonding of two clean wooden samples does not confirm the suitability of the same formulation for a finished facade.
In the bonding record, note the substrate, coating, preparation, adhesive, clamping method and holding time. For an unfamiliar combination, make a test on materials that replicate the future joint. Check not only that the part is held, but also the absence of stains, softening of the coating and a noticeable adhesive trace along the edge.
The method for removing squeezed-out adhesive is also tested in advance. Under a clear finish, adhesive residue can show up as a stain; on finished enamel, cleaning may leave a mark. You cannot count on any adhesive being wiped away without a trace after fixing. The working sequence includes a cleaning method suitable for the specific materials and the point at which it is carried out.
Required Mounting and finishing materials are selected after determining this pair of surfaces. There is no universal "clamp for a few minutes" time for all formulations. The moment of releasing the clamp and the readiness of the joint for further processing may differ.
Rosettes: first the axis and position relative to the frame
Wooden sockets it is convenient to position them by the intersection of the axes. But the center of the facade and the center of the field inside the moldings do not always coincide: the frame may have different offsets at the top and bottom.
On the dry layout, mark what the rosette is centered relative to. If it completes a vertical pilaster, the axis of this element will be the base. If it occupies the field inside the frame, first check the position of the frame itself.
For an ornament with a directional pattern, mark the top. A round outer contour does not mean that the part can be rotated arbitrarily. After priming, a faint pencil mark will disappear, so the orientation is preserved in the template or accompanying card.
The moment of final fixing is determined by the coating and the fastening. For installation after painting, the repeated position must be restored without applying noticeable lines to the finished facade.
Moldings: cutting and dry frame first
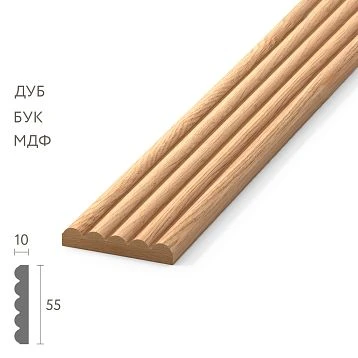
for wooden moldings for furniture the process begins with checking the profile, cutting, and assembling without final fastening. If the frame is rectangular and joined with a miter, the cutting angle is coordinated with the geometry of the joint; the usual 45° applies to a 90° junction.
Lay out all sides on the facade, check the outer dimensions, diagonals, corner fit, and distances to the edges. Comparing diagonals is useful but does not replace checking the sides and the joints themselves. The frame must match the specified shape as a whole.
After the trial fit, mark the top, bottom, left, and right strips, as well as their orientation. Two pieces of the same length may differ in the position of the pattern or in the fitting of a specific corner.
If the moldings are painted together with the facade, the final joining is done before the relevant finishing operations. With separate finishing, the prepared contact areas are preserved and the effect of the coating on the joints is taken into account. Adjusting an already painted miter without the prescribed technique means risking a visible strip of bare wood.
Molding decor is checked together with the entire frame
A corner piece or connecting overlay may cover the joint, abut the end, or occupy a designated gap. These methods produce different strip lengths. Therefore Decor for Molding it must be part of the dry assembly before the final cutting of the set.
First determine which surfaces are being joined, then check the relief height and transitions. A decorative corner piece must not serve as a way to hide unchecked frame geometry.
If an element protrudes above the molding, plan the clamping in advance. Pressure on the highest leaf or scroll can damage the carving. The fixture must hold the piece in the required position and transmit force through suitable areas without leaving marks on the finish.
Brackets: two contact planes and access to the fastening
for wooden brackets check the vertical and horizontal surfaces, the angle between them, and the orientation and position of the pair. Test-fitting to one plane does not reveal a gap with the second.
If the bracket is located under a shelf or cornice, assemble this unit before finishing. Confirm whether the fasteners can be reached after the upper part is installed. Sometimes the bracket must be attached to a separate side panel before assembling the carcass, even if both parts are already painted.
A decorative purpose does not confirm load-bearing capacity. If the element is to support a shelf, that is a separate structural and fastening task. The general painting route does not replace its verification.
Capitals and pilasters are test-fitted as one system
wooden capitals are checked together with the corresponding pilasters and columns, the lower termination and the cornice. A capital that fits in width alone does not yet confirm the overall height and the position of the transitions.
On the assembly mock-up, mark a single axis for the entire vertical. Check whether the protruding relief displaces the adjacent moulding and whether access to the hidden fastening of the upper unit remains.
For separate finishing, keep track of whether elements belong to the left or right side of the furniture. If the parts have already been fitted to a specific location, their identical name does not make them interchangeable. They must return to final assembly as a complete set with their markings preserved.
Handles and legs are included in the test fit, even if they are installed later
Wooden furniture handles approved before drilling the front. The number of fasteners, center-to-center distance, orientation and finger clearance next to the pull are checked. The handle's overall dimensions do not always match the distance between the holes.
After the trial installation, the removable handle can be sent for a separate finish. The agreed holes remain on the front, and its article number and fasteners are recorded in the spec sheet. The screw length is selected to match the front thickness and the actual depth of the mating part so that it does not bottom out before the handle is secured.
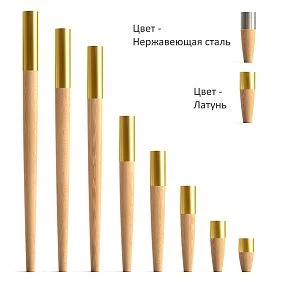
Wooden furniture legs are checked together with the mounting assembly and the lower part of the cabinet. They determine the final height and clearance, while the position of the lower decorative element determines access to the fastener. If the supports interfere with finishing or transportation, they are removed after fitting and installed at the designated assembly stage.
One finish result does not always mean one recipe
If the overlays, handles, legs and moldings are to have the same color, combine them under a single finish designation. For example: "Finish 01 — approved white enamel, specified gloss level, front sample No. 1".
But the same designation describes the result. The preparation of beech, oak and other solid wood in the furniture composition may differ. Copying one sanding and priming procedure onto all substrates does not guarantee a matching surface.
In the description quality of wooden products STAVROS separately specifies the preparation of the blank for enamel and for tinting. Under a transparent finish, wood selection matters: the same article number does not eliminate natural differences in grain and shade.
Keep a separate working sequence for each material, but compare the result against a single approved sample. It is useful to evaluate parts that will stand next to each other side by side and under the same lighting.
A test coat must replicate the actual part
A flat sample shows the direction of the color. A carved profile additionally reveals how the finish settles into the recesses, whether the pattern is lost after priming, and how much the end-grain areas differ.
For a new combination, prepare a sample of the selected decor together with a fragment of the facade. If installation before painting is planned, the test is also performed in assembled form. Otherwise, the most sensitive area — the joint between the overlay and the base — will remain untested.
Product samples help evaluate the material and the available preparation options, but do not always replace the selected full-size element. To check a specific relief and mounting plane, a corresponding sample is needed.
They approve the color, gloss, preservation of the relief and the appearance of the joint. At the same time, the compositions, their sequence and the surface preparation are recorded. Without this record, a successful paint test is difficult to reproduce on a batch.
A surface that is dry to the touch does not yet mean it is ready for assembly
After finishing, it is necessary to determine when the part may be handled, pressed, glued, installed and packed. These actions may require different holding times.
The manufacturer Rubio Monocoat in its explanation on the drying and curing of oil coatings distinguishes between the possibility of careful handling of the surface and the complete curing of the composition. The specific times depend on the product and the conditions. The time for one oil cannot be transferred to any enamel or lacquer.
In the production sheet, specify the condition for release to installation according to the documentation of the selected coating. Check it together with the adhesive: the surface's readiness for careful transfer does not confirm readiness for prolonged pressing or contact with the installation compound.
For painted relief, the support and protection points are important. Even a suitable pad must not leave a mark or stick. It is tested on a sample with the same coating holding time.
Marking and paired parts: keeping the set together through finishing
Before priming, mark which product and position each part belongs to. For paired overlays, keep the left and right versions separately. Latin letters in the factory part number must be copied exactly, without substituting similar-looking characters.
Marking on the face surface will disappear under the coating or show up where it is not wanted. Use a card, a labeled cell, or a designated hidden area that is not involved in gluing. When handing off to the next operation, the marking must travel with the part.
The left and right overlays are test-fitted, approved, and compared after finishing at the same time. For five fronts with one pair on each, you need five left and five right parts, not an arbitrary ten overlays. After separate drying, they must return to their pairs.
If an element is already glued to the front, it is counted as part of that assembly in further kitting. The same overlay does not need to be issued again for final assembly.
How to create a decorative process sheet
The sheet includes the operations and the conditions for moving between them. A list of purchased parts alone is not enough: it does not answer which areas to protect from primer or when to make the joint.
Below is a conditional example for a project. Actual part numbers, materials, and exposure times are entered after the assemblies have been checked.
| Position | Test fitting and preparation | Finish | Final installation | Condition for transfer onward |
|---|---|---|---|---|
| Overlay 01 | Check of axis, fit and pressure | Together with the front | Before priming | Joint held, excess glue removed |
| Socket 01 | Position template, preparation of contact zones | Separate tinting and coating | After finishing on the removed front | Coating and surfaces are ready for the selected fastening method |
| Frame 01 | Cutting, dry assembly, marking of four slats | Together with the front | After fitting, before finishing | Dimensions and joints checked |
| Handle 01 | Model verification and drilling of the front | Separately according to the approved sample | At final assembly | The coating allows installation, the fasteners match the assembly |
Attach the marking drawing, the sample designation, and information about the adhesive and coating to the table. If the route has changed, update the card version for the entire batch. A verbal instruction to one worker must not leave the old sequence with the next one.
One control front before the series
The control front must go through the entire route: fitting, preparation, the chosen installation moment, finishing, holding, handle installation and opening check. Stopping after a beautiful paint job leaves the fastening and final gaps unchecked.
Compare the result with the drawing and the sample. Inspect the relief under side light, the edges of the overlays, the corners of the frame, the pressure marks and access to the fasteners. Check the movement of the front together with adjacent parts, not only separately on the workbench.
If the error is related to marking or the route, correct the template and the map, then repeat the corresponding inspection section. A single front adjusted by hand does not confirm the readiness of the series: the rest will be manufactured according to the remaining template.
For a small batch, such a full pass allows a recurring problem to be detected before the same error appears on all products.
When final installation should be postponed
Do not fix the decor permanently if the method of connection with the future coating has not been chosen, access to hidden fasteners has not been checked, or an agreed trimming of an adjacent part remains. These issues affect the order of work itself.
If the painted front is already finished, do not automatically start by removing the coating under the overlay. First determine whether such preparation is permissible, whether a clean edge can be preserved, and whether another proven fastening scheme is provided. Accidental mechanical sanding can create a visible defect before a workable assembly is found.
A decorative overlay should also not be used to mask a structural skew. It may cover the joint line, but it will not correct the incorrect position of the frame, shelf or front.
Where to buy decor for furniture manufacturing
Select decor for furniture manufacturing in the STAVROS catalog it is convenient to search by part purpose and the selected production route. For ornamental overlays, rosettes and other elements, use the section wooden carved decoration.
Before purchasing wooden decor for furniture in bulk, record the exact item code, size, material, preparation for finishing and quantity per product. Separately count the parts for samples and the control facade: a suitable approved sample may go into the series, while one that has been tested or kept as a reference may require an additional line item.
In the request to the supplier, state whether the element will be painted together with the facade or separately. Clarify the condition of the mounting side, the available versions and any missing dimensions. For repeat orders, review conditions for manufacturers.
Hand over the set to the workshop together with the operations card. It must show what to test-fit, what to process before coating, which surfaces to keep for joining and at what point to finally install each part.