Article Contents:
- Divide the door into zones with different purposes
- Identify the main decorative layer
- Three levels of expressiveness
- What to coordinate before cutting
- Example calculation for a smooth panel
- How to align the profile and carved joints
- Pilasters connect the bottom and top of the frame
- What to check in motion
- Combined finishing
- Separate finishing
- Single test paint
- Compare the cost of the complete solution
- Can the two sides of a door be finished differently
- How to coordinate door decor with wall panels
- What to do with a portal right next to the corner of the room
- How to replace a damaged socket or cover plate
- How to plan for subsequent handle replacement
- Is it necessary to design all doors in a room the same way
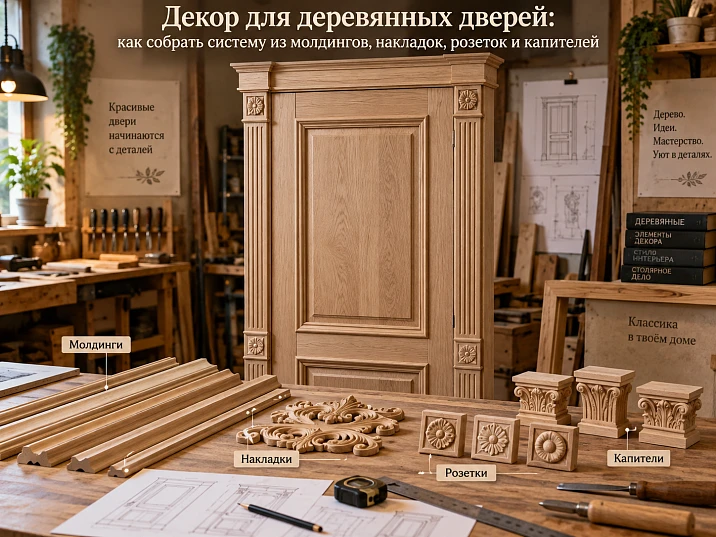
A wide carved overlay may look good on an empty door leaf and turn out to be too large after moldings are installed. The frame will reduce the free field, the handle will take up space on the side, and the upper ornament will begin to compete with the portal cornice. Therefore, a decor set should be selected based on the overall door drawing: first determine the boundaries and main lines, then add accents and check their compatibility.
For a smooth interior door, a molding frame often becomes the basis. On a paneled door, this work is already performed by the existing division of the leaf. Pilasters and capitals belong to the next scale — the design of the opening. When these levels are coordinated, even a small set of ready-made parts allows you to achieve a complete composition.
Decor for wooden doors does not necessarily have to include all the listed elements. Sometimes two frames are enough. In another project, a pronounced upper accent is needed, while it is better to leave calm lines on the leaf. The decision depends on the door construction, the proportions of the opening, the hardware, and the finish — and it is desirable to determine all four conditions before purchasing the products.
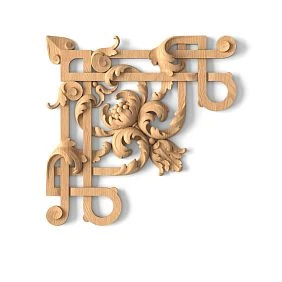
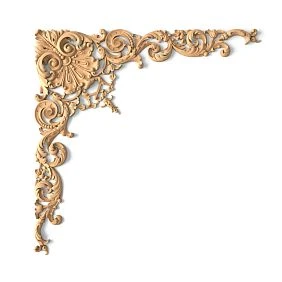
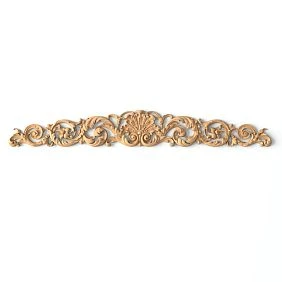
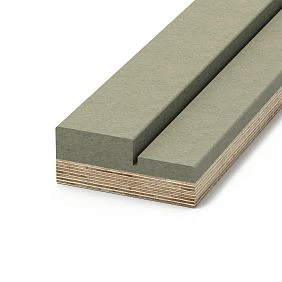
Divide the door into zones with different tasks
Start by measuring the leaf and the opening. On one sheet, show the door as a whole; on another, show its front surface with the handle, lock plate, panels, and glazing, if any. The design of the fixed frame and the decor of the moving leaf should already be distinguishable in the sketch.
A zone map helps you understand why each part is needed. If the purpose of an element is difficult to explain, it is too early to include it in the order.
| Zone | Design task | Suitable elements |
|---|---|---|
| Central field | Highlight the main section of the panel | Central overlay or standalone rosette |
| top field | Emphasize the height and complete the design of the door leaf | Horizontal overlay, paired ornament |
| bottom field | Maintain the overall rhythm | Simpler frame or restrained repetition of the motif |
| Field boundaries | Create division of the surface | Molding, decorative profile |
| Frame corners | Mark a turn or junction of lines | Corner decoration, matching rosette |
| Side parts of the portal | Build verticals around the opening | Pilasters with coordinated terminations |
| Top of the portal | Connect the verticals and finish the framing | Pilaster capitals, frieze, cornice |
This is a list of possible functions, not a mandatory set composition. For example, a small rosette needs only one place in the center of the upper field. Repeating it in the other four corners just to fill empty areas is not necessary.
Distinguish between the central field and the geometric center of the entire door. On a leaf with two unequal panels, the main accent may be located in the upper, taller part. Its position is subordinated to this field, not to half of the total height of the leaf.
Separately mark the areas that must remain free: the grip zone, hardware fastenings, gaps between moving parts, removable glazing beads. On an old door, add information about the substrate to the map. Externally, a wooden surface may be solid, veneered, or painted; the method of attaching the decoration for them cannot be chosen based on external similarity alone.




Identify the main decorative layer
The composition should have a clear order of perception. First, the overall architecture of the door is visible, then the main accent, followed by smaller details. If a large pattern on the panel, carved corners, relief pilasters, and the top cornice are all equally active, the eye constantly jumps between them.
For the first sketch, choose one base:
- molding frames without separate carving;
- frames and one main overlay;
- frames with small rosettes;
- overlays inside existing panels;
- a portal with pilasters and capitals with a calmer panel.
The first option is suitable when expressiveness is built on proportions. The second allows you to highlight a specific field. The third sets a rhythm with repeating details. The fourth preserves the original constructive logic of the door. The fifth shifts the main attention to the opening and the wall around it.
Our factory also produces:
Three levels of expressiveness
The architectural level is formed by frames, verticals, and horizontals. The main accent is set by character—this can be a carved overlay on the door leaf or an elaborate portal top. Supporting decor ties these solutions together: small rosettes, corner inserts, repetition of individual curves.
You can reduce activity not only through size. A smooth profile is calmer than a dense ornament, shallow relief stands out less under side light, and a single color unifies dissimilar surfaces. Therefore, a large simple frame can remain a background for a relatively small carved detail.
Check the composition from the distance at which the door is usually seen: from the hallway, from the room entrance, from the staircase. If from that point a random corner is noticed first and the central motif is lost, revise the sizes or depth of the supporting details. Evaluating only from close up at the workbench often overestimates fine carving.
Get Consultation
On a smooth panel, first create the frame architecture
Decorating doors with moldings begins with choosing the fields. Decide whether you need one tall frame, two unequal rectangles, or a more subdivided layout. Then align the horizontal lines with the handle position and neighboring doors if they are visible at the same time.
Molding creates a panel-like pattern but does not change the construction of the door leaf. An applied frame does not turn a smooth door into a structurally paneled one. This distinction is especially important when choosing fastening: you have to rely on the actual material of the face layer and the substrate beneath it.
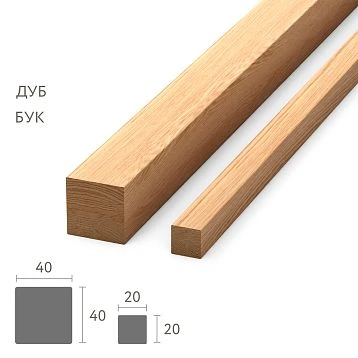
To compare profiles, use the section wooden moldings for the door. Look at the width of the strip, the projection from the plane, and the profile pattern at the same time. A narrow line with a pronounced bead and a wide shallow line of the same color can be perceived completely differently.
What to coordinate before cutting
A frame has an outer contour, an inner contour, and a joint line. The drawing must make clear which of them the dimensions refer to. The note “frame 600 × 1000 mm” without this clarification allows for different manufacturing options.
Also check how the profile ends at the corners. If special corner pieces are provided, the dimensions of the straight sections are calculated according to their installation diagram. You cannot first cut a closed frame and then, without recalculation, replace the corners with large carved inserts.
Decorating interior doors with moldings is convenient for a series: one principle of division can be repeated on several panels. However, a door of a different width requires separate verification. Mechanically preserving all the offsets can leave an inner field that is too narrow, especially if an overlay is provided inside it.
For purchasing the trim, you need the lengths of the parts with an indication of the measurement method, the cutting angles, and the original length of the strips. The total perimeter is useful for a preliminary estimate of consumption, but it does not replace the cutting plan: the same total meterage does not always yield the required long sections.
On a paneled door, preserve the existing geometry
A frame door already has stiles, rails, profiles, and panels. An additional frame is justified only when it supports this division. Several closely spaced contours can turn a small area into a set of tight strips, inside which there is no room left for carving.
Measure the flat part of the panel separately from its bevels and framing. It is on this area that the overlay is to be placed, taking into account the shape of its reverse side. The visible width of the panel and the width of the area suitable for installation can differ noticeably.
Next, look at the relationship between the upper and lower fields. A tall upper panel may suit a vertical composition, while the lower one may only suit a repetition of the profile without an independent ornament. The same decor in both fields is appropriate when their geometry truly supports such repetition.
Do not connect with a rigid overlay parts that the construction provides for the possibility of mutual movement. In particular, a movable wooden panel must not be accidentally tied to the frame with a common glued-on part. When humidity changes, the wood changes dimensions, and the decorative assembly must not interfere with the intended operation of the joint.
For a door with glass, leave access to the serviceable fasteners. If the overlay simultaneously covers the glazing bead and the fixed part of the leaf, replacing the glass may require dismantling the decor. Such an assembly must be provided for in advance, or the ornament must be moved to an independent field.
A detailed selection of an individual part is discussed in the article about overlays for wooden doors for a smooth panel, a raised panel, and a frame. When designing the entire door, the task is broader: each selected overlay must maintain the overall order of lines and accents.
Choose an overlay based on its role in the composition
A carved overlay allows you to place an accent where a single profile line is not enough. Start with the direction that needs to be emphasized: the vertical of a tall panel, the horizontal of the upper part, or the movement of the ornament toward the central axis.
| Task | Which type to consider | When the solution should be changed |
|---|---|---|
| Highlight the center of a separate panel | Central symmetrical overlay | The panel is too small for free gaps around the carving |
| Emphasize a tall narrow section | Vertical overlay | Its lower part falls into the handle's working area |
| Complete the upper part of the panel | Horizontal overlay | A stronger portal ornament is already nearby |
| Form a paired motif | Left and right parts of a single composition | There is not enough space for the pair after installing the frame |
| Develop the corner pattern | Corner overlay | The contour or back side is not aligned with the molding |
In the catalog, it is convenient to compare separately Vertical wooden overlays и Horizontal wooden overlays. Such a starting point narrows the choice, but the final decision is still made based on the door field and the product drawing.
The corner motif requires special attention. It can visually continue the lines of the frame, adjoin it, or be placed inside with a separate offset. These are different ways of constructing the junction. Corner wooden trim they cannot be considered interchangeable simply because they all occupy a corner.
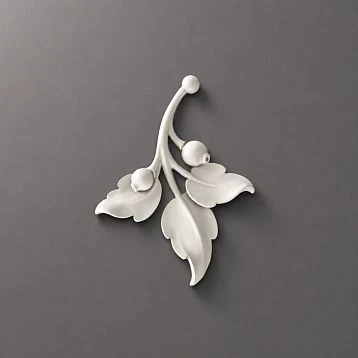
Before deciding to buy decorative door overlays, determine their quantity on one side of the panel. A central composition, two upper elements, and four corner elements create different loads on the door's pattern. Start with the minimal composition that solves the task, and evaluate each additional element on the overall layout.
Use rosettes as standalone or connecting accents
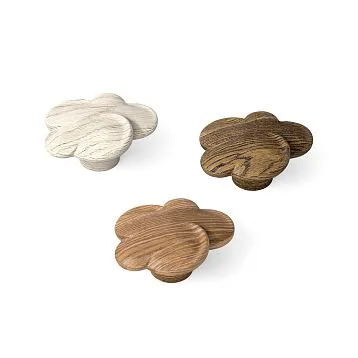
Carved wooden rosettes are suitable for a compact accent in the center of the field, repetition in the corners, or decorating the junction where lines intersect. However, a decorative wooden rosette and a metal door handle rosette serve different functions. They should be visually coordinated, but not substitute for each other.
In a small field, a single rosette may prove more convincing than an elongated overlay. It does not require a long free area and allows a noticeable portion of the background to be preserved. A round or square motif is evaluated by its actual contour: equal width does not yet mean equal perception within a narrow frame.
To place it at the intersection of moldings, first choose the connection device. Straight profiles may abut a separate block, while a specially designed piece can cover a coordinated junction. An ordinary rosette with a flat back cannot be automatically glued over protruding profiles: there may be no stable mounting plane there.
When selecting wooden door rosettes, compare their thickness with the molding and the main accent. A strongly protruding small element can attract more attention than a large flat overlay, especially under side lighting.
Repeating rosettes creates rhythm, so not only the SKU should be the same. Coordinate the size, position relative to the frame, direction of the pattern if it is pronounced, and finish. If one piece is used as a central accent and the others support the corners, their sizes may differ — this should be consciously shown in the design.
Align the molding and the overlay using the free field
The selection sequence is simple: the outer boundaries of the frame, the molding profile, the remaining inner field, then the carved element. The reverse order forces you to adjust the door's architecture to a part you have already purchased.
Calculation example for a smooth slab
Let's take a hypothetical project: door width 800 mm, outer frame width 600 mm. With central placement, 100 mm remains from each edge of the slab to the outer boundary of the frame. For the example, let's assume that the molding occupies a 30 mm wide strip in the door plane and is located entirely within the outer contour.
Then the free width between the inner edges of the moldings will be:
600 − 2 × 30 = 540 mm.
If the project provides for leaving at least 40 mm of free background around the overlay, its maximum width in this scheme will be:
540 − 2 × 40 = 460 mm.
Here 40 mm is a compositional distance taken for the example, not a universal standard. It does not replace a separate check of the handle, base, and relief depth.
Now let's replace the profile with a wider one: 45 mm instead of 30 mm, keeping the outer frame. The inner field will decrease to 510 mm. Around an overlay 460 mm wide, 25 mm will remain, although the original drawing had 40 mm. To preserve the specified gaps, an overlay no wider than 430 mm will be required, or a change to the frame.
This calculation applies to a rectangular field. If the corner overlays extend inward into the frame, the available contour becomes more complex. A large central ornament may fit within the width at the middle while simultaneously colliding with the corner decor above. Therefore, after the arithmetic, a full-scale contour layout is needed.
How to coordinate the profile and carved joints
When an ornament must continue the molding without a visual break, compare the junction point, the profile width, the relief height, and its termination line. The collection's general name is not sufficient for such a check.
In the section decoration for moldings products are grouped, among other things, by the corresponding profile models. This helps find the original combination. The specific joint is still coordinated based on the selected finishes and drawings, especially if the parts differ in size or one of them will be modified in the workshop.
If no suitable junction exists, you can leave a free background between the overlay and the frame. Clearly separated elements often look neater than an attempt to join two mismatched reliefs.
Proceed to the portal only after evaluating the entire opening
The portal includes a fixed surround around the door. Its scale is determined by the width of the opening, the wall sections, the height of the room, and adjacent interior details. Here, the dimensions of the door leaf alone are no longer sufficient: the pilasters need space on the sides, and the upper termination needs space above the frame.
First, draw the outer contour of the portal together with the baseboard and adjoining walls. Clarify where the projecting cornice will extend, how the side ends will be finished, and whether one vertical will end up noticeably cramped by a nearby corner of the room. A symmetrical design on a separate sketch may not fit into the actual wall section.
If there is little free space, reducing all details in the same proportion does not always help. A flat surround with a small upper accent may be a better solution. A complex portal is justified when its parts have enough space and read as a single architecture.
Pilasters connect the lower and upper parts of the surround
Wooden pilasters they define the side verticals. In the classical scheme, they are aligned with the lower termination, the capitals, and the upper horizontal element. The position of the base relative to the floor and skirting is best determined before choosing the length of the pilaster shaft.
The total height of such an assembly is not always equal to the simple sum of the heights of the purchased parts: there may be overlaps or seating areas in the joints. The assembly order and height calculation must follow the drawing for the specific combination.
For example, pilasters PLM-015 the product page lists dimensions A × B × C × E × F: 2200 × 70 × 16 × 120 × 280 mm; beech and oak are available. Additional dimensions must not be discarded, leaving only the length in the request. Their purpose and permissible fitting areas are determined from the drawing so as not to disrupt the placement of the ornament.
A pilaster should not look like a random long overlay next to a door. Its top is tied to the termination of the portal, its bottom to the accepted base line, and its lateral position to the opening. Decorative parts are not assigned a load-bearing function without a separate structural solution.
Select a capital for the vertical and the upper termination
The query “capital above the door” can mean different things: the termination of a side pilaster, a large central accent, or the entire upper surround. Before purchasing, it is useful to clarify which specific assembly is required. A capital crowns a vertical element; the extended horizontal part of the portal is usually formed separately.
In a scheme with two pilasters, capitals help transition from the side verticals to the frieze or cornice. Here, the width of the lower part, the size of the side projection, the depth, and the overall height are checked. An overly wide upper element may extend beyond the available wall pier, even if the pilaster itself fits without difficulty.
In the wooden capitals dimensions A and B are designated as height and width. For overlays in the catalog, their purpose is different: A is width, B is height. Therefore, in working documentation, the dimension names and a reference to the product drawing are needed next to the letters.
У capitals KL-004.02 for pilasters PLM Five parameters are specified: A, B, C, F, and G. One of the versions has values of 98 × 118 × 40 × 21 × 78 mm. The name helps identify the application family, but it does not mean that any size of this capital fits any PLM pilaster. Specific mating sections need to be matched.
If you need to buy a capital for interior doors, attach a front and side view of the portal to your request. From a single image of the ornament, neither the cornice projection nor the fit of the parts can be verified. At the same time, an expressive capital often makes it possible to simplify the door leaf decor: the main upper accent is already present in the frame.
Leave the handle and lock a full working area
The handle is a noticeable part of the composition even on a restrained door. Its shape, color, and position already create a side accent. If a rich ornament is placed next to it, the pattern may become cramped, and using the door will be inconvenient.
On the drawing, mark not only the handle axis but the entire set: lever, rosette or plate, keyhole, and turn knob. Then check the space for the hand. Free distance between the metal part and the overlay does not yet guarantee a comfortable grip: fingers need space behind and around the lever.
Check the handle in motion — press it to the working position, turn the knob, insert the key. For such a trial fit, actual hardware or an accurate three-dimensional sample is useful. Relief located close to the lever can interfere after the press has already begun, even though with the door closed a gap is visible between the parts.
Access to the fastening screws is also left free. The decorative overlay should not turn routine lock maintenance into disassembling a carved composition. If the ornament comes right up to the hardware, clarify the handle removal procedure before final installation.
Visually, the connection can be quite subtle: similar rosette geometry, repetition of a single arc, coordinated color. It is not necessary to literally duplicate the pattern of the metal handle in the carving. The more active the hardware itself, the more useful a calm background directly around it.
Check the relief depth and the opening trajectory
Width and height show whether the decor fits on the front surface. Depth answers a different question: what will happen when the door starts to move. On a frontal sketch, it is impossible to see a collision between the carving and the wall or a fixed frame.
In product cards, parameter C may denote thickness or depth. But the protrusion of the finished assembly is determined by the entire placement of the part: the base surface, any possible backing, and the chosen mounting method. If the overlay is not installed directly on the plane of the door leaf, its own thickness does not equal the total protrusion.
What to check during movement
Open the door to the full angle required in use. Assess the parts of the ornament closest to obstacles, especially near the hinges and the outer corners of the frame. On a double-leaf unit, check each leaf and their interaction in the intended sequence.
Compare the decor with the wall, casing, adjacent leaf, handle, and nearby furniture. An opening restrictor can be considered only as part of an agreed solution: it must not unexpectedly reduce the required passage or make normal use of the room difficult.
If the protrusion gets in the way, reconsider the depth, position, or composition of the decor. Sometimes a flatter rosette is enough; in another case, overlays must be omitted in a specific area. Reducing the width of the part by itself does not eliminate the problem of its protrusion.
The total mass of the added elements is taken into account when checking the leaf, hinges, and fastenings. Ready-made decorative parts do not replace such a check. For an already installed door with sagging, first eliminate the cause of the fault: a new design will not fix the operation of the suspension.
Choose a different composition logic for one and two leaves
A single-leaf door usually has one main vertical axis. Frames and central accents are built from it, taking into account the actual geometry of the panels. The side position of the handle does not necessarily need to be balanced by additional carving on the opposite side: functional asymmetry is not a mistake in itself.
A double-leaf door has two possible principles. Each of them must be considered together with the position of the leaves when opening.
| Principle | How the design is built | What to Check |
|---|---|---|
| Each leaf is independent | Each has its own frame and its own center | Are the frame heights and the scale of the details consistent |
| The two leaves form a single composition | The ornament is oriented toward the common axis of the opening | How the door looks with one leaf open and whether the decor crosses the working joint |
When the leaves are of different widths, the same overlay may take up too large a share of the narrow field. In that case, proportionate options are chosen, or the common motif is preserved with different levels of detail. Equality of all purchased parts does not guarantee visual balance.
The center joint requires a separate solution. A decorative element must not connect the two moving leaves. If one of them has an astragal, take into account its width, projection, and opening sequence. The common central axis in the drawing does not override these structural boundaries.
For a door series, it is useful to establish a common principle: for example, the same profile and height of the upper field with different frame widths. Then the doors will be recognizably related to one another without mechanically repeating unsuitable dimensions.
Count the left and right decor as separate line items
In paired compositions, the left and right overlays are different order line items. The L and R designations in the SKUs must not be removed when transferring data to the schedule. At the same time, the orientation of the carved element and the door opening direction are not the same attribute.
Conditional calculation for ten doors with one pair on one finished side:
10 doors × 1 left overlay = 10 left overlays.
10 doors × 1 right overlay = 10 right overlays.
An order of twenty identical parts will not replace this set. If the same composition is provided on both sides of each door, the quantity will increase to twenty left and twenty right. The doubling here is due to the number of finished sides, not the number of leaves.
For different door types, the calculation is performed separately, then matching versions are summed up. Samples for finishing and the agreed reserve are recorded as separate lines. This way they will not be accidentally counted as parts already allocated to finished products.
Changing one overlay in a pair requires checking the second. A matching model name at different sizes does not yet guarantee a coordinated mirrored set. Detailed layout of carved elements for doors is useful at the next stage, when the overall composition of the decor has already been determined and the exact position of each part needs to be fixed.
Choose oak or beech for finishing the entire door
The wood species is considered together with the finish of the leaf and the portal. If all surfaces are to be painted with opaque enamel, the task differs from a project where the open wood grain must be preserved. The same article in different materials may produce a different result after a transparent finish.
| Intended surface | What to consider | What to approve on the sample |
|---|---|---|
| Smooth, uniform color | Beech as one of the options for enamel | Surface preparation and relief pattern after full coating |
| Pronounced natural texture | Oak for tinting, oil, or clear lacquer | Color, visibility of pores, and combination with the panel |
| Light transparent finish | Beech or oak depending on the desired pattern | Change in the original shade after applying the coating |
| Contrasting wooden accent | Wood species with the desired texture next to the painted background | How noticeable are the differences between individual parts |
Beech is not limited to enamel, and oak can be painted opaquely. The question is the required surface and the labor intensity of its preparation. If you need a visually smooth solid color on oak without pronounced pores, this must be discussed separately with the finisher, rather than expecting such a result from any layer of paint.
With a transparent finish, check the molding, overlay, rosette, and door leaf sample together. One species does not guarantee the same texture: grain direction, wood sections, and carving shape differ. The same stain also does not promise a complete color match on different substrates.
STAVROS provides information on blank preparation and finish variations in the section quality of wooden products. Designations for preparation for enamel or tinting do not mean that the final coating has already been applied. The required finish should be confirmed for each item, especially if part of the decor will remain with visible texture.
Grain direction is taken into account both visually and when making joints. The coating does not cancel changes in the dimensions of natural wood when humidity changes. A long profile, panel, and cross overlay must be combined in a structurally meaningful way, preserving the intended movement of wooden parts.
Coordinate painting and installation as one process
A common color helps bring the frame and carving into a unified architecture. A contrasting finish makes wooden door decor a standalone accent. However, the visual solution and the production sequence are two different matters: a uniform color can be achieved with either joint or separate finishing, if the technology is coordinated.
Joint finishing
If moldings and overlays are attached before the final painting, the assembled surface can be assessed as a whole. At the same time, access to recesses, internal corners, and side ends must be ensured. Carving that is too dense near the frame makes uniform treatment and subsequent inspection more difficult.
Assembly before finishing cannot be used as a way to hide incorrect joining. A thick layer of material in the gap alters the profile pattern, and covering over a structurally movable joint does not eliminate the movement itself. The assembly must be functional before the finish is applied.
Separate finishing
Separate finishing is more convenient for processing parts with different colors, degrees of gloss, or methods of decorative highlighting of carvings. But after painting, the question of attachment to the prepared base arises. The suitability of the adhesive depends, among other things, on the contacting surfaces and the coating; it is verified according to the requirements of the selected materials and on a test joint.
Mounting areas that must remain uncoated are planned in advance. One cannot assume that an overlay will hold reliably simply because both it and the door are made of wood: the actual base for the adhesive may turn out to be old varnish or a layer of paint.
Single test coating
For approval, a small assembled sample is needed: a fragment of the panel, the selected molding, and a section of carving. It shows at once the color, gloss, filling of recesses, and appearance of the joint. These properties are harder to assess from a separate smooth board.
Stain is primarily responsible for changing the color; the protective part of the finish is selected as part of a specific system. Oil, lacquer, enamel, and patina are not interchangeable names for the same coating. Patination can emphasize recesses, but at the same time make secondary ornament too prominent — after test application, it is useful to evaluate the composition once more.
Record the materials, the sequence of preparation and application, the number of layers, and the approved appearance. Refine the working scheme according to the coating documentation and installation and finishing advice. For a repeat order, a sample of the finished surface is more useful than a single verbal color designation.
Check the composition on a full-size mockup
A paper layout helps detect scale errors before ordering a set. It requires the outlines of the specific selected items, not approximate images of similar carving. Take drawings and product models, prepare templates and verify the print scale against a known dimension.
It is more convenient to structure the verification order from fixed geometry to working components:
- Transfer the boundaries of the panel, door panels, and free mounting areas onto the layout.
- Draw the outer and inner lines of the moulding frames.
- Place the overlay and rosette templates indicating the item code, size, and orientation.
- Add the handle, lock, rebate strip, and other hardware elements.
- Show the fixed framing, pilasters, and top of the portal alongside.
- Evaluate the design from normal viewing points and adjust the hierarchy of accents.
- Check the protrusions on a 3D layout or real samples, then test the opening and grip.
Paper shows the contour but not the depth. To check the protrusion, a temporary three-dimensional sample with reliable fastening that does not damage the door is needed, or a separate test mock-up. Do not open and close the door with heavy parts held by a random fastener.
For a small series, it is advisable to check one complete set in the chosen material and finish. This reveals problems that are not visible on paper: awkward fit, difficult access to threaded areas, mismatched sheen, or an overly active shadow from the relief.
Based on the result, approve one version of the drawing and the sample. If, after checking, the molding, handle position, or capital size changes, re-evaluate the affected adjacent elements. A small change of article number can alter the clearance or protrusion of the entire assembly.
Transfer the approved set to the specification
The specification links the door drawing to purchasing and assembly. It should make clear which part goes where, in which finish it is ordered, and to which version of the project it belongs. A photograph of a beautiful set does not replace this information.
| Field | What to record |
|---|---|
| Door designation | For example, D-01; specify the size and type of the leaf separately |
| Side and leaf | Side of the room, specific leaf, opening direction |
| Decor zone | Top field, center, corner, side part of the portal |
| Product | Full name and article number without abbreviated suffixes |
| Orientation | Left, right or central part; manufacturer designation |
| Dimensions | A, B, C, L and additional parameters for the specific card |
| Location | Link to the drawing with references and designation of the measured contour |
| Material and preparation | Wood species, selected blank finish, sanding quality |
| Finishing | Approved sample code and coating sequence |
| Installation | Base, mounting method and approved assembly |
| Quantity | For one side or set, number of doors, total |
| Samples and stock | Separate quantity with a clear purpose |
| project version | Date and designation of the approved drawing |
For moulding, additionally compile a list of cut pieces. Specify the lengths, the measurement method, the cutting angles and the required profile orientation. The purchased length L and the finished cut piece length are different values. Proceed to purchasing calculations after laying out the parts across the source strips, taking into account the accepted cutting technology.
For sets, both sides of the door must have separate designations, even if they are completely identical at first. Later, one side may get a different colour or a calmer ornament, and separate tracking will allow it to be changed without confusion.
Upon acceptance, compare the delivery with the approved list: item codes, dimensions, orientation, material and quantity. Then lay out the parts by specific doors and zones. For a clear finish, it is useful to assess the texture nearby before installation, so as to determine in advance the placement of elements in the set.
If a missing size has to be replaced, update the specification after re-fitting. A verbal agreement about an “almost identical overlay” leaves the assembler with incorrect references and the purchaser with outdated data for the next order.
Where to buy decor for wooden doors
In the STAVROS catalog you can select Carved Door Decor from several product groups. It is more convenient to start with the approved composition: frames, the main ornament, supporting parts and, if necessary, a separate opening surround.
If you need to buy decorative overlays for doors, go to the section wooden decorative overlays with already known dimensions of the free field. For the task of buying decorative moulding for doors, you will need the cross-section, the lengths of the pieces and the method of finishing the corners. Rosettes are chosen after determining their role, and capitals — together with a specific vertical and the upper unit of the portal.
You can view product combinations carved door design ideas. Such examples are useful for choosing the overall character, but the dimensions and composition should be reworked for your own project. Someone else's door may have a different stile width, handle position, and frame height.
To calculate an order, prepare a door drawing, a specification, and your finishing preferences. If you want to buy wooden door decor with a clear finish, state your requirements for the visible wood grain right away. For enamel, specify the required surface quality and the agreed preparation procedure.
Compare the cost of the complete solution
The price of a single overlay does not show the cost of finishing a door. The calculation includes all carved elements, linear trim, portal parts, samples, preparation, finishing, installation, and delivery. Two compositions with a similar cost of purchased items can differ noticeably in the amount of handwork.
Compare offers for the same dimensions, materials, preparation, and quantity. Deep, complex relief is evaluated together with finishing costs and the ability to process it neatly in an assembled unit. If the budget is limited, first preserve the quality geometry of the frames and one main accent; secondary ornaments can be revised without destroying the concept.
Useful for a workshop with repeat orders conditions for manufacturers. The availability of the required version, lead times, and the cost of a specific set are confirmed before placing an order. The decision to buy decorative door elements becomes concrete when not only the carving pattern is defined, but also all the units where it will be used.
Additional questions before ordering
Can the two sides of a door be finished differently
Yes, if this matches the interiors of the adjacent rooms and the door construction. Keep a clear geometric relationship where it is needed, while the color and intensity of the carving can differ. Separately check the projections on both sides and take into account all added decor when evaluating the fasteners and suspension. In the order, label the sides by room to avoid confusion during assembly.
How to coordinate door decor with wall panels
Choose common reference points: the character of the profile, the position of horizontal lines, the color, or the degree of gloss. Full repetition of every ornament is not required. If the door is located within a row of panels, first draw the entire wall: a single successful frame on its own can disrupt the overall rhythm. At the same time, the junctions between the moving leaf and the fixed cladding must remain functional.
What to do with a portal right next to the corner of the room
First check the available width of the pier and the possibility of completing the protruding parts. If a full pilaster with a capital does not fit, consider a flatter surround for the entire opening. A capital accidentally cut off on one side usually requires reworking the composition, not just adjusting the part on site. An asymmetrical solution is possible, but it must be designed as a whole.
How to replace a damaged rosette or applique
Pull up the original specification: you will need the article number, size, orientation, and material. Even if the model matches, the new part must be test-fitted and its finish coordinated next to the surviving decor. The method for removing the damaged element depends on the fastening and the condition of the base. If the exact execution is unavailable, consider replacing the entire visible pair or group so that a random part does not disrupt the overall pattern.
How to allow for subsequent handle replacement
Keep access to the fasteners and sufficient free space around the installed hardware. But there is no universal allowance for any future model: handles differ in backplates, rosettes, fastenings, and working dimensions. If replacement is already planned, choose the new hardware before the final positioning of the threads. Otherwise, you will have to check it within the remaining boundaries.
Is it necessary to design all doors in a room identically
The principle can be the same: the profile of the frame, the color, the line of horizontal division, and the character of the ornament. Sizes and the number of details may vary to suit specific leaves. The main door can be highlighted with a portal, while secondary doors can be supported with simpler decor. This way, a unified system is preserved without attempting to place the same set on openings of different geometries.
Wooden door decor is ready to order when the frames leave the required margin, the carving has a clear role, the portal is coordinated with the opening, and the handle and leaves operate freely. After approving the layout and finish, transfer the selected designs to the specification — it can be used to purchase the set and replicate it in future projects.