Article Contents:
- Where ugliness hides: anatomy of problem areas
- Complete list of problematic edges in a typical apartment
- Polyurethane corner moldings: clean edge as an architectural technique
- Technical specifications of polyurethane corner moldings
- External and internal corner: what's the difference
- Slopes: how a window and door opening becomes part of the architecture
- Molding on a slope: three techniques
- How to decorate slopes comprehensively: step-by-step plan
- Niches: transforming a technical recess into a decorative center
- Types of niches and approach to decorating each
- Corner elements for niche ends
- Lighting + moldings: how relief is revealed in light
- External wall corners: how a ventilation box became an architectural vertical
- Molding on an external corner: five application options
- How to calculate the number of corner moldings
- Portals and arches: how a doorway without a door became an architectural event
- Portal without a door: design principles
- Arched opening: specifics of framing
- Molding decor: corner elements for portals
- Ceiling joints and cornices: how the top corner completes the interior
- Choosing a cornice: three principles
- Ceiling cornice + wall moldings: a connected system
- Chandelier rosette: ceiling center
- Joints of different finishes: molding as a seam and border
- What to buy for each task: summary table
- Five mistakes when buying moldings for corners and slopes
- Mistake one: flat molding instead of corner molding
- Mistake two: incorrect overhang calculation
- Mistake three: contrasting color on a small corner element
- Mistake four: finishing one end of a niche and leaving the other bare
- Mistake five: not buying spare material
- Additional zones: what is rarely considered during renovation
- Balcony threshold and door joint with the floor
- Transition of the ceiling cornice into a niche
- Mansard angles and sloped joints
- FAQ: Answers to the Most Important Questions
- About the Company STAVROS
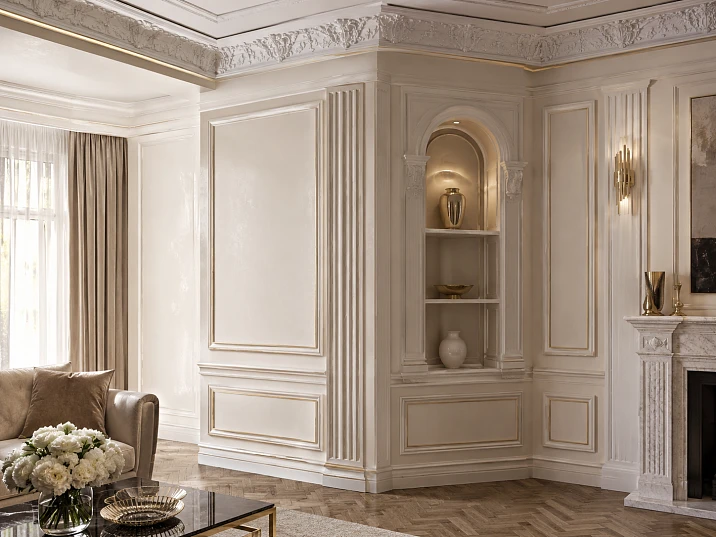
There is one pattern that everyone notices without exception — even those who don't understand interior design. When you look at a beautifully decorated room, it gives an impression of integrity. And when something in it is 'off' — your gaze automatically finds that spot. And almost always it's the edge.
Not the center of the wall. Not the chandelier. Not the furniture. It's the edge: a window slope, a bare external corner, an empty end of a niche, an awkward joint near a portal, a transition between two different finishes. These small 'technical' zones are the main betrayers of an expensive renovation. Everything else can be flawless, but if the edges are unfinished, the room looks incomplete.
Moldings и Moldings made of polyurethane — this is exactly what turns a technical edge into an architectural line. They don't mask the problem — they solve it. A slope becomes an opening with a frame. A niche becomes a decorative showcase. A ventilation duct corner becomes an architectural vertical. An arched transition becomes a portal.
to buy molding to design corners and slopes means to invest a minimum and get a maximum: all those places that "crumble" upon the first detailed look at the interior suddenly start working for it.
An expensive interior begins not from the center of the wall, but from a neat edge.
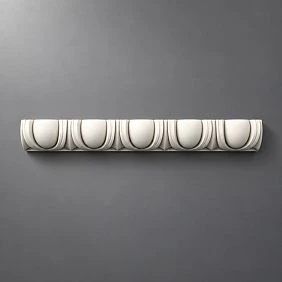
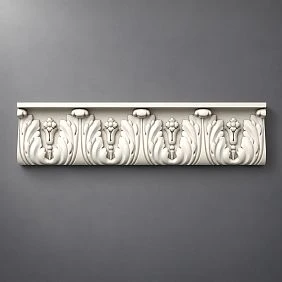
Where ugliness hides: anatomy of problem areas
Before talking about solutions, you need to honestly name all the places where the interior "crumbles." There are more of them than it seems.




Complete list of problem edges in a typical apartment
Window slopes. Each window has three slope surfaces: left, right, top. After window replacement, slopes often remain in a "just painted" state: even, but empty, without architectural framing. A room may have two or three windows — meaning six to nine slope surfaces.
Door slopes and architraves. Interior doors without architraves or with thin plastic profiles look unfinished. Each doorway is a potential area for architectural design.
External wall corners. In modern layouts, there are many protrusions: ventilation ducts, pylons, piers between windows, transitions from kitchen to living room, column projections. A bare external corner is a sharp line, acute and cold.
Niches. Built-in shelves, decorative recesses, niches for a TV, niches for a console or mirror — all require contour framing.
Arched openings. An arch without framing is just a "hole" in the wall. An arch with molding framing is an architectural transition.
Doorless portals. Open openings between the kitchen and living room, between the living room and hallway — without architraves and portals, they look like unfinished renovation.
Joints of different finishes. The transition from tile to paint, from wallpaper to paint, from panels to plaster — all these "seams" require an architectural solution.
The junction of wall and ceiling. Without a cornice, this corner is the "rawest" in the room.
If you honestly count all these places in an average two-room apartment, there will be from 30 to 50. And each of them is a small question to the interior: "is this thought out or not?"
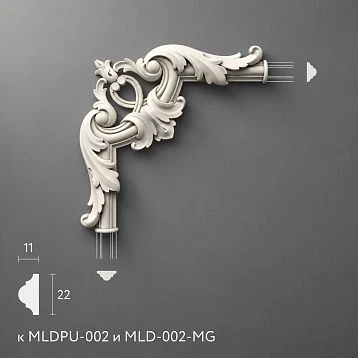
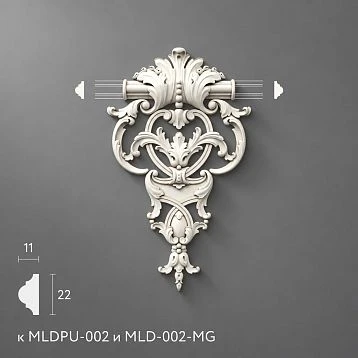
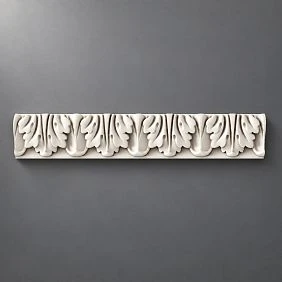
Our factory also produces:
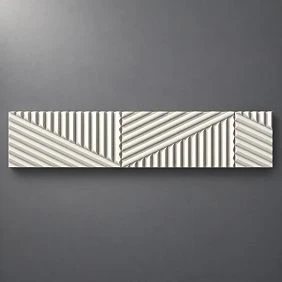
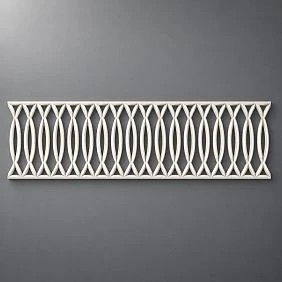
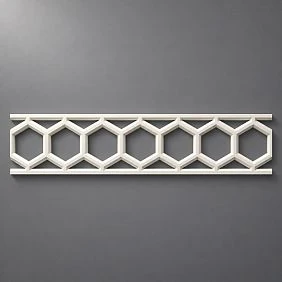
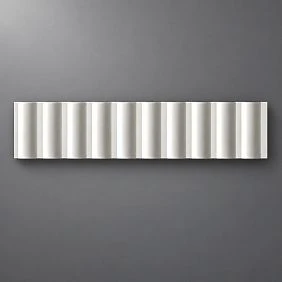
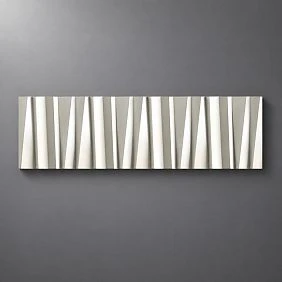
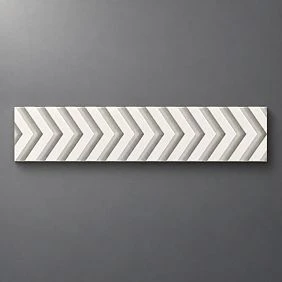
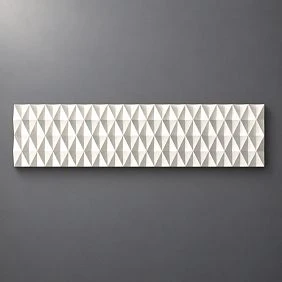
Corner moldings made of polyurethane: clean edge as an architectural technique
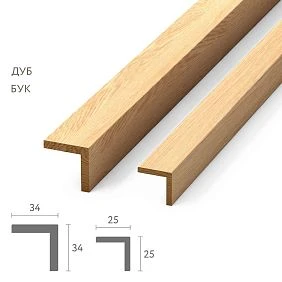
A corner molding is not the same as a regular flat molding cut at 45°. It is a specialized profile designed specifically for installation on the edge of a corner: external or internal. Its geometry is such that one shelf of the molding lies on one plane of the corner, the second on the other, and the profile itself creates a decorative line or relief transition at the edge point.
Why is this important? Because a flat molding installed on one plane does not cover the edge of the corner — it simply runs along it. And a corner molding "embraces" the edge, physically covers it, and turns a technical joint into a decorative detail.
Buy polyurethane moldings in the corner version — this is the first point in the task of designing any complex edge.
Get Consultation
Technical characteristics of polyurethane corner moldings
Polyurethane corner moldings are produced by extrusion: the profile is continuously extruded through a shaped die, maintaining an absolutely precise cross-section along the entire length. This means:
-
Profile consistency: the relief pattern does not change from the beginning to the end of a linear meter — unlike plaster products, where manual work creates variation
-
Precise angle geometry: the shelves of the corner profile maintain strictly 90° (or another specified angle) with a tolerance of ±0.5°
-
Ease of installation: polyurethane is cut with a hacksaw or a sharp utility knife, mounted on glue without additional fasteners
-
Weight: a linear meter of a 50 mm corner molding weighs 200–450 g — many times lighter than its plaster counterpart
-
Moisture resistance: does not swell or crack with changes in humidity — important for slopes near balcony doors
External and internal corner: what is the difference
An external corner is an edge protruding into the room. A ventilation box, a partition, a column, a pylon — all have external corners. These edges are sharp, cold, and technical. A corner molding for an external corner "wraps" the edge and creates a soft, decorative replacement for a sharp joint.
An internal corner is a corner "receding" into the wall. The junction of two walls in a room corner, the junction of a wall with a niche, the junction of a slope with the main wall — these are internal corners. Here, a corner molding or a special internal baseboard creates a smooth transition instead of a rough seam.
buy polyurethane moldings Understanding the type of corner is half the success of installation.
Slopes: how a window or door opening becomes part of the architecture
A slope is the most "visible" of all corner zones. Every time a person looks at a window, they see the slope. When entering a room through a door, they see the door slope. These are constant participants in the visual field, and that is why their condition so strongly affects the overall impression.
In most apartments, slopes are done in one of two ways: plastered and painted, or covered with plastic panels matching the window color. Both options are functional, but not architectural. They solve a technical task (closing the opening) but do not create a decorative context.
Molding on the slope: three techniques
First technique: external molding along the perimeter of the opening. The molding is installed along the edge of the slope — along the outer edge, where the slope transitions into the main wall. This creates a "framing" of the opening from the outside: a line that reads as a casing, even if there is no door.
For a window slope 15–20 cm wide, a molding profile of 25–40 mm is sufficient. For a wide slope at a balcony door — 40–55 mm. The profile can be straight or with slight relief.
Second technique: vertical moldings on the slope plane. The side plane of the slope is a small but noticeable surface. A thin molding 15–25 mm, installed vertically in the center of this plane, creates relief and detailing where there is usually none. The slope transforms from a "simply painted surface" into a "finished slope with an architectural detail."
Third technique: decorative stucco in the upper part of the opening. This is the most "expensive" technique. A small Relief Decoration in the keystone part of the upper slope — where the horizontal meets the verticals — creates a "keystone" of the window or door. This technique comes from classical architecture, where the keystone of an arch was always decoratively highlighted. In a modern interior, it works the same way — as a point that focuses the opening.
buy decorative moldings for the upper part of the slope — this is a small element (10–20 cm), but it is precisely this that turns an ordinary window opening into a "window with architectural character."
How to design slopes comprehensively: a step-by-step plan
-
Draw a plan of the window or door opening on paper: width, height, slope depth
-
Choose a molding for the outer edge (corner profile or straight with a 45° cut)
-
Decide on the method of finishing the slope plane (smooth / with vertical molding)
-
Choose a decorative element for the lock part (is it needed in this interior)
-
Calculate the footage: for a standard window 120×150 cm — about 8–10 linear meters of molding for full framing including slopes
Polyurethane wall decor complements the slope finishing with side accents that can continue the molding line on the main wall.
Niches: transforming a technical recess into a decorative center
A niche is a space that itself is an invitation to decorate. Builders left a recess — you decide what to fill it with. Shelves? Lighting? A decorative object? All of this is the content of the niche. But before content — form. And the form of the niche is determined by how its contour is finished.
A bare niche with straight plastered edges is a construction artifact. A niche with molding framing and a decorative accent is an architectural element. The difference is not in area or depth — but precisely in the edges.
Types of niches and approach to finishing each
TV niche. A modern trend is to build a TV into a niche and create a decorative context around it. A molding frame along the niche's perimeter creates a "screen portal" — the TV ends up inside an architectural frame rather than just hanging on the wall. Moldings made of polyurethane with a 45–65 mm profile along the niche's perimeter — minimal investment, maximum effect.
Decorative niche behind the sofa. If a niche is created behind the sofa (or the wall has a recess for a decorative shelf), a molding frame along its perimeter turns it into an "architectural niche." Inside — lighting, a decorative object, a mirror. Along the edges — Decorative stucco as accent points at the corners of the molding frame.
Niche in the hallway for a mirror. A narrow hallway often has a niche — a technical leftover from the layout. Molding frame + mirror inside + a small Relief Decoration above the mirror — and the hallway niche turns into a "mirror wall section" with architectural character.
Niche for a fireplace. A decorative electric fireplace built into a niche requires a portal frame. Molding along the niche's perimeter + decorative corner elements + a stucco accent above the portal — this is a full-fledged "fireplace with a portal" without construction work.
Book niche in the bedroom or study. Built-in shelves in a niche are framed with molding along the outer edge and decorative corner elements at the ends. This turns a utilitarian shelf structure into an architectural "library."
Corner elements for the ends of the niche
The end of the niche is its "side wall," the transition from the main wall to the inner plane of the niche. This is where the regular molding "ends" and a joint problem arises. The corner element solves it: it is installed on the edge of the end and creates a smooth transition between the molding frame of the niche's facade and the clean plane of its side wall.
Buy Molded Decoration in the form of corner trims for niche ends — this is a small investment that makes the framing "closed" and complete.
Lighting + moldings: how relief reveals itself in light
Stucco decor and moldings show their full potential precisely with side lighting. Lighting inside the niche — an LED strip around the perimeter or spotlights — creates shadows from the relief of moldings and trims that change throughout the day and under artificial lighting.
This is an important principle: Buy stucco decor for a niche and add lighting — this is a working system. Stucco without light is one thing. Stucco in light is something else entirely.
External wall corners: how a ventilation duct became an architectural vertical
This question sounds funny — but only until you stand in the middle of the kitchen and look at the corner of the ventilation duct painted white. A sharp edge, an abrupt joint of planes, no detailing. This is a typical "technical" detail that is usually "painted over and ignored" during renovation.
But it is precisely this that first catches the eye at the kitchen entrance. It is precisely this that ruins the impression of a beautifully designed backsplash and expensive furniture. Because the corner is what a person sees when moving, when turning, when entering. And if it is bare — it gives it away.
Molding on an external corner: five application options
Ventilation duct in the kitchen. A corner molding installed vertically along the edges of the duct from floor to ceiling turns a technical element into a "decorative vertical" or "pilaster." It can be complemented with a small decor for moldings at the top and bottom points — and the corner will acquire a full architectural look.
The wall between windows. If two windows are separated by a narrow wall of 20–30 cm, its outer corners are the most prominent edges in the room. Corner molding on both edges of the wall creates an "architectural vertical" between the windows, which looks like a planned design element.
Transition from kitchen to living room. In apartments with partially open layouts, this area often has a pillar or wall with outer corners. Corner moldings along the edges + Moldings decoration as a small accent at the transition — and the zonal boundary acquires architectural design.
Column. A load-bearing column in the living room or kitchen-living room is potentially the strongest architectural element in the room. With corner moldings on all four edges, it becomes a real architectural column, not a "concrete pillar that cannot be removed."
Protrusion near the fireplace or TV zone. If a decorative niche or TV zone is designed as a protruding volume, its outer corners require the same attention as window slopes.
How to calculate the number of corner moldings
Each corner edge = room height. For standard 2.7 m, 3 linear meters of molding per edge will be needed, including allowance. If the edge does not reach the ceiling (e.g., a ventilation duct 2.0 m high) — correspondingly less.
For a complete design of the wall between windows (two outer corners + two inner joints at the windows), about 12–15 linear meters of different types of molding will be needed.
Buy stucco decor For accents on vertical corner elements — small overlays at the top and bottom points of each corner — this is the final touch that adds a "capital" and "base" to the architectural vertical.
Portals and arches: how a doorway without a door became an architectural event
An open doorway without a door is a typical feature of modern layouts. Between the kitchen and living room, between the living room and hallway, between the bedroom and dressing room. A door is not needed here — but the opening looks unfinished: just a hole in the wall, without architraves, without framing, without architectural context.
The traditional solution is to install a door. The modern solution is to design the opening as a portal.
Portal without a door: design principles
Portal framing is created from moldings installed along the outer edges and planes of the opening. This works on the same logic as a window reveal: molding along the edge → architectural line → decorative context.
For a rectangular opening without a door, the scheme is simple:
-
Corner molding along the two vertical edges of the opening (outer corners)
-
Horizontal molding along the top edge
-
Decorative overlay at the top center point — the "keystone" of the portal
-
If necessary — molding framing along the plane of the opening slope
decorative molding The "keystone" of the portal is the key element of the entire system. It is what turns a set of moldings into a full-fledged "portal."
Arched opening: specifics of framing
An arch is more complex than a rectangular opening: it has no sharp corners but has a sliding curve, and the molding must either be bent or cut into small fragments following the shape of the arch.
Polyurethane moldings can be bent with slight heating (using a heat gun): the profile softens and takes the desired shape, and after cooling, it is fixed. This makes buy polyurethane moldings and bending them to the shape of the arch a quite feasible task for DIY installation.
A decorative "keystone" at the top point of the arch is a classic technique. Buy Moldings in the form of a small ornamental or geometric element for the arch's apex — this is a minimal investment with maximum classic effect.
Decor for moldings: corner elements for portals
At points where moldings meet at an angle — the upper corners of the portal, joints of horizontals and verticals — corner decorative elements are installed. Decor for Molding hides trim joints and adds emphasis exactly where it's needed — at the "frame" point.
Ceiling joints and cornices: how the top corner completes the interior
The angle between the wall and ceiling is the longest of all corner joints in a room. Its total length in a standard 4×5 m room is 18 linear meters. This is a huge area visible from any point in the room.
Without a cornice, this corner looks "technical" — even if both planes (wall and ceiling) are perfectly painted. Two colors simply meet, and their meeting point has no decor, no transition, no architectural meaning.
Ceiling molding in the form of a cornice — is the answer. A cornice creates a smooth or relief transition between the wall and ceiling, "linking" the two planes into a single architectural system.
Choosing a cornice: three principles
Principle of scale. The cornice should match the ceiling height: ceiling 2.5 m — cornice 55–75 mm, ceiling 2.8 m — cornice 75–100 mm, ceiling 3.0 m and higher — cornice 100–150 mm. A cornice that is too small on a high ceiling gets "lost." One that is too large on a low ceiling feels oppressive.
Principle of style. For a modern interior — a simple geometric cornice with minimal relief. For neoclassicism — a cornice with a stepped profile and slight ornamentation. For classic style — a complex multi-tiered cornice with rich relief.
Principle of color. A cornice painted the color of the ceiling "raises" the ceiling — it visually becomes part of the ceiling plane. A cornice the color of the wall "lowers" it — creating a cozier, more intimate feel. The monochrome option (cornice matching the wall or ceiling color) is the most delicate and expensive.
Buy ceiling stucco molding in the right profile — is the first and most important step toward a finished ceiling.
Ceiling cornice + wall moldings: a connected system
When there are already molding frames on the walls, the cornice around the ceiling perimeter acts as a "lid" for the entire system. It completes the vertical architecture of the walls and creates a logical finish at the top.
Perfect logic: baseboard at the bottom → molding frames on the walls → cornice at the top. Three horizontals that "package" the wall space from top and bottom. Even without any decorative overlays — just these three lines — the room gains architectural completeness.
Buy ceiling molding и Moldings made of polyurethane ordering in one order — this is the right approach to creating a connected system of wall and ceiling decorative elements.
Chandelier rosette: ceiling center
Where there is a cornice, an empty ceiling center without a chandelier rosette looks especially noticeable. The cornice creates a "frame" for the ceiling — and the empty center of this frame becomes obvious. ceiling rosettes made of polyurethane — lightweight, with precise relief, ready for painting — are mounted on the ceiling with glue in 20–30 minutes and cover this "emptiness" with a professional result.
Joints of different finishes: molding as a seam and border
This is a rarely discussed but very practical topic. The transition from tile to paint, from wood panels to plaster, from wallpaper to a finished wall — all these "seams" are usually solved unattractively: with a straight cut or a thin plastic strip.
Molding as a "border element" — an elegant alternative. A narrow molding 15–25 mm, installed along the transition line between two finishes, masks the seam and simultaneously creates a decorative line dividing the two zones. This works both horizontally (transition from tile to paint at a certain height) and vertically (border between two zones on one wall).
Decorative stucco At the start and end points of such a "border molding" — small decorative elements — give the system a finished look.
What to buy for each task: summary table
| Task | Mandatory items | Additionally | Main link |
|---|---|---|---|
| Finish a window/door slope | Corner molding for the edge, narrow molding on the surface | Decorative overlay for the lock part, paint | PU moldings |
| Make a niche beautiful | Moldings along the contour, corner elements for the ends | Relief Decoration inside, backlight | PU overlays |
| Close the outer corner | Corner moldings along the edges | Decorative accents top/bottom, paint in wall color | PU moldings |
| Design the portal | Moldings along the edges + horizontal on top | Decor for Molding in corners, overlay in a "lock" | Wall Decor |
| Finish the arched opening | Molding along the arc, accent at the apex | Corner elements, glue, paint | PU overlays |
| Connect the wall and ceiling | Ceiling molding — cornice around the perimeter | Rosette under the chandelier, paint | ceiling decor |
| Finish the junction of finishes | Thin molding along the transition line | Decorative accents at the start/end of the line | PU moldings |
Five mistakes when buying moldings for corners and slopes
Mistakes in this topic occur regularly — and almost always their cost is the same: rework, additional order, or acceptance of an imperfect result.
Mistake one: flat molding instead of corner molding
The most common one. Flat molding is good for frames on a smooth wall. For a corner — no. It either doesn't cover the edge, or is attached only to one plane and peels off, or simply looks untidy. For a corner — you need a profile designed specifically for the corner.
Mistake two: incorrect calculation of the protrusion
On slopes and in niches, not only the width of the molding is important, but also its projection (profile depth). A profile that is too deep on a narrow slope will "stick out" and compete with the wall plane. One that is too flat will not create the desired relief and shadow. For slopes with a depth of 15–25 cm, the optimal profile projection is 10–20 mm.
Mistake three: contrasting paint on a small corner element
A contrastingly painted molding on a slope or corner is an "accent" that only works if it is planned as part of a stylistic system. In most cases, it is better to paint the molding on a slope or corner in the color of the adjacent surface — the wall or the slope. Then it looks "built-in" rather than "stuck on."
Mistake four: finishing one end of a niche and leaving the other bare
If a niche has two ends, both must be finished. One finished and one bare end creates an asymmetry that reads as a mistake. The same applies to slopes: if one window slope in a room is finished, it is advisable to finish all of them — otherwise, one beautiful slope only highlights the imperfection of the others.
Mistake five: not buying a spare
On corners and slopes, there is especially much cutting: each joint of two moldings is a 45° angle cut, each end is a right angle cut. When calculating for corner areas, allow at least 25% extra beyond the calculated length.
Additional areas: what is rarely considered during renovation
Balcony threshold and door joint with the floor
The joint of a door or balcony block with the flooring is another "technical" area. Narrow Polyurethane molding how a "floor threshold" (flat or slightly embossed profile) creates a neat decorative border between coverings.
Transition of a ceiling cornice into a niche
If there is a niche in the wall and a cornice runs along the perimeter of the ceiling, the cornice is interrupted at the niche point. This transition needs to be resolved architecturally: either the cornice turns into the niche (continues along the upper plane), or a corner or decorative element is installed at the interruption point.
Buy molding for such a "nodal" solution — this is a task that is best solved at the planning stage, not after installation.
Attic angles and sloped joints
In attic spaces or apartments with non-standard roof geometry, sloped wall-to-ceiling joints appear. A standard cornice will not work here — a molding cut to a non-standard angle is needed. Polyurethane allows this to be done with precision: the material cuts easily at any angle.
FAQ: answers to the most important questions
Which moldings to buy for slopes?
Corner moldings are suitable for slopes Moldings made of polyurethane with a profile designed for installation along the edge of the corner. For the slope plane — a narrow straight molding 15–30 mm. For the upper locking part — a small Decorative stucco.
Can stucco be used for niches?
Yes, this is one of the most striking applications. Molding along the contour + corner elements at the ends + Relief Decoration inside — a complete system for decorating any niche of any depth and width.
How to beautifully cover the outer corner of a wall?
Corner Moldings made of polyurethane on the edges of outer corners — this is the neatest and most durable method. They "hug" the edge, create a decorative vertical line, and look like a planned architectural element.
Is ceiling stucco needed when decorating corners and slopes?
Yes — for the completeness of the system. If walls and slopes are decorated with moldings, but the ceiling corner is empty, the interior looks unfinished. Ceiling molding in the form of a cornice connects the vertical and horizontal architecture.
What to buy together with corner moldings?
Glue for PU products, paint matching the adjacent surface, Decor for Molding for corner joints, Relief Decoration for accent points and regular flat moldings to "continue the line" on adjacent straight surfaces.
How to design an arch without expensive renovations?
Corner Moldings made of polyurethane along the edges of the arched opening + a decorative overlay at the arch point + paint matching the wall color. Installation in one day, without construction work.
Can moldings be glued onto slopes with plastic panels?
This is a complex case: the glue must provide adhesion to plastic (PVC). Specialized adhesives for PU and PVC exist, but it is recommended to test adhesion on a small area before installation.
About the company STAVROS
The entire range for professional finishing of corners, slopes, niches, and arches — Moldings made of polyurethane, Decorative stucco, Relief Decoration, Ceiling molding, Decor for Molding, Wall Decor — is collected in a single catalog of the STAVROS company.
STAVROS produces products from high-quality extruded and cast polyurethane with precise reproduction of relief, low weight, and full readiness for painting. The STAVROS catalog is structured by tasks — so that it is easy to find the necessary element for any area: from a window slope to a ceiling cornice of a large country house.
Buy molding for finishing corners, slopes, and complex joints from STAVROS — is to choose products that work where ordinary repairs end and professional ones begin.