Article Contents:
- How RS-001 disappears from the specification
- Why the phrase "we'll add it later" creates extra risks
- Formula for side margins
- Pilaster without a separate joint
- One visible node on each pilaster
- Several nodes along the height
- Different nodes in one composition
- Complex wall system
- Is there an actual joint
- Should the joint be covered by a separate part
- Is there a flat area for installation
- Does the center of the socket coincide with the connection line
- Is a depth of 24 mm suitable
- Does the pattern match the style
- The cross-section matters more than a verbal description
- Why the template is applied to the joint, not to the middle of the pilaster
- Three-dimensional depth mockup
- Paired pilasters are checked simultaneously
- The base does not replace the connecting socket
- The capital does not make the joint invisible
- The pilaster body determines the useful field
- One material for the visible group
- Beech for opaque finish
- Oak for tinted or transparent composition
- Mixing wood species is not a way to fix a missing position
- Enamel
- Oil or tinting
- One batch of finish
- Door portal
- Boiserie
- Column or half-column
- Beam and architectural frieze
- Furniture architecture
- Main pilasters
- Side dividers
- Paired elements at the door
- Corner areas
- The molding must not accidentally overlap the ornament
- The gap must not be masked by the trim
- The offset can vary
- Joint under the socket
- Lay out the kit
- Attach the selected RS-001
- Look from the side
- Compare paired nodes
- Record the result
- What should be nearby in the list
- Ceiling rosette
- Self-made carved overlay
- Ordinary wooden decorative rosette
- RS-002, RS-003 and RS-004
- Base
- Capital
- Molding
- Error 7. Depth of 24 mm is not applied to the section
- Error 8. The joint is shifted, and the socket is centered on the pilaster
- Error 9. Paired pilasters are marked separately
- Error 10. Material is chosen after pilaster installation
- Error 11. "Prestige" is mistaken for a finished finish
- Error 12. RS-001 is confused with a ceiling rosette
- Error 13. Another RS model is considered a direct replacement
- Error 14. Molding is trimmed after installation
- Error 15. Side margins are estimated by eye
- Error 16. All six templates are replaced with one
- Error 17. The frontal template is considered sufficient
- Error 18. The count is checked by the total sum
- Error 19. The wood residue is considered a color sample
- Error 20. The rosette is installed on an unprepared base
- Error 21. One size is transferred from the portal to the boiserie
- Error 22. The standard position is ordered before the drawing
- Error 23. The reserve is calculated as a percentage
- Error 24. Different sizes are combined into one line
- Error 25. Late delivery is not marked
- Check the article number and dimensions
- Check the quantity by nodes
- Make sure of the material
- Inspect the relief
- Do a dry fitting
- Record the result
- Record the actual node
- Check if RS-001 is really needed
- Select two nearest sizes, not one
- Assess the condition of the finish
- Check the possibility of installation
- First fix one node
- What is RS-001 for?
- Is RS-001 mandatory for every pilaster?
- How many RS-001 are needed for two pilasters?
- What sizes are available?
- Do all variants have the same depth?
- Can I specify only the width in the order?
- What size should I choose for a narrow pilaster?
- What size is suitable for a wide pilaster?
- Why do 100 and 105 mm need to be checked separately?
- What does the useful field mean?
- How to calculate the side margins?
- Do I need to center RS-001 on the pilaster?
- Can the rosette be shifted if the joint does not run through the center?
- What is RS-001 made of?
- Which material to choose for enamel?
- What to choose for tinting?
- Can I put a beech RS-001 on an oak pilaster?
- What grinding quality is provided?
- Is "Prestige" a ready-made finish?
- Where can I view the DWG?
- Why is a paper template needed?
- Do I need to model the depth?
- Can RS-001 be replaced with a regular carved overlay?
- How is RS-001 different from a ceiling rosette?
- How is RS-001 different from RS-002, RS-003, and RS-004?
- Where can I read the model comparison?
- Can RS-001 be installed between the base and the body?
- Can it be placed under the capital?
- Is RS-001 suitable for boiserie?
- Can it be used on furniture?
- How to count sockets for a wall panel?
- Is a spare needed?
- How to record a reserve?
- Can I order different sizes in one batch?
- Do I need to label the packaging?
- Which glue should I choose?
- Can it be glued to an already painted surface?
- When is it better to paint RS-001?
- Why can't I install the pilaster first and then choose the socket?
- How to check paired pilasters?
- What to do if the joint is already left open?
- Where to buy wooden pilasters and columns?
- Where can I see all connector sockets?
- Where can I find the current price for RS-001?
- Can I order RS-001 separately?
- What documents should I provide to the manager?
- When is the design service needed?
- How can I check the entire order with one question?
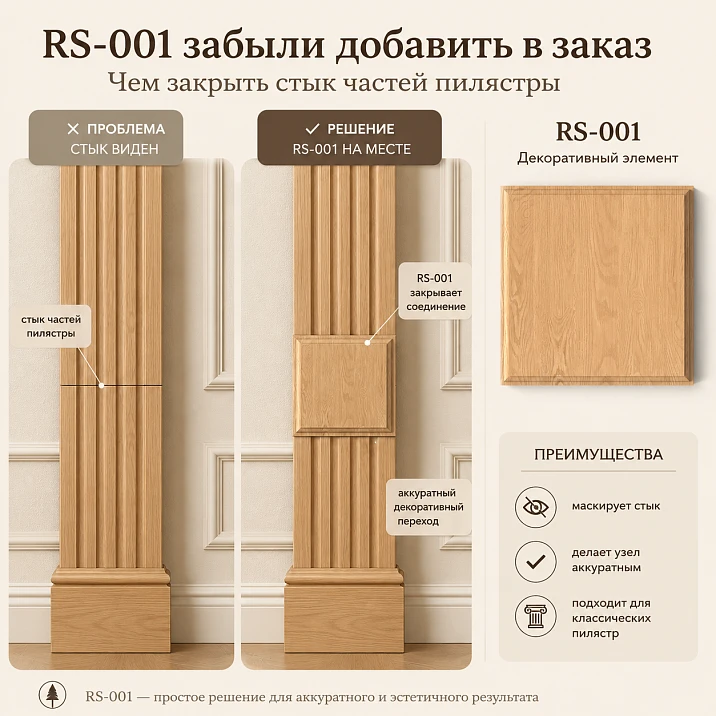
The pilaster is selected, the base is approved, the capital is included in the estimate, the vertical parts are counted, and the finish is confirmed. The order seems complete. But after layout on site, a visible joint remains between individual parts: the technical line runs across the composition, disrupts the rhythm, and shows that the set was assembled not as a single architectural solution, but as a collection of disparate parts. The reason is simple — the connector socket RS-001 was not included in the specification.
Such an item is missed not because it is inconspicuous. On the contrary, after installation, the absence of the joint decor becomes especially obvious. The buyer perceives RS-001 as an additional overlay that can be purchased later if the joint looks unattractive. But late selection is more difficult: the pilaster is already installed, the actual fields differ from the drawing, the base and capital are painted, the batch of wood has run out, and a randomly chosen socket either does not cover the required area or overlaps the adjacent profile.
The connector socket RS-001 is designed for decorative finishing of joints between parts of pilasters, columns, beams, and other architectural compositions. It is not a ceiling socket or a universal furniture overlay. The product has six confirmed sizes — from 50 × 50 × 24 to 105 × 105 × 24 mm. All variants have the same depth of 24 mm, are made of beech or oak, and are offered with "Prestige" sanding quality. Therefore, before buy a connecting socket RS-001, you need to answer three practical questions: where exactly the joint is located, what size the decorative field surrounding it is, and how many such nodes there are in the entire project.
The main mistake is counting RS-001 by the number of pilasters. One vertical composition may have no connecting sockets, may have one, or may have several. It all depends on what parts the pilaster is assembled from, where the connections are, and how they are presented in the working drawing. Therefore, the correct route starts not with the quantity of items in the cart, but with the layout: mark all nodes, choose a size for each, check the DWG, agree on the material, and only then compile the full order.
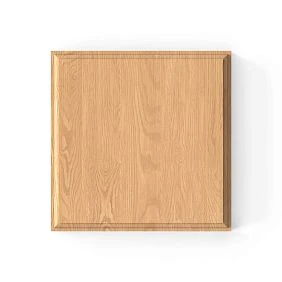
How RS-001 disappears from the specification
An incomplete list usually looks convincing. It includes the main large elements:
-
base — 2 pcs.;
-
vertical part of the pilaster — 2 pcs.;
-
capital — 2 pcs.;
-
wooden plinth — as calculated;
-
installation materials — as per the project.
There is no RS-001 line. The assembler reasons as follows: the base covers the lower transition, the capital completes the top, and the joint between vertical fragments can be neatly fitted. If the line remains visible, it will be covered by a molding or a small carved overlay. The problem is discovered later when a random part does not match the pilaster width, relief, or material.
RS-001 should be looked for not at the end of the estimate among optional decorations, but near a specific connecting node. If on the drawing two parts of the pilaster meet in an area that should be covered by a decorative square element, the connecting rosette is part of the composition. It cannot be removed without changing the project: after removal, not only the decor changes, but also the way the joint is visually finished.




Why the phrase "we'll add it later" creates extra risks
A late order seems convenient until you have to match a new part with already installed decor. Questions arise:
-
which of the six sizes is needed;
-
whether beech or oak matches the main group;
-
whether the new batch differs in tone after finishing;
-
whether there is access to the installation site;
-
whether the rosette covers the entire intended area;
-
whether equal margins remain;
-
doesn't the 24 mm depth conflict with the adjacent profile;
-
is it possible to do a neat dry fit without disassembly.
Some of these issues are resolved if order a complete pilaster set with a single bill of materials. Then the base, vertical elements, capital, and connecting rosettes are checked on one layout, rather than selected after installation.
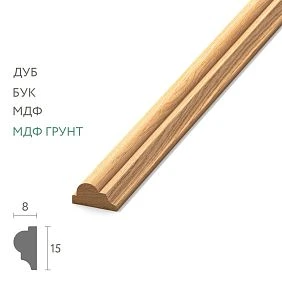
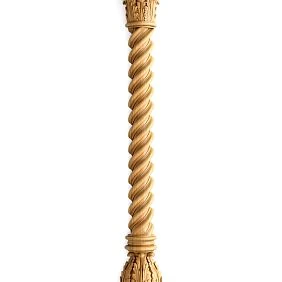
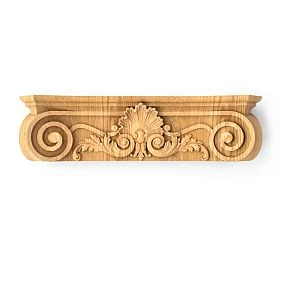
Our factory also produces:
RS-001 is a junction element, not a regular decorative rosette
The word "rosette" covers different products, but their functions differ. A ceiling rosette forms the central composition around a light fixture or a standalone ornament. A regular carved rosette can serve as an accent on a wall, door, or furniture. The connecting RS-001 solves a more specific task: it finishes the intended joint between parts of architectural decor.
This difference affects the choice. A standalone overlay can be moved across the surface until a pleasing position is found. The connecting rosette is tied to the junction. Its center is determined by the joint line, and its size by the width of the decorative field and adjacent profiles. If RS-001 is shifted for symmetry relative to the wall, it may stop covering the connection. If it is chosen only by the pilaster width, it may turn out larger than the available flat area.
For a general understanding of the models, it is useful to read the material about what a connecting rosette isThe new task is no longer to compare the entire assortment, but to not forget one specific RS-001 in the finished specification and correctly choose its size.
Get Consultation
Six sizes of RS-001: one depth, different node scale
| Option | Full size | Frontal dimension | Depth | What to check |
|---|---|---|---|---|
| 1 | 50 × 50 × 24 mm | 50 мм | 24 мм | Is the size enough to cover the joint |
| 2 | 55 × 55 × 24 mm | 55 мм | 24 мм | Does the element look too small |
| 3 | 70 × 70 × 24 mm | 70 мм | 24 мм | Does it match the useful field |
| 4 | 80 × 80 × 24 mm | 80 мм | 24 мм | Does the adjacent profile overlap |
| 5 | 100 × 100 × 24 mm | 100 мм | 24 мм | Is the width of the pilaster and free margins sufficient |
| 6 | 105 × 105 × 24 mm | 105 мм | 24 мм | Does it support the large scale of the composition |
The entry "RS-001 — 4 pcs." is incomplete. It does not specify which exact square to order. The difference between 50 and 105 mm is 55 mm — more than the width of the most compact option. With the same depth, a large rosette occupies more than four times the frontal projection area than 50 × 50 mm. Therefore, the size cannot be left to the discretion of production or the installer.
The correct line must include the full dimensions:
Connecting rosette RS-001, 80 × 80 × 24 mm, beech, "Prestige" sanding quality, finish per project, 4 pcs.; placement — according to the approved layout of the pilaster composition.
If a different execution is chosen, the entire dimension line changes. Even with the same depth, 100 × 100 × 24 mm cannot be shortened to "RS-001 100 mm": all three values are important in the working document.
Where the pilaster width ends and the useful field begins
The overall width of a pilaster is rarely equal to the free area under the connection socket. The front side may have flutes, side profiles, chamfers, overlays, protruding edges, or a central panel. RS-001 should be placed where its base actually fits against the surface and where the pattern does not clash with the adjacent relief.
The useful width is determined by the layout and cross-section. From the overall dimension, exclude areas that the socket should not cover:
-
protruding side profiles;
-
flutes;
-
chamfers;
-
moldings;
-
decorative frames;
-
mounting fields;
-
already provided overlays;
-
transitions to the base or capital;
-
door portal elements;
-
areas covered by another part.
After this, the actual area remains. It is this that is compared with squares of 50, 55, 70, 80, 100, and 105 mm.
Formula for side margins
If the useful width is known, the preliminary symmetrical field is calculated as follows:
Field on one side = (useful width − width of RS-001) ÷ 2.
Suppose the useful flat area is 120 mm. For RS-001 80 × 80 mm:
(120 − 80) ÷ 2 = 20 mm.
This results in two fields of 20 mm each. This is only a geometric result, not a universal recommendation. You need to see how such fields relate to flutes, the joint line, and the ornament. If the rosette must overlap the joint not at the center of the useful area, symmetrical division may not be applicable.
For the 105 mm option on the same area:
(120 − 105) ÷ 2 = 7.5 mm.
Physically, the element fits, but the fields may look too tight or fall on a relief transition. A full-size template will show this better than numbers.
You need to count connection nodes, not the number of pilasters
Two pilasters do not always mean two RS-001. The number of items is determined by the assembly scheme.
Pilaster without a separate joint
If the vertical part is solid or the connection is finished with another design element, RS-001 may not be needed. Do not add a rosette for symmetry without a drawing.
One visible joint on each pilaster
A paired portal contains two identical verticals, and each has one joint. Then two RS-001 of the same size and material will be required.
Multiple joints along the height
A pilaster may consist of several sections. If two connections must be covered with rosettes, one vertical will require two pieces. For a pair, that will be four.
Different joints in one composition
The lower transition may be finished with RS-001 80 × 80 mm, and the upper one with another element or a different size. You cannot automatically multiply one line by the total number of joints.
Complex wall system
In boiserie, pilasters repeat across the entire wall. Some are near the door, some between panels, some in corners. The number of rosettes is counted for each group. For visually identical joints, it is desirable to use one size, but this is confirmed by the layout.
The control formula is simple:
The quantity of RS-001 of a specific size = the number of marked nodes to which this size is assigned.
This is not the number of pilasters, not the number of bases, and not the number of capitals. Each node is assigned a number, and then identical positions are summarized in a table.
Node map: a document that prevents forgetting RS-001
On the elevation, all connection points are marked. It is convenient to use designations U-01, U-02, U-03, and so on. For each, record:
-
location;
-
joint type;
-
useful width;
-
height of the decorative field;
-
selected size of RS-001;
-
material;
-
finishing;
-
adjacent elements;
-
drawing number;
-
number of repetitions.
Example of a statement:
| Node | Location | Useful field | RS-001 | Quantity | Note |
| U-01 | Left portal pilaster | 90 × 90 mm | 80 × 80 × 24 mm | 1 | Center along the joint axis |
| U-02 | Right portal pilaster | 90 × 90 mm | 80 × 80 × 24 mm | 1 | Mirrored U-01 |
| U-03 | Central wall pilaster | 112 × 112 mm | 100 × 100 × 24 mm | 2 | Repeat in two panels |
| U-04 | Corner vertical | Per separate drawing | Not assigned | 0 | Another way of finishing |
This map prevents two opposite mistakes: missing a needed outlet and buying extra parts for assemblies where RS-001 is not provided.
How to understand whether RS-001 is needed in your project
Look not at the product photo, but at the connection of parts. Answer sequentially.
Is there an actual joint
If a pilaster is assembled from several parts, the joint line must be shown on the drawing. Sometimes it is hidden by a profile, sometimes it is part of a decorative node, sometimes it remains visible.
Should the joint be covered by a separate part
Not every seam requires RS-001. It may be finished by a molding, capital, base, or a specially designed overlay. A connecting rosette is needed where it is provided by the composition.
Is there a flat area for installation
A square of 50–105 mm must fit on the surface without conflicting with the relief. The overall width of the pilaster does not guarantee this.
Does the center of the rosette coincide with the joint line
If RS-001 is offset, it may not fully cover the joint. If the joint is structurally offset, the decorative center requires a separate solution.
Is the depth of 24 mm suitable
All dimensions have the same projection. It is compared with moldings, the pilaster body, base, capital, and adjacent overlays.
Does the drawing match the style
RS-001 should continue the architectural language of the composition. If a different ornament is chosen, it is better compare RS-001, RS-002, RS-003, and RS-004 by cards and sizes, rather than replacing the model after purchase.
Size 50 × 50 × 24 mm: a small square for a compact node
The smallest RS-001 is suitable for testing on a narrow pilaster, thin profile, or small decorative panel. But compactness does not mean universality. The element must fully cover the intended connection area.
Size 50 mm may be too small if:
-
the joint line is longer than the available central part;
-
adjacent profiles require a larger accent;
-
the pilaster is wide and the rosette gets lost;
-
the composition is viewed from a distance;
-
next to it stand a large base and a capital.
Before ordering, make a 50 × 50 mm square from paper and apply it to the node. Separately model the depth of 24 mm. A flat sheet shows the size on the facade but does not convey the actual projection.
Size 55 × 55 × 24 mm: a slight increase that changes the margins
The difference from 50 mm seems minimal — 5 mm in each direction. The area, however, increases. On a narrow pilaster, the margins decrease, and the ornament becomes more noticeable.
The 55 mm option is considered when 50 mm is insufficient in scale, but 70 mm is already close to the side profile. The choice is confirmed with a template: the human eye notices the difference well if strict vertical lines run nearby.
Size 70 × 70 × 24 mm: a medium module for a pronounced joint
RS-001 70 mm can work in a medium-scale composition: on a pilaster, wall panel, or portal where a noticeable but not dominant node is required. Here it is especially important to check the distance to flutes and frames.
The 70 mm square should not be considered the "medium by default." For a narrow surface, it will be large; for a massive column, it will be small. The size is assessed relative to the useful area, not relative to the six catalog options.
Size 80 × 80 × 24 mm: a noticeable connecting rosette
The 80 mm option is often convenient for project specifications because it is easy to tie into a large vertical composition. However, this is not a ready-made recommendation for any wooden pilaster.
Before order RS-001 sized 80 × 80 mm, check:
-
the useful field is not less than required;
-
there are deliberate indents on the sides;
-
the 24 mm depth is coordinated with the profile;
-
the joint is located under the central part;
-
the pair of pilasters gets the same orientation;
-
the size is written in full — 80 × 80 × 24 mm.
Size 100 × 100 × 24 mm: a large node for a wide composition
A 100 mm square noticeably affects the rhythm. It can tie together a massive base, a wide pilaster body, and a capital, but it can overlap adjacent decor on a narrower vertical.
On a large wall panel, 100 mm reads calmer than on a door portal, where a casing, opening, and handle are nearby. Therefore, one size cannot be transferred between rooms without checking.
Size 105 × 105 × 24 mm: maximum scale of RS-001
The largest version is only 5 mm wider than the 100 mm variant, but these millimeters reduce side margins and can bring the edge to a bevel or molding. If the project is built very tightly, the difference is critical.
RS-001 105 × 105 × 24 mm is suitable only after checking the full square. It cannot be chosen on the principle of "large pilaster — largest rosette." Sometimes 100 mm gives cleaner margins, while 105 mm creates tight contact with adjacent relief.
The same depth of 24 mm does not eliminate the need to check the relief
All six sizes of RS-001 have the same depth — 24 mm. This simplifies comparison: when moving from 50 to 105 mm, the frontal scale changes, but the maximum projection remains the same. However, this cannot be used to conclude that any version combines equally well with a pilaster.
The depth is compared with several planes:
-
the front surface of the vertical element;
-
the protrusion of side moldings;
-
base relief;
-
capital profile;
-
adjacent carved overlays;
-
door casing;
-
wall frame;
-
decorative panel thickness.
If the molding protrudes only slightly, RS-001 with a depth of 24 mm will create a strong shadow. In a large composition, this can look convincing. On a thin pilaster, the same projection may seem excessive. Evaluation from a frontal photo does not show this difference, so a side template or section is needed.
A section is more important than a verbal description
On the section, mark the base plane and the maximum point of the rosette. Then apply adjacent profiles. It is immediately clear whether RS-001 will:
-
stand out as the main relief center;
-
be at the same level as the molding;
-
to appear sunk between deeper details;
-
to interfere with the abutment of the base or capital;
-
to create too sharp a step.
For an accurate check, you can download drawing RS-001 and compare the DWG with the pilaster section. The 50–105 mm dimensions should be read together with the 24 mm depth, not as flat squares.
Four paper templates are not enough — make all six
When there are many options, the buyer often prints only the smallest, medium, and largest. This can cause the best size to be missed. The difference between 50 and 55 mm or between 100 and 105 mm seems small, but it is precisely this that sometimes preserves neat side margins.
Prepare six squares:
-
50 × 50 mm;
-
55 × 55 mm;
-
70 × 70 mm;
-
80 × 80 mm;
-
100 × 100 mm;
-
105 × 105 mm.
Sign each one. Mark the center and the horizontal axis. Apply the template to a real surface or a full-size layout. Photograph it strictly from the front and at an angle.
Why the template is applied to the joint, not to the middle of the pilaster
RS-001 must cover a specific node. If the joint is above or below the geometric center of the vertical, the template is placed along the connection line. Moving it for a nice shot may hide the real problem.
3D depth mock-up
Attach a strip of cardboard 24 mm high to the paper square or make a simple box mock-up. It will show the side shadow and the distance to adjacent parts.
Paired pilasters are checked simultaneously
On a door portal, two identical elements must have the same height, margins, and orientation. Place the templates on both sides of the opening and step back to the usual viewing distance. An error of a few millimeters in height becomes noticeable when emphasized by the horizontal joint line.
Base, body, RS-001, and capital: the set is read from bottom to top
The pilaster is perceived as an architectural vertical. The base provides support, the body forms the main rhythm, the connecting rosette frames the joint, and the capital completes the top. If one part is missing, the composition may look unfinished even if the remaining parts are made with high quality.
The base does not replace the connecting rosette
The base frames the lower finish. It is not intended to close a joint higher up the vertical if the project includes RS-001. When selecting a wooden base for the pilaster, you need to check its width, material, and connection to the body, but do not cross out the connecting element from another zone.
The capital does not make the joint invisible
The capital draws attention from above, but the technical line below remains visible. It becomes especially prominent after painting, when light glides across the surface.
The pilaster body defines the useful field
The width of the entire part, the central plane, flutes, and side profiles limit the size of RS-001. Therefore, the vertical part is first selected and drawn, then the rosette is checked.
One material for the visible group
Beech or oak should preferably be matched for the base, body, RS-001, and capital. With a transparent finish, mixing wood species will be noticeable. Under enamel, differences can also affect surface preparation.
Beech or oak: the material is chosen for the entire composition
RS-001 is available in beech and oak. The buyer should not choose the wood species separately from the other parts of the pilaster.
Beech for opaque finish
Beech is often considered for enamel painting when the relief should be read through light and shadow, not through texture contrast. If the base, body, and capital are also beech, it is easier to build a unified technological cycle.
You can find out the price of RS-001 in beech after choosing the exact size. The price of one rosette does not show the cost of the assembly: the set includes other elements and materials.
Oak for tinted or transparent composition
Oak is chosen when the wood grain pattern is important. On a square rosette, the texture interacts with the carved relief, and the 24 mm depth enhances shadows. Before a batch, a test finish on a real fragment is needed.
The customer can buy oak RS-001 in the selected size, but moldings, base, and capital must be checked by material separately.
Mixing wood species is not a way to fix a missing item
If the pilaster is already made of oak, and the forgotten RS-001 is available faster in beech, one cannot assume that tinting will completely hide the difference. Texture, density, and finishing behavior may differ. Late replacement is allowed only after a sample and approval of the technology.
Sanding "Prestige": what is confirmed and what remains to be done
For RS-001, the quality of "Prestige" sanding is confirmed. This is a characteristic of carved surface preparation, not a finish coating and not readiness for installation on any base.
Before finishing, check:
-
front ornament;
-
side edges;
-
recesses;
-
rear plane;
-
condition after transportation;
-
conformity to the selected sample;
-
absence of contaminants;
-
compatibility with the finishing system.
Enamel
If the composition is applied opaquely, the test is done on the same material and type of relief. Deep areas may appear darker due to shadows even with the same color.
Oil or tinting
For an oak composition, you can buy oil for oak decor after checking the purpose of the specific composition. The article does not prescribe a universal product or consumption rate: it depends on the chosen system and the area of the parts.
One batch of finish
If RS-001 was ordered later, the shade should be compared with an already painted pilaster. It is better to include connecting rosettes in the overall order before starting the color sample.
Where RS-001 is used besides a single pilaster
The topic focuses on the junction of pilaster parts, but the same principle works in more complex architectural compositions. Everywhere, first find the node, then choose the size.
Door portal
Two pilasters frame the opening. RS-001 can cover identical joints on the left and right. Here, especially important are:
-
one installation height;
-
mirror marking;
-
same size;
-
equal margins;
-
connection with the casing;
-
distance to the opening;
-
relief depth.
If one rosette is shifted by a few millimeters, the horizontal level will reveal the error. For a complex node, you can order a door portal project before completing the batch.
Boiserie
In the wall panel, pilasters divide sections. Connecting rosettes may repeat throughout the room and form a horizontal line. An error in one position turns into a break in rhythm.
In this section you can view wall panels with pilasters and assess the scale of finished compositions. Your own project still requires precise dimensions.
Column or half-column
RS-001 can participate in the design of the connection node if provided for by the drawing. Curved surfaces or other geometry require separate fit checks; a square rosette does not become compatible automatically.
Beam and architectural frieze
The connecting rosette can cover the intended intersection of decorative elements. Here, the center of the node and the direction of the composition are set by the overall layout.
Furniture architecture
Built-in library, cabinet, or large furniture portal may use pilaster verticals. RS-001 must account for doors, handles, facade depth, and distance to shelves. Decorative use does not negate base checks.
RS-001 in boiserie: count repeating lines
A wall composition often contains several types of pilasters. Central ones may be wider, side ones narrower, corner ones partially hidden. A single RS-001 size for the entire room may not be enough.
Main pilasters
On the central panel, a larger node is acceptable — 100 or 105 mm, if the useful field supports the scale.
Side dividers
For narrow verticals, 50, 55, or 70 mm may be suitable. The decision is made based on templates.
Paired elements at the door
The size must match the portal and be repeated mirror-wise.
Corner zones
If part of the pilaster goes around the corner, a square RS-001 may not have a sufficient base. A separate drawing is needed.
In the boiserie sheet, each type gets a code. You cannot order "RS-001 — 18 pcs." without size distribution. Correctly:
-
type P-1 — RS-001 80 × 80 × 24 mm, 8 pcs.;
-
type P-2 — RS-001 55 × 55 × 24 mm, 6 pcs.;
-
type P-3 — without connecting socket, 4 nodes are arranged differently.
Depth 24 mm next to the molding
The molding can run horizontally through the node or approach the socket from two sides. Then not only the frontal square is checked, but also the end-face joint.
The molding must not accidentally overlap the ornament
If the profile overlaps part of the carving, the composition looks assembled from incompatible parts. The end line is applied to the DWG.
The gap must not be masked by finishing
The clearance between RS-001 and the molding indicates a geometry error. Putty or a thick layer of paint does not replace a correct node.
The protrusion can vary
A socket with a depth of 24 mm can protrude further than the molding. This is acceptable as a deliberate center, but it needs to be seen in cross-section.
Joint under the socket
If RS-001 overlaps the joint line, the base must allow the part to be installed evenly. The article does not specify the fastening method — it depends on the design.
What to buy together with RS-001
| Position | Role in the set | What to check |
| RS-001 | Design of a specific connection node | Size 50–105 mm, depth 24 mm, material |
| Vertical part of the pilaster | Main architectural line | Useful field, profile, and joint location |
| Base | Bottom finish | Width, material, and interface |
| Capital | Top finish | Scale and common axis |
| Moldings | Bind parts of the composition | Section, extension, and ends |
| Installation materials | Fixation by project | Base, finish, and technology |
| Materials for painting | Unified finish | Beech or oak, test stain |
| Drawing | Coordinates nodes | Version, dimensions, and designations |
| Designing | Checks complex layout | All connections and quantity |
| Delivery | Combines the set | Marking of dimensions and packaging |
After compiling the list, you can buy bases, capitals, and connecting sockets within a single architectural order. Specific compatible combinations are determined by the drawing, not by belonging to a common category.
Mounting adhesive: an item that also cannot be added blindly
In the materials section, you can buy mounting adhesive for RS-001, but the choice of composition depends on the substrate, finish, and project technology.
Check:
-
RS-001 wood;
-
pilaster material;
-
painted or unpainted surface;
-
contact area;
-
vertical position;
-
humidity and room conditions;
-
adhesive manufacturer's requirements;
-
the need for temporary fixation;
-
compatibility with the finish coating.
The article does not state that adhesive bonding is sufficient for any joint. In some projects, the attachment method is determined by the designer or the composition manufacturer.
Dry assembly before painting
RS-001 must be included in the trial assembly along with the base, body, and capital. If it is not present at this stage, the specification error has not yet been corrected.
Lay out the kit
On a flat surface or stand, arrange the elements in the design sequence. Mark the joint.
Apply the selected RS-001
Check that it covers the line, does not overlap profiles, and aligns with the axis.
Look from the side
Assess the 24 mm depth and the transition to adjacent parts.
Compare paired nodes
The two pilasters of the portal should look identical. Measure the height of the center from one baseline.
Record the result
After approval, record the size, coordinate, material, and orientation. Only then can you proceed to painting and final installation.
Correct specification RS-001
The phrase "RS-001 — 4 pcs." only indicates the item number and quantity. It lacks the size, material, sanding, finish, and place of application.
A complete line might look like this:
Connecting socket RS-001, 80 × 80 × 24 mm, beech, sanding quality "Prestige", preparation and painting per the approved system, 4 pcs.; nodes U-01–U-04, placement per layout No. 7.
For oak:
Connecting socket RS-001, 100 × 100 × 24 mm, oak, sanding quality "Prestige", finish per the agreed sample, 2 pcs.; paired pilasters of the door portal, center at mark ___ mm.
What should be nearby in the list
-
pilaster item number;
-
base;
-
capital;
-
moldings;
-
joint number;
-
size RS-001;
-
material;
-
quantity;
-
finish;
-
mounting materials;
-
drawing number;
-
packing group.
Invoice check before payment
The commercial proposal is cross-checked with the node map.
Check:
-
whether all nodes from the drawing are included in the list;
-
whether one of the six sizes is selected;
-
whether the depth of 24 mm is recorded;
-
whether the material matches;
-
is the "Prestige" quality indicated;
-
is there no line without a standard size;
-
are the sockets not counted automatically by the number of pilasters;
-
are the bases and capitals included;
-
are finishing materials added;
-
does the delivery match the full set.
The query "RS-001 price" refers to a specific card and size. The project budget is determined by the entire set, not by a single square piece.
Why buying RS-001 late costs more than it seems
The price of a missed socket is not the only expense. After installation, the following may be needed:
-
a repeat visit by the measurer;
-
dismantling of the adjacent part;
-
selection of a new batch of wood;
-
separate paint sample;
-
repeat delivery;
-
correction of markings;
-
restoration of the coating;
-
waiting for manufacturing;
-
temporary suspension of work.
Therefore, it is more advantageous to perceive the connecting rosette as part of the project configuration. After choosing the size, you can order the RS-001 kit for pilasters together with the main batch.
How not to confuse RS-001 with similar products
Ceiling rose outlet
It is designed for a ceiling composition and does not replace the nodal element of a pilaster.
Standalone carved overlay
It can decorate a free field, but does not have to have geometry for a specific joint.
Ordinary wooden decorative rosette
The search phrase is broad and can lead to different products. For ordering, you need to specify: connecting, RS-001, for pilaster, of the selected size.
RS-002, RS-003, and RS-004
These are other models of connecting sockets. They may differ in pattern and size. The common function does not make them interchangeable.
Base
It forms the lower part, not the middle connecting joint.
Capital
It completes the top of the pilaster and does not overlap the joint elsewhere.
Molding
It can participate in the design of the connection, but only according to the project. It cannot be accidentally installed instead of RS-001 after installation.
If you need to choose not only the size but also a different pattern, open the selection where you can view the sizes of connecting sockets.
Who RS-001 is suitable for
The product should be included in the project if:
-
The joint of the pilaster parts should be decorated with a square carved detail;
-
The useful field corresponds to one of six sizes;
-
The depth of 24 mm is coordinated with the relief;
-
Beech or oak matches the visible group;
-
The composition requires a repeating nodal accent;
-
There is an approved layout;
-
Quantity
Error 7. The depth of 24 mm is not applied to the section
All decisions are made based on the frontal image.
What happens: the relief protrudes too much or turns out to be weaker than the adjacent molding.
How to fix: build the side view.
Error 8. The joint is shifted, and the rosette is centered on the pilaster
The compositional axis and the technical line do not coincide.
What happens: RS-001 only partially covers the connection.
How to fix: first mark the actual node, then determine the decorative center.
Error 9. Paired pilasters are marked separately
The installer transfers dimensions from different baseline lines.
What happens: the rosettes are at different heights.
How to fix: use a common horizontal level and one layout.
Error 10. The material is chosen after the pilaster is installed
The main set is oak, late RS-001 is beech.
What happens: the finish does not hide the difference in texture.
How to fix: order the visible group in one wood species or approve a sample.
Error 11. "Prestige" is mistaken for a ready finish
Finishing materials are not included in the estimate.
What happens: the batch arrives without the agreed color and protective system.
How to fix: separate sanding and final coating.
Error 12. RS-001 is confused with a ceiling rosette
The product is selected by the general word "rosette".
What happens: the function, scale, and geometry do not match the joint.
How to fix: specify the full name "connector socket RS-001".
Error 13. Another RS model is considered a direct replacement
RS-002, RS-003, or RS-004 are chosen only by similar width.
What happens: the pattern changes or the node does not match the project.
How to fix: compare cards and DWG.
Error 14. Molding is trimmed after installation
RS-001 is added to an already finished composition.
What happens: profile ends have to be redone on the wall.
How to fix: assemble a dry node before painting.
Error 15. Side margins are estimated by eye
The socket looks almost centered.
What's happening: the strict vertical composition emphasizes asymmetry.
How to fix: calculate the margins and check them with a tape measure.
Error 16. All six templates are replaced with one
The buyer only checks 80 mm.
What's happening: the more suitable option of 70 or 100 mm is not considered.
How to fix: provide the full size range.
Error 17. The frontal template is considered sufficient
The depth is depicted with a shadow in the visualization.
What's happening: the actual protrusion of 24 mm turns out to be unexpected.
How to fix: make a 3D mockup.
Error 18. The account is checked by the total amount.
The article number is present, so the set is complete.
What happens: the size or number of nodes is specified incorrectly.
How to fix: check each line against the map.
Error 19. The wood residue is considered a color sample.
For late RS-001, a random piece of beech or oak is used.
What happens: a flat surface does not show color in carved relief.
How to fix: make a color swatch on a comparable ornament.
Error 20. The rosette is installed on an unprepared base.
The mounting method is chosen on the day of installation.
What's happening: adhesion and fit are not confirmed.
How to fix: agree on the base and materials in advance.
Error 21. One size is transferred from the portal to the boiserie
In both projects, the pilasters look similar.
What's happening: useful fields and viewing distance differ.
How to fix: check each group separately.
Error 22. A standard item is ordered before the drawing
The decision is made based on the card photo.
What's happening: the node changes, and the purchased sockets do not fit.
How to fix: first the layout, then the order.
Error 23. Stock is calculated as a percentage
10% is added to the batch without understanding the purpose.
What happens: the required size is insufficient, while extra parts of another size remain.
How to fix: allocate reserve for specific components.
Error 24. Different sizes are combined into one line
The invoice states "RS-001 — 12 pcs.".
What happens: it is impossible to control the completeness.
How to fix: a separate line for each size.
Error 25. Late delivery is not marked
The new RS-001 ends up at another site.
What's happening: the installer installs 80 mm instead of 70 mm.
How to fix: mark the size and node number on the packaging.
How to place an order with STAVROS without missing parts
The commercial route should be short but consistent.
-
Open the drawing of the pilaster composition.
-
Mark each connection of parts.
-
Decide which nodes are designed as RS-001.
-
Measure the usable field.
-
Make six templates.
-
Choose a size for each type of node.
-
Check the depth of 24 mm.
-
Download DWG.
-
Approve beech or oak.
-
Secure the "Prestige" sanding.
-
Determine the finishing system.
-
Calculate the quantity by nodes.
-
Add base, capital, and moldings.
-
Select mounting materials.
-
Assemble a test fragment.
-
Consolidate items into one list.
-
Check the invoice.
-
Approve labeling and delivery.
For a complex composition, it is reasonable order RS-001 layout on pilaster. The designer is given dimensions, photos, part numbers, material, and desired finish.
After approval of the specification, you can buy RS-001 with delivery and separately check the terms of the overall delivery. For a large project, it is more useful to buy the entire pilaster set in one delivery, so as not to split the base, vertical parts, rosettes, and capitals across different deadlines.
Acceptance of RS-001 batch before finishing begins
Check the part number and dimensions
On the packaging and in the documents, RS-001, the front dimension, and the depth of 24 mm must match. If there are several options in the project, sort them into groups.
Check the quantity by nodes
Don't limit yourself to the overall figure. Match the packages with U-01, U-02, and other designations.
Verify the material
Beech and oak should not be mixed randomly. Pay special attention to paired pilasters.
Inspect the relief
Side lighting helps to see edges, recesses, and possible damage.
Do a dry fit
Before applying enamel, oil, or tinting, attach one part of each size to the corresponding assembly.
Record the result
If everything matches, label the package and the drawing. If an error is found, do not start finishing the batch.
If RS-001 was forgotten after installation: the correction procedure without random purchases
Sometimes the article is needed only after the mistake has already occurred. The pilaster is assembled, the joint is visible, and RS-001 is missing from the original list. In this situation, you cannot immediately open the card and select a square that roughly matches the width of the vertical. First, you need to understand whether the connecting socket can be installed without reworking adjacent parts.
Record the actual assembly
Photograph the joint strictly from the front and side. The frame must show a ruler or another dimensional scale. Measure:
-
the full width of the pilaster;
-
the useful flat area;
-
the length of the visible joint line;
-
the distance to the flutes;
-
the distance to the moldings;
-
the depth of the adjacent relief;
-
center position;
-
the height of the identical node on the paired pilaster.
Do not try to hide the seam until measurements are complete. Putty, local painting, or a temporary overlay may alter the surface and make accurate fitting difficult.
Check whether RS-001 is really needed
Perhaps the open joint appeared not due to a missing rosette, but due to incorrect profile assembly, part displacement, or erroneous cutting. Compare the actual composition with the working drawing. If RS-001 was originally intended, restore exactly that component. If it was not in the project, adding a rosette becomes a design change and requires separate approval.
Choose the two closest sizes, not just one
Suppose the usable field is 86 mm. Do not order 80 × 80 × 24 mm right away. Make templates of 70 and 80 mm, compare the fields, and ensure the larger square does not overlap the relief. If the usable field is 103 mm, check 100 mm separately; the 105 mm version is already wider than the platform, even if the overall pilaster allows it to fit.
Assess the condition of the finish
If the main decor is already painted, the new RS-001 must undergo a test paint-out. For oak under tint, compare texture and color under the same lighting. For beech under enamel, check not only the shade but also the gloss level. A locally matched color may match during the day and differ in the evening under artificial light.
Check the possibility of installation
The finished composition may restrict access to the back side, pressing, or temporary fixation. The installation method is chosen after assessing the base. You cannot give a universal promise that a late RS-001 will adhere without dismantling: the decision depends on the surface and the chosen technology.
First fix one component
If the error repeats on ten pilasters, do not order ten rosettes at once. Prepare one control piece, perform a dry fit, agree on color and installation. After confirmation, the component becomes a sample for the remaining items.
This procedure takes more steps than timely inclusion of RS-001 in the specification, but it is cheaper than a mass error. The main thing is not to turn the connecting rosette into a patch. After correction, it should look like an intended part of the composition.
Control of RS-001 size by typical situation
Situation What to measure first Which sizes to put on the template Main risk Narrow pilaster Useful central platform 50 and 55 mm The socket will go onto the side profile Medium-scale pilaster Field between flutes 70 and 80 mm The selected square will break the fields Wide architectural vertical Full front and adjacent moldings 80, 100 and 105 mm A large node will overload the composition Paired door portal Both pilasters from one baseline One confirmed size for the pair Sockets will be at different heights Serial boiserie Types of all repeating sections A separate set for each type One size will be mistakenly applied to the entire wall Already assembled joint Actual plane and finish Two nearest sizes A later part will not match in color and fit The table does not assign a size automatically. It shows which options need to be compared before opening the card and completing the purchase.
Frequently asked questions about the RS-001 connector socket
What is the RS-001 for?
It frames the intended joint of parts of a pilaster, column, beam, or other architectural composition. The specific location is determined by the project.
Is RS-001 mandatory for each pilaster?
No. It depends on the number and method of finishing the connection joints.
How many RS-001 are needed for two pilasters?
From zero to several pieces. Count the joints marked on the layout that are assigned this model.
What sizes are available?
50 × 50 × 24, 55 × 55 × 24, 70 × 70 × 24, 80 × 80 × 24, 100 × 100 × 24, and 105 × 105 × 24 mm.
Do all variants have the same depth?
Yes, the confirmed depth is 24 mm.
Can I specify only the width in the order?
No. A correct specification includes the full size, material, sanding, quantity, and joint number.
What size should be chosen for a narrow pilaster?
First, measure the useful flat field. Then compare the 50 and 55 mm templates, and if there is enough space, 70 mm. The overall width of the pilaster does not provide a ready answer.
What size suits a wide pilaster?
You can consider 80, 100, or 105 mm, but the choice depends on the side fields, relief, and the scale of the base and capital.
Why should 100 and 105 mm be checked separately?
The 5 mm difference reduces the field on each side. On a dense composition, the edge may fall on a profile or chamfer.
What does useful field mean?
This is the actual flat area where RS-001 can be placed without overlapping flutes, moldings, or other details.
How to calculate side margins?
Subtract the size of the rosette from the useful width and divide the remainder by two if the node is symmetrical.
Should RS-001 be centered on the pilaster?
It should cover the joint and align with the approved axis. These two lines do not always coincide automatically.
Can the socket be moved if the joint does not run through the center?
Only according to the revised project. The shift affects the fields and pairing.
What is RS-001 made of?
in beech or oak.
What material to choose for enamel?
Beech is often considered for opaque finishes, but the entire visible group must be coordinated in material and preparation.
What to choose for tinting?
Oak allows preserving the texture. The color is checked on a sample.
Can a beech RS-001 be installed on an oak pilaster?
Only after a conscious approval of the finish. With a transparent system, the difference in wood species will be noticeable.
What quality of sanding is provided?
"Prestige".
Is "Prestige" a ready-made coating?
No. This is the quality of surface preparation, and the finish is chosen separately.
Where can I view the DWG?
You can Get DWG of the connecting socket and compare it with the sweep.
Why do you need a paper template?
It shows the real frontal scale and side margins before purchase.
Do I need to model the depth?
Yes. All options protrude by 24 mm, which affects the shadow and the connection with the molding.
Can RS-001 be replaced with a regular carved overlay?
Only if the project is redesigned and the new part is confirmed for the assembly. A random overlay does not guarantee proper joint finishing.
How is RS-001 different from a ceiling rosette?
The ceiling part finishes the ceiling composition. RS-001 is intended for the connecting joint of architectural decor.
How is RS-001 different from RS-002, RS-003, and RS-004?
These are different models. For a full comparison, you need to open the cards and the general guide.
Where can I read the model comparison?
In the material about, How does RS-001 differ from RS-002, RS-003, and RS-004?.
Can RS-001 be installed between the base and the body?
Only if such a position is provided for in the drawing. The base itself forms the lower part, so the joint requires verification.
Can it be placed under the capital?
Yes, if the project contains a joint that the rosette should cover. There is no automatic rule.
Is RS-001 suitable for boiserie?
Yes, as part of a pilaster or architectural composition according to the project. In repeating panels, a single horizontal line is especially important.
Can it be used on furniture?
Possibility depends on the pilaster decor of the furniture, the base, and dimensions. The article does not confirm universal installation on any facade.
How to count sockets for a wall panel?
Divide the pilasters into types, mark the nodes, and sum up identical dimensions.
Is a reserve needed?
Reserve is assigned based on specific risk and size. A percentage of the total quantity may yield extra parts of unsuitable dimensions.
How to record the reserve?
As a separate line: RS-001 80 × 80 × 24 mm, 1 pc., repair stock for nodes U-01–U-04.
Can different sizes be ordered in one batch?
Conditions are checked at the time of ordering. In the specification, each size must be listed as a separate line.
Is it necessary to mark the packaging?
Yes. Indicate the size and node numbers, especially if the project has multiple variants.
Which adhesive should be chosen?
Based on the base material, finish, and requirements of the specific composition. The universal adhesive does not specify an article.
Can it be glued to an already painted surface?
The possibility depends on the coating and technology. Adhesion and compatibility must be checked before installation.
When is it better to paint RS-001?
After a dry fit. The further procedure depends on the finishing system.
Why can't you install the pilaster first and then choose the rosette?
After installation, it is more difficult to measure the joint, select the material, perform the color sample, and neatly align the parts.
How to check paired pilasters?
Use one baseline, identical templates, and a joint frontal photograph.
What to do if the joint has already been left open?
Take precise measurements, determine the usable area, check the depth and material. Do not buy the first trim that fits the width.
Where to buy wooden pilasters and columns?
Can be opened wooden pilasters — catalog and prices and assemble the set according to the drawing.
Where can I see all the connector sockets?
In the filter, you can buy a wooden connector socket after comparing models.
Where can I find the current price for RS-001?
In the card of the specific product and size. The price should not be carried over from another size.
Can I order RS-001 separately?
Terms are clarified in the card or with the manager. For color and size consistency, a complete set is preferable.
What documents should be provided to the manager?
A layout, node map, size list, material, finish, quantity, and information about adjacent elements.
When is the design service needed?
When there are many nodes, sizes differ, and there are moldings, doors, panels, or several types of pilasters.
How to check the entire order with one question?
Ask: "For each connecting node, is a specific part, size, and quantity specified?" If the answer is no, the specification is incomplete.
Not a socket "for later," but a part of the node from the first drawing.
RS-001 is easy to forget because the pilaster is recognizable even without it: the base sits at the bottom, the capital completes the top, and the vertical part defines the shape. But the architectural composition is judged not by the presence of large details, but by how accurately the transitions are connected. An open joint immediately ruins the impression of integrity.
Before ordering, do not count sockets by the number of pilasters. Mark each node, measure the useful field, compare six sizes, and check the 24 mm depth. Then choose beech or oak, fix "Prestige," agree on the finish, and include RS-001 in the same list where the base, body, capital, moldings, and mounting materials are located.
STAVROS company allows you to go through the entire route without random selection: choose the connecting socket RS-001, compare other models, open the catalog of pilasters and columns, select bases, get DWG, order project layout, finishing materials and delivery. When the kit is assembled as a single system, the connecting socket does not appear at the last moment. It takes its place in advance on the drawing, in the estimate and in the finished architectural composition.
-