Article Contents:
- Window as an architectural element: why framing matters
- Anatomy of a window frame: all elements individually
- Side carved architraves
- Top horizontal element
- Bottom horizontal element
- Top piece: the upper decorative accent
- Rosettes: the element that brings corners to life
- Connecting elements
- Brackets as a complement to the frame
- Top piece: detailed anatomy of the main element
- How the top piece is installed
- Space for the finial
- Symmetry of the finial
- Finial and side casing ornament
- Rosettes in detail: how to choose and install correctly
- Rosette as a nodal element
- Types of rosettes
- How many rosettes are needed per window
- Installing a rosette: precision matters
- How to assemble a window casing: installation sequence
- Step 1: Marking
- Step 2: Installing side casings
- Step 3: Installing the top horizontal element
- Step 4: Installing the bottom horizontal element (if needed)
- Step 5: Installing sockets
- Step 6: Installing the top piece
- Step 7: Sealing and painting
- How to choose elements in one style: a practical guide
- Guide 1: Ornamental style
- Guide 2: Scale of ornament
- Guide 3: Width and proportions
- Guide 4: Material and thickness
- When a pediment is mandatory and when it is superfluous
- Pediment is mandatory:
- Pediment is appropriate but not mandatory:
- Pediment is superfluous:
- Examples of sets for different types of houses
- Scenario 1: Country house, 4 windows, modest decoration
- Scenario 2: Bathhouse with two windows and an entrance door, medium decor
- Scenario 3: Wooden house, main facade, 4 windows + entrance door
- Facade addition: wooden baguette and overlays
- Common mistakes when assembling window framing
- Buy only side trims
- Do not count sockets and connecting elements
- Mix ornaments of different styles
- Choose a finial without considering free space
- Do not think about color before purchasing
- Choose a finial that is too massive for a small window
- Install without marking
- Window framing and house style: how to connect details with the overall look
- FAQ: answers to popular questions about window framing
- What is a carved window casing finial and why is it needed?
- Are sockets needed for carved architraves?
- Can the set be assembled independently by selecting elements individually?
- Will a frame with a pediment fit a small window?
- How many sockets are needed for one window?
- How to correctly choose the width of the architrave for the window size?
- Should the architraves be painted before or after installation?
- About the Company STAVROS

It is precisely these details that will be discussed. How to assemble a complete, proportionate, and expressive window frame from individual elements — side architraves, pediment, sockets, connecting parts. How not to overload, how not to lose in the small things, how to make sure that every window on the facade works for the image of the house, and not just "exists."
There will be no general words about the beauty of wooden decor here. Here — the specific architecture of the frame, a clear assembly logic, and precise guidelines for selection. Carved architraves with pediment "— it's a system, not a set. And this article is about how to build that system."
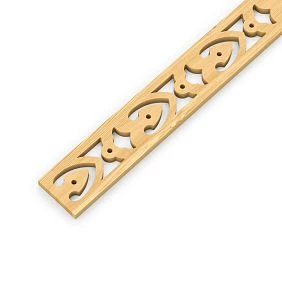
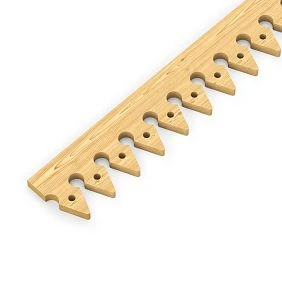
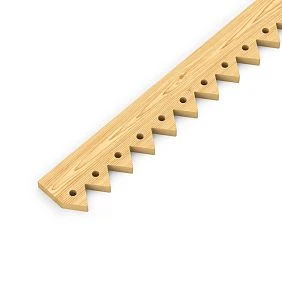
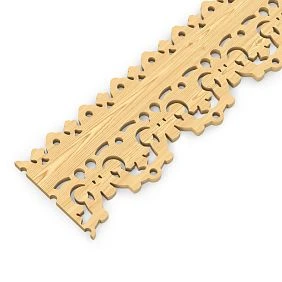
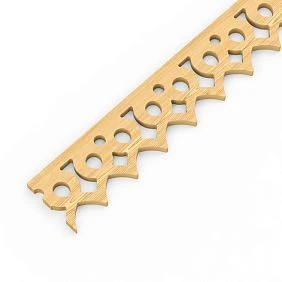
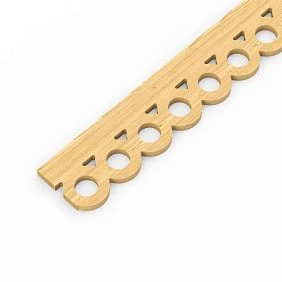
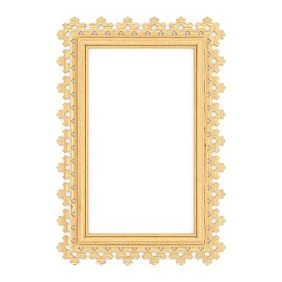
"Window as an architectural element: why framing matters"
"There is one thing that architects understand but homeowners often overlook: a window is not just a hole in the wall. It is the most 'human' element of the facade. It is windows that give a house its expression — serious or welcoming, closed or open."
"A bare window in a wall is neutral. It says nothing. A framed window speaks. It tells about the owner's taste, the style of the house, and how carefully a person treats what they create."
"Carved wooden window framing is historically one of the richest tools for facade expressiveness. Russian wooden houses with architraves are recognizable throughout the country. But this is not about museum reconstruction: modern" House Carving "— these are precise products with specified geometry, ready for installation and any finishing."
"What makes framing 'beautiful'? Not the richness of the ornament or the number of elements. But proportionality, unity of style, and thoughtfulness of details. A top piece that fits in width. Rosettes that neatly cover the corner. Side architraves that hold the vertical. All of this is an assembly that needs to be understood once."




"Anatomy of window framing: all elements individually"
"Before talking about how to assemble a set, let's break down each element separately. This will give an understanding of the role of each detail — and help decide what your window needs."
Our factory also produces:
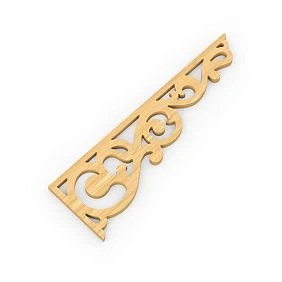
"Side carved architraves"
Two vertical elements are the foundation of any framing. They mark the side boundaries of the opening, set the height of the decorative zone, and create a vertical line that visually "stretches" the window.
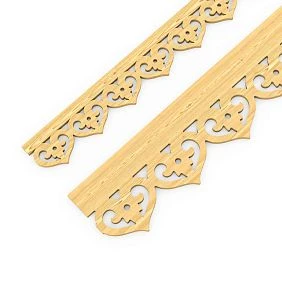
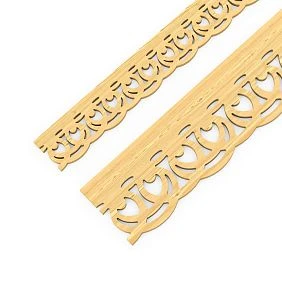
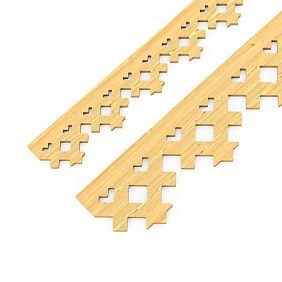
Side , decorative overlays and carved cornices. Installing the gable not only improves the building's appearance but also makes it more harmonious and complete. are produced in a standard length of 2000 mm. For most window openings up to 1500–1600 mm high, this is sufficient: the casing is cut to size at the top and bottom on site.
The width of side casings varies: 80, 100, 120, 140, 160 mm — depending on the collection. The width is chosen based on the width of the window opening: for a 900 mm window, a 90–120 mm casing is suitable; for a 1200 mm window, 110–140 mm.
The ornament of the side casing — geometric, floral, or openwork — sets the overall character of the entire framing. It is the side casings that create the "tone" of the facade: they are repeated on all windows and are perceived as a single rhythm.
Get Consultation
Top horizontal element
The horizontal casing covers the upper area above the opening and connects the two side elements into a single frame. Without it, the side casings are just two vertical lines, not brought into a system.
The upper horizontal element is selected with a width matching the width of the side casings. The length is selected based on the width of the opening: the horizontal element should cover the opening and extend slightly beyond the side casings — or meet them exactly at the corner rosettes.
The standard length of the horizontal element is 2000 mm, and it is cut to size on site. In some collections, the ornament of the horizontal element is symmetrical and has a center — in this case, it is important to maintain symmetry when cutting.
Bottom horizontal element
The lower horizontal piece frames the area under the window — between the windowsill and the facade plane. It mirrors the logic of the upper element and creates a complete frame around the opening.
The lower element is an optional piece. Without it, the framing looks like three sides of a frame (two sides and the top). With it, it looks like a complete four-sided frame. On the main facade, the lower element is desirable. On side and rear facades, it is optional.
Important technical point: the lower element is installed below the window sill level. It must be clearly aligned in height with the existing window sill so that there is no non-functional gap between them.
Crown: the upper decorative accent
A crown is a decorative detail installed above the horizontal element. It is what makes the window "named": not just framed, but adorned, solemn, and special.
Carved architraves with pediment on the main facade of a wooden house — it is the pinnacle of traditional house carving. The crown lifts the gaze upward, creates a vertical accent, and gives the window a "title" — just as a drop cap gives weight to the first word in a text.
Types of crowns:
-
Semicircular — a soft arch above the horizontal element. Creates a calm, harmonious look. Works well on houses without a distinct architectural style.
-
Triangular (pediment) — a sharp or shallow triangular top. Echoes the gable roof, creating a sense of architectural logic.
-
Figural — an asymmetrical or complex crown with curls, volutes, and openwork cutouts. The richest option for a formal facade or entrance area.
-
Rectangular — a horizontal superstructure with ornament. A laconic option, suitable for modern styles and large windows.
The crown is installed flush above the horizontal element. Its width must match the width of the horizontal casing — no overhangs beyond the side casings or, conversely, no narrowing.
The height of the finial is a matter of proportion. For a window 900 mm wide, a finial height of 150–200 mm is optimal. For a wide window of 1400–1600 mm, it is 250–350 mm.
Rosettes: an element that brings corners to life
Here is a question many people have: why are rosettes even needed? Can't you just join the side casing with the horizontal one directly?
Technically, you can. Visually, it's a loss. Joints of wooden elements without rosettes look like a construction problem solved head-on: one board meets another at a corner. A rosette turns this corner into a decorative node — small, precise, beautiful.
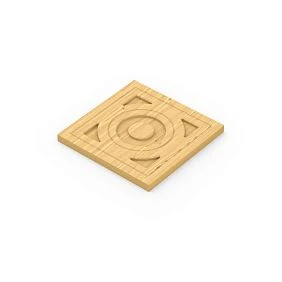
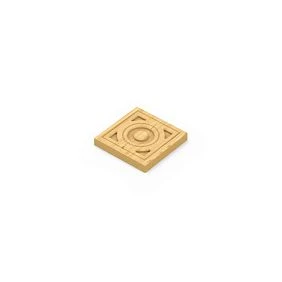
Rosettes for casings — these are square or diamond-shaped decorative elements with ornamentation, installed at the corners where vertical and horizontal casings meet. They perform two functions simultaneously: they cover the corner joint and become an independent ornamental accent.
The standard size of a rosette is from 60 × 60 mm to 120 × 120 mm. The size is selected based on the width of the casing: the rosette should be proportionate to the casing — not smaller than its width and not wider than the diagonal of the corner.
For a full frame with horizontal elements at the top and bottom, four rosettes are needed. For a frame with only a top horizontal element, two rosettes are needed. This is important to consider when calculating the order.
The ornament of the rosette should echo the ornament of the casing — not necessarily repeat it literally, but belong to the same 'vocabulary of forms'.
Connecting elements
Connecting parts are a subtle but important topic. They are needed in two cases.
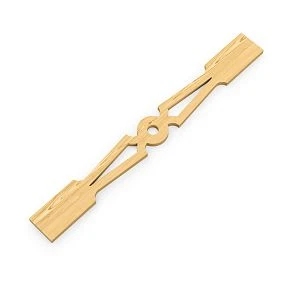
The first is when the height of the window opening exceeds the standard length of the casing (2000 mm). This is typical for door openings, tall French windows, and veranda openings. In this case, the side casing is assembled from two elements, and the joint is covered with a connecting plate.
The second is when two adjacent windows are placed side by side without a partition (paired windows). Between them, a connecting insert is needed, which covers the gap and creates the impression of a single frame rather than two separate ones.
Connecting elements are small and often forgotten when ordering. But they determine the neatness of installation in complex areas.
Brackets as an addition to the framing
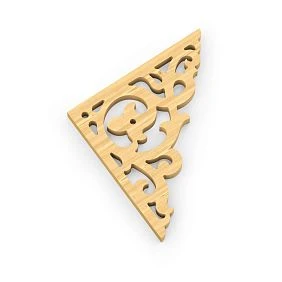
Brackets are not part of the "main" window framing kit, but they organically complement it on the main facade and at the entrance area. Two brackets on each side of the window, under the cornice or under the windowsill, add volume and architectural depth to the framing.
Brackets work especially well paired with a pediment: if the pediment creates an accent at the top, the brackets "hold" the bottom — and the entire vertical axis of the window receives decorative framing along its full height.
The full range of facade elements — from casings to brackets — is presented in the section of carved decor for the facade.
Pediment: detailed anatomy of the main element
The pediment deserves a separate discussion. It is a detail that is most often considered separately from the rest of the kit — and this is where the most mistakes are made.
How the pediment is installed
The top piece is attached to the facade above the horizontal casing. It rests on the upper plane of the horizontal element or is installed with a slight overlap. This is important: the top piece does not "hang in the air"; it is connected to the horizontal casing either structurally (via a groove or ridge) or through tight contact.
Fastening the top piece to the wall — using self-tapping screws through the material, followed by puttying the screw heads, or using mounting adhesive foam in combination with self-tapping screws. For heavy, shaped top pieces with a large overhang, additional fastening through the back side is recommended.
Space for the top piece
The first thing to check before choosing a top piece is whether there is enough free space above the horizontal casing. The distance from the upper edge of the horizontal element to the cornice, the next window, or another architectural obstacle must be at least the height of the top piece plus 50–100 mm of technological clearance.
If there is no space, the top piece is either not installed, or the lowest available option is chosen.
Symmetry of the top piece
The top piece must be strictly symmetrical relative to the central axis of the window. This seems obvious, but during installation it is often misaligned: first the horizontal casing is attached, then the top piece is "seated" on it — and if the horizontal element is shifted, the top piece will look sideways.
Rule: first find the central axis of the window opening, mark it on the wall, then install the horizontal casing strictly symmetrically to this axis, and only then install the top piece.
Top piece and ornament of side casings
The top piece and side casings do not have to have the same ornament. Moreover, sometimes the contrast between "calm" side casings and an "active" top piece creates an interesting hierarchy — the window seems to "grow" from simple to rich from bottom to top.
But at the same time, they must belong to the same ornamental vocabulary: geometry to geometry, floral to floral, openwork to openwork. A style mismatch between the side casing and the top piece is one of the most noticeable errors in facade decor.
Rosettes in detail: how to choose and install correctly
A rosette is a small detail with great significance. Let's discuss it separately and in detail.
The rosette as a nodal element
The corner where vertical and horizontal casings meet is a visually active point. When scanning a facade, the human eye first takes in the silhouette, then the details—and the framing corners are among the first to catch attention.
If the corner is covered by a rosette, the eye receives an 'answer'—a decorative node that completes the corner. If the corner is open, the eye sees a 'question'—incompleteness, a technical joint.
That is why rosettes, despite their small size, contribute to the overall sense of refinement and quality of the framing.
Types of rosettes
Square rosettes are the most common type. They are installed in the corner, where the width of the rosette equals the width of both converging casings. Ornamentation: geometric, floral, diamond-shaped.
Diamond-shaped rosettes are a more dynamic form, creating a sense of rotation. They are appropriate in collections with active geometric ornamentation.
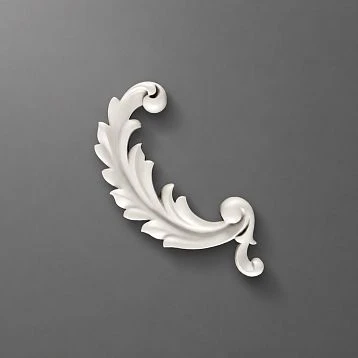
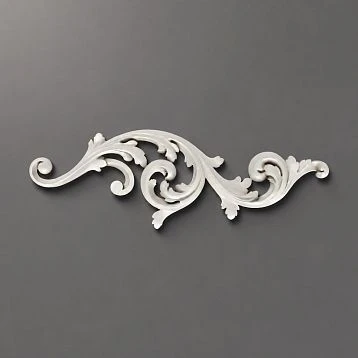
Figural rosettes are carved details of complex shape, often featuring a flower, star, or scroll. They are the richest option for a formal facade.
Connecting sockets are flat parts used at joint points when extending the trim lengthwise. They are less decorative and more functional.
How many sockets are needed for one window
This depends on the framing scheme:
| Framing scheme | Number of sockets |
|---|---|
| Only side trims (without horizontal ones) | 0 |
| Side + top horizontal | 2 |
| Side + top + bottom horizontal | 4 |
| Side + top + bottom + finial | 4 sockets + 2 corner sockets for finial (optional) |
Installing a socket: precision matters
The socket is installed in the corner after mounting the architraves. It must completely cover the ends of both elements — vertical and horizontal — without gaps and without protruding beyond the plane of the architrave.
To achieve this, when installing the horizontal architrave, its ends are not cut flush against the side architrave — a small space (equal to the width of the socket) is left, into which the socket is later fitted.
This is a small technical nuance that affects the entire installation: if you plan to use sockets, account for their width when cutting the horizontal architraves.
How to assemble a window frame: installation sequence
Understanding the correct installation sequence is not only practical. It also helps to understand how the elements are connected and why the order matters.
Step 1: Marking
Before installation, mark key reference points on the wall:
-
Central axis of the opening (vertical line through the middle of the window)
-
Horizontal line of the top edge of the casing or frame
-
Horizontal of the lower edge of the casing
-
Marks for socket (corner) positions
This marking will save time and eliminate the need to "re-do" installation due to misalignments.
Step 2: Installing side trims
Start with the side ones. Each trim is cut to length: the top end — under the lower plane of the horizontal trim (considering the socket width), the bottom end — at the level of the lower edge of the casing or windowsill.
Side trims are fastened with self-tapping screws through the face plane (with putty over the heads) or with mounting adhesive combined with several point fastenings.
Strictly check the vertical with a level. A deviation of the side trim from vertical by 2–3 mm is noticeable to the naked eye — especially if there are several identical windows nearby.
Step 3: Installing the top horizontal element
The horizontal trim is cut to length: the length equals the distance between the inner edges of the side trims plus double the socket width (if sockets are used) or exactly flush with the side trims (if there are no sockets).
It is installed flush against the top ends of the side trims. The horizontal is checked with a level.
Step 4: Installation of the lower horizontal element (if needed)
Similar to the upper one. Installed under the bottom end of the side casings. Important: the lower element must be strictly horizontal and not cover the ventilation gap under the windowsill, if provided by the design.
Step 5: Installation of rosettes
After installing the side and horizontal casings, rosettes are inserted into the corners. They are placed over the joints and fixed with glue or small nails.
Important point: the rosette must fit tightly against the surface of the casings and the wall. Gaps should be filled with acrylic sealant before painting.
Step 6: Installation of the crown
The crown is the last element installed at the very end. It is mounted over or above the horizontal casing, strictly along the central axis of the opening.
For heavy crowns, an additional attachment point to the wall is recommended — through the upper part of the crown, in a place that will be hidden after painting.
Step 7: Sealing and painting
After installation, all joints, ends, and gaps are treated with acrylic sealant. Let the sealant dry, sand the surface, and proceed with painting. Painting after installation allows all elements to be painted simultaneously in a single color, including joints and sealant.
How to choose elements in one style: a practical guide
The main mistake when assembling a set is to choose each element separately, guided only by your own impression. You liked the casing here, the top piece there, the rosettes — these are beautiful. As a result, the facade has three different ornaments that don't talk to each other.
Guide 1: ornamental style
Decide on the style of ornament before choosing individual elements. Three main directions:
Folk / traditional: plant motifs, curls, sun rosettes, curvilinear forms. For a country house, log cabin, bathhouse in Russian style.
Geometric: diamonds, lattices, weaves, straight lines. Universal, works well on both traditional and modern buildings.
Openwork (sawn): through cuts, lightness, airiness. Especially good on large areas: veranda, fence, gate.
Having chosen a style, stay within it: side casings, top piece and rosettes — from one ornamental direction.
Guide 2: scale of ornament
The scale of the ornament must be consistent. If the side casings have a fine detailed pattern, the top piece should also be fine or medium in scale. A large "monumental" ornament on the top piece against a background of a delicate openwork pattern on the side casings is a mismatch of scales.
Simple rule: consider all selected elements side by side (in a catalog or in reality) and assess how comparable their pattern "density" is.
Guideline 3: width and proportions
All horizontal framing elements (top and bottom casings) must have the same width as the side ones. This uniformity of width creates the feeling of a "frame" — uniform around the entire perimeter.
The pediment may be wider than the side casings — exactly as much as it overlaps them at the corner points. Extending beyond the corner points creates dissonance.
Guideline 4: material and thickness
All framing elements must be made of the same material (e.g., glued pine panel) and of the same thickness — so that after installation they lie in the same plane. Different thickness creates "steps" on the facade — small but noticeable.
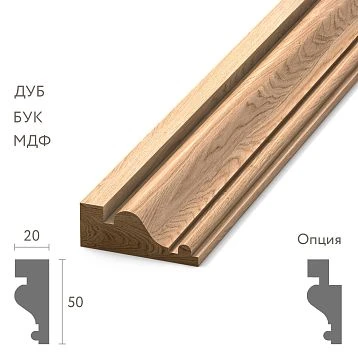
Wooden decorative inlays и Wooden Picture Frame for creating horizontal belts next to the framing — must also lie in the same thickness as the main casings.
When a pediment is mandatory and when it is unnecessary
This question is asked most often. And the answer always depends on the context.
A pediment is mandatory:
-
On the main facade of a wooden house, if the house claims architectural expressiveness
-
On the entrance opening — this is the central accent of the entrance group
-
On the central window of the front facade — if it stands out in size or position
-
On the window next to the porch — to create a cohesive decorative image of the entrance area
A finial is appropriate but not required:
-
On the veranda windows — on the main facade of the veranda, on the central or corner window
-
On the bathhouse windows — on the front facade, near the entrance door
-
On the country house windows — if the overall decorative style is sufficiently rich
A finial is superfluous:
-
On all windows of a large facade with many identical windows — overload
-
On small windows (600 × 600 mm or less) — the finial will be disproportionate
-
On side and rear facades — saving resources without losing the image
-
On attic floor windows, if they are close to the cornice — no space
Examples of kits for different types of houses
Let's break down several specific scenarios — from simple to complex.
Scenario 1: Country house, 4 windows, modest decoration
Goal: neat, inexpensive decoration without excess.
-
Side trims 80 mm, geometric pattern — 8 pcs.
-
Top horizontal 80 mm — 4 pcs.
-
Corner rosettes 80 × 80 mm — 8 pcs.
Without top piece, without bottom element. White color.
Scenario 2: Bathhouse with two windows and an entrance door, medium decor
Goal: expressive image of the entrance area with modest window design.
Two windows 900 × 1200 mm:
-
Side casings 100 mm — 4 pcs.
-
Top horizontal — 2 pcs.
-
Rosettes — 4 pcs.
Entrance door 900 × 2000 mm:
-
Side casings 120 mm (considering joint) — 4 pcs.
-
Upper horizontal — 1 pc.
-
Shaped top piece — 1 pc.
-
Connecting overlays — 2 pcs.
-
Rosettes — 2 pcs.
Overall — a simple but expressive set. Attention is focused on the front door.
Scenario 3: Wooden house, main facade, 4 windows + front door
Goal: rich but proportionate decoration of the main facade.
Four windows 1200 × 1400 mm:
-
Side trims 120 mm — 8 pcs.
-
Upper horizontals — 4 pcs.
-
Lower horizontals — 4 pcs.
-
Semicircular tops — 4 pcs.
-
Rosettes 120 × 120 mm — 16 pcs.
Front door 1000 × 2100 mm:
-
Side trims 140 mm — 4 pcs. (including joint)
-
Upper horizontal — 1 pc.
-
Shaped top piece — 1 pc.
-
Connecting overlays — 2 pcs.
-
Rosettes — 2 pcs.
-
Paired brackets at the door — 4 pcs.
Result: a rich, formal facade with a clear emphasis on the entrance area.
Facade addition: wooden baguette and overlays
To the three scenarios above, you can add Wooden Picture Frame to create a horizontal belt around the perimeter of the first floor — it will visually unite all windows into a single line and add architectural refinement to the facade. Also appropriate are Wooden decorative inlays on the piers between windows — if the distance between openings is sufficient.
Details about the material and properties of the products are described on the page Materials and quality of STAVROS products — useful reading before making a final decision.
Common mistakes when assembling window trim
Each of these mistakes is made regularly — and each is easy to avoid if you know about it in advance.
Buy only side trims
Two vertical architraves without horizontal elements are not a frame, but a decorative "accompaniment" to the opening. Beautiful, but incomplete. Verticals without horizontals do not create a frame — they simply flank the window.
If the budget is limited — the minimum working set: side pieces + top horizontal + two rosettes. The bottom element and the finial are the next step.
Do not count rosettes and connecting elements
Rosettes and connectors are small and often inexpensive, but their absence makes the installation incomplete. They are counted separately and ordered with a 20–25% margin.
Mixing ornaments of different styles
Geometric architrave + floral finial + openwork rosettes = a facade that says nothing coherent. Stick to one ornamental language.
Choosing a finial without considering the available space
If there is no space above the horizontal architrave, the finial will hit the cornice or the windowsill of the next floor. Always measure the space above the horizontal element before making a decision.
Not thinking through the color before purchase
"We'll paint it later" is a risk. Color determines the overall perception of the decor. White, dark, matching the facade — each option changes the feel of the facade dramatically. Decide on the color before ordering, before installation, before purchase.
Choosing too massive a pediment for a small window
A pediment 400 mm high above a window 700 mm wide is a disproportion that catches the eye. Maintain the proportion: the height of the pediment should not exceed 25–30% of the height of the side casing.
Installing without marking
Every casing installed "by eye" risks being slightly shifted. On one window, this is unnoticeable. On a facade with six windows, the inconsistencies add up — and the facade looks sloppy. Marking before installation is a mandatory step.
Window framing and house style: how to connect details with the overall image
The final and perhaps most interesting question: how to make the window framing work for the overall image of the house, rather than existing on its own?
The answer lies in consistency. Window decor should be part of a unified decorative program of the facade. This means: the ornament of the casings echoes the ornament of the gate and wicket casings (if they are wooden). The color of the casings is repeated in the color of the brackets and railings. The type of carving — folk, geometric, openwork — is uniform for the entire estate.
wooden decorative elements For different parts of the estate — house, bathhouse, gazebo, fence — they can be from different collections, but must belong to the same style. This creates a sense of intent and refinement that distinguishes a beautifully designed estate from a merely "decorated" one.
And here the role of the pediment and rosettes goes beyond "details at the window." They become part of the architectural language — the language your entire house speaks.
FAQ: answers to popular questions about window framing
What is the top piece of a carved window casing and why is it needed?
The top piece is an upper decorative element installed above the horizontal casing. It makes the window expressive, complete, and "headline" on the facade. The top piece turns an ordinary frame around a window into an architectural accent.
Are rosettes needed for carved window casings?
Technically, they are not required. Practically, rosettes cover the corner joints of casings and turn a technical corner into a decorative node. Without rosettes, the framing looks unfinished at the connection points of elements.
Can I assemble a set myself by choosing elements individually?
Yes, provided that all elements belong to the same ornamental style, have the same width and thickness, and are made of the same material. Random assembly from different collections often gives an inconsistent result.
Will a framing with a top piece suit a small window?
Yes, but the top piece should be chosen proportionally: low (150–180 mm for a window 600–700 mm wide), with moderate ornamentation. A massive top piece on a small window creates disproportion.
How many rosettes are needed for one window?
Depends on the scheme: 2 rosettes if the framing only has the upper horizontal element, 4 rosettes if there are both upper and lower horizontal elements. Additionally, 2 rosettes under the top piece if corner mounting is provided.
How to properly select the width of the casing for the window size?
Approximately: casing width — 8–12% of the window opening width. For a 900 mm window — casing 80–110 mm, for a 1200 mm window — 100–140 mm. A very wide casing narrows the visible glass; a very narrow one gets lost on the facade.
Should the casings be painted before or after installation?
The first coat of primer — better before installation (easier to cover all edges, including ends). Final painting — after installation and sealing of joints. This ensures a uniform color of the entire frame and hides joints under the paint layer.
About the company STAVROS
A beautifully assembled window frame is the result of proper element selection and precise installation. But the foundation is a product with accurate geometry, stable material, and carefully milled ornament.
STAVROS manufactures house carving on CNC machines. This means that each casing, each top piece, each rosette is an exact copy of the previous one. The width matches to the millimeter, the ornament repeats without distortion. During installation, elements from the same batch align in a single plane without adjustment.
Material — glued pine furniture board with removed knots and resin pockets. Geometrically stable, ready for any final finish, durable with proper care. Details about the material — on the page Materials and quality of STAVROS products.
In the of carved decor for the facade — everything needed to assemble a complete window frame: side casings, horizontal elements, top pieces, rosettes, connecting overlays, brackets, Decorative Inserts и Wooden Picture Frame.
Start with the catalog STAVROS house carving — and assemble a frame that will work for your home's image every day.