Article Contents:
- First, measure the free area of the facade
- The overall size of the overlay and the scale of the pattern are different parameters
- Choose a typical viewing point for the furniture
- One large motif or several small ones
- Free space helps the carving read clearly
- The volume of the relief is assessed together with the light
- The central element must have a clear role
- Vertical and horizontal decor are compared by their cross-sectional dimension
- Corners and rosettes can support the composition
- The bracket and capital need to be seen from the side
- Set the main motif and subordinate details
- Related ornaments do not require the same sheet on every part
- The frame must match the carving in expressiveness
- The handle is part of the composition and must remain comfortable
- Material and finish change the perceived scale
- How to check the scale before buying the entire set
- Record the compositional role together with the SKU
- Where to buy carved furniture elements for the chosen composition

The overlay fits between the edges of the door, but after fitting it looks too cramped: the scrolls almost touch the frame, the handle gets lost, and the small leaves blend into a blur from a distance. The mistake may not be in the size of the facade or the quality of the carving. Only the external dimensions of the part were considered for the selection, leaving the density of the pattern, the protrusion, and neighboring elements out of account.
Carved furniture elements are evaluated within the whole composition. You need to determine the free field, choose the main accent, and check how the ornament reads from a normal viewing point. After that, compare specific models, their sizes, and relief. This order helps you choose expressive decor without filling every available part of the surface with it.
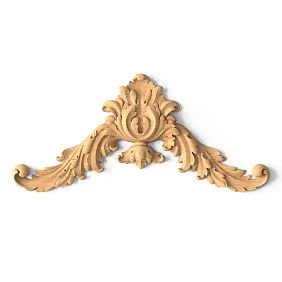
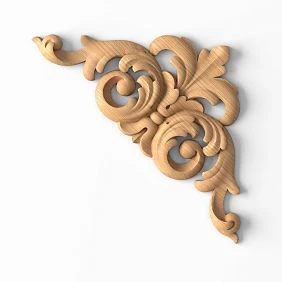
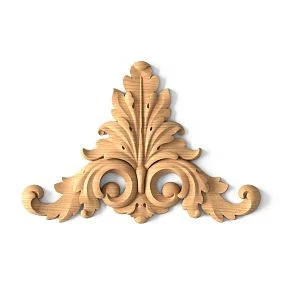
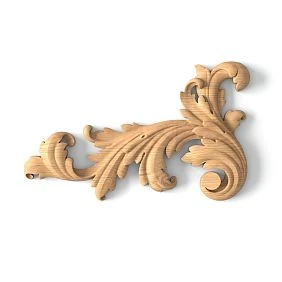
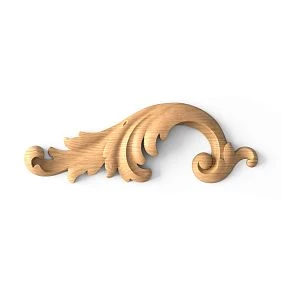
First, measure the free area of the facade
The full width of the door is not equal to the space that can be allocated for the overlay. Part of the surface is occupied by the frame, handle, paneled transitions, and necessary clearances. Start with a drawing of the facade on which these elements are already marked.
Let's consider a conventional door measuring 500 × 700 mm. If the outer edge of the frame is set back 35 mm from each edge, and the profile takes up another 20 mm inward, the free rectangular field will be 390 × 590 mm. It is with this that the central overlay is compared. This is an example of geometry, not a recommendation for a universal field size.
If a handle is located in the same area, the available zone can no longer be described by a single rectangle. Mark its outline and the grip area. For a shaped panel, the actual boundaries of the plane to which the decor will adjoin are also taken into account.
Selected Wooden moldings for furniture must appear on the sketch before the final choice of overlay. Replacing a narrow frame with a wide one will change the free field even if the original facade dimensions remain the same.




The overall dimensions of the overlay and the scale of the pattern are different parameters
Two pieces 300 mm wide can be perceived completely differently. One has a single large leaf and several smooth lines. The other has many small curls, tight slots, and frequent relief transitions. The external size is the same, but the number of visible details differs.
Therefore Carved decorative inserts for furniture are compared simultaneously by outline and internal pattern. Look at how large the main motifs are, how many gaps there are between them, and whether there is a recognizable center. For dense ornament, checking from a distance is especially important.
For an elongated piece, long thin ends can increase the overall size without making the motif itself massive. For a compact overlay, a dense central part, on the contrary, can look heavier. Comparing bounding rectangles alone is not enough here.
It is useful to overlay an image of the actual outline onto the sketch. A black rectangle shows only the occupied space, while a cut-out silhouette helps evaluate the gaps around leaves and curls. For a final decision, you will also need to see the relief itself.
Our factory also produces:
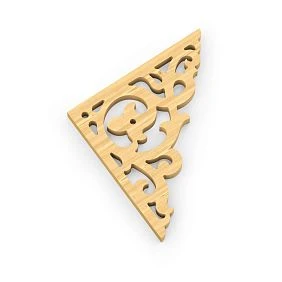
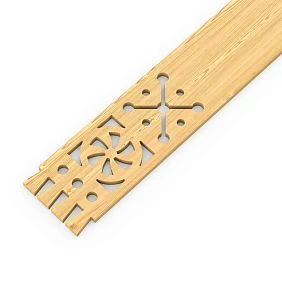
Choose a typical furniture viewing point
Scale is assessed from the distance at which the item is used and seen in the room. An inlay on a bedside table often ends up close to a person. The upper decor of a tall wardrobe is viewed farther away and from a different angle. The same level of detail reads differently under these conditions.
First assess the overall silhouette of the furniture, then an individual facade, and only then the quality of fine carving. If the pattern is interesting only in a large photograph but disappears during normal viewing, it is worth comparing it with a larger or less dense motif.
Check several characteristic positions: directly in front of the facade, from the side, and from the entrance to the room. For a low cabinet, a slightly top-down view is useful. For a wardrobe near a wall, the angle from which its side is usually seen matters.
Photograph the options from the same point and under the same lighting. Automatically zooming each element to full screen hides the difference in scale. The shot should show the surrounding field and neighboring details, otherwise you are comparing individual ornaments rather than the future furniture.
Get Consultation
One large motif or several small ones
A large central element gathers attention in one zone. Several small ones create repetition and can stretch the composition across the width or height. These solutions cannot be compared only by the sum of the sizes of the details.
Let's take a conditional free field 390 mm wide. One element 300 mm wide, when placed in the center, will leave 45 mm on each side. Three elements of 100 mm with two gaps of 20 mm will already take up 340 mm, leaving 25 mm at the edges.
| Sketch option | Total occupied width | Side margin when centered |
|---|---|---|
| One element 300 mm | 300 мм | 45 mm each |
| Three elements of 100 mm, gaps of 20 mm | 340 мм | 25 mm each |
This is a conditional comparison, not a set of catalog dimensions and not a standard for intervals. It shows why the same total width of carving does not mean the same composition.
Additionally, evaluate the height and density of each motif. Three small rosettes can create a calm row, while three rich appliqués create several competing centers. The choice depends on the role of the decor on a specific facade.
For furniture with repeating doors, you need to check one more scale — the entire piece. A single appliqué on a separate facade may look restrained, but six such facades next to each other will create six noticeable accents. Place the entire repeat on a general sketch, including handles and dividing lines. If the row becomes too dense, compare a calmer motif or a different distribution of decorative zones. The size of one detail can remain the same: what changes is the organization of the whole set.
Free space helps the carving read
The gap between the appliqué and the frame separates one pattern from another. When there is almost none, the edge of the leaf may visually merge with the profile, and the thin end of a scroll may look as if it is randomly pressed against the border. Formally, the details may not touch.
There is no universal rule requiring a certain percentage of empty margin. Perception is influenced by the shape of the contour, the size of the motif, light, background color, and the activity of neighboring decor. Instead of a single calculated percentage, compare several variants of real sizes and offsets.
Look separately at the tightest spots. The average distance around the appliqué may be large, but one protruding leaf will end up almost at the handle. It is this local area that can make the whole composition unconvincing.
If the field looks overloaded, there are various solutions: reduce the detail, choose a more open ornament, cut down the number of elements, or reconsider the frame. Reducing all details at once does not always help. Sometimes the main accent disappears, while many small motifs continue to create a fragmented pattern.
The volume of the relief is assessed together with the light
A protruding overlay casts shadows on its own surface and on the facade. Under side lighting, these can make it more noticeable than intended based on the frontal catalog photo. Soft front light shows the same element more calmly.
At the same time, the overall thickness of the product is not equal to the depth of the carved ornament. Two overlays of the same thickness may differ in the height of the relief steps, the character of the bevels, and the size of the recesses. Therefore, expressiveness cannot be assessed by a single dimension alone.
Check the sample under normal daylight and artificial lighting at the intended installation location. There is no need to deliberately create dramatic side lighting if the furniture will stand in different conditions. It is important to see the real pattern of shadows, especially on small leaves and deep cuts.
Patina and contrasting finishes can enhance the differences between recesses and peaks. If they are specified in the project, compare the finished color sample. An unpainted detail confirms the shape but does not yet show the final visual impact of the carved decor on the facade.
The central element must have a clear role
A central overlay is suitable when the facade needs one pronounced accent. Its position is tied to the door axis, the frame, and the handle. First, the geometric center of the available field is marked, then it is checked how a specific pattern is perceived within it.
For a symmetrical detail with a massive lower part, the impression may differ from an overlay with thin lower ends. Therefore, the same center mark does not guarantee the same result. Any possible offset is checked on a mock-up and fixed with a dimension, while preserving the accepted logic of symmetry.
Pay attention to the direction of the motif. An ascending ornament can support the vertical, while a wide garland can emphasize the horizontal. If the task is to decorate the center of a tall door, a wide, low detail does not become suitable just because it fits between the edges.
For two adjacent doors, determine whether two independent centers or a single composition are needed. After that, choose either one symmetrical element per door or a coordinated pair. In both cases, compare the closed fronts together, and check the opening capability separately.
Vertical and horizontal decor are compared by their cross-sectional dimension
With an elongated overlay, it is easy to focus on the length and underestimate the width. Meanwhile, on a narrow front, it is precisely the wide central part that can occupy almost the entire field. The thin ends create a deceptive impression of lightness.
When selecting vertical carved overlays, check the width at the densest point. Compare it with the field of the door or post at the same height. Also look at where the large leaves fall relative to the handle and horizontal rails.
У horizontal carved overlays on a drawer, the height of the motif matters. A long piece may fit in width while leaving gaps that are too tight above and below. On a frieze, check its relationship to the upper and lower lines of the band.
Compare models in their actual proportions. Stretching an image only in width can produce a beautiful picture, but not a product that exists. For a mockup, use the dimensions of a specific version, and treat changes in proportions as a separate design task.
Corners and rosettes can support the composition
corner carved overlays help shape the completion of the frame. Their scale is assessed relative to the profile width, the size of the inner field, and the central decor. If each corner becomes as prominent as the main overlay, the front gets several equal accents.
Check the grain direction in all corners. A single directional part cannot be automatically turned into the required mirrored pair by rotation. For the selected models, specify the side and permissible orientation, then place the entire set on the sketch.
Carved outlets from wood they can mark a center, create repetition, or take part in decorating a junction. Their compact outline does not mean a weak accent: dense carving and pronounced volume can make a small rosette very noticeable.
If the rosette is to connect profiles, check the fit and the shape of the joint separately. In the section decoration for moldings there are solutions related to specific profiles. An arbitrary element of a suitable diameter does not guarantee the same result in a joint.
The bracket and capital need to be seen from the side
Wooden Brackets they create a three-dimensional accent. Their impression depends on the projection, the side silhouette, and the shadow under the adjacent shelf or band. Comparing with a flat applique only by height and width does not show these differences.
Check the bracket in the general view of the furniture and in the side image. Make sure it is proportionate to the upper part and does not look accidentally enlarged relative to the base. If a load-bearing function is intended, it is verified against the structure and fastening; decorative scale is not a load calculation.
wooden capitals they are assessed in conjunction with the post or pilaster and the upper cornice. It matters where the widest and most protruding parts are, how they transition into adjacent elements, and whether a heavy top appears with too thin a vertical base.
For such a junction, a paper outline from the front is not enough. Add at least a side template showing the projection. If the furniture is usually seen at an angle, this view may be more important than a strictly frontal photograph.
Set the main motif and subordinate details
When a central overlay, corner decor, rosettes, and an active frame are all present on a facade at the same time, it helps to distribute their roles. You need to understand what a person notices first and which elements help read the overall pattern.
| Role | Possible solution | What to check |
|---|---|---|
| Main accent | Central overlay, expressive upper node | Is there enough space around it, and is the motif fully visible |
| Support | Paired verticals, small corners, repeated rosettes | Whether they become equal to the main element in prominence |
| Framing | Calm profile, even bands | Whether the connection between the decor and the facade surface is preserved |
This is a working method of comparison, not a mandatory distribution of product groups. A rosette can be the main accent, while an overlay can be part of a calm, repeating row.
For richly decorated classic furniture, consistency between large and small motifs is especially important. A large amount of carving can look convincing when the pattern is organized. If the hierarchy does not read clearly, try temporarily removing one type of element or replacing it with a calmer model, then compare the entire piece.
A kinship of ornaments does not require an identical leaf on every detail
The combination of several elements is built on the character of the lines, the scale of the motifs, and the density of the pattern. Exact repetition of a single leaf on the handle, the overlay, and the leg is not required. At the same time, similar names of ornaments do not yet guarantee compatibility.
For example, a wide, smooth scroll may pair well with a simple rounded profile. Fine, sharp carving next to a large, calm motif will require more careful checking: the difference must be part of the design intent, not an accidental result of choosing from different photographs.
Gather images of the candidates at the same scale on a furniture sketch. Compare the thickness of the stems, the size of the main leaves, and the frequency of small details. If one element looks as if it were taken from an item of a different size, it is worth reconsidering its execution or role.
A catalog collection helps narrow the search, but the final decision is made on a specific set. Even within a single stylistic direction, decorative elements vary in scale and purpose. Checking on the facade remains necessary.
The frame must be consistent with the carving in terms of expressiveness
Molding defines not only the boundary of the free field but also the character of the lines around the overlay. A wide, multi-layered profile with pronounced relief already draws attention. Inside it, rich carving will be perceived differently than on a large smooth surface.
Compare the height of the protruding parts and the pattern of shadows on the frame and the overlay. They do not have to lie at the same level, but the transition should look intentional. Lines that are too close, almost coinciding, can create the impression of imprecise joining, even if the parts are not supposed to connect at all.
If the ornament of the overlay visually continues the frame, check where the lines meet. If it exists independently, maintain a clear gap between the contours. Different relationships between these elements require different spacing and forms of motif termination.
For a profile with a repeating pattern, its alignment at the corners is also assessed. An accidental break in the ornament can become more noticeable than a carefully chosen central detail. Therefore, it is better to approve the scale of the overlay on a sketch with real corners and a complete frame.
The handle participates in the composition and must remain comfortable
Wooden furniture handles cannot be considered neutral points on the facade. A large bracket, a carved handle, or a contrasting knob can become a separate accent. Their placement is determined together with the overlay.
Before buying carved decor for furniture, check the combination on a template. See whether two close centers arise: the massive part of the handle and the rich middle of the ornament. Sometimes it is enough to change the size of the overlay or choose a calmer handle while preserving the overall idea of the facade.
Then check hand access. The outer contours may not intersect, but the protruding leaf will end up in the finger zone. This requires a three-dimensional sample or a mockup reproducing the protrusion of the selected part.
The handle's position cannot be shifted solely for the sake of a beautiful photograph. The requirements for opening and fastening remain. If the composition works only with an inconvenient grip, the decorative set should be reconsidered. A successful solution must remain convincing in everyday use of the furniture as well.
Material and finish change the perceived scale
A dark overlay on a light background can become more noticeable than a larger part painted together with the facade. Contrasting wood grain, patina, and sheen also affect how actively the ornament is perceived. Therefore, the final size is approved taking the future finish into account.
For enamel, first of all compare the shape, surface texture, and light and shadow. For a transparent coating, the wood texture is added. In oak, it can noticeably participate in the overall pattern; beech allows you to see a different character of the wooden base. The choice is confirmed by a color sample, not by the name of the species alone.
The parameters of the blank and surface are checked in the description quality of wooden products and in the card of the selected model. An enamel finish cannot be considered suitable for any transparent result without verification.
If the approved layout assumed a solid-color facade, and later the idea of contrasting tinting appeared, the composition should be evaluated anew. The dimensions will not change, but the previous distribution of accents may stop working. It is enough to repeat the comparison of options with the new color solution.
How to check the scale before purchasing the entire set
First, select two or three real options from the catalog. For each one, specify the dimensions and the available size variants. drawings and product models help verify the geometry if the required materials are available for the selected item code.
Then prepare a comparison:
- Transfer the outline of the part at full scale, keeping the proportions.
- Place the template on the front panel together with the frame and handle.
- Mark the axes and the tightest gaps.
- Capture each option from the same point and compare the entire furniture set.
- Check the chosen solution on a physical sample with the planned finish.
Removable templates are attached in a way that does not damage the surface. Paper confirms the outline and placement, but does not show thickness, weight, or real shadows. For a three-dimensional check, you need an appropriate mock-up or the part itself.
Before fitting, measure the printed template with a ruler. The print mode that fits to page can change its size, even if the source image was prepared correctly. When comparing, change one parameter at a time: first the size of the overlay with the same frame, then the character of the pattern or the number of elements. If you simultaneously replace the profile, color, handle, and ornament, it will be difficult to understand which change improved the composition. After shortlisting, reassemble the full option to check how all the parts work together.
In the section product samples you can confirm the available options. The availability of samples does not mean that a small fragment will replace any overlay. Before buying carved wooden elements for the entire set, check the specific sample that answers the remaining question: scale, relief, junction, or finish.
Record the compositional role together with the product code
After selection, it is important to preserve not only the list of products but also the approved layout. Otherwise, during assembly, suitable parts may end up rearranged, and a later replacement with a similar product code will change the scale of the composition.
| Schedule field | What to record |
|---|---|
| Position | Element designation on the furniture sketch |
| Model | Full product code and selected size version |
| Role | Main accent, supporting motif, or part of the frame |
| Location | Facade, axis, and distances from the accepted boundaries |
| Orientation | Top, bottom, right or left side if necessary |
| Material and finish | Wood species, surface finish, approved paint color |
| Quantity | Separately for each model and side |
| Check | Link to the approved sketch and physical sample |
For a pair, the right and left parts are considered separately. For repeating fronts, keep the same coordinate system, not just the same number of overlays. A photograph of the overall layout complements the dimensions and helps restore the intended order.
When replacing an item, re-check the parameters that affect the composition. The same width does not guarantee the same expressiveness if the new pattern is denser or noticeably more voluminous. Approval based on a single dimension is not enough here.
Where to buy carved furniture elements for the chosen composition
At STAVROS you can select Carved elements for furniture by purpose and shape, then refine the dimensions, material and surface finish. The search becomes more specific once the free field, the role of the part and its relationship with the frame and handle are known.
To buy carved wooden decor for a specific project, prepare a front sketch with dimensions and mark the main motif. For paired elements, indicate the sides; for a row of identical fronts, indicate the quantity of each item. With such a request, it is easier to compare applicable models than from a single photo of a liked ornament.
It is useful for workshops to clarify in advance conditions for manufacturers and the possibility of obtaining the selected parts for verification. The configuration, availability and lead times are agreed upon by specific item codes.
The approved set must maintain a clear pattern across the entire furniture: the main accent is legible from a normal distance, neighboring elements support it, and the gaps allow the shape to be distinguished. A mockup and a trial part make it possible to check this before ordering the full set of carved decor.