Article Contents:
- What to buy for starting a staircase: a kit from the first step
- Starting post as a style reference point
- Types of stair posts
- Wood species: what to choose
- Balusters: rhythm, scale, and style in one line
- Baluster spacing: safety and aesthetics
- Wooden balusters: turned and carved
- Flat balusters: for special cases
- Table: how to choose the type of baluster
- Railing and handrail: a function you touch
- Installation of railings and balusters: what is important to know before purchasing
- Wall along the staircase: the main decorative opportunity
- Moldings along the stair flight: how to handle a sloping wall
- Frame panels on the landing
- How to match polyurethane decor to a carved wooden post
- Three rules for balancing wood and polyurethane in the stair area
- Staircase styles: from classic to carved tradition
- Classic staircase
- Neoclassical staircase
- Carved traditional staircase
- Modern classicism
- Staircase landing: how to turn a transition into a space
- Mirror and frame on the landing
- Sconce on the landing
- Cornice and baseboard on the landing
- Decor of the opening at the start of the staircase
- Area under the staircase: a forgotten space
- Ready-made kits for the staircase area
- Kit "Start of the staircase"
- Kit "Full flight"
- Staircase Landing Kit
- Installation: From Wooden Posts to Polyurethane Moldings
- Installing the Starting Post
- Newel Installation
- Installing Moldings on a Sloped Wall
- Mistakes When Buying Posts, Balusters, and Stucco
- Buying a Post Without Matching Balusters
- Choosing Overly Ornate Stucco Next to Carved Wood
- Not Accounting for Railing Height
- Forgetting About the Wall Along the Stairs
- Mixing Different Carving and Stucco Styles
- Use polyurethane where a load-bearing part is needed
- Buy moldings without a diagram
- Complete purchasing list for a classic wooden staircase
- FAQ: questions about stairs, posts, and decor
- About the Company STAVROS
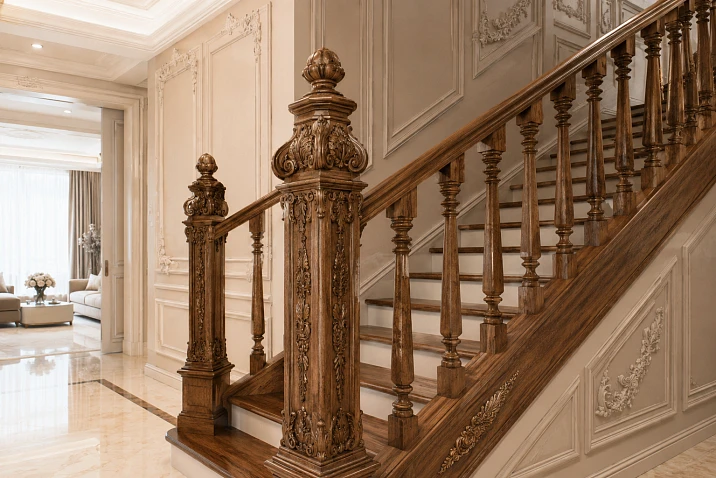
A staircase is not just a structure connecting two floors. It is the first thing a guest sees when entering a home. It is the architectural backbone of the space, the vertical axis around which everything else is built. And if the staircase looks like a set of randomly purchased elements — no wall decor or expensive flooring nearby can fix that impression.
carved wooden balusters set the style of the entire staircase — from the start of the flight to the last step. They must work alongside Balusters for staircase, railings, handrails, and — necessarily — Moldings made of polyurethane on the wall along the flight, polyurethane decor on the landing and the cornice that closes the top line. Only in such a system does the staircase cease to be a passage and become an interior statement.
This article is a detailed breakdown of how to assemble a staircase area from the first post to the landing at the top. What to buy, in what logic, what mistakes to avoid, and why wood and polyurethane in the context of a staircase are not competitors, but partners.
What to buy for starting a staircase: a kit from the first step
Before talking about styles and combinations — about what you need to buy. This is commercial reality: a staircase is assembled from many elements, and if you miss even one — the final result will be incomplete.
Wooden staircase elements:
-
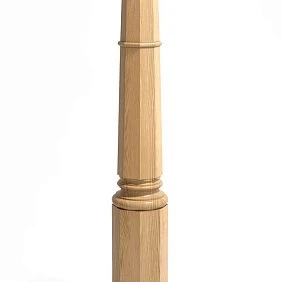
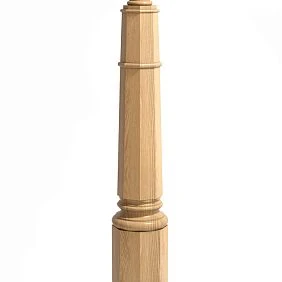
carved wooden post — starting and turning;
-
Wooden balusters — by step calculation;
-
Flat balusters — for non-standard configurations;
-
handrails;
-
handrail;
-
steps and risers — if wooden.
Polyurethane decoration:
-
Moldings made of polyurethane — for the wall along the flight and landing;
-
cornice — for the top platform;
-
baseboard — bottom line along the perimeter;
-
decorative polyurethane elements — corner inserts, overlays;
-
Polyurethane wall decor — frame panels;
-
Polyurethane trim — linear profiles for junctions.
Consumables:
-
fasteners for wooden staircase elements;
-
mounting adhesive for polyurethane;
-
acrylic sealant;
-
primer for polyurethane;
-
varnish or oil for wood;
-
paint for moldings and cornice;
-
allow 10–15% extra for all items.




Starting post as a style reference point
Ask yourself one question: where does your staircase begin? Not from the first step — but visually, compositionally? It begins with the starting post. It sets the tone, and the entire subsequent flight is "read" from it.
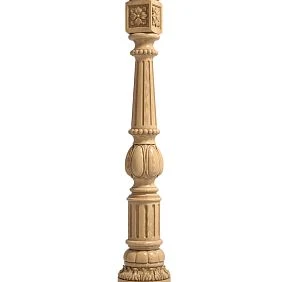
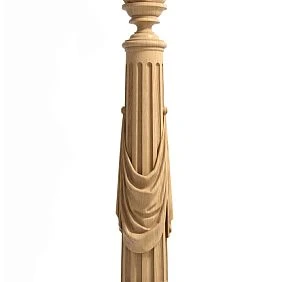
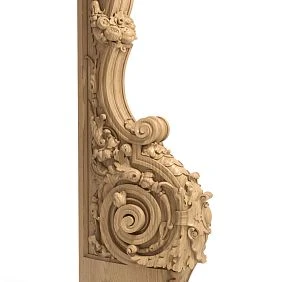
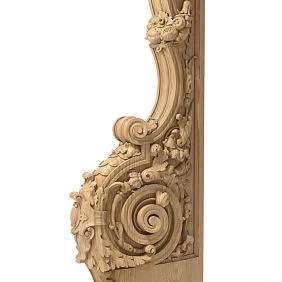
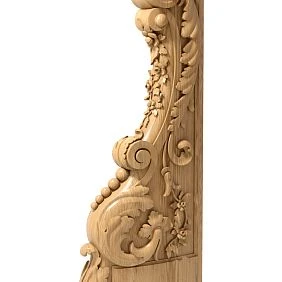
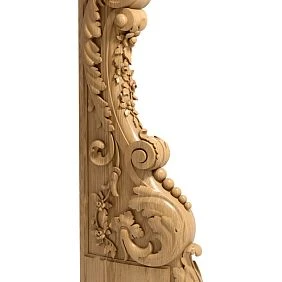
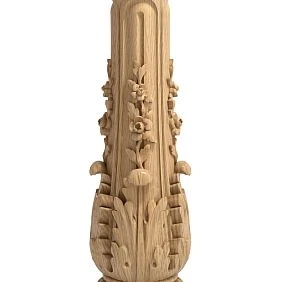
carved wooden balusters — products made from solid hardwood: beech, oak, birch. The carved relief on the post body is not just decoration. It is a statement of style. A starting post with elaborate carving says: this is a classic staircase, this is handcrafted, this has character.
Our factory also produces:
Types of staircase posts
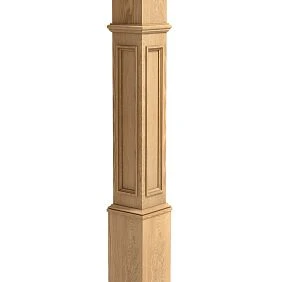
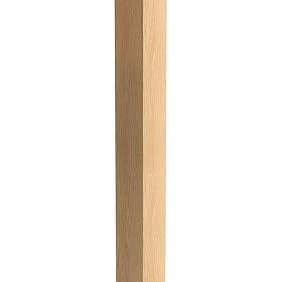
Starting post — installed at the bottom step, opens the flight. This is the most noticeable element: it is at eye level, people walk around it, they touch it with their hand. Dimensions of a starting post for a classic staircase: height 900–1100 mm (from step to top point), cross-section 80–100 × 80–100 mm. Carved profile — along the entire height or in a decorative belt.
Turn post — installed at the turning point of the flight or on an intermediate landing. Structurally, it supports the handrail on both sides, so it must be strong and have the correct dimensions for railing attachment. Stylistically, it should match the starting post or be a smaller version of it.
Intermediate post — used in long flights or on the landing at the top. It can be in the same style as the starting post, but somewhat more modest in the scale of carving.
Get Consultation
Wood species: what to choose
Oak is hard, durable, with a beautiful texture, and takes staining well. Ideal for posts and load-bearing structures. More expensive than beech, but lasts for decades without deformation.
Beech is also a hardwood, with a slightly more uniform texture. It turns and cuts well, and accepts any paint and varnish. It is more cost-effective than oak with comparable mechanical properties.
Birch is more affordable but requires careful surface treatment. It is less suitable for open wood (varnish, oil) — the texture is less expressive. Good for painting.
Balusters: rhythm, scale, and style in one line
If the starting post is a capital letter, then Balusters for staircase is a line. The even rhythm of balusters placed at equal intervals along the flight creates visual order, which is perceived as a "correct" staircase even by people without design education.
Baluster spacing: safety and aesthetics
According to safety standards, the distance between balusters should not exceed 150 mm (so a child cannot stick their head through). The optimal spacing for a classic wooden staircase is 100–120 mm. This is both safe and creates a dense rhythm characteristic of classic interiors.
With a step width of 900–1000 mm, there are 2–3 balusters per step. Two placement options: one per step (more formal, more airy) or two per step (denser, more traditional).
Wooden balusters: turned and carved
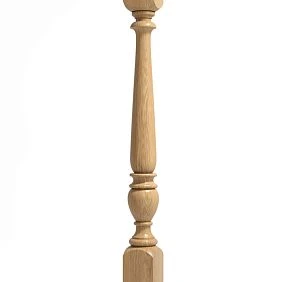
Wooden balusters They can be turned (the profile is created on a lathe) and carved (additional hand or milling relief). For a classic staircase — a turned baluster with a profile: vases, grips, heels. The more complex the profile, the closer it is to the Baroque tradition. The cleaner and more geometric, the closer it is to modern classics.
Baluster height: from the step to the lower part of the handrail — 900–950 mm as per standard, at least 900 mm. Cross-section at the base: 40–50 × 40–50 mm for classics, 50–60 mm for more massive solutions.
Flat balusters: for special cases
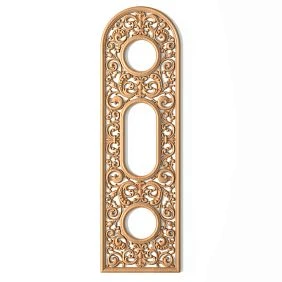
Flat balusters — these are balusters with a figured flat profile instead of a three-dimensional turned shape. They are used where a different character of railing is needed: more strict, graphic. A flat baluster with a through pattern is a solution for staircases with a more restrained style, where a three-dimensional turned baluster would be too decorative.
A flat baluster is also convenient for corner configurations and turning flights: it is easier to trim and install in non-standard points.
Table: how to choose the type of baluster
| Staircase style | Baluster type | Section | Step | Finish |
|---|---|---|---|---|
| Classic | Turned with vases | 40–50 mm | 100–120 mm | Varnish, tinting |
| Neoclassical | Turned, moderate profile | 40–45 mm | 110–130 mm | Paint or varnish |
| Carved traditional | Turned with carved belt | 50–60 mm | 100–110 mm | Varnish, oil |
| Modern Classic | Flat or minimally turned | 40 мм | 120–150 mm | Paint |
Railings and handrail: a function you touch
Railings are the hand you place on the wood every time you pass by. Therefore, the handrail should not only be beautiful but also pleasant to the touch: smooth, warm, with the right cross-section.
Handrail width for a comfortable grip: 50–60 mm. Profile — with rounded edges, "palm-shaped". A flat handrail is beautiful but less comfortable. For a home staircase with daily use — a rounded or semi-oval handrail.
staircase components include not only balusters and posts, but also handrails, railings, fasteners, handrail connectors for turning flights. When purchasing a staircase railing, it is important to take everything from one system: compatibility of fasteners, unified profile style, unified wood species.
Installation of railings and balusters: what is important to know before purchasing
Installation of Wooden Handrails and Balusters — a procedure requiring precise marking and proper fastening. Balusters are attached to the steps with pins or self-tapping screws through embedded elements. The handrail is connected to the post via a special tie bolt. Rotary connections are made through shaped adapters.
Important: before purchasing balusters and posts, you need to know the slope angle of the flight — it determines the cut angle of the lower end of the baluster. The standard slope of a wooden staircase is 35–45°. Balusters are cut at this angle with an accuracy of 1°.
Wall along the staircase: the main decorative opportunity
Here is what most people miss when arranging a staircase: the wall along the flight is the longest and most visible decorative plane in the house. It runs diagonally from the first floor to the second floor ceiling — and almost always remains undecorated.
It is here polyurethane decor provides maximum effect with minimal cost.
Moldings along the staircase flight: how to handle a sloping wall
A sloping wall along the staircase is a non-standard challenge for moldings. Horizontal frame panels do not work here the same way as on a vertical wall: the lower and upper boundaries of the flight dictate the angle. There are several solutions:
Parallel moldings along the slope. The moldings run parallel to the sloping line of the steps and railings — above and below the strip. They create a dynamic sloping structure that "leads" the eye upward. This is a clean, modern solution.
Vertical frame panels. The moldings form vertical rectangles along the wall, regardless of the flight angle. Each rectangle is a separate vertical frame. The lower edges are cut along the line of the steps. This is a more complex installation task, but the result is a classic framed wall even in a sloping space.
Horizontal strips. A single horizontal molding at the height of the handrail, parallel to the floor — creates a visual "horizon" that stabilizes the sloping space.
The width of the wall molding along the staircase: 25–35 mm. The scale should match the scale of the balusters and posts. If the balusters are thin (40 mm), the molding should not be wider than 30 mm.
Frame panels on the landing
The staircase landing is a horizontal surface with vertical walls. Here, classic frame panels made of of polyurethane moldings work to their full potential. Two or three vertical frames around the perimeter of the landing, a cornice at the top, a baseboard at the bottom — this is the architectural completeness of a space that in most houses remains an empty corridor between flights.
Polyurethane wall decor on the staircase landing can include not only moldings but also a frame around the mirror, a decorative panel under the sconce, an architectural portal at the entrance to the landing.
How to choose polyurethane decor for a carved wooden post
This is a fundamental question that is rarely asked but often thought about: if I have an active carved post with rich relief — what should I put next to it on the wall? Compete with the carving — or yield?
The answer is unequivocal: yield. And here's why.
A carved wooden post is a complex, rich detail. It already contains movement, rhythm, and relief. If you place a large ornamental polyurethane decor with the same complexity next to the post — two sources of visual richness will compete. The result: an interior that tires the eyes.
Polyurethane decor next to carved wood should be calmer than the wood. Geometric profiles. Clean frames. Thin moldings without ornament. A cornice of moderate profile. Decorative elements — only pointwise, not as a system of overlays on the wall.
Three rules of balance between wood and polyurethane in the staircase area
Rule one: scale. The scale of the moldings on the wall should be proportionate to the scale of the balusters. A thin baluster of 40 mm — a thin molding of 20–25 mm. A massive baluster of 60 mm — a molding of 30–40 mm. Disproportion destroys the system.
Rule two: complexity. Complexity of carving on the post + complexity of relief on the moldings = overload. If the post is carved — the moldings are simple. If the post is turned with a moderate profile — you can add Decor for polyurethane moldings with a light ornament.
Rule three: color. Wood and polyurethane can be in different colors (wood under varnish, moldings for painting) or in a single color (everything painted). A single color creates maximum unity. Contrast (dark wood + white moldings) is a deliberate design technique that works only with careful adherence to proportions.
Staircase styles: from classic to carved tradition
Classic staircase
The most common scenario. A carved post with a moderately expressive profile, turned balusters with vases, a rounded handrail, molding frames on the wall along the flight.
Decor:
-
moldings width 25–30 mm;
-
frame panels on the landing;
-
cornice height 80–100 mm;
-
baseboard 90–100 mm;
-
decorative polyurethane elements — corner inserts in frames.
Color scheme: wood under varnish or tinting, moldings in warm white. Walls — light neutral or cream.
Neoclassical staircase
More restrained character. Post with a clean turned profile without elaborate carving. Balusters — with a moderate silhouette. Handrail — smooth, without complex profile.
Decor:
-
thin moldings 20–25 mm;
-
minimum decorative overlays;
-
cornice 70–80 mm;
-
Baseboard 80–90 mm.
Color scheme: uniform light coloring of wood and moldings, walls in soft gray-beige.
Carved traditional staircase
An active carved post, possibly with historical ornament. This is a bold choice that makes a statement.
Decor near such a staircase should be as modest as possible. Moldings should be thin, 15–20 mm, only as a bottom and top line along the flight. No large overlays. The cornice should be moderate. The emphasis is on the wood, not the walls.
Color scheme: natural wood under varnish, walls — neutral white or light beige.
Modern classic
Laconic posts, flat or with minimal turned profile. The railing is more architectural than decorative.
Decor:
-
strict moldings with a geometric profile;
-
cornice without ornament;
-
minimum decorative overlays.
Color scheme: wood painted in a neutral tone (gray, warm white), moldings in the same or a similar shade.
Staircase landing: how to turn a transition into a space
A landing is an architectural pause between flights. In most private homes, it remains a functional area without decoration. This is a missed opportunity: the landing is the only place on the staircase where a person stops. And it is here that decor works at full strength.
Mirror and frame on the landing
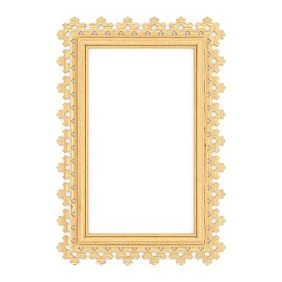
A mirror on the landing is a classic technique. It visually expands the space, adds light, and creates a point of interest. A frame molding around the mirror made of polyurethane decor is an elegant solution that turns an ordinary mirror into an architectural element.
Width of the molding frame around the mirror: 30–50 mm. Profile — a moderate heel or smooth with a bevel. decorative polyurethane elements — corner inserts at the intersections of the frame.
Sconce on the landing
A sconce is both functional lighting for the flight and a decorative element. A decorative plate or molding frame around the sconce is a small detail that integrates the light fixture into the architectural context of the wall.
Cornice and baseboard on the landing
A landing with a cornice at the top and a baseboard at the bottom is a complete architectural space, not just a hallway. A cornice made of moldings from polyurethane 80–100 mm high around the perimeter of the platform, baseboard 90–100 mm, frame moldings on the walls — and the platform becomes a «room».
Polyurethane trim used for finishing joints between the flight and the platform, for lower lines under moldings, for decorative horizontal strips in transition zones.
Decor of the opening at the start of the staircase
The opening through which the staircase «enters» the hall or living room space is another point of application for polyurethane decor. An arched portal or rectangular architectural frame made of moldings around this opening creates a visual «introduction» to the staircase.
This is especially relevant for homes where the staircase is open to the living room or hall. A molding portal around the opening, a cornice above it, pilasters on the sides — this is a small but very effective architectural operation that significantly enhances the perception of the space.
Polyurethane wall decor for the portal at the staircase may include pilaster overlays, a horizontal frieze above the opening, a decorative architrave — depending on the chosen style.
Area under the staircase: not forgotten space
The space under the staircase flight is another point of application for decor. Depending on the layout, this could be:
-
a dressing room or storage room with a door;
-
an open niche with a decorative panel;
-
built-in furniture.
In any case, the side walls under the stairs are inclined planes that require a neat bottom line. Polyurethane trim for the bottom junction and molding around the door opening (if there is a door) — the minimum decorative package for this area.
Ready-made kits for the stair area
Stair Start Kit
Solution for a buyer who wants to design only the lower part — the starting point of the stairs, the first 2–3 steps and the nearest wall.
What to buy:
-
carved wooden post — 1 pc.;
-
Wooden balusters — as calculated;
-
handrail — along the length of the flight;
-
Moldings made of polyurethane — 2–3 horizontal strips on the nearest wall;
-
baseboard along the bottom line of this section;
-
glue, fasteners, varnish, paint, spare.
Full Flight Kit
Full design of the flight from the bottom post to the landing at the top.
What to buy:
-
carved wooden balusters — starting + turning;
-
Balusters for staircase — as calculated;
-
railing + handrail;
-
Moldings made of polyurethane — parallel to the slope or vertical frames on the wall along the flight;
-
cornice on the landing;
-
baseboard along the entire bottom line;
-
decorative elements — corner inserts;
-
glue, fasteners, primer, paint, varnish, spare.
Staircase Landing Kit
For those who already have a staircase but want to turn the landing from a transitional spot into a full-fledged space.
What to buy:
-
Moldings made of polyurethane — frame panels on the walls;
-
cornice around the perimeter of the landing;
-
baseboard around the perimeter;
-
decorative elements — corner inserts, mirror frame;
-
Polyurethane trim for junctions;
-
glue, sealant, primer, paint, spare.
Installation: from wooden posts to polyurethane moldings
Installation of the starting post
The starting post is mounted to the staircase structure via a bolted connection. At the lower end of the post, there is a through hole for an M12 or M16 bolt. The bolt passes through the step or platform and is tightened with a nut from below. This is a rigid fastening that withstands lateral loads when using the handrails.
Before installing the post, check the horizontal level of the step. If the step has a slope, a leveling washer or aligning pad is placed under the base of the post.
Installing balusters
Wooden balusters are attached to the steps via studs or self-tapping screws, and to the handrail via special mounting plates or a direct self-tapping screw. The lower end is cut to match the angle of the flight. The upper end is cut to the same angle if the handrail is sloped, or horizontally for a flat handrail.
Marking before installation is a key stage. The final spacing of the balusters must be uniform throughout the entire flight with an accuracy of ±2 mm. Uneven spacing is immediately noticeable and gives an impression of carelessness.
Installation of moldings on a sloped wall
installing polyurethane molding on a sloped wall along the flight is technically more challenging than on a vertical wall. The main features are:
-
moldings running parallel to the slope are attached according to markings made parallel to the line of the steps;
-
joints at corner transitions (from a sloped to a horizontal section on the landing) are made via special cutting or ready-made transition elements;
-
adhesive is applied in a zigzag pattern along the entire length of the molding strip;
-
Before the glue polymerizes, the molding is fixed with painter's tape or temporary screws.
About choosing glue — details in the article what to glue polyurethane molding with.
After installation: sealant in joints, sanding, primer, two coats of paint.
Mistakes when buying posts, balusters, and moldings
Buying a post without selecting balusters
This is one of the most common mistakes. You buy an impressive carved post — and then it turns out there are no balusters of the required style and cross-section from the same manufacturer. The result is an inconsistent system or a repeat purchase.
Rule: choose the post and balusters from the same category. If you chose a carved oak post — the balusters should also be oak, of the same style.
Choosing overly active moldings next to carved wood
A carved post + ornamental polyurethane wall overlays are competing decorative systems. Next to active wood — calm moldings. This is an unbreakable rule.
Not accounting for the height of the railing
The standard height of railings is 900 mm for residential buildings. This is the height from the step surface to the top of the handrail. If balusters are purchased without considering this parameter and the required handrail height, installation becomes improvisation.
Forgetting about the wall along the staircase
Posts, balusters, railings have been purchased and installed. But the wall along the flight remains an empty, bare surface. This is a missed opportunity. Moldings along the staircase wall are a budget-friendly solution with maximum visual impact.
Mixing different styles of carving and stucco
A baroque carved post + a strict geometric molding of a modern profile is a stylistic contradiction. Either everything in one style, or a neutral molding that does not belong to any specific style.
Using polyurethane where a load-bearing part is needed
Polyurethane is a material for decorative finishing. It does not bear load. Posts, balusters, railings should be made of wood. Polyurethane "balusters" are decorative elements, not suitable for railings.
Buying moldings without a diagram
Without a diagram with exact dimensions, it is impossible to calculate the quantity. The result is extra trips to the store and uncovered sections of the wall.
Complete shopping list for a classic wooden staircase
Wooden staircases components for wooden staircases:
-
carved wooden balusters — starting + turning (+ intermediate if necessary);
-
Balusters for staircase — by step calculation;
-
Flat balusters — if necessary;
-
railing + handrail;
-
fasteners for wood.
Polyurethane decoration:
-
Moldings made of polyurethane — along the wall along the flight + landing;
-
cornice — along the landing and transition areas;
-
baseboard — along the perimeter;
-
decorative polyurethane elements — corner inserts;
-
Polyurethane wall decor — frames, portals if necessary;
-
Polyurethane trim — junctions;
-
Decor for polyurethane moldings — point decorative inserts if necessary.
Consumables:
-
mounting adhesive for polyurethane;
-
acrylic sealant;
-
adhesive primer;
-
varnish or oil for wood;
-
paint for moldings and cornice;
-
spare elements 10–15%.
FAQ: questions about stairs, posts, and decor
Can carved wooden posts be combined with polyurethane stucco molding?
Yes, and this is the right strategy. Wood is used for load-bearing and tactile elements: posts, balusters, handrails, steps. Polyurethane is used for decorative wall finishes, landings, openings, and junctions. Balance: the more active the carving on the wood, the more restrained the polyurethane decor should be.
What to buy for a classic wooden staircase?
carved wooden balusters, Balusters for staircase, handrails, railing, Moldings made of polyurethane for walls, cornice, baseboard, decorative elements, glue, fasteners, and finishing materials.
How to choose stucco molding for a carved post?
If the post is active with developed carving, the moldings are thin (20–25 mm), without ornament, and the cornice is moderate. If the post has a turned profile without carving, the moldings can be slightly wider with a moderate profile.
Where to use moldings near the staircase?
On the wall along the flight — parallel to the slope or in vertical frames. On the landing — framed panels. Around the opening at the staircase entrance. Around the mirror and sconce on the landing.
Can wooden staircase elements be replaced with polyurethane?
Load-bearing elements — absolutely not. Posts Wooden balusters and handrails must be wooden — they bear the load and are safety elements. Polyurethane is only for decorative finishing of walls, ceilings, and junctions.
How Many Balusters Are Needed for a Staircase?
Calculate: flight length in mm ÷ step 110 mm = number of balusters. Plus 10% reserve. Example: flight 3600 mm ÷ 110 = 33 balusters, with reserve — 36 pieces.
How to properly secure the starting post?
Through an M12 or M16 bolt passing through the base of the post into the staircase structure. A rigid bolted connection is the only reliable option for a load-bearing starting post.
About the company STAVROS
The entire range for wooden staircases and their decorative finishing — carved wooden balusters, balusters for staircases, components for wooden staircases, Moldings made of polyurethane, Trim, decorative elements and all consumables are manufactured and supplied by STAVROS.
STAVROS is a Russian manufacturer of natural wood and polyurethane products for architectural finishing, furniture, and stairs. Founded in St. Petersburg in 2002. Its portfolio includes the Hermitage, the Konstantinovsky and Alexander Palaces, and the Trinity-Izmailovsky Cathedral. Experience in restoring historical interiors sets the standard for profile precision and surface quality applied to every product—from decorative molding to a load-bearing stair newel post.
Order carved wooden balusters, balusters and moldings, get advice on stair area configuration and style solutions—on the STAVROS website. Contact us to confirm shipping to your destination., orders from a single unit, assistance in selecting a set for your project.