Article Contents:
- How many NL-16 usually needed for one window: short answer
- What is carved trim NL-16
- Ready-made pattern instead of self-sawing
- Length 2000 mm sets the logic of the set
- Thickness 18 mm creates volume
- Two widths solve different visual tasks
- Pine requires conscious finishing
- This is a separate plank, not a complete window set
- Total length shows only the lower limit
- Each side piece must fit entirely
- The top bar has its own length
- The ornament limits the use of the remainder
- Width is not involved in division but affects connection
- Two side bars
- One top bar
- Connecting elements
- Bottom element
- Top piece, brackets and "towel"
- First determine the mounting plane
- Measure the height at several points
- Check the width at the top, middle and bottom
- Account for the overlap of the mounting seam
- Check the drip cap and window sill
- Mark the direction of the pattern
- Make a full-width template
- Why regular rounding is not enough
- Check each plank
- Joint changes the formula
- Spare is not equal to a random extra plank
- First plank
- Second plank
- Why two remainders are not enough
- How to use the third bar
- What can change the calculation
- Remainders after side parts
- Rational scheme
- Why it is useful to calculate the entire facade
- First plank
- Second plank
- Main limitation
- Why horizontals cannot be placed together
- Final layout
- One whole remainder is longer than the top part
- The ornament maintains the correct direction
- The cut location does not destroy the key fragment
- The end face allows the selected joint
- There is allowance for final cutting
- Assign a number to each window
- Label each detail
- Distribute details across blanks
- Mark orientation separately
- Record leftovers
- Leave space for test cuts
- Four identical windows 900 × 1200 mm
- Why the result remains preliminary
- Different windows use leftovers better
- Facade first, then individual window
- Reordering is worse than a single calculation
- One simple opening
- Several identical windows
- Complex pattern and many joints
- External facade
- NL-16 width 185 mm
- NL-16 width 295 mm
- The quantity along the length may match
- You cannot reduce the width by longitudinal sawing without a project
- Comparison with neighboring models
- SNL-13
- SNL-12
- SNL-19
- The connector changes the length of straight parts
- Joint of two remnants
- NL-13
- NL-14
- NL-8
- SNL connecting element
- Flat baluster BNL
- Regular planed board
- Plastic overlay
- Inspect the surface before painting
- Treat fresh cut ends
- Paint the inner edges of the ornament
- Do not leave the back side untreated
- Check the compatibility of the compounds
- Consider maintenance
- Finish before installation
- Finish after installation
- Combined approach
- One batch for all windows
- First study the drawing
- Support the plank across its entire width
- Use a finishing tool
- Do not press on openwork areas
- Mark parts before cutting
- Protect the end immediately after preparation
- Fastening to the casing
- Mounting to the facade board
- Glue does not replace mechanical calculation
- Pilot hole drilling
- Concealing fasteners
- Aligning left and right sides
- Installing the top part
- Log house
- Frame house
- Bathhouse
- Veranda
- Gazebo
- Modern wooden facade
- Doorway
- Interior window
- Decorative panel
- Cornice composition
- Standard window 1200 × 1400 mm
- Small window 700 × 900 mm
- Tall window 1200 × 1800 mm
- Four-sided frame
- Five identical windows
- Window with SNL
- Facade for white paint
- Dark wooden house
- Divide the total area by 2000 and round immediately
- Calculate by glass size
- Not choosing a width of 185 or 295 mm
- Joining two leftovers without a project
- Flipping the pattern to save money
- Not treating the ends
- Installing untreated pine outdoors
- Buying connectors only by photo
- Do not consider the ebb
- Order each window separately
- Do not check delivery of long parts
- No need to redraw the ornament
- No need to cut identical side panels manually
- No need to look for a random pine blank
- Focus on the kit
- Even horizontal support
- Protection from Moisture and Sun
- Separation of executions
- Inspection upon receipt
- What length is the carved architrave NL-16?
- What thickness does NL-16 have?
- What width is available?
- What wood is the architrave made of?
- How many NL-16 are needed for a standard window?
- Why can't you just divide the total footage by 2000?
- Can the top element be made from the remainder?
- Can one plank be cut into two side pieces?
- Do I need to buy three planks for a 1200 × 1400 mm window?
- How many planks are needed for a 700 × 900 mm window?
- How to calculate NL-16 for multiple windows?
- Is a spare needed?
- Can two short remnants be joined?
- Are SNL connecting elements needed?
- Is NL-16 supplied painted?
- How to protect pine outdoors?
- Do I need to paint the end after cutting?
- Can NL-16 be used on a door?
- Is the trim suitable for a bathhouse or gazebo?
- How to attach NL-16 to a wooden facade?
- Where to buy NL-16?
- Can I order a set for all windows of the house?
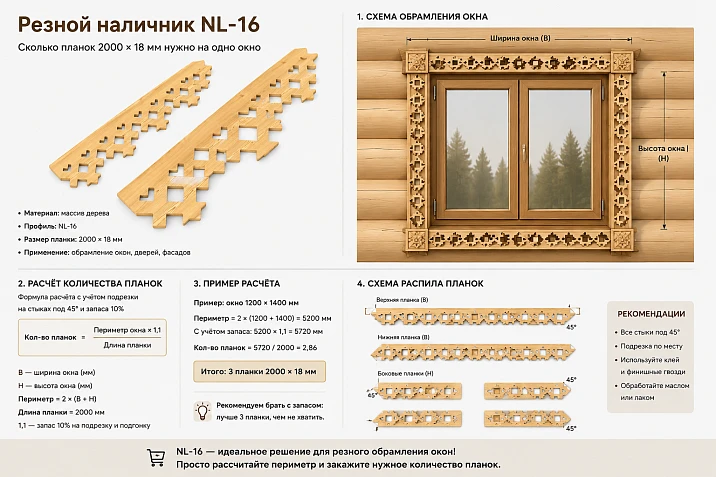
Practical calculation of a set of two-meter carved planks for a window, door, and facade composition
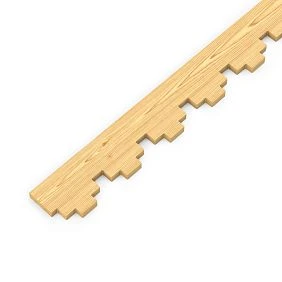
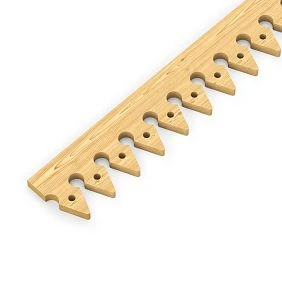
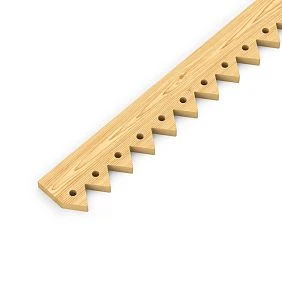
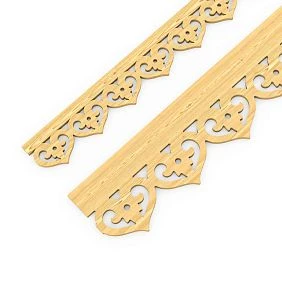
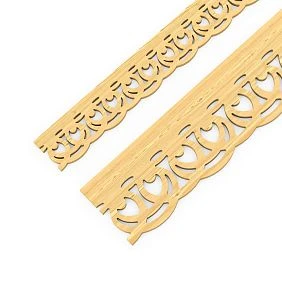
How many NL-16 are usually needed for one window: short answer
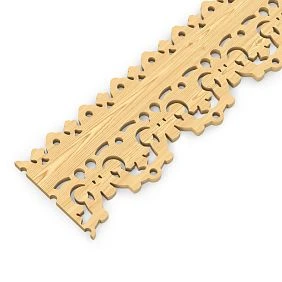
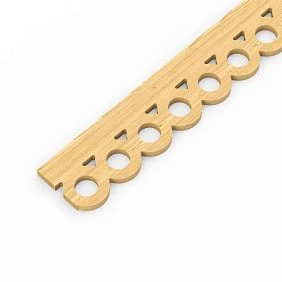
The carved trim NL-16 is worth buying if you need a ready-made two-meter element made of pine for window, door, facade, or interior framing. The current card presents options of 2000 × 185 × 18 mm and 2000 × 295 × 18 mm. For a standard three-sided window, most often two whole planks are pre-laid for the left and right sides, and one more plank for the top. two whole planks for the left and right sides, and one more plank for the top. However, for a small opening, two planks are sometimes enough, while for a tall or four-sided frame, four or more may be required. The result cannot be obtained simply by dividing the total length by 2000 mm: a cutting map is needed, taking into account the length of each part, the direction of the ornament, permissible trimming zones, and the possibility of using remnants without a joint.
Buy carved trim NL-16 View all carved architraves Select a connecting element Order a facade design project
The length of each plank is 2000 mm, thickness is 18 mm. Two widths are available in the card: 185 and 295 mm.
The material is pine. The current card describes the product as a finger-jointed pine array without knots, the sanding quality is "Standard", preparation is for enamel.
Delivery does not mean finished exterior cladding. The facade requires a compatible protective-decorative system, including edge treatment after cutting.
Three strips is a common but not universal answer. A small opening can sometimes be assembled from two, while a four-sided contour may require four separate strips.
Remnants are only counted after layout. Two 600 mm sections do not replace a single 1200 mm top piece if the project does not allow a joint.
Width and pattern affect appearance and trimming. The exact orientation of the ornament, repeatability, and permissible cutting points must be checked against drawing NL-16 and dry fitting.
Buying wooden carved window casings is easy when it comes to a single decorative strip. Complexity arises when you need to determine the quantity for a specific opening. The total length may show two strips, but actual cutting may require three. The reason is simple: side pieces must remain whole, the top element cannot always be assembled from two short remnants, and the carving pattern limits cutting freedom.
NL-16 is a convenient model for such calculations because the length of each blank is known in advance: 2000 mm. The buyer can measure the future side and top pieces, distribute them across two-meter strips, and see the remnants before placing an order. However, the calculation cannot only use the window frame dimensions. First, determine the outer contour of the trim, the overlap of the installation joint, the position of the drip cap, the top decorative element, and connectors.
The current NL-16 trim offers two width options — 185 and 295 mm, with a fixed length of 2000 mm and thickness of 18 mm. The width has little effect on the linear quantity calculation, but it does influence the facade scale, the overlap around the window, the weight of the part, and the joint geometry. Before purchasing, you need to choose not only the number of planks but also the specific version.
To calculate and order, you can open the product card and select a two-meter pine trim. If the pattern or width is not suitable, it is better to buy wooden carved trims of a different article number, rather than trying to modify NL-16 with random longitudinal cutting.




What is the carved trim NL-16
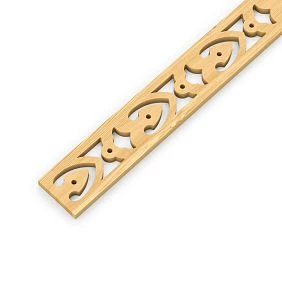
NL-16 is a long profiled carved pine plank for framing window and door openings, as well as facade and interior compositions. It covers the technical and visual area around the opening, creates a decorative frame, and helps connect the window with cornices, connecting elements, flat balusters, and other house carvings.
Our factory also produces:
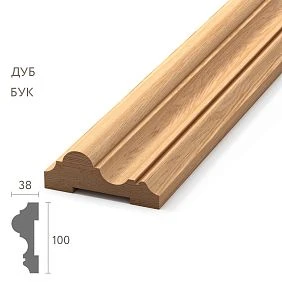
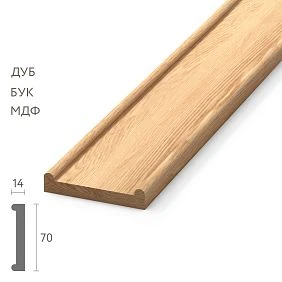
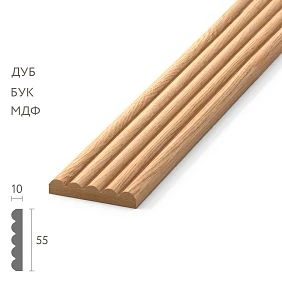
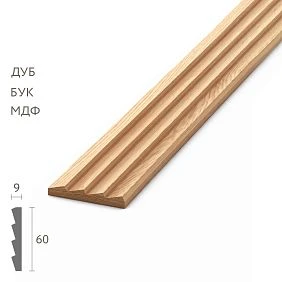
Ready-made pattern instead of manual sawing
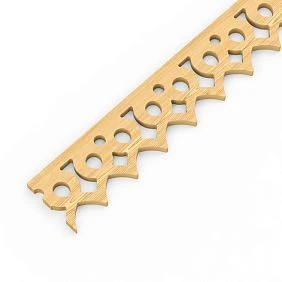
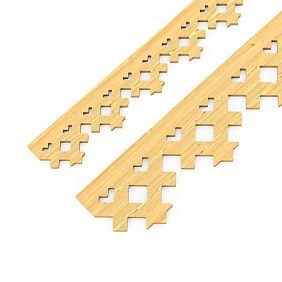
The buyer does not need to transfer a complex pattern onto a pine board and cut out each hole manually. The ready-made NL-16 allows focusing on measuring, cutting, finishing, and installation. This reduces the risk that the left and right sides will differ in pattern or width.
Get Consultation
The length of 2000 mm sets the logic of the kit
A two-meter plank fits most side parts of a standard window without a longitudinal joint. If the required height exceeds 2000 mm, one plank per side is no longer sufficient. Then a different project, a connecting unit, or an individual solution confirmed before ordering is needed.
The thickness of 18 mm creates volume
The trim is not a flat sticker. The thickness of 18 mm forms a noticeable shadow and requires a solid base. This value is taken into account near an opening shutter, door leaf, slope, and protruding frame.
Two widths solve different visual tasks
The 185 mm option looks more compact and leaves more open wall. The 295 mm version occupies a wider strip around the window and suits a large facade. The width cannot be transferred from a photo: on a small window, 295 mm can significantly change proportions.
Pine requires conscious finishing
The product is prepared for further finishing, but the external facade cannot be left without confirmed protection. After cutting, fresh ends appear that also need to be treated. The system of primer, paint, enamel, glaze, or other coating is chosen based on the object's conditions and the material manufacturer's instructions.
This is a separate plank, not a complete window kit
The NL-16 card refers to one trim. The top piece, bottom belt, finial, connecting rosettes, and brackets do not appear automatically. Their quantity and compatibility are calculated separately.
Confirmed specifications NL-16
| Parameter | Confirmed value | What changes when purchasing | What to check additionally |
|---|---|---|---|
| Article number | NL-16 | Allows ordering the same design for all windows | Do not mix with NL-13, NL-14 or NL-8 |
| Type | Carved architrave, house carving | Used as a decorative trim for the opening | Full window kit composition |
| Size, option 1 | 2000 × 185 × 18 mm | More compact width with the same length | Window scale and overlap of the area around the frame |
| Size, option 2 | 2000 × 295 × 18 mm | Wide decorative framing | Free spaces between adjacent windows and facade corners |
| Material | Pine; in the card — finger-jointed array without knots | Provides a wooden base for painting | Moisture, storage, and finish compatibility |
| Sanding | "Standard" | The product requires inspection and final preparation before painting | Ornament recesses and ends after cutting |
| Preparation | For enamel | You can design a covering finish | Specific ground and finish system |
| Primary application | Window and door openings, facade and interior | One article can be used in a single architectural system | Outdoor operating conditions and mounting base |
| Finish coating | Finished exterior coating not confirmed | The budget includes finishing of all surfaces and ends | Color, protection system and maintenance frequency |
| Cut to size | The plank allows for design cutting; the seller does not confirm the cutting service | The customer orders whole two-meter products and plans trimming | Allowed cutting zones and pattern continuation |
A width of 185 or 295 mm does not change the workpiece length, so the quantity formula remains the same. However, the wide option may extend beyond the free zone, approach a neighboring window or house corner, and require a different top composition. The layout must be made to full scale according to the selected execution.
Why quantity cannot be calculated only by total footage
The preliminary formula for three-sided framing looks simple: two heights plus one width. For example, two side pieces of 1400 mm each and a top of 1200 mm give exactly 4000 mm. Dividing by 2000 shows two planks. However, two planks do not allow obtaining three whole pieces: after two side pieces, two 600 mm segments remain, and a top of 1200 mm cannot be cut from one leftover.
Total footage shows only the lower limit
Dividing the sum of lengths by 2000 mm answers the question of how much material is needed theoretically without considering cutting. It is useful as a first check, but not as an order result. After that, each piece must be placed within a specific two-meter plank.
Each side piece must fit entirely
If the side height is 1400 mm, one plank will leave 600 mm. These leftovers cannot be automatically combined. A joint in height may disrupt the pattern, weaken the appearance, and require a connecting element. For a regular side, a whole piece is preferable.
The top plank has its own length
The top can be equal to the width of the decorative contour, be longer due to extensions, or include connectors and a finial. The calculation uses not the width of the glass unit, but the final size of the finished top part according to the drawing.
The ornament limits the use of the remainder
A segment may fit in length but start or end in an inconvenient part of the pattern. Sometimes a part cannot be rotated without changing the direction. These limitations are confirmed by the drawing and dry layout.
Width is not involved in division but affects the connection
For the 185 mm and 295 mm options, the linear length is the same. However, a wide casing creates a different external corner, requires more space for extensions, and may change the way the top and side parts are joined.
Minimum set for one window
The most common set is two side parts and one top part. It covers the opening on three sides and leaves the bottom part for a drip cap, window sill, or a separate decorative solution. The number of product planks depends on the sizes of the cut parts.
Two side planks
For a window height over 1000 mm, each side often takes a separate two-meter blank because two parts no longer fit in 2000 mm. If the sides are shorter than or equal to 1000 mm, they can theoretically be cut from one plank, but only if the ornament direction allows.
One top plank
The top is often cut from a separate NL-16. This ensures the integrity of the pattern and leaves a clear remainder. The top can only be obtained from the remainder of a side plank when one remainder is longer than the required part and the pattern area is suitable for trimming.
Connecting elements
If the top and sides are not joined with a straight or miter cut, the project may include SNL carved elements. They cannot be added solely to mask an inaccurate cut. The connector must match the width, pattern, and overall composition.
Bottom element
A four-sided frame requires one more horizontal part. Its length may match the top or differ due to the drip cap, windowsill, and side projections. The bottom part is calculated separately.
Finial, brackets, and "towel"
Elaborate house carving may include an additional top, side brackets, and a lower decorative belt. NL-16 remains the main plank, but the full set goes beyond three parts. For a complex facade system, it is useful to order a calculation of the window composition and facade.
Three-sided or four-sided framing
| Option | Composition | When it fits | What increases the number of NL-16 |
|---|---|---|---|
| Three sides | Two sides and top | Window with drip cap or separate bottom board | High sides, wide top, inability to use remnants |
| Four sides | Two sides, top and bottom | Interior opening or facade without separate bottom element | Two horizontals longer than available remnants |
| Three sides with connectors | NL-16 and paired SNL | A decorative transition is needed between the top and side panels | Connectors change the final length of straight parts |
| With a finial | Main planks and separate top decor | Facade in Russian style, large pediment above the window | Additional extensions and support elements |
| With a lower "towel" | Side panels, top, bottom system, and decor | Elaborate design of a wooden house | The lower belt is calculated separately from the upper one |
| Doorway | Two high side panels and a top | Interior or exterior door | Height over 2000 mm requires a different scheme or joint |
How to measure a window for trim
Calculation begins after the main opening geometry is complete. The size of the glass, frame, and construction opening are three different values. NL-16 should cover the required area around the window without interfering with sash opening, drip cap, or maintenance of the mounting joint.
First, determine the mounting plane
On a wooden facade, the trim can be attached to the casing, wall board, or prepared backing. Measure the surface where the product will actually be placed. Relief logs and uneven cladding require a separate assembly.
Measure the height at several points
The left and right sides may differ. Record the actual dimensions and determine the final line of the top piece. Do not cut both side panels to the same value without checking the other side.
Check the width at the top, middle, and bottom
The opening may not be perfectly rectangular. For the top bar, the actual width at its installation level is important. The bottom piece is measured separately for a four-sided contour.
Consider the overlap of the installation seam
The casing must cover the planned area, but the exact projection cannot be assigned universally. It depends on the frame, jamb, slope, and width of NL-16. Mark the outer contour on the facade before ordering.
Check the drip cap and window sill
The side pieces should not randomly abut the metal drip cap with their end. The lower part requires a protective assembly that diverts water. The dimensions of the side pieces are determined considering this finish.
Mark the direction of the pattern
On the diagram, label the top and bottom of each piece. If the ornament has a pronounced direction, the left and right sides should look consistent. The possibility of rotating NL-16 is checked against the drawing, not assumed.
Make a full-size width template
A strip of paper 185 or 295 mm shows how much of the facade the casing will occupy. This is especially important between two close windows, near a corner of the house, and next to the eaves.
Preliminary calculation formula
For a three-sided frame, use the lengths of the finished parts:
Total length = left side + right side + top part.
Preliminary number of planks = total length ÷ 2000 mm, rounded up.
If the side parts are identical, the formula can be written as 2 × height + top length. For a four-sided contour, add the bottom part. But the result remains only preliminary: after it, you need to pack the segments into individual two-meter planks.
Why simple rounding is not enough
Three segments of 1200, 1200, and 900 mm give 3300 mm, i.e., two items by total length. But no pair of parts fits into 2000 mm: 1200 + 900 = 2100 mm. The actual order is three planks.
Check each plank
Create a table and record which parts are cut from the first, second, and third blanks. The sum of segments within one row should not exceed 2000 mm, and the pattern must maintain the permissible direction.
The joint changes the formula
If the project deliberately allows a composite top part with SNL, the two remnants can be used differently. But then the cost of the connector, additional ends, pattern fitting, and mounting assembly are added. This is not automatic savings.
Stock is not equal to a random extra plank
Stock is formed based on risks: complex cutting, multiple angles, pattern repetition, exterior finishing, serial facade. For a simple window, one extra plank may be excessive, but for ten windows, it is a reasonable insurance. The cutting map makes the decision.
Preliminary calculation table for standard sizes
The table shows lengths of finished straight parts without extensions, connectors, and stock. The values indicate the minimum packaging in 2000 mm planks. The actual order is adjusted after checking the NL-16 drawing.
| Decorative contour size, width × height | Three parts | Total length | Theoretical minimum | Preliminary order without joints | Reason |
|---|---|---|---|---|---|
| 700 × 900 mm | 900 + 900 + 700 | 2500 мм | 2 | 2 planks, if two side panels can be cut from one | 900 + 900 = 1800 mm; the top is taken from the second plank |
| 800 × 1000 mm | 1000 + 1000 + 800 | 2800 мм | 2 | 2 planks with acceptable orientation | Two side panels take up one full plank |
| 900 × 1200 mm | 1200 + 1200 + 900 | 3300 мм | 2 | 3 planks | Remainder after side panel — 800 mm, top 900 mm does not fit |
| 1000 × 1000 mm | 1000 + 1000 + 1000 | 3000 мм | 2 | 2 planks with acceptable cutting | Two parts of 1000 mm fit into one plank |
| 1200 × 1400 mm | 1400 + 1400 + 1200 | 4000 мм | 2 | 3 planks | Two remnants of 600 mm do not make a solid top of 1200 mm |
| 1500 × 1600 mm | 1600 + 1600 + 1500 | 4700 мм | 3 | 3 planks | Each large part occupies a separate blank |
| 1200 × 1800 mm | 1800 + 1800 + 1200 | 4800 мм | 3 | 3 planks | Remnants of 200 mm are not suitable for the top part |
The table does not confirm the possibility to rotate or flip the specific ornament NL-16. For sizes where two parts fit into one plank mathematically, it is necessary to separately check the pattern direction and permissible cutting zones.
Example 1: window 1200 × 1400 mm
Let the final length of each side part be 1400 mm, and the top part 1200 mm. The total length is 4000 mm. At first glance, two planks of 2000 mm are sufficient. But this conclusion does not withstand a cutting check.
First plank
A left side piece of 1400 mm is cut from it. 600 mm remains.
Second plank
A right side piece of 1400 mm is cut from it. Another 600 mm remains.
Why two remnants are insufficient
The top piece must be 1200 mm long. Two 600 mm remnants can only be joined via a separate design joint. Without it, a solid top is impossible. Therefore, the standard pre-order is three NL-16 planks.
How to use the third plank
A top piece of 1200 mm is cut from it, leaving 800 mm. This section can be saved for test painting, a small interior detail, a connecting node, or another window if the pattern and dimensions match.
What can change the calculation
Top piece extensions, SNL at corners, bottom element, and the requirement to align the pattern. Any addition is entered into the cutting map before placing the order.
Example 2: window 900 × 1200 mm
Two sides of 1200 mm each and a top of 900 mm give a total length of 3300 mm. Arithmetic division again shows two planks, but the actual set requires three.
Remnants after side parts
From each two-meter plank, 800 mm remains. The top has a length of 900 mm, so no remnant fits. Joining two short fragments without a specially designed connector is not recommended.
Rational scheme
The first and second planks go to the sides, the third to the top. The 1100 mm remnant from the top plank may be useful for another window. In a serial order, such a remnant cannot be considered waste in advance.
Why it is useful to consider the entire facade
If there is a small window with a top of 1000 mm nearby, the 1100 mm remnant can cover its top part. Therefore, a single window requires three planks, but two different windows together sometimes use material more efficiently.
Example 3: small window 700 × 900 mm
Two sides of 900 mm each and a top of 700 mm give 2500 mm. Here, two planks may be sufficient.
First plank
Theoretically, two side pieces of 900 mm each are cut from it. The remainder is 200 mm.
Second plank
A top piece of 700 mm is cut from it. 1300 mm remains for another opening or a test piece.
Main limitation
Such cutting is only permissible if the pattern allows both side pieces to be obtained from one plank with the correct direction. If one piece had to be flipped and the ornament would be oriented differently, a third plank would be required.
Example 4: four-sided contour 1200 × 1400 mm
For a full rectangle, two side pieces of 1400 mm each and two horizontal pieces of 1200 mm each are needed. The total length is 5200 mm. The theoretical minimum is three planks, but without joints, four will be required.
Why horizontals cannot be placed together
1200 + 1200 = 2400 mm, which exceeds the length of NL-16. Each horizontal occupies a separate blank. Side pieces of 1400 mm also cannot be placed in pairs or together with a horizontal.
Final layout
Four whole pieces — four two-meter planks. The remnants will be two sections of 600 mm each and two of 800 mm each. They can be redistributed to other windows, but not deducted from the current order without a map of the entire facade.
When the top part can be obtained from the remainder
The remainder is suitable for the top only if several conditions are met simultaneously. One length is not enough.
One solid remainder is longer than the top part
If after the side panel of 900 mm there remains 1100 mm, and the top has a length of 1000 mm, mathematically cutting is possible. If two pieces of 600 mm each remain, there is no solid top of 1200 mm.
The ornament maintains the correct direction
The top part may require a different orientation of the pattern. You cannot rotate the remainder just for savings if leaves, slots, or repeats start to look wrong.
The cut location does not destroy a key fragment
The beginning and end of the part should look complete or be covered by confirmed connectors. Cutting through an important element of the ornament creates a truncated pattern.
The end allows the selected connection
A straight cut, a 45-degree angle, and a joint via SNL require different lengths. A remainder that equals the clear width of the opening may turn out short after forming the corners.
There is a reserve for finish cutting
Do not plan the part right up to the last millimeter without a test end cut. The actual angle, saw quality, and the need to align the end reduce the usable length.
Cutting map for two-meter planks
A cutting map is a table where each purchased plank gets a specific assignment. It answers the question "how much to add to the cart" more accurately than the total length.
Assign a number to each window
For example: W-1, W-2, W-3. For identical windows, still keep separate numbers: the actual facade dimensions may differ.
Label each part
Left side, right side, top, bottom. Add the final length after accounting for connectors and overhangs. This makes it clear which elements can be placed together.
Distribute the parts among the blanks
Plank 1 — left side of W-1, plank 2 — right side of W-1, plank 3 — top of W-1 and top of W-2. The sum within each plank does not exceed 2000 mm.
Separately note the orientation
The "top" arrow or ornament direction helps avoid using the remainder in the wrong position. This is especially important for serial layout.
Fix the remainders
Record not just the length, but the length, execution width NL-16, pattern direction, and end quality. A remainder of 800 mm after a clean cross cut is more valuable than a fragment with a damaged ornament.
Leave space for test cuts
For a complex facade, part of the material can be allocated for tool setup and angle checking. This should be a conscious decision, not a hidden calculation error.
How to calculate NL-16 for multiple windows
When ordering for an entire house, you cannot simply multiply three planks by the number of windows. This method is safe but often leaves many unused pieces. First, calculate each opening, then combine the remainders into a common map.
Four identical windows 900 × 1200 mm
One window requires three planks: two sides and a top. If calculated independently, you get 12 pieces. But each top plank after the 900 mm detail leaves 1100 mm. Depending on the ornament direction, two top details can be placed on one two-meter blank: 900 + 900 = 1800 mm. Then for eight sides, eight planks are needed, and for four tops, two. The theoretical result is ten instead of twelve.
Why the result remains preliminary
It is necessary to confirm that the two top elements can be cut from one plank and their direction matches. Finishing cuts, overhangs, and connectors are also taken into account. Without this check, savings exist only on paper.
Different windows use leftovers better
After the top piece of 1200 mm, 800 mm remains. Such a leftover is not suitable for a top of 900 mm, but can cover the top of a small window of 700 mm. Sorting parts by length helps reduce the number of whole planks.
First the facade, then the individual window
Window sets must look the same. You cannot rotate the pattern on one window differently than on the others for the sake of savings. Cutting optimization is subordinate to composition, not the other way around.
A reorder is worse than a single calculation
Later, the batch of wood or the availability of the required width may differ. A full calculation for the house helps to obtain a single material and simultaneously prepare all parts for painting.
Is a reserve needed when purchasing NL-16
A reserve is not always needed in the form of an extra whole plank for each window. Its size depends on the number of openings, complexity of corners, master's experience, pattern repeatability, and the possibility of using leftovers.
One simple opening
If the cutting map gives three planks without complex joints and all parts are significantly shorter than 2000 mm, a separate fourth may be redundant. But you need to account for finish cuts and trial setup.
Several identical windows
A common reserve is more efficient than individual ones. One spare plank for the entire facade can compensate for an error without accumulating excess material.
Complex ornament and many joints
The more SNL, corners, gables, and external outlets, the higher the risk of error. The reserve is determined after the layout, not by a universal ten percent.
Exterior facade
It is useful to keep a suitable leftover after installation. It will come in handy for a trial coating renewal or local repair. A labeled NL-16 fragment is better than a random board of a different width.
Width 185 or 295 mm: what to choose
NL-16 width 185 mm
Compact fit for standard windows, narrow piers, and facades where a corner, another window, or a decorative board is nearby. It covers a smaller strip of the wall and leaves more free background.
NL-16 width 295 mm
The wide version creates more noticeable wooden lace and suits large windows or spacious facades. Before ordering, check the distance to adjacent elements and how the top piece connects to the side panels.
The quantity along the length may match
Both versions have a length of 2000 mm, so a 1200 × 1400 mm window requires three strips in any version. However, the cost, weight, mounting plane, and overall scale will differ.
The width cannot be reduced by longitudinal cutting without a project
The carved pattern is designed for a specific contour. Longitudinal trimming can destroy the ornament and weaken the bridges. If 295 mm does not fit, choose 185 mm or another article.
Comparison with neighboring models
If a different pattern is needed, you can View carved trim NL-13, Buy carved trim NL-14 or choose a more expressive window decor NL-8. The dimensions of each product are checked individually.
When SNL connecting elements are needed
The connector is used not because two sections are poorly fitted, but when it is intended as part of the design. SNL can cover the transition between the top and side parts, form a decorative corner, or link the casing with another element of house carving. Compatibility with a width of 185 or 295 mm and the NL-16 pattern must be checked against the drawings.
SNL-13
For a design joint, you can buy connecting element SNL-13. It cannot be considered a universal rosette for NL-16 just because it is in the same category. First, compare the dimensions, carving lines, and mounting plane.
SNL-12
Another option is select the SNL-12 connecting element. It fits the project only after verifying that the connection does not create an accidental difference in width and thickness.
SNL-19
When a small accent is needed, you can View compact connecting element SNL-19. Compactness does not mean automatic compatibility with every casing.
The connector changes the length of straight parts
If SNL occupies a corner, the top and sides may end earlier. Therefore, first select a connector and build a complete outer contour, then calculate NL-16. Adding a socket after cutting is risky: straight parts may turn out too short.
Joint of two remnants
Two short segments can only be joined in a specially designed node. A random seam in the middle of the top bar, covered by an unsuitable socket, looks like a mistake correction. It is useful to read in advance how to select connecting elements for trim joints.
What to buy together with NL-16
The minimum purchase consists of the required number of planks of the selected width. A complete facade set may include SNL, finishing materials, a fastening system, and adjacent house carving. All additions are selected according to a single drawing to avoid different scales and random joints.
| What to add to the purchase | Why this is needed | For which scenario | What to Check |
|---|---|---|---|
| Buy carved trim NL-16 | Assemble the side and horizontal parts of the frame | Window, door, facade or interior frame | Width of 185 or 295 mm, quantity and cutting map |
| Close the joint of carved trims | Form a decorative transition | Top corners or design joint | Compatibility of SNL-13 with NL-16 per drawing |
| Complete the window composition | Consider a different connection type | Set with decorative corners | Width, thickness, pattern, and orientation |
| Buy a flat carved baluster | Continue one language of house carving | Veranda, porch, railing near windows | Scale of pattern and overall pine finish |
| Select materials for installation and finishing of platbands | Prepare ends, front surface, and fastening | Facade and interior | Compatibility of compounds with pine and operating conditions |
| order a calculation of the window composition and facade | Get a general layout of several windows | House with different openings, pediments, and lower belts | Provide exact dimensions, photos, and selected width NL-16 |
| Recommendations for installation and finishing of wooden decor | Check overall preparation for work | Self-cutting and installation | Do not replace advice with instructions for specific materials |
| Payment and delivery terms for NL-16 trims | Plan to receive long carved parts | Order for multiple windows or to another city | Packaging, inspection, and safety of 2000 mm strips |
How not to confuse NL-16 with similar products
NL-13
NL-13 has a different pattern and its own dimensions. It cannot be used as a continuation of NL-16 without a design check. It is suitable when the buyer needs an alternative pattern for the window.
NL-14
NL-14 is a separate version of house carving. Even if the length matches, the width and ornament require a new calculation. The NL-16 cutting map cannot be transferred to an adjacent model without a card.
NL-8
NL-8 is perceived differently in scale. It is chosen for a different decorative character. Comparison should be done on full-size strips, not from catalog thumbnails.
Connecting element SNL
SNL does not replace a long side or top. It covers or finishes a specific joint. The number of NL-16 strips and the number of connectors are calculated separately.
Flat baluster BNL
BNL is used in fencing or decorative panels, not as a window casing. A similar openwork pattern does not make the products interchangeable.
Regular planed board
A board can cover the mounting seam, but it will not replicate the finished carved pattern. Self-cutting requires a template, tools, time, and consistent results on all parts. NL-16 is purchased precisely as a ready-made ornamental element.
Plastic overlay
Plastic has a different thickness, texture, finish, and installation method. Recommendations for pine, ends, and protective coating cannot be transferred to it or vice versa.
Pine and preparation for outdoor use
NL-16 is made of pine and prepared for enamel, but outdoor use requires a complete protective system. The word 'pine' itself does not mean the strip can be installed on a facade without primer and finish.
Inspect the surface before painting
Check the front side, inner edges of slots, and the back plane. Standard sanding may require local manual finishing. Do not smooth thin bridges with excessive force.
Treat fresh ends
After each cut, new wood is exposed. The end grain absorbs moisture and compounds differently than a sanded surface. It is primed and coated using the same compatible system.
Paint the inner edges of the ornament
The openwork pattern contains hard-to-reach areas. Unpainted sections are especially vulnerable outdoors. The application technique is chosen to avoid filling slots with a thick layer.
Do not leave the back side untreated
Even if it is not visible, facade conditions can affect the wood. The completeness of protective treatment is determined by the project and the instructions of the chosen coating.
Check the compatibility of compounds
Primer, enamel, glaze, or other finish must work as a single system. Random materials cannot be mixed and a predictable result expected. It is useful to study, how to prepare carved window frames for painting.
Consider maintenance
The exterior coating is periodically inspected, especially on the upper horizontal edges and ends. The exact renewal time depends on the system, climate, facade orientation, and surface condition.
Paint before or after installation
Finishing before installation
Allows processing of internal cutouts, ends, and the back side on a workbench. The risk is damaging the finished coating during cutting and fastening. After final trimming, the ends are still refreshed.
Finishing after installation
Helps unify fastening points and joints, but access to openwork edges becomes more difficult. The window, facade, and drip cap need careful protection.
Combined approach
Often the main layers are applied before installation, and after installation, local touch-ups are performed. The specific sequence depends on the chosen enamel, weather, substrate, and fastening method.
One batch for all windows
It is better to paint the planks in one cycle. This makes it easier to achieve the same shade and gloss on the entire facade. Keep a control sample and a record of materials.
How to cut NL-16 without accidentally damaging the pattern
First, study the drawing
Determine where the ornament allows termination and how it repeats along the length. You cannot choose the cut location only based on the required dimension if it passes through a thin bridge or a key motif.
Support the plank across its entire width
The 295 mm execution requires a wide, flat support. Overhanging parts may vibrate and cause chipping. The work area should support the carved element without pressure on the protrusions.
Use a finishing tool
The specific saw and tooling are chosen by the craftsman based on pine, 18 mm thickness, and the shape of the part. Before the main cut, perform a test on a technological offcut.
Do not press on openwork areas
The fixation should hold the main plane, not the thin carving. A rigid clamp on a cut-out element can cause a crack.
Mark parts before cutting
Label the window, side, top, and direction. After several identical cuts, it's easy to confuse side panels and remnants.
Protect the end grain immediately after preparation
Do not leave fresh cuts outside until the next stage. The sequence of protective treatment is coordinated with the installation technology.
Installation of NL-16 on a wooden facade
The fastening method depends on the base, sheathing thickness, casing design, wind load, trim width, and chosen finish. A single universal glue or screw type cannot be assigned for all houses. The design must hold the plank, not split the pine, and allow the facade to work without random stresses.
Fastening to the casing
The window structure of a wooden house may have a casing that compensates for wall movement. The trim cannot be fastened in a way that rigidly connects moving elements and disrupts the joint's operation. Fastening points are coordinated with the specific opening's design.
Fastening to the facade board
The base must be strong and level. Thin decorative sheathing is not always capable of holding a wide 295 mm plank. If necessary, a prepared backing or embedded system should be provided.
Glue does not replace mechanical calculation
The compound can aid positioning and contact distribution, but an external long element often requires mechanical fastening. The master selects the type of fastener and spacing. Before work, you can Select materials for installation and finishing of platbands, then check the instructions for each product.
Pre-drilling
Pine may split near the edge, especially after complex trimming. The necessity and diameter of the pilot hole depend on the fastener. The point should not fall into a thin openwork bridge.
Concealing fasteners
Invisible installation is only possible with a confirmed system. Covering heads with random compound after painting is not always safe: the spot may differ in gloss. Fastening points are designed before finishing.
Aligning left and right sides
First, mark the overall horizontal and vertical lines. Both side panels are temporarily fitted simultaneously. If you install one side completely and then align the second to the window, facade asymmetry may become noticeable.
Installing the top piece
The top rests on the design node: a straight joint, an angled cut, or SNL. It should not be held only by the ends of the side panels. Fastening is calculated to the base.
NL-16 on a log house, frame house, bathhouse and veranda
Log house
Wood movement and the installation of casing become the main conditions. The trim should not interfere with shrinkage processes. Measurements are taken after the installation unit is ready, not based on the rough opening.
Frame house
The facade cladding may be smoother, but its load-bearing capacity varies. Fasteners must go into the prepared base. The wide NL-16 295 mm especially requires checking.
Bathhouse
High humidity and temperature fluctuations require a suitable external protection system. A pine trim should not be considered ready for a bathhouse without finishing and maintenance.
Veranda
NL-16 can connect windows with an openwork railing. For a unified system, you can complement the veranda decor with a flat carved baluster, having previously compared the pattern and scale.
Gazebo
The open structure receives more moisture and sunlight. All ends and slots are protected using external technology. The fastening must account for wind load and thin thread elements.
Modern wooden facade
A carved architrave does not have to be used only in historical style. A single color with the facade makes the pattern calmer, while a contrasting one makes it more noticeable. It is important not to overload the house by using several unrelated ornaments simultaneously.
For the overall system, it is useful to see how they combine architraves, cornices, and patterns for a wooden facade.
Application on doors and in interiors
Door opening
Side elements taller than 2000 mm do not fit into a single plank. For a standard tall door, a design joint, a separate top assembly, or a different model may be required. A solid side piece cannot be guaranteed without measurement.
Interior window
Inside the room, the requirements for atmospheric protection are lower, but issues of scale, color, and fastening remain. A width of 295 mm can take up a significant part of the wall next to furniture.
Decorative panel
NL-16 can be used as a long ornamental belt or frame if the project preserves the pattern. This does not exempt from calculation: each segment must have a finished edge.
Cornice composition
The casing can support the house carving above the window, but is not a ceiling cornice. Its purpose and orientation are determined by the specific scheme.
Practical selection for different tasks
Standard window 1200 × 1400 mm
Pre-lay three planks for three sides. After selecting the width and connection, clarify the final lengths. Two products by total length are insufficient without a composite top.
Small window 700 × 900 mm
Two planks may be sufficient if two side pieces of 900 mm each can be obtained from one blank. The pattern direction is checked before ordering.
Tall window 1200 × 1800 mm
Each side piece takes a separate plank, the top takes a third. Remnants of 200 mm from the side pieces rarely help the main set.
Four-sided frame
Add the bottom part and repack all segments by planks. Do not automatically add one piece: sometimes two horizontals fit together, sometimes each requires a separate blank.
Five identical windows
Calculate all top parts together. Remnants from planks are redistributed between windows. After optimization, a general reserve is added, not a stock for each opening.
Window with SNL
First, select and place connectors. They change the length of NL-16. Only after that is the cutting map formed.
Facade for white paint
Buy the entire volume in one batch, prepare and paint simultaneously. White color emphasizes shadows in the carving, and unpainted ends become especially noticeable.
Dark wooden house
A contrasting light trim makes the window the main accent. NL-16 with a width of 295 mm will be more noticeable than 185 mm. Make a paper mockup before ordering.
Main mistakes when ordering NL-16
Dividing the total footage by 2000 and rounding immediately
This creates erroneous two planks for a window 1200 × 1400 mm. Always distribute individual parts among blanks.
Calculating by glass size
The casing frames the outer contour of the opening. The glass unit size does not account for the frame, mounting seam, casing, or extensions.
Not selecting a width of 185 or 295 mm
The quantity by length may match, but the appearance and installation differ. The order must specify a specific execution.
Joining two remnants without a project
A seam in the middle of the top part can ruin the pattern. If a joint is needed, it is designed with a compatible element and accounted for in the length.
Flipping the ornament to save money
Mathematically, two parts fit, but one may face the opposite direction. The drawing is more important than the waste percentage.
Do not process the ends
Fresh cut remains vulnerable and differs in absorption. Ends are included in the finishing system.
Install untreated pine outdoors
Preparation for enamel is not a finished atmospheric protection. The finish is chosen before installation.
Buy connectors only by photo
SNL must match in scale and pattern line. Belonging to the same category does not guarantee compatibility.
Do not account for the drip cap
The lower ends of the side panels require neat finishing and water protection. Accidental contact with metal worsens the joint.
Order each window separately
Thus, leftovers are not redistributed, and batches may differ. For a home, a common cutting map is more profitable.
Cannot check delivery of long parts
2000 mm planks need to be safely transported and stored. Open before ordering Payment and delivery terms for NL-16 trims.
Who is NL-16 suitable for
- a wooden house that needs ready-made carved window decor from pine;
- windows and doors with a pre-calculated outer contour;
- three-sided and four-sided framing;
- a facade with a unified house carving system;
- an order for several windows with a common cutting map;
- a project for covering enamel;
- for a buyer who needs widths of 185 or 295 mm;
- compositions with confirmed SNL connectors;
- to the interior panel or door opening after measurement;
- for a craftsman ready to perform the final cut and protect the ends.
When it's better to choose a different trim
- the required side part is longer than 2000 mm and a joint is undesirable;
- the width of 185 mm is too large for the pier;
- 295 mm overloads a small window;
- ornament NL-16 does not match the existing carving;
- the project requires a ready-made finish coating without further finishing;
- the base does not allow safe fastening of a 18 mm thick plank;
- a different pattern NL-13, NL-14 or NL-8 is needed;
- the buyer is not ready to check the direction of the ornament and the cutting map;
- the product is planned to be left outside without a protective system.
What should not be done from scratch if there is a ready-made NL-16
Making an openwork architrave yourself does not start with sawing the board, but with developing the design, transferring the template, cutting out internal openings, sanding each bridge, and repeating the result on all sides of the window. Even a small difference between the left and right parts becomes noticeable on the facade.
No need to redraw the ornament
NL-16 already has a ready-made design. The buyer just needs to check its scale, choose a width of 185 or 295 mm, and determine the places for final trimming.
No need to cut identical side panels manually
Serial planks help maintain a consistent carving character across multiple windows. This is especially important on the main facade, where differences are clearly visible.
No need to search for a random pine blank
The card confirms the material, dimensions, and preparation. The buyer expects a specific article, not trying to match boards of different thicknesses and widths.
Focus on the set
Practical work shifts to measurement, cutting map, selection of connectors, painting, and installation. The commercial route looks clear: ready NL-16, suitable SNL, finishing materials, overall facade scheme, and ordering the required quantity.
How to store two-meter planks before installation
Level horizontal support
A long carved element cannot be left with sagging ends. Planks are placed on a flat surface with multiple support points, without loading the openwork sections.
Protection from moisture and sun
Before applying the finish, the pine must be kept in conditions that comply with the manufacturer's recommendations. Do not store unpainted decor under rain, on a damp floor, or near a heating appliance.
Execution separation
If options 185 and 295 mm or several articles are ordered, label the packages. Also mark leftovers: model, width, window, ornament direction, and length.
Inspection upon receipt
Check the quantity, dimensions, and integrity before cutting. It is useful to study in advance Rules for storage and operation of wooden decor.
What to Check Before Ordering
- article NL-16;
- execution 2000 × 185 × 18 or 2000 × 295 × 18 mm;
- final dimensions of side, top, and bottom parts;
- three-sided or four-sided contour;
- position of the drip cap, casing, and installation joint;
- direction and repeat of the ornament;
- ability to cut two parts from one plank;
- allowable places for final trimming;
- need for SNL and connector sizes;
- cutting map for each window and the entire facade;
- unified allowance for test cuts and possible error;
- exterior or interior finishing system;
- treatment of fresh ends;
- base and method of mechanical fastening;
- storage and delivery conditions for two-meter products;
- current parameters and drawing in the product card.
How to buy NL-16 on STAVROS
Start with the product card and buy the carved architrave NL-16 only after selecting the width. Then enter the final lengths of the parts in the cutting map and determine the number of whole two-meter planks.
If the NL-16 pattern does not fit, open the category and view all architraves of the NL series. Compare not only the photo, but also the width, thickness, pattern, material, and trimming area.
For corners and joints, first select SNL according to the drawing, and only then adjust the length of straight parts. For a facade with multiple windows, it is more useful to order a general layout than to calculate each opening independently.
Before painting, you can learn about materials and wood processing quality, select compatible compounds and perform a test on the leftover. This way, the buyer receives not just a few carved planks, but a calculated set with clear cutting and finishing.
FAQ: questions about carved trim NL-16
How long is the carved trim NL-16?
Standard length is 2000 mm.
What is the thickness of NL-16?
The thickness of both confirmed versions is 18 mm.
What width is available?
The card presents options of 185 and 295 mm.
What type of wood is the trim made from?
Made of pine; the card describes the material as finger-jointed solid wood without knots.
How many NL-16 are needed for a standard window?
For three sides, three planks are often required: two for the sides and one for the top. For a small window, sometimes two are enough after checking the cut layout.
Why can't you just divide the total length by 2000?
Individual parts must fit entirely into specific planks. Two short leftovers do not form a solid top without a design joint.
Can the top element be made from a leftover piece?
Yes, if one solid leftover has sufficient length, the pattern maintains direction, and there is allowance for final cutting.
Can one plank be cut into two side parts?
Mathematically yes, if the sum of heights does not exceed 2000 mm. Practically, you need to check the orientation of the pattern.
Do you need to buy three planks for a 1200 × 1400 mm window?
For three solid parts of 1400, 1400 and 1200 mm, three strips are needed in advance.
How many strips are needed for a window 700 × 900 mm?
Theoretically two: two sides of 900 mm from one strip and the top of 700 mm from the second. The pattern must allow such cutting.
How to calculate NL-16 for several windows?
Create a general map and redistribute leftovers between openings. Simply multiplying the quantity by the number of windows may be uneconomical.
Is a reserve needed?
The margin depends on the angles, number of windows, master's experience, and pattern. For a series of windows, a general reserve is more reasonable than an extra strip for each opening.
Can two short leftovers be joined?
Only in a specially designed joint with a suitable connector. A random seam in the middle of the top is undesirable.
Are SNL connecting elements needed?
Not always. They are needed if provided by the joint pattern. Compatibility with NL-16 is checked by dimensions and drawings.
Is NL-16 supplied painted?
Finished coating is not confirmed. The product is prepared for enamel and requires further finishing.
How to protect pine outdoors?
Compatible exterior primer and finish coating system. The specific composition is selected according to the instructions and facade conditions.
Do I need to paint the end after cutting?
Yes, the fresh end is included in the protective system.
Can NL-16 be used on doors?
Yes, the product is suitable for door openings, but a side part longer than 2000 mm will require a separate solution.
Is the trim suitable for a bathhouse or gazebo?
The possibility depends on the exterior finish, base, and conditions. Untreated pine cannot be left without protection.
How to attach NL-16 to a wooden facade?
According to the base and casing project, with suitable mechanical fixation and, if necessary, compatible glue. There is no universal scheme.
Where to buy NL-16?
In the card, you can Buy carved trim NL-16 of the required width and order the necessary number of planks.
Can I order a set for all windows of the house?
Yes. It is better to provide the dimensions of all openings and prepare a general cutting map to use leftovers rationally.
Result: count not meters, but whole parts within two-meter planks
NL-16 is a ready-made carved pine casing 2000 mm long and 18 mm thick, available in widths of 185 and 295 mm. For a regular window with two sides and a top, three planks are often needed, but a small opening may require two, and a four-sided or developed set may require four or more.
The correct calculation consists of two stages. First, add up the lengths of the finished parts. Then place each part within a specific plank, taking into account the pattern, clean cuts, SNL, and possible use of leftovers. It is the second stage that answers the question of how many items to add to the order.
Before installation, you need to choose the width, check the drawing, prepare the outer pine finish, treat the ends, and calculate the attachment to the actual base. For several windows, one facade map is more advantageous than separate approximate calculations.
STAVROS позволяет перейти от замера к комплекту: выбрать NL-16, сравнить другие наличники, подобрать соединительные элементы и материалы для отделки. Такой подход помогает купить готовые резные наличники на окна без недостачи, случайных стыков и лишних планок.