Article Contents:
- Why a defect after handover cannot be assessed from a photo alone
- The first step is not to repair, but to document
- What to do if intervention is required immediately
- Claim triage: which issues require immediate action
- How to determine which trim was actually installed
- Why the SKU matters more than a photo
- Reconstruct the technical timeline in one line
- Typical problem groups for wooden skirting after installation
- Why a “crack” does not yet mean a manufacturing defect
- Why the denominator matters, not just the number of defects
- If cracks appeared in the same places on several moldings
- A single defect and a systemic defect are different situations
- ISOLATED
- REPEATING
- SYSTEMIC
- Manufacturing
- Transportation
- Installation
- Operational
- CONTEXT
- ELEMENT
- DETAIL

The property has already been accepted. Skirting boards, mouldings and cornices are installed, the comments have been closed out, and the space is in use. A few weeks or months later, a problem appears: the skirting board has come away from the wall, a crack has appeared in the moulding frame, the cornice has changed geometry, or damage to the coating is visible on the surface. At this point, the weakest wording is “the product is bad, replace it.”
If building materials supplier must investigate the problem after the project is handed over; first, the full history needs to be reconstructed:
PRODUCT → DELIVERY → INSTALLATION → HANDOVER → DEFECT DISCOVERED → EVIDENCE → CLAIM → INVESTIGATION → CORRECTIVE ACTION → CLOSED.
A professional claim does not begin with assigning blame, but with identifying the product, recording the symptom, operating conditions, and timeline. The more accurately the initial data is collected, the faster one can move from dispute to technical analysis.

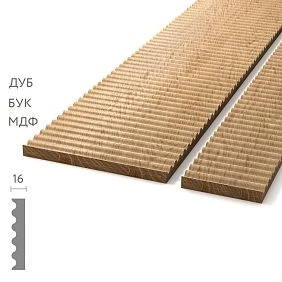
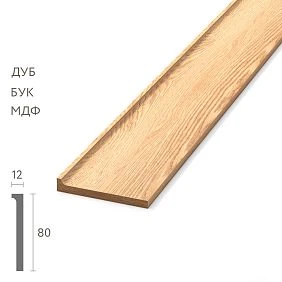
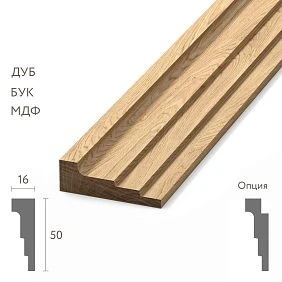
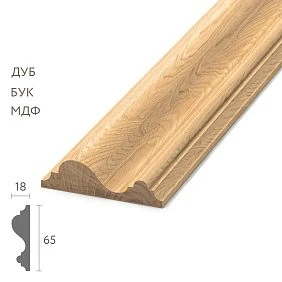
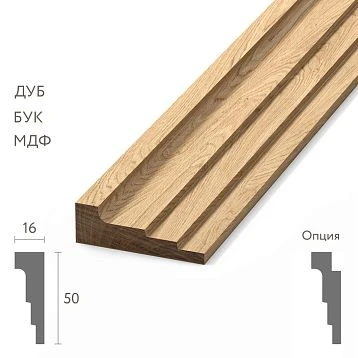
Why a defect after handover cannot be assessed from a photograph alone
An issue that looks the same may have different causes.
For example, the skirting board has come away from the wall. Possible lines of investigation:
- condition of the base;
- installation method;
- changes in the wall geometry;
- operating conditions;
- exposure to moisture;
- characteristics of the product itself.
A single photograph cannot reliably establish the root cause. A photo shows the symptom, but not the entire cause-and-effect chain.




The first step is not to repair, but to document
If the problem does not require immediate intervention for safety or to prevent further damage, first document the original condition.
Minimum:
- overall view of the room;
- medium shot of the problem area;
- close-up;
- exact location on the wall or in the room;
- date of detection;
- number of affected elements.
If you immediately fill, repaint, re-glue, or dismantle the part, some of the evidence will disappear.
Our factory also produces:



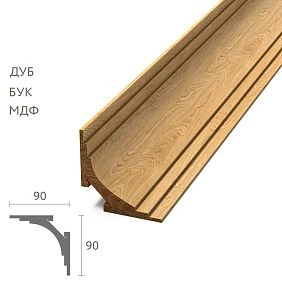
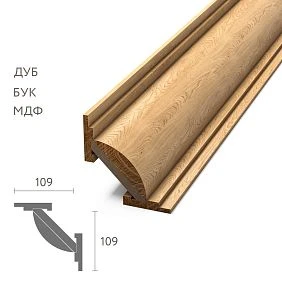
What to do if intervention is necessary immediately
Sometimes you cannot wait: the element interferes with use, may damage adjacent finishes, or has already partially detached.
Then, before intervening, you need to quickly gather as much data as possible:
- photos and videos;
- measurements;
- marking;
- layout diagram;
- store the removed element separately;
- assign it an ID.
That is, urgent repair does not cancel documentation — it makes it even more important.
Get Consultation
Claim triage: which issues require immediate action
Not every remark after handover has the same priority.
| Priority | Situation | First action |
|---|---|---|
| URGENT | The element may damage adjacent finishes or come loose | Safety + documentation |
| HIGH | The symptom develops quickly or recurs on a mass scale | Zone isolation + technical inspection |
| NORMAL | Local stable issue without risk | Documentation + claim |
| MONITOR | Minor symptom without confirmed dynamics | Photo + re-inspection |
This way the team doesn't spend the same resources on a single scratch and on a massively developing deformation.
How to determine which specific trim is installed
The wording "oak skirting board STAVROS" is too general.
Need to find:
- article number;
- the material;
- finish;
- order number;
- delivery date;
- if possible — batch data;
- room or area;
- a link to the project specification.
Working note:
PLT-XXX / OAK / FIN-02 / ORDER-125 / ZONE LOBBY
Why SKU matters more than a photo
Visually similar profiles may be used on the project. Without the exact article number, it is harder for the supplier to understand what exactly was manufactured, which configuration was used, and which technical data applies to a specific item.
A photo helps you see the symptom. The SKU helps identify the item under investigation.
Reconstruct the technical timeline in one line
For a complex claim, a short timeline is useful:
ORDER → DELIVERY → INSTALLATION → HANDOVER → DISCOVERY → CLAIM OPENED
For example:
Order 10.01 → Delivered 22.02 → Installed 05.03 → Handover 15.03 → Symptom 02.06 → Claim 04.06
Such a line quickly shows how much time passed between stages and where to look for additional documents.
Typical groups of wooden skirting board problems after installation
Until the cause is determined, it is better to record the symptom itself.
| Symptom code | What is observed |
|---|---|
| GAP | Gap appeared |
| CRACK | Crack |
| WARP | Change in geometry |
| FINISH ISSUE | Change in surface or finish |
| JOINT ISSUE | Joint issue |
| MECHANICAL DAMAGE | Impact, scratch, chip |
The observed condition is recorded first. The cause is determined only after inspection.
Why a “crack” does not yet mean a manufacturing defect
For the analysis, it is important to know:
- when the crack appeared;
- on one or many strips;
- in the same place;
- whether it was present at handover;
- whether there is a similar problem on the spare strip;
- whether the conditions in the room changed.
The same symptom can have different causes, so assigning responsibility in advance is wrong.
Why the denominator matters, not just the number of defects
The phrase “11 strips with cracks” says little without the total scope of the inspection.
You need to see:
AFFECTED RATE = affected qty / inspected qty.
For example:
11 / 185 = 5,9%
This is not a diagnosis or a standard. It is a way to describe the scale of the problem consistently across different sites.
If cracks appeared in the same places on several moldings
Repeatability is a strong diagnostic signal.
For example, on all molded frames the problem appears only in the corners. Then especially carefully check:
- the mounting assembly;
- joint;
- base preparation;
- wall behavior;
- method of fixation.
If the defects are chaotically distributed over the surface of the strips themselves, the direction of inspection will be different.
A single defect and a systemic defect are different situations
ISOLATED
One element out of a large volume.
REPEATING
The same symptom on several elements.
SYSTEMIC
The problem manifests en masse by batch, zone, or several rooms.
In the claim package, the scale must be specified separately. This affects the investigation method and the scope of inspection.
Why it is important to show the entire assembly for a wooden cornice
If the problem is at the wall and ceiling, a macro photo of a single crack is not very informative.
Need to show:
- the cornice itself;
- wall;
- ceiling;
- mounting point;
- adjacent elements;
- the orientation of the profile.
Context often helps to understand whether the symptom is in the product itself or in the junction area of several systems.
The condition of the room after handover is part of the investigation
It is necessary to record the known operating conditions:
- whether the room was heated;
- whether there were long periods without heating;
- whether repeated wet works were carried out;
- whether there were any leaks;
- whether the operating mode changed;
- whether any repair work took place nearby.
This data is collected not for automatic rejection of a claim, but to reconstruct the actual timeline.
Why an indoor climate log is more useful than the words "the room was fine"
Large facilities may have a BMS, thermo-hygrometers, or an operation log. If such data exists, it is useful to attach it.
If it does not exist, there is no need to invent readings retroactively. It is better to state honestly that instrumental data is unavailable and to use the available factual information.
Which operational events are especially important to include in the timeline
Events that could have changed the conditions are recorded separately:
- emergency heating shutdown;
- leak;
- repainting the walls;
- wet repair work;
- replacement of the ventilation system;
- demolition or repair nearby.
The mere fact of the event does not prove the cause, but it helps not to lose significant context.
Pull up photos from the moment the property was handed over
This is one of the strongest sources of chronology.
For example:
HANDOVER PHOTO — 15.03 — profile visually intact
CLAIM PHOTO — 02.06 — a gap appeared
This results in a clear time interval in which the problem occurred.
Why final installation acceptance is especially important for future claims
If the snag list was closed at handover and the condition of the trim was recorded, a baseline is established:
- photographs;
- date;
- list of defects;
- installation status;
- confirmation that the specific defect was absent at the time or was already known.
Without this point, the start of the timeline becomes less defined.
Compare the installed product with the spare stock
If an intact spare plank of the same article is available, it can be used as a reference.
Compare:
- geometry;
- surface;
- finish;
- presence of a similar symptom.
But the reserve was stored under different conditions, so the comparison does not automatically establish the cause.
How to store the reference sample after opening a claim
If the spare plank is used in the investigation, it is also assigned an ID:
REF-01 / PLT-XXX / ORDER-125
It is useful to photograph it before any testing and store it separately from the regular operational reserve. Then the reference will not be accidentally used by the repair crew before the analysis is completed.
Why the storage location of the spare plank also needs to be recorded
If the reference plank has been lying for two years in a different climate, its condition cannot be directly equated to the installed product.
Therefore, the following is recorded:
- where it was stored;
- whether it was packaged;
- whether it was exposed to moisture;
- which order it relates to.
Four types of issues must not be mixed up
Manufacturing
The issue relates to the product itself or its finish.
Transportation
The damage occurred before the site or during transport.
Installation
The issue is related to a completed assembly or handling during installation.
Operational
The impact occurred after handover.
The main goal of the investigation is to determine the most justified category, not to assign responsibility as quickly as possible.
Material supplier: which data package to send in the first email
for materials supplier it's better to prepare a structured claim package right away.
| Field | What to specify |
|---|---|
| Project | Name / code |
| Order | Order number |
| SKU | Exact SKU |
| Material | Species / finish |
| Finish | Code or description |
| Zone | Room |
| Qty affected | Quantity |
| Discovery date | When discovered |
| Symptom | What is observed |
| Photos | Context + element + detail |
| Handover state | What it was like at handover |
How to photograph the defect
Three levels are needed.
CONTEXT
Where the problem is located in the room.
ELEMENT
Which specific skirting board, molding, or cornice is affected.
DETAIL
The defect itself, close-up.
If you send only macro photos, the supplier may not understand where the symptom is located and how it relates to the surrounding assembly.
Add scale to the photo
You can place a ruler or tape measure next to the problem so that it does not cover the defect itself.
Size helps distinguish a microcrack from an opening of several millimeters and makes repeat observations comparable.
Why video is useful for moving defects
If an element comes loose when pressed, vibrates, or changes position, a static photo does not always show the nature of the problem.
A short video can capture movement, but it should still be supplemented with photos, SKU, and a description of the area.
Do not write "a lot of skirting board has cracked"
The problem needs to be measured.
For example:
185 planks inspected
symptom found on 11
of which 8 — floor 3
This makes the claim quantitatively verifiable.
For a large site, a Defect Map is useful
| ID | Floor | Room | SKU | Symptom | Date |
|---|---|---|---|---|---|
| D-01 | 2 | 204 | PLT-A | CRACK | ... |
| D-02 | 2 | 208 | PLT-A | CRACK | ... |
| D-03 | 4 | 401 | MLD-B | FINISH ISSUE | ... |
The map shows the distribution, not just a list of photos.
What the defect distribution can tell you
If the problem is only on one floor, it is useful to investigate local conditions.
If only on one SKU — the product, assembly, and history of that specific item.
If different products show the same symptom in one room — the area itself and its conditions are checked especially carefully.
These are areas for inspection, not an automatic diagnosis.
When a control area without a defect is useful
For comparison, it is useful to select a similar area where the same SKU is installed in a similar unit, but there is no symptom.
Compare:
- geometry;
- joints;
- room conditions;
- installation drawing;
- installation time.
The control area helps to look for differences between the problematic and the normal case.
Material suppliers: why the request should be neutral
When contacting Material suppliers it is better to avoid wording like "you have a defect, urgently replace everything" before the analysis is completed.
Working wording:
"A recurring symptom has been detected. We are attaching the order data, SKU, areas, photos, and timeline. We ask you to conduct a technical assessment and propose the next course of action."
This way, communication immediately moves to a substantive review.
When photos are not enough
For a complex or widespread issue, the following may be needed:
- on-site inspection;
- additional measurements;
- selective removal of an element;
- comparison with the reserve;
- checking adjacent areas.
We cannot promise that the supplier is always obligated to make a site visit: the procedure is determined by the specific situation and the documents of the specific order.
What to prepare for an on-site technical inspection
To keep the site visit from turning into a haphazard inspection, prepare in advance:
- Defect Map;
- the SKU list;
- 2–3 typical defects;
- a control zone;
- handover photos;
- reference sample;
- a known timeline.
This way, the inspection starts with specific points and questions.
Do not dismantle the entire volume at once
If the problem is widespread, it is useful to keep at least some of the typical elements in their original state until the cause is identified.
If 200 planks are replaced before the inspection, investigating the original state will be significantly more difficult.
If the element is nevertheless removed
Assign it an ID:
D-07 SAMPLE
And record:
- where it was taken from;
- date;
- SKU;
- side;
- orientation;
- type of defect.
Do not put such an element in the general construction pile: it may become an important sample for analysis.
Chain of custody for the taken sample
On a large B2B site, it is useful to record who took the sample, when, where it is stored, and to whom it was transferred.
| Sample | Location | Removed | Stored at | Transferred to |
|---|---|---|---|---|
| D-07 | Room 204 | 06.06 | Site office | Technical review |
This reduces the risk of confusing the element under investigation with another similar profile.
Do not confuse symptom and root cause
For example:
symptom: the molding is coming loose.
root cause: not yet determined.
Possible directions — fastening, base, changing conditions, or another factor.
The article should teach Root Cause Analysis, not internet diagnostics from a single photo.
How to build a Root Cause Matrix
| Observation | What to Check | What not to claim in advance |
|---|---|---|
| CRACK | Repeatability, area, time of occurrence | “Manufacturing defect” |
| GAP | Base, installation, geometry | “Bad glue” |
| FINISH ISSUE | Operation, surface, reserve | “Poor-quality painting” |
| WARP | Zone, storage, conditions, repeatability | “Bad wood” |
The matrix does not make a diagnosis. It does not allow jumping from symptom to accusation.
How to formulate a confirmed cause
Instead of an emotional note bad skirting board it is better to technically record the established mechanism of the problem.
For example:
CAUSE CONFIRMED — issue related to specific fixing detail
Or:
CAUSE CONFIRMED — finish issue within affected group
The wording should describe the established cause, not a general assessment of the brand or participant.
The solution depends on the established cause
Possible technical outcomes:
- local restoration;
- reinstallation;
- component replacement;
- assembly modification;
- adjustment of operating conditions;
- monitoring;
- combination of several measures.
Which solution to apply is determined after analyzing the specific case.
Corrective Action Matrix
| Confirmed cause | Possible action | What to check after |
|---|---|---|
| Local mounting assembly | Reinstallation | Stability and repeatability |
| Damaged single unit | Replacement | SKU and finish match |
| Local finish issue | Restoration or replacement | Visual result |
| Operational impact | Eliminate impact + repair | No recurrence |
This is not a universal repair instruction, but a way to link a confirmed cause to a verifiable result.
Do not start mass replacement after the first case
First, you need to determine:
- scale;
- pattern;
- probable cause;
- boundaries of the affected group;
- effectiveness of the proposed corrective action.
Otherwise, you can replace hundreds of planks without eliminating the source of the problem.
A pilot corrective action is more useful than mass repair
If the cause and solution are predetermined, on a large site it is reasonable to first test the corrective action on a small typical area.
For example:
- reinstall 2–3 elements;
- check the node behavior;
- evaluate the visual result;
- only then scale the solution.
This reduces the risk of repeating the error during the claim itself.
Claim Register for a B2B site
| Claim | SKU | Qty | Opened | Root cause | Action | Status |
|---|---|---|---|---|---|---|
| C-01 | PLT-A | 11 | 02.06 | UNDER REVIEW | — | OPEN |
| C-02 | MLD-B | 3 | 04.06 | INSTALLATION | REPAIR | CLOSED |
This is a single point of control instead of a dozen emails and chats.
Why Claim Register should have an owner and due date
An OPEN status without an assignee quickly turns into a forgotten issue.
Useful fields:
- OWNER;
- NEXT ACTION;
- DUE DATE;
- LAST UPDATE;
- STATUS.
Then you can see not only that there is a problem, but also who should take the next step.
Which statuses to use for a claim
OPEN — request registered.
UNDER REVIEW — analysis in progress.
CAUSE CONFIRMED — cause confirmed under the accepted procedure.
ACTION AGREED — solution agreed.
RECTIFIED — work completed.
CLOSED — result verified and the issue resolved.
Why ACTION AGREED does not yet mean CLOSED
If a replacement has been agreed, the claim is not closed at the moment the new material is sent.
You need to:
- receive a replacement;
- install;
- verify the result;
- ensure the symptom is resolved;
- only then close the claim.
How to verify the result after corrective action
The verification should be comparable to the original record.
It is useful to do:
- a photo of the same area;
- a repeat measurement, if applicable;
- date;
- status replaced / repaired;
- observation over an agreed period, if the problem might not have appeared immediately.
A claim should update procurement knowledge
If it turns out that a certain assembly requires a different installation approach, this knowledge should carry over to the next project.
For example:
- into the specification;
- installation instructions;
- mock-up checklist;
- acceptance checklist;
- storage or operating instructions.
This way, a claim becomes a process improvement tool, not just a way to close a specific dispute.
Why it is useful to classify claims by cause
After several projects, a pattern becomes visible:
- one SKU regularly raises a question;
- one type of joint creates problems;
- defects are concentrated in one area of use;
- one installation method shows weak results.
These data are more important than the subjective assessment “this time everything was bad.”
Which metrics are useful after closing a claim
After a series of projects, you can calculate:
- number of claims per 1000 installed elements;
- share of ISOLATED / REPEATING / SYSTEMIC;
- average time from OPEN to CLOSED;
- share of local repairs;
- share of replacements;
- repeatability for a single SKU or assembly.
This is already a basis for improving procurement, installation, and design.
Warranty terms must be verified against the documents for the specific order
Do not use a universal warranty period for the entire range of wooden moulding in the article.
The correct wording is:
verify warranty terms and period against the documents for the specific order and specific product.
This protects the project from the incorrect assumption that one period automatically applies to any material, finish, and product type.
Why a claim after handover differs from a claim during acceptance
During vehicle acceptance, the problem is recorded before installation: shortage, wrong item, damaged packaging, incorrect SKU.
After the project handover, the goods have already undergone:
delivery → storage → installation → acceptance → operation.
Therefore, the investigation requires reconstructing the entire chain, not just checking the delivery note.
What should remain in the Close-out Pack for a claim
After closing a claim, it is useful to keep a short set of documents so that a year later you don't have to reconstruct the history from scratch.
- initial request;
- Defect Map;
- photos before intervention;
- handover photos;
- identification of the SKU and order;
- Root Cause conclusion;
- agreed corrective action;
- photos after correction;
- CLOSED date;
- conclusions for future projects.
A Close-out Pack is not needed for the archive as such. It allows you to quickly answer what happened, why a specific remediation method was chosen, and how the claim was resolved.
Why defect dynamics must be recorded consistently
If the symptom is observed for several weeks, photos should be taken from approximately the same point and at the same scale. Otherwise, it is difficult to tell whether the crack is actually growing or the shots were simply taken differently.
For an observed issue, a simple record is useful:
OBS-01 / 02.06 / width ... / photo A
OBS-02 / 16.06 / width ... / photo B
This way, MONITOR becomes a measurable process, and the decision to intervene is based on dynamics rather than impression.
Final post-handover claim algorithm
- Do not alter the problem area before documentation, if possible.
- Take CONTEXT / ELEMENT / DETAIL photos.
- Record the date of detection.
- Determine SKU, material, and finish.
- Find the order number and delivery date.
- Pull up handover photos.
- Record the operating conditions.
- Count the number of affected items.
- Create a Defect Map for a large site.
- Determine the scope: ISOLATED / REPEATING / SYSTEMIC.
- Compare with the operational reserve, if any.
- Prepare a claim package.
- Send a neutral technical inquiry to the supplier.
- If necessary, retain the removed sample with the ID.
- Conduct a Root Cause Analysis.
- Approve the corrective action.
- For a mass issue, first verify the pilot solution.
- Execute the corrective action.
- Verify the result.
- Move the claim to CLOSED only after verification.
- Carry the findings over to the next project.
A professional claim after project handover is not a dispute about who is at fault. It is a managed reconstruction of the facts: which profile was installed, when it was delivered, in what condition it was accepted, when the symptom appeared, where exactly it recurs, and what happened to the room after commissioning.
The better the SKUs, handover photos, reserve samples, installation data, and project history are preserved, the easier it is to move from the phrase "something happened to the skirting board" to a proper technical investigation.
And only after that does a justified corrective action appear — local repair, reinstallation, replacement, modification of the assembly, or another solution confirmed by the specific situation.